
P-51B Mustang
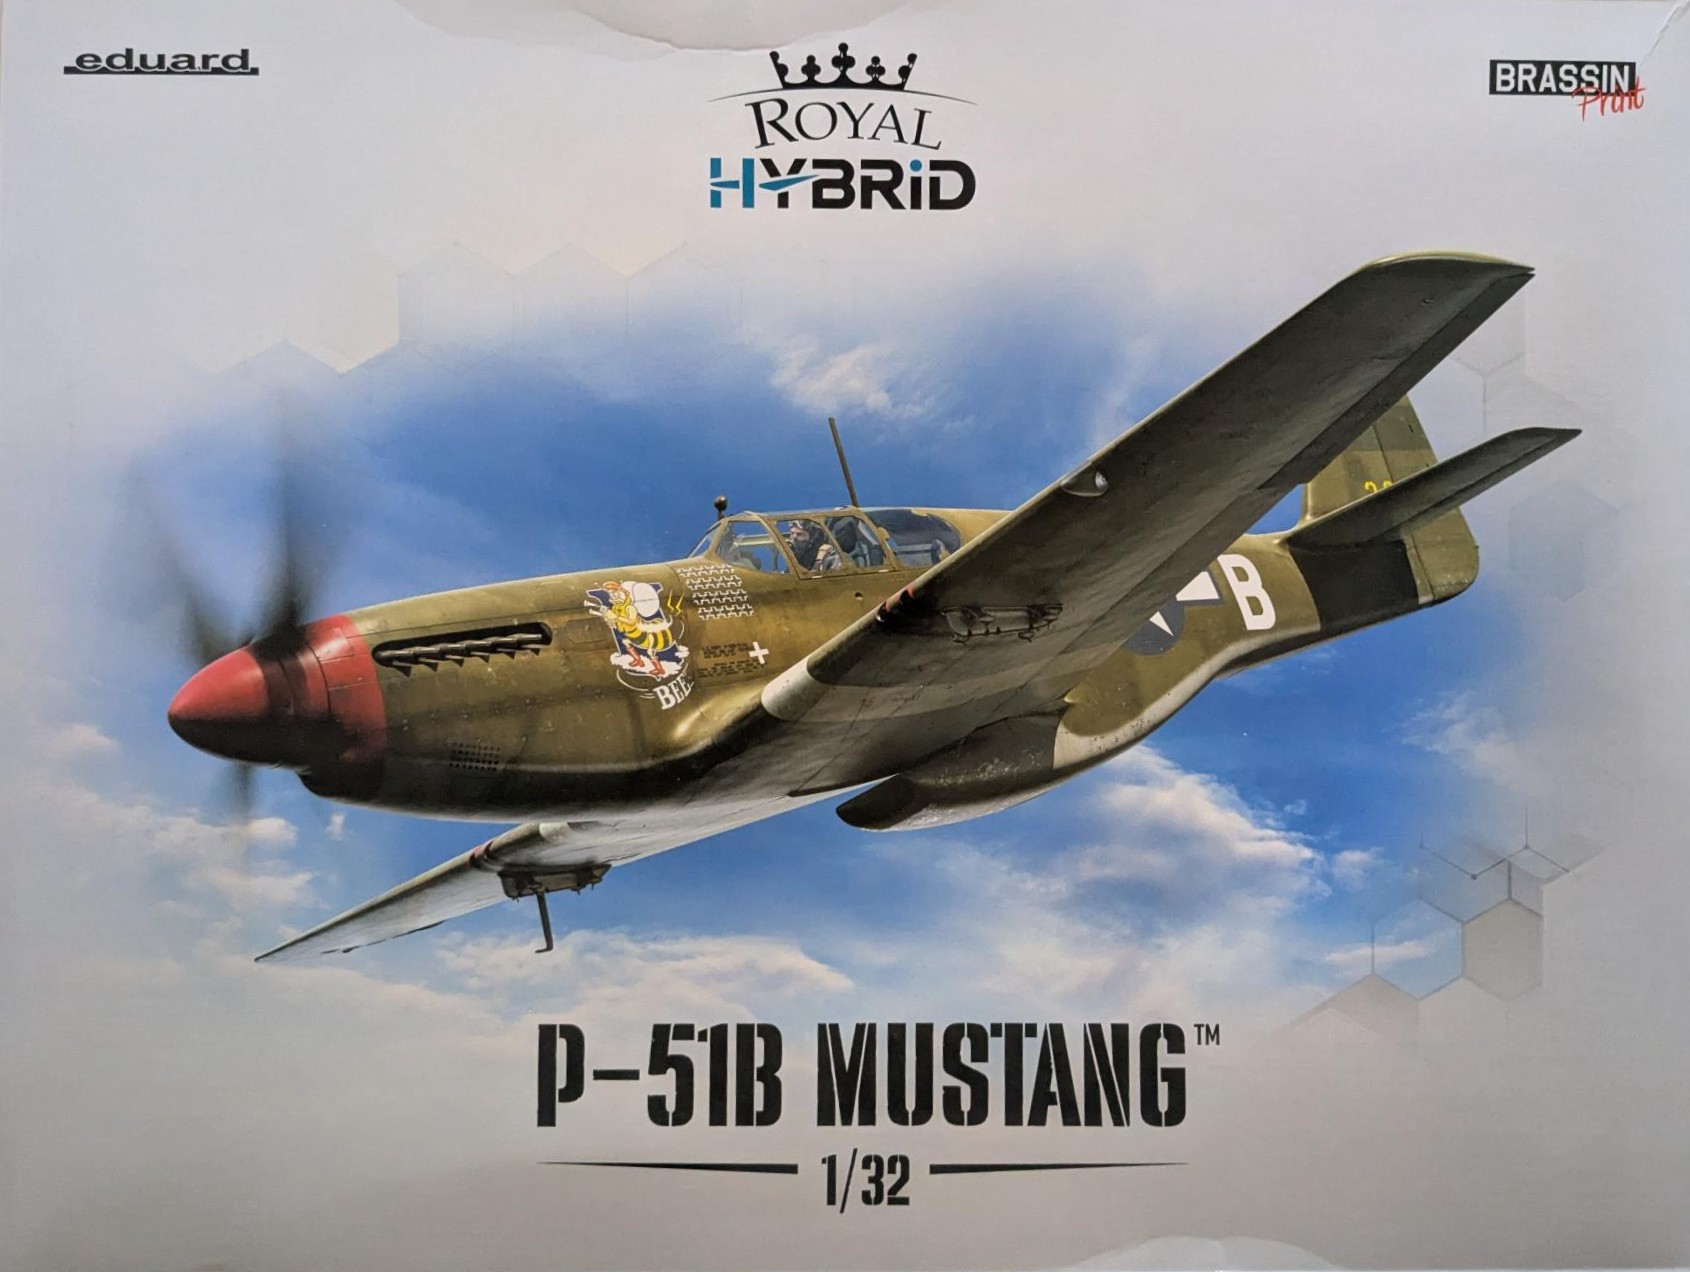
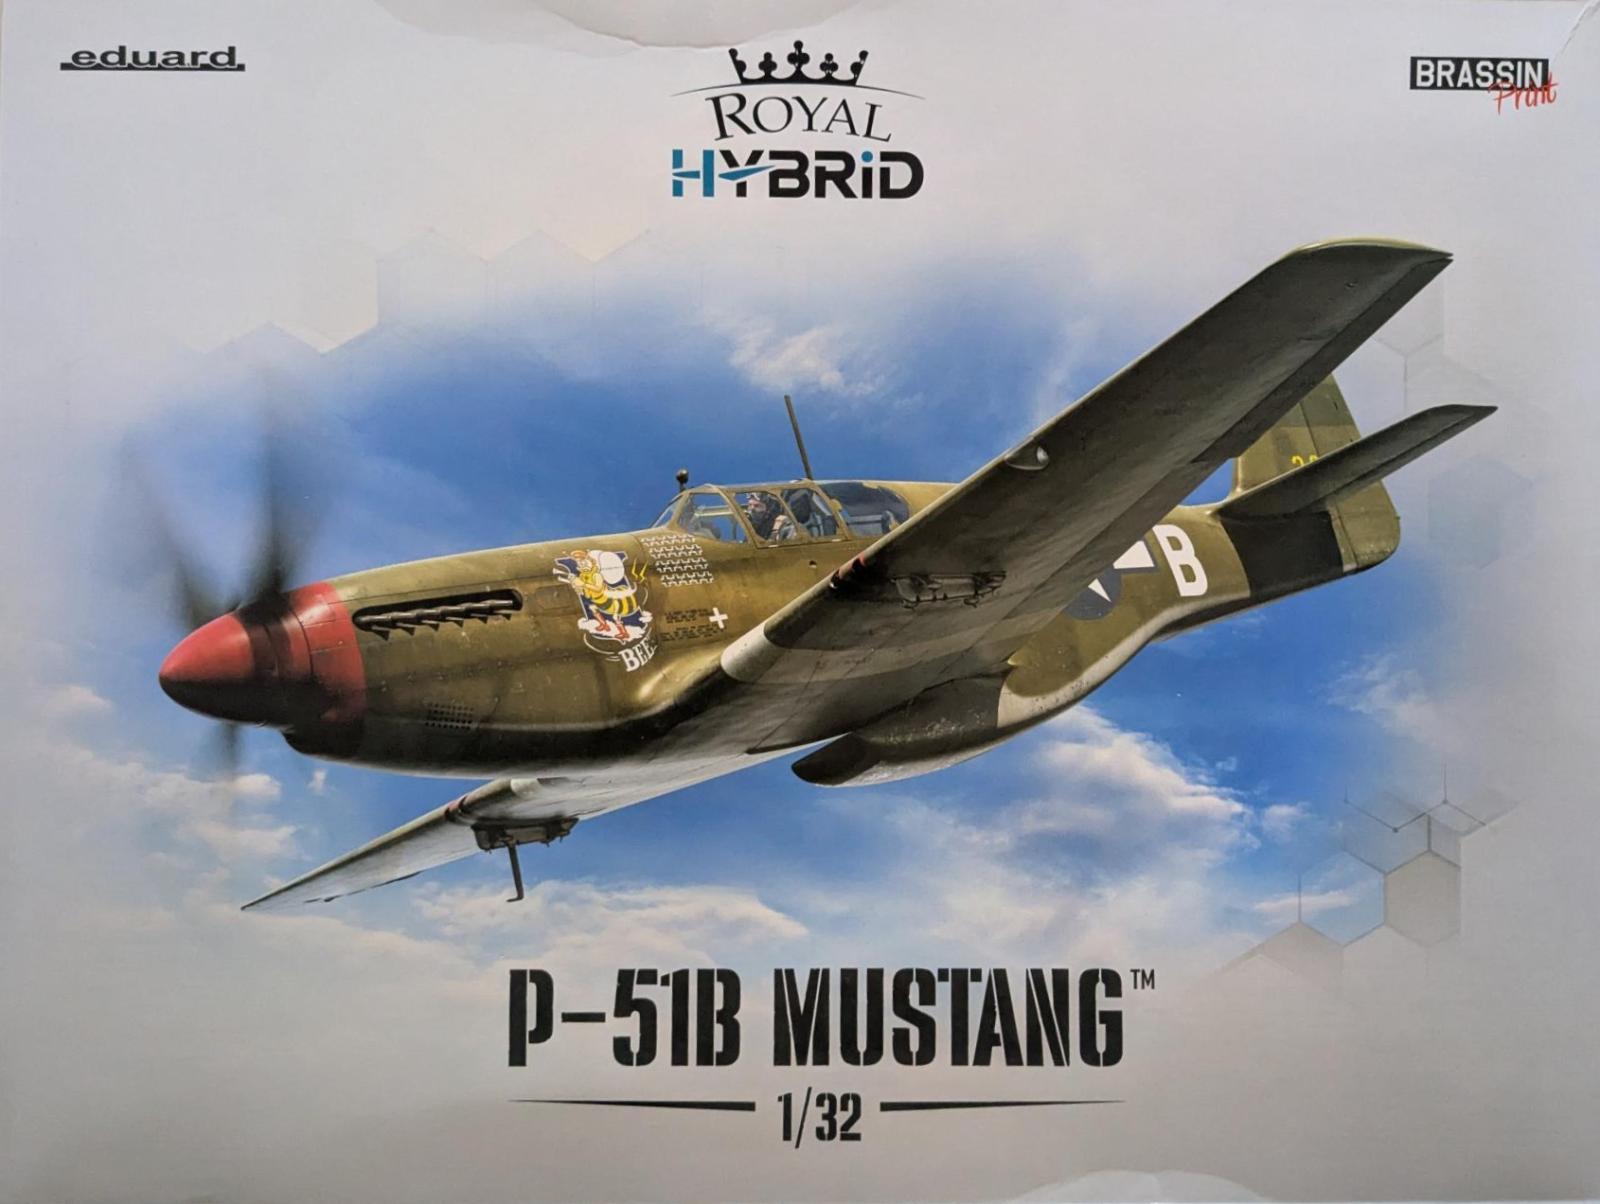
The recent Eduard P-51B in 1/32 was quite the hit at the recent IPMS Nats in Fort Wayne. A 1/32 P-51B is rare, and this is only the second kit in this scale (the other is Trumpeter’s 2009 release). Eduard’s new release is billed as their first Royal Hybrid kit (which represents a premium extension of the standard Eduard Hybrid line), consisting of injected molded plastic, 3D printing, and cast resin parts, decals, canopy masks and wheel well masking plugs.
From the Eduard website:
The Royal Hybrid edition kit of the famous US fighter aircraft P-51B Mustang in 1/32 scale.
The kit offers markings for 8 aircraft of 8th and 9th Air Force
- plastic parts: Eduard
- marking options: 8
- decals: Eduard
- PE parts: yes
- painting mask: yes
- resin parts: yes, cockpit, undercarriage bays, wheels, guns, exhausts
- extra: a pictorial book about service of the P-51B/C Mustangs written by Jan Zdiarský
Royal Hybrid Edition
The Royal Hybrid range represents a combination of plastic parts and 3D-printed components. Each part of the kit has been designed to offer the highest possible level of detail and usability.
Large parts such as fuselages, wings, and other airframe components featuring surface details like rivets and hinges – forming the basis of the kit – are produced in plastic (HPS) using metal injection moulds. This ensures high-quality surface detail and easy assembly.
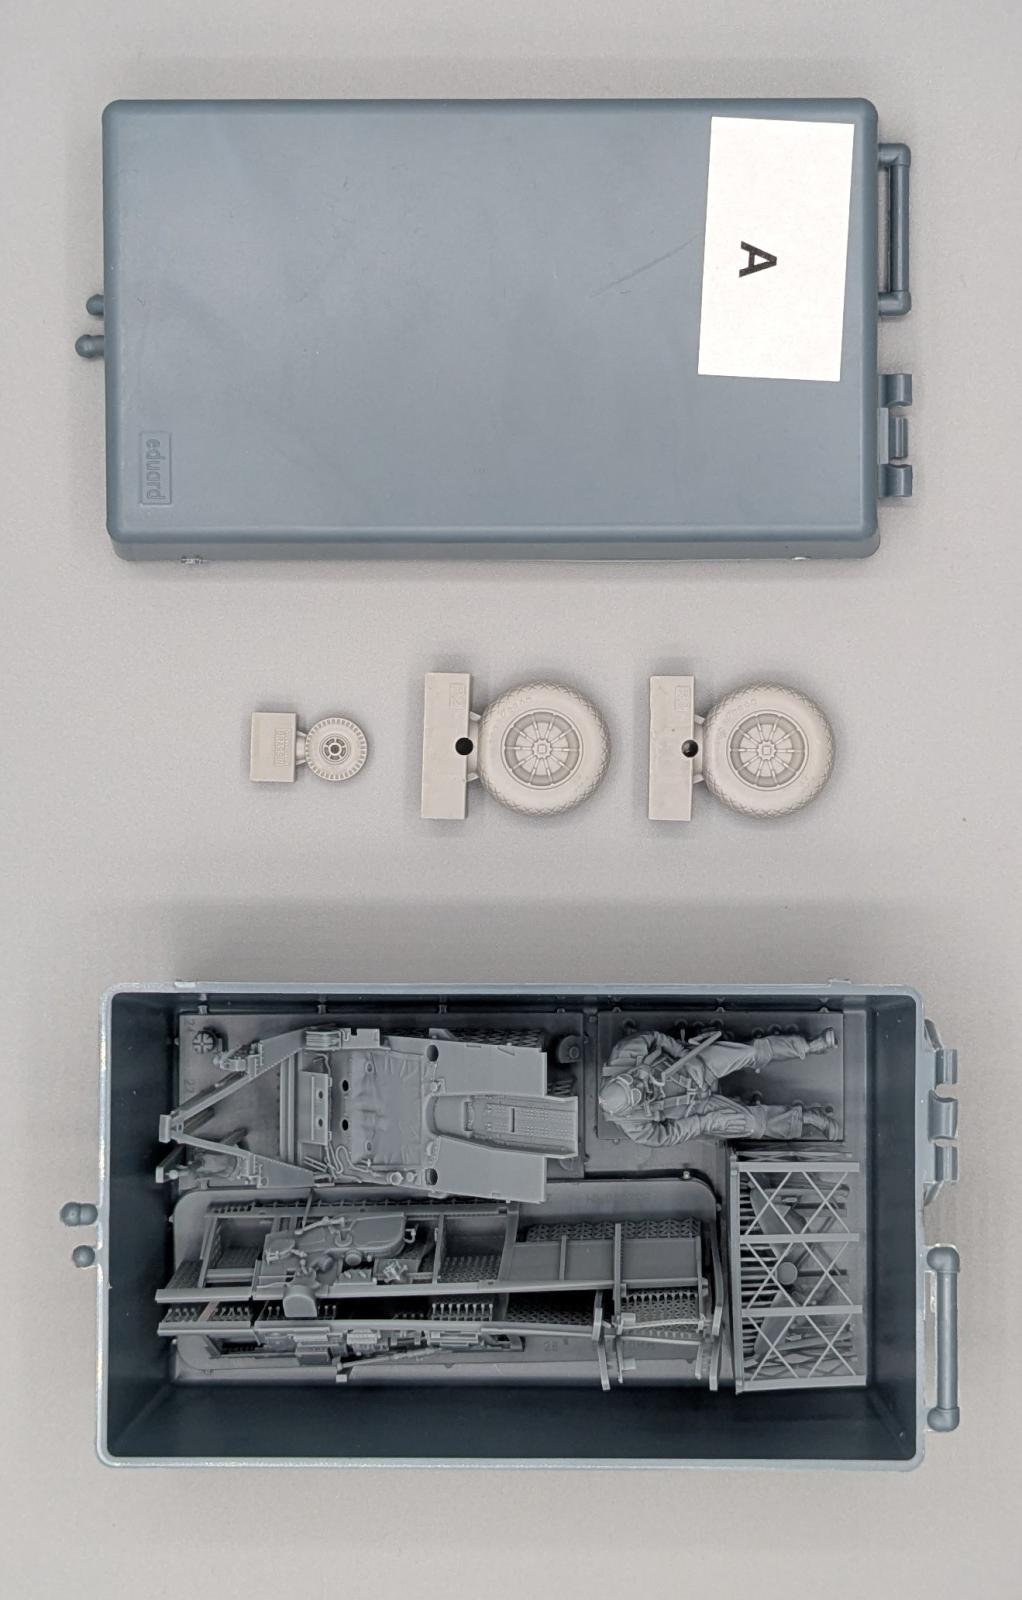
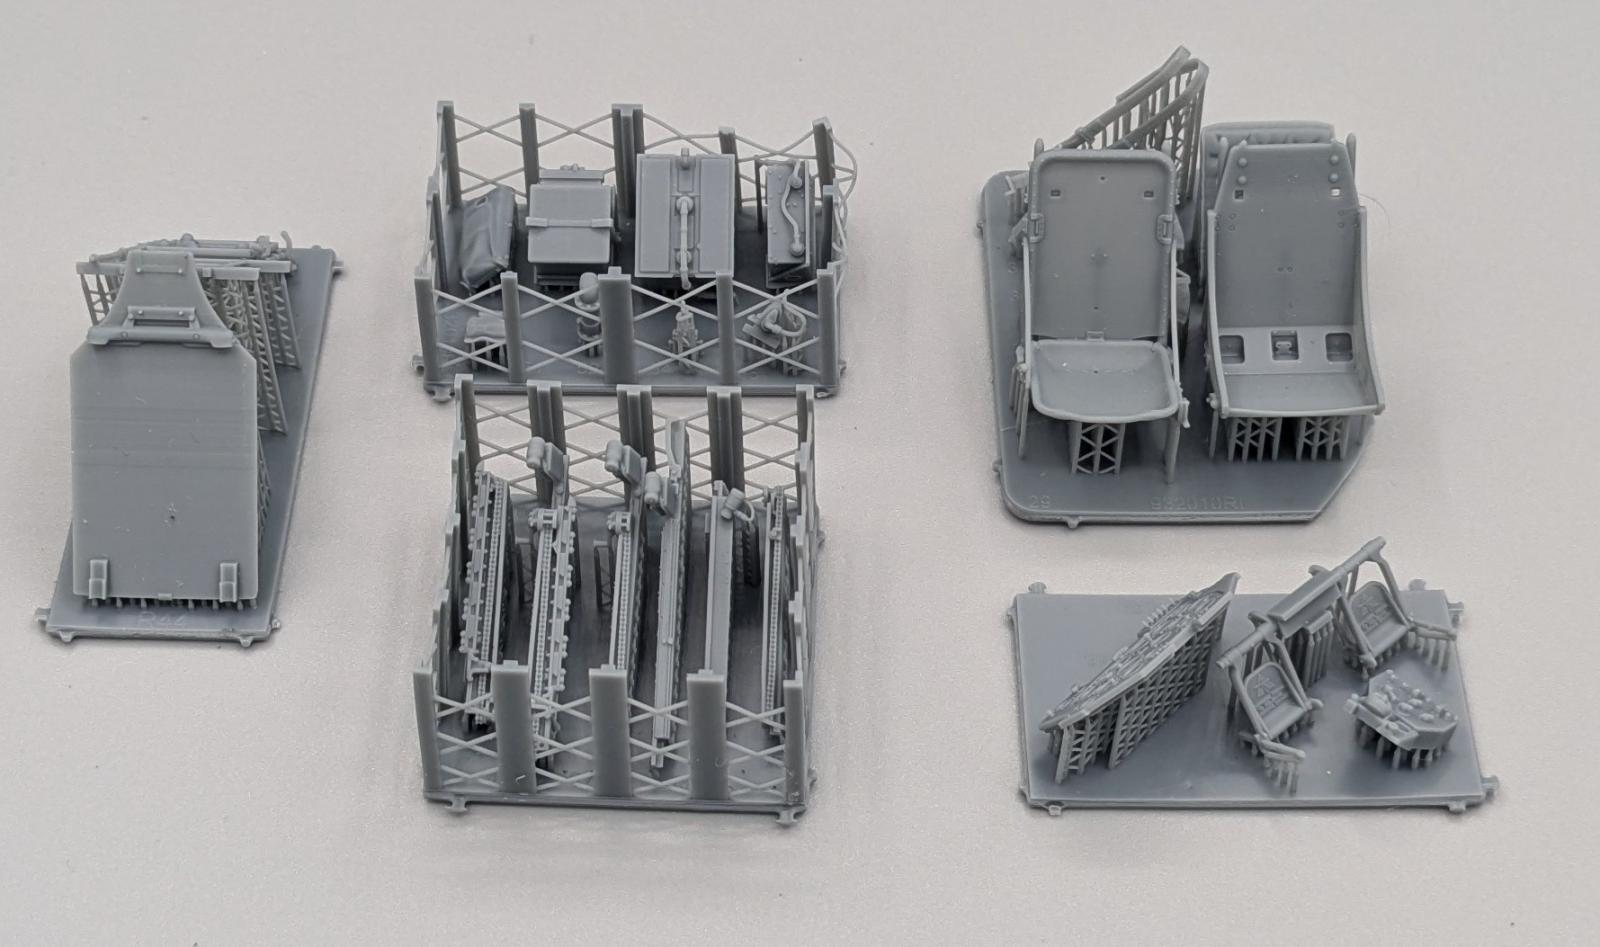
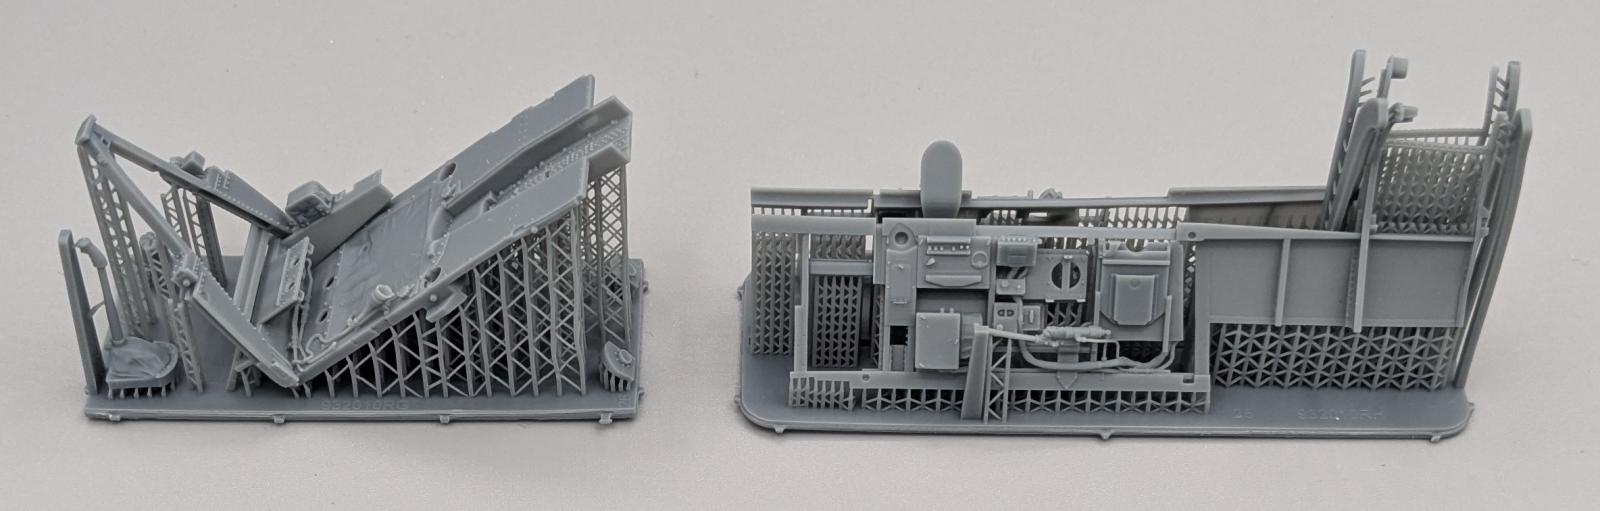
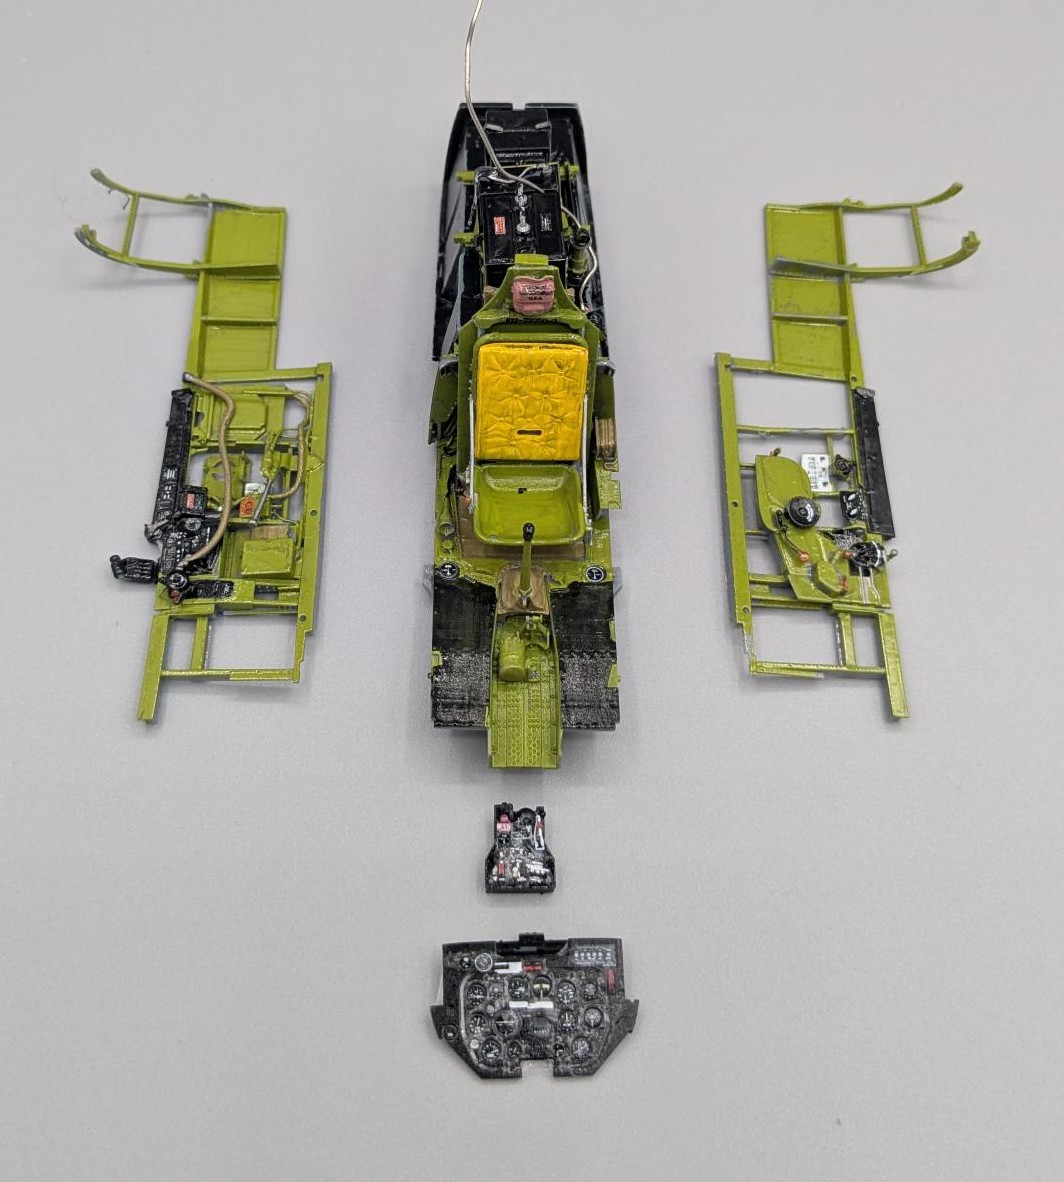
Small parts and assemblies such as cockpits and landing gear bays are produced using modern 3D printing technology. This allows a level of detail that cannot be achieved with traditional injection moulding. It also enables larger integrated assemblies with many details printed as a single part, eliminating the need to break down fine details into multiple components during production.
For example, a landing gear bay base forms a single detailed assembly, with only a few small parts added during construction – mainly to simplify painting of the complete assembly. This differs from traditional plastic kits, where such assemblies must be built from many separate small parts.
Please note: printed parts are an integral part of the kit – the model cannot be built without them.”
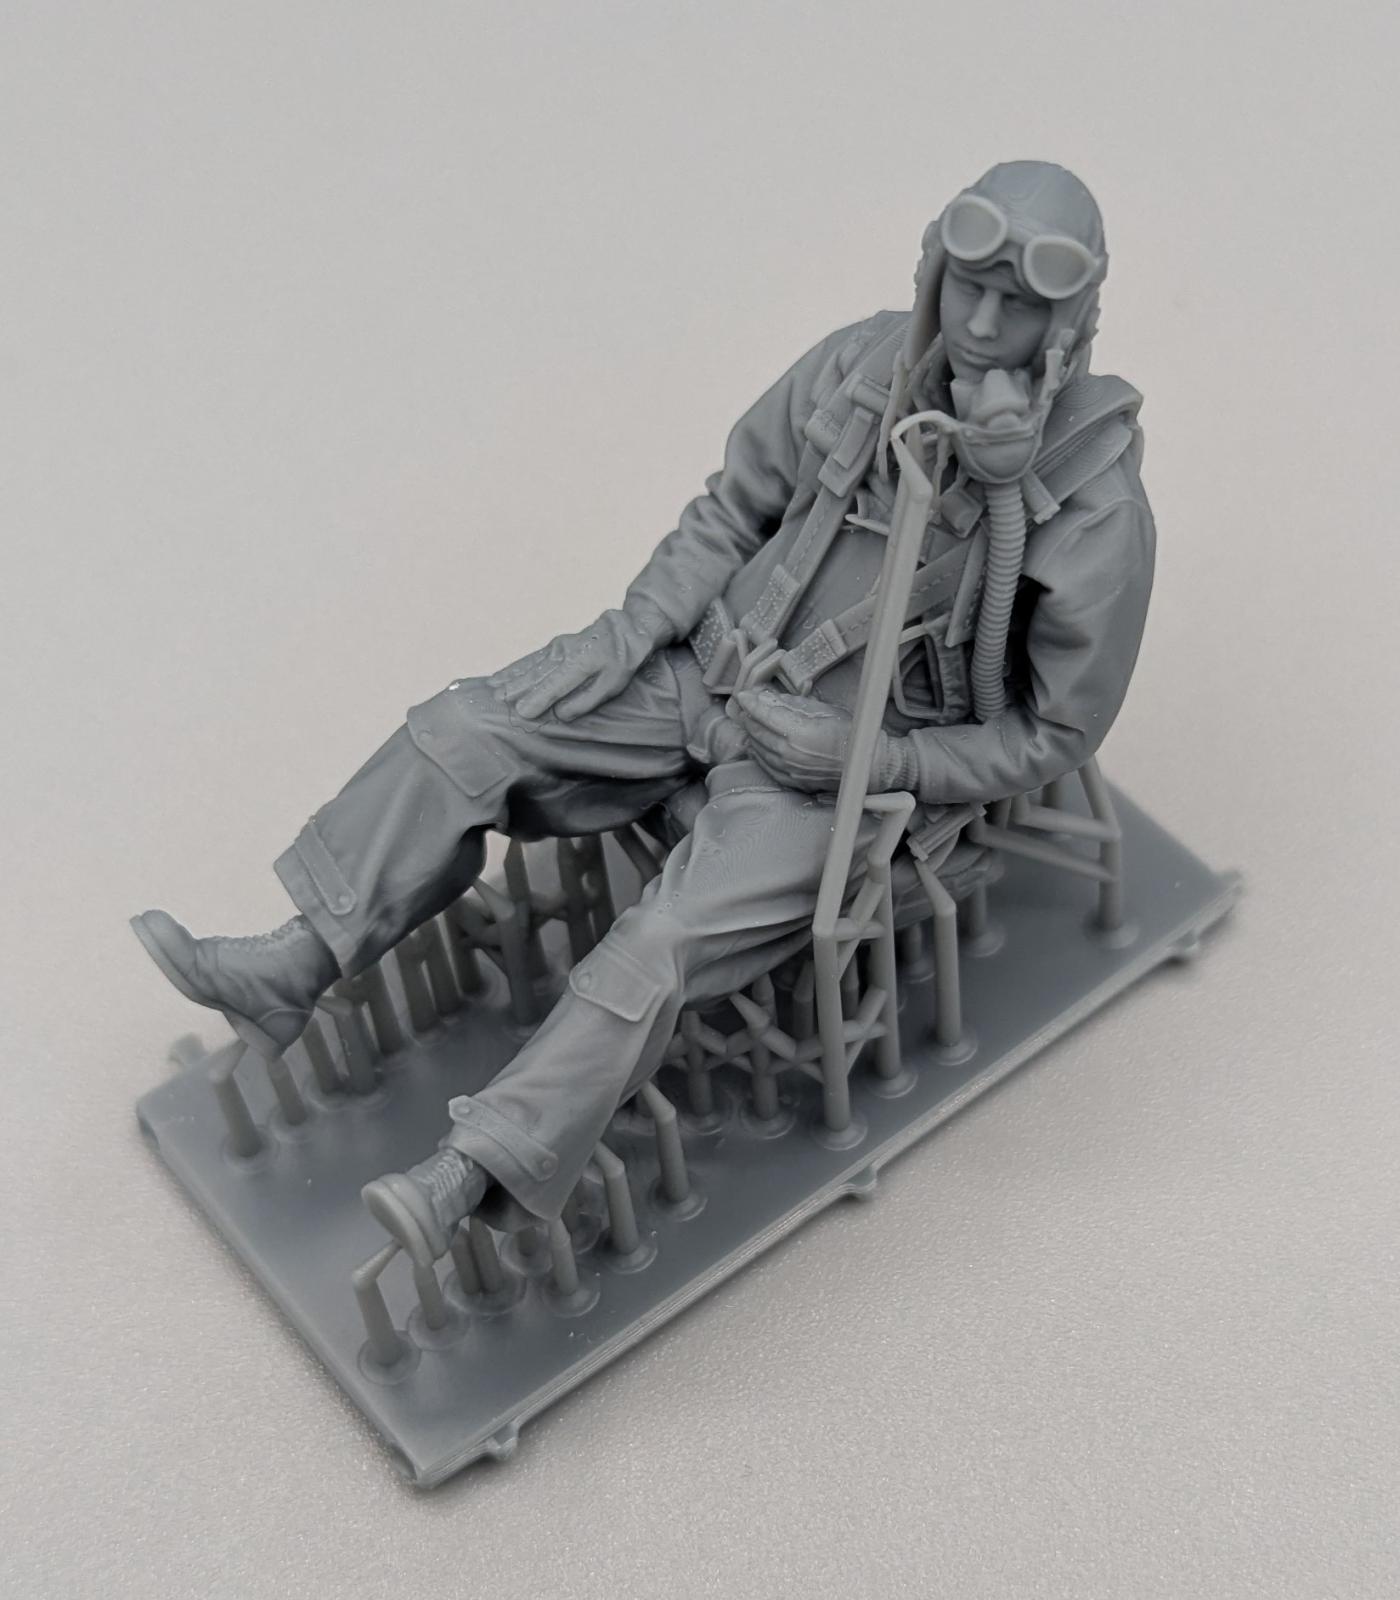
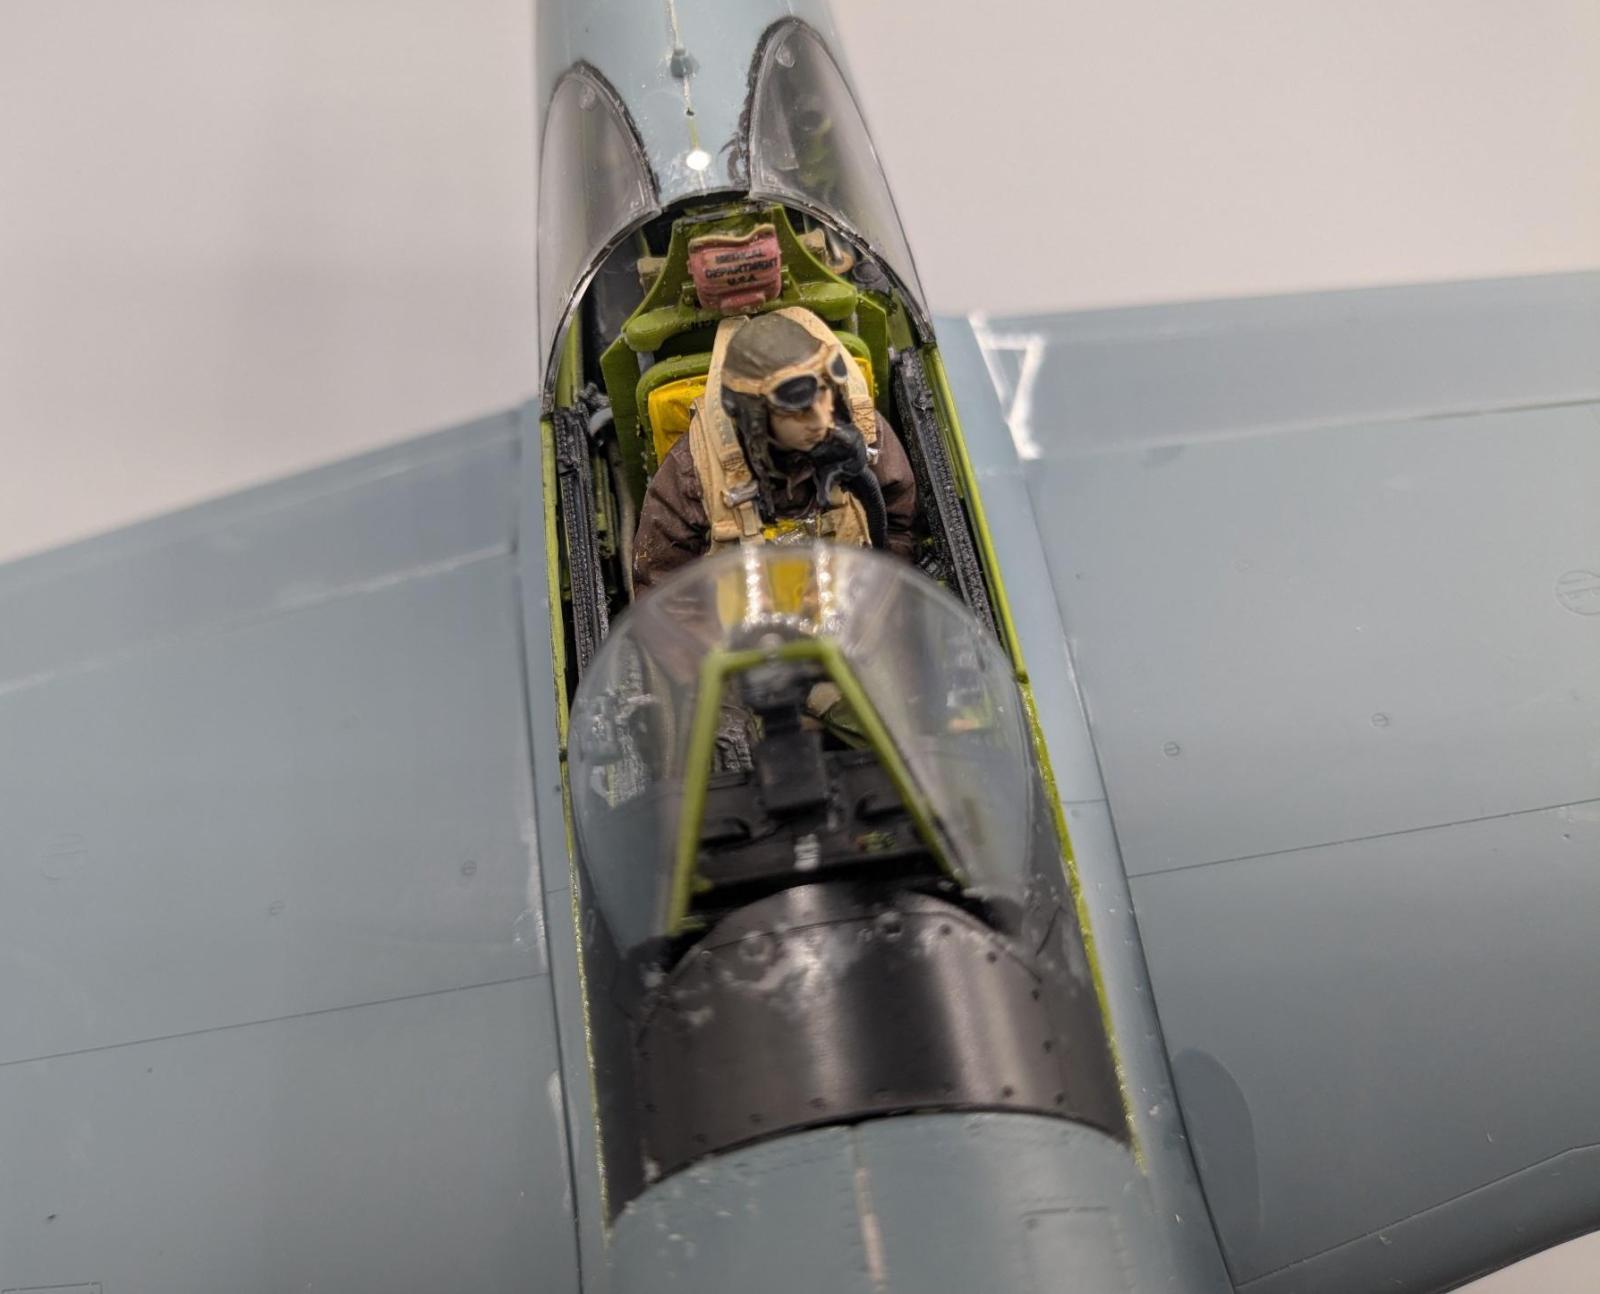
To say that this kit is impressive is an understatement. A beautiful model can be built out of the box without the need for aftermarket accessories. The 3D printing is sublime, and the seated pilot figure is beautiful in itself.
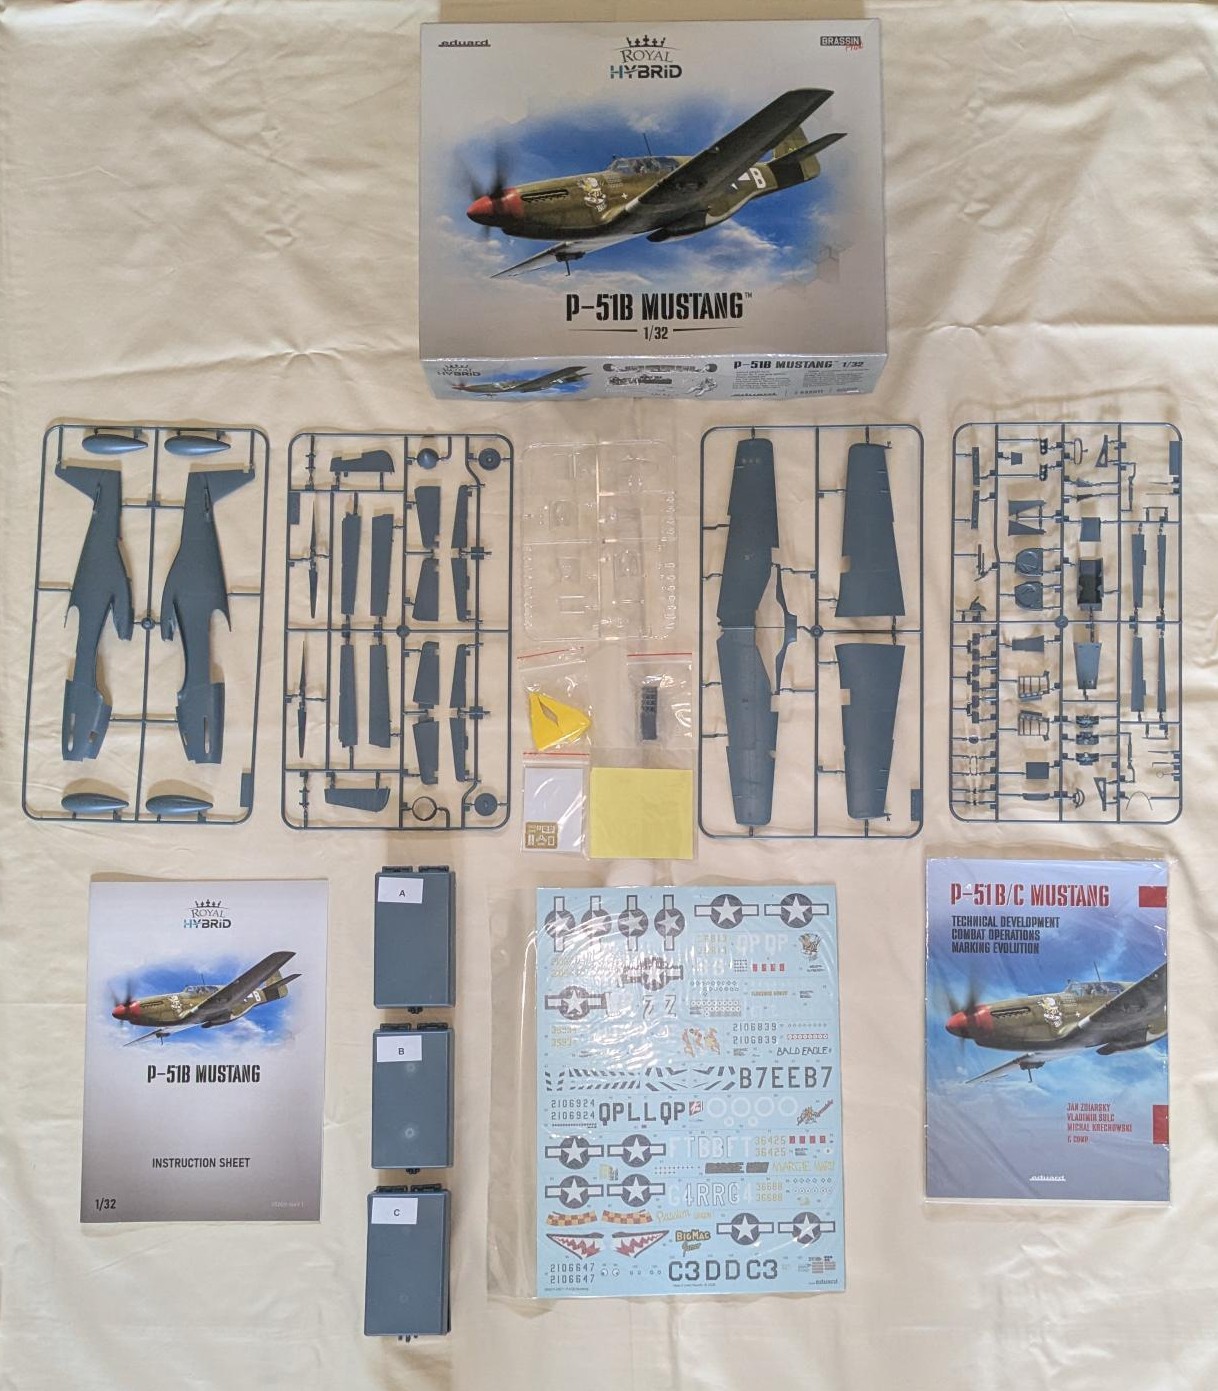
Upon opening the box cover, there are a plethora of well packaged and protected parts. The color illustrated instructions are 24 pages long (18 for the build, the remainder for each of the eight P-51B schemes), consisting of A-Q steps. There are five plastic sprues with 84 parts (with several unused for other variants), 71 3D parts separated into three separate protective plastic boxes, canopy and lights (formation and landing) mask sheet, PE fret (with nine parts), two main landing gear wheel well foam mask plugs (from Omask), three decal sheets, and an incredible bonus, a 112 page reference book (P-51B/C Mustang - Technical Development, Combat Operations, Marking Evolutions written by Jan Zdiarský, Vladimír Šulc, and Michel Krechowski & Company, that really comes in handy during the build, provides excellent reference and historical details, and provides inspiration for many, many more P-51B/C Mustang kits.). The downloadable instructions are also available online.
I have rarely experienced such joy building a model that is so well designed and engineered. The merging of plastic with 3D parts and PE is easy and joyful. For this model, determine with of the eight Mustangs you want to build, as Eduard has marked the instructions with the marking options (A-H). The model build instructions are logical and I have highlighted notes with their instruction step:
Preliminary: I recommend removing the 3D parts from their printing supports. This alone will take a long time, but it is well worth it to keep the model building moving smoothly. Thank goodness I picked up a Squadron Tools Ultrasonic 3D Parts Support Remover Cutter at the Nats to make this process more efficient and a lot easier.
The wheels are cast resin by Brassin.
Before Step A (pp 1-2):
- Choose between the Warren McArthur SK-2016 and the Schick-Johnson S-9153074 seats. The instructions identify which variant used the Schick-Johnson seat; the reminder used the Warren McArthur.
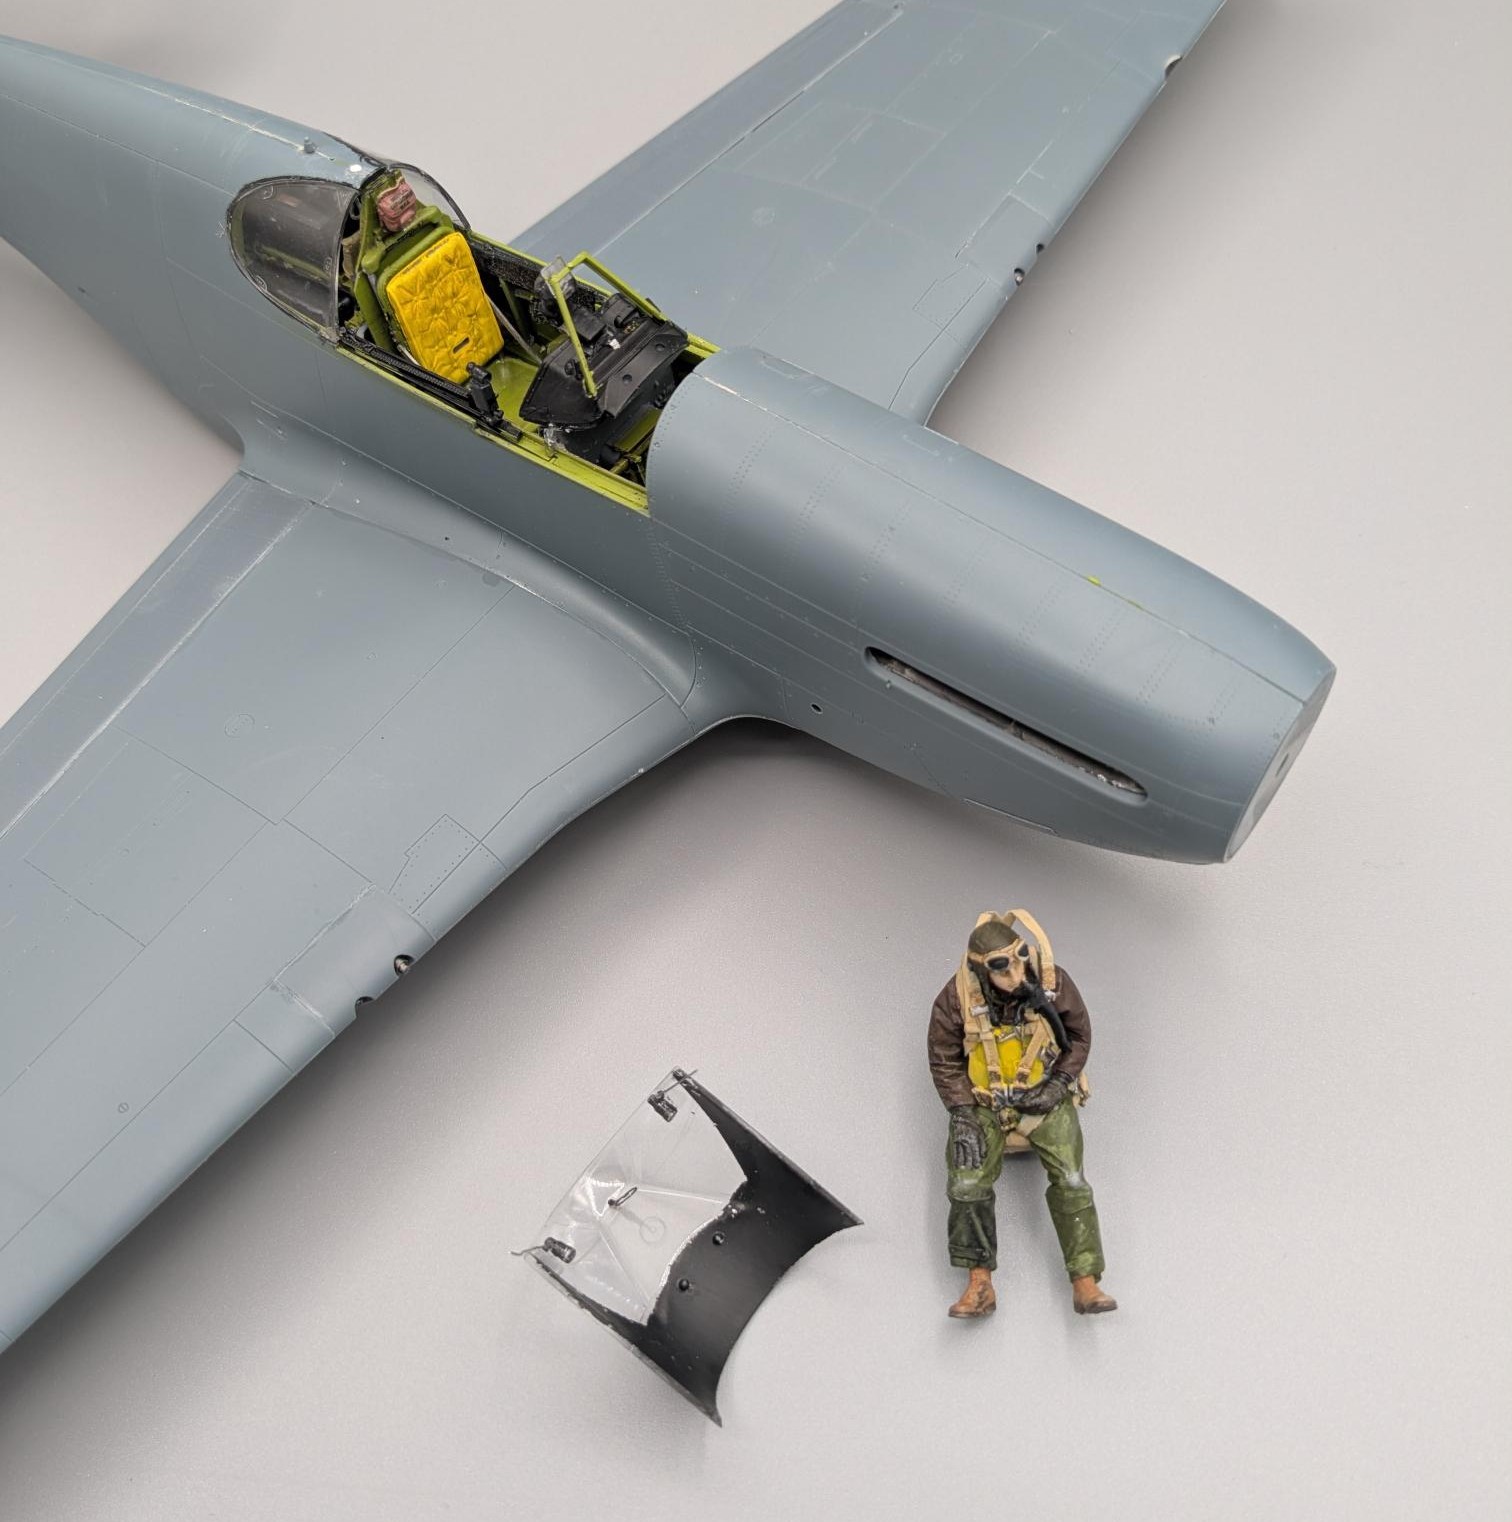
- The seat can be assembled with or without a pilot, and the seatbelt harness has both options thanks to 3D printing.
Step (pg 5): Build, paint and decal with the choice of open or closed canopy. Eduard thoughtfully provides a color photo of the assembled port cockpit side.
Step B (pg 6): Same as previous step for the starboard side. I recommend placing decal K8 before installing the hose RN62.
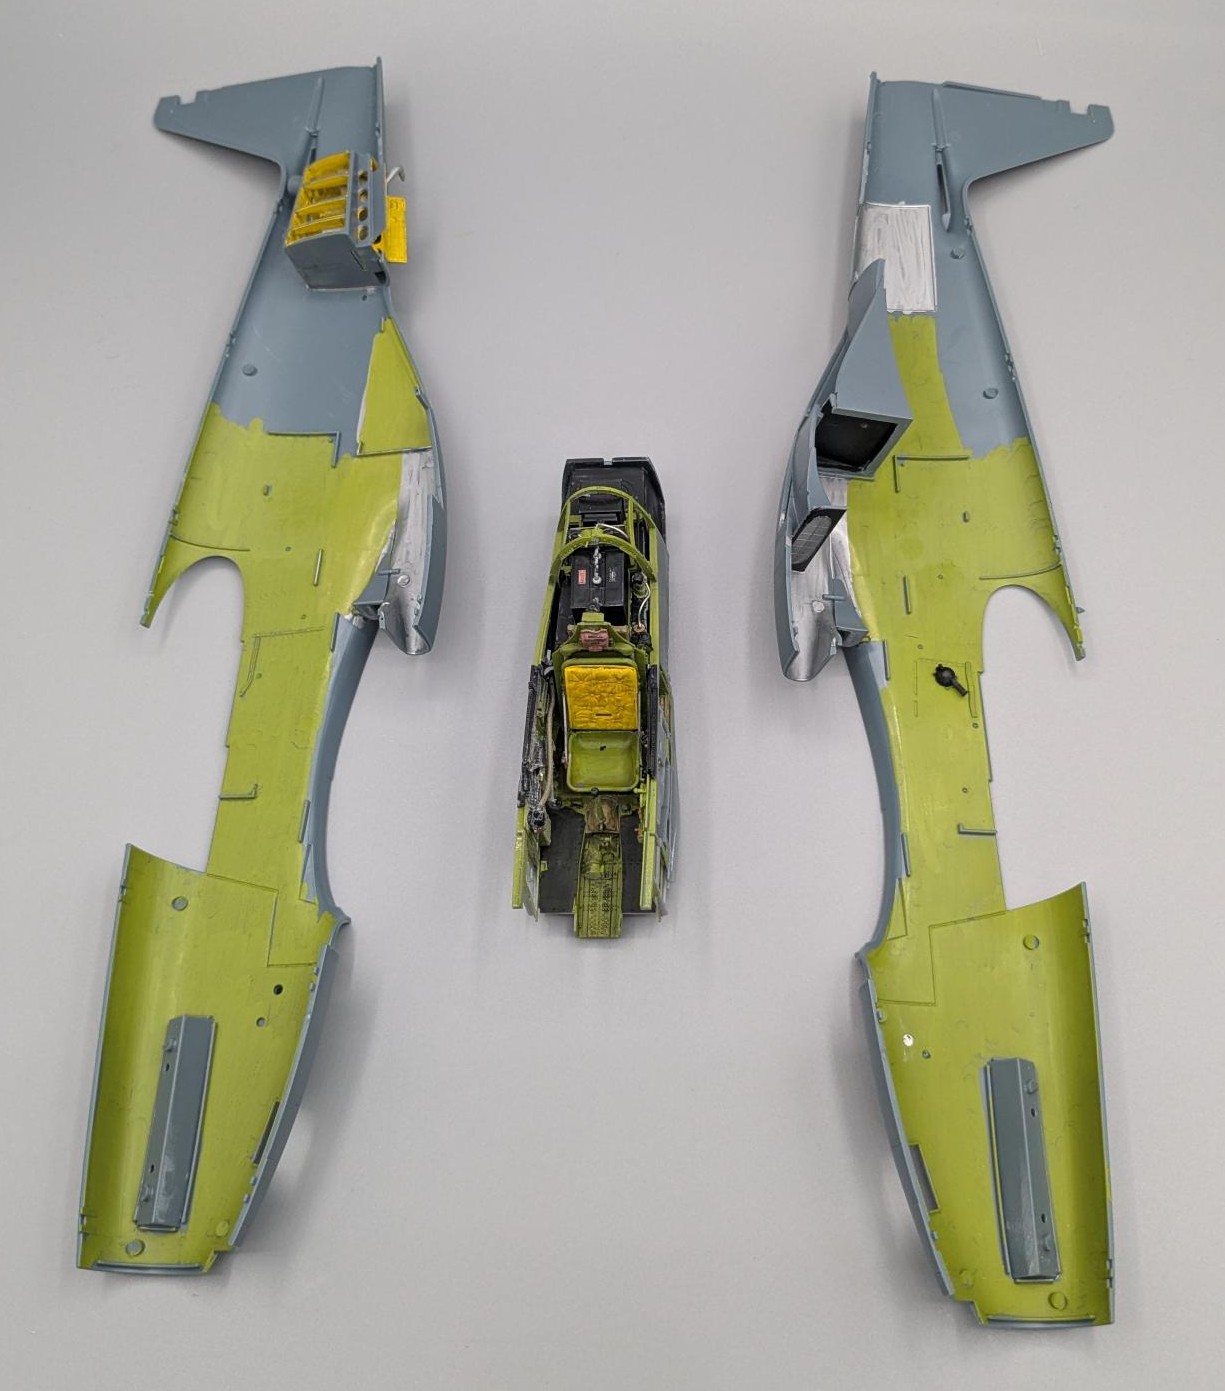
Step C (pg 7): Test fit the radio gear to the rack, using the reference photo and book to ensure it all lines up properly. If not, the cockpit won’t assemble properly, affecting the joining of the fuselage halves later. Again, the color photos and color callouts are great.
Step D (pg 8): Depending on the aircraft built, a small hole will have to be drilled behind the cockpit.
Step E (pg 8): Depending on the aircraft, another small hole will have to be drilled, and another filled in.
Step F (pg 9):
- Part F17, for the propeller assembly, fits with the nub to the inside of the fuselage.
- 3D part RE14 attaches to Part RE15, not RE16 as instructed. The photo in the step shows the correct location.
Step F (pg 10):
- For parts RE19 and RE20, refer to the enclosed book on pages 104-105 for the correct location and orientation. I recommend not installing these until Step L (pg 15) and installing gear flaps (Parts E30 and 31) into their proper location, then install Parts RE19 and RE20.
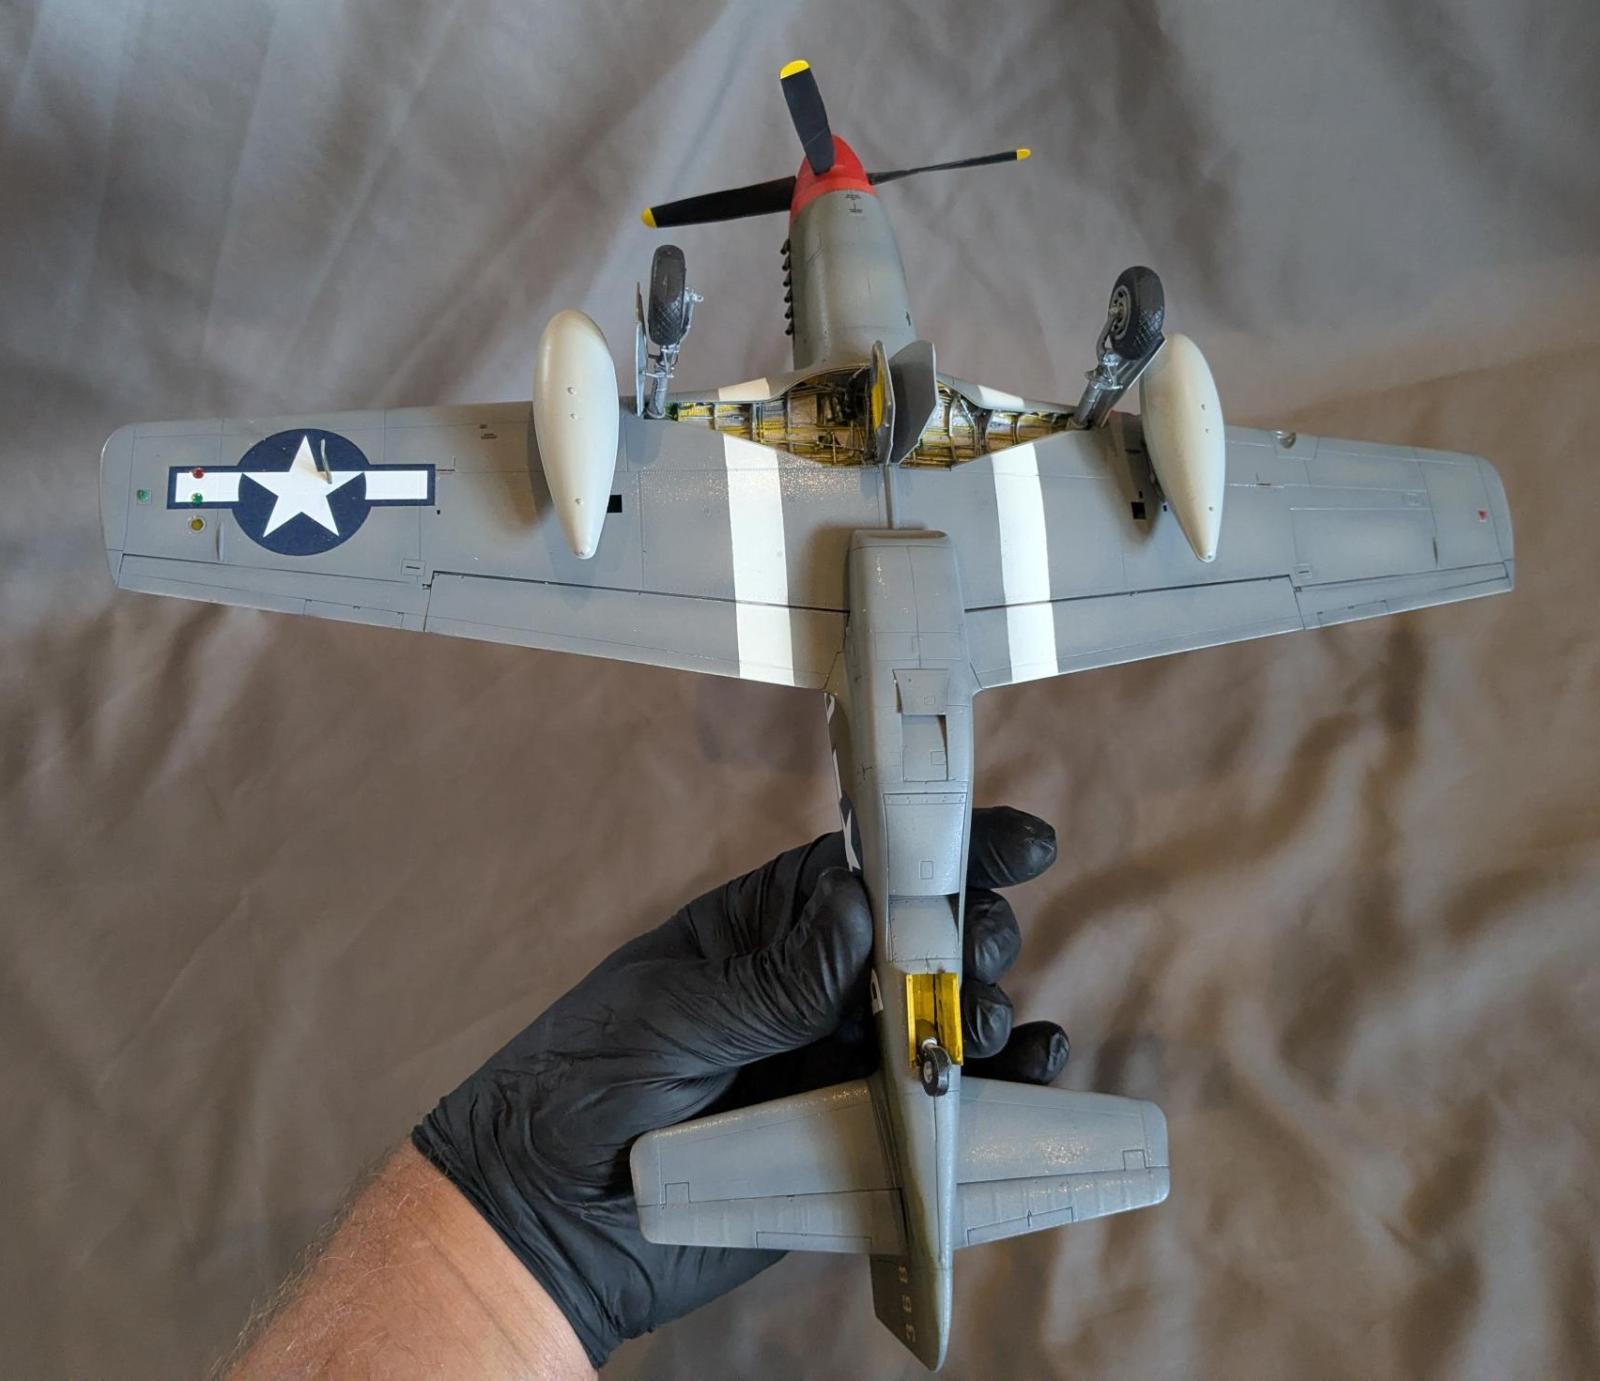
- I had to shave down the assembled 3D wheel wells to fit in between the lower and upper wings. This is most likely my fault, but test fit before committing to adhesive.
- The landing light location is a little nebulous; it works well if Part RE17 is first put in the lower port wing, then clear Part A9 fits easily into Part RE17.
Step F (pg 11):
- The navigation lights (2 x A2) are called out to be installed. I recommend leaving them off until after painting and decaling during final assembly.
- Eduard’s engineering really shows itself with the mating of the wings to the fuselage with its unique, non-symmetrical join in the wing.
Step F (pg 12): The air scoop (Part E24) contains a small PE splitter/reinforcing piece (Part PE 8); I recommend this be added during final assembly to make painting the scoop easier.
Step G (pg 13):
- The gunsights and front windshields have several options presented. Refer to your aircraft, and even then, there are options. Prolific Mustang modelers, or experts on P-51 Mustangs, will know which version they want to build.
- I recommend leaving the above canopy fixtures (Parts RH42 or A16) off until final assembly.
- The gunsight (Part PE4) is fiddly, and I had a hard time lining it up with the glass gunsight while sliding it into the cockpit area. I lost it twice and recovered it once from the well-detailed cockpit.
- Masks are available for the window gunsights (Parts A19 or A20); refer to page 19 for instructions and use them before painting and installation (I discovered this nifty fact after the canopy was closed for painting.
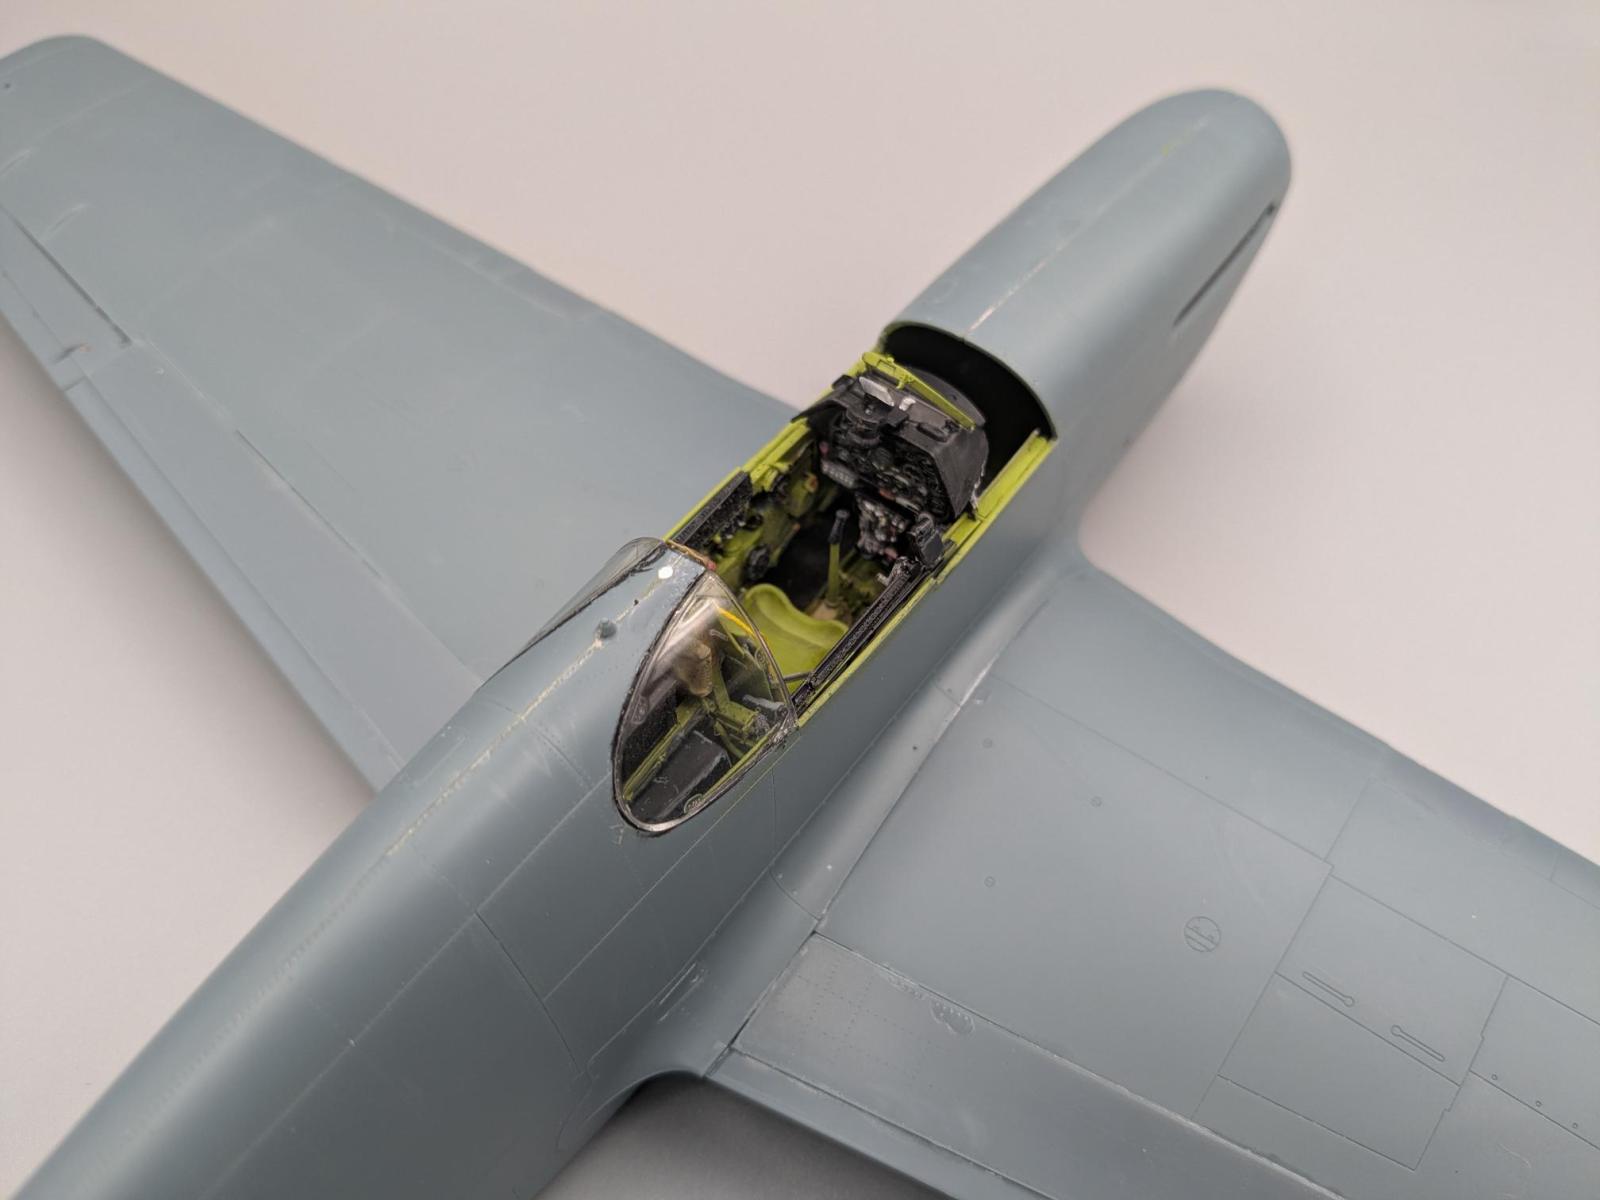
- Note: I thought I really screwed up while installing the cockpit and joining the fuselage halves as there was a huge gap between the seat and cowling. The front windshield assembly (Part A7) in this step filles that gap beautifully. Again, very good engineering!
Step M (pg 15):
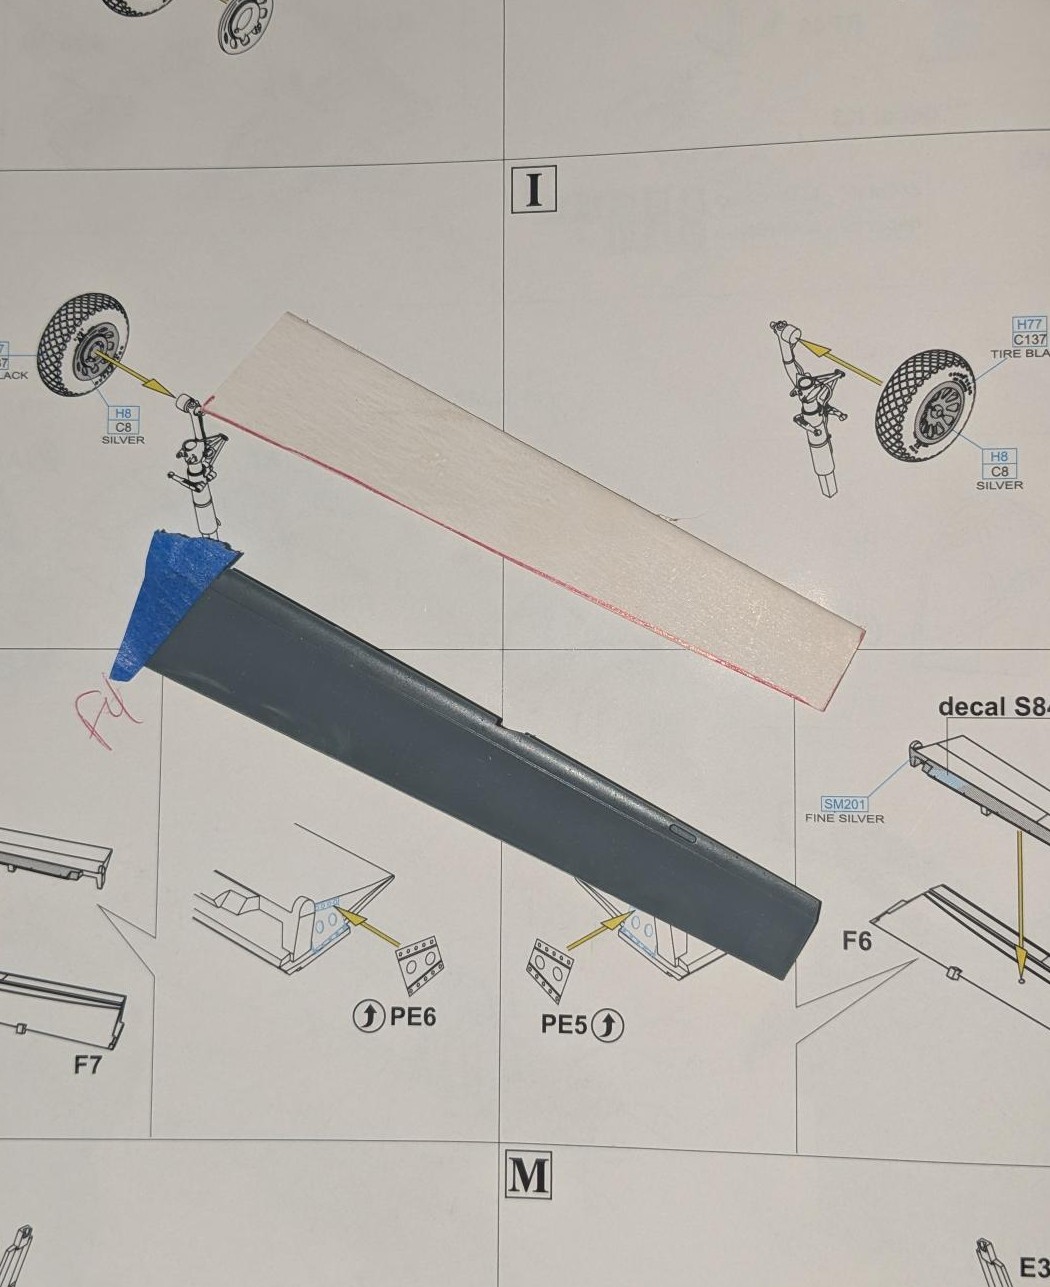
- This was the disappointment of the kit – the installation of the large, inner flaps (Steps J and K). The kit is designed to be posed with flaps down. This makes sense while parked and the hydraulics have been bled, but not in flight (with a pilot in the seat and a closed canopy, especially a birdcage canopy that folds down). I didn’t know this until this step. Looking back at the instructions, Steps J and K have part of the flaps highlighted in gray. To modify the flaps, those parts ended up being cut, but the nubs were also cut and sanded down, and the flap joins with the fuselage had to be cut at a precise angle to fit properly for an in-flight alignment.
- From Step F (pg 10), Parts RE19 and RE20, I recommend installing gear flaps (Parts E30 and 31) into their proper location, then install Parts RE19 and RE20.
- The pitot tube (Part E2) is to be installed; I recommend it be installed during final assembly.
Step P (pg 16):
- Part of this step is a repeat of the front cockpit (Part A7) from Step G. The remainder of this step is determining the type of canopy and whether it is open or closed.
- External parts (PE2 front gunsight and a small aerial wire) are recommended to be installed during final assembly.
Step P (pg 17):
- Navigation light (Part A15); recommend installation during final assembly.
- External attachments (Parts RJ42 and A16) are also a repeat of Step G.
- Recommend keeping aerials (Parts E8 or E9) off until final assembly.
Masking (pg 19): Eduard does a great job of using color codes for the mask based on the canopy used. The instructions also show masking for the gunsights, landing light, and formation lights under the starboard wing.
This P-51B kit has eight marking options (with brief history of the pilots and aircraft):
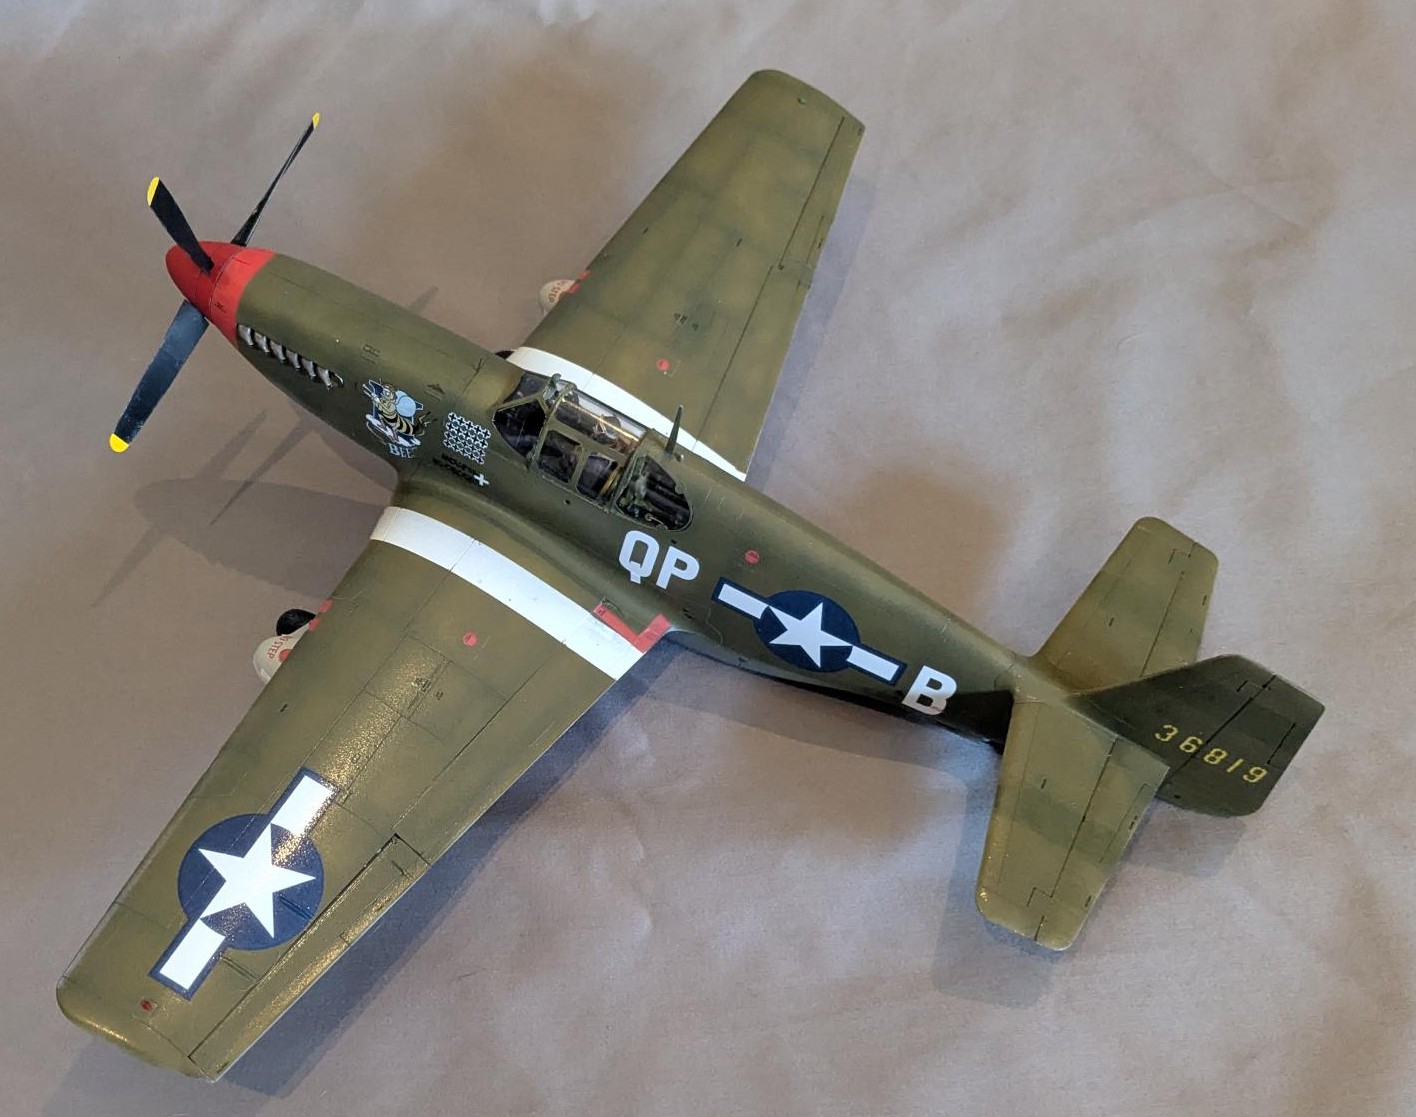
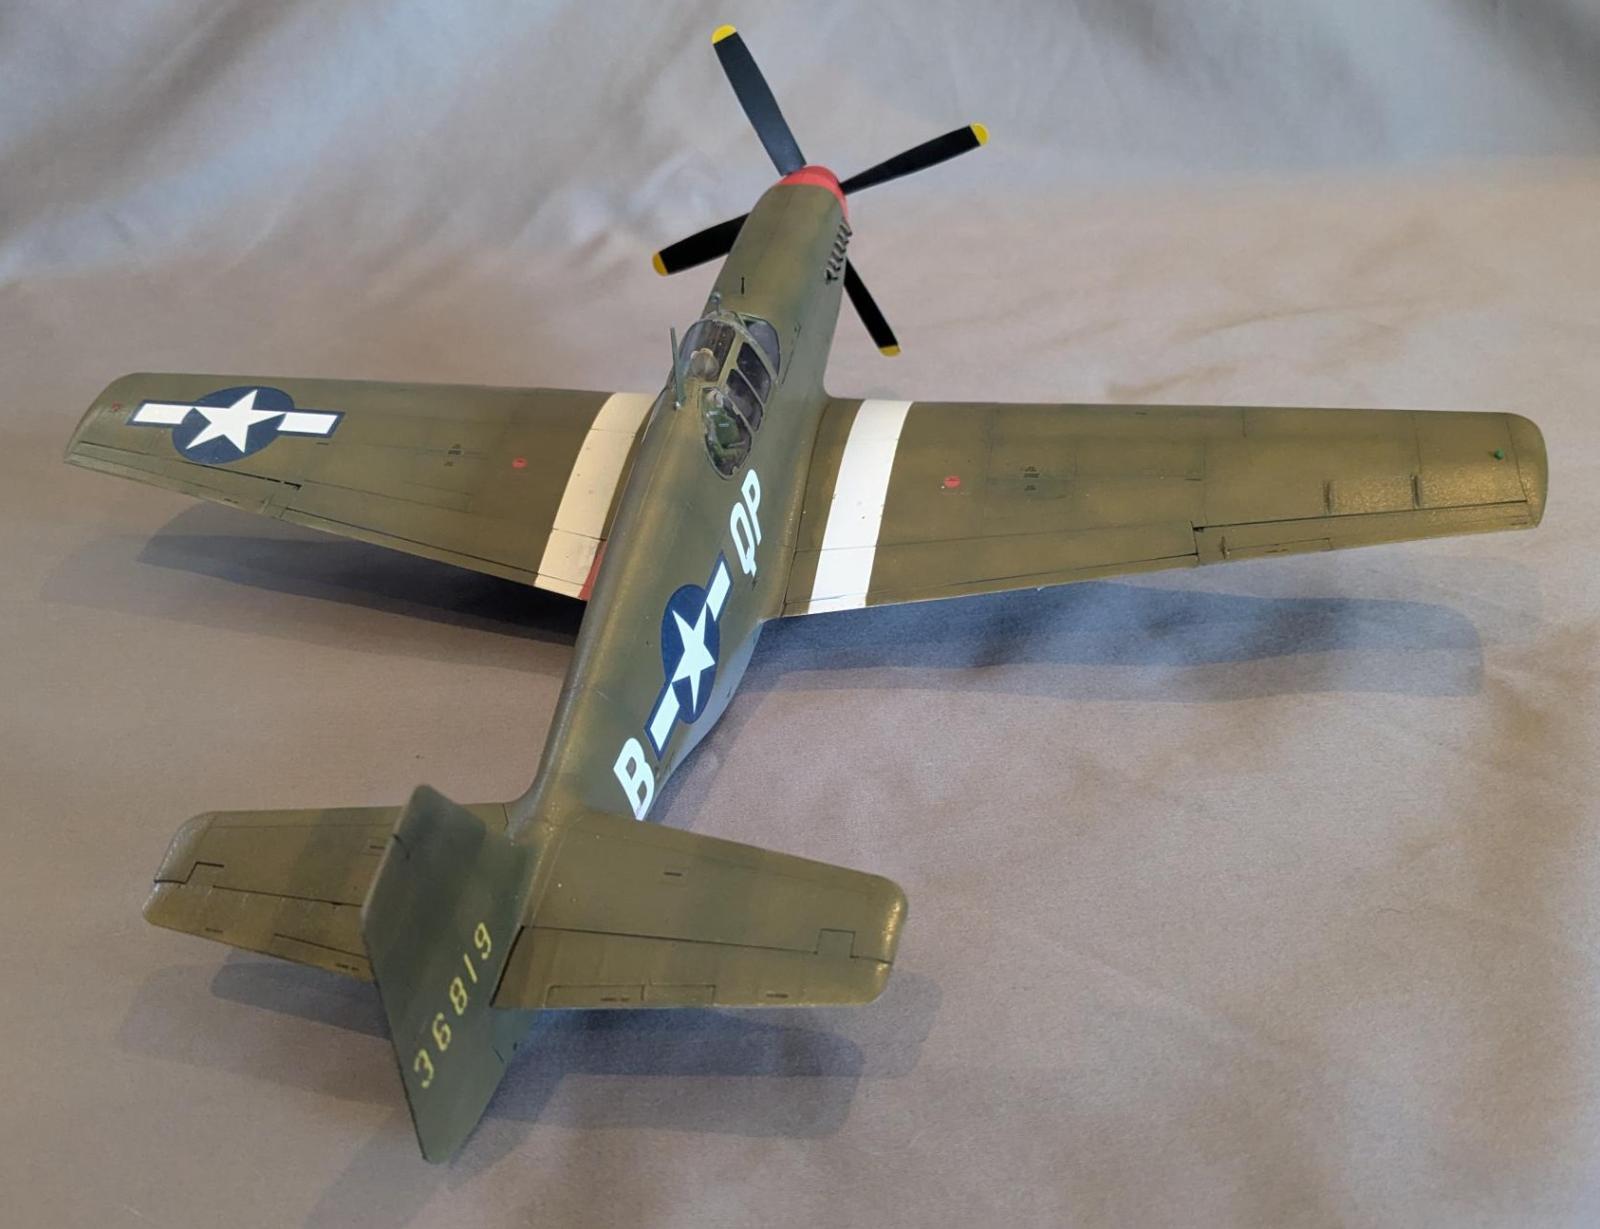
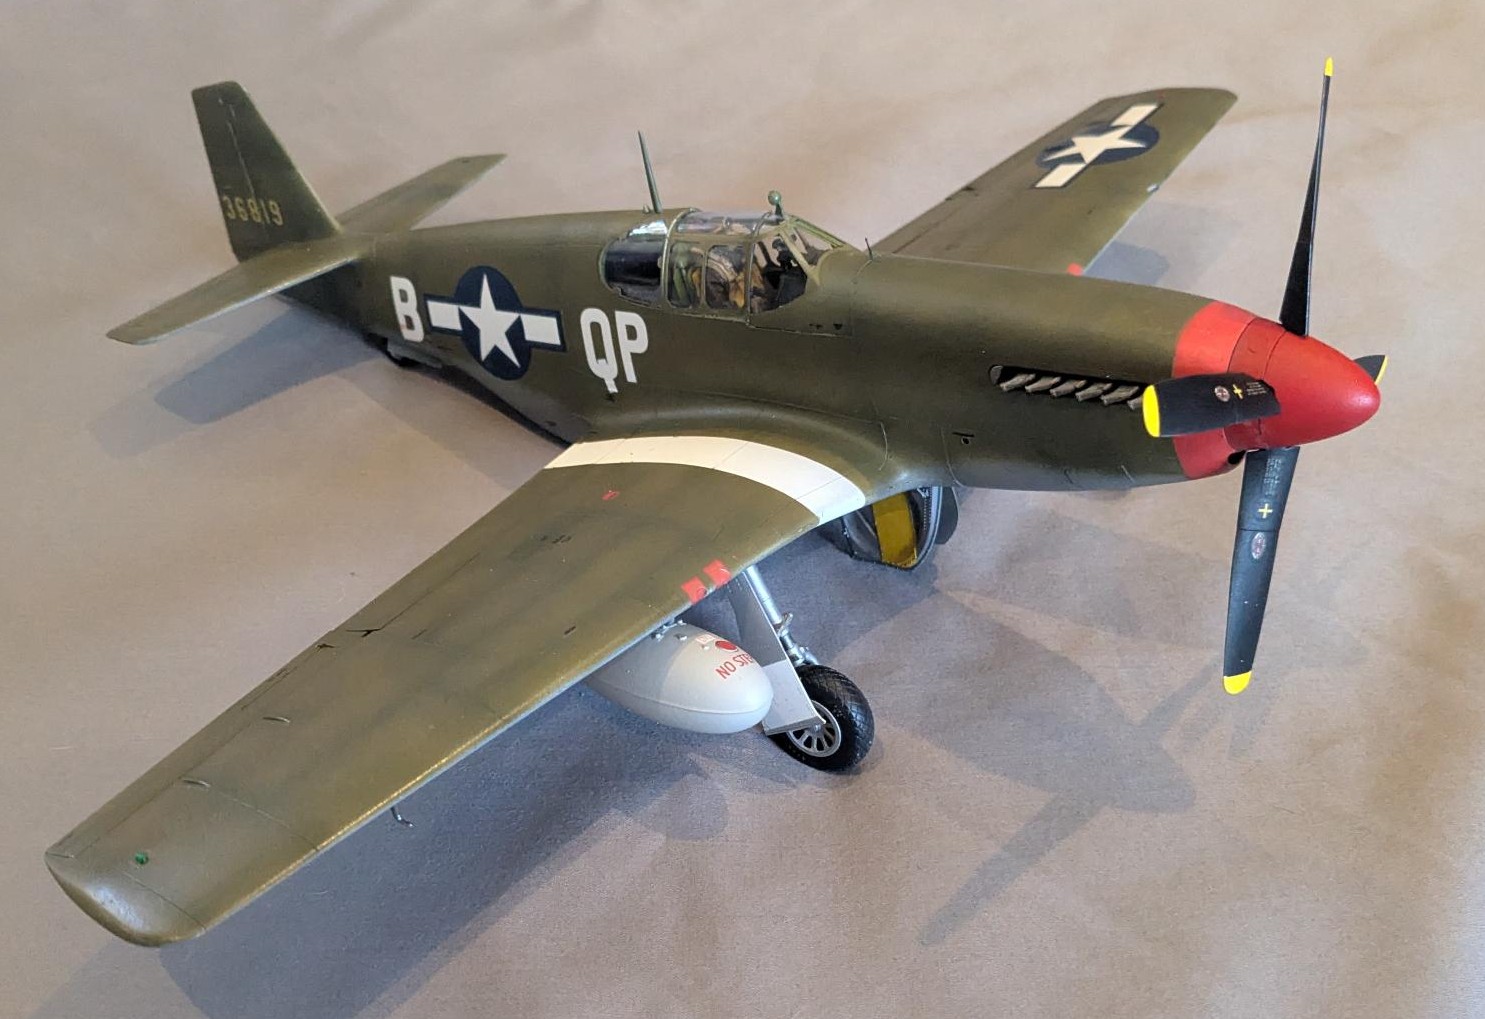
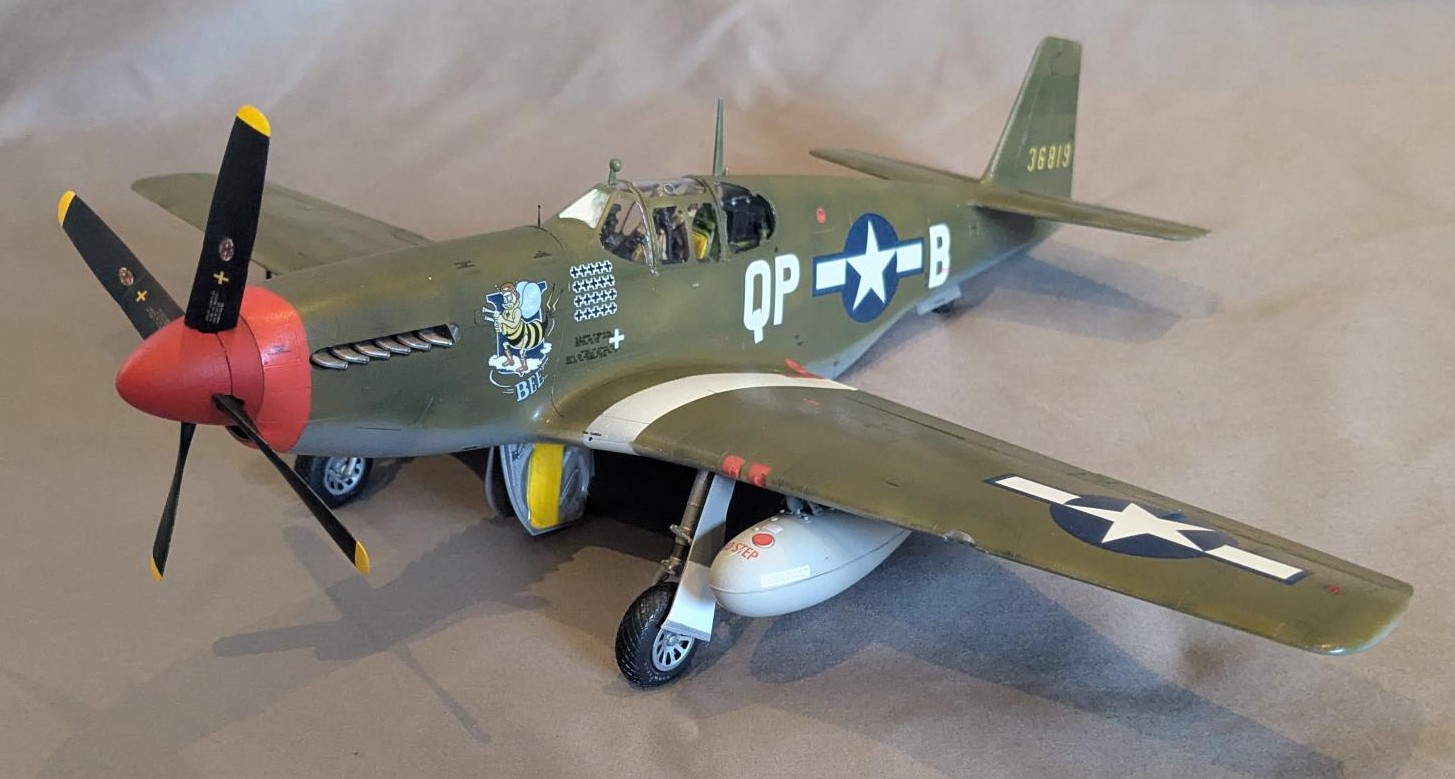
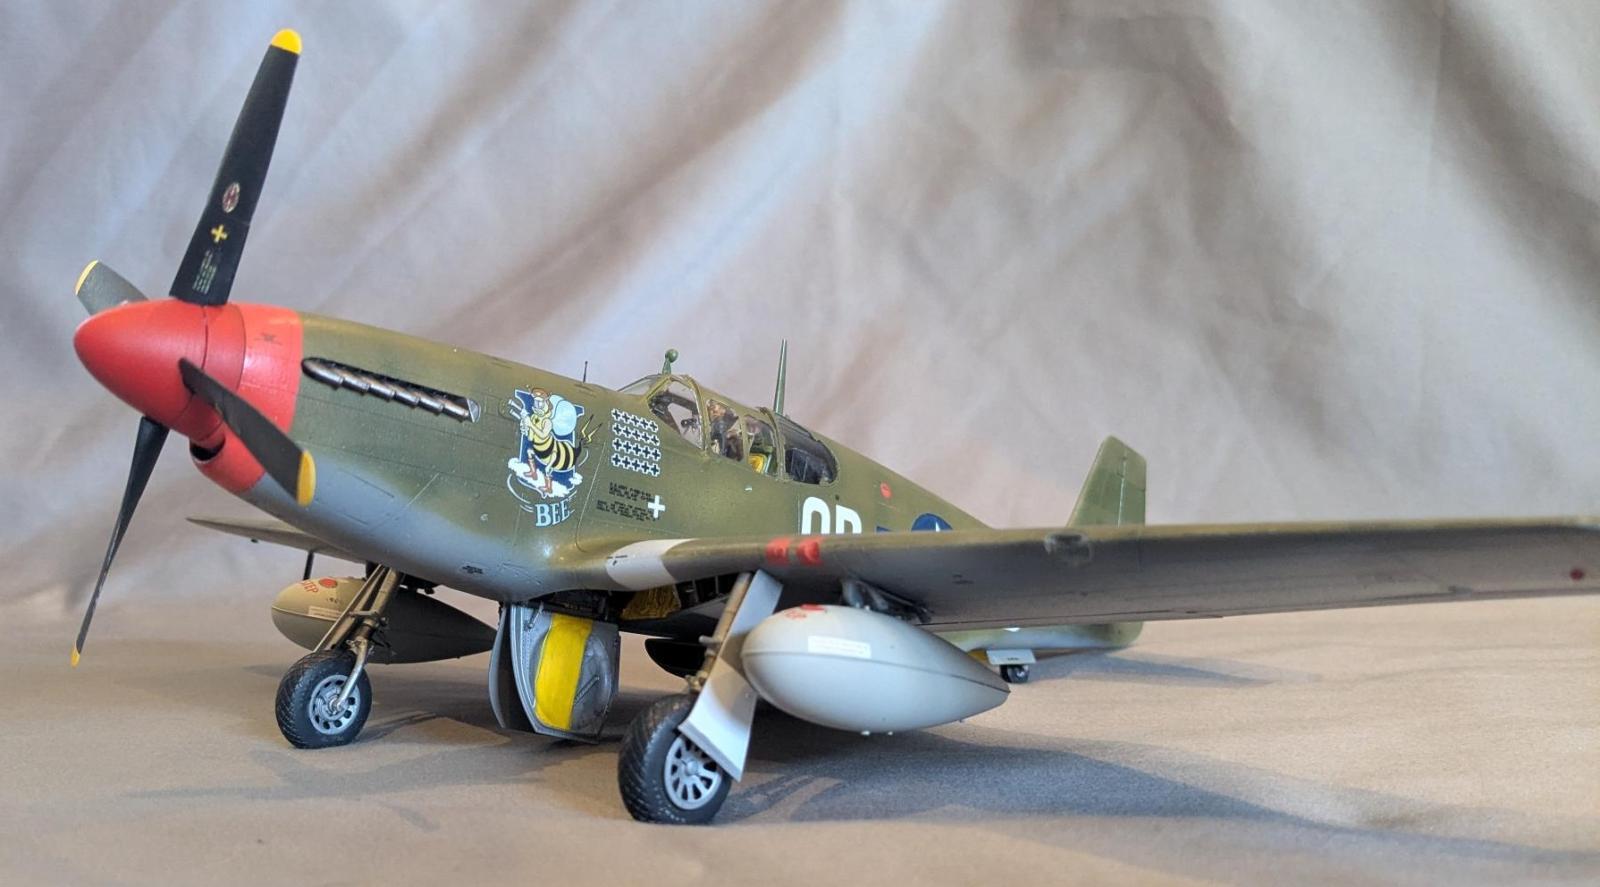
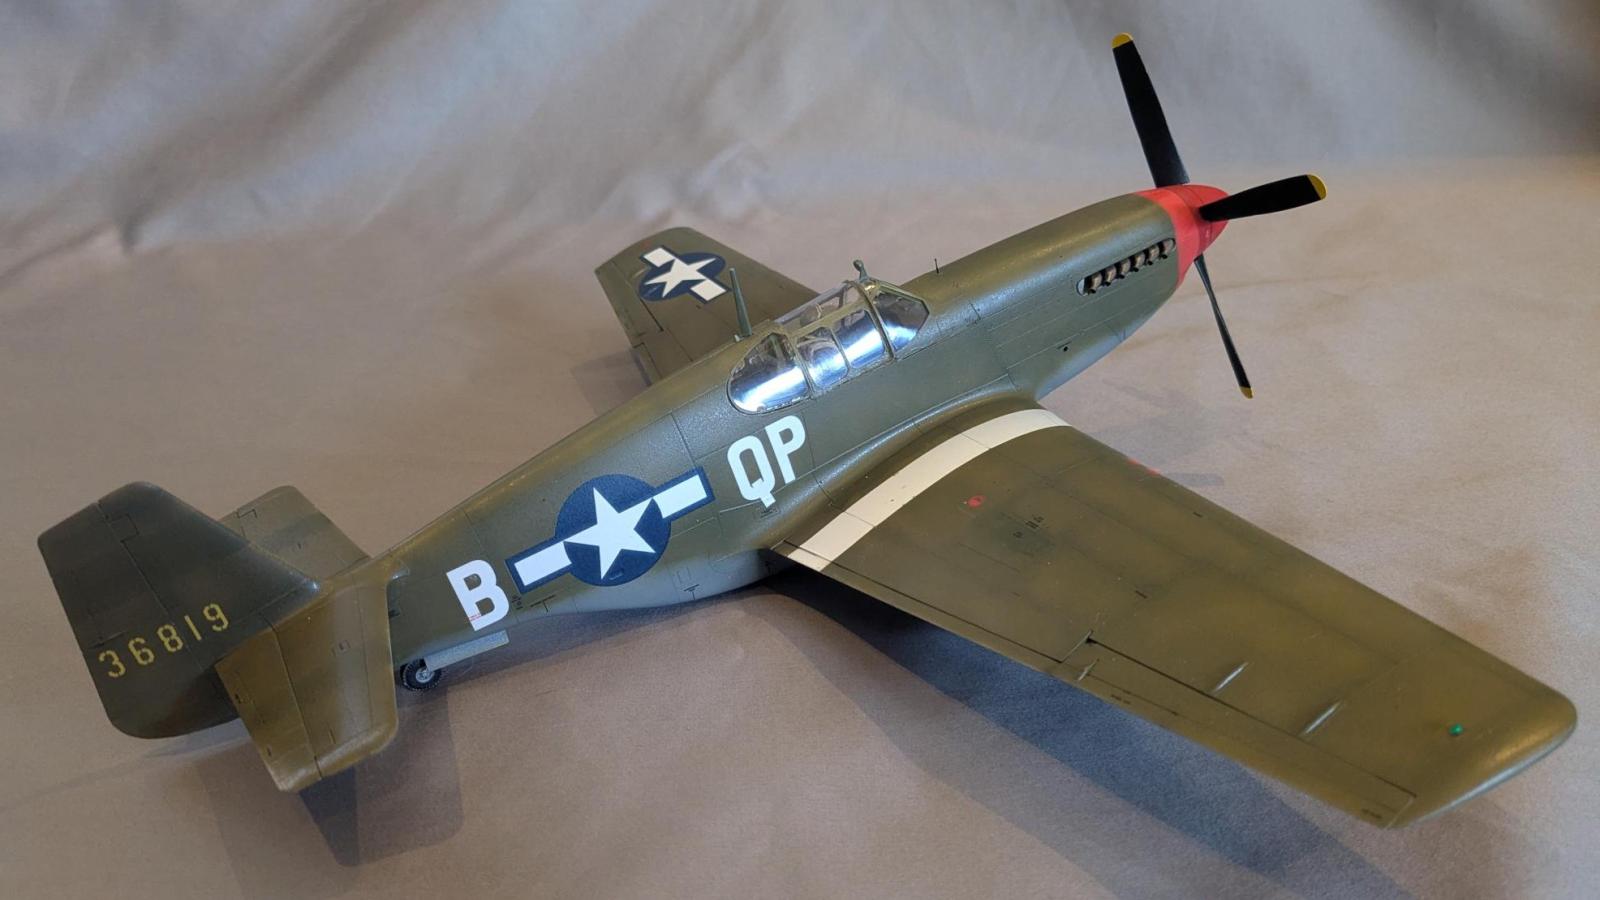
- P‑51B‑5‑NA, s/n 43‑6819, Capt. Duane W. Beeson, 334th FS, 4th FG, 8th AF, Debden, UK, March-April 1944
- P‑51B‑10‑NA, s/n 42‑106448, Capt. Henry W. Brown, 354th FS, 355th FG, 8th AF, Steeple Morden, UK, June 1944
- P‑51B‑10‑NA, s/n 43‑6934, Capt. Henry White, 328th FS, 352nd FG, 8th AF, Bodney, UK, June 1944
- P‑51B‑15‑NA, s/n 42‑106839, Lt. Robert Eckfeldt, 374th FS, 361st FG, 8th AF, Bottisham, UK, June-July 1944
- P‑51B‑15‑NA, s/n 42‑106924, 2nd Lt. Ralph K. Hofer, 334th FS, 4th FG, 8th AF, Debden, UK, June 1944
- P‑51B‑5‑NA, s/n 43‑6425, Maj. Jack T. Bradley, CO 353rd FS, 354th FG, 9th AF, A.2 Criqueville, France, June 1944
- P‑51B‑10‑NA, s/n 43‑6688, 1Lt. Arval J. Roberson, 362nd FS, 357th FG, 8th AF, Leiston, United Kingdom, June 1944
- P‑51B‑10‑NA, s/n 42-106647, Capt. John R. Brown Jr., 382nd FS, 363rd FG, 9th AF, Staplehurst, United Kingdom, June 1944
I painted my P-51 as the first option (A) on the box art. Eduard’s decals are the best kit decals, and among the finest, I have had the pleasure of using. They sink right into the paint and look fantastic.
This is an amazing kit, and it builds like a dream once a few nuances are understood. The modeler can spend more time painting and detailing thanks to the inclusion of 3D prints, particularly in the cockpit and wheel well. Also, a huge shoutout of thanks for the inclusion of a beautifully rendered pilot. The only minor inconveniences are the flaps with only the option to be in the down position. Hopefully the aftermarket (or Eduard) will address this so those modelers, like me, who like to pose their aircraft in flight, can do so. As I had the wheels down, I cannot attest to the ease of closing the landing gear doors for an inflight model, although it would be a shame to hide all that wonderful detail.
Well done, Eduard! P-51B Mustangs modelers rejoice!
Profuse thanks to Eduard and IPMS/USA for providing the review sample.
Comments
Add new comment
This site is protected by reCAPTCHA and the Google Privacy Policy and Terms of Service apply.
Similar Reviews