
Napoleon’s Red Lancer
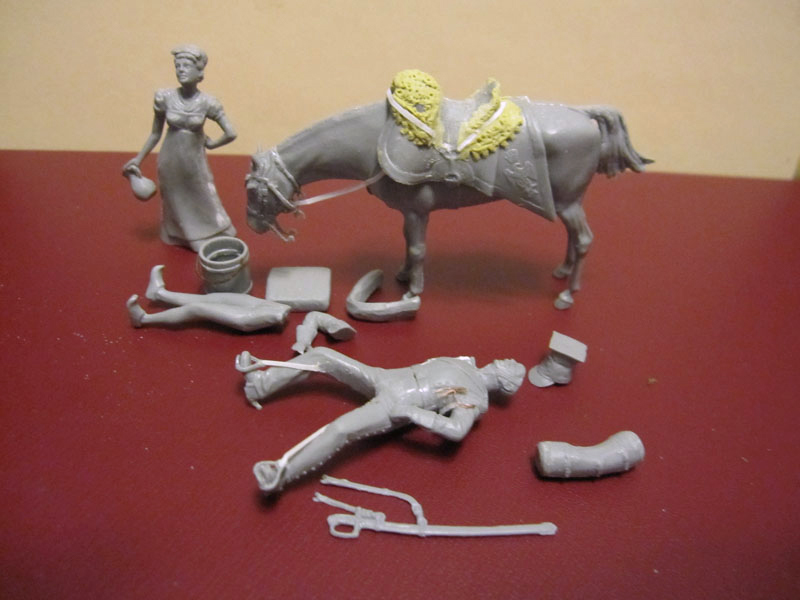
This is the first of a series of 1/32nd Napoleonic figures from Master Box, who has always given us unusual or creative modeling subjects. Upon opening this box, the modeler will find one sprue of gray plastic with 45 parts. Detail is good, with the kit representing a mounted French Red Lancer as he marches through Holland on his way to Russia, a local girl has provided a drink for him and his mount.
Napoleon formed a unit made of Polish volunteers, which became the 1st Regiment of Lancers of the Imperial Guard. In 1810, following the annexation of the Kingdom of Holland by France, a second Lancer Regiment of the Imperial Guard was formed of Dutch volunteers, the Dutch Lancers, but due to their bright red uniforms they were more commonly called the Red Lancers. Commanded by General Colbert, one of Napoleon’s most capable leaders, the Red Lancers distinguished themselves in battle many times, although they suffered heavily in the invasion of Russia, where many of the original Dutch Lancers died. The Red Lancers served Napoleon to the end and fought at Waterloo.
You may notice by the pictures, that there is no lance. Not all Lancers carried one. Half the men formed the front rank, armed with lance, saber and pistol. The rest were armed with saber, pistol and musket. In a charge, the men in the front rank would attack with lances, but if the men in the rear had lances, they posed a danger to the men and horses in front. The figure in our kit has no musket either, only a saber, so he is, in fact, a sergeant.
I had in my kit collection a Historex Dutch Lancer, and the instruction sheet served as the basis for my research on the uniform. The figure is in campaign dress, usually worn in the field to protect the fine uniform from the elements. This consisted of a cloth cover for the Polish style chapska helmet, and heavy overalls with leather reinforced inseam. These could be various colors, it is dark blue on the box art, but gray was also common.
I began assembly with the horse, which required some filler along the seams on the back, belly, and chest. Then I glued together the saddle, to make sure it fit the horse correctly. Finally I glued the rider’s legs together, and made sure they fit the saddle, everything meshed well. Each part required clean up along the seam. The woman’s dress required some filling as well. The pitcher in the woman’s hand needs to be hollowed out a bit on top. I drilled a hole and widened it with a hobby knife. Most pieces fit well, part 28, which is a piece of the horse’s harness, was too thick. I glued it on the horse and later filed the sides of the straps down till they lined up with the straps on the horse. Part 31 is not shown on the instructions, but is a blanket roll that fits over the horse’s neck just under the saddle. This raised area under the saddle is also where the rider kept his pistols. The stirrups fit on the lancer’s toes, and a strap of plastic card or paper is added and glued inside the man’s leg. The upper part of the collar is molded on the sides of the horse’s neck. Cut a narrow piece of paper and attack it to the center of the collar and the girth, this part should be loose, as shown in the box art. A heart shaped breastplate is shown on the box art, but the Red Lancers used a round plate, so a slice of round plastic stock in a suitable size will do nicely. I also added a strip of paper to make the strap that leads from the harness to the saddle, on the horse’s left side, this is not shown in the box art.
A bucket is included, plus a stone to set it on, which I didn’t use. I added a wire handle to the bucket. The drinking cup held by the lancer is too thick to fit in his hand properly, and as I was trying to thin it down I dropped the cup, losing it on the floor somewhere. I looked in my spare accessories and found a Historex cup that was a perfect fit.
There were a couple of minor mistakes on the figure that need to be addressed. First, since the figure is in campaign dress, the lapel would be buttoned over. So the edge of the lapel on the left side must be filled in. Be careful to not damage the button detail. The seam on the center of the man’s chest must be eliminated, I just scraped it smooth with a knife. The aigullette, the cords on the figure’s left shoulder, are poorly detailed. I added a couple of loops from thin wire, after scraping away the two hanging tassles on the man’s chest, which I also replaced with wire.
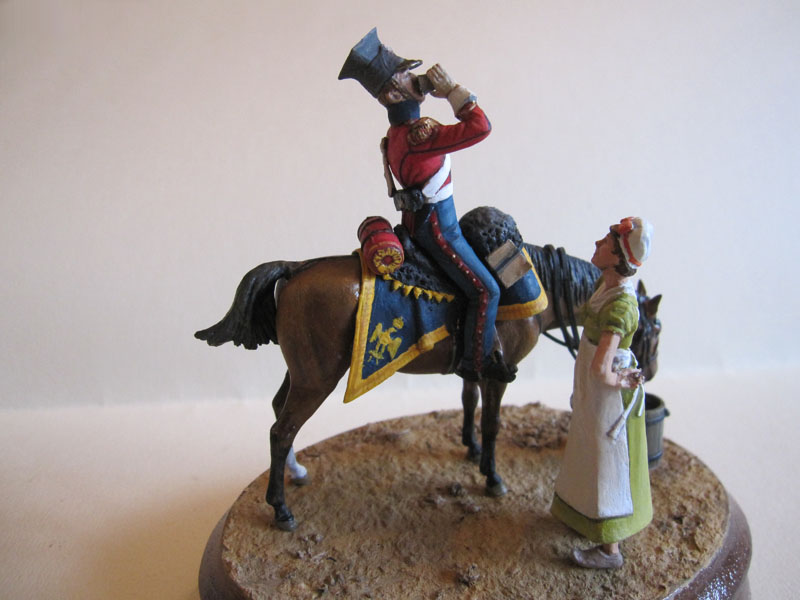
The shabraque, the cloth cover on the saddle, is also incorrect. The French cavalry had several different configurations for saddles, the Red Lancers had a blue cloth shabraque with a black sheepskin saddle cover, edged with yellow “wolf’s teeth”. The way it is now, the shabraque without the sheepskin and the large “N” on the front half is correct for the Polish Lancers. You could paint the figure in a blue uniform with crimson trim and make him a Polish Lancer. I chose to build mine as a Red Lancer, so I scraped off the Napoleonic N on the sides, and made a sheepskin cover from Milliput. Using the piece from the Historex kit as a guide, I laid on the Milliput and covered the straps on the saddle assembly. You will not have to apply the putty on the saddle where the figure sits, or where the saddle roll is behind the figure. I used a knife to cut the sawtooth design on the sheepskin edge. A book is molded on the right side of the saddle, most likely a roster of some type used by the sergeant, I filed this off and added a new booklet made from a folded piece of paper. Then I added paper straps which held the sheepskin and booklet in place. I also gave the putty texture on the sheepskin. If you have experience with Epoxy putty or Milliput, this is an easy conversion.
After a shot of Tamiya primer, it was time to start laying paint on the model. The box has color call outs for Valejo and Lifecolor paints, but I use Testors and Model Master enamels.
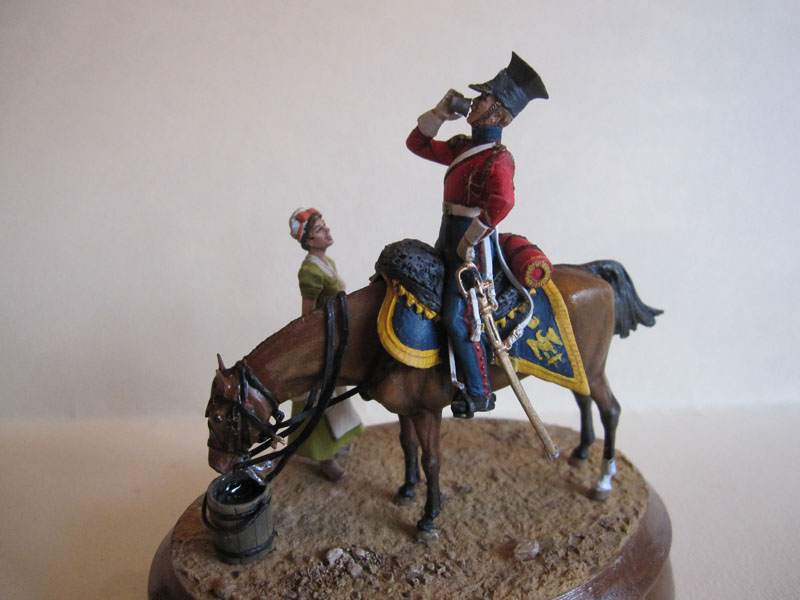
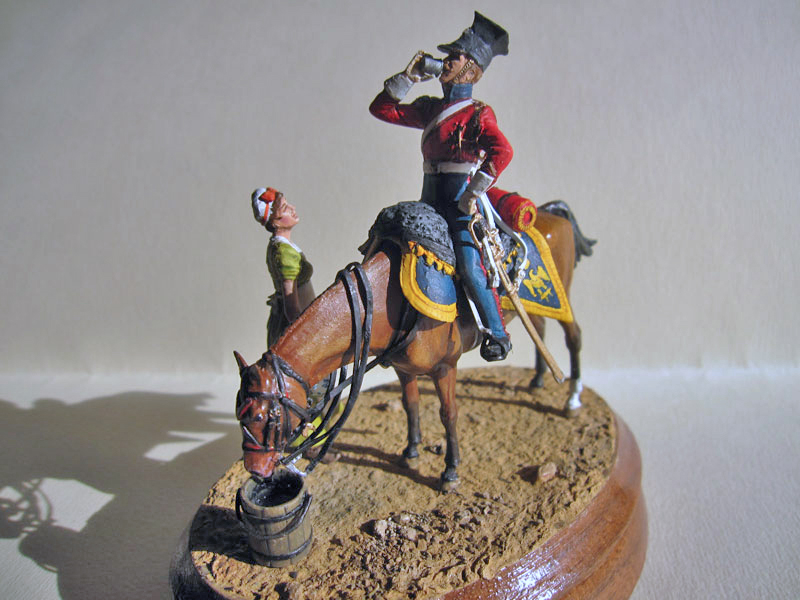
The horse was painted Model Master Leather, the Red Lancers rode chestnuts and bays, so any reasonable color of brown will work. Leather work was black, the harness was lined in red cloth, but in this scale I had trouble depicting this. The mane, tail and lower legs were also done in black, with a drybrushed highlight of Wood Tan and black. The shabraque is Testors Dark Blue, the lining on the edge is yellow, as is the Napoleonic Eagle and teeth on the sheepskin. The portmanteau, or saddle roll, is red with yellow trim on the edges.
The bucket was painted to look like old oak, and I used Vallejo Water Effects, a product that dries hard and crystal clear. Since it is in a paste form out of the jar, I used a toothpick to apply it to the bucket, and had to add a bit of Crystal Clear to even out the top smoothly.
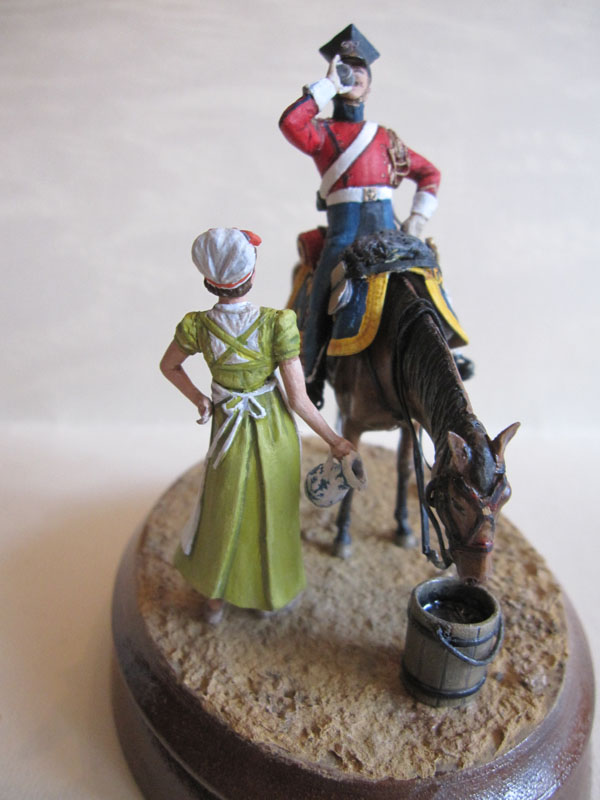
The flesh is made from Testors Light Tan and white, I made the woman’s skin a bit lighter. I looked for info on civilian female dress of the era, and found much on the upper class clothing, but nothing on the dress of the lower class, such as this Dutch farm girl. The high-waisted dress style was very popular throughout Europe at this time, and light colors were common. So I gave her a dress of light green made from blue and yellow paint. Her blouse, apron and bonnet would be white. The wooden shoes are light tan. I painted her vase in the Delft style, very common in Holland, it is white with blue designs.
The lancer has a red jacket with dark blue collar. This blue is much darker than what is shown on the box, and it also trims the coattails and piping on the back. Gold is used on the shoulder cord, belt buckle, buttons, and sergeant’s stripes on both sleeves (just visible above gauntlet cuffs). The epaulette on right shoulder is gold with a red stripe running lengthwise, and gold and red fringe. The overalls are blue, with black leather inner section. A red stripe runs down the outer leg, with brass buttons.
With everything painted, I gave a shot of Testor’s Clear Flat to the figures and saddle. I glued the saddle assembly to the horse, and my next step was to add the reins. Paper would work, but lead foil would show some weight, so I used a product from UMM-USA, Flat Lead Wire, a perfect product for this application. I cut the length I needed of the 1 mm size, gave it some primer and painted it black. There are no good clear connection points on the bit, so study the box art carefully, I super-glued the bent wire to the bits, and formed the rein over the horse;s neck.
I left off the sword to add after the figure was mounted on the horse. The sword and scabbard are both brass, with black trim on the hilt, and a black slit on both sides of the scabbard. I realized the sword knot was not included on the kit, although it is prominently shown in the cover illustration, and one must be added. I found a small tassle in a spares box of Historex parts, which I glued to the end of a small strip of plastic. This was then glued to the sword. When I tried to place the sword on the figure, it would not fit, I had dry fitted the sword previously, but the portmanteau on the shabraque was in the way. I tried to bend the sword straps, but they just broke. So I cut them off just above the buckle detail, and added straps made from the useful flat lead wire I had used for the reins. It came out perfectly.
The figure is fragile, and this mini-scene needs to be put on a base. I had a spare base in the right size, gave it some stain and varnish, and groundwork of craft paint, white glue, water and Celluclay. I glued the horse and rider, woman and bucket to the base with white glue.
This builds up into a nice little figure, beginners may want to make it right out of the box, but advanced modelers will want to correct the minor mistakes. I did enjoy the model, and look forward to the other mounted figures in this series, French Hussar and Cuiriasser figures. Thanks so much to Dragon USA and IPMS USA for the review kit.


Comments
Add new comment
This site is protected by reCAPTCHA and the Google Privacy Policy and Terms of Service apply.
Similar Reviews