
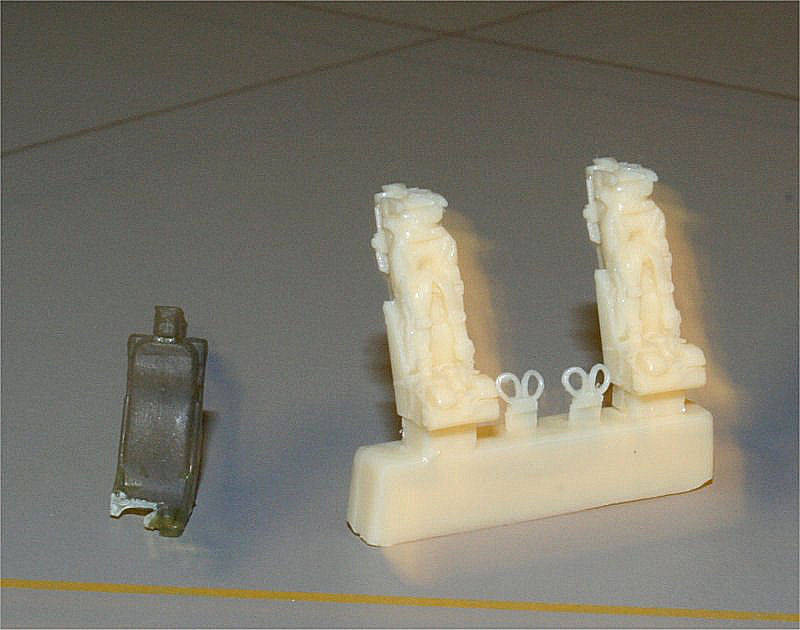
Martin Baker Mk 4 Resin Seat for Mirage/Jaguar
I have built several PJ Productions kits, done at least one of their conversions, and a number of their detail parts. I have real respect for Phillipe’s ability to produce a really good resin product.
You get one resin pour with 2 seats and 2 ejection handles. Both of the seats were free of flaws or bubbles, and those fine little handle assemblies were also flawless.
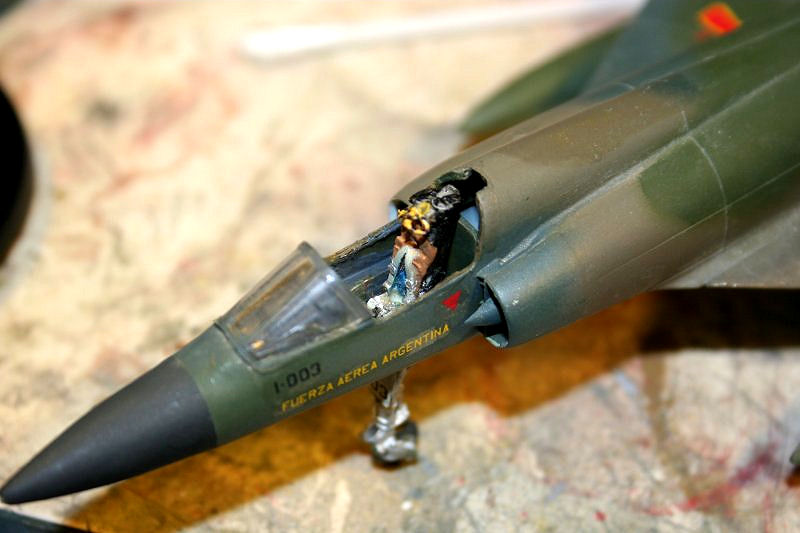
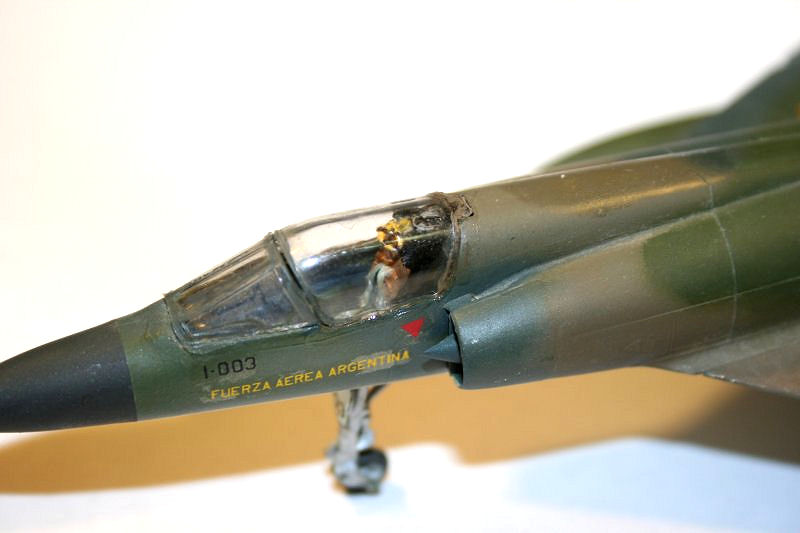
Rather than start from scratch with this project, I thought I would take a Mirage I had built previously and add the PJP seat. I could have used a Jaguar, but decided that it would be nicer to improve one of my several Mirages. Then I ran into the problem. Three of the four Mirage kits I’ve built have been PJ Production kits or conversions, and they already had good resin seats. OK, I was going to use a Dagger I built 20 years ago with Argentine markings from the Malvinas/Falklands war. And to tell the truth, I can’t remember whose kit it is.
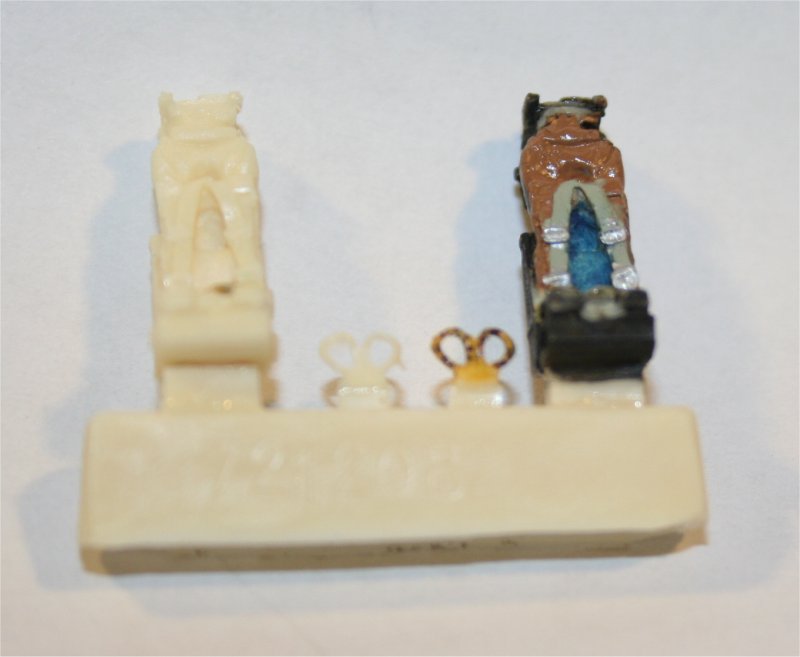
I popped the canopy off the aircraft and removed the seat. Unfortunately, it didn’t come out cleanly, as can be seen in the photo. Also note that the kit seat is remarkably free of any detail.
I painted the seat, using the tiny photo on the package as my guide. I left the seat and handle on the pour sprue for ease of handling. I used Floquil blue for the cushion and Floquil Old Silver for the belt buckles. The rest of the colors were Tamiya acrylics. Everything was brush painted.
The handle was painted with Floquil Reefer Yellow. The black marks were done with a fine-point Sharpie pen.
When the paint was dry, I removed the seat from the sprue with a razor saw. The only way I could cut the seat was from the outer edge inward, as the saw blade would hit that fairly fragile handle, and I was afraid of damaging the handle. This is where the tragedy occurred. As the saw blade cut through the last of the seat, it then proceeded to demolish both sets of handles.
Fortunately I still remember the advice of my friend and mentor, George Reny, who said, “There’s nothing you can screw up that you can’t fix. Sometimes it requires a whole new kit, but you CAN fix it.” I found some tag wire, which was the same diameter as the damaged handles. I bent it to shape, using a pair of needle-nosed pliers, and painted it yellow with black stripes. I then attached the replacement handle.
Nevertheless, next time I tackle one of these sets, I will make the first cut through the sprue to separate the seat and handles, thereby avoiding the problem I’ve had.
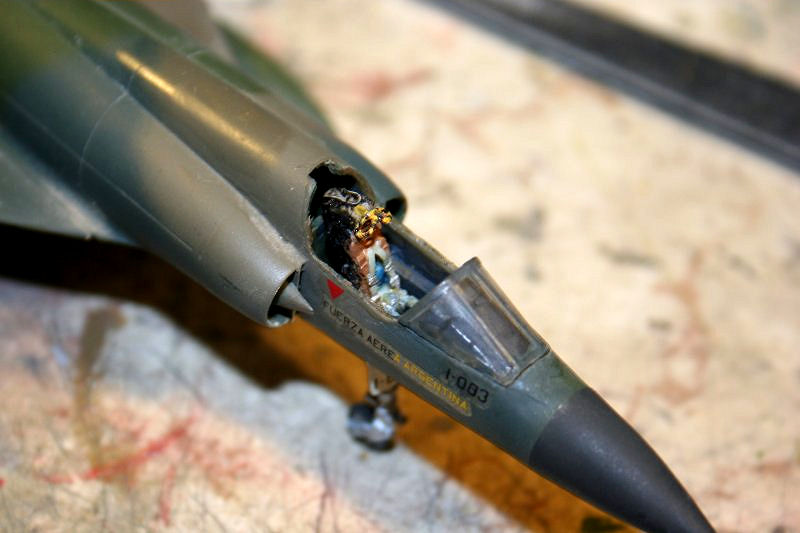
A bit of gel-type super glue on the bottom of the seat holds it in the cockpit. I glued the canopy back on, and it looks really great in there. A huge improvement.
OVERALL EVALUATION: Highly recommended. I have a number of older kits which could use this type of upgrade for the interior. Doing an upgrade like this to a kit I finished a while ago showed me that my AMS level has increased in the last decade or so. I’ll probably have to look at some of my other older kits and see what’s out there for upgrades.
Thanks to PJ Productions for providing the seat, and to Steve Collins and IPMS/USA for letting me do the review.

Comments
Add new comment
This site is protected by reCAPTCHA and the Google Privacy Policy and Terms of Service apply.
Similar Reviews