
Lockheed Martin C-130J C5 Hercules, Part II – The Build
Check the “What’s in the Box” prequel to this build review.
To set the stage for the build, recall from the initial look that surface detail on the plastic is raised, reflecting the age of the moulds for the base kit. However, the styrene feels a little softer and more “oily” then Italeri’s previous offering of these mouldings. My example of the previous kit issue seems very brittle in comparison. AMS superdetailers will have a much easier go at re-scribing panel lines and surface detailing with this material, than the old plastic. Individual sprues reveal crisp moldings and very little flash from what must be tired, but well-made molds. The new sprue parts seem to be a good fit for the current larger engines onto the wing-mount locations, and the six-bladed props are a pretty good representation of the updated propulsion system. The rest of the kit sprues are identical mouldings to those from my #246 Italeri boxing, and my old Testors issue of this kit as a C-130E/H.
Because of the sheer size of this kit, and the amount of plastic in the box, I elected to build this review as a static, parked aircraft with all doors, ramps and hatches closed up. I assembled all the appropriate kit pats, but did not paint the cabin or interior, save for the cockpit, which is where the build starts.
My internet research shows that the cockpit parts are basic representations of generic C-130 offices, and haven’t been updated for this kit offering, except for the instrument panel. The operating face side of the panel itself isn’t visible through the cockpit glass in the completed model, but the backside is. It has none of the rear housings detailing of an exposed instrument panel that one would expect to see. The kit’s seats are rather blocky and chunky representations of the real things. The space itself is ripe for the use of the various aftermarket offerings to spruce things up with more accurate seats and lots of photoetch bits to more accurately represent the instrumentation. I assembled and painted the kit interior according to the instructions, and what you can see through the windows looks just fine. There are a few ejection pin marks cockpit parts to deal with, but most are not noticeable in the final assemblies.
The kit offers a full cabin interior, complete with lots of detailing, including A/C ducting, paddings, structural representation, tie-downs, ramp operators, miscellaneous equipment, and so forth. I chose to assemble, but not paint all of this detailing, since it would not be exposed in my build. Again, this portion of the kit is a great canvas for the superdetailers out there. When I build another Herc someday down the road, I plan to do an EC version that will have lots of interior detailing. The interior structure is well represented, and provides an accurate starting point to put together an enticing and eye catching view through the huge rear cargo ramp opening.
For those proceeding with a build of this kit, my first important note from the experience is to add a lot of liquid gravity or other such material to the front end of the fuselage before closing up the halves. I naively assumed that the aircraft’s forward length and multiple wheel set-up of the main gear would provide a substantial stance for the bird. I have a tail-sitter, although only by about a quarter of an inch! If the build is completed with an open ramp assembly, the stance will be correct, as long as some careful planning is used to line things up.
Be sure to insert the wing spar in the correct configuration as shown in the instructions, as the wing assemblies won’t fit correctly if the spar is upside down. Also, be sure to install the clear porthole window parts from the inside of the fuselage halves. If preferred, the openings are suitably small to use one of the clear parts cements to render them after final painting. Consult your references regarding the window configurations of the cabin exit doors. The kit instructions aren’t clear on this, and the aircraft I represented should have been modified to accept the rectangular shaped glass.
The fuselage halves join without too much fuss, and I was able to keep things lined up fairly well. I use rubber bands and some large clamps to keep things in place while the liquid seam welds set overnight. The ramp assemblies will require some sanding and multiple dry-fittings to achieve an acceptable closed configuration. My example kit exhibited some slight warping in the rear fuselage, which made for a challenging fit for these parts. The cockpit glass part fit within the appropriate slotted opening without too much fuss. A little fit sanding, and then filler to blend with the fuselage surface was required to make it look right.
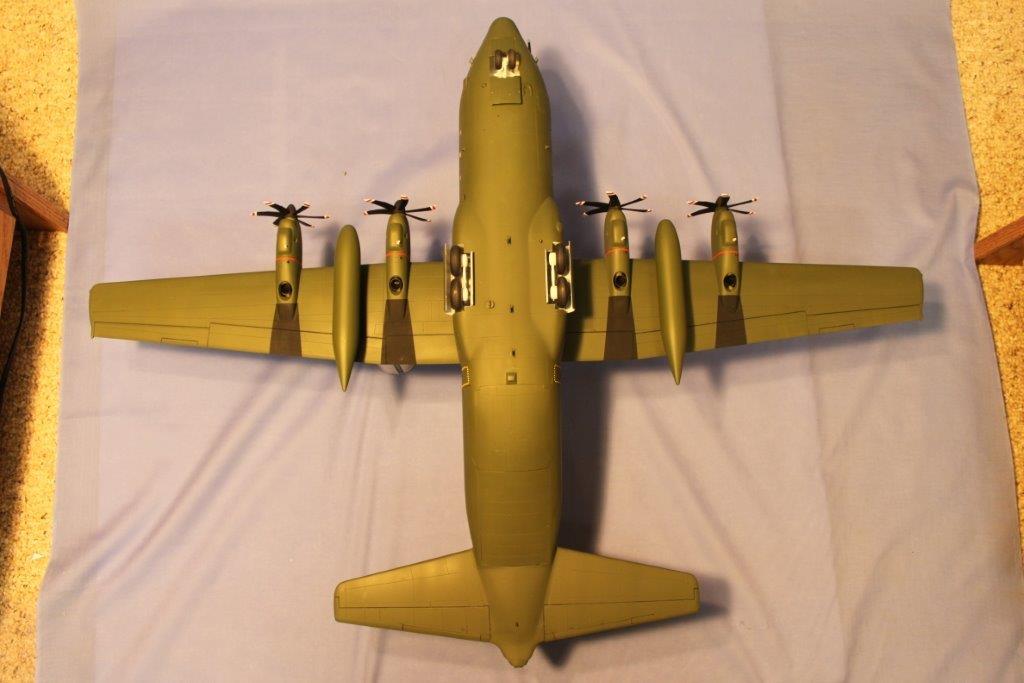
Once the fuselage is assembled, it is a quick build to get to a fully assembled airframe. The main wings, horizontal stabilizers, and vertical stabilizers are all sandwich assemblies that go together quickly, and attach easily to the fuselage. Some installation points to watch out for include the alignment of the horizontal stabilizers at the front and back of the attachment points. Be sure the rear is aligned correctly, as the leading edge will be an easier area to provide any required sanding and/or filling adjustments. Also, the main wings don’t allow for any of the naturally occurring “droop” from fuselage to wingtip of the real aircraft. Keep a look for any warpage of the wing parts, as that is more easily dealt with by staged gluing of the upper and lower halves, than after they have set. I needed some putty and sanding at some of the engine nacelles.
Once all of the appendages are attached, there is much filling and sanding required at the joins and seams. Most of the join seams will be rough, with over and under hangs of the the joints that will need a lot of sanding to even out. This will of course destroy a lot of the raised surface detailing on the kit, particularly at the upper fuselage/wing joins, and the left-right and front-rear fuselage joints. All are at focal areas of the kit. I did some careful scribing to replace panel lines, rather than spend the many hours it would require to provide stretched sprue replacement detailing. It looks okay on the finished product, but certainly wouldn’t pass the careful eyes of judges at a contest. On a future build, I will likely sand and then rescribe all the surface detailing and panel lines. I don’t think the effort will be substantially more than that required to provide acceptable repairs to what is necessary during basic assembly. The wing roots and top of the fuselage provide a very uneven surface area when finally assembled. Careful filling, sanding and replacement of surface detailing in this area will provide the builder with several hours of modeling pleasure …
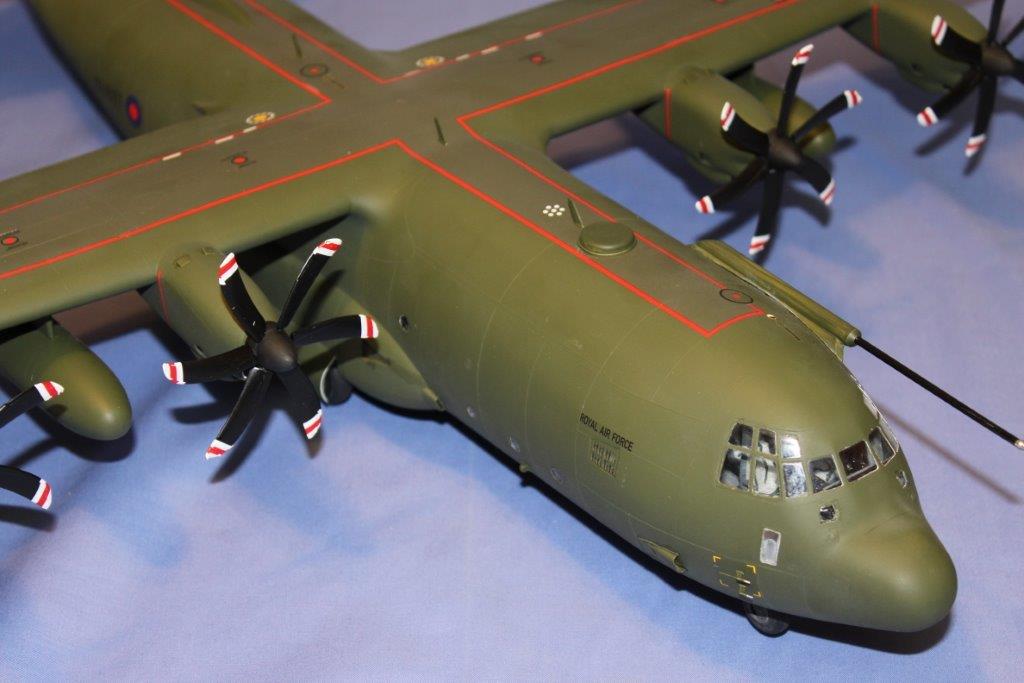
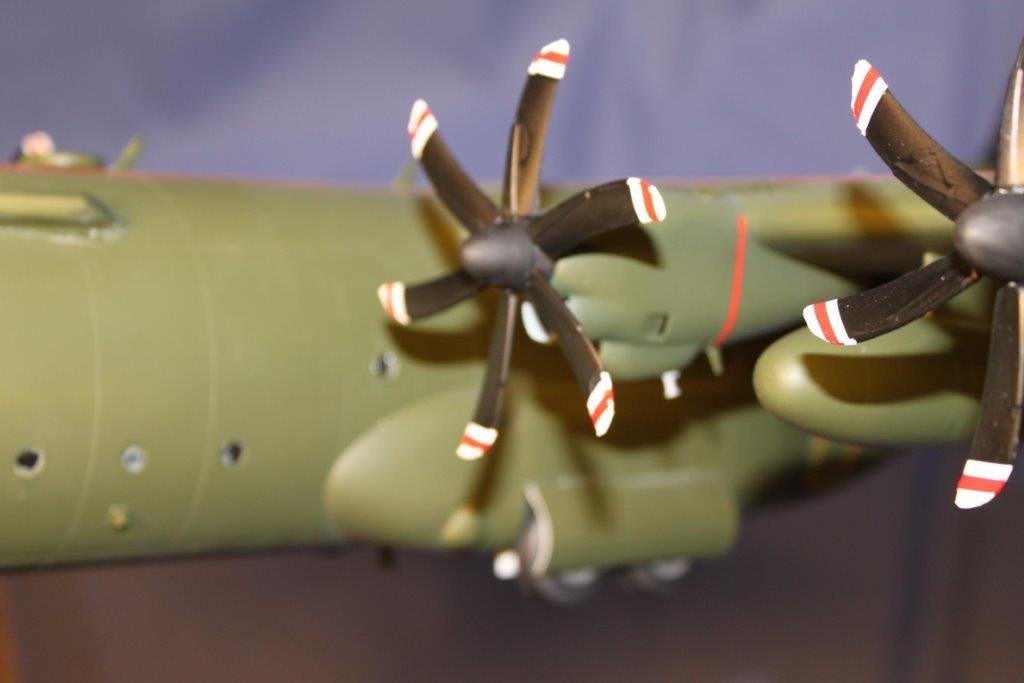
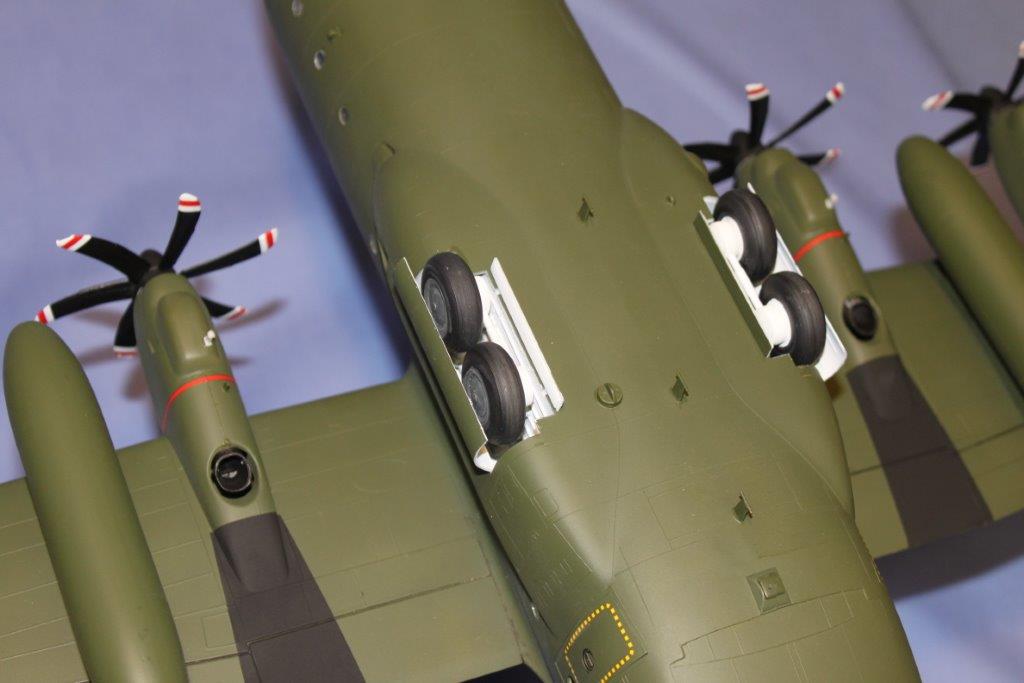
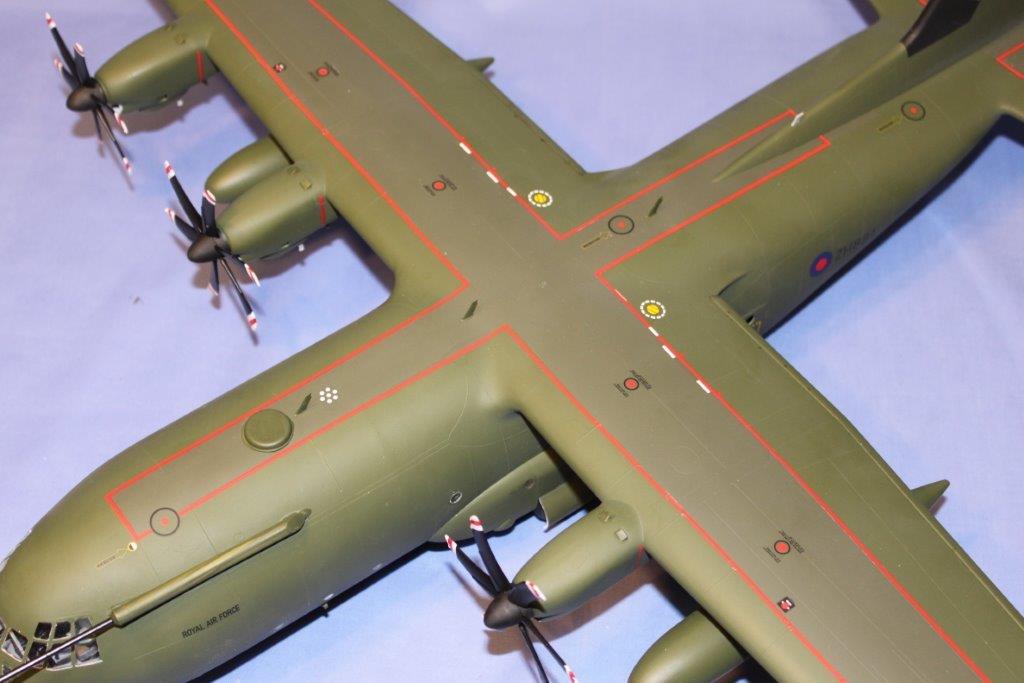
The forward engine nacelle assemblies go together quickly after some pre-painting of the interior parts. The parts fit to the attachment points on the main wings is pretty good, but putty and sanding was required here, too, as was the requisite replacement of surface detailing. Don’t install the propeller/hub assemblies until your model is completed, as the blade/hub attachment points are fragile. My research indicates that the prop blade warning stripe decals for the RAF aircraft I represented are incorrect. The red and white stripes should be reversed. The kit’s decals are two white stripes with a red center stripe. Photos of an actual blade indicate is should be two red stripes with a white center stripe. Also, the kit prop decals are generously oversized, which caused a sloppy overlap after I applied setting solution to them.
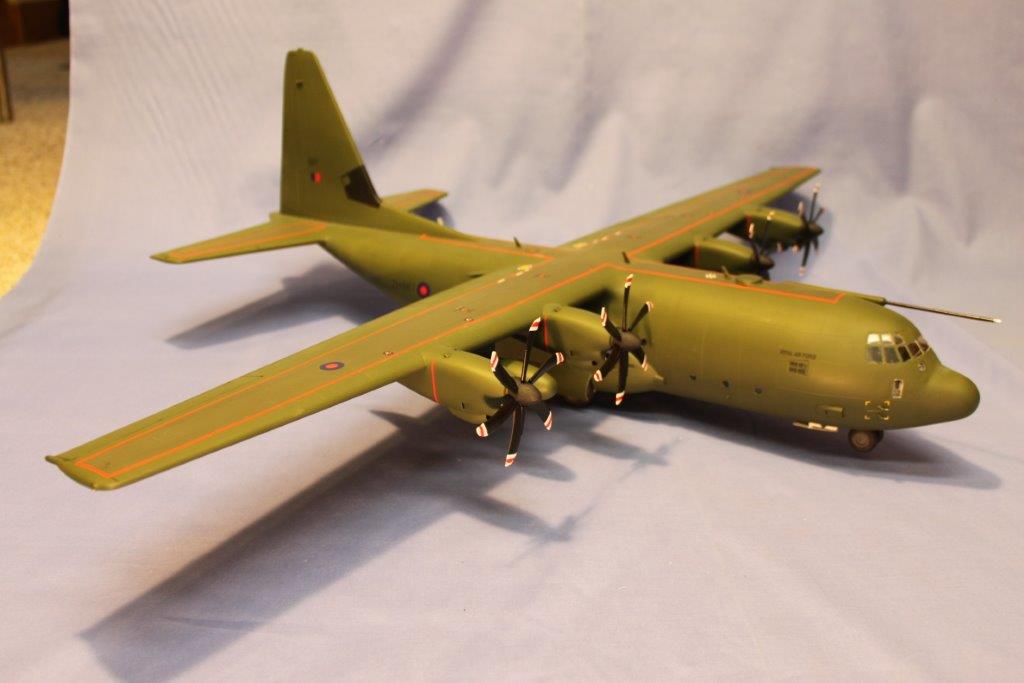
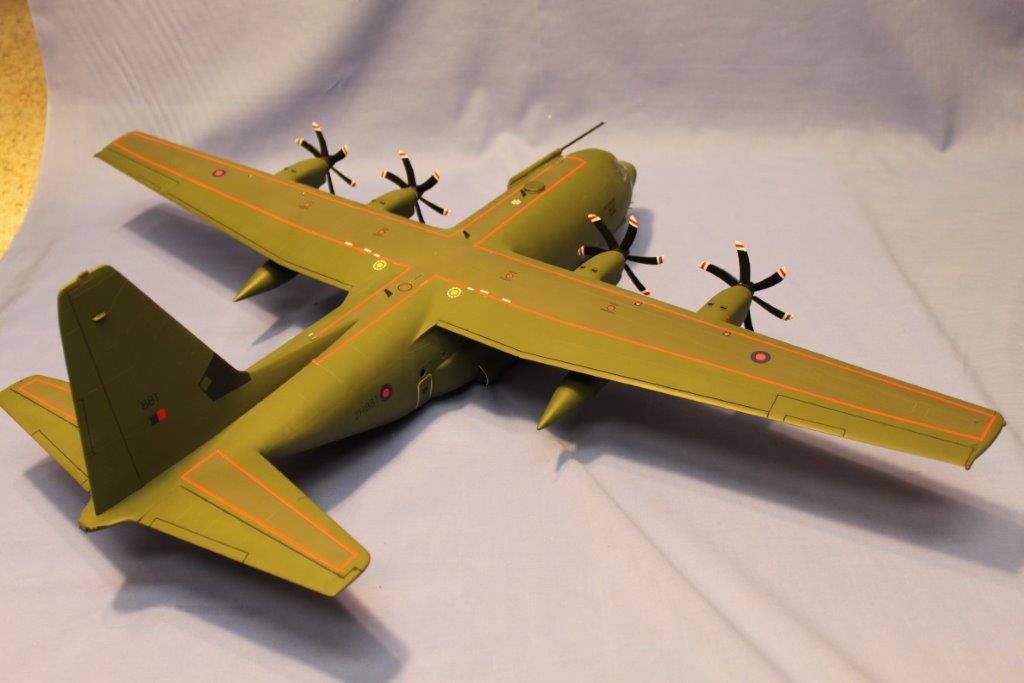
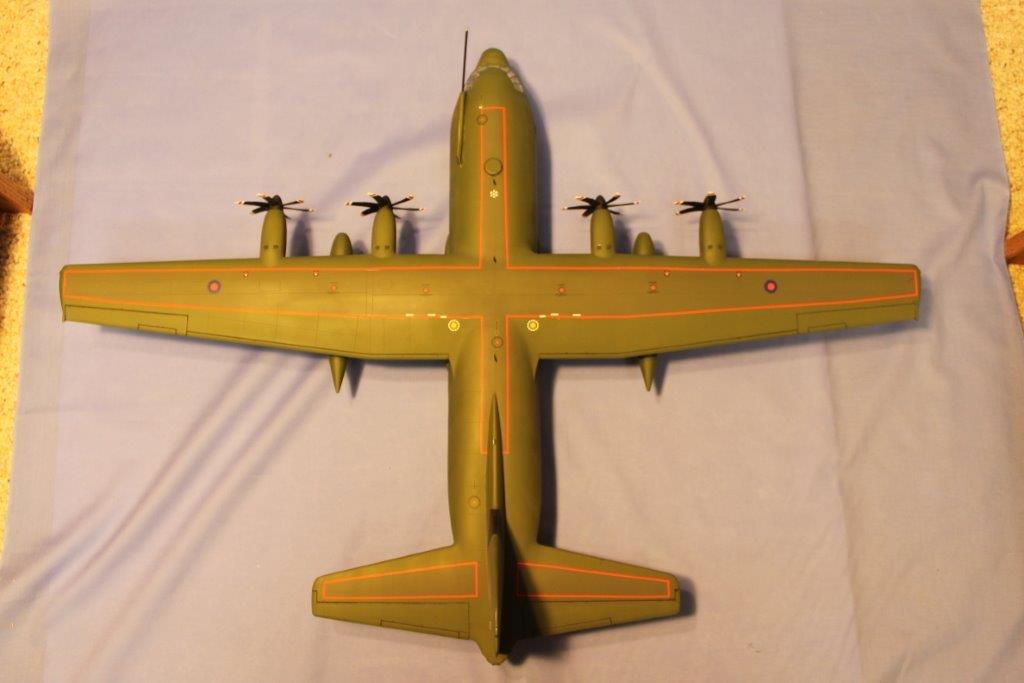
Once I completed the lengthy seam and surface corrections, It was on to painting. Another experience note if you’re building this kit. Buy twice as much exterior paint as you think you will need. Even after priming with Tamiya fine white primer, I went through two full bottles of Vallejo Model Air acrylic, and needed a third for some touch ups! There is a LOT of surface are on this model! I used Vallejo Model Air color numbers 71.017 “Russian Green” and 71.020 “German Green” to represent FS34082 “Flat Medium Green II” and FS34079 “Flat Dark Green” respectively, for the overall exterior and upper surface walkways.
I assembled and painted the landing gear and exhausts while the exterior paint cured. I had cut the nose gear from the assembly prior to closing up all the gear doors for painting with the exterior. I drilled out both parts for the final assembly and inserted a wire rod for strength, prior to reattachment.
When the Vallejo paint had cured for a few days, I applied several light coats of Future to provide a glossy surface for decaling. Again, an experience note here: research the considerable number of photos of the real aircraft available on the Internet before proceeding with the markings on this version of the Herc. Some of the kit decaling instructions and placements are incorrect. Of particular note are the rescue door cut-out markings and wingtop fuel points. Be careful with the wingwalk stripes. I suggest cutting them into sections for installation, as they are unmanageable otherwise. The decals are well printed, and settle down with an application of setting solution. A final couple of misted Future coats sealed the decals, and I flattened everything with some Testors Clear Dull Coat, when dry.
I completed the exterior detail painting, such as the black exhaust patterns, nav lights, etc, with Testors enamels, and then painted and installed the numerous exterior antennae, exhaust ports, refueling probe, and so forth. I installed the landing gear and re-attached the gear door assemblies and called it done.
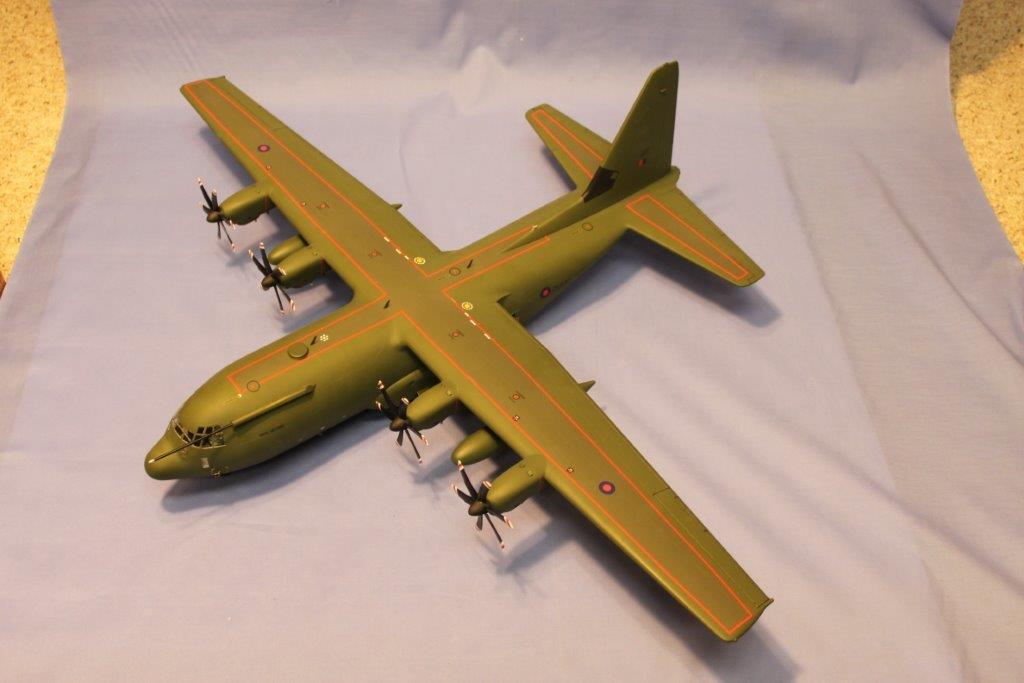
In summary, this was not a difficult build, although probably not suitable for novices. Rivet counters have always had issues with this kit, but it certainly looks the part after completion, and is a striking addition to my 1/48 collection. It is not just large, but huge, when finished. I had to rid my shelves of some old builds that were not up to my current standards to make room for this one. As stated earlier, I plan to build a different version of this kit, and will do considerably more work to depict one of the many possible configurations of this historically important aircraft.
Thanks to the IPMS Reviewer Corps and Italeri for the opportunity to review this kit.


Comments
Nice detailed review with…
Nice detailed review with lots of focus on watch-outs. Very helpful as I decide what kit to buy 👍
Greetings
Glad you liked it
IPMS USA
Add new comment
This site is protected by reCAPTCHA and the Google Privacy Policy and Terms of Service apply.
Similar Reviews