
Avro Shackelton AEW.2
For the last several years, Airfix has transformed itself. They have been releasing a plethora of new kits that are heads and tails above the kits that we all put together as kids and young adults. The Avro Shackleton under review is further evidence of Airfix moving forward into the 21st Century. In 2015, Airfix released the Avro Shackleton MR.2. In 2017, Airfix released the Avro Shackelton AEW.2. This kit continues their current trend of crafting exquisite kits with modern molding technology and engineering. The plane had a long service life and pedigree according to the blurb on the instructions, “Developed from the Lincoln bomber and sharing with it the DNA of the famous Lancaster [bomber], the Avro Shackleton enjoyed a long career with the RAF, first as a maritime patrol craft and then as the RAF’s primary AEW (Airborne Early Warning) aircraft . . . . the AEW.2 version remained in service until 1991, the MR.2 was phased out in favor of the Nimrod in the 1970s.”
The Kit
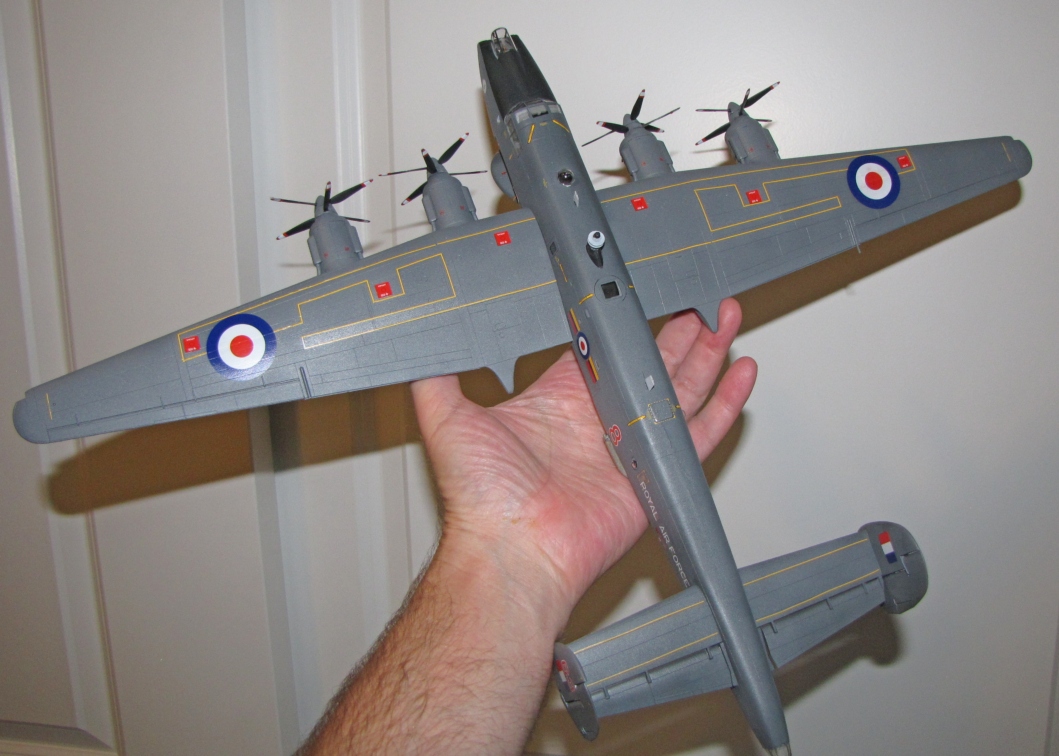
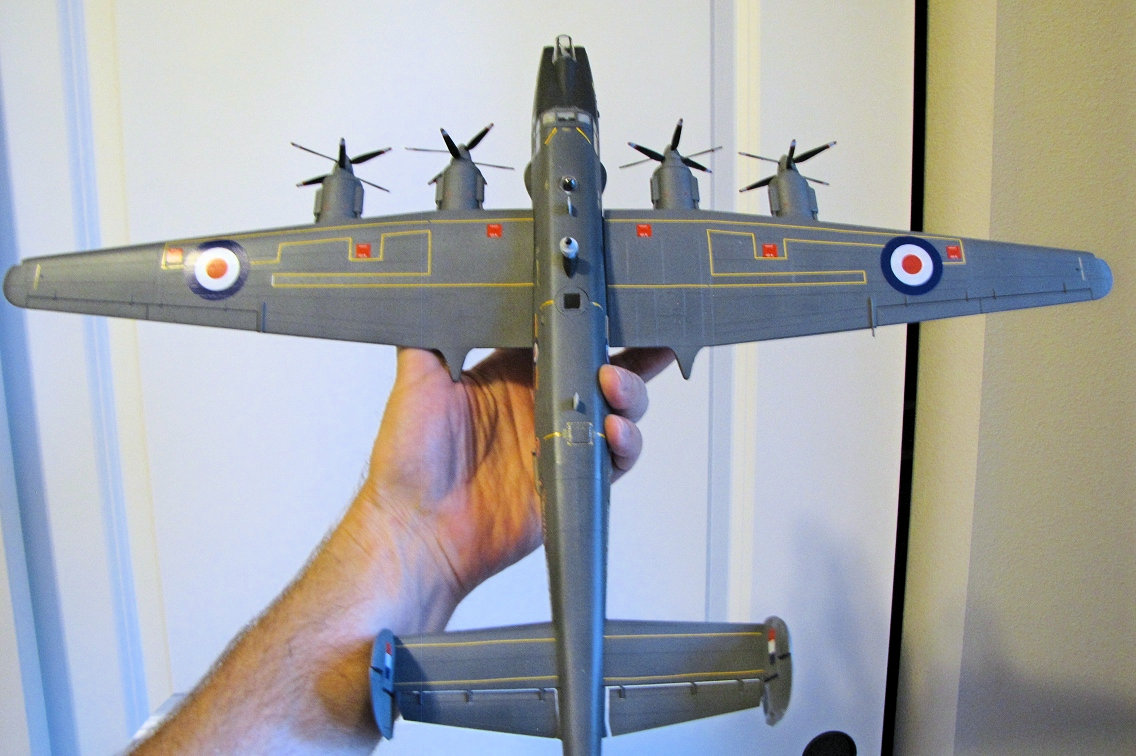
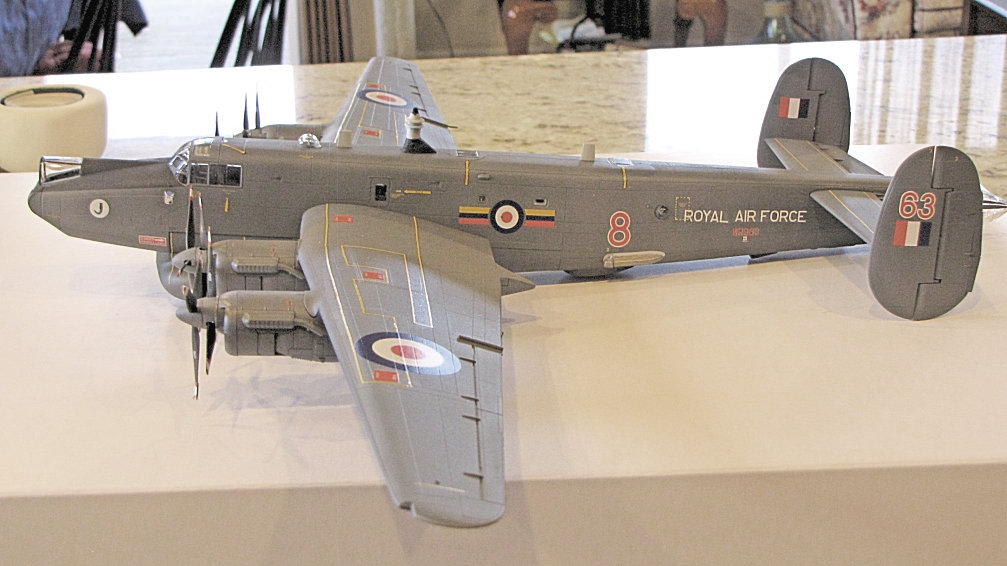
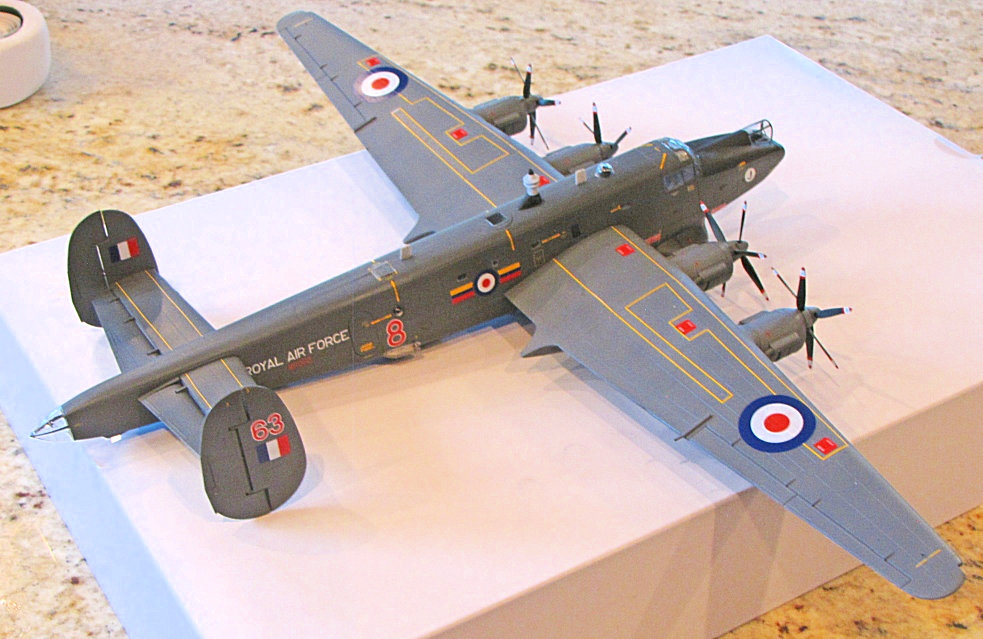
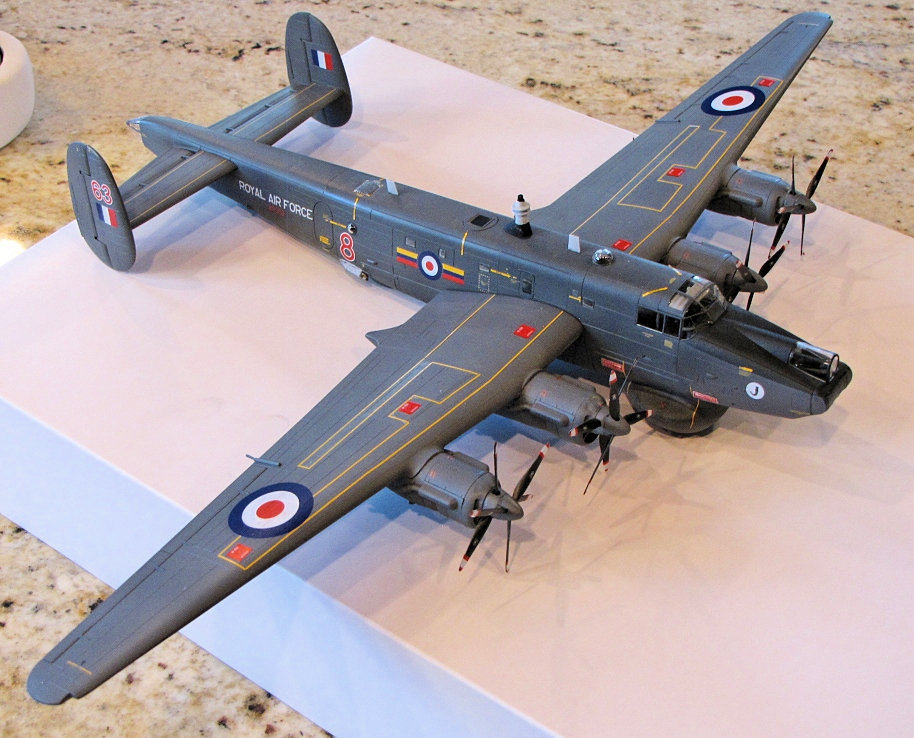
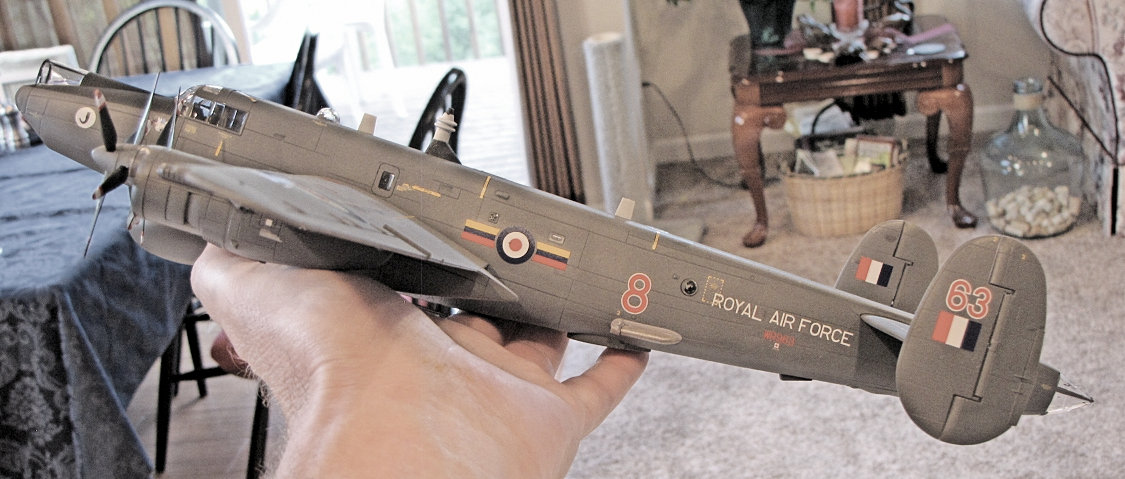
The kit comes in an oversized, now familiar, red box with some eye-catching box art. As is Airfix’s custom, all of the sprues are packaged together without any cushioning, so parts came off of the sprue. Rather than molded in their now familiar light blue plastic, this kit is molded in grey plastic. The plastic seems to be very soft in comparison with some of their more recent releases. Since this is a relatively new kit, there is an expectation that the parts would be free from flash. Unfortunately, there is quite a bit of flash, in particular on the larger parts – the wings and the fuselage. The parts themselves are well molded with nice, but restrained panel lines. Some of the sprue gates are rather large, so the parts must be removed carefully. There are also some noticeable ejector pin marks in the interior. While they will not be seen once the fuselage is assembled, they are obvious. There are eight sprues. The clear parts are packaged separately and are free of blemishes and imperfections. The kit has markings for two aircraft based in Scotland in 1979 and 1980. One of the aircraft is now in a museum. The instructions are in the format adopted for Airfix’s new kits. The guide is clear and provides all of the options which include a cockpit with or without pilots and the choice of keeping the bomb bay doors either open or closed. The color schemes and decal placements are in a large, full color pullout as well as the stencil placements for the aircraft. Color callouts are in the Humbrol line of paints. There are plenty of conversion charts on the web, so no worries there.
Assembly
Assembly starts with the interior. There is a basic cockpit and workstations for the radar equipment. Even though you will not see much of it once the plane is assembled, I chose to put it all together since this is a review. For the main instrument panels in the cockpit, Airfix includes a decal. To anchor the wings to the fuselage, two of the interior pieces include large spars to anchor the wings, an engineering enhancement that is much appreciated! Once the interior is assembled and painted, it slides into the fuselage. That is where the challenges began. The interior was assembled according to the instructions without any issues. When I attempted to join the fuselage halves, they would not properly fit. I sanded the edges of the interior and shaved off some of the plastic. That assisted in a proper fit, but there were still substantial gaps that required putty and some shims made of styrene rod. I am not certain that this issue was the result of operator error, but was very disappointing in a new kit. The bomb bay can be displayed either open or closed, I chose to keep it closed. Kudos to Airfix for allowing the transparencies to be installed on the exterior of the fuselage rather than the interior!
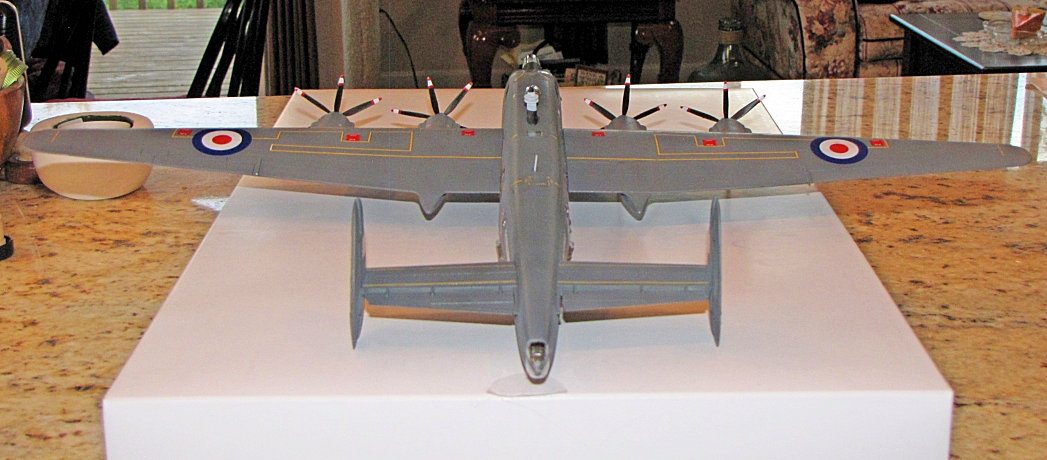
Once the fuselage is joined, the twin rudders go together with ease. Engine nacelles and wings are the next steps. There are four engines, two of which have the landing gear bays that accommodate the landing gear. The bay is painted white, with one of the bulkheads being the fuselage color. There are some injection pin marks in the main bulkheads of the landing gear bays. Unfortunately, since one of the legs of main landing gear was not molded properly, rather than struggling to retrofit the piece with styrene rod, I opted to keep the bay doors closed. In addition, I found the frame work for the tailwheel would not firmly sit in the tabs provided. Given the loose fit, that also contributed to the decision to close up the bay doors. The wings attach with ease. The kit has two substantial spars that slide into the wings, resulting in a very tight fit. I chose not to glue the wings, for ease of storage and to facilitate transport.
The kit does not provide details of the engine. The propellers were counter rotating, so there are two sets of props for every nacelle. They went together well, though when I attached the nacelles to the wings, they did not have a very positive fit. With some sanding the fit got better, but not ideal. I saved the smaller antennas and other bits for the final stage of assembly. I am clumsy and often knock these off (sure enough I did!).
Finishing
Since it is difficult to find Humbrol paint where I live, I substituted those colors for Tamiya. The overall color scheme is Dark Sea Grey (XF-54). I got a set of masks from Eduard. There is one slight oddity in the instructions. The painting directions imply one of the transparencies on the top of the hull is painted over, even though Eduard provides a mask. I chose to paint it over. Once the various sub-assemblies were painted, I applied a coat of Johnston Future as a gloss coat. The decals include markings for two aircraft as well as a myriad of stencils. Unlike the Airfix decals of old, these are in register and very colorful. I found the stencils, in particular the yellow demarcation lines that appear on the wings, extremely fiddly to lay down. Keep in mind, there are no gaps in these lines, so when you put the roundels down on the top of the wings, the yellow of the demarcation lines show through the white of the RAF roundels. It would been nice if Airfix had created a gap in the demarcation lines so they would not have shown through.
I am drawn to kits that are, in my mind, unusual and relatively unknown. The Shackleton certain fits the bill. While this was an enjoyable build, the challenges encountered were frustrating given how new the molds are. My nick name for this kit – the bear. The excessive amount of flash and fiddly fit of the fuselage and engine nacelles was disappointing. While the overall finish is nice, given the challenges I encountered, this does not seem to be an appropriate kit for a beginner. My thanks to IPMS, Hornby, and Airfix for giving me the opportunity to review this


Comments
Add new comment
This site is protected by reCAPTCHA and the Google Privacy Policy and Terms of Service apply.
Similar Reviews