
Kfz.305 Opel Blitz Typ A 4x4
From Italeri Website
The Opel Blitz medium truck formed the backbone of the logistics and transport system of the German Army during the Second World War. Produced in significant numbers, it was characterized by its flexibility and robustness in service, enhanced by the rear axle combined with twin wheels, which ensured greater payload capacity under all operating conditions. Designed to be easy to manufacture, repair, and maintain, it was effectively employed by the Wehrmacht on all major operational fronts, from North Africa to Russia, demonstrating the soundness of its design. It was produced in numerous configurations and versions, including the effective 4x4 variant capable of ensuring good performance even on difficult terrain.
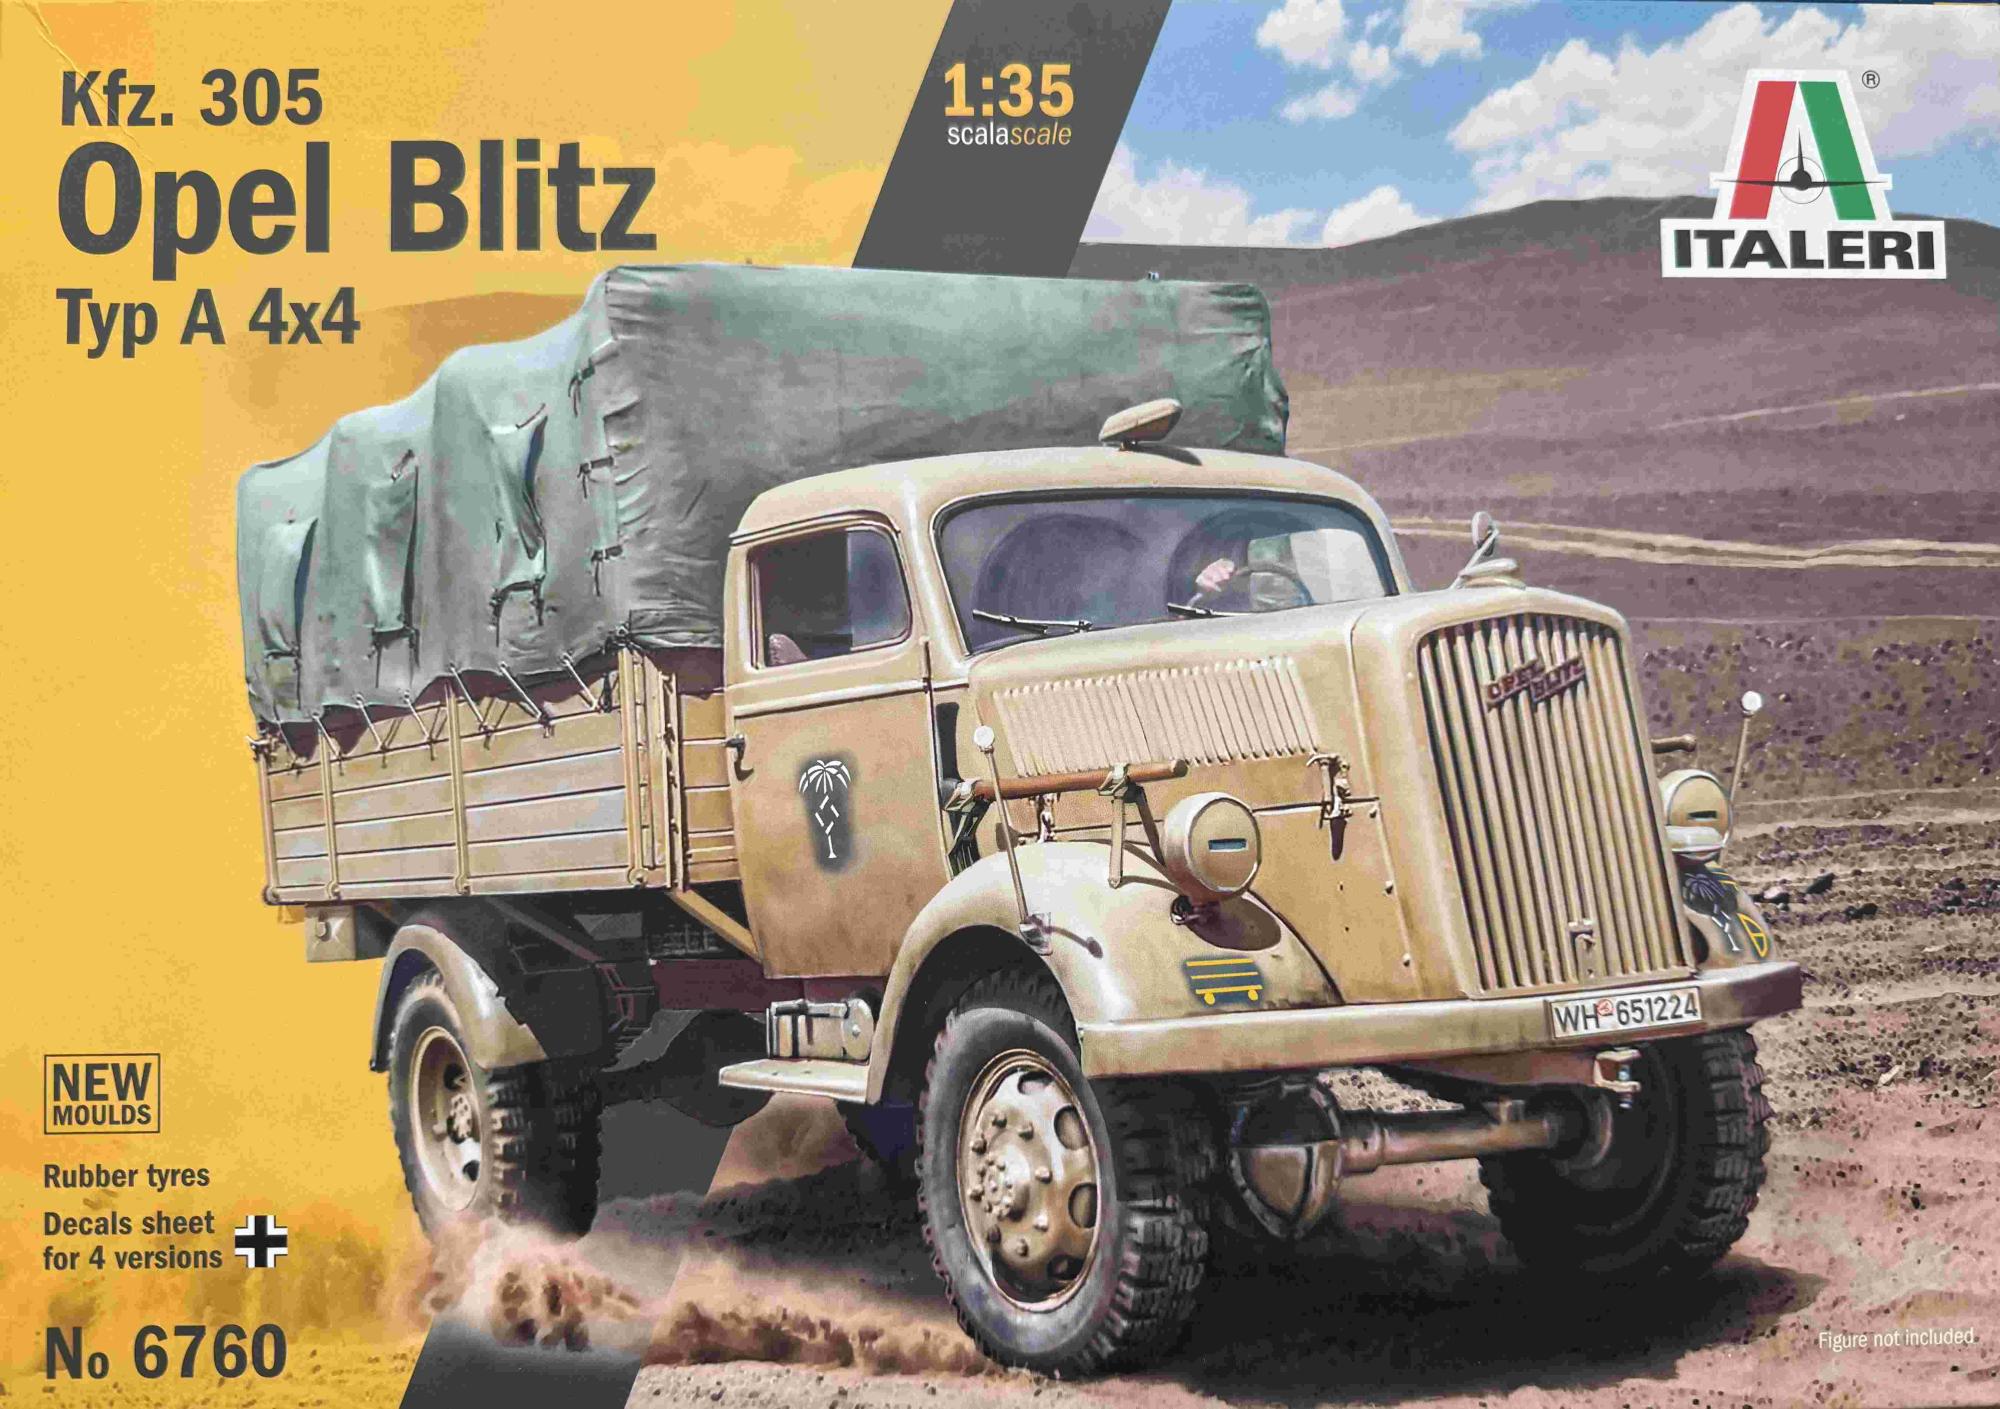
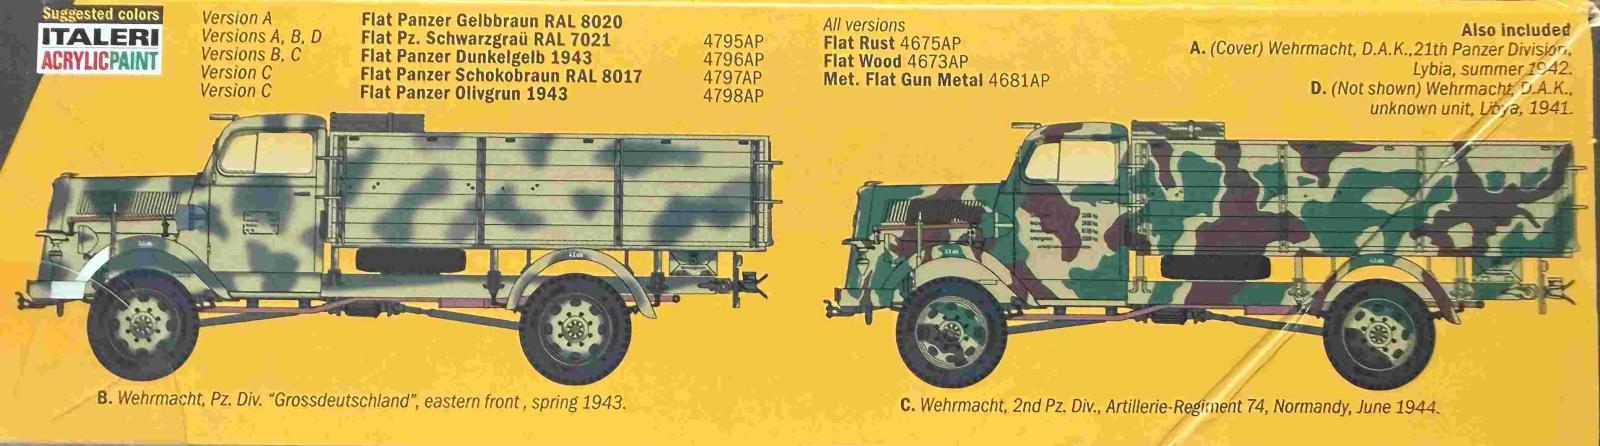
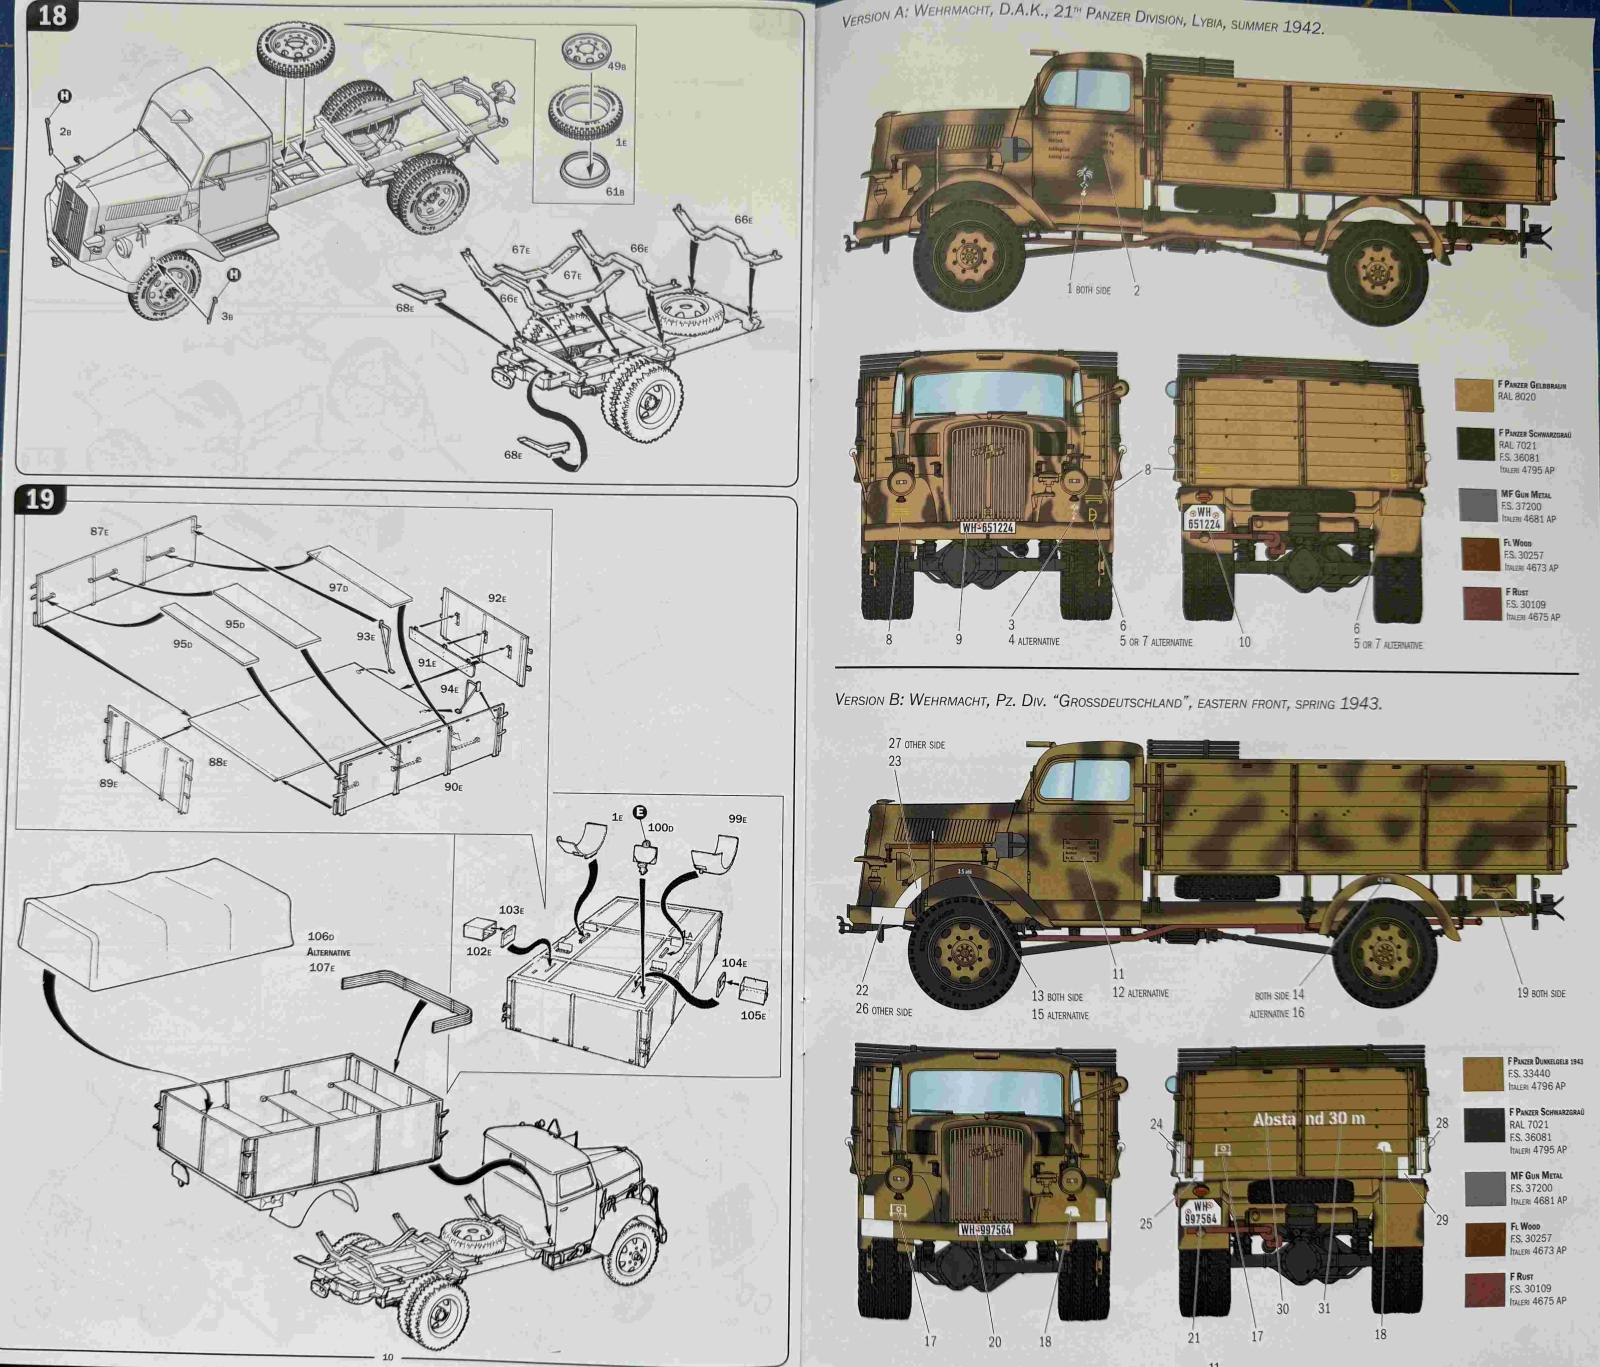
Italeri’s Kfz.305 Opel Blitz Typ A 4x4 kit is a new mold offering from Italy. The kit has an eye-catching color box cover with a vehicle from the Afrika Korps. There are five sprues inside (one being clear), a decal sheet, 7 rubber tires, a color instruction manual and a correction sheet for step 8. The instruction sheet’s cover page offers a brief history of the vehicle in 6 languages. There is a list of suggested colors to paint the assembled kit. The colors list Italeri acrylic paints and a helpful Federal Standard color reference. A QR code on the box’s side takes you to the Italeri website with additional information about this kit. The instruction manual has 12 pages and provides a view of the sprues with the part numbers. There are several parts highlighted that are not for use. There are 19 assembly steps shown in the manual. Alternative options are offered toward the end of the assembly: a folded triangular sign on top of the cab and an open or covered truck bed.
Construction
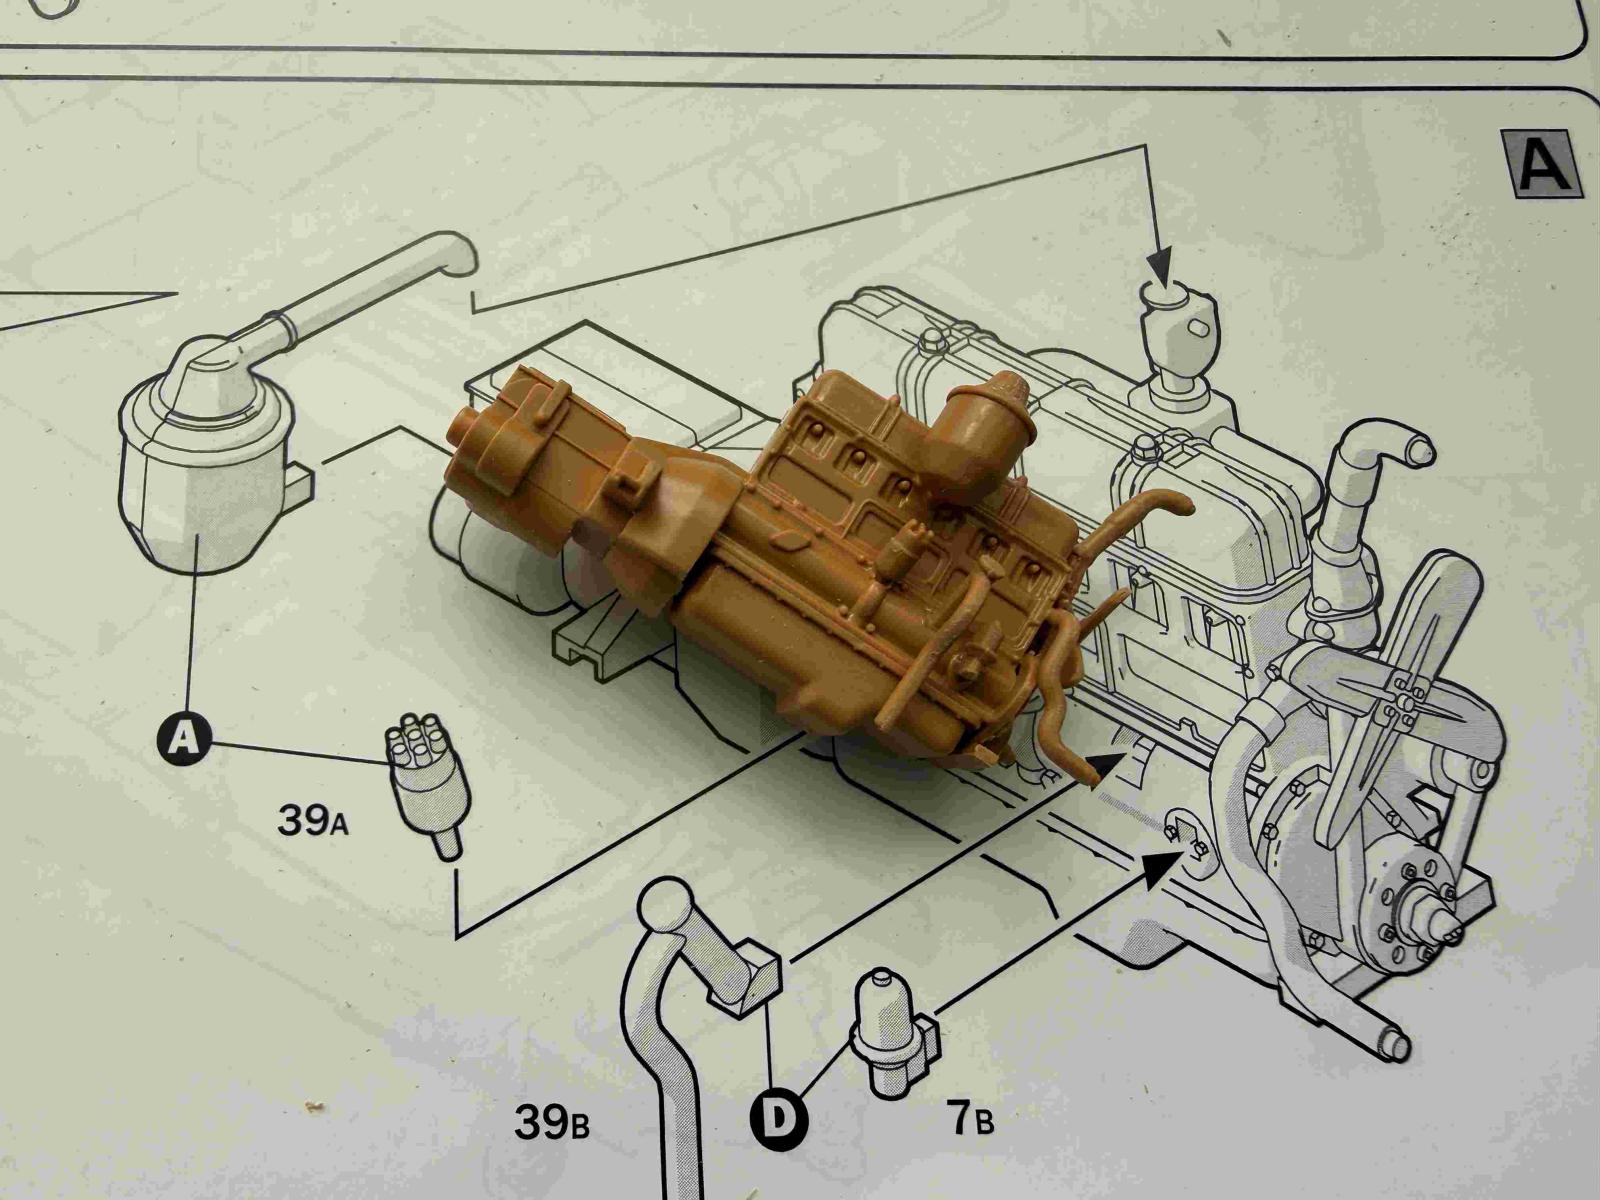
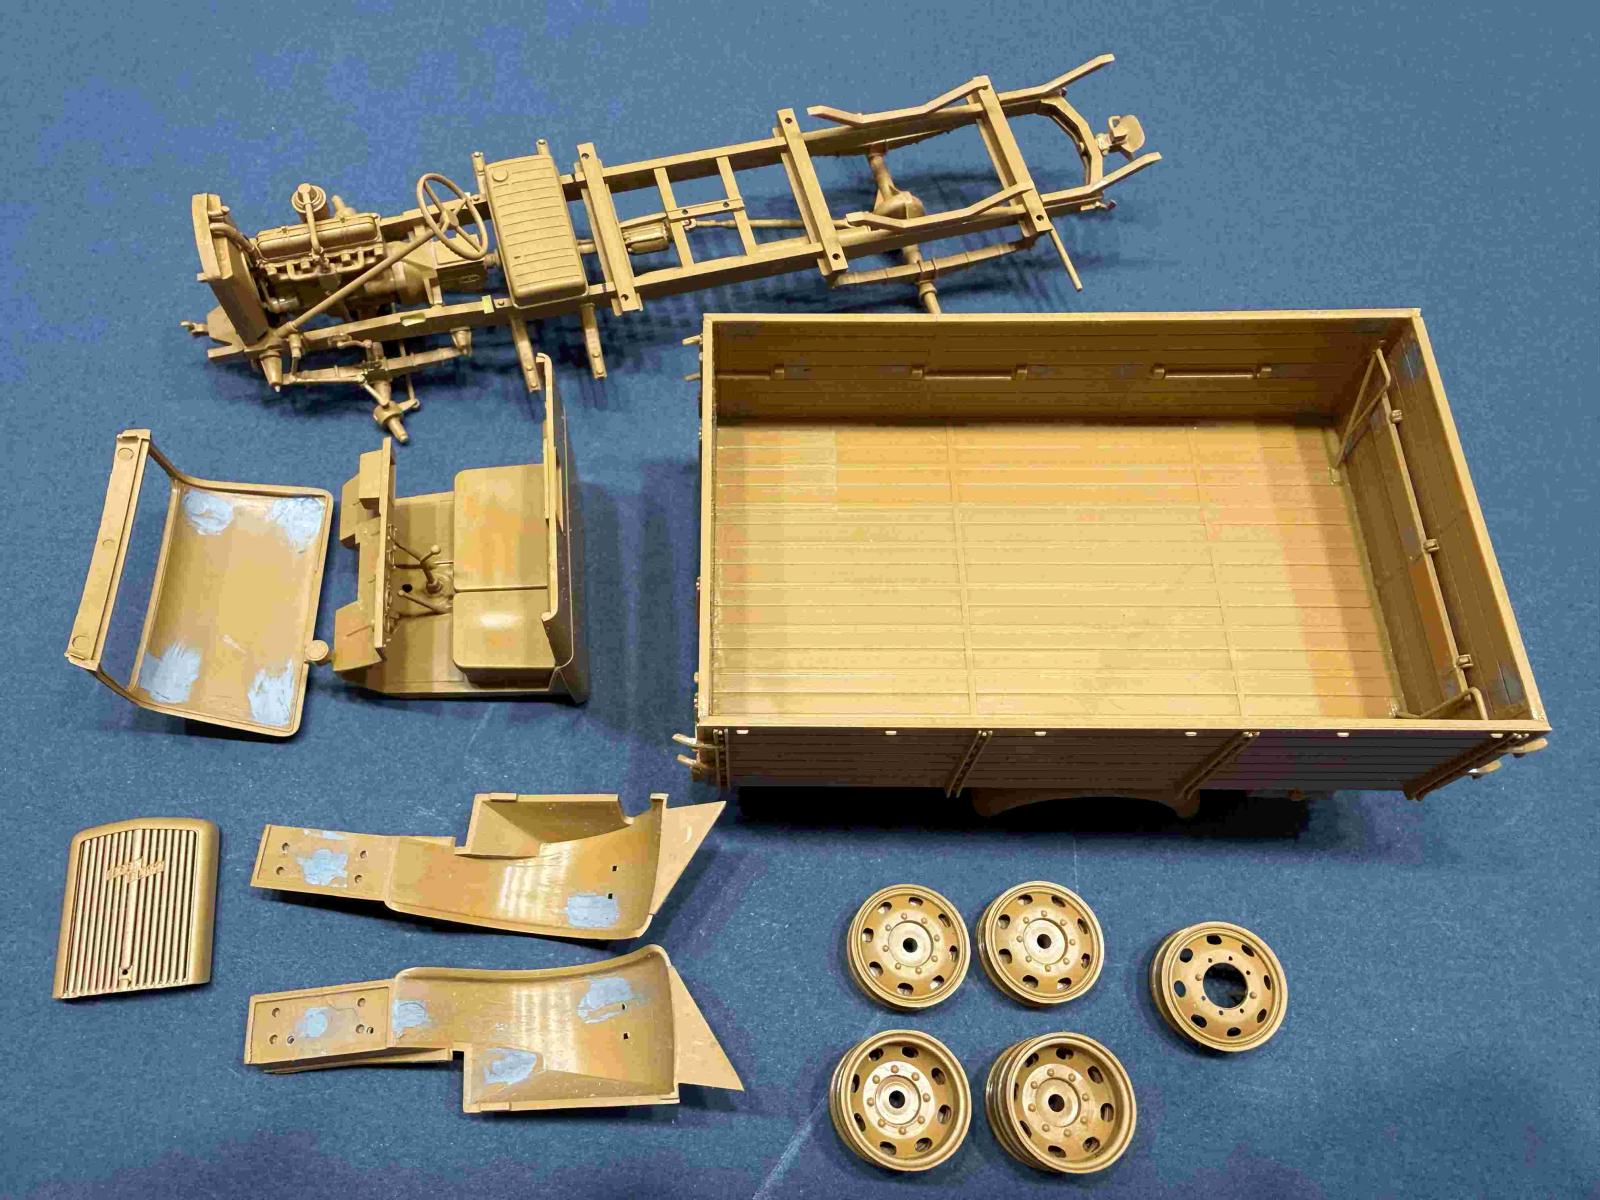
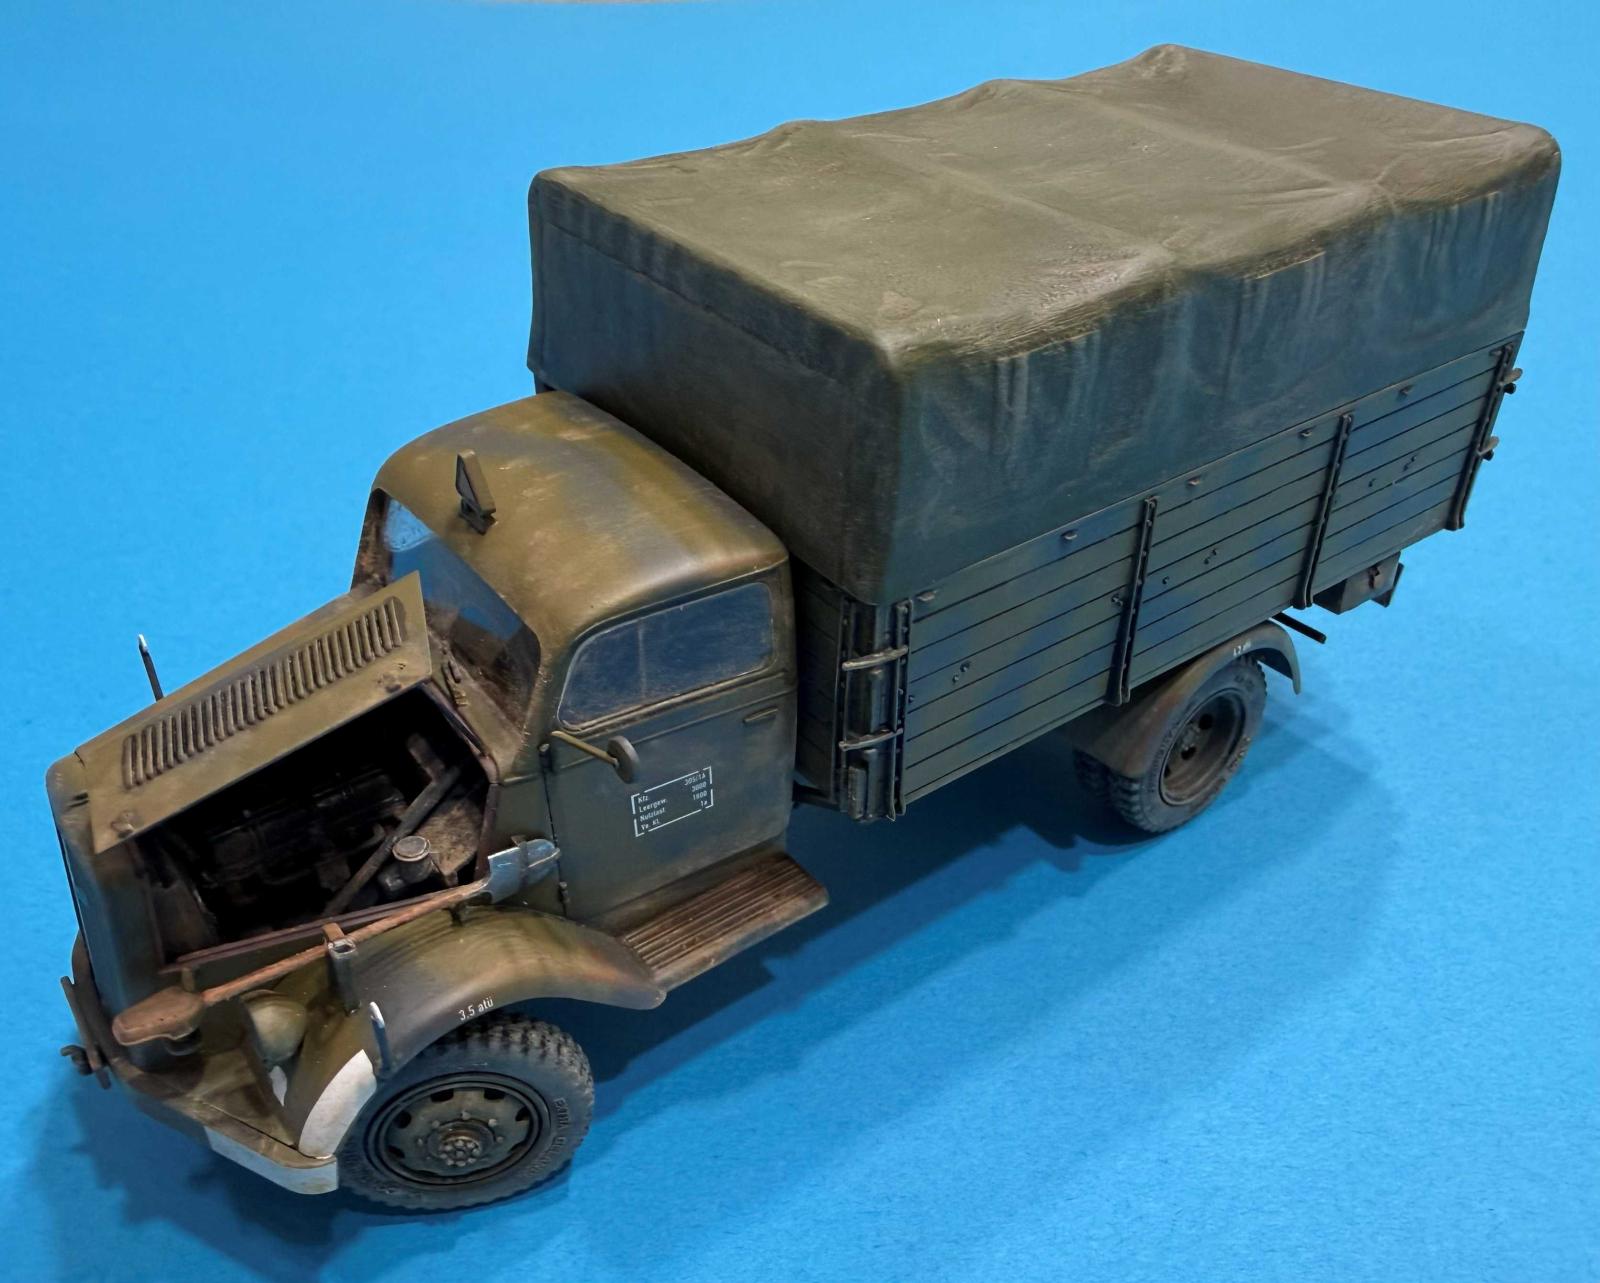
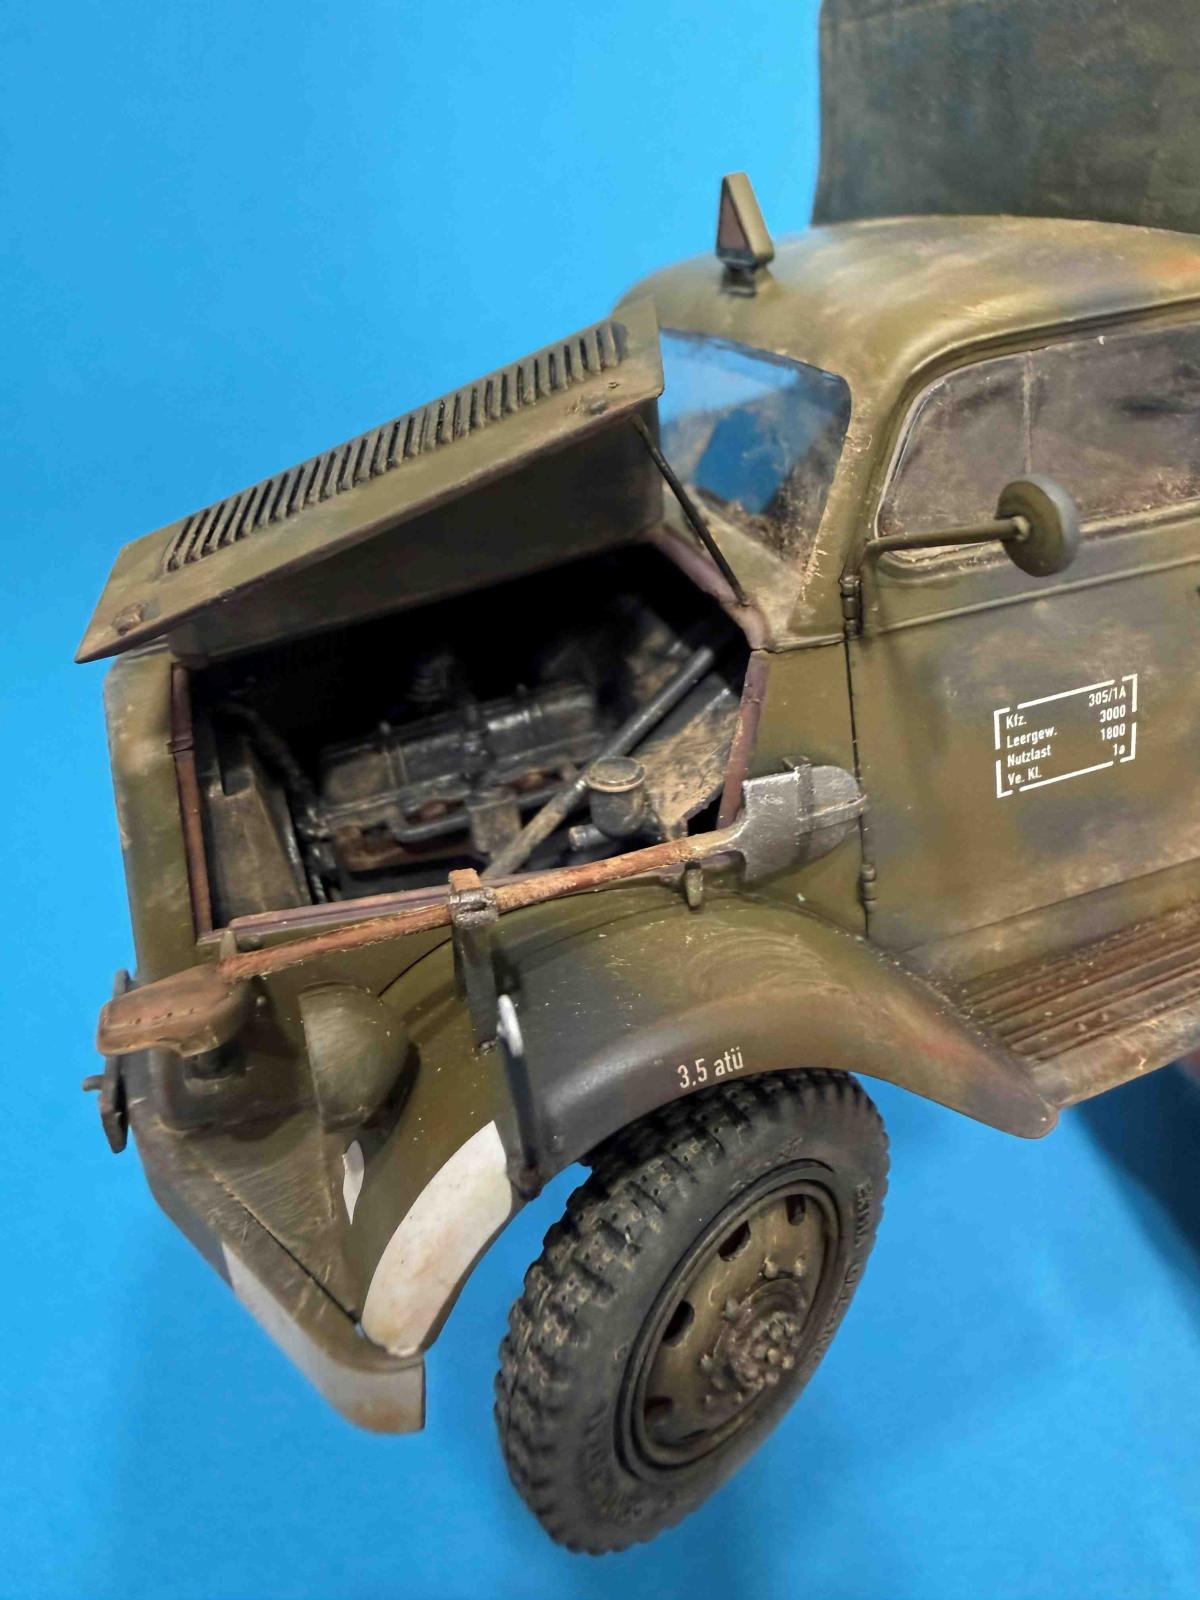
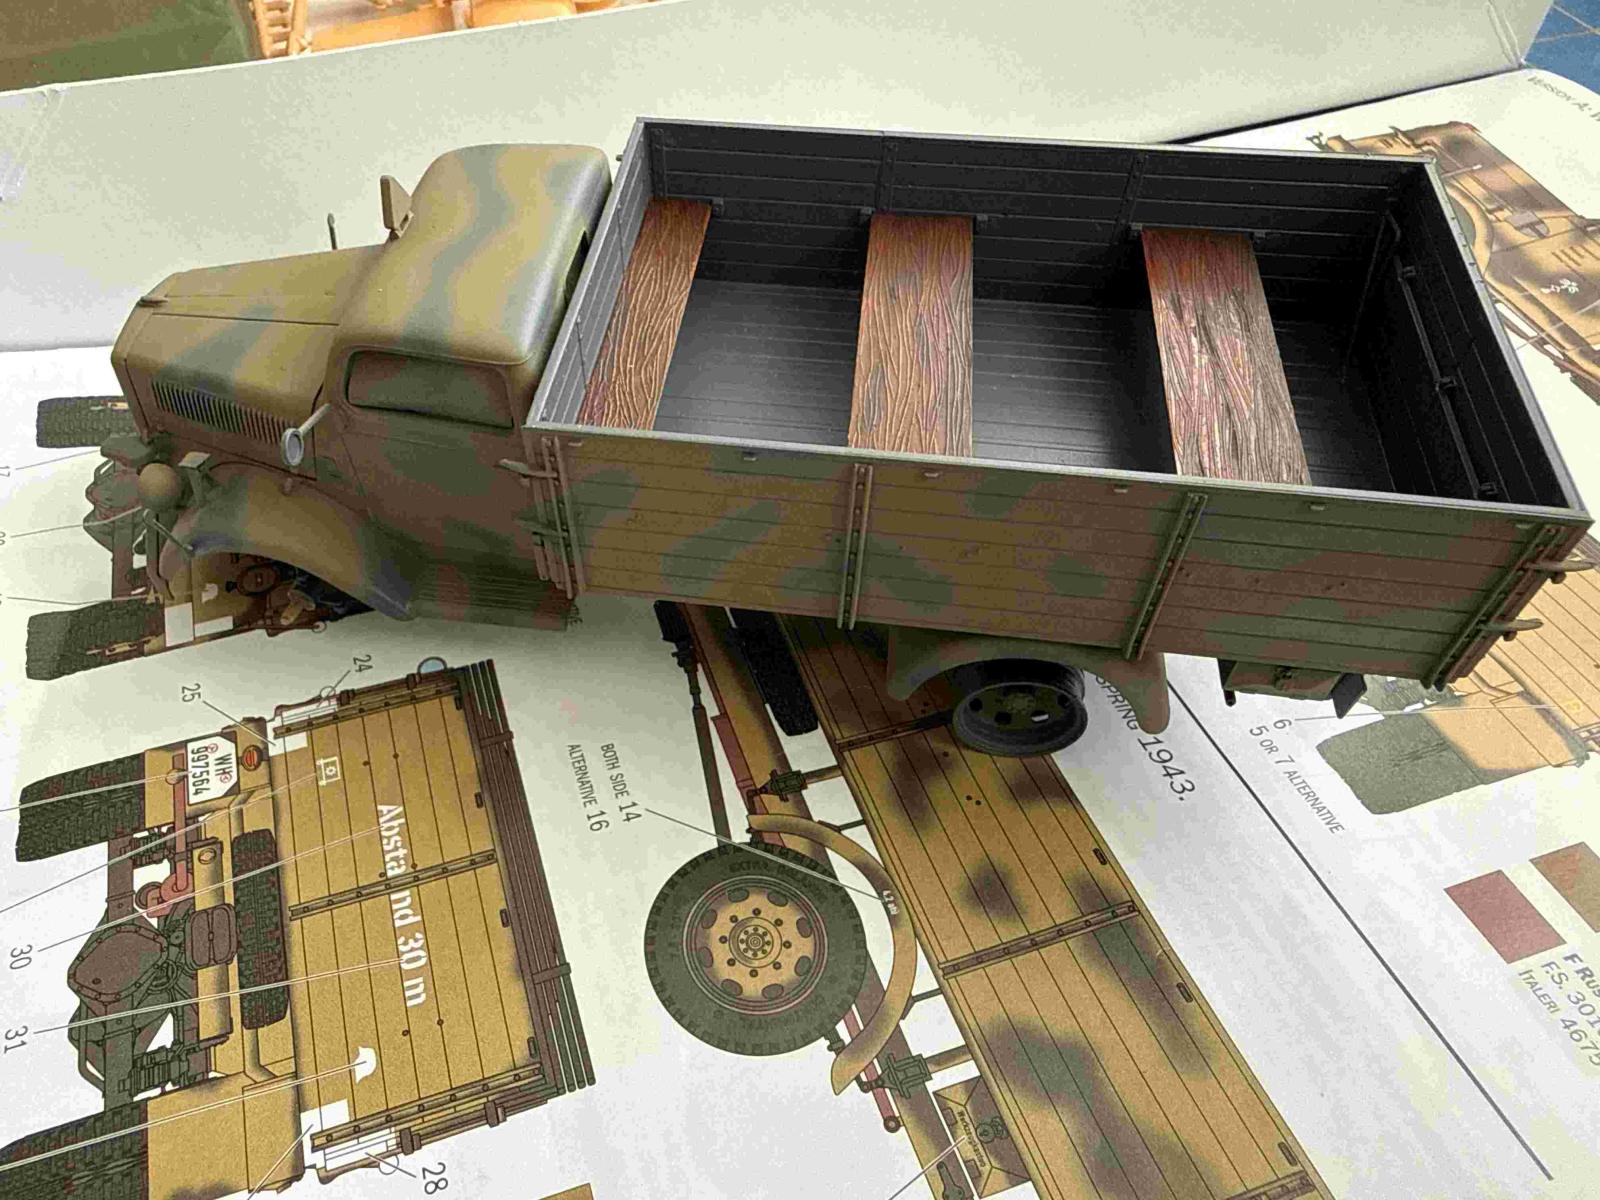
The assembly process starts with the engine and the fit is very good. The engine can only be seen on both sides if the hood if the separate covers are positioned open. I decided to open and expose just one side of the engine. I found four parts in steps 1 incorrectly numbered: 16A, 35A, 36A, 53A should have reference to sprue B, not A. Similar issue exists in step 3 where 3 of 4 parts for the radiator assembly should have referenced sprue B, not A. The radiator detail and texture are very nice.
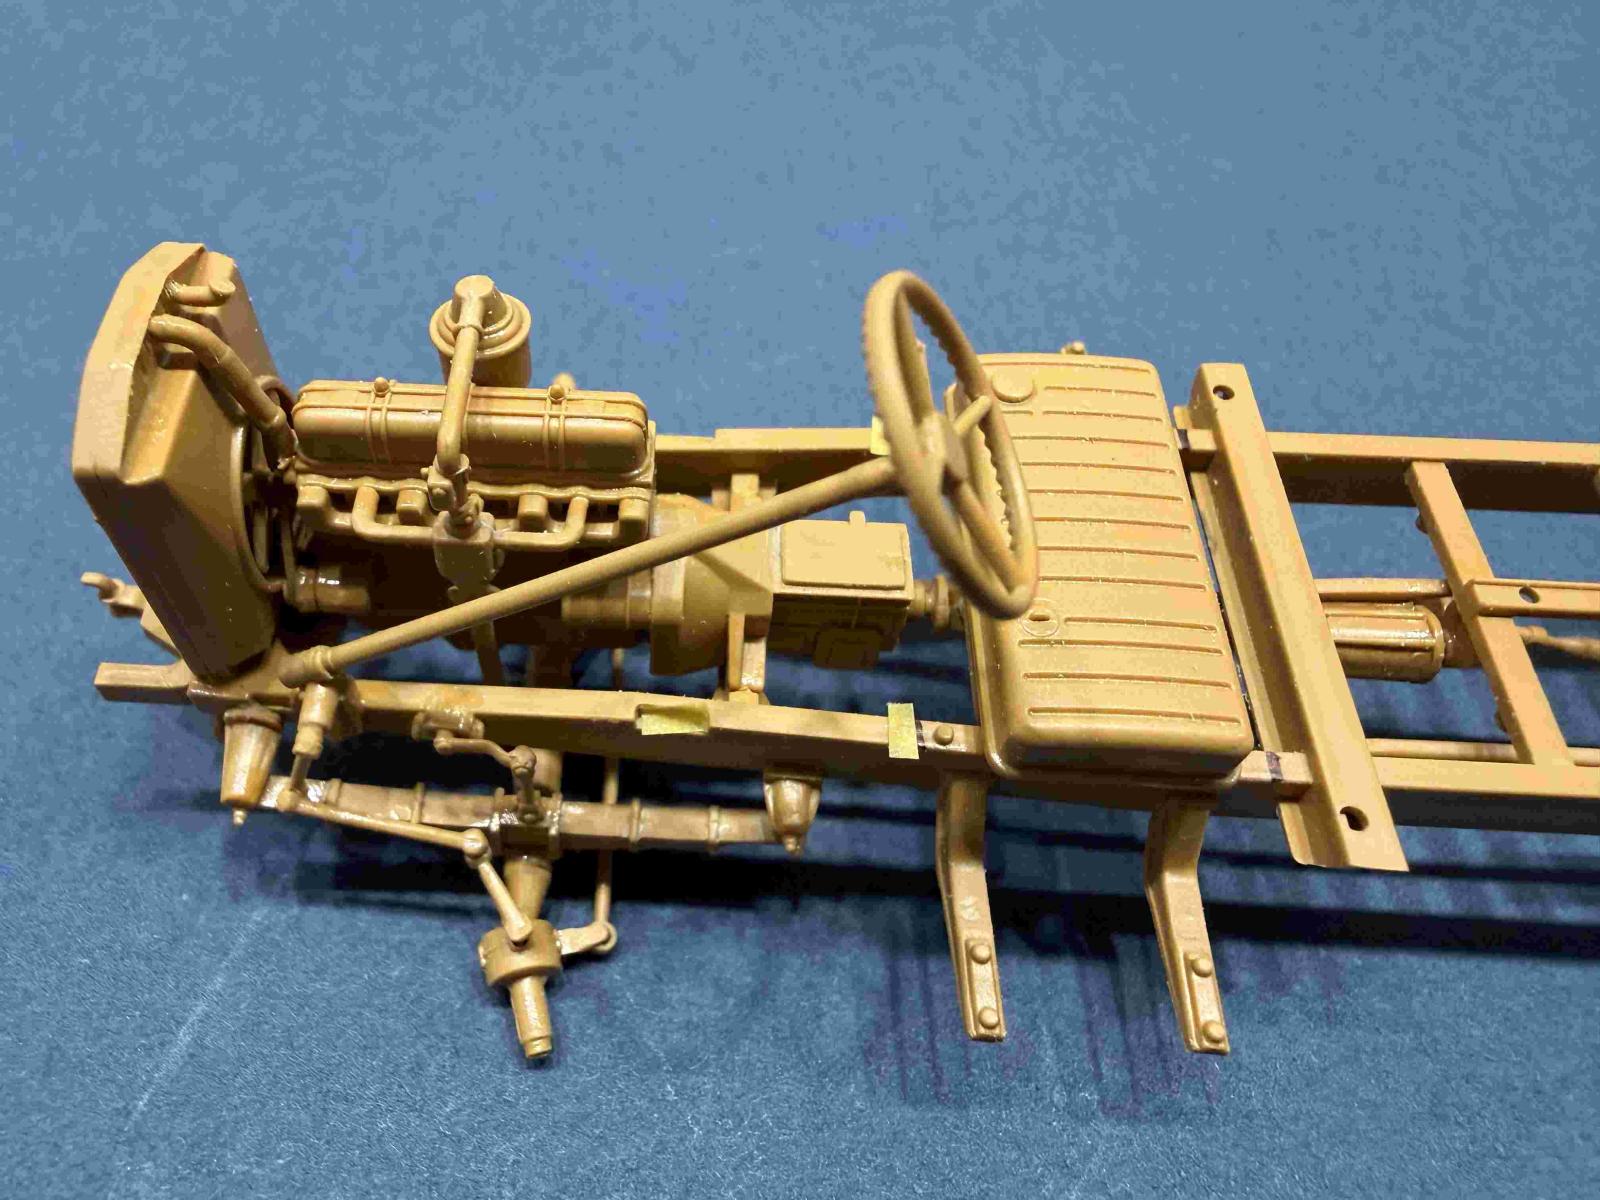
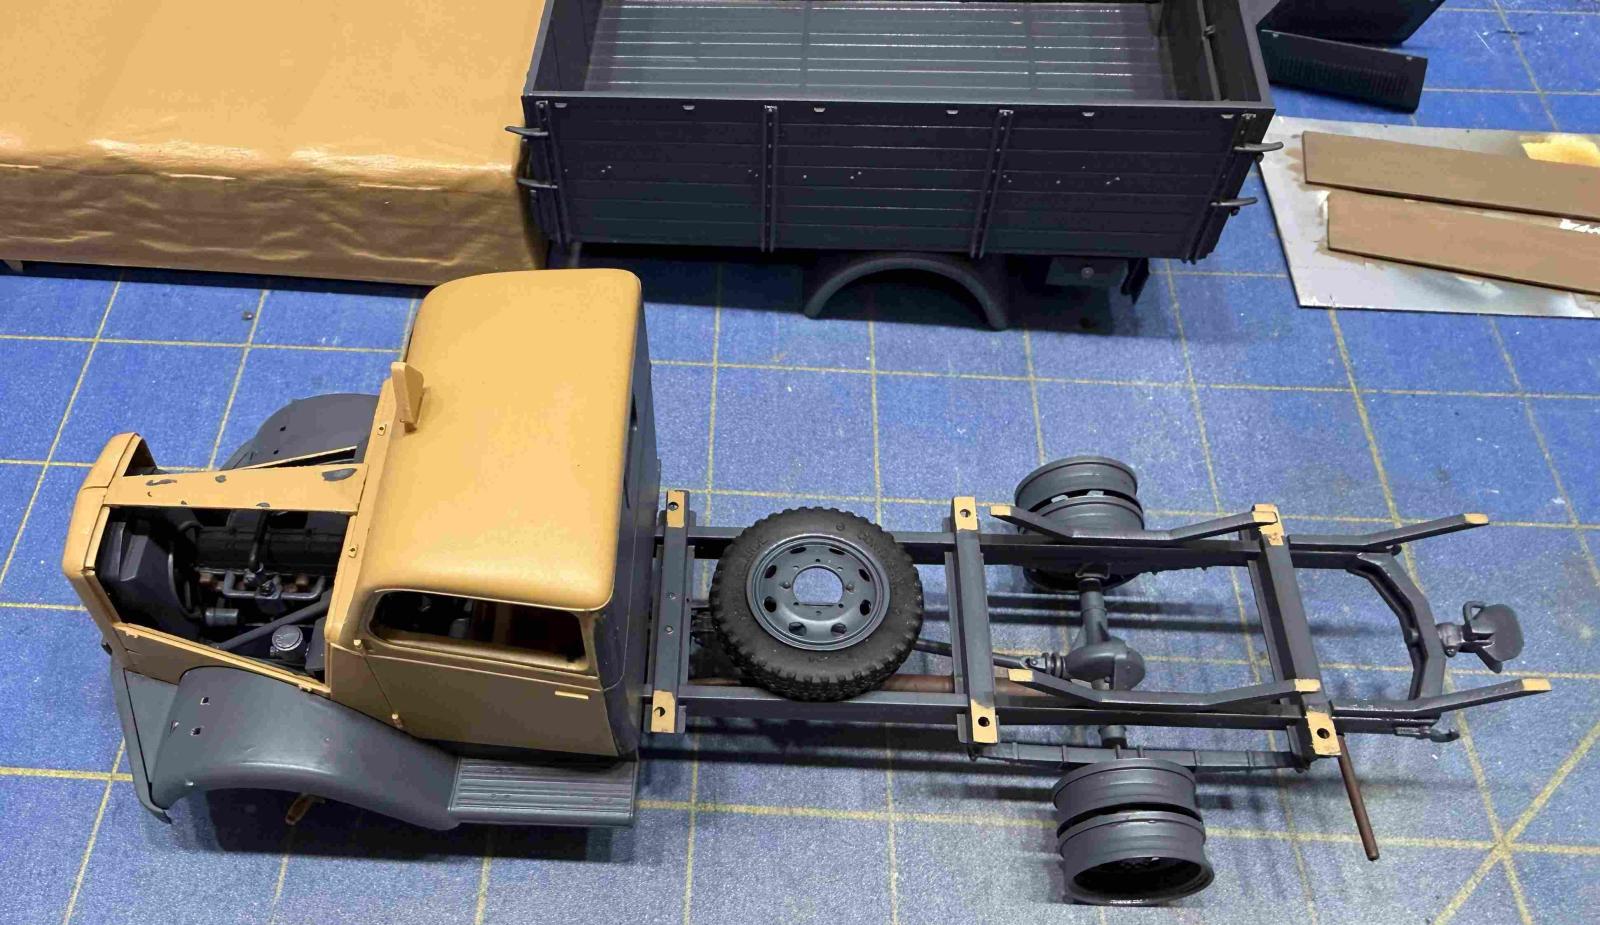
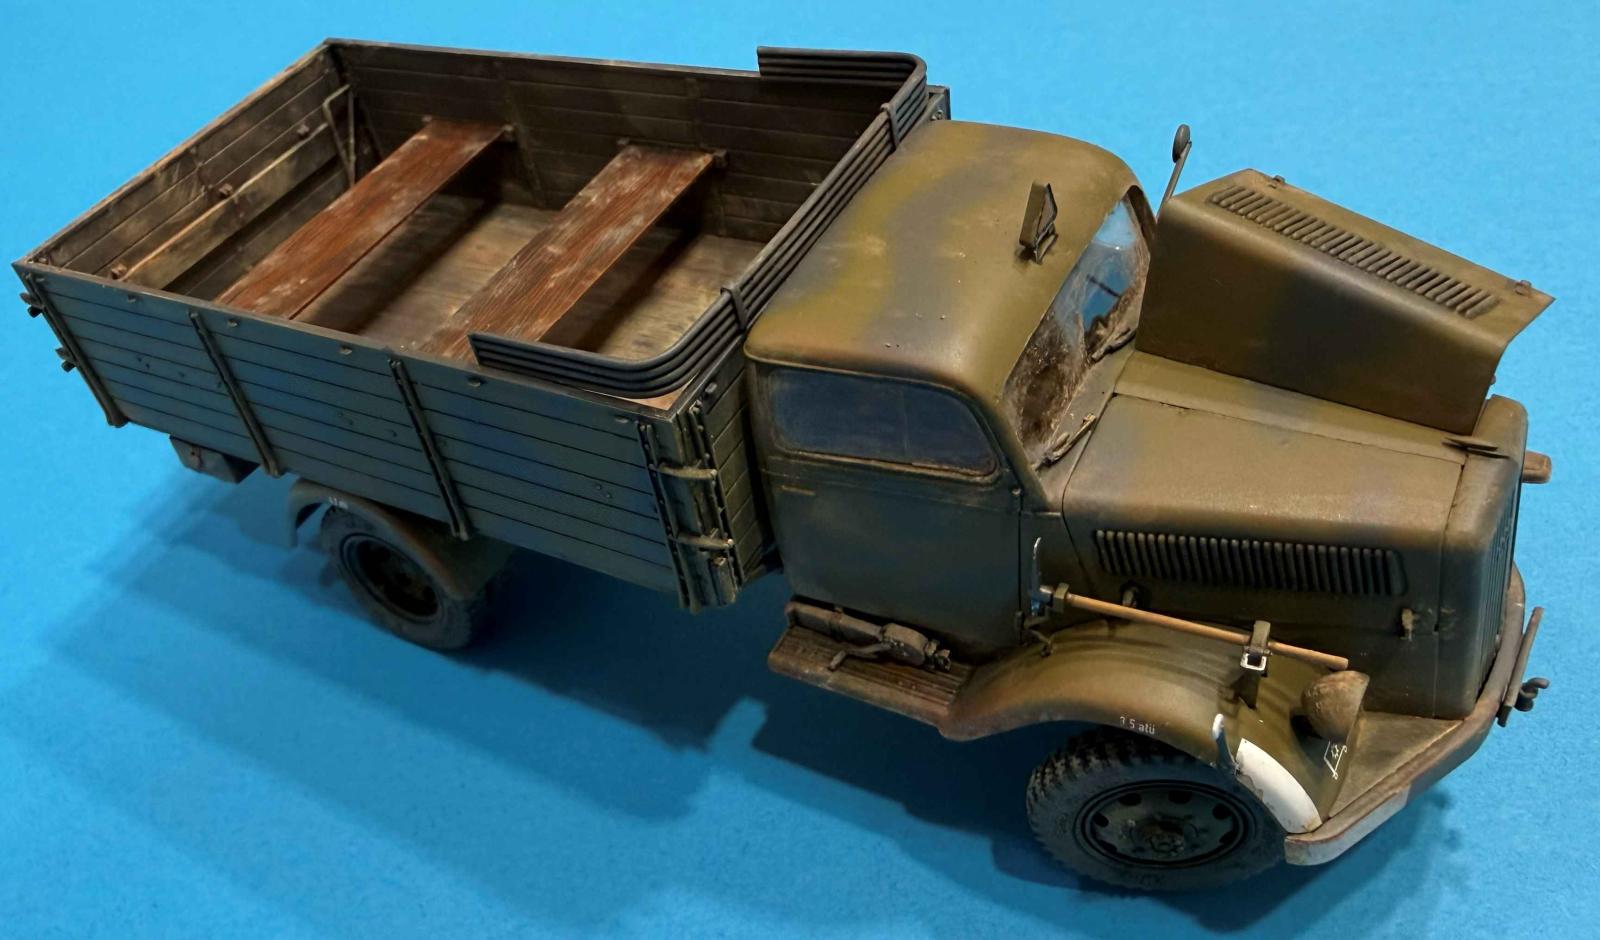
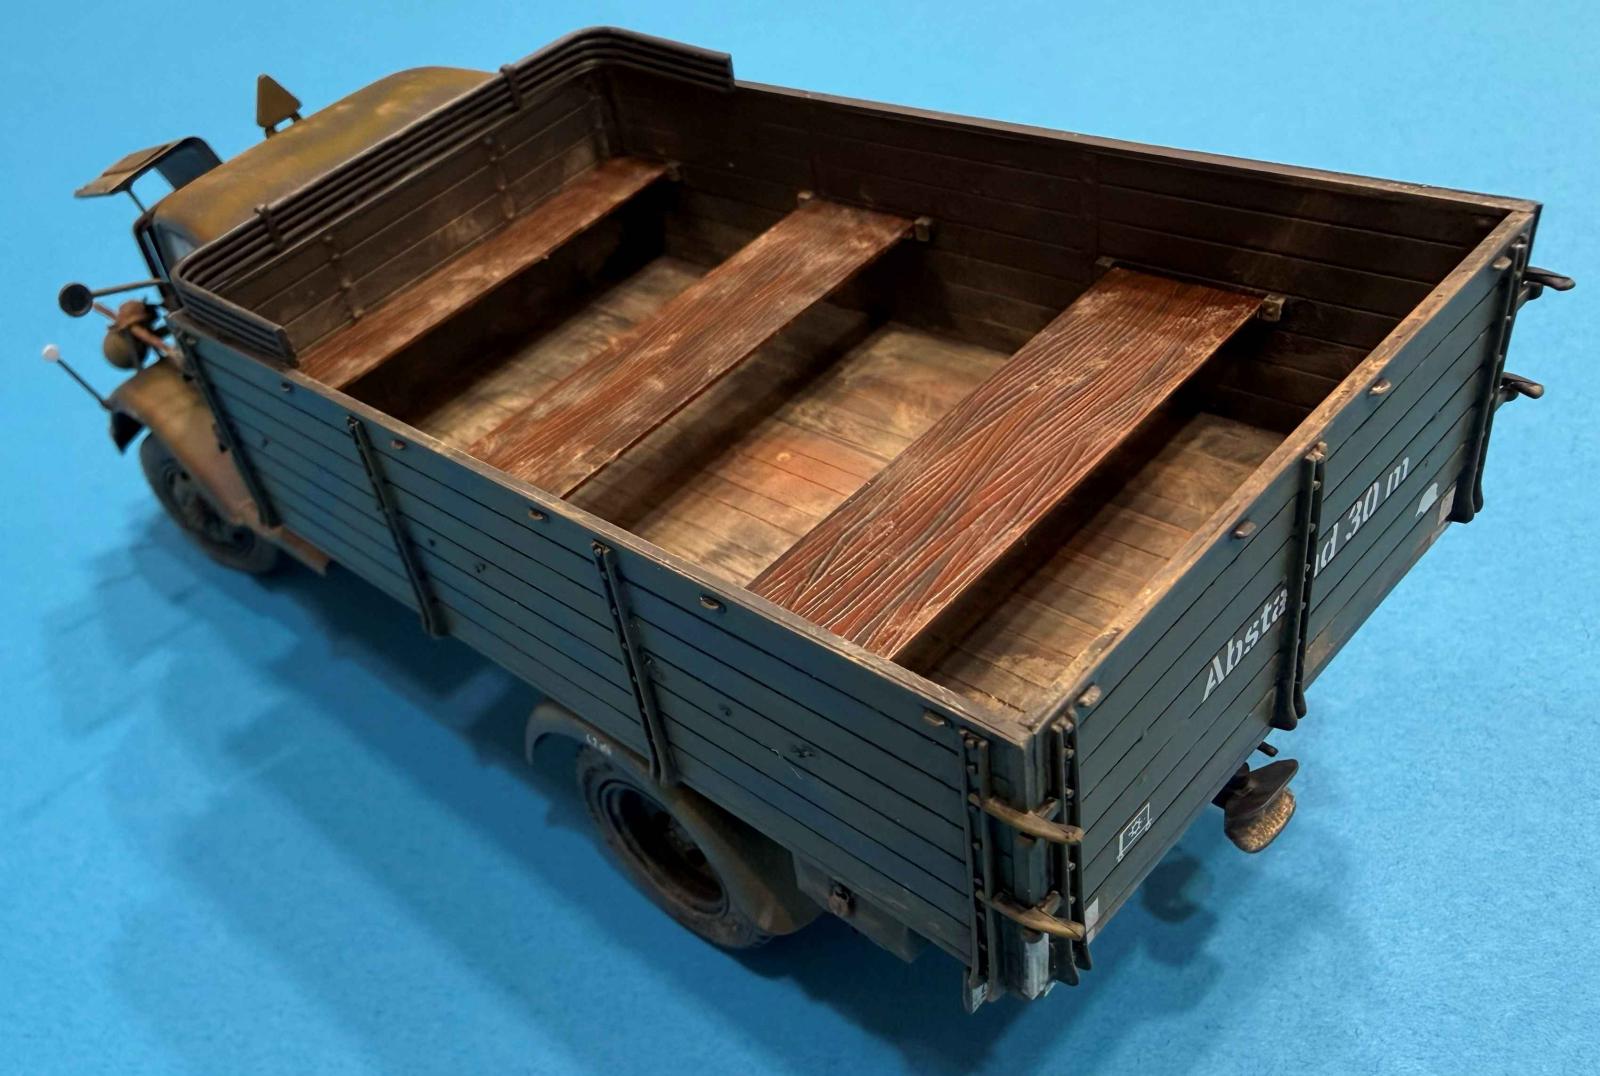
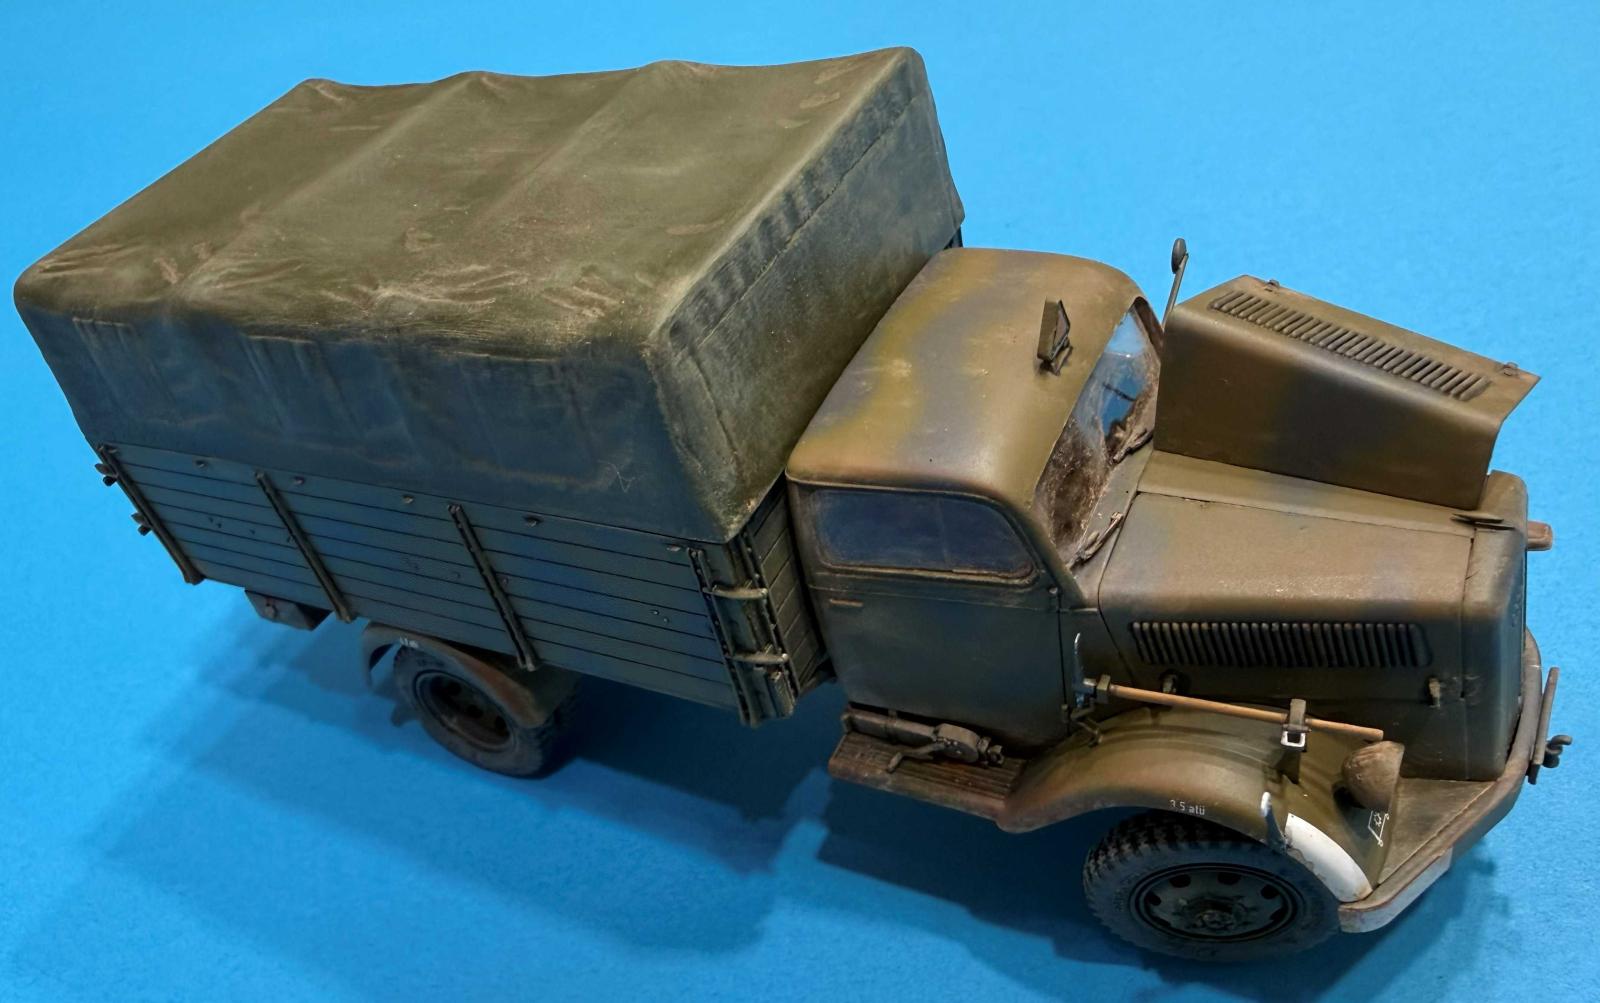
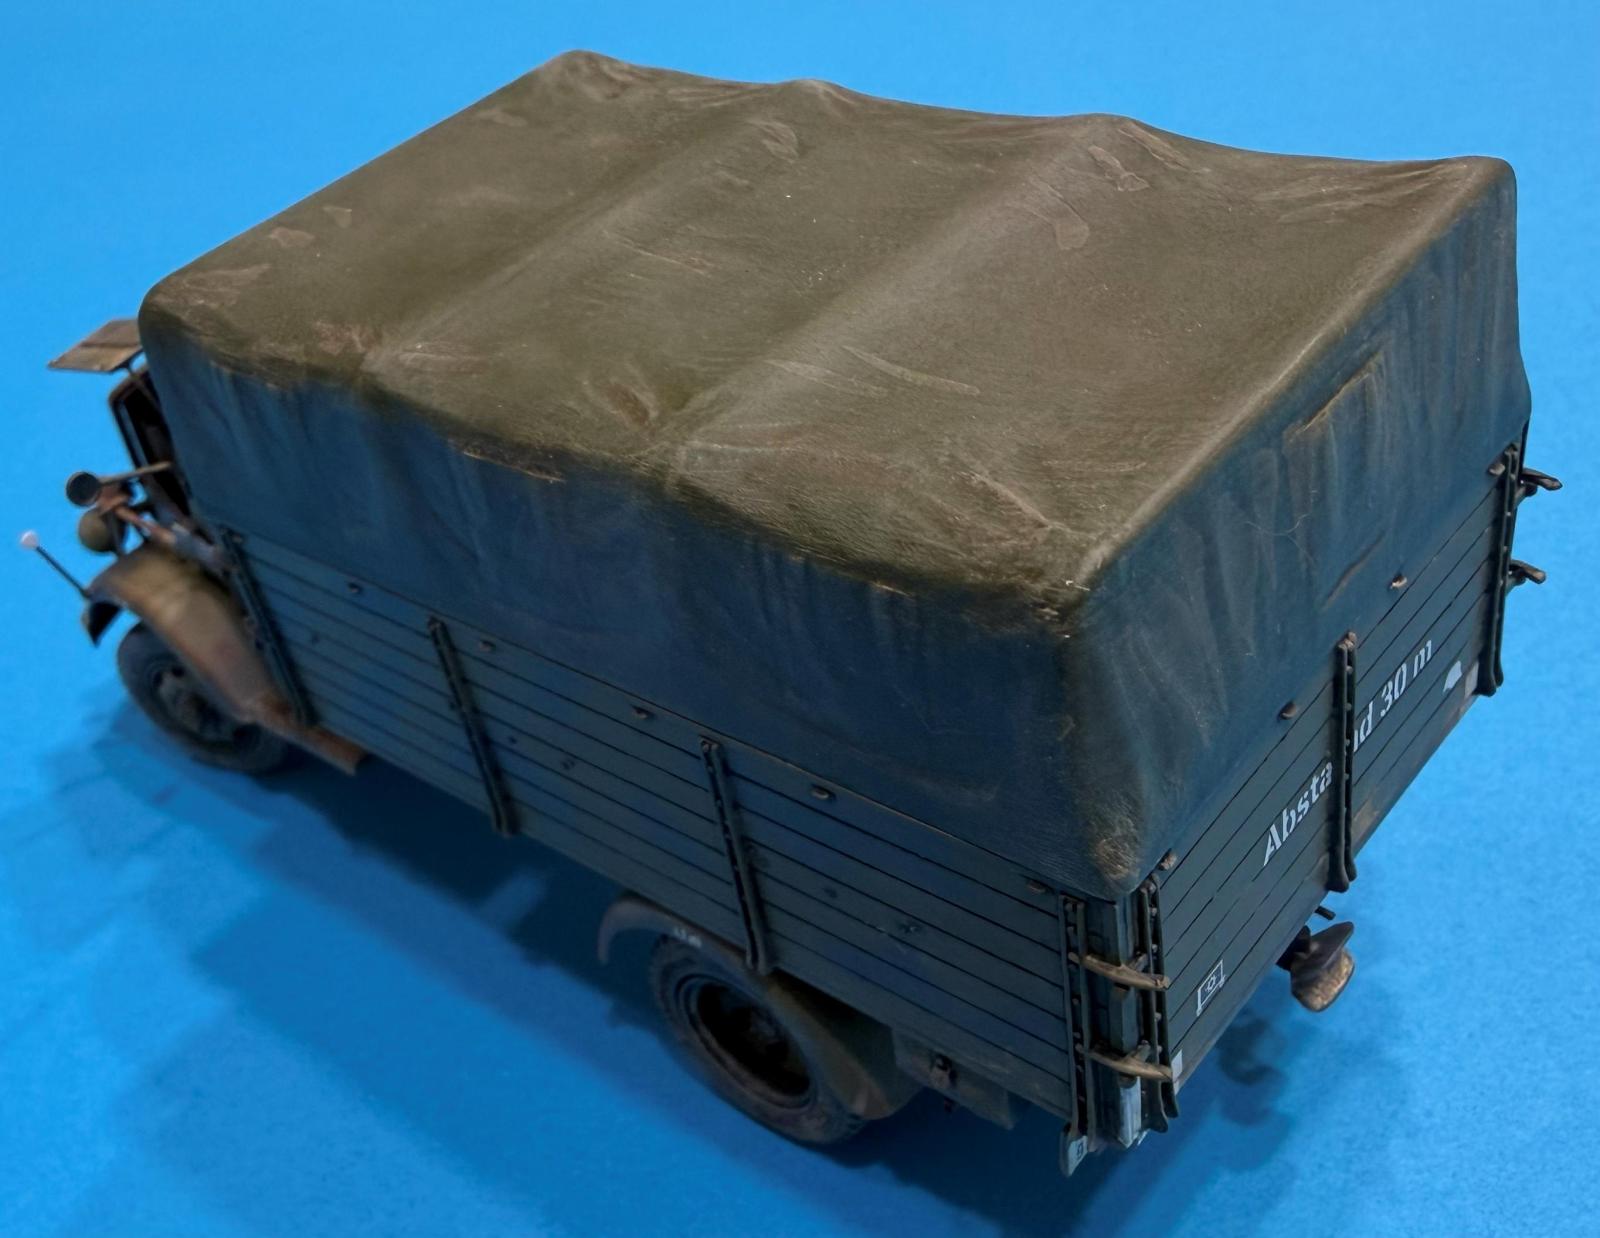
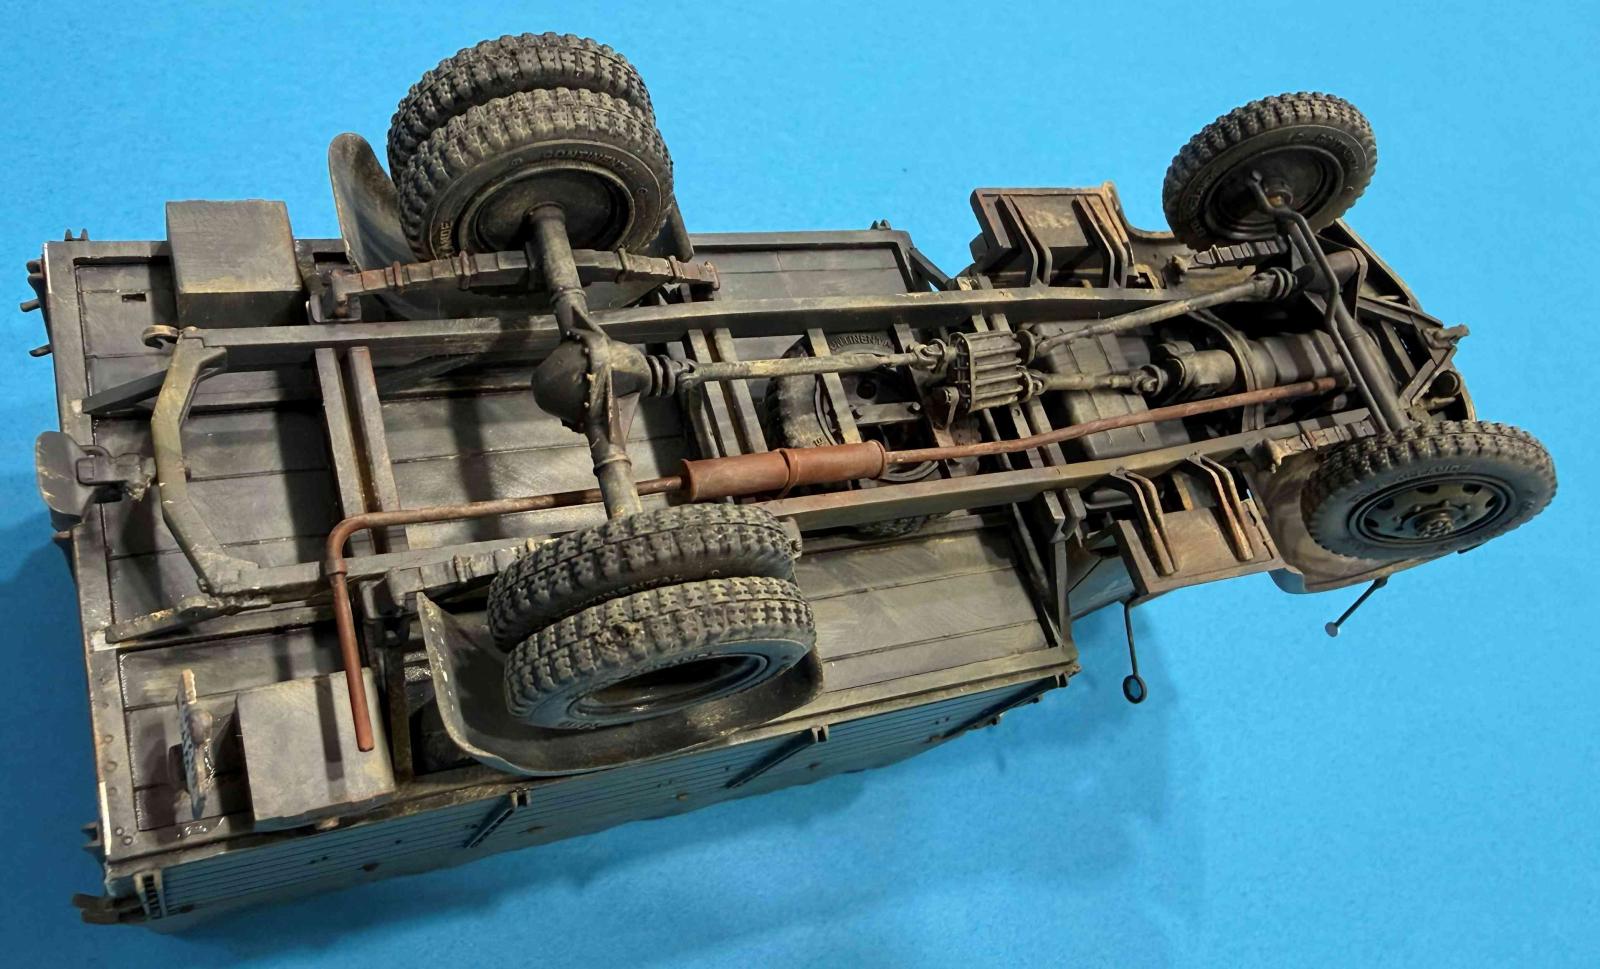
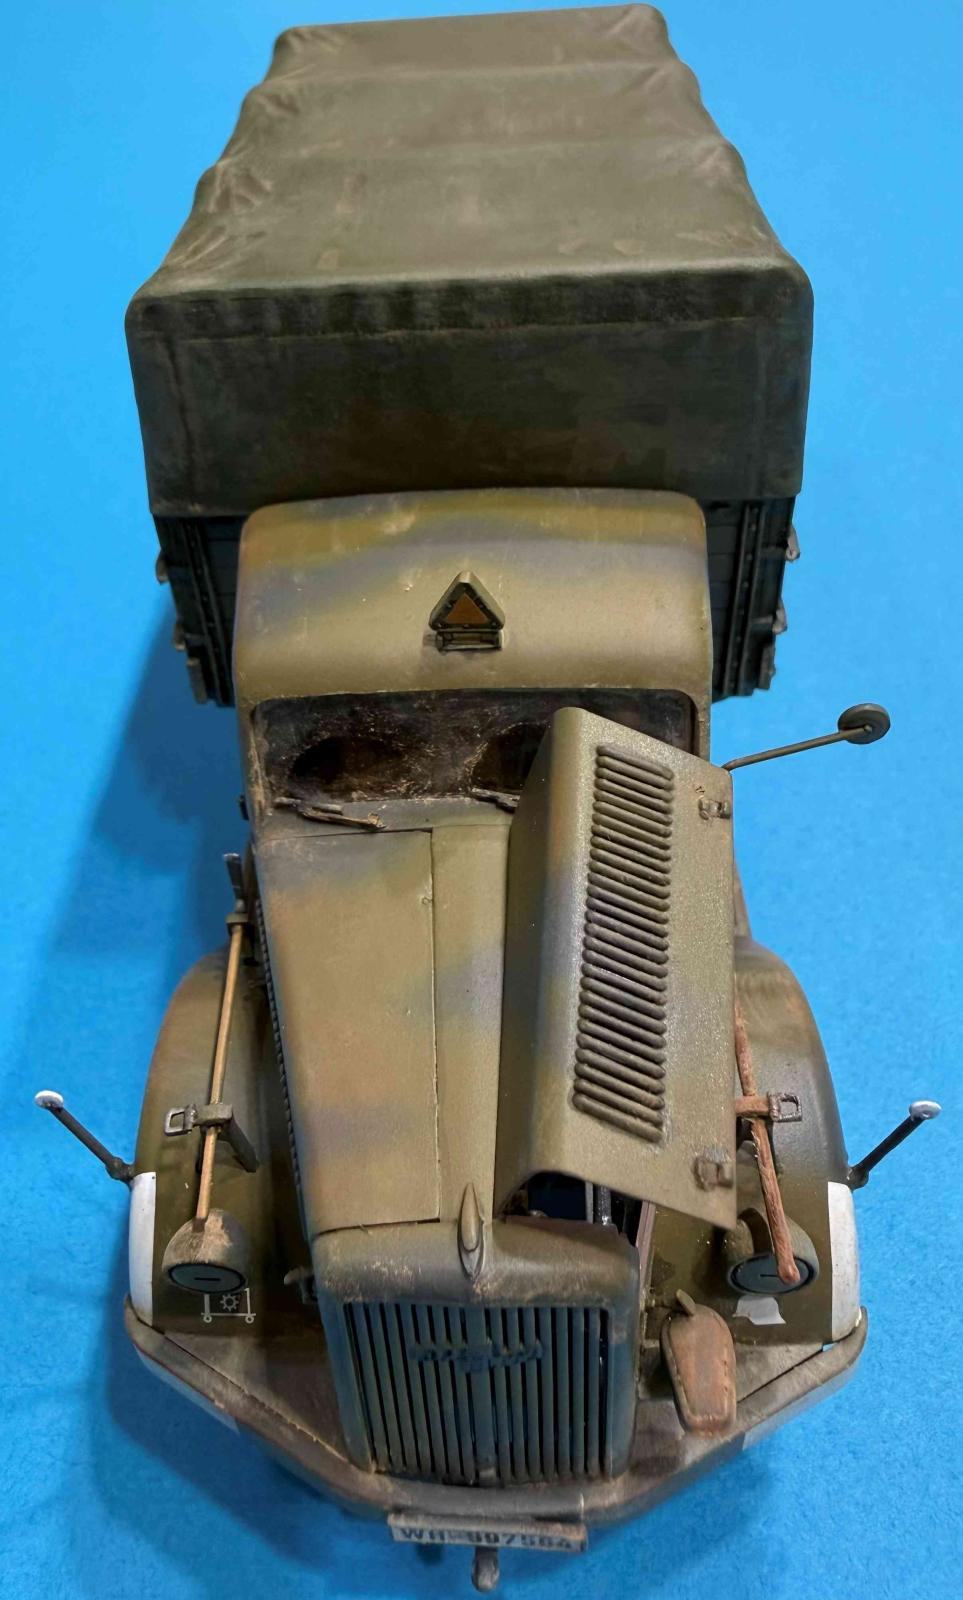
Steps 3 through 9 describe the chassis assembly and the attachment of the engine to it. The fit is very good. The only issue encountered there were small mold lines and ejector pin marks on some parts. The front axle and its connected actuators are movable, an excellent feature allowing different front wheel positions. In step 12, caution must be used because parts 24A and 25A are switched in the instructions. I decided to attach the rubber tires after the finished model was painted. In steps 10 through 16, the truck’s cabin needs to be assembled. The dashboard has 4 decals for the instrument dials. I had to use some filler on the wheel covers in step 14. I also decided not to attach the clear windshield and cab windows until the model was painted. I did regret that because the windshield would have been easier to attach as instructed and masked before painting. Parts 2B and 3B (front turn radius indicators) are very fragile and I suggest attaching them after finishing and painting the kit. I installed them in step 18 and broke both during the painting process. Assembling the truck’s bed in step 19 was easy but there are several ejection pin marks on the inside of the boards that have to be filled. Also, part 95D is listed twice in this step and one of these parts should have been marked 96D instead. Please remember to attach the spare wheel to the chassis before attaching the truck’s bed in step 19. I attached the bed only after I have painted the truck’s cab, chassis, and bed separately. I attached the rubber tires after the model was completely assembled and painted. The rubber tires have great details on them, a very nice touch. I inserted two small stiff wires into part 107E so that I could remove it and attach the canvas cover (part 106D), as an alternative option. Both versions look great. I used a good reference during the assembly and recommend it to modelers: Opel Blitz (11009 Topshots series) by Albert Osinski from the Kagero publisher.
Painting and Markings
The kit offers four marking options:
- Wehrmacht, D.A.K., 21st Panzer Division, Libia, Summer 1942
- Wehrmacht, Pz. Div. “Grossdeutschland”, Eastern Front, Spring 1943
- Wehrmacht, 2nd Pz. Div., Artillerie-Regiment 74, Normandy, June 1944
- Wehrmacht, D.A.K., Unknown Unit, Libia, Summer 1941
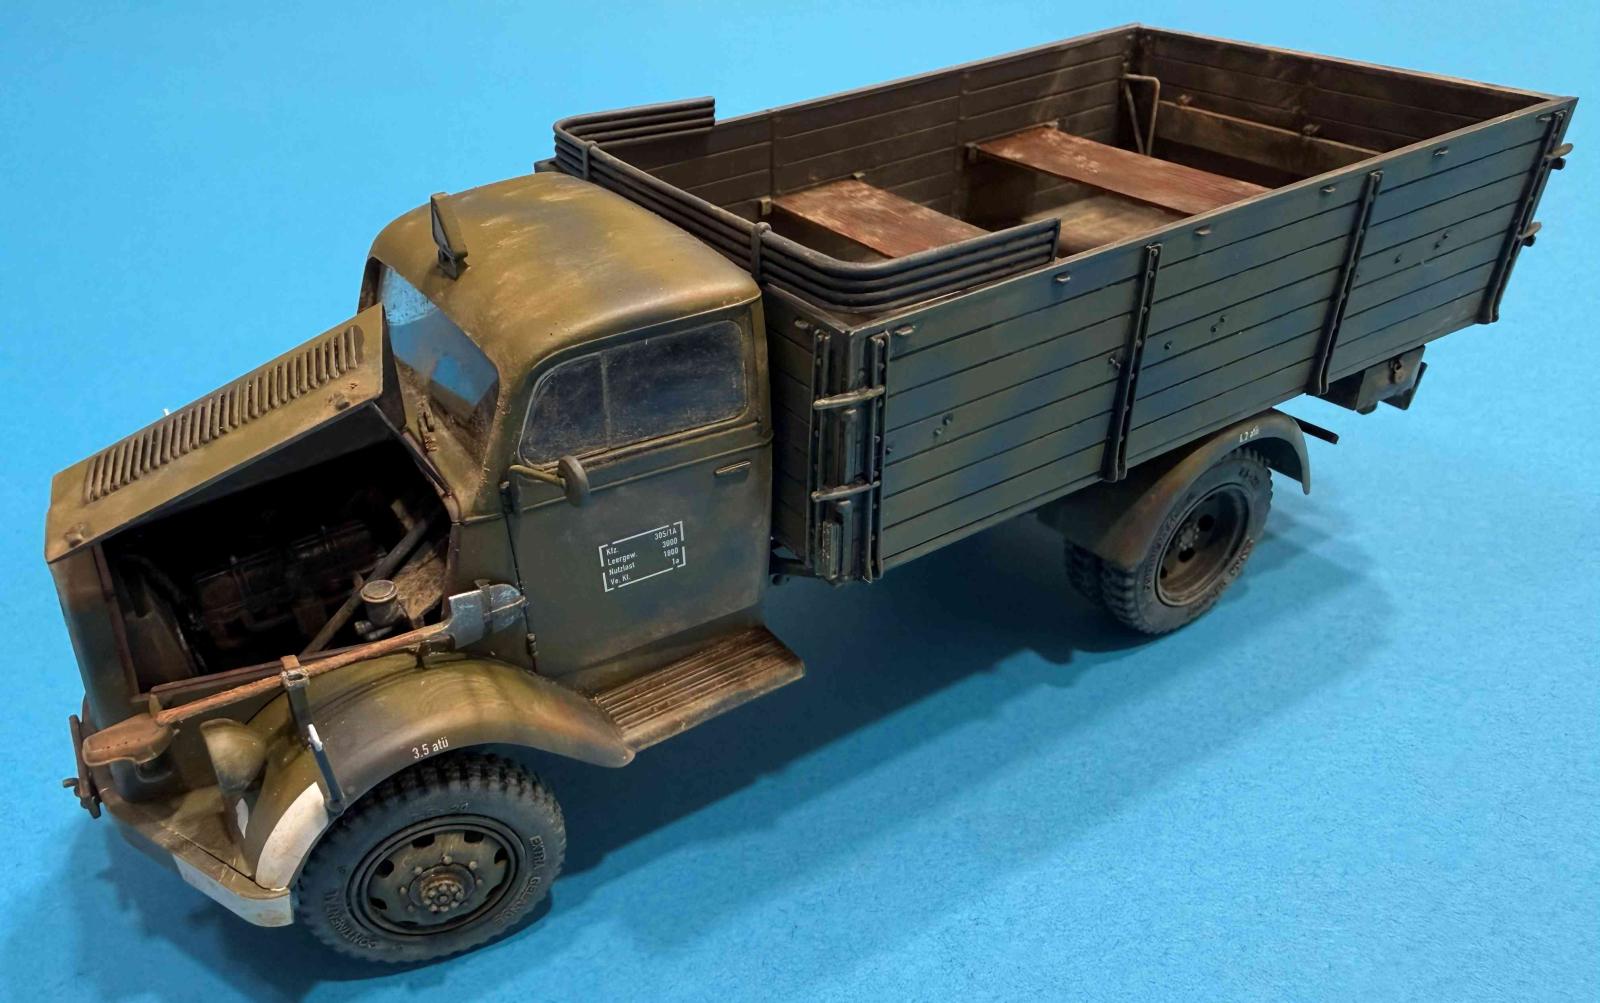
I selected the “Grossdeutschland” option in my build. After painting the base color using a Tamiya spray can TS-4 (German Grey), I applied Tamiya XF-49 khaki camouflage. The decals went on easily on a gloss varnish and conformed well to the surface using a decal solution. I used several AMMO powders mixed with AMMO Odorless Thinner to apply the mix to the painted model to imitate dust and dirt.
Final Notes
It was a real pleasure to build the Opel Blitz model. The kit builds into a great representation of this vehicle. I liked the extremely good fit of the parts. The six tires rest evenly on a flat surface, one of the vehicle’s building challenges, and Italeri did a great job engineering the chassis and the entire kit. The markings and paint schemes are very attractive and I had hard time deciding which one to choose. I am very happy with the final result. I would highly recommend the kit to any modeler who wants to add this German vehicle to their collection of Axis trucks in WWII. I am looking forward to seeing more similar offerings from Italeri.
My sincere thanks go to Italeri for generously providing this kit to review and IPMS/USA for allowing me to review it.
Reviewer Bio
Tomasz Menert

I grew up in Poland and immigrated to the US 35 years ago when I was in my twenties. Ironically, I majored in English here, but I have fond memories related to my interest in aviation. What spiked my interest in reviewing items were the books on some familiar subjects. For example, I received a glider pilot license in Poland and one of the books Pablo Bouleo mentioned in the 'stash' is from MMP (PZL-104 Wilga 35A, Single No. 46). In my glider training, the plane towing us was the PZL-104 Wilga! So, anything around Polish subjects like PZL Combat Fighters, etc., would land you a quick and thorough review just because I had an exposure to some of the topics. Not to mention an uncle who flew a total of over 4000 hours in Mig-21s. Therefore, I want to thank you both for giving me the opportunity to join this review. group.
Comments
Add new comment
This site is protected by reCAPTCHA and the Google Privacy Policy and Terms of Service apply.
Similar Reviews