
Jeep Willys SAS, Part 3 – Final
Agora Models
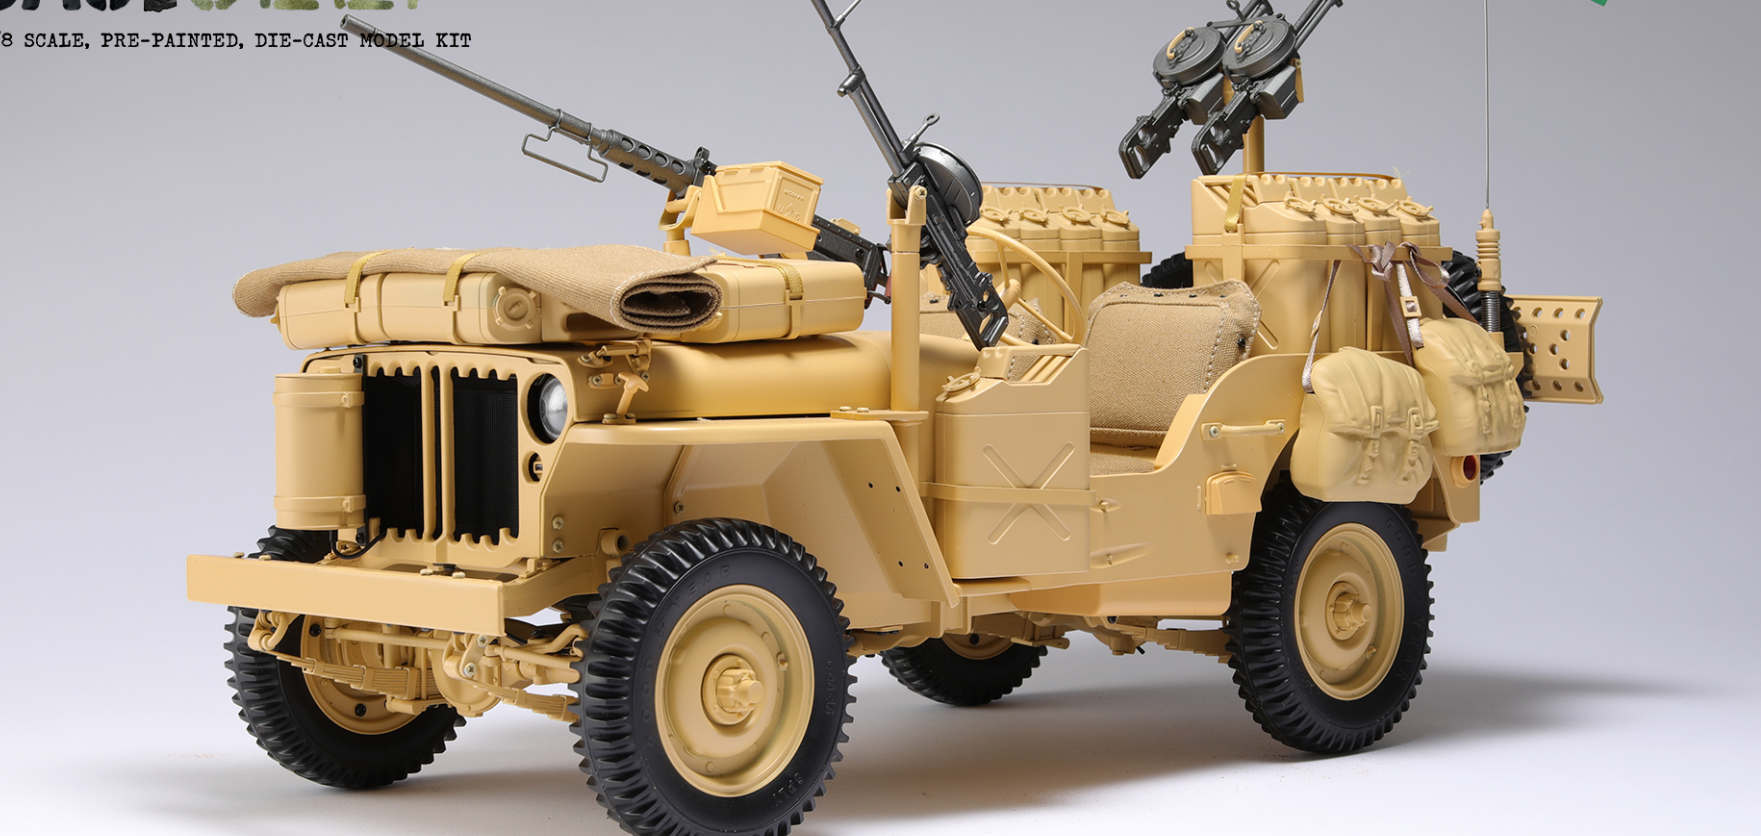
Agora Models is a UK company based in London, England that specializes in high-quality large-scale models. This is the third part of the review of Agora Models’ Jeep Willys SAS, describing assembly and finishing of the Jeep. Agora distributes the Jeep kit monthly in 12 Packs.
Summary
Agora’s Willys SAS Jeep is a fantastic kit that will please Jeep lovers and fans of large-scale modeling. Assembly of the big kit is straightforward with detailed, clear instructions. There are many tiny screws used in the build, which is the only challenging part of the assembly. Pre-finishing of the parts allows building the kit without additional painting steps and even less experienced modelers will find the build enjoyable.
Most of the assembly is done with screws (many, many tiny screws). Agora does a good job hiding many of the screws, but some do remain exposed. I filled some screw heads in obvious locations with epoxy to conceal their appearance. The fit of the parts is perfect with precise alignment of screws. Construction of Agora‘s Jeep is very solid and well built. Detail on the parts is good considering the large scale of the jeep.
The Agora Jeep kit is expensive, but comparable to other large scale model kits. The kit can be purchased over 12 or 24 months to spread out the cost.
The kit is primarily diecast metal with some plastic parts, rubber tires, cloth seats, string, etc. The parts are pre-painted, even the plastic parts. The Sand Yellow paint on the metal parts is flawless and very durable.
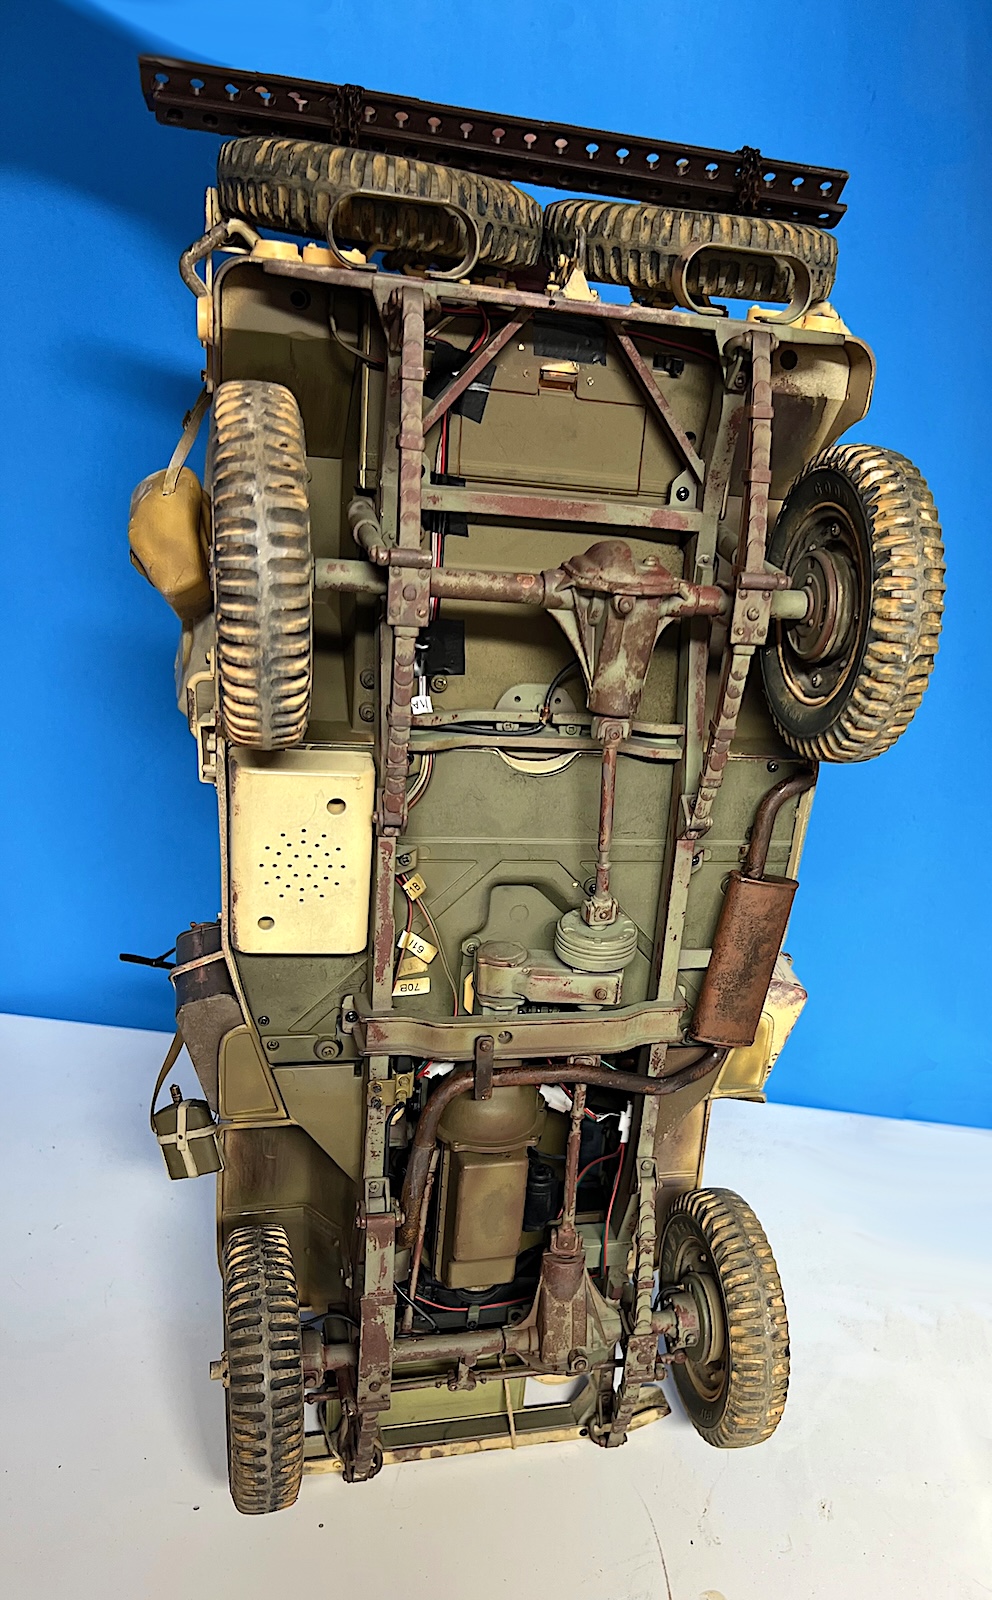
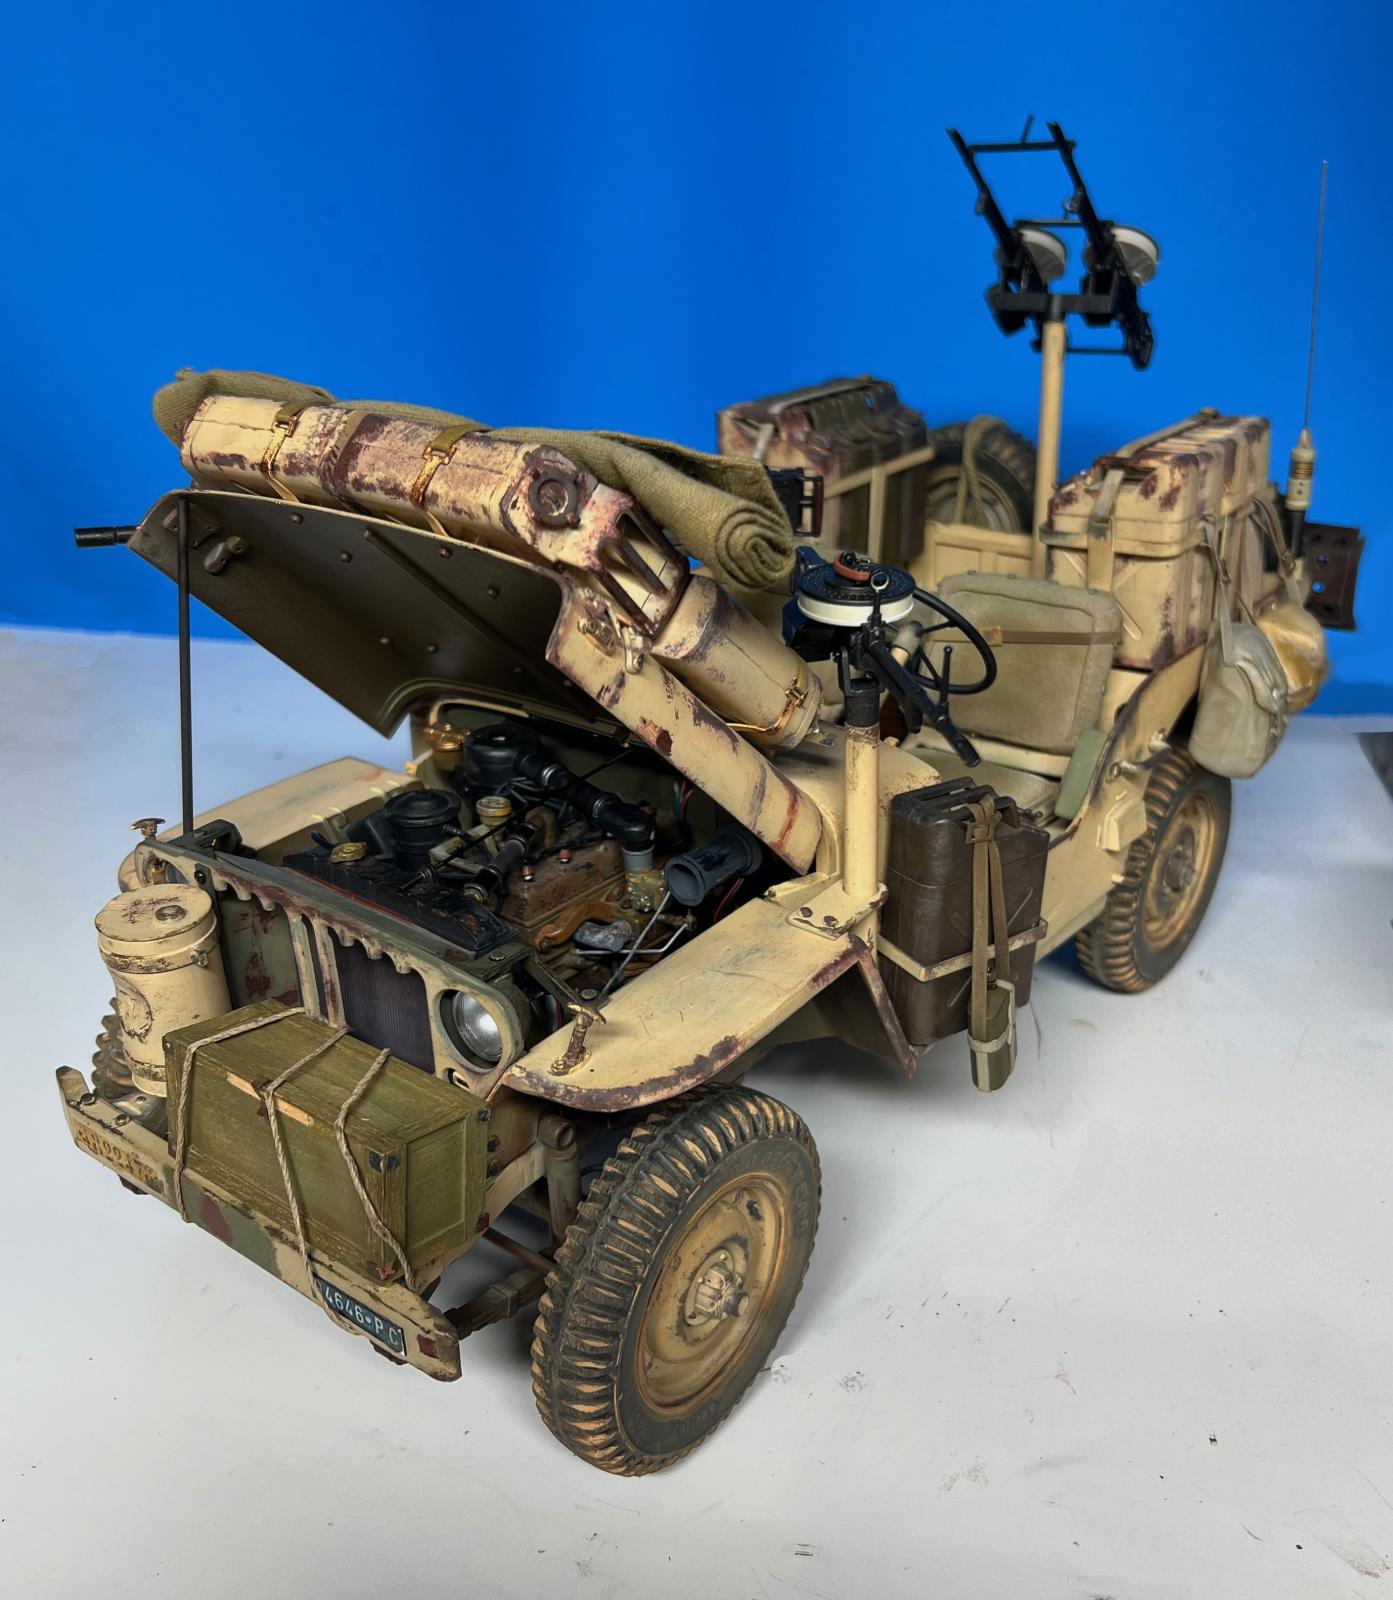
I decided to finish the Jeep with a weathered and worn appearance to reflect the harsh Desert environment where the SAS operated.
The kit builds into an accurate representation of a SAS Jeep with body modifications, weapons, and accessories.
Instructions
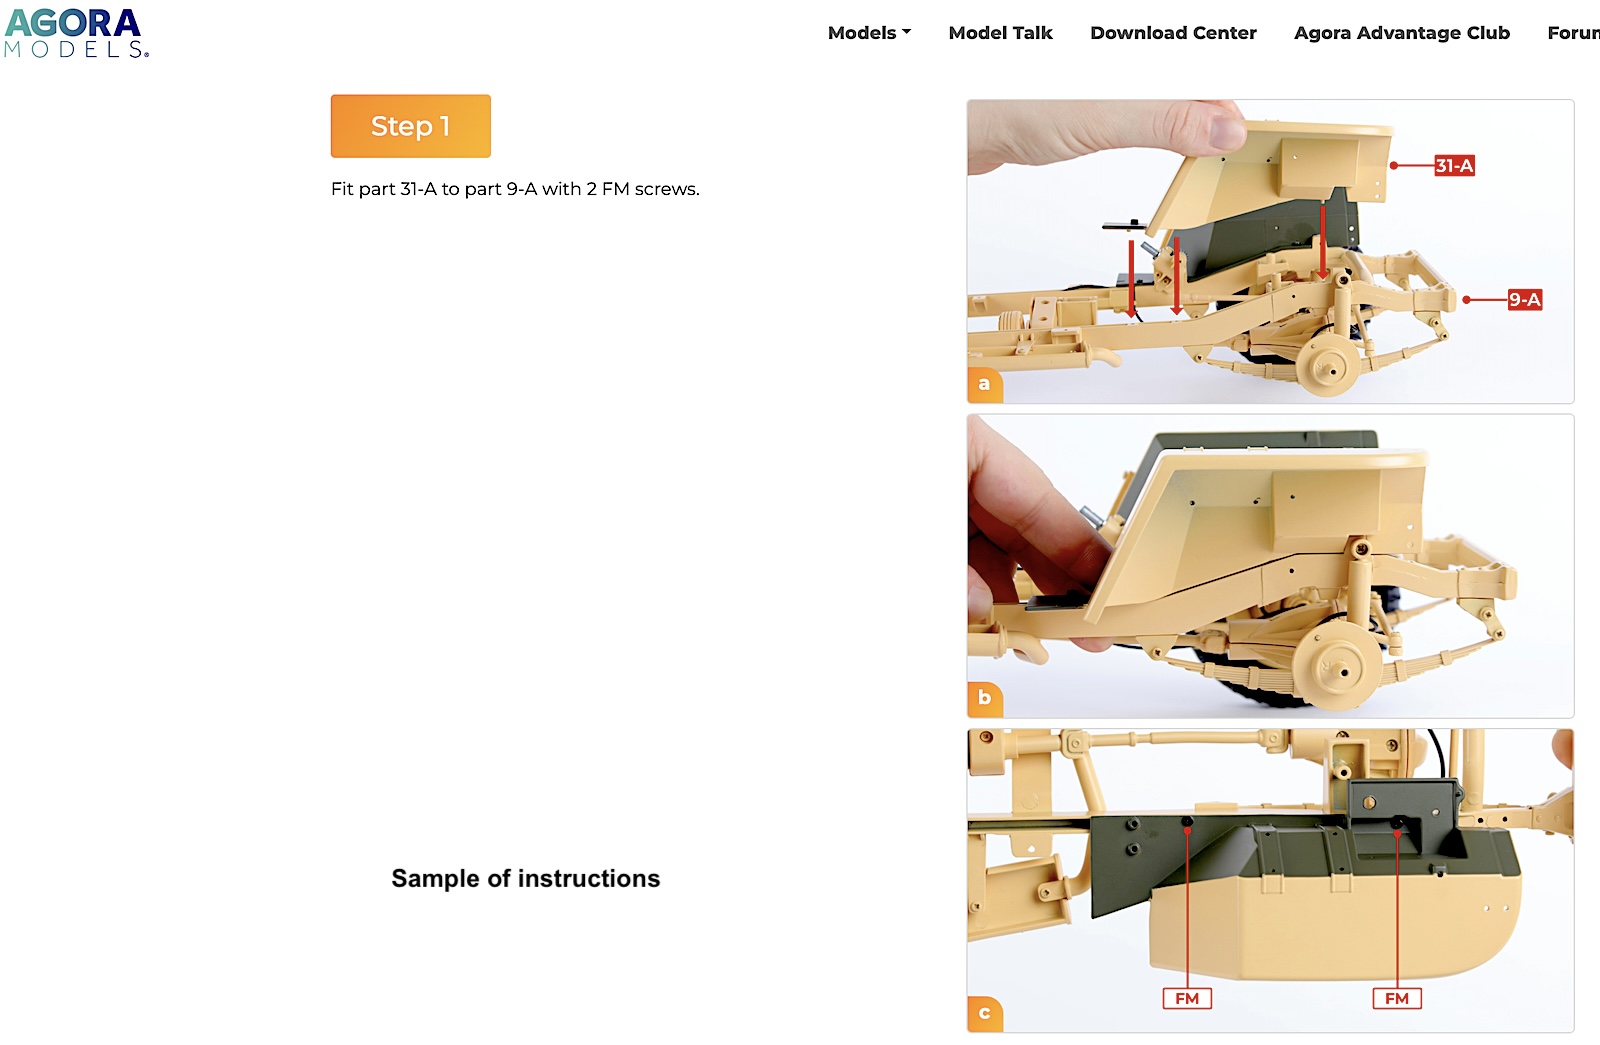
Agora’s instructions for the Jeep are awesome! Printed instructions are not included with the kit Packs but are available to view or download from Agora’s website. Instructions are step-by-step photos showing parts, how to install them, and what they should look like after installation. PDFs are used for the instructions so they can be downloaded and printed for a hard copy. I used my iPhone & laptop to view the assembly steps online during the build, which allows zooming in for greater detail. Photos are used in the instructions with numbered parts to show each assembly step, and the steps are nicely indexed to find the one you need. The photos are very sharp & clear. Agora provides “Advice from the Experts” with tips on tools and assembly. The instructions show installation of every part and the ability to zoom in on details makes assembly very clear. I found the instructions to be very clear and easy to use.
I did not log my time to build the Jeep but estimate spending 80 to 90 hours on assembly. I ended up repainting almost every part for the purpose of weathering the vehicle, which added another 80 to 100 hours or so for painting & weathering.
Notes on Assembly
Pack 05 Front Fenders, Radiator, Front Wheels
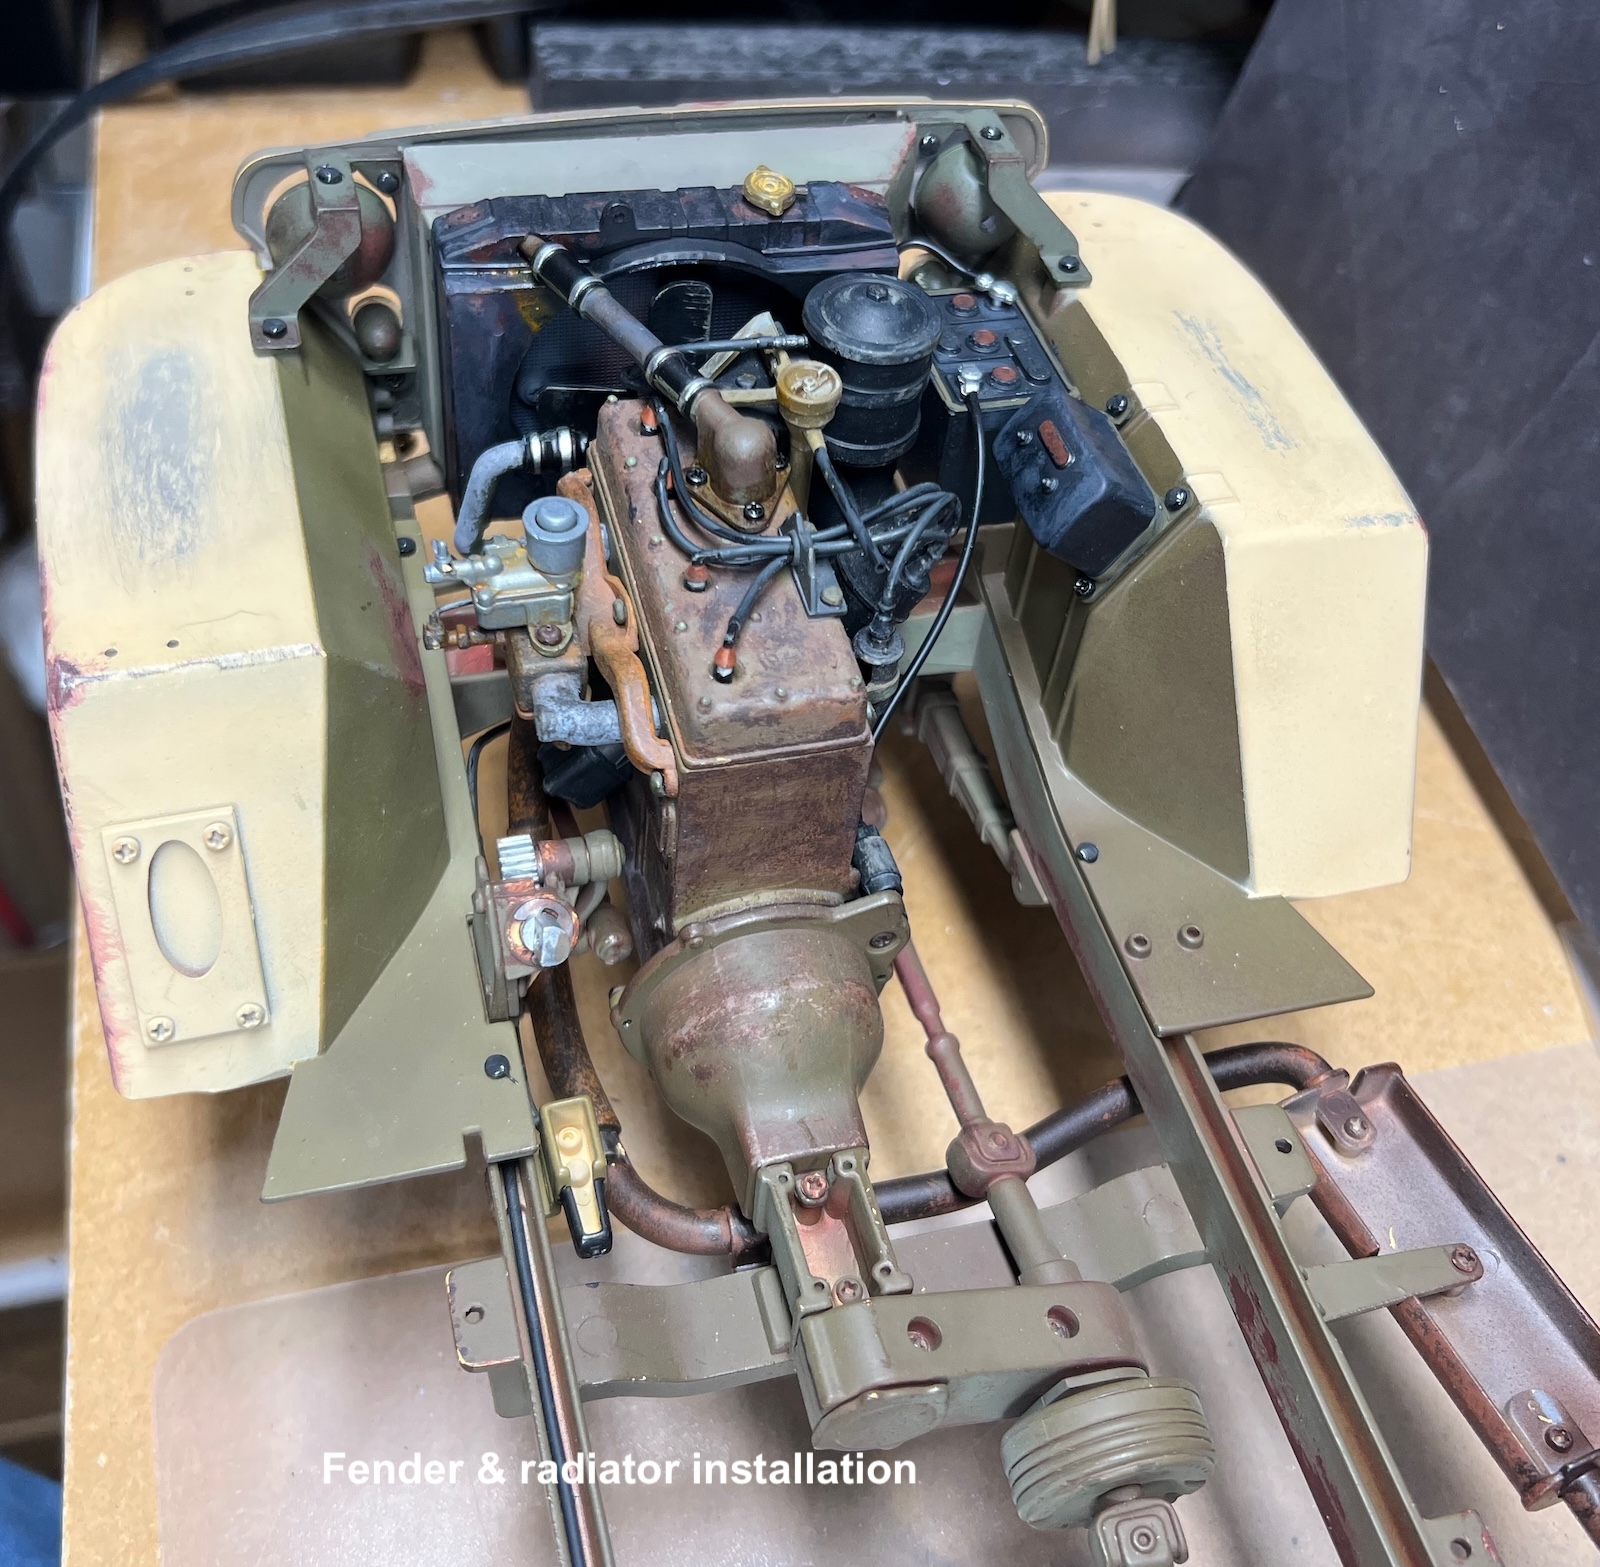
After the engine and chassis are completed, it’s time to move onto the body of the jeep, starting with the front fenders. The body is built up from several sections that fit together perfectly. The painted finish on the body is immaculate. I wanted to bend the fender to show some damage, but the metal was too thick. Scaling .08-inch thick fenders at 1:8 would be about 5/8-inch full size, so slightly over-scaled. I used a rotary tool to grind in some dents on the fenders.
The three-piece radiator attaches to the chassis without any fit issues. The engine and front grill are also attached in this stage. The grill fit tightly between the two fenders so I had to do some filing and loosen the fender screws to get it into place. Once placed, the screws fit perfectly, and the grill is solidly attached. Attaching the lower radiator hose, part 34C, was difficult, but with some readjustment of the water pump it does fit into place.
A theodolite is assembled in this stage but won’t be installed on the jeep until later. The theodolite is like the other small plastic parts, which are pre-painted. They do include some mold seams and sprue attachments that will need to be cleaned up and the paint touched up. The parts are painted a gray metallic color and pressed together tightly without the need for adhesive.
Pack 06 Control Levers, Bonnet Accessories, & Rear Wheels
Levers for the gear selector and transfer case are installed on the backside of the firewall with screws. The attachment allows the levers to move.
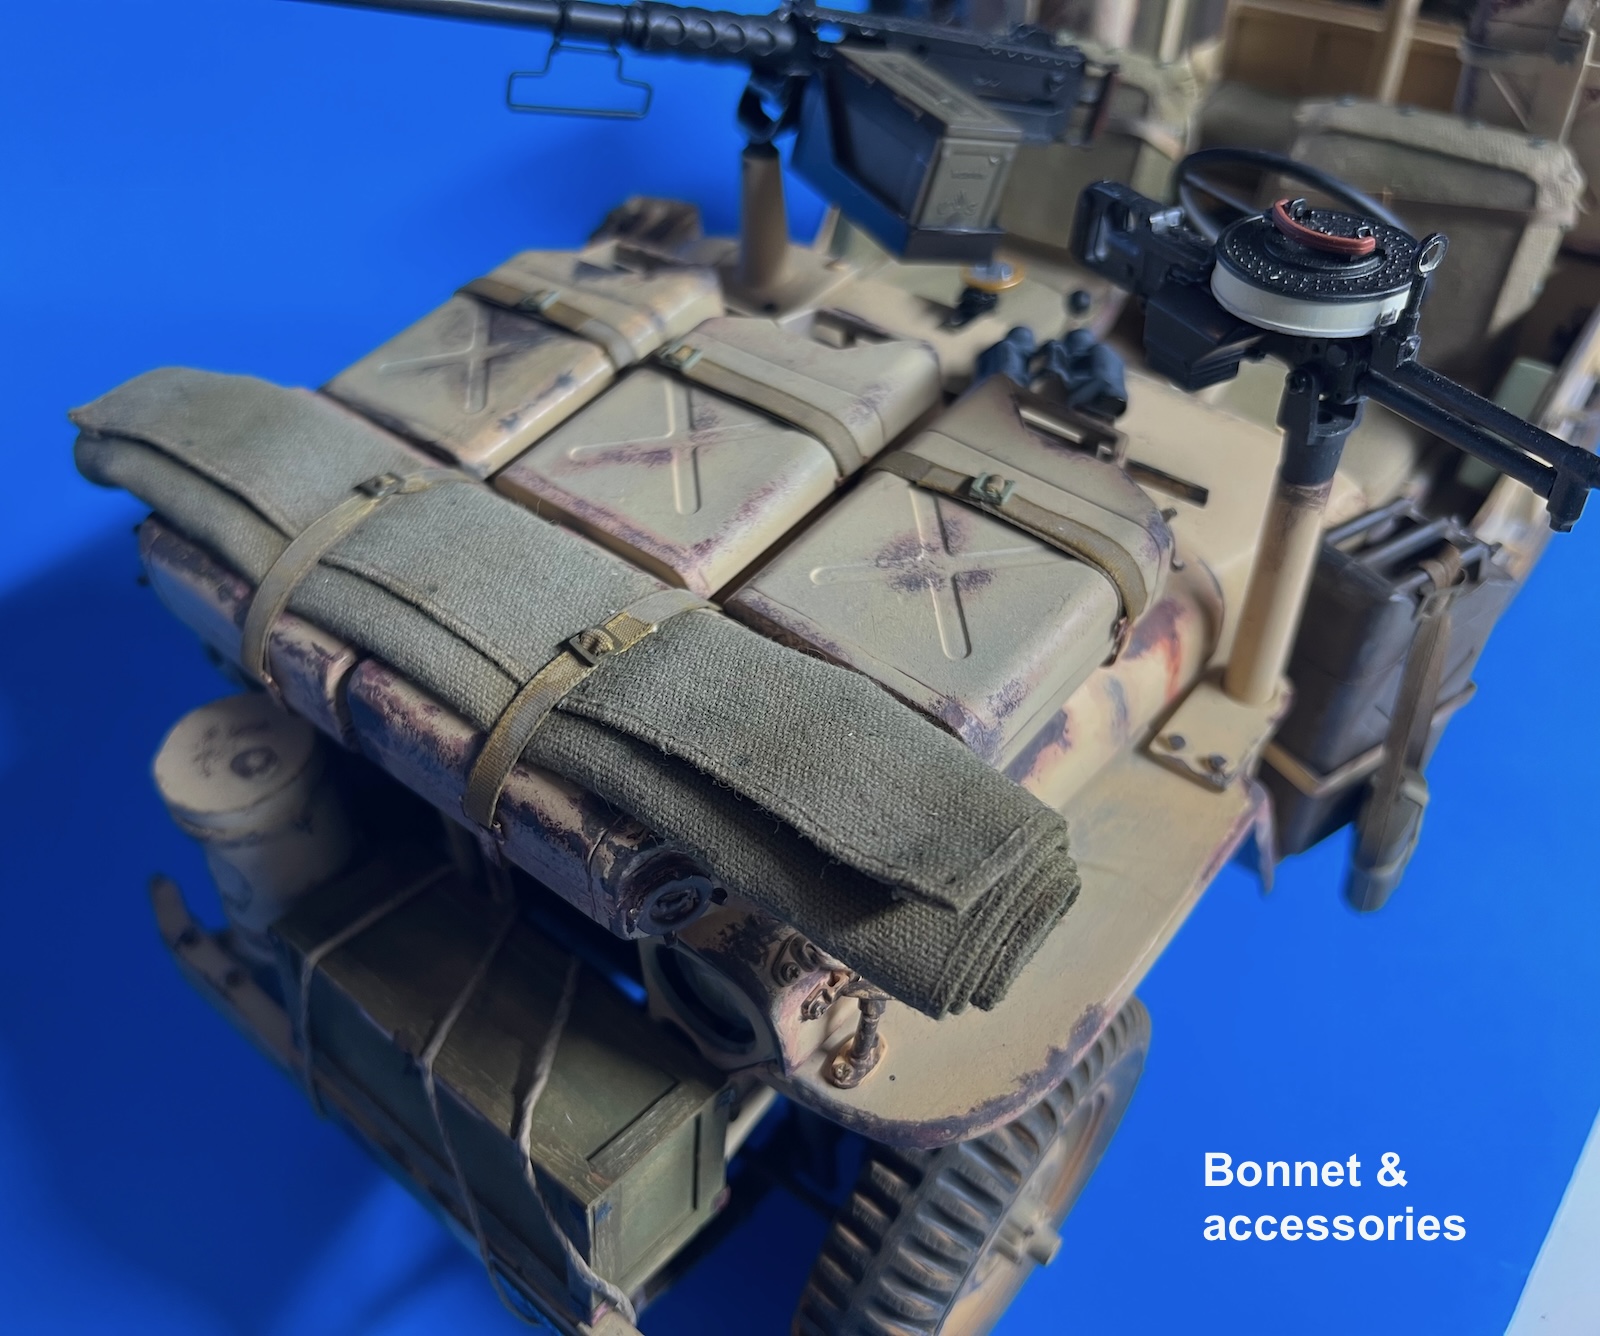
Jerry cans are installed on top of the bonnet using metal brackets and fabric straps. The fabric straps are a good representation of the straps on the actual jeeps. Attachment of the straps is with double stick tape, which would have been better with buckles. Buckles are provided on the canteen and knapsacks with the kit, so it would have been nice to have buckles provided for the jerry can straps also. I scrounged some buckles and added them to the straps. I weathered the straps with khaki and off-white paints to give them a more worn look.
Pack 07 Front Seats & Firewall
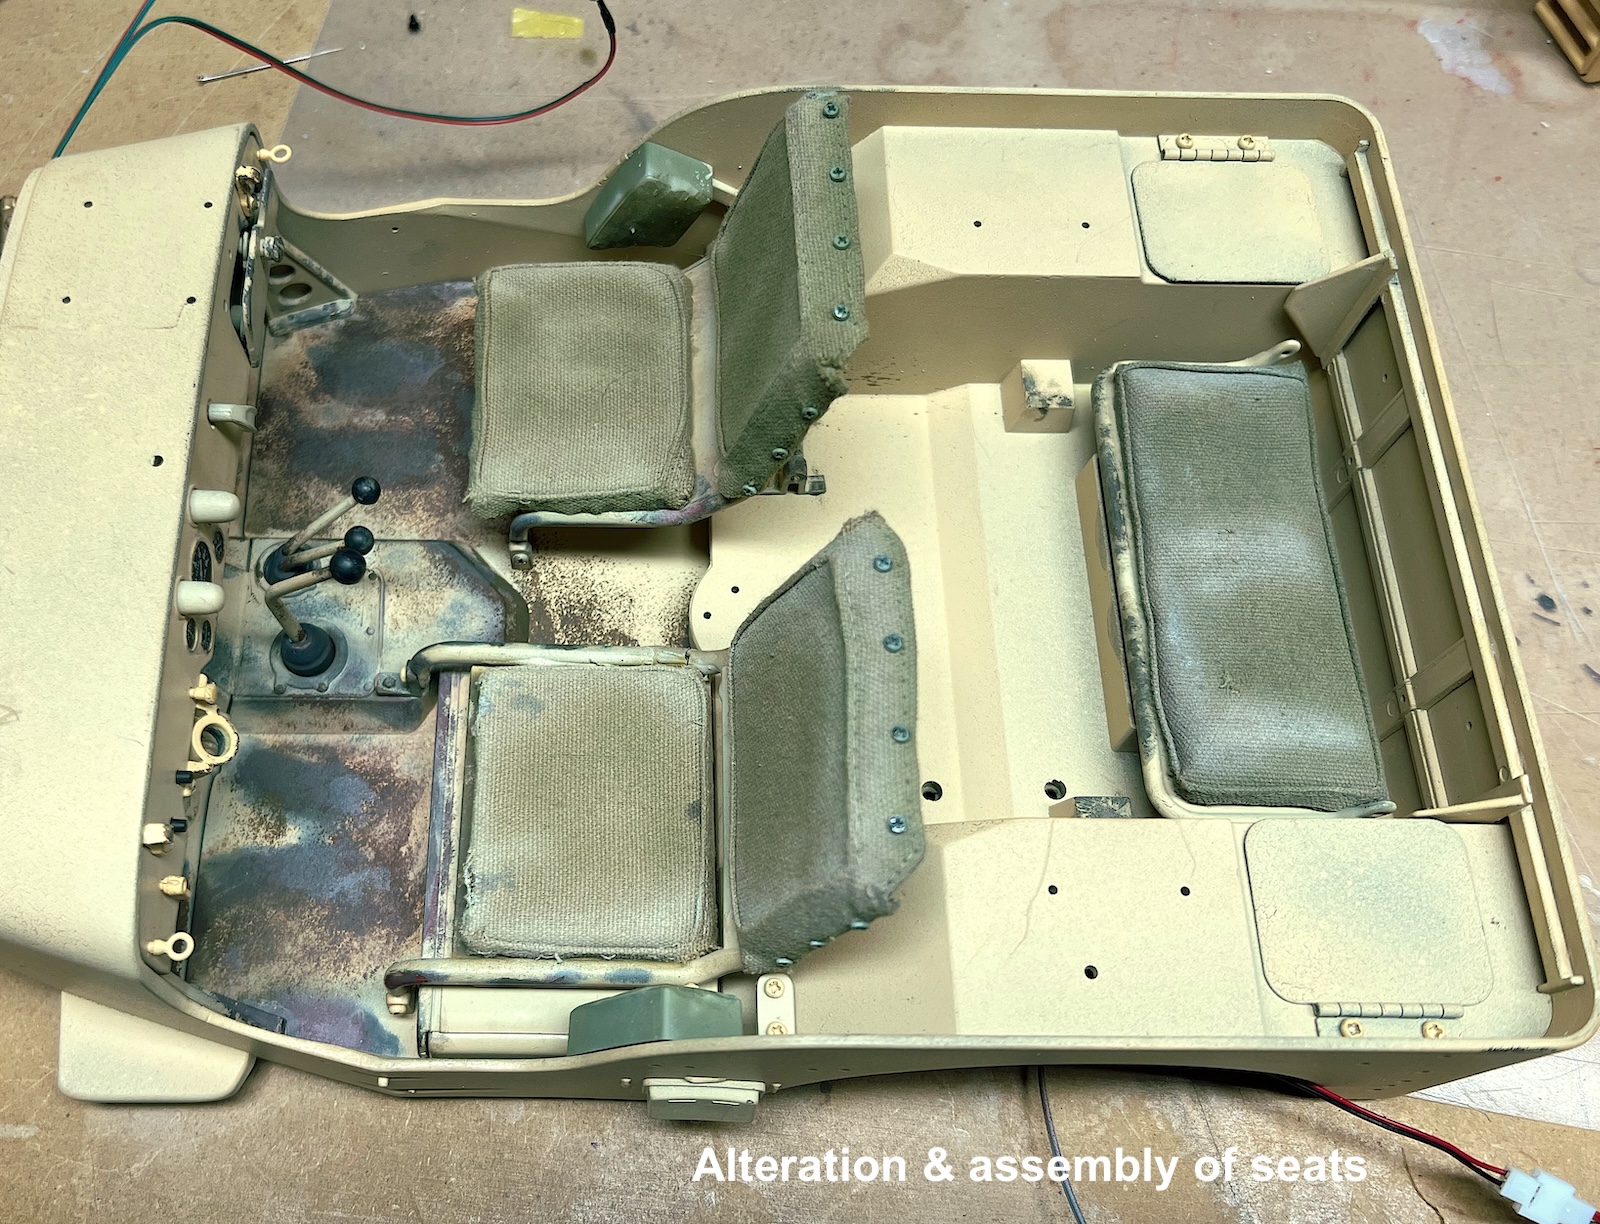
The driver’s seat backrest screws onto the floor of the jeep. The seat frame came bent and did not fit between the floor brackets. I clumsily tried to straighten the frame but broke it instead and had to epoxy the frame together. The fabric on the seats is glued to the backrest over foam insulation. To give the seats a more worn look I peeled back the fabric and removed the foam to give it a more sunken look. Superglue was used to pull down the loose ends of the fabric. I painted the seat fabric a darker, worn olive drab color with some desert sand highlights. The seats look fantastic when finished.
The interior starts to take shape as the firewall is attached to the floor of the Jeep. The reference vehicle I am using shows considerable wear on the interior of the Jeep. I repainted the firewall and floor in several layers to allow chipping.
Pack 08 Pedals, Vickers Machine Gun, Dashboard
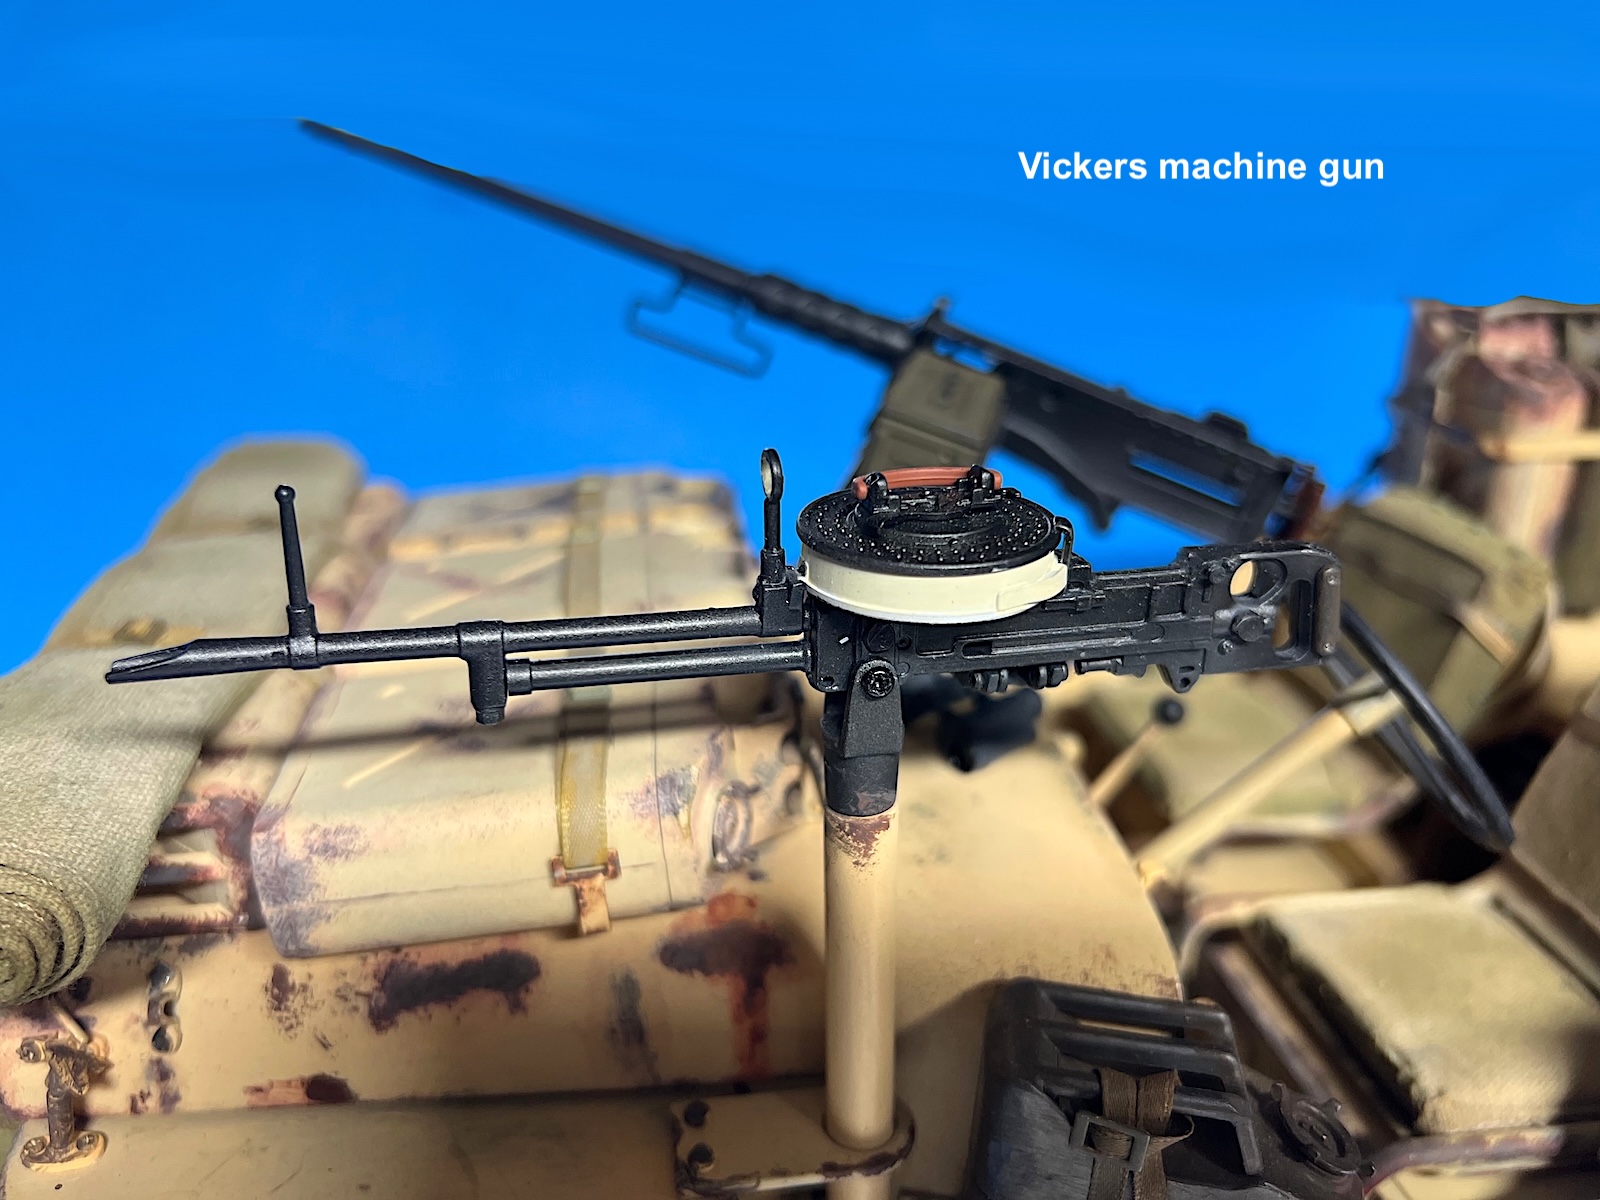
The driver’s pedals are installed to allow movement. The first Vickers machine gun is assembled, built of metal and pre-painted gunmetal gray. The body of the gun comes in two halves screwed together. This leaves a rough joining seam which I epoxied and ground smooth. Detail on the Vickers is nice and gives it a realistic look.
The first of several cartridge pans for the Vickers machine guns are built in this stage. A sprue of plastic bullets is included to be installed in the cartridge pan. They will only be visible if the top of the pan is removed. I painted the bullets with a brass casing and a copper bullet.
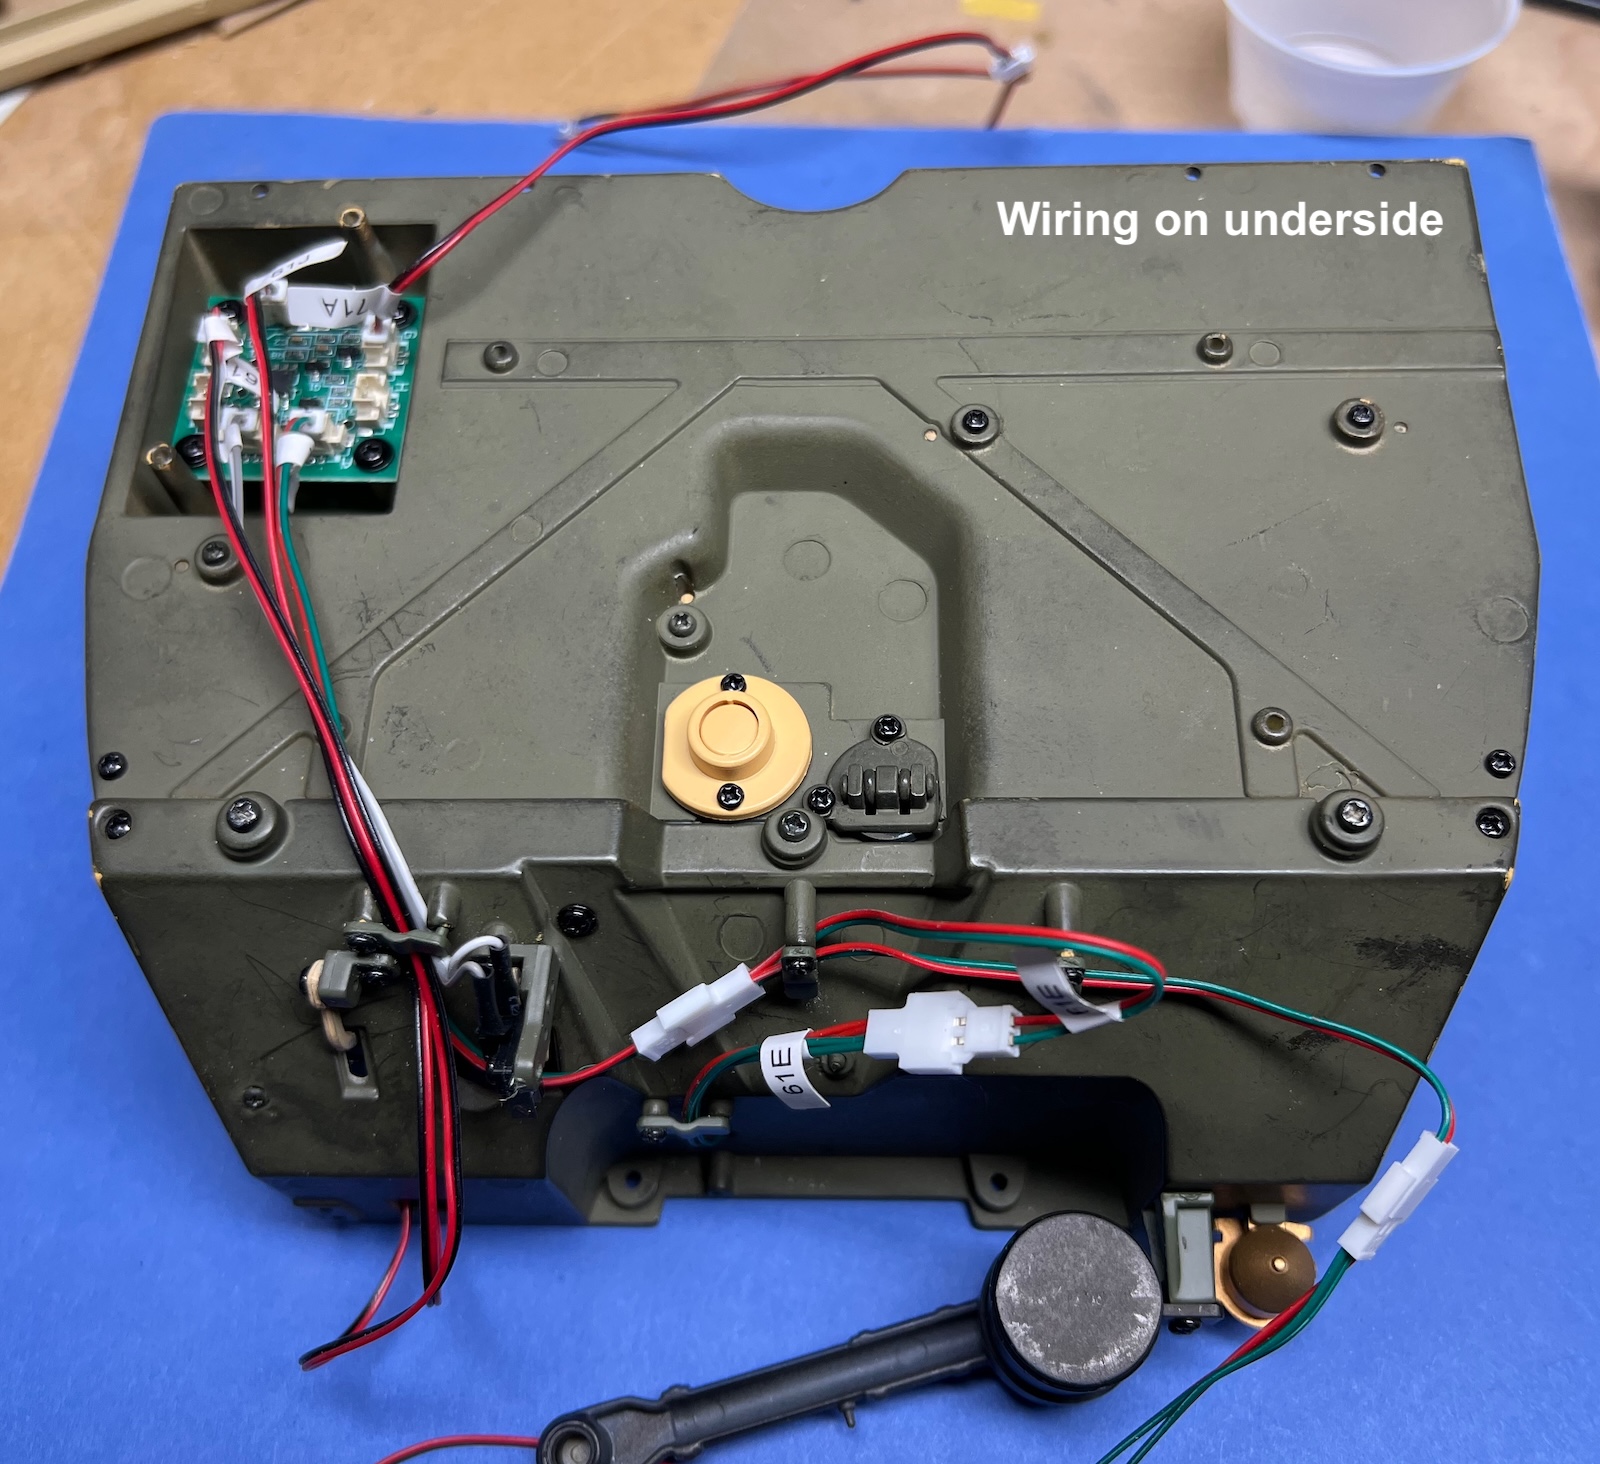
Decals for the dashboard instruments come preinstalled and look very nice. The door for the glove compartment is hinged and has a latch to keep it closed. Agora includes several lighting elements that are controlled by switches on the dashboard. A battery compartment is hidden under the rear seat and is accessible from the underside of the Jeep. The dashboard is then installed on the interior of the firewall.
Pack 09 Body Wiring, Vickers Magazine, Rear Seat
This pack starts with installation of the right and left toolboxes, including hinged covers. Footrests for the rear passengers are installed, and the support frame for the rear of the body is screwed into place. My frame piece was warped but easily fixed by supergluing the ends of the frame to the body panel.
A .50 caliber ammunition belt is built using a plastic form for the bullets and two pieces of tape. The belt is not installed at this point, but it is for future use. It would be possible to load the belt into an open ammo can and fed into the machine gun if desired.
The rear passenger seat fits over the battery compartment. Like the front seats, the rear seat fabric is installed over thin foam insulation. I cut out parts of the insulation to allow the fabric to sag for a realistic used appearance. Crash pads for the front seats are molded in plastic. The real pads had canvas covering like the seats. I shaped the pads to show some wear and painted them the same color as the fabric seats.
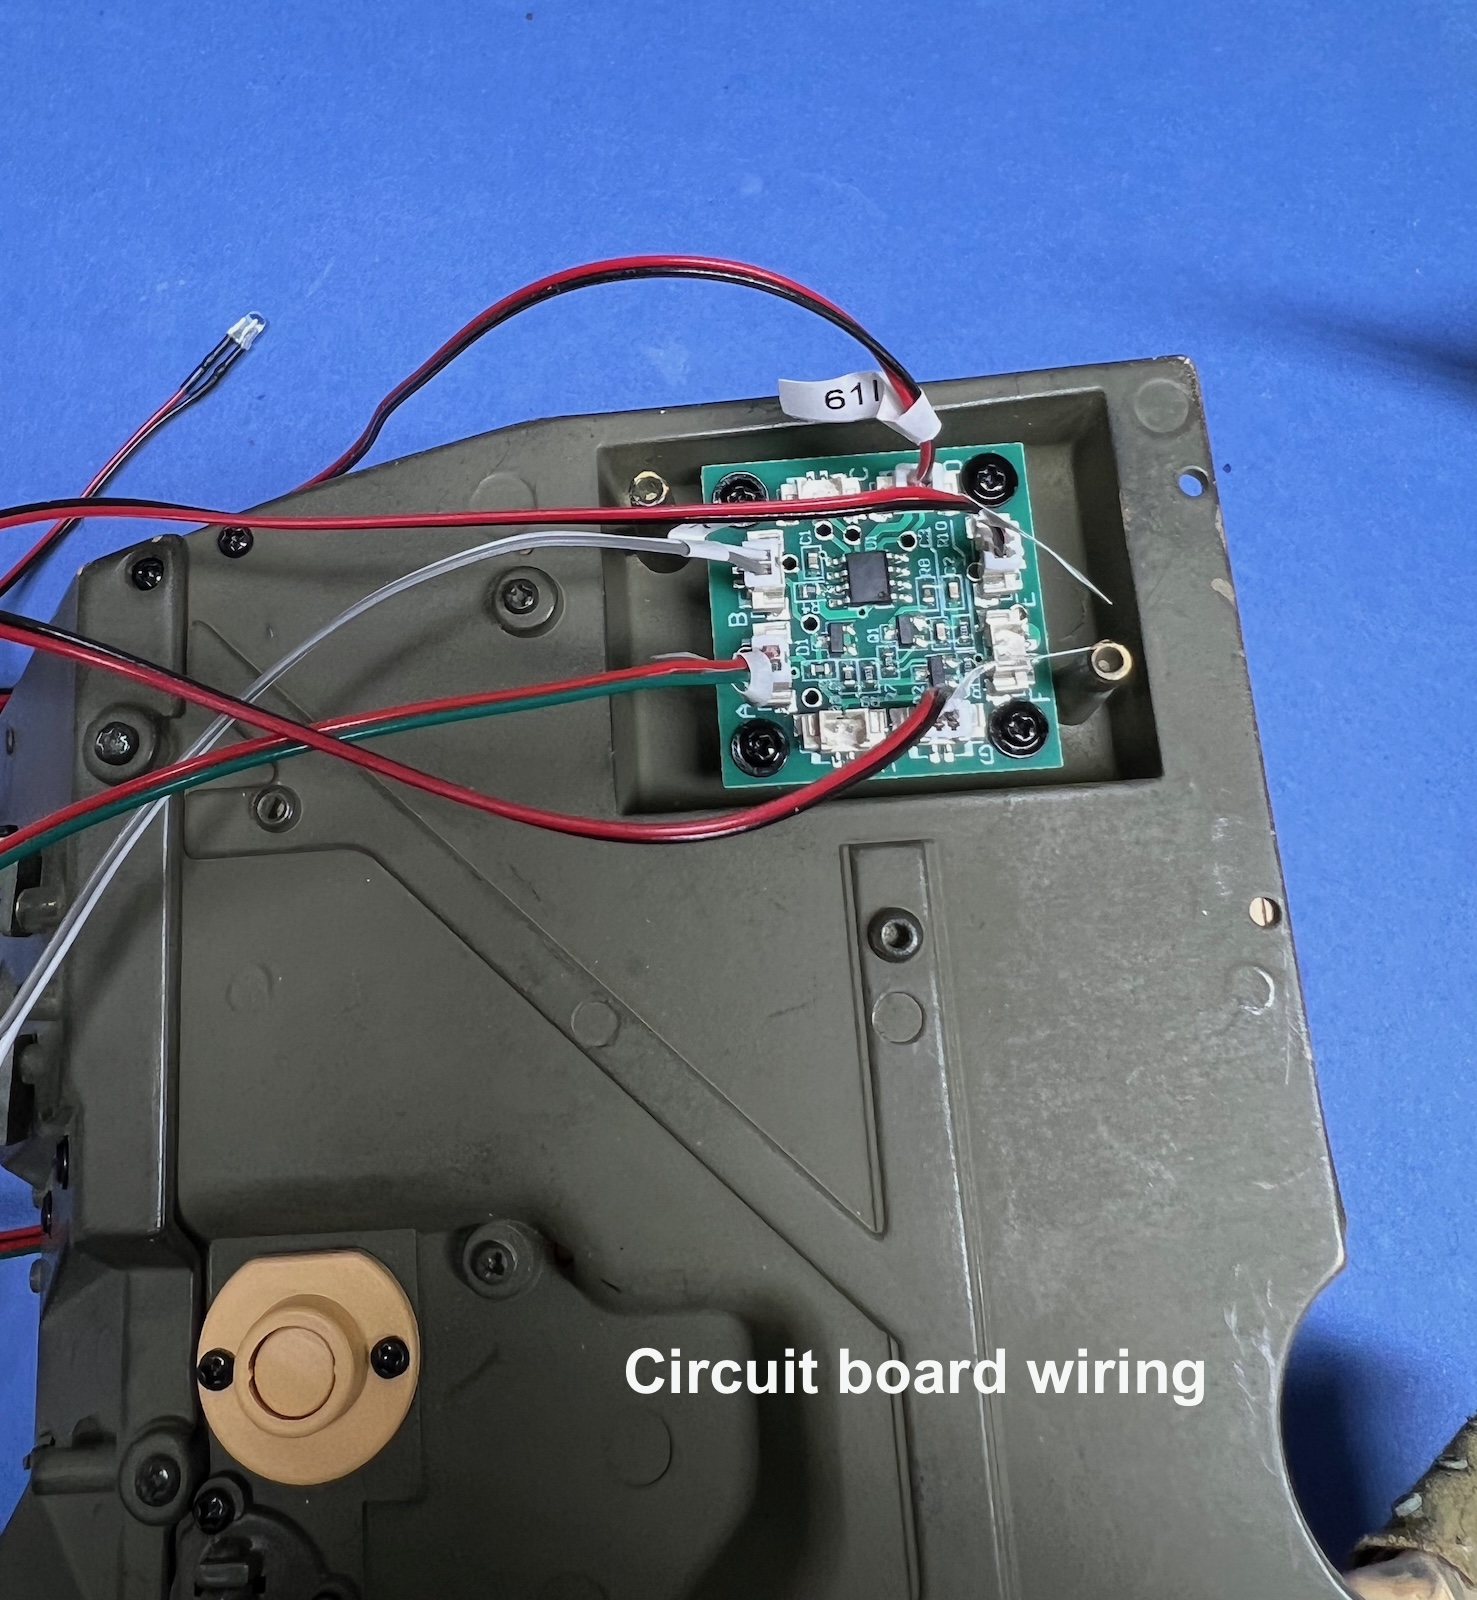
A circuit board and wiring are added to the bottom of the Jeep for control of the lights and horn sound of the Jeep. Switches on the dashboard are wired to honk the horn and turn on the headlights and taillights. The cockpit interior is then screwed to the underside of the body.
Pack 10 Bonnet, Cockpit
The hood is installed to the body with a continuous hinge, forming a strong connection. The cockpit assembly is screwed to the chassis. Be careful not to pinch any of the wires between the metal parts as they are tightened. The steering column also needs to be connected to the steering box. The steering connection is loose but will work if the wheels are turned at the same time as the steering wheel.
Grab handles, lights, and reflectors are installed around the rear of the vehicle, all with perfect fit.
The plastic water condenser is assembled and attached to the front grill. Most of the photos of actual SAS jeeps I’ve seen show dents in the condenser. I cut out a piece of the condenser and reversed it, creating a recessed dent.
Pack 11 Spare Wheels, Browning Machine Gun
This pack assembles and installs many of the SAS Jeep accessories:
- Plastic flare gun and vinyl holster
- Binoculars
- Two spare wheels and tires installed on brackets
- Assembling and installing Vickers machine guns for the driver and twin guns on the rear
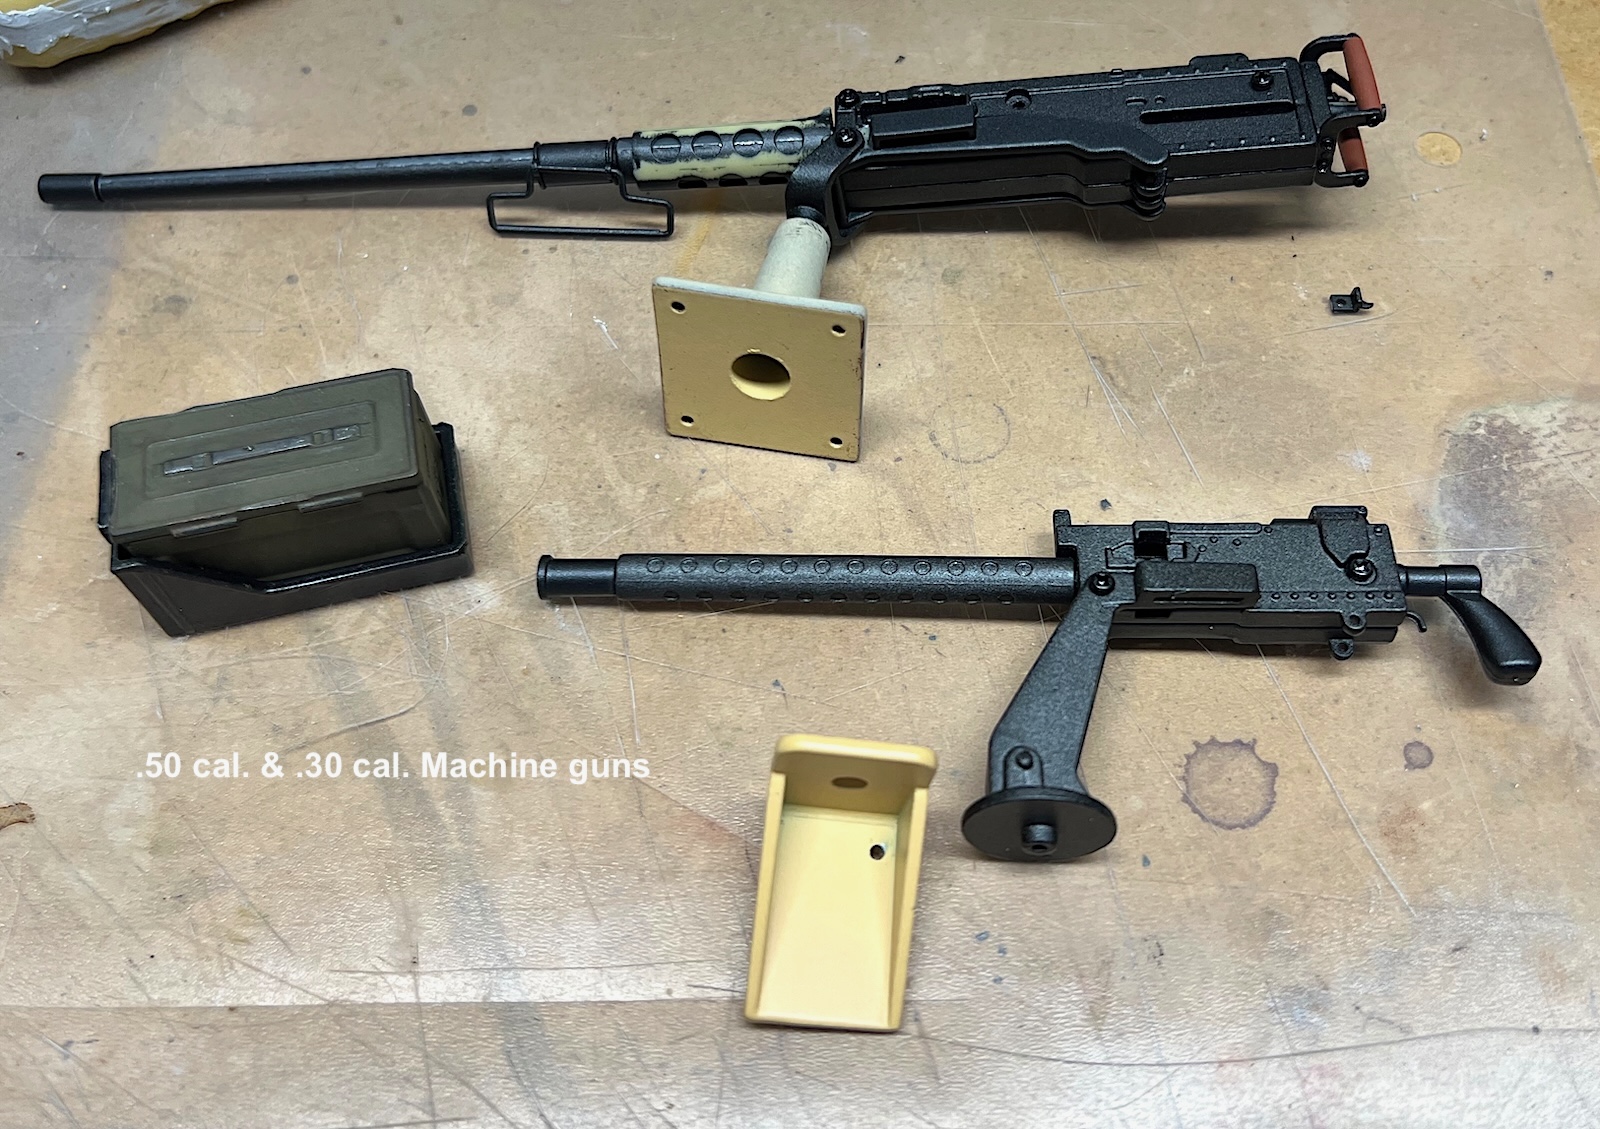
The metal .50 cal. machine gun is built up and installed at the passenger’s seat. Like the other machine guns, the top seam between the halves of the gun were filled with epoxy and ground smooth. The .50 cal. is nicely detailed, and the metal body has a nice heft to it. An ammo can with bullets is provided for the .50 cal. gun. All the guns mount solidly to support posts with screws.
Pack 12 (the final one!) Wheel Sand Channels, Accessories, .30 cal. Machine Gun
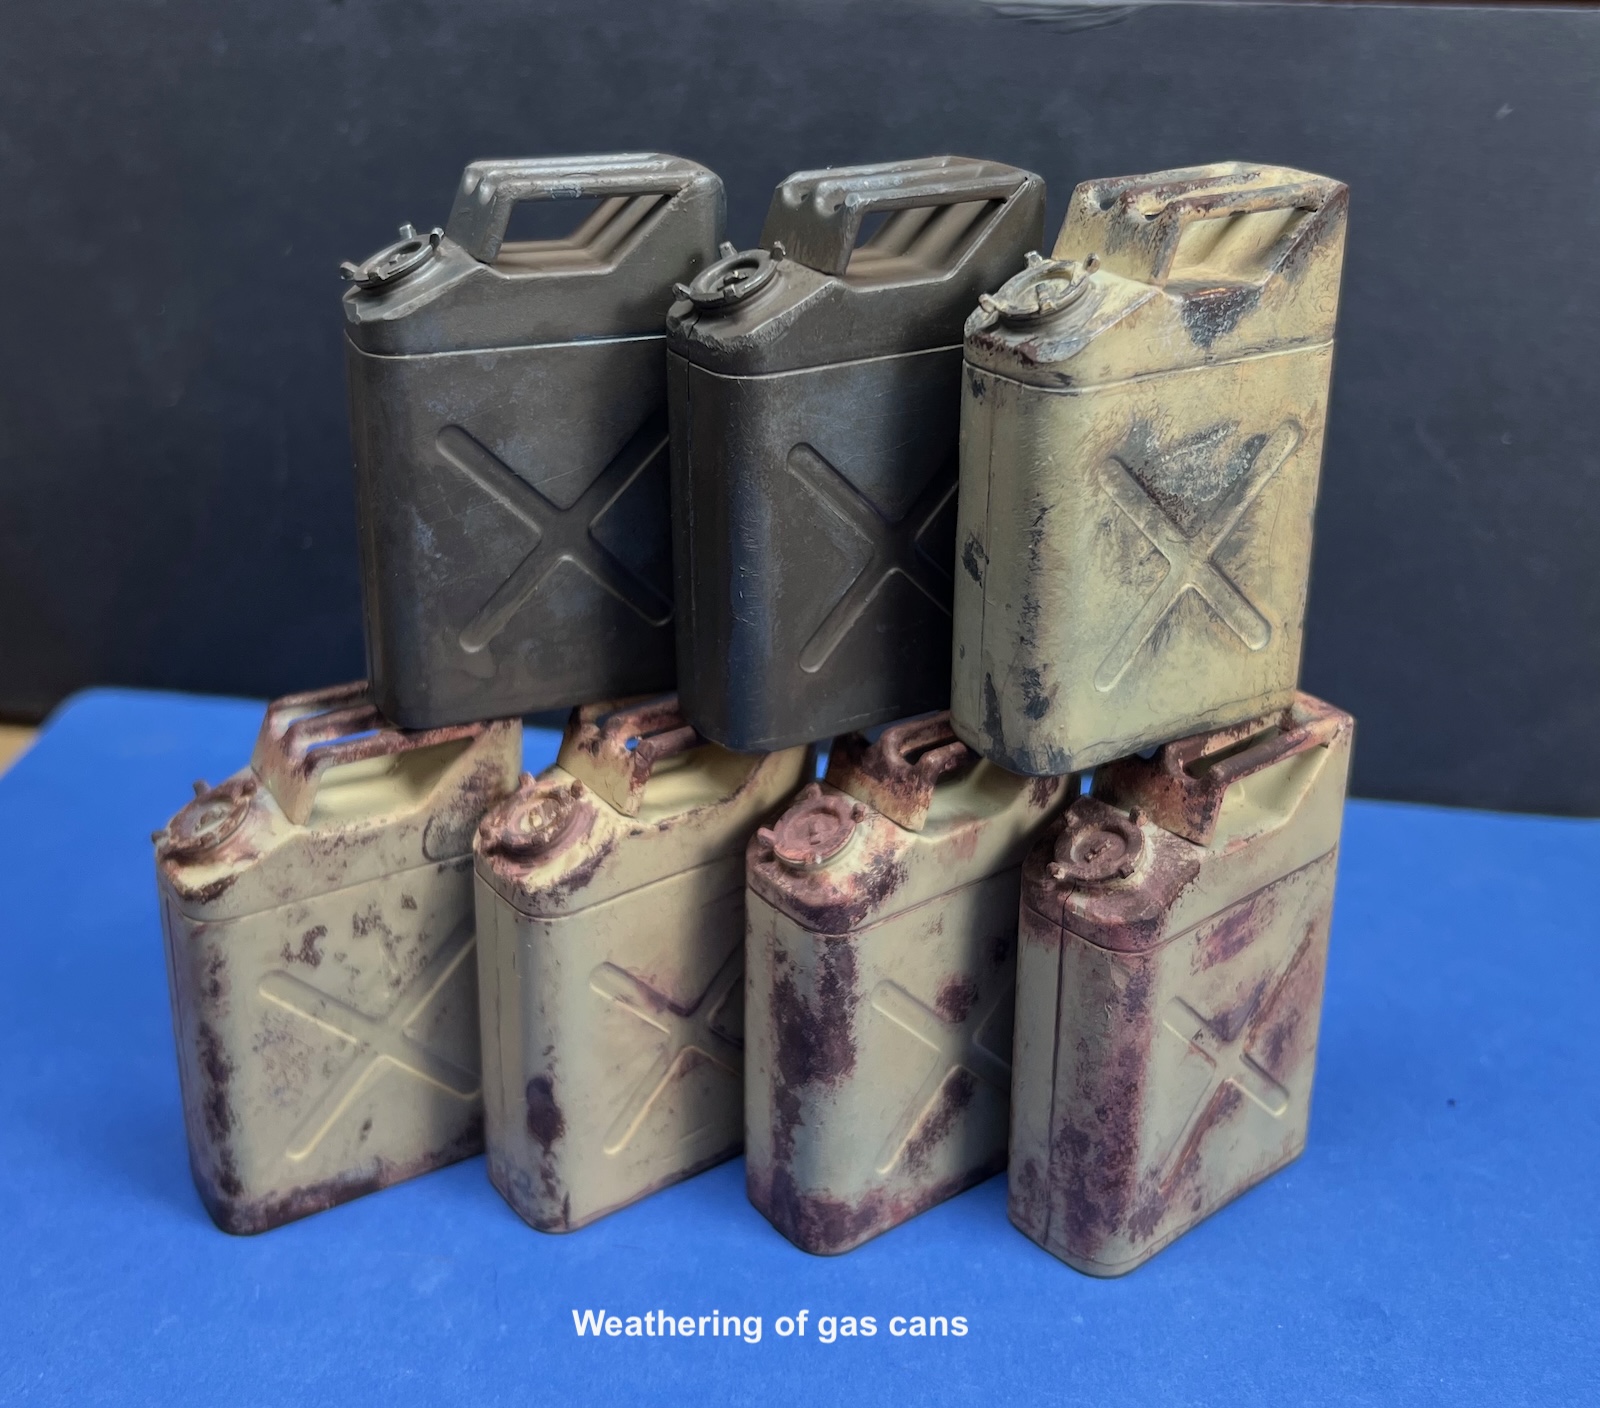
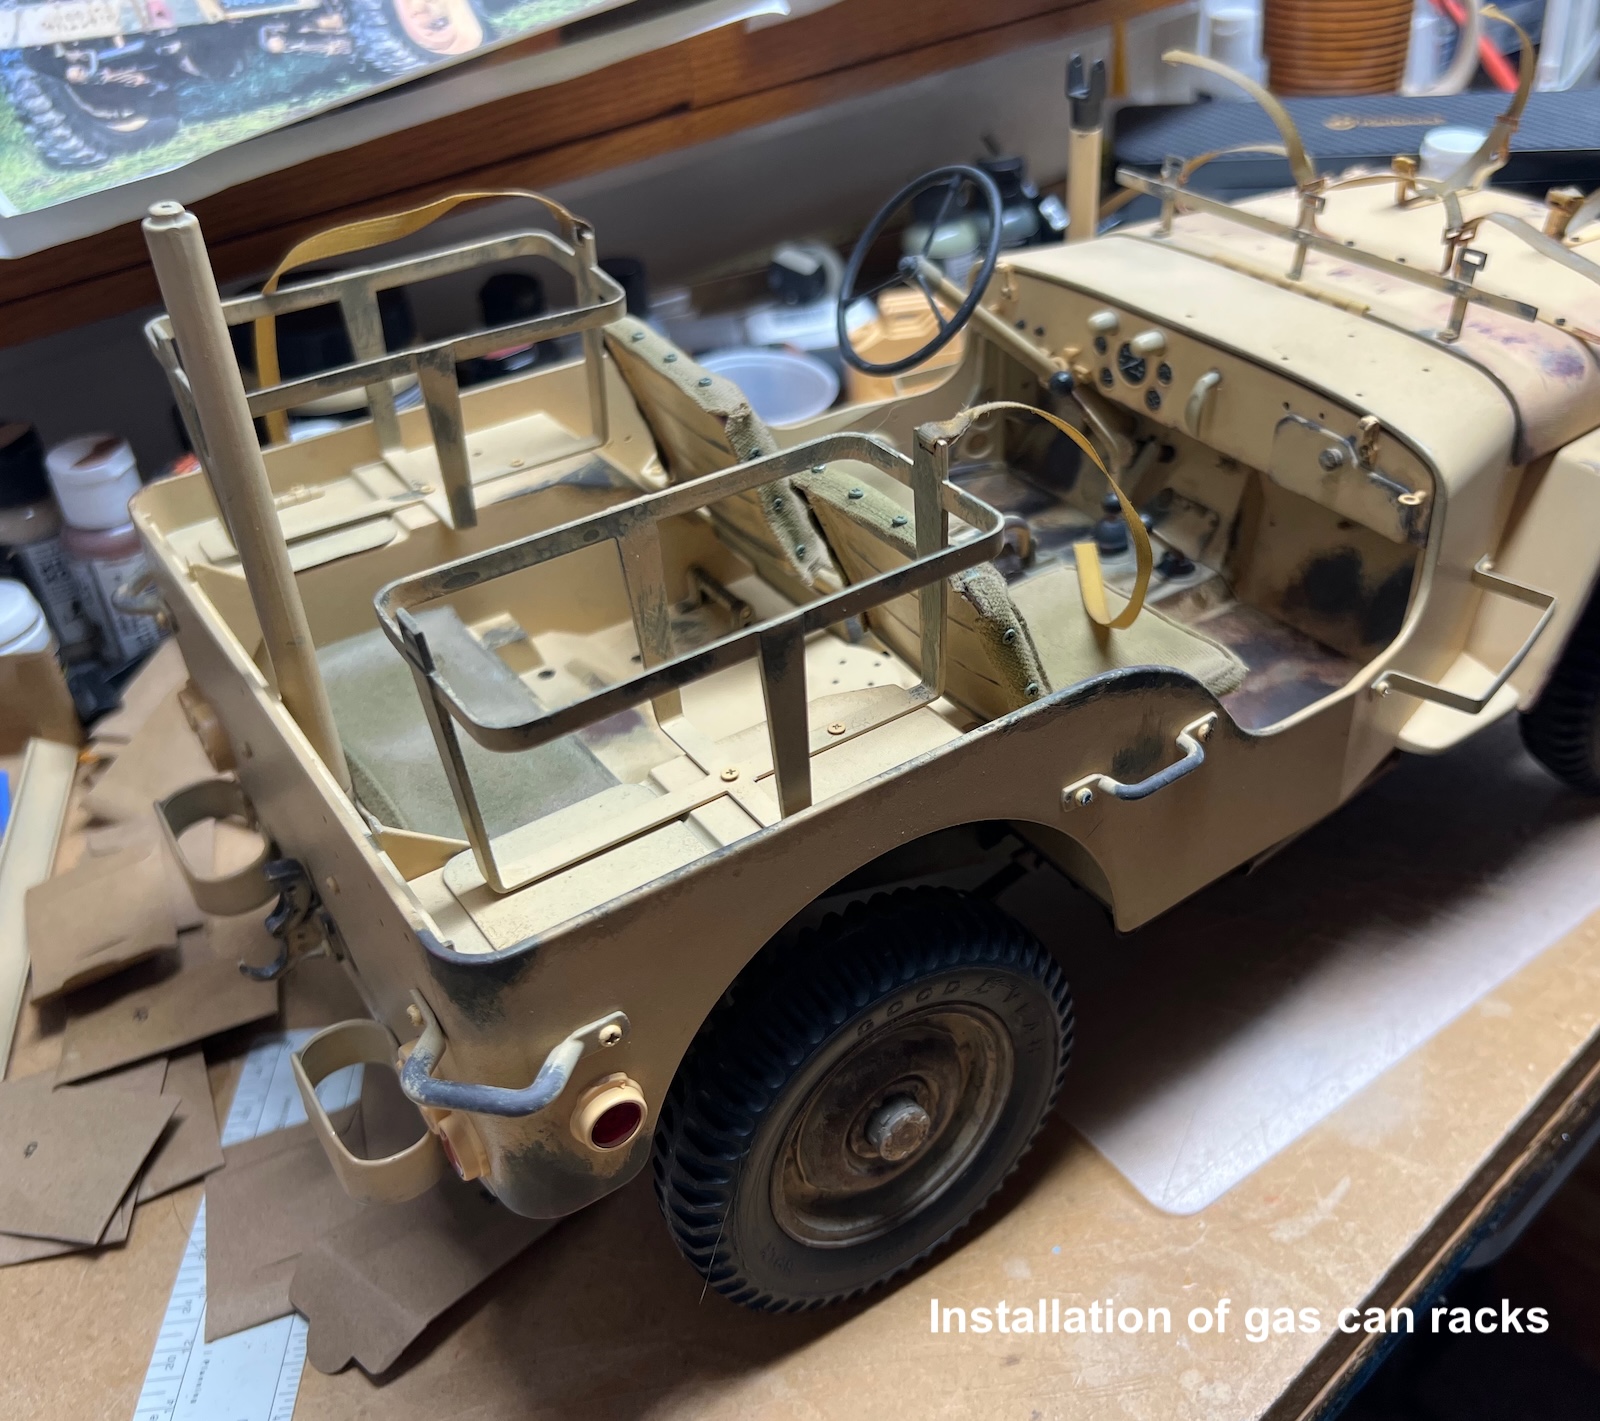
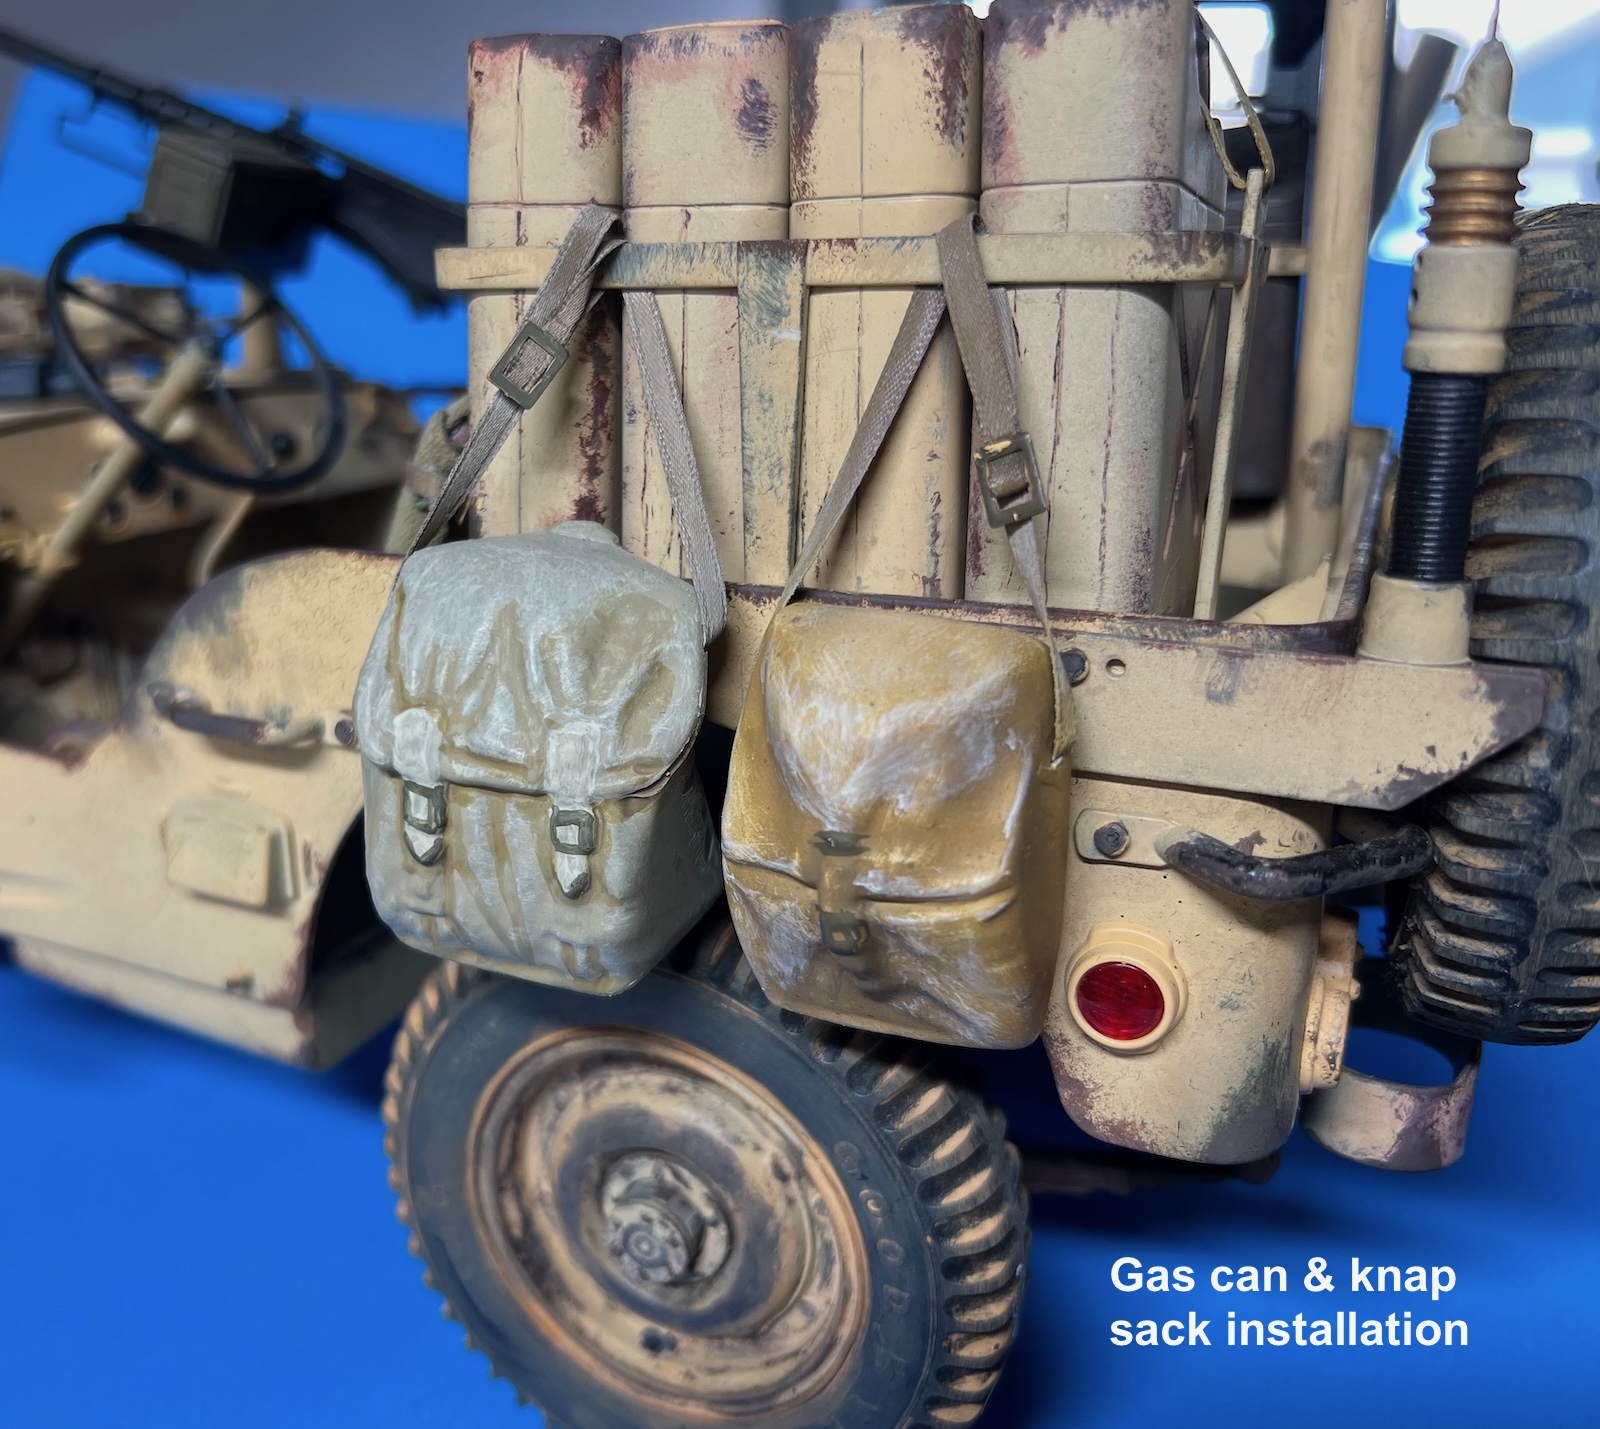
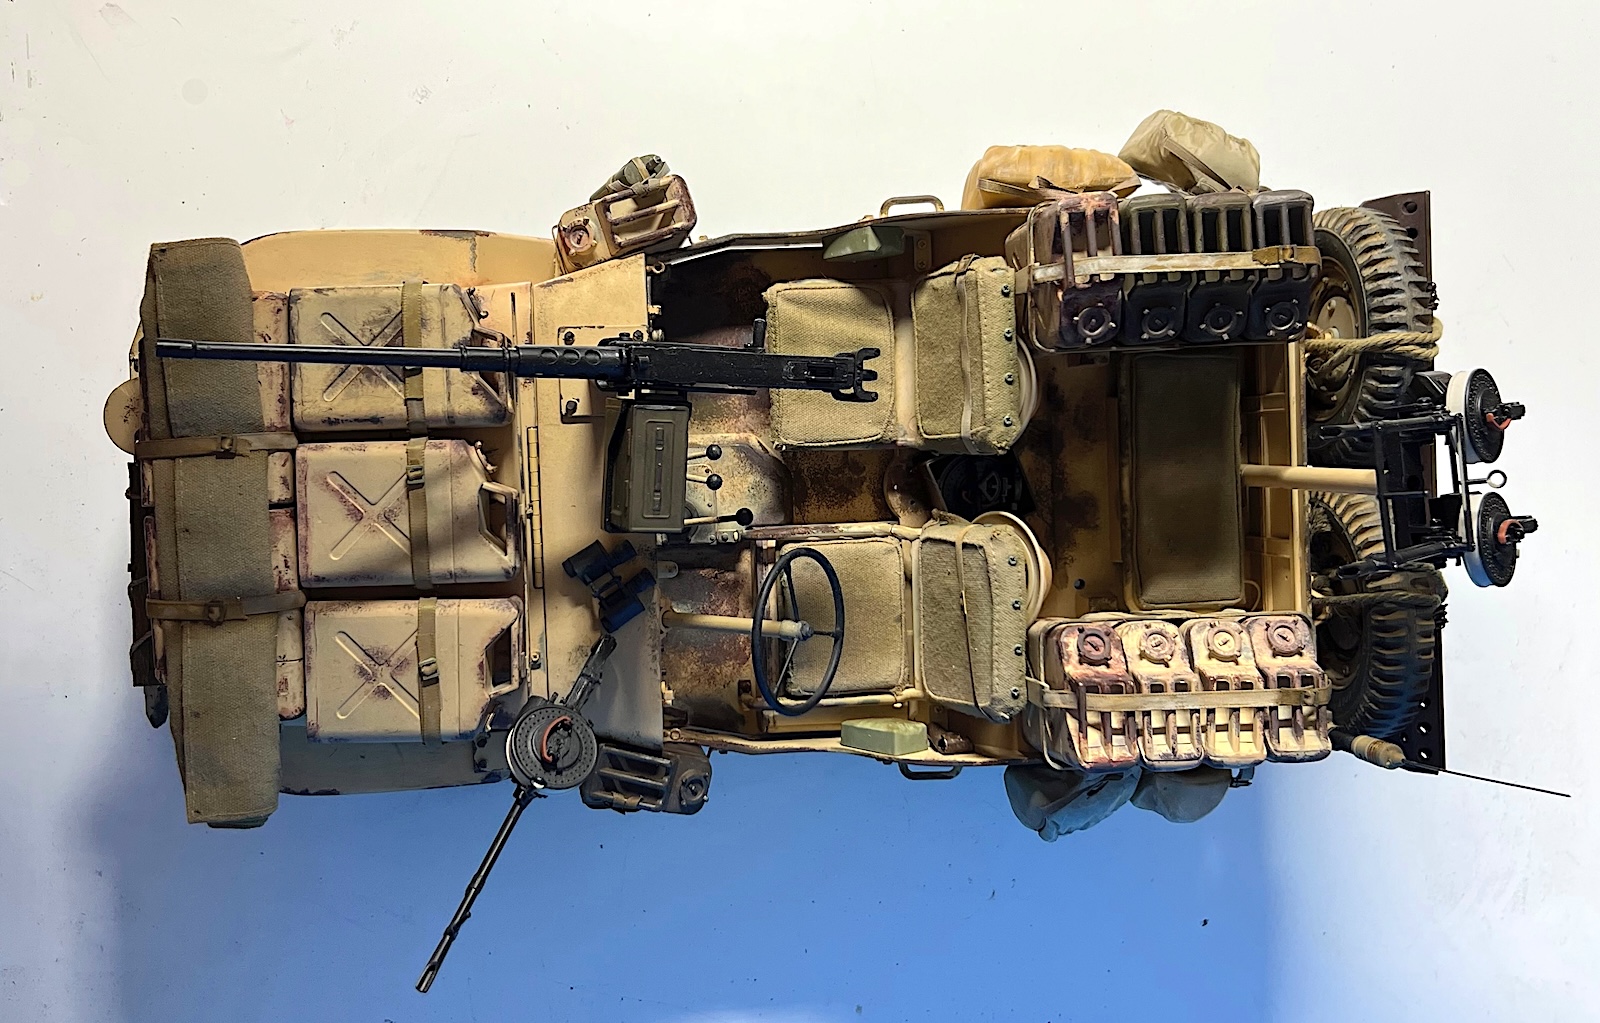
Many of the jerry cans are added to the storage racks with fabric straps. I scrounged some buckles to use in addition to the double-stick tape Agora provides for fastening the straps.
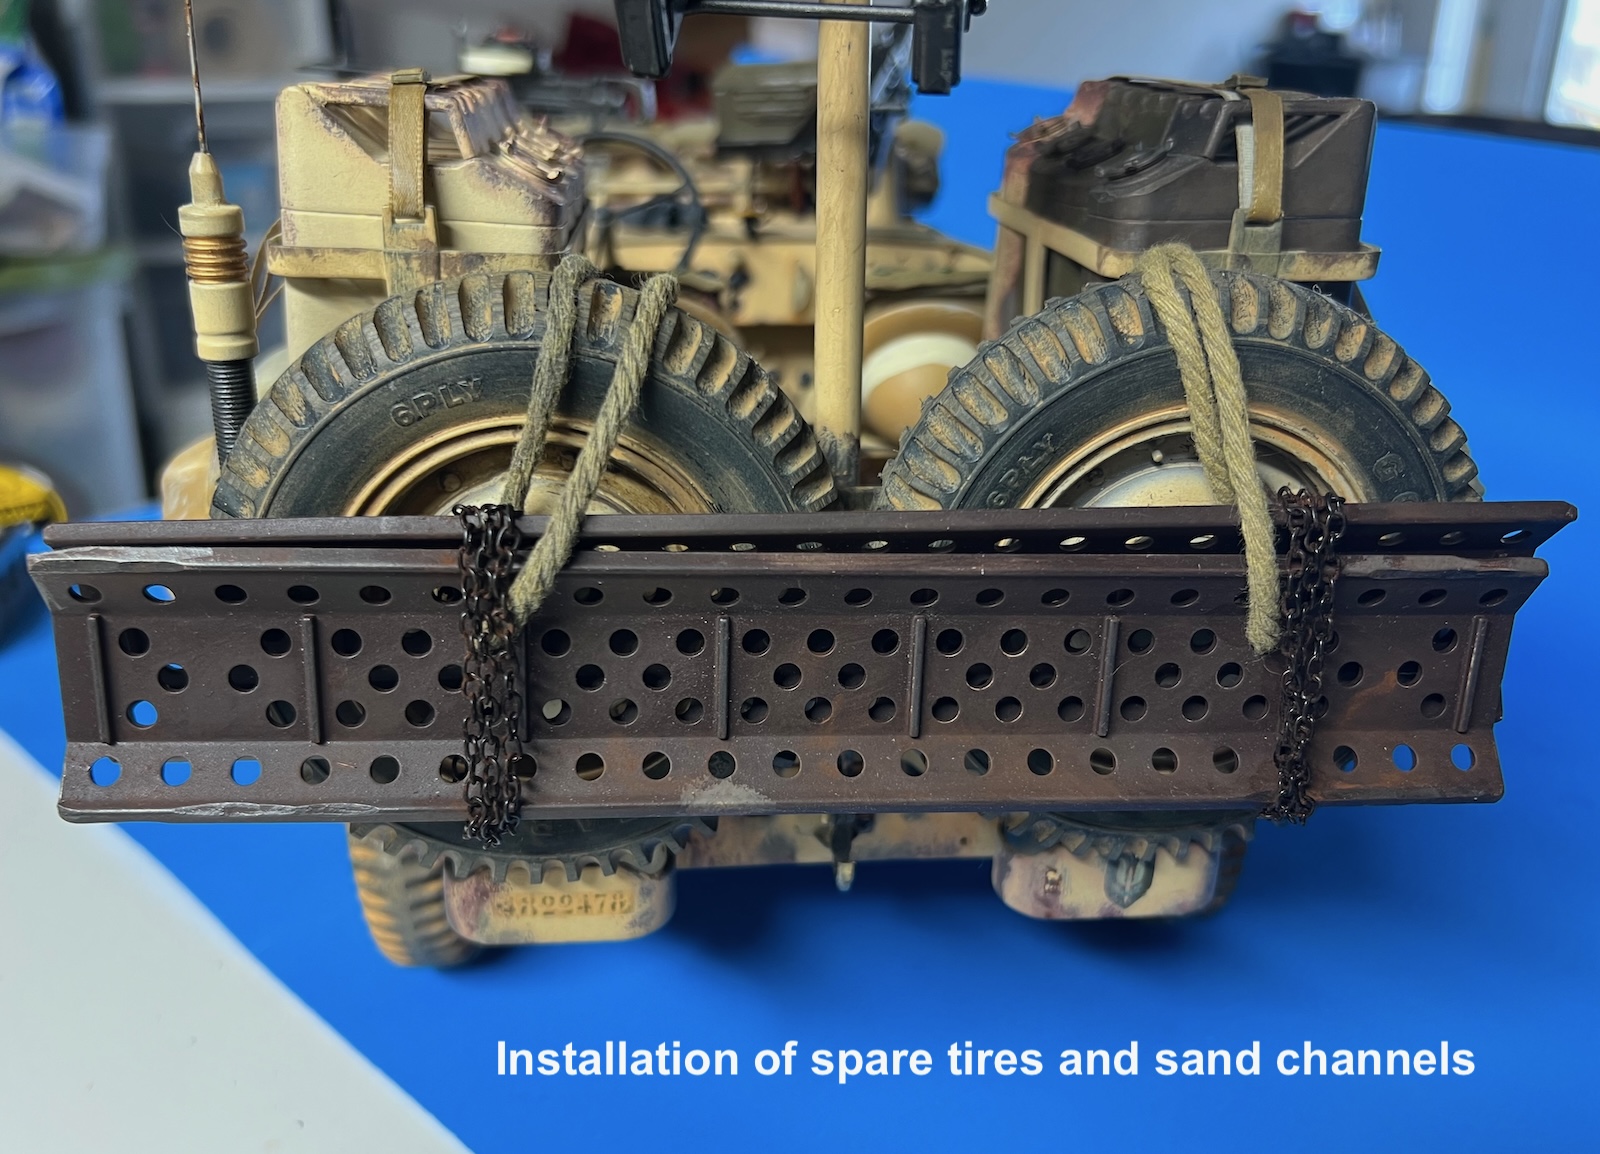
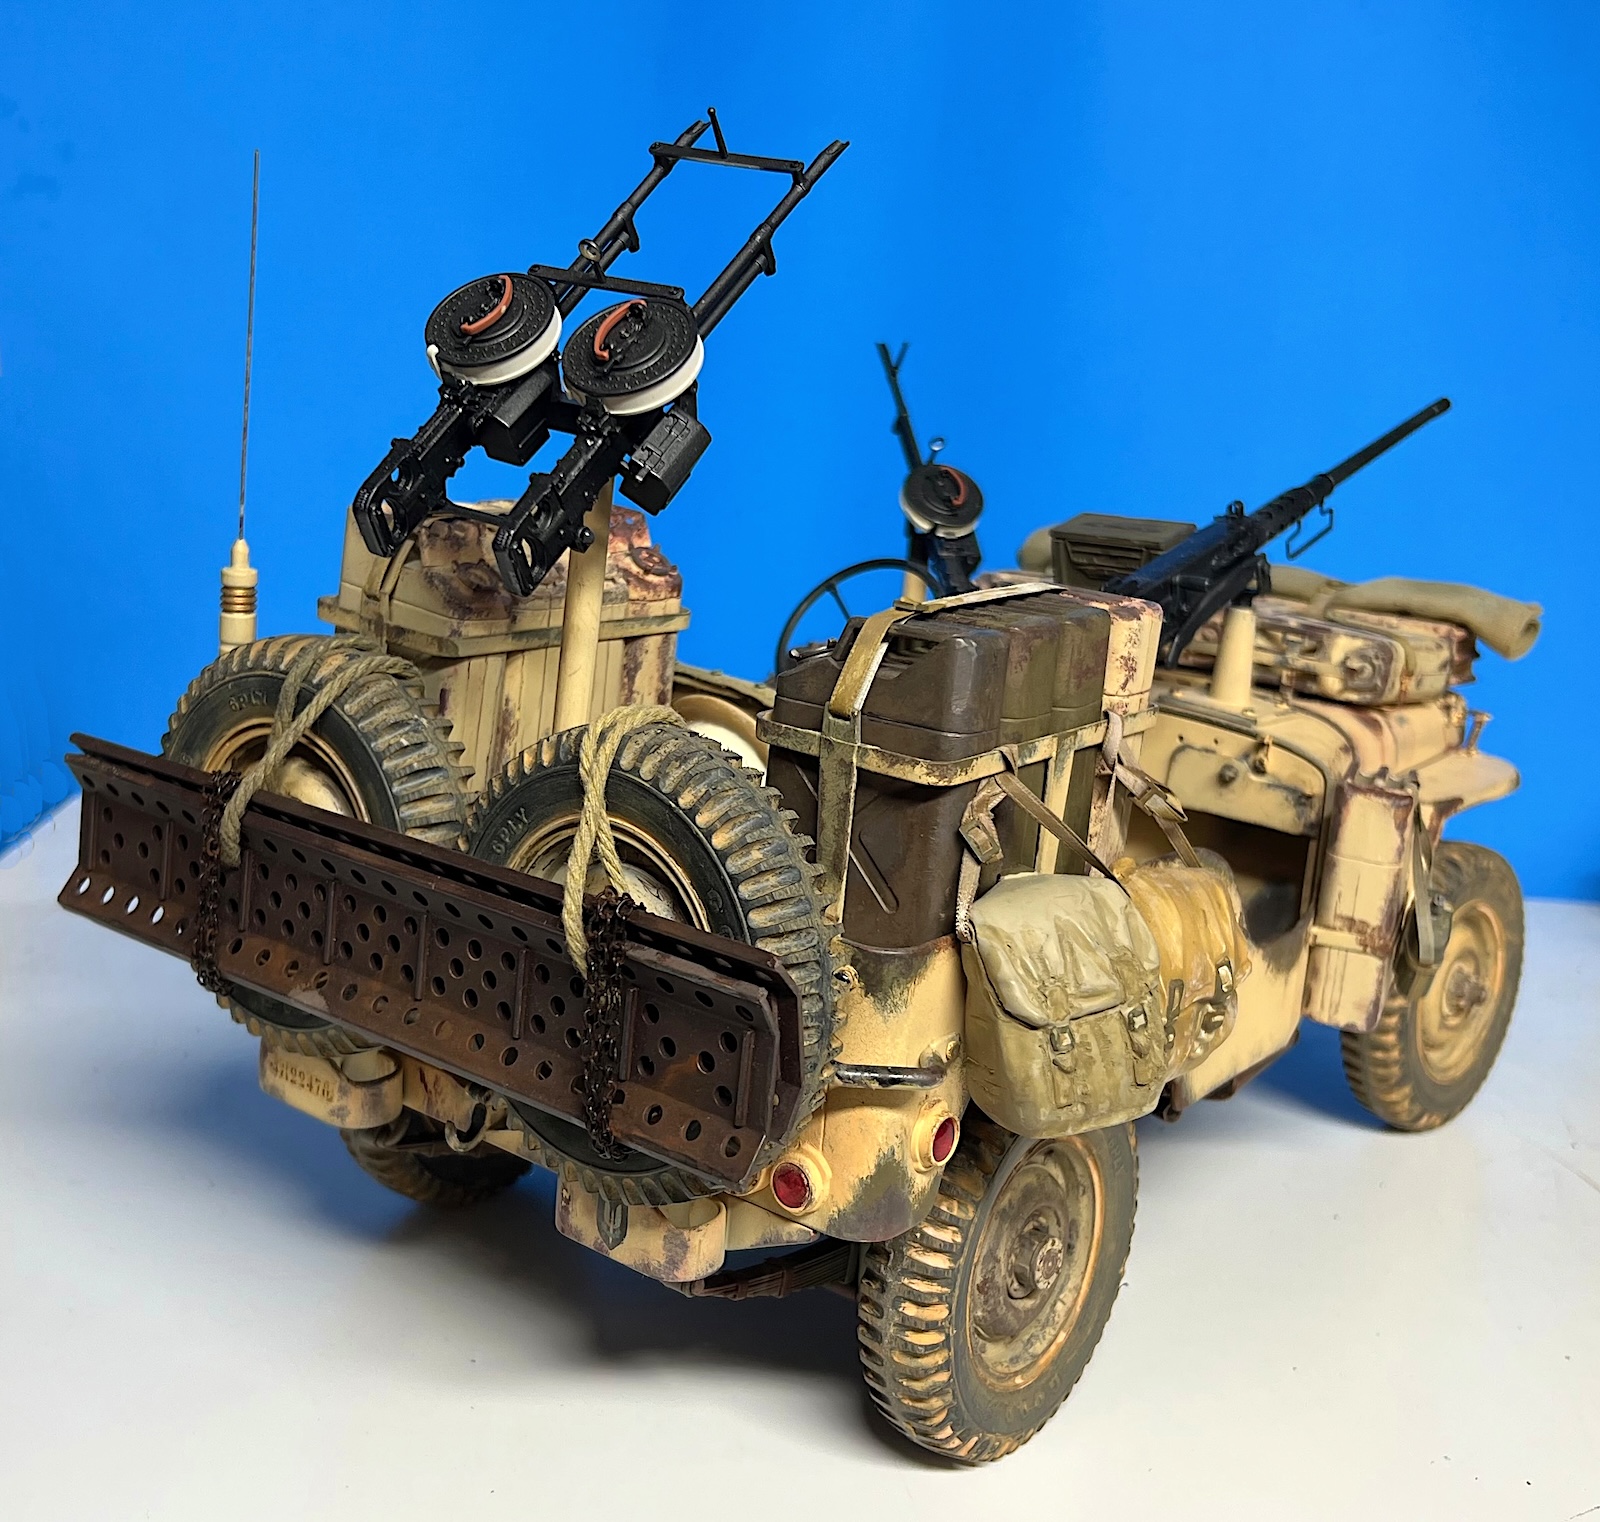
Plastic is used to represent the metal sand channels used by the SAS. Making them of metal would provide a nice weight but might be too thick compared to the plastic ones. I painted them in a rusty metal color. String used for rope and a small chain are used to attach the channels to the back of the spare tires.
A plastic box is provided for the Vickers wood ammo canisters but it lacks any detail. I painted the box to resemble wood and left the top open, exposing the canisters for detail.
Pith helmets and canvas bags are included with fabric straps. The bags are very softly molded with little detail. I painted the fabric straps to give them a worn look.
A .30 cal. M1919 machine gun is provided as an option to the .50 cal., but I decided to stay with the bigger Browning gun.
Weathering the SAS Jeep
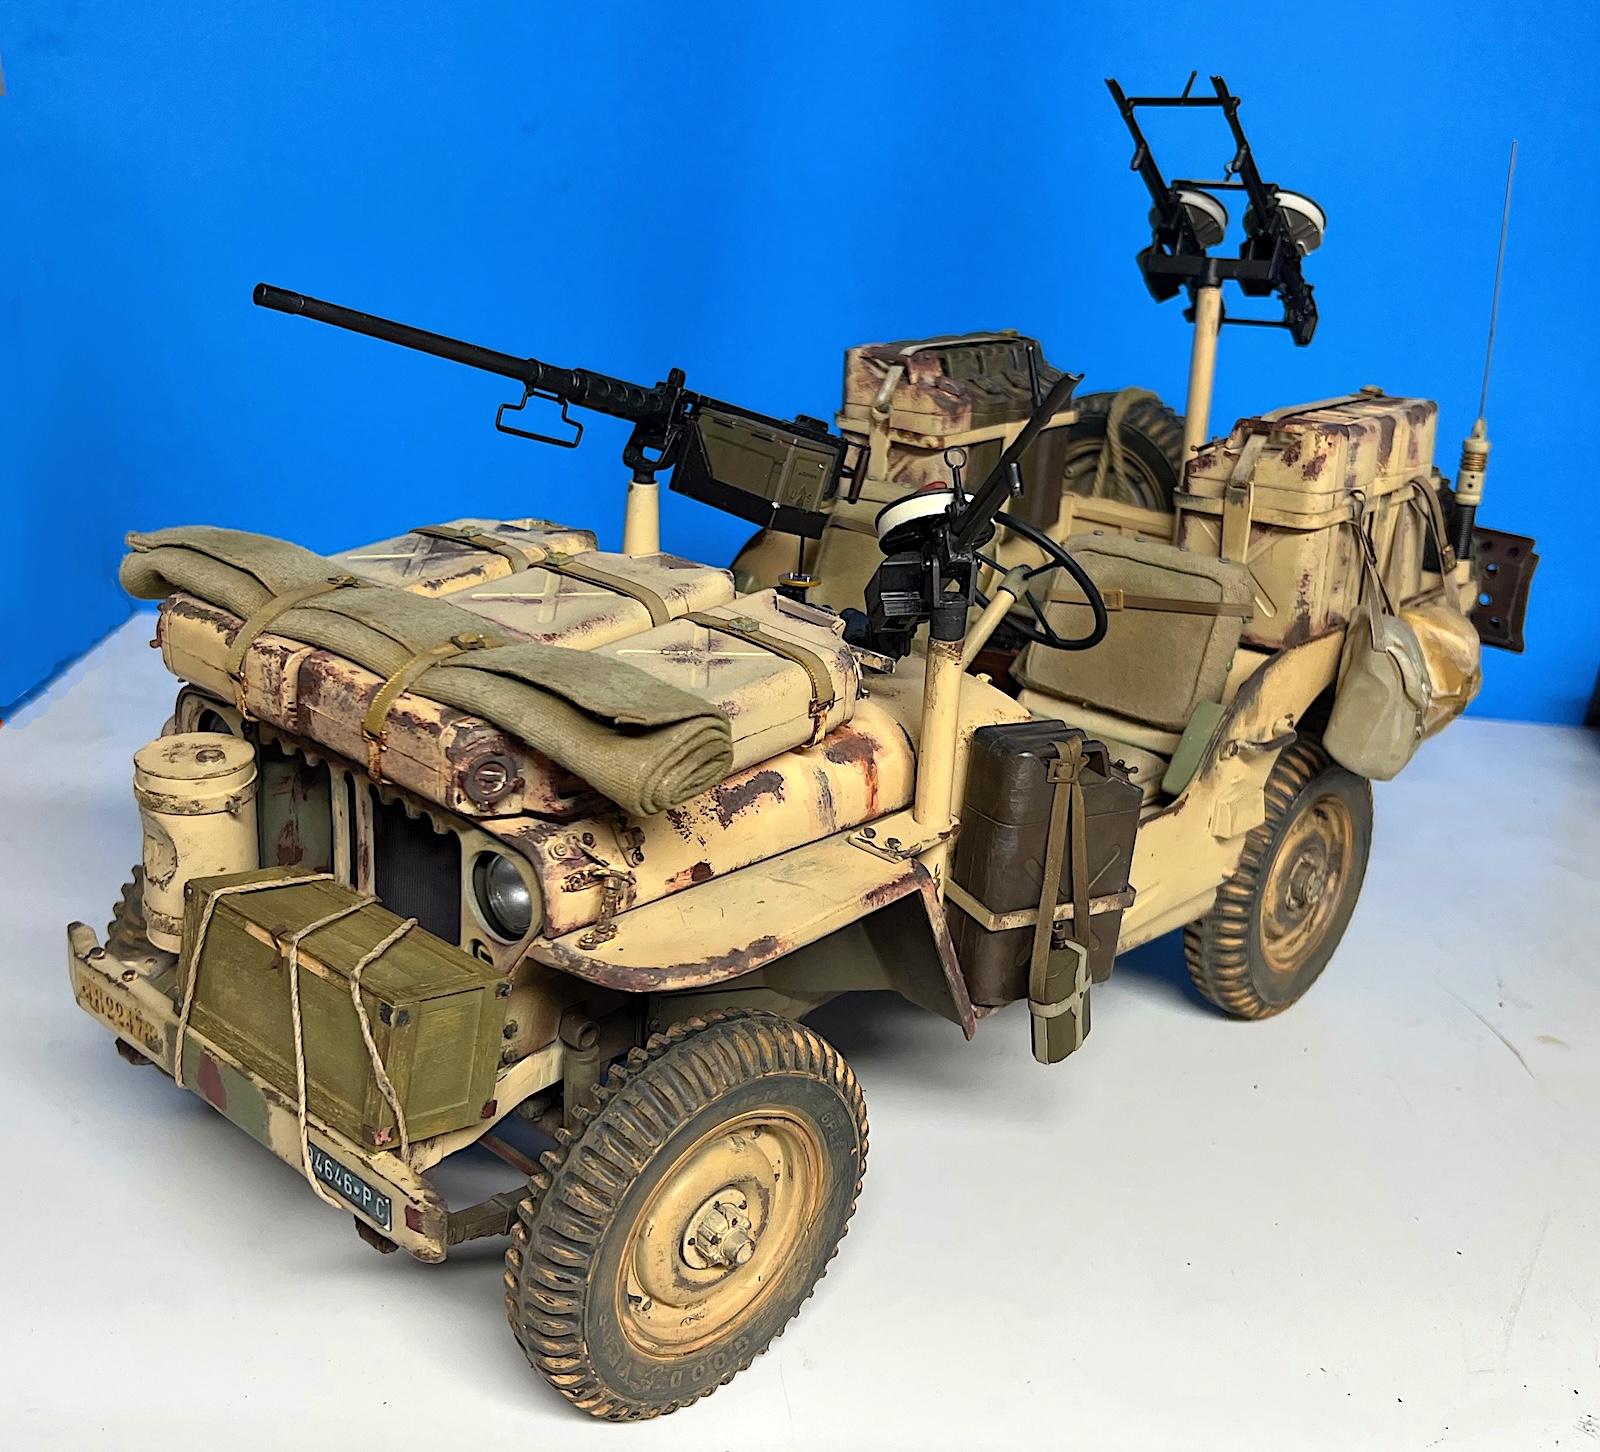
To allow finishing of the Jeep for a weathered and worn look, I ended up repainting most of the parts in the kit to allow for reductive chipping. Multiple layers of acrylic paint separated by chipping fluid allowed chipping of the topcoat to expose colors below. Chipping of the finish coat exposed layers of the original olive grab paint, and areas of rust, primer, or bare steel. Additional chipping and wear was added with brush & sponge applications.
Weathering process:
- Sanding prefinished paint for new paint to grip
- Primer (gray, red oxide, or steel)
- Rust Base 3 tones (Dark, medium, light)
- Chipping fluid
- Base color (Olive drab)
- Chipping fluid
- Finish color (Sand Yellow)
- Chipping with water, brush/toothpick
- Additional weathering with brush & sponge
- Sand pigment & fuel/grease stains
- Matt varnish protection
Summary
This completes assembly of the Agora SAS Willys Jeep. The kit is 16 inches long and a hefty 14 pounds. Assembly has been enjoyable as all the parts fit together perfectly and the completed assembly is awesome! Detail on the chassis & engine is very good.
The kit can be built out of the box into a stunning realistic model Jeep. Even less experienced modelers can build this kit with the screwed-together parts.
Many thanks to Agora Models for building these wonderful large-scale kits and providing review samples to IPMS. These kits are fantastic!
Comments
SAS Jeep
Excellent weathering!
Thanks Doug!
Thanks Doug!
Review Collaboration Proposal from Stirlingkit
Hi Bill,
Phenomenal review and amazing weathering work on this 1/8 SAS Jeep! The attention to detail throughout your 3-part review is truly impressive.
I’m reaching out from Stirlingkit. Given your expertise in high-end, detailed scale model kits, we would love to invite you to test and review our Teching World's 1st Car Model Kit (430+ pcs): https://www.stirlingkit.com/products/teching-worlds-1st-car-build-your-own-automobile-model-building-kits-430pcs-dm229
We’d be delighted to send you a complimentary sample kit for a review if you're interested. Could you please let us know the best email address to contact you or the IPMS review management team to discuss details?
Thanks for your time and fantastic work!
Best regards,
Stirlingkit
Greetings
Hi Strilingkit:
We would love to review the kit. It looks fabulous. Please contact me via email and I will get the needed mailing info to you
ipmsusa1stvp@ipmsusa.org
Dave Morrissette
IPMS USA
Thank You! The Agora Models…
Thank You!
The Agora Models SAS Jeep is a nice kit and lent itself well to weathering. I wanted to make the Jeep more representative of a battle worn vehicle so it is quite heavily weathered due to the environmental conditions of North Africa during WWII.
Dave Morrissette. IPMS' VP of our Review Corps will reach out to you about submitting review samples. The Teching World's Benz auto looks like an amazingly engineered kit that we would very much enjoy reviewing and sharing it with our members!
Thanks, Bill O'Malley
Add new comment
This site is protected by reCAPTCHA and the Google Privacy Policy and Terms of Service apply.
Similar Reviews