
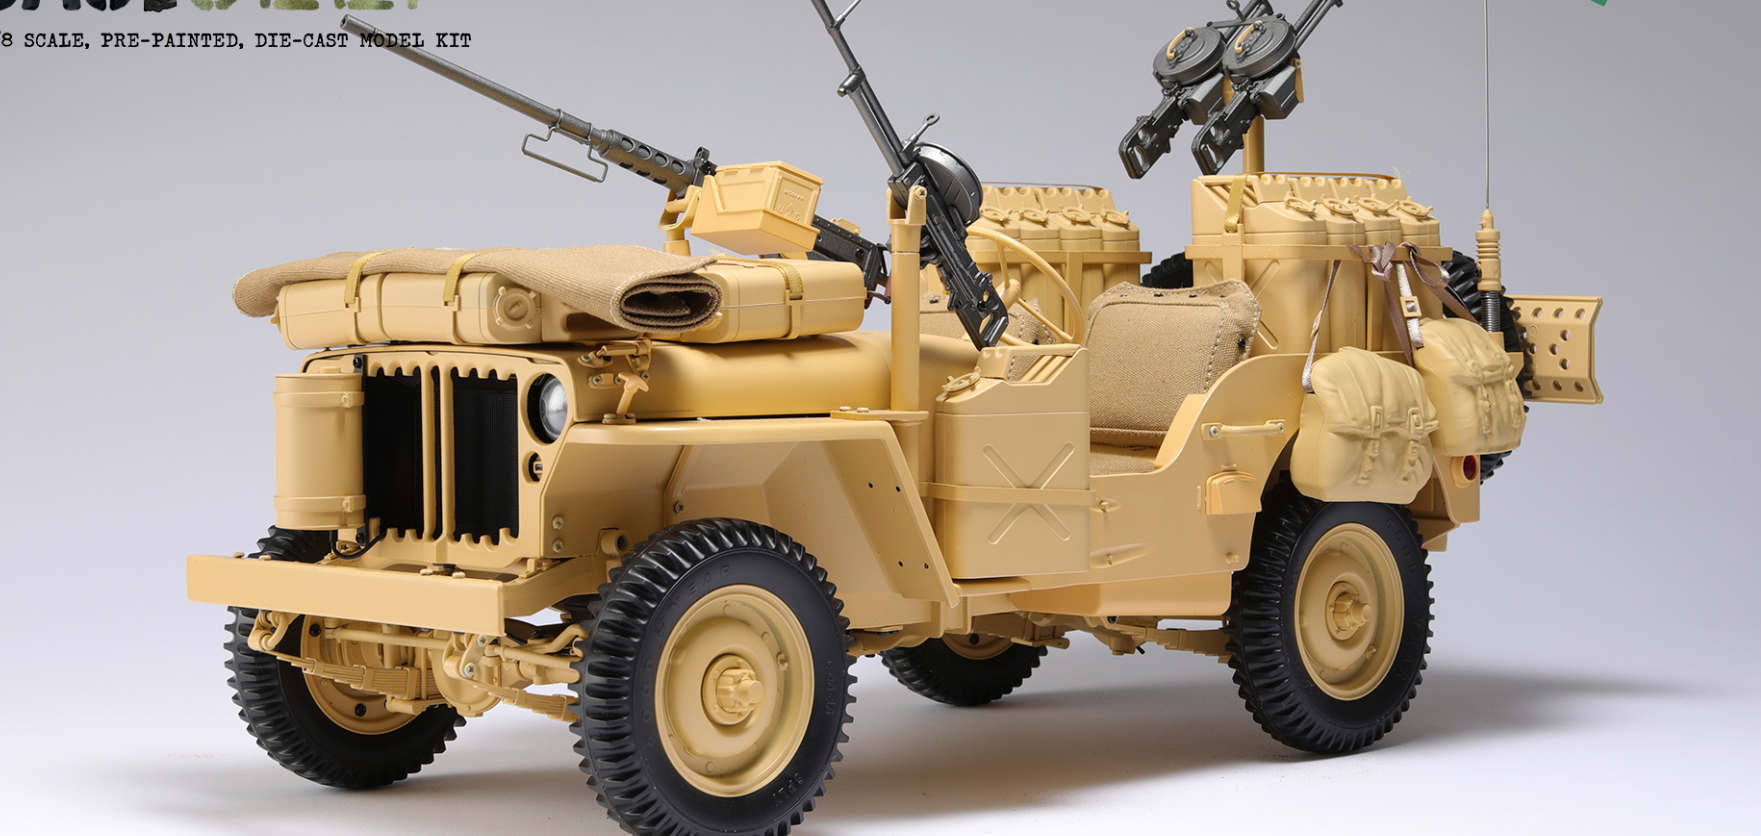
Jeep Willys SAS, Part 2 – Engine and Chassis
Agora Models Willis MB Jeep Engine
The SAS Jeep Engine from Agora is highly detailed and goes together easily. Parts of the engine are included in Packs 1 and 2. I counted 52 parts to the engine assembly, not including numerous screws used for construction. There will be many more parts added to the engine bay in later steps. Having all parts and screws packed separately for each step makes it easy to find the right part for each assembly step. Agora has recently switched to recyclable manila paper envelopes for the parts.
Instructions
Printed instructions are not included with the kit Packs but are available to view or download from Agora’s website. PDFs are used for the instructions so they can be downloaded and printed for a hard copy. I use my iPhone & laptop to view the assembly steps online during the build, which allows zooming in for greater detail. Photos are used in the instructions with numbered parts to show each assembly step, and the steps are nicely indexed to find the one you need. The photos are very sharp & clear. Agora provides “Advice from the Experts” with tips on tools and assembly. The instructions show installation of every part and the ability to zoom in on details makes assembly very clear.
Engine Assembly
The assembly instructions for the SAS Jeep engine are in 5 ‘Stages’ and 66 steps.
All the parts are painted in olive drab or black, which is consistent with the reference vehicle I am using. I’m assuming the engine was factory painted olive drab, and the body was painted desert yellow as a field modification by the SAS. I intend to weather the kit to reflect heavy use by the SAS and the harsh desert environment.
There are many tiny screws used to construct the engine, which is the only difficult part of assembly. The screwdrivers included with the kit work OK, but require enough pressure to avoid stripping the screw head. Agora gives good advice to use soap on the screw threads to make threading easier. I pre-threaded the screws without the parts, but still managed to twist the head off one screw. I filled the heads of screws in more visible locations to disguise the Philips head.
The engine block halves, head, and oil pan are all metal. The exhaust and intake manifolds are plastic. When I installed the head on the engine block, the front right pinhole needed to be drilled out for the head to sit down tightly. Otherwise all the parts fit perfectly.
Agora provides 1.5 mm black vinyl tubing for the ignition wires and fuel piping, which appears about right in scale. I fit the ignition wires and then trimmed the lengths about 5 mm so they snuggled closer to the engine. I replaced the tubing with brass rods to get straighter runs of the fuel piping. A small rubber band is provided for the fan belt and looks great!
Weathering the Engine
Once the engine is assembled, painted, and weathered it looks awesome! Just the right amount of detail considering its large size, with nicely fitting parts. Easy to build but still building into a good representation of the Jeep engine. I painted the engine with layers of dark rust, standard rust, khaki drab, with chipping fluid and chipping between each layer. Later in assembly I will apply sand pigments and oil, grease, and fuel stains.
Chassis Assembly
The ladder frame for the Jeep comes as a one-piece pre-assembled part painted desert yellow. The chassis on my reference Jeep is olive drab, so I repainted the Agora chassis olive drab.
Assembly of the chassis starts in Pack 02, Stage 17, and extends through Pack 05, Stage 38, including 84 steps that install the transfer case differential, suspension, axles, steering linkage, engine, and wheels to the chassis.
The transfer case installed in stage 11 seems a little wobbly but will stiffen up later when the drive shafts are installed. The front leaf springs installed on stage 12 are quite stiff, but provide some resiliency so it will be interesting to see how much spring they provide under the full weight of the body. The shock absorbers are two pieces that will flex with the movement of the axles. Assembly of the differential on the front axle left a gap between the top and bottom parts, which I filled with epoxy.
The steering gear 17-E has some play in the gears to allow positioning the wheels. After assembling all the steering linkage, turning the wheels was very tight. I went back and loosened most of the screws which freed the wheels up considerably. Being able to change the position of the wheels is a nice feature of the kit. The front wheel hubs attach very securely to the front axle on a ball joint that allows the wheels to be steered. The wheels do rotate when assembled.
Fitting the rear shock absorbers is similar to the front and provides movement with the axle. The sun compass is also assembled in this step, but won’t be installed until much later. Agora frequently adds these little teasers of parts that won’t be used until later in the construction. This breaks the routine of assembly and gives a glimpse of the future details in the kit.
Weathering the Chassis
At this point I panted and weathered the chassis before continuing with construction. I used a mini-sandblast airbrush to remove the gloss finish on the kit paint to prepare for painting. Painting was done in layers to allow for reductive chipping. Paint layers are cold rolled steel primer, red oxide, olive drab faded and khaki drab. Chipping fluid and chipping was done between each layer.
Pack 04
Building the wheel and tire assemblies is scattered throughout the Packs so far. The wheels are in two pieces that screw together clamped on the tire. The tires are quite stiff and Agora suggests heating them in a bowl of hot water so they are soft enough to install the wheel halves. I found this to be absolutely necessary and eases assembly of the wheels. A hot hair dryer also works to heat up the tires so they are soft enough.
All the kit tires have a non-directional tread NDT pattern with a center molding seam. Seeing actual tires shows they also have a center seam. Side wall markings for the tire is GOOD YEAR 6 PLY 6.00–16. The reference photos for the SAS Willys Jeep show both military NDT treads and civilian tires mixed on the vehicles, probably due to whatever the SAS could scrounge.
To weather the tires, I chucked the wheels in a drill and spun the tires against a file to create wear on the treads. I also scuffed the side walls to give a worn appearance. I airbrushed rubber tire paint on the treads to flatten the shine in the tread valleys.
Brake lines are added as soft vinyl tubing, which adds a nice detail to the chassis. Agora clearly shows the placement of the hoses in the instructions. The lines are left dangling, so I super glued them to the frame and chassis parts like an actual jeep.
Three more gas cans are provided with this Pack. The cans are plastic halves screwed together with separate pieces for the handles and filler cap. Small plugs are included to cover the screw heads.
The muffler is assembled as two exhaust pipe sections and the bottom half of the muffler. Only the bottom half of the muffler is provided as the top will eventually be concealed by the Jeep body. The tailpipe and muffler fit perfectly into place connecting to the engine exhaust pipe.
Stage 30 starts to install the front fenders and wheel well for the jeep. I’m going to hold this off until the chassis is completed.
I weathered the wheels before assembling them to the chassis. My reference vehicle shows desert sand-colored wheels that are barely damaged to wheels that are heavily worn through to the olive drab base color. The wheels were painted with cold rolled steel primer, dark rust, khaki drab, and British sand yellow modern, chipped to varying degrees as on the reference vehicle. I will add grease, sand, & dust later in construction.
The wheel and tire assemblies are installed to the wheel hubs with a small gasket and a screw. The wheels as installed are very sturdy. I had to drill out the hole for the axle on one of the wheels, but the other three slipped on easily and were quite secure.
Pack 05
The engine fits perfectly into the chassis and it is held securely in place with three screws.
Summary
This completes assembly of the Agora SAS Willys Jeep engine and chassis. The kit is already 16 inches long and a hefty 4.5 pounds. Assembly has been enjoyable as all the parts fit together perfectly and the completed assembly is awesome! Detail on the chassis & engine is very good.
The kit can be built out of the box into a stunning realistic model jeep. Even less experienced modelers can build this kit with the screwed-together parts.
Many thanks to Agora Models for building these wonderful large-scale kits and providing review samples to IPMS. These kits are fantastic!
Subsequent Packs of the SAS Jeep will be reviewed as they are released.


Comments
Add new comment
This site is protected by reCAPTCHA and the Google Privacy Policy and Terms of Service apply.
Similar Reviews