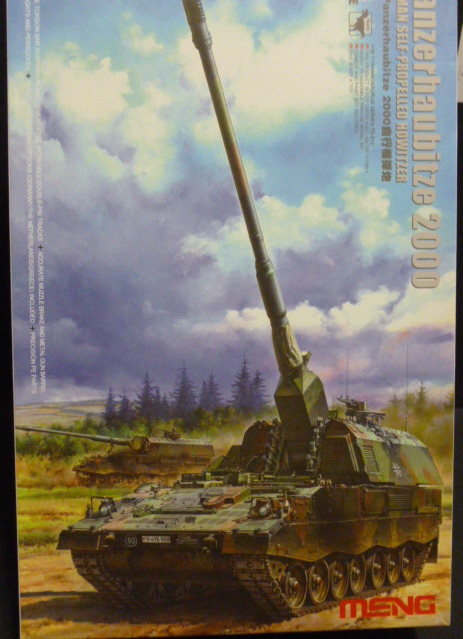
Panzerhaubitze 2000 German Self-Propelled Howitzer
The Panzerhaubitze 2000 is one of the most advanced self-propelled howitzers in the world. The vehicle utilizes a large number of chassis parts of Leopard 1 MBT and Leopard 2 MBT. It is powered by the MTU MT881 engine which provides excellent mobility and is armed with a Rheinmetall 155mm L52 gun with an advanced sight and fire-control system. 60 rounds are stored vertically on board in a horseshoe arrangement. Its automatic shell-loading system has realized automatic management of all ammunition. This vehicle entered German Army service in 1998, and then into armies of Italy, the Netherlands and Greece. The Croatian Armed Forces (COA) recently completed a purchase agreement for 12 former Bundeswehr vehicles to fulfil their NATO requirement.
The kit is composed of nine sprues molded in green and 6 sprues of track links and pads molded in black, a small sprue of clear parts, two small frets of photo etch, a piece of rope for the tow cable, upper and a lower hull along with a metal barrel.
Marking Options
The decal sheet provides marking options for five Panzerhabitze’s:
- 131st Artillery Battalion, German Federal Armed Forces
- 115th Panzer Artillery Battalion, Federal German Armed Forces
- School of Artillery, Federal German Armed Forces
- 14th Field Artillery Division, Royal Netherlands Army
- Hellenic Army, Greek National Day Parade, 2005
Assembly
Construction of the Panzerhaubitze takes place in 23 steps with a well put together instruction booklet. Steps 1-6 start construction of the road wheels and suspension. The road wheels and drive sprockets were flash free and required zero cleanup. After getting all the road wheels and suspension parts completed it was time to get the torsion bars installed so we could mount the road wheels, virtually no problems so far. The road wheels are secured to the torsion bars via poly caps.
The hull assemblies were extremely accurate with Meng doing an excellent job replicating the non-skid surfaces and bolt detail. The rear plate assembly does require minor surgery and depending on how you mount the tow cable, some hole filling in the upper right corner may be required. The mid plate (part D32) requires some sanding and filing to get it to sit perfectly and ensure the upper portion of the hull assembly goes flush. The upper hull provides a metric ton of options for configuration and tool placement, these are not country specific but more of a unit SOP/Vehicle commander preference.
The tracks are individual links, 98 for each side. Each link is joined by two sets of teeth with tiny track pins enabling the entire run to be flexible. I’m no expert in armor kits by any means, but I see Meng provides a jig to assemble the runs compared to the many methods and homemade contraptions that most modelers make themselves. Each link is composed of three parts. Part B fits into the jig (J2), face down. Part A presses on to B along with the track pins placed in the slots on the bottom of part B. This was, by far, the most painstaking part of this kit.
Once the tracks and upper/lower hulls are completed it’s time to move to the turret assembly. The Panzerhaubitze has no interior at all, so just like the hull assemblies, the turret should take no time at all. The Turret assembly is where the rest of the army plating is added from the F sprue. Choices once again! There are options for the type of front storage racks to be used and types of Machine guns for the Commanders cupola, I built the German variant so I used the MG3, which by the way is a very accurately depicted FN Mag commonly known as the M240B in America, and added the rest to my spares. The barrel assembly allows use of the actual muzzle break at the end, or the muzzle bag for use when in transit or storage. I used the muzzle break. I decided to go by the kit instructions and used the first storage rack which consisted of parts E14, E15, and E17 along with the appropriate PE. Also, just a heads up, its hard to mess it up but just in case, the two large poly caps are for the cannon to traverse up and down fit snug in their place and did the job they were intended to do.
Finishing
There’s only one color configuration for this kit and it’s a NATO pattern camouflage scheme using only Vallejo color callouts. I once again decided to go my own route and paint mine the color I have seen in real life in Afghanistan, TAN BABY! That made a lot of the headache of finishing a flash. I used Tamiya Acrylics for this finish, I used XF-60 dark yellow, and mixed a couple drops of X-2 white to lighten it up a little. After 2 coats of paint I sealed the paint with future and let dry for 24 hours before decaling operations began. The decal’s texture-wise made me nervous lol - the had the same texture as Airfix decals and were still pretty stiff after soaking in warm water. To my amazement they settled down very well using only MicroSol and MicroSet, and were sturdy enough to be peeled off with tweezers and repositioned without tearing! After another coat of future to seal the decals I let it sit another 24 hours.
The only other Panzerhaubitze kit prior to Meng’s release was the 1999 release from Revell Germany so it was due for a facelift. The engineering is fantastic, and was a pure pleasure to build. Thanks for making my first armor kit a memorable experience!
My thanks to Stevens International and IPMS/USA for giving me the opportunity to review this kit.


Comments
Add new comment
This site is protected by reCAPTCHA and the Google Privacy Policy and Terms of Service apply.
Similar Reviews