
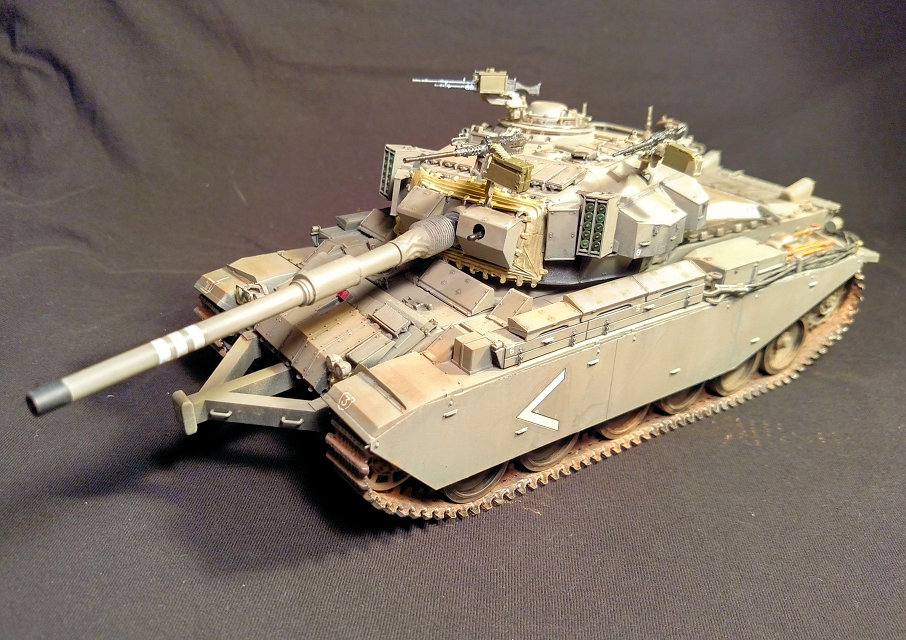
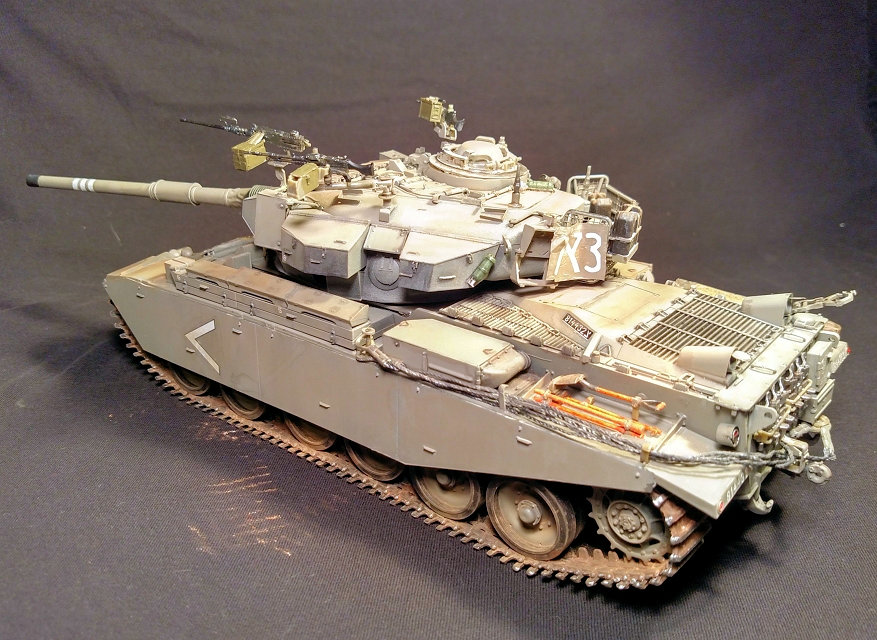
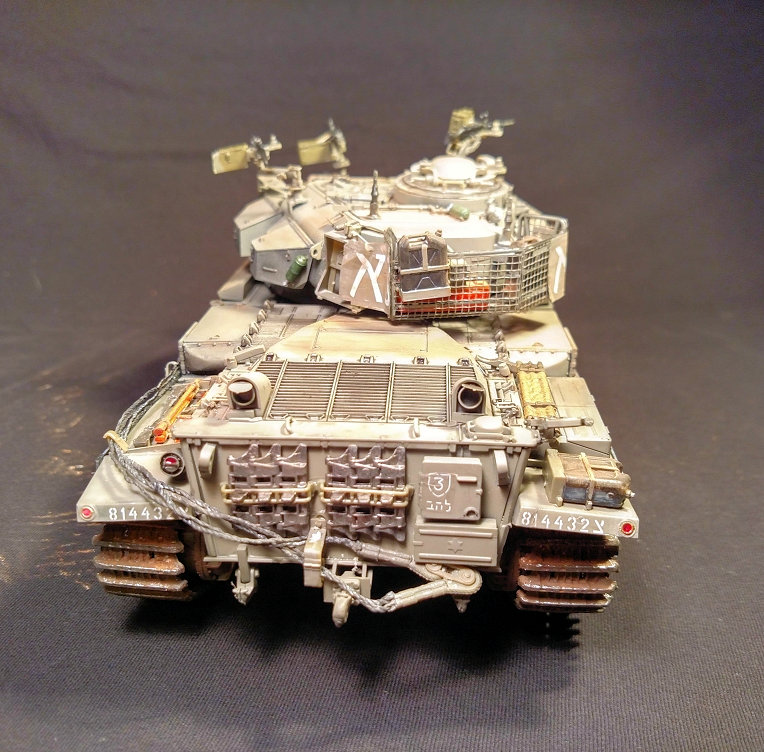
IDF Sho’t Kal Gimel Type II - Operation Peace for Galilee 1982
They say first impressions really do define a relationship- and when I first received this kit and opened it up to see the vast amount of plastic inside, I knew this would be a long term commitment. One thing to note is the mix of gates from the older Centurion kit, mixed along with newer gates with the newer features of this specific Sho’t Kal kit like the explosive reactive armor (ERA). This led to some challenges during the build as the older Centurion parts trees had their labels raised in very small letters along the sides of the gates.- although the location varied. Sometimes it was on the edge and other times it was towards the middle. The newer trees had their labels as newer kits do - outside with a dedicated square label that is very easy to read. In the end, I used some masking tape labels I made myself as I grew tired of searching for which sprue was which.
That being said, the parts really are quite crisp and detailed. Some of the parts I ran into were actually broken on the sprue, although it turned out that these parts were ones that weren’t actually used in the build so I lucked out there! There was rare amounts of small bits of flash here and there but nothing too insurmountable. AFV Club has provided loads of extra details that can be added to the kit build as well to allow you to detail as you see fit.
What's in the Box
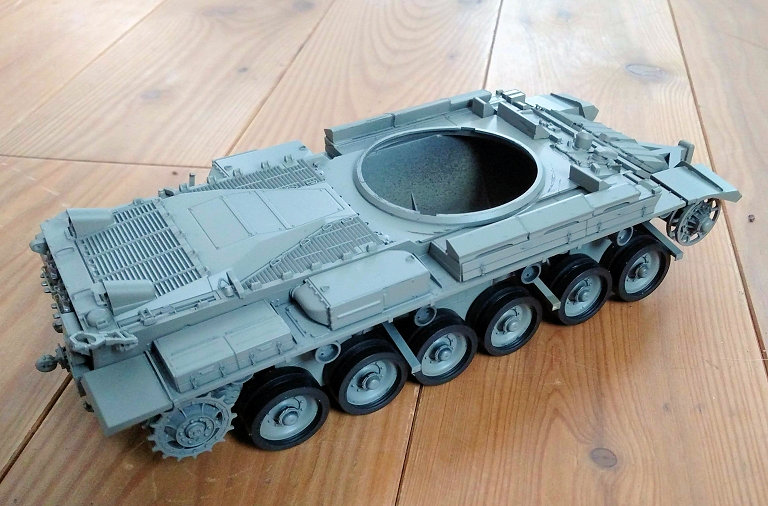
As I mentioned previously, there is quite a bit of plastic right to the brim in this box. A separate lower hull piece is quite crisply detailed. Inside there are 23 sprue trees molded in tan plastic with some from the previously released Centurion kits. There is a PE fret with excellent screens to use for the turret basket, exhaust, and light details. A small clear parts tree provides lenses for the periscopes and there is a beautiful aluminum rifled barrel for the main gun. There is a small flexible vinyl tree containing the mantlet cover, sleeve for the base of the gun barrel, and covers for the smoke grenade launchers. Included also are 24 soft vinyl tires that you plug the road wheels into which makes painting much easier. The tracks are of the rubber band variety, but there are 6 individual track links provided for the spare tracks rack at the rear of the tank. Finally, a small baggie of springs for the suspension are included. Decals are provided for three different schemes.
Construction
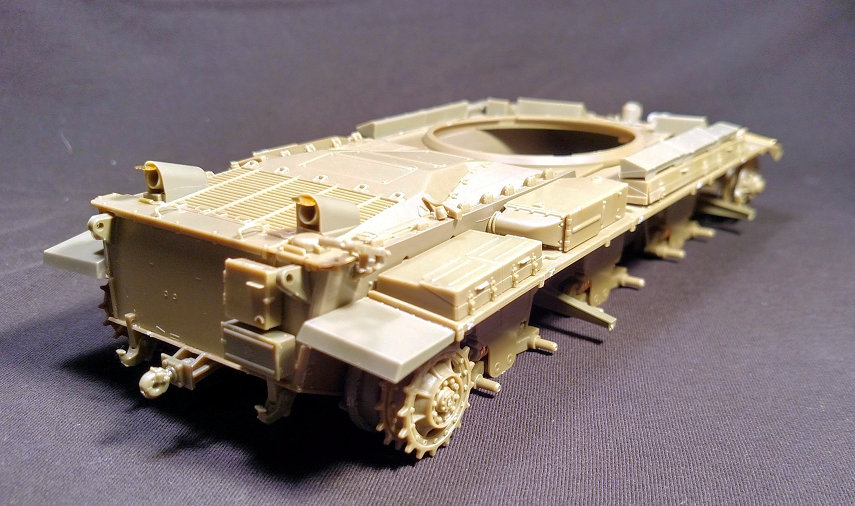
Like most AFV Club kits, the work begins with the suspension. You’re provided with small springs that fit in between the suspension arms to give a little flexibility to the assemblies and for the most part, everything fits together pretty nicely. Once complete, you assemble the road wheels into pairs that slip right onto the suspension assemblies thanks to the nylon inserts between the wheels.
Steps 5-8 involve attaching everything to the lower hull tub, including the pintle hook, spare tracks rack, infantry phone, return rollers, idler, and sprocket wheels, and side skirt brackets. Care is needed at this point as those brackets are susceptible to getting knocked off- it happened to me twice despite being careful. One thing of note here - the return rollers are two-piece assemblies, but the male and female parts did not mesh well for me and this was a weak point later when attaching the tracks as a few came apart on me.
Steps 9-13 involve assembly of the top of the hull, fenders, and assorted pieces of armor and toolboxes. Step 9 in particular is tricky - there are four parts of the top that go in stepwise. Front fenders first, then the front hatch plate. Fit is very tight here and I needed to spread the lower hull assembly out a bit to muscle it in there. The turret deck and then engine deck follow and must also be wedged in. It all turned out fine- but there was no real guide to how to align everything- I had to do it by feel. Toolboxes went together easily, although you may want to wait to attach the tools to paint them separately. Here is where the instructions really shine - there are interspersed diagrams with close-ups helping you place the toolboxes correctly.
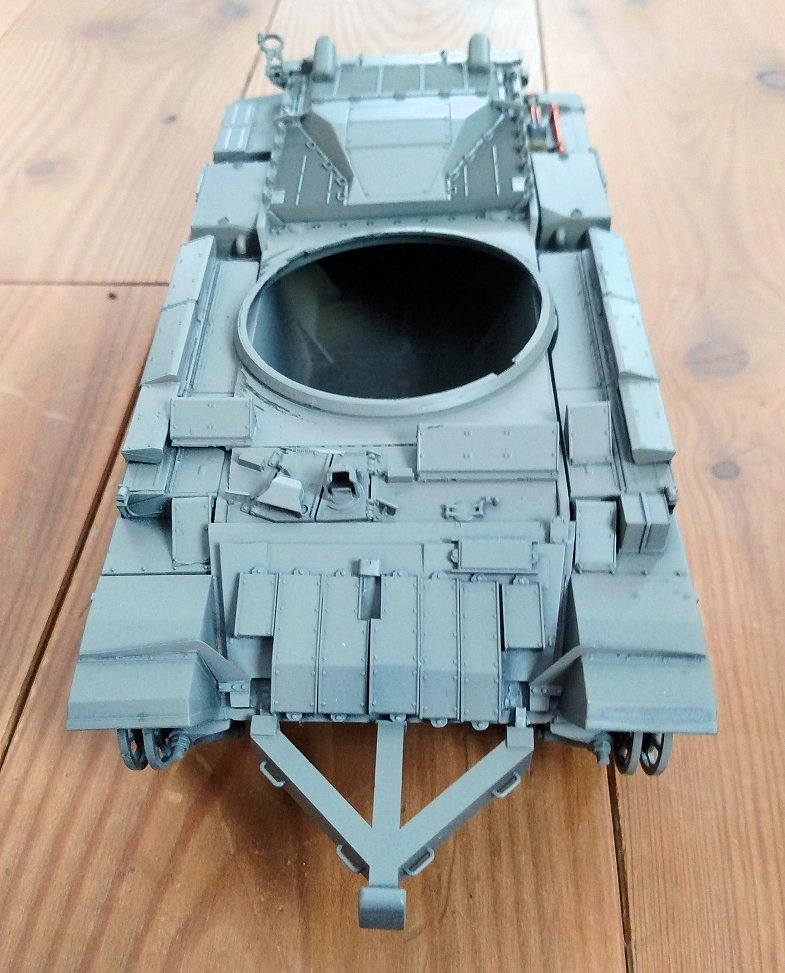
Steps 14-18 include attaching small bits to the deck, as well as the exhausts, turret lock, front glacis plate, ram assembly (optional), ERA plates, and light assembly. There are again great close-up diagrams to aid in placement of the ERA and even a few b&w photos of the exhausts for reference. One nitpick for me was the headlight assembly. I know not everyone minds this, but the fact that the assembly for the headlight guards are in four parts and very fiddly ups the difficulty level of the build - steps like this definitely are not for beginners. Unfortunately, the assembly for the left side broke apart for me as the parts are really quite thin, so I had to leave this off.
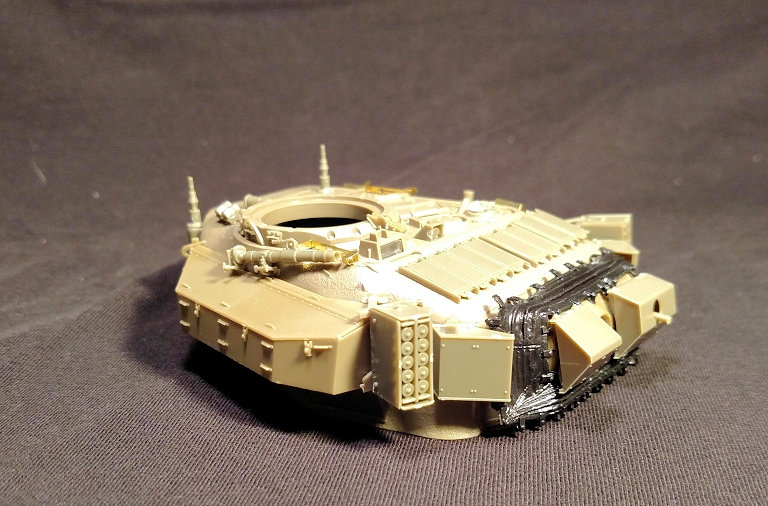
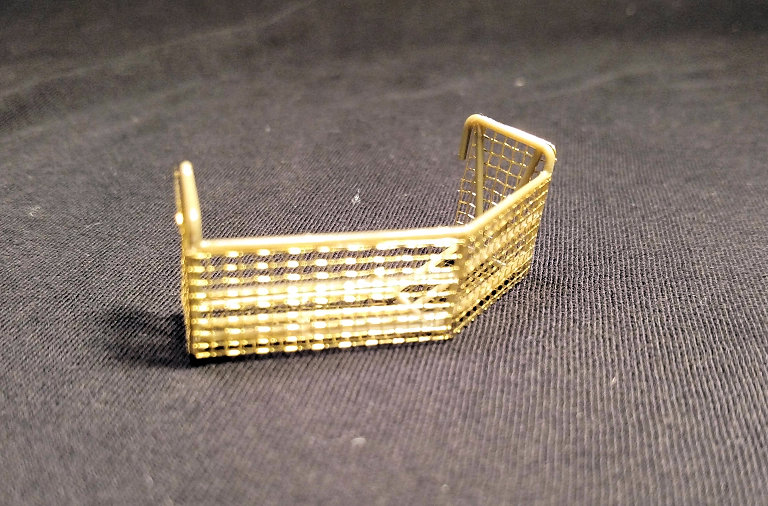
Steps 19-23 involve tow cable assembly, track assembly, side skirt attachment, and turret assembly. Tow cables use string that fit into the tiny holes of the plastic loops. I had some issues gluing the ends of the rubber band tracks together. My CA glue would not keep them together and in the end, I had to glue the ends together onto the return rollers. The lower turret is made up of five parts but went together flawlessly. The PE screens for the basket need to be bent- and my Fender Bender was quite helpful in getting the shape I needed to glue them onto the fiddly plastic frame. The screens lend strength to this assembly and it all went together pretty well.
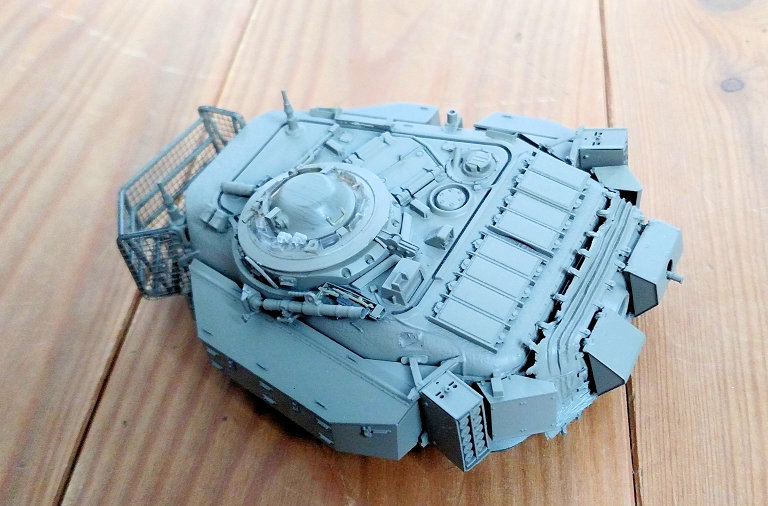
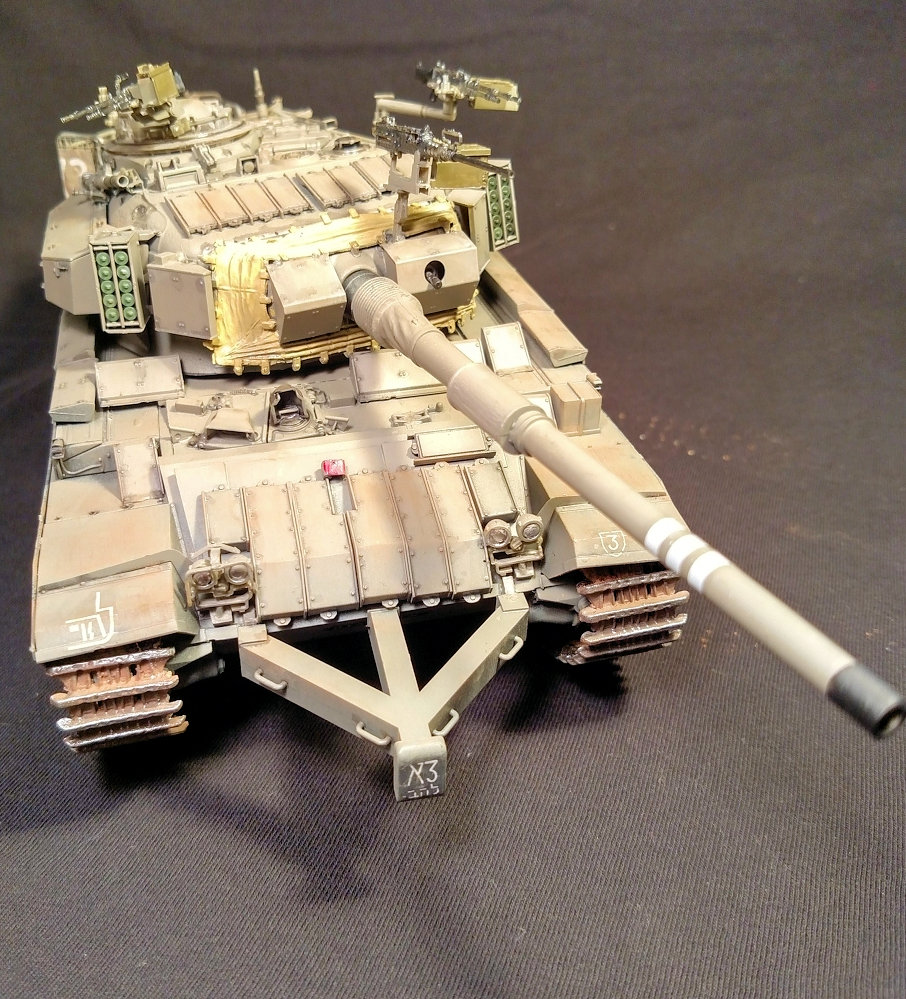
Steps 24-29 are associated with adding details to the turret assembly, including fuel cans, turret hatches, mortar, extinguishers, turret boxes, more ERA plates, and a nice assortment of small arms that can be added to PE racks on the turret.
Steps 30-35 see the addition of the vinyl mantlet cover, mantlet ERA, smoke grenade launchers, and machine guns. For me, the fit of the mantlet cover was not a piece of cake. You have to stretch the vinyl cover over the plastic piece and try to glue it down. I’m not sure if it was error on my part or maybe some malformation of the vinyl, but I could not get it to fit correctly. When I tried to force it down to CA it in place, it ripped on me. The FN MAG 7.62mm machine gun assemblies for the commander and loader positions are intricate but assemble into nice pieces.
Steps 36-37 complete the build and involve adding the vinyl sleeve to the base of the gun barrel and the two plastic pieces that attach around the middle of the barrel. The optional vinyl covers for the grenade launchers are added here- but I chose to leave mine off. The instructions show assembly of an assortment of small arms which can be added- including the Galil ARM 5.56mm, Galil SAR 5.56mm, and early model UZI guns. They suggest stretching sprue to create the two 6cm tall antenna…and apparently in the process of moving my build to my photo area, they have come up missing.
Paint and Weathering
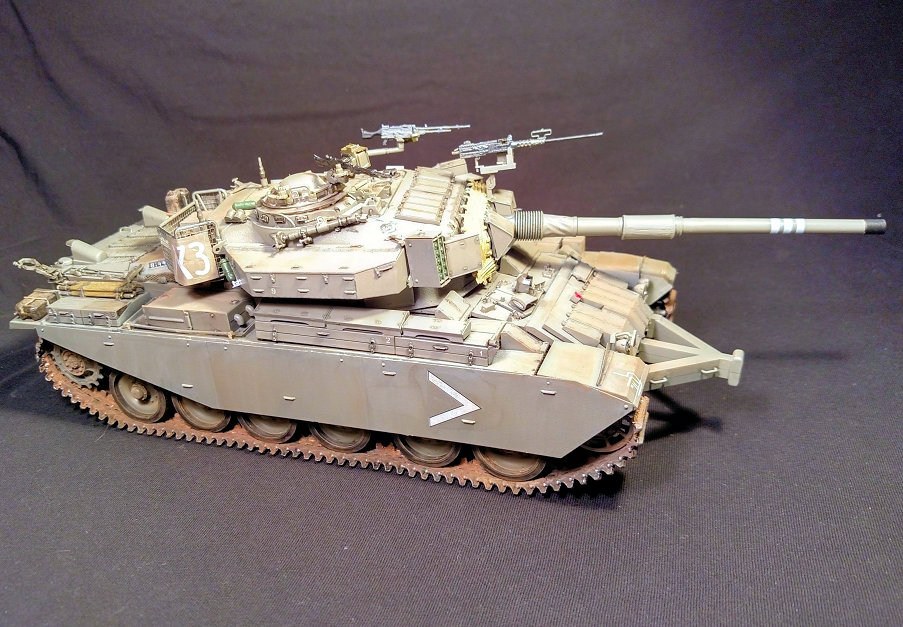
The three schemes all feature the same color of IDF Gray 2.There are no details as to which units the schemes belong to. Scheme A features three bands on the gun barrel- which indicate a 3rd battalion tank and the turret markings feature a 1st platoon tank. Scheme B is for a 2nd battalion, 2nd platoon, 3rd company tank. Scheme C is a 2nd battalion, 1st platoon tank.
After priming with Krylon flat black primer for plastic, I sprayed Vallejo Model Air IDF Sinai Gray 82 through my airbrush. After that and a coat of Future, I applied the decals for the first scheme. For the marking on the turret basket, I first sprayed some aluminum foil with the Sinai Gray and then cut them to size and added the decal to them before attaching them. After a flat coat, I used AK Interactive Rain Marks for NATO tanks for the side skirts and turret sides. Assorted Mig washes and pigments were used to detail the ERA and armor plates and Tamiya Panel Wash was used to pin wash the details.
Conclusion
Let there be no doubt that this was a challenging build - I consider myself an intermediate builder and my skills were taxed in some areas of the build. The reward through skill and perseverance though is an excellent representation of a vital piece of IDF armor. Care is needed throughout or this kit will bite you back. There is some over-engineering in the detail on some of the parts and in some instances, the attachment points for some parts or assemblies leave a bit to be desired.
In the end though, the tank looks the part quite nicely and with great care and patience, it is quite a nice piece. I really would only recommend this to experienced builders though due to some of the complicated assemblies and photoetch parts. I feel a beginner might get frustrated quickly in some stages of the build of this kit- but if they are patient and dry fit everything and take care, the rewards are great.
My sincere thanks to AFV Club and to IPMS for the chance to take on this important piece of IDF armor.


Comments
Add new comment
This site is protected by reCAPTCHA and the Google Privacy Policy and Terms of Service apply.
Similar Reviews