
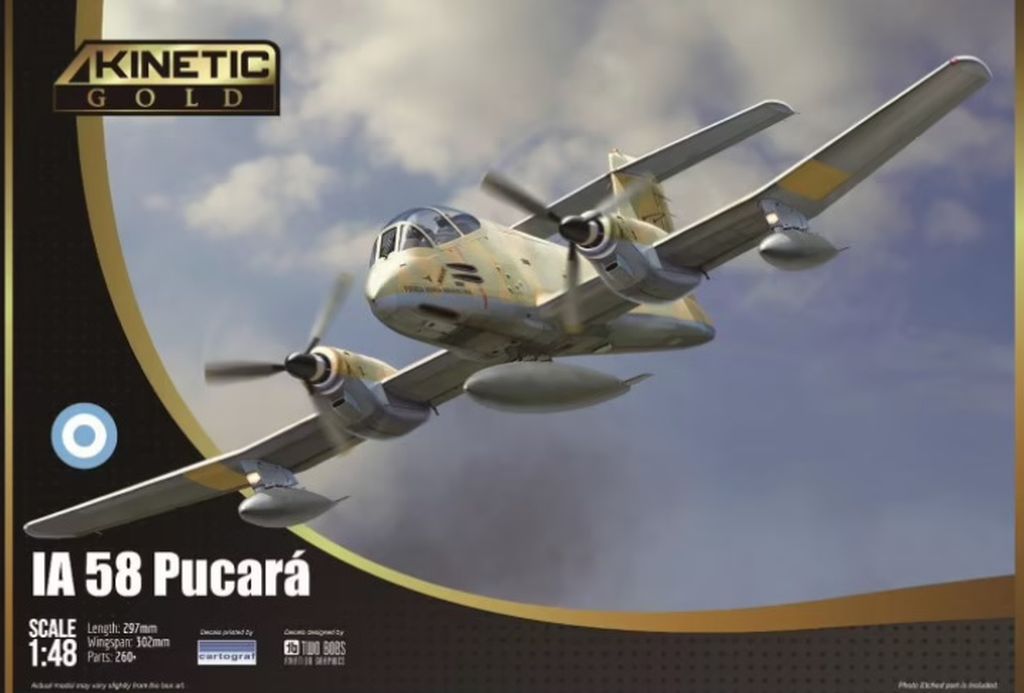
IA-58 Pucara
Kinetic Models has been consistently releasing airplanes covering the Falklands War conflict and their latest release has been the IA 58 Pucara in 1/48 scale. This kit is part of their “Kinetic Gold” series which is a substantial improvement on the mold quality relative to previous kits of the same manufacturer. All parts are sharply modeled, with very fine panel lines and no flash anywhere to be seen.
Inside the box you find 5 sprues (one of the sprues is provided twice as there are parts that are needed twice) and one of the sprues is molded in clear for the canopy and all the lights covers. There is a small photoetch fret and a decal sheet for two aircrafts, one from the Uruguayan Air Force and one for the Argentinean Air Force during the Falkland War era. Loadout options are limited to drop tanks.
From the sprues you can finish your kit as an IA-58A (Alpha) or IA-58D (Delta), but there are no markings for the IA-58D in the decal sheet. I’m pretty sure aftermarket decals will appear soon for the -D mark. As a historical note, there were also the IA-58B (Bravo) and IA-58C (Charlie, single seater) and both flew only as prototypes. The Kinetic kit is a great base for building either the -B or the -C airframes but I am not aware of any conversion kit at this point.
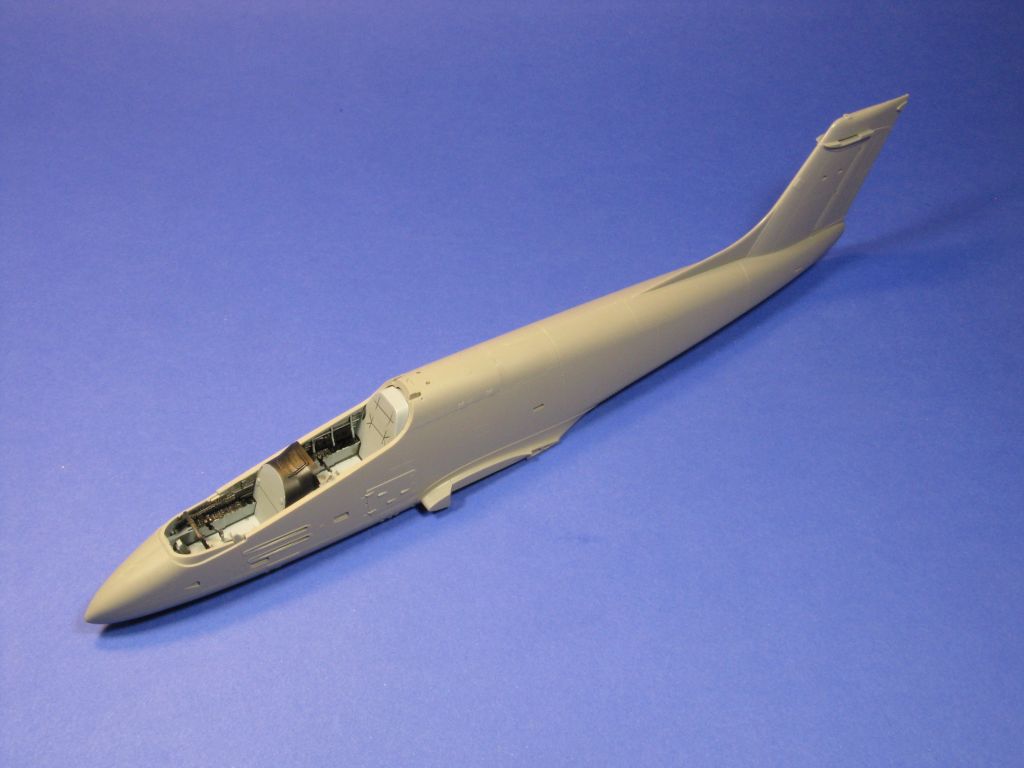
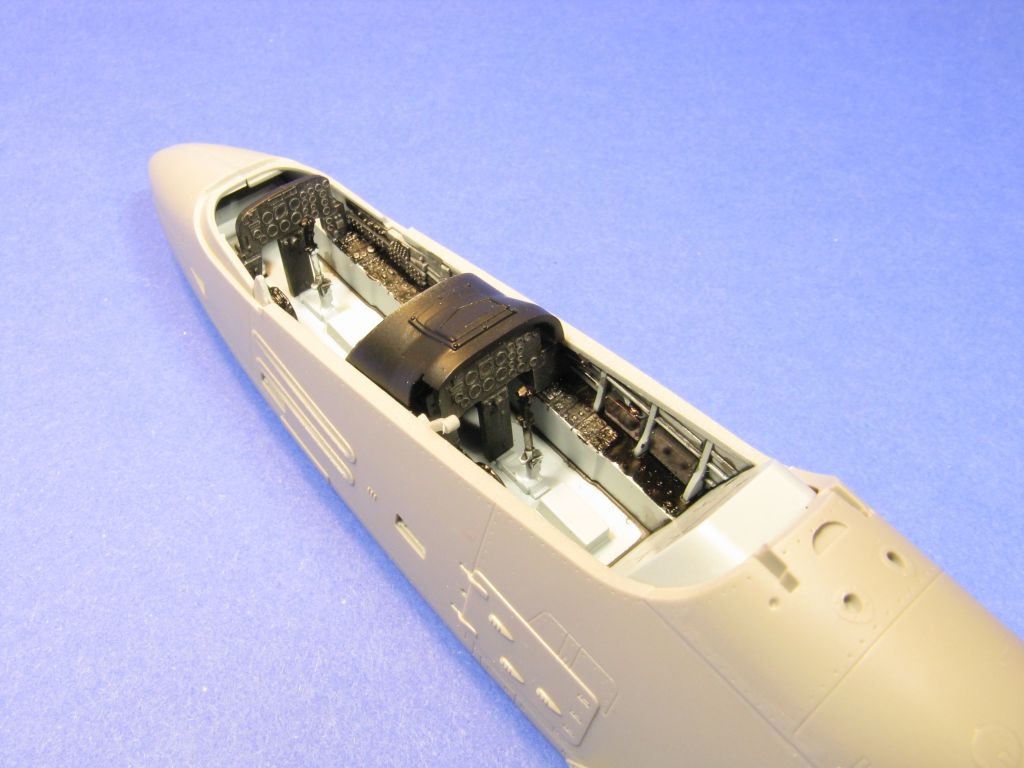
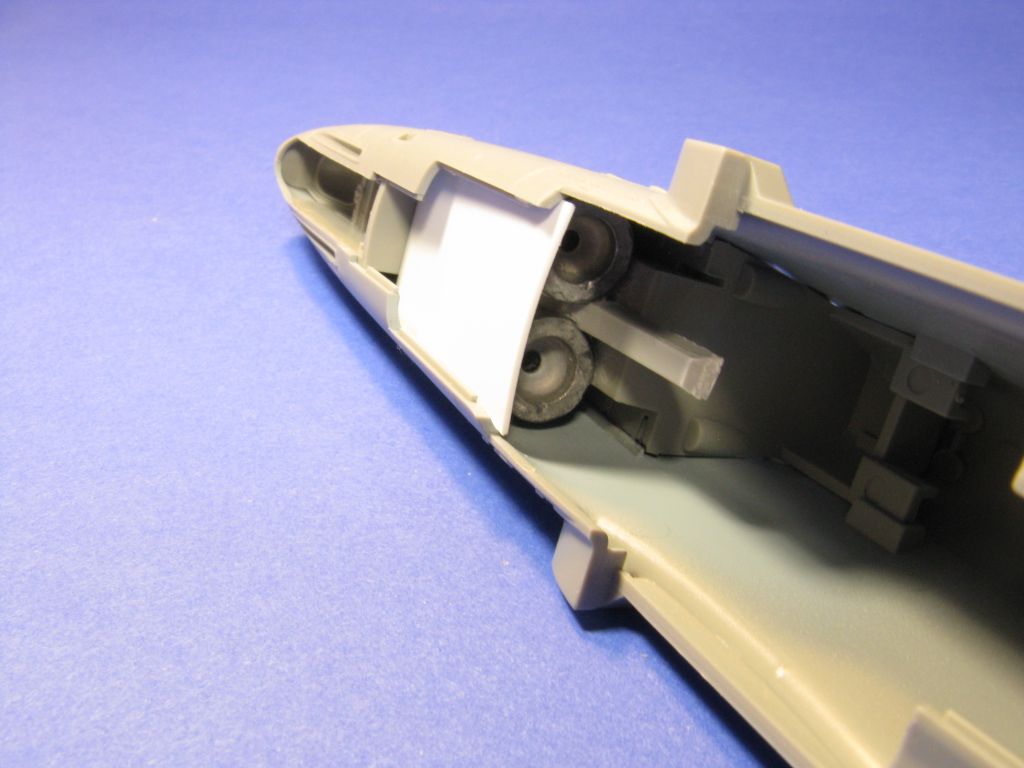
Like virtually any aircraft model, construction starts with the cockpit. It is very nicely detailed (with raised parts for drybrushing) and separate side consoles that you apply to the interior side of the fuselage. The instrument panels have raised detail but the dials themselves have no detail; it is just a raised circle. A decal would have been nice to have or you can get some aftermarket parts to dress up the cockpit (Quinta Studio has a very nice aftermarket set already out). The seats are a multi-part assembly, with the seat cushion, backrest and headrest being separate parts which makes painting and detailing very easy. The photoetch fret provides you with seatbelts but it seems to only includes the shoulder harness and no lap belts are included. I was unable to quite figure it out if the lap belts were missing or if the provided photoetch belts are accurate. I decided to leave them out of my model -for now- and to retrofit the seatbelts at a later point, when I can confirm if lap belts are needed.
The next few steps in the assembly are related to the fuselage and lower wing and it shows you to open some holes depending which version (-A or -D) you choose to build, or the correct holes in the wing based on the wing pylons you choose to install. By the way, the -D version had climate control for the cockpit and it has some exhausts vents in the fuselage side which are provided as photoetch parts.
When closing the fuselage, the only thing you have to do is to properly clean up the sprue attachment point and everything will fit perfectly. This might also be a good time to add weight to the nose. The natural location would be below the second seat as there is a nice ‘cavern’ in there for the weight. I choose to superglue the lead sinkers to the bottom of the cockpit piece (I added some extra sprues to provide more surface are for better ‘grip’ of the glue to the weight) and then I decided to slide a piece of styrene sheet to provide extra support to the weights.
Construction then moved very fast to the point of getting the airframe ready for major painting. I do want to mention that I choose to make a few minor modifications to my model:
I chose to close the belly access hatch. It is easy to do but you will have a minor gap to fill.
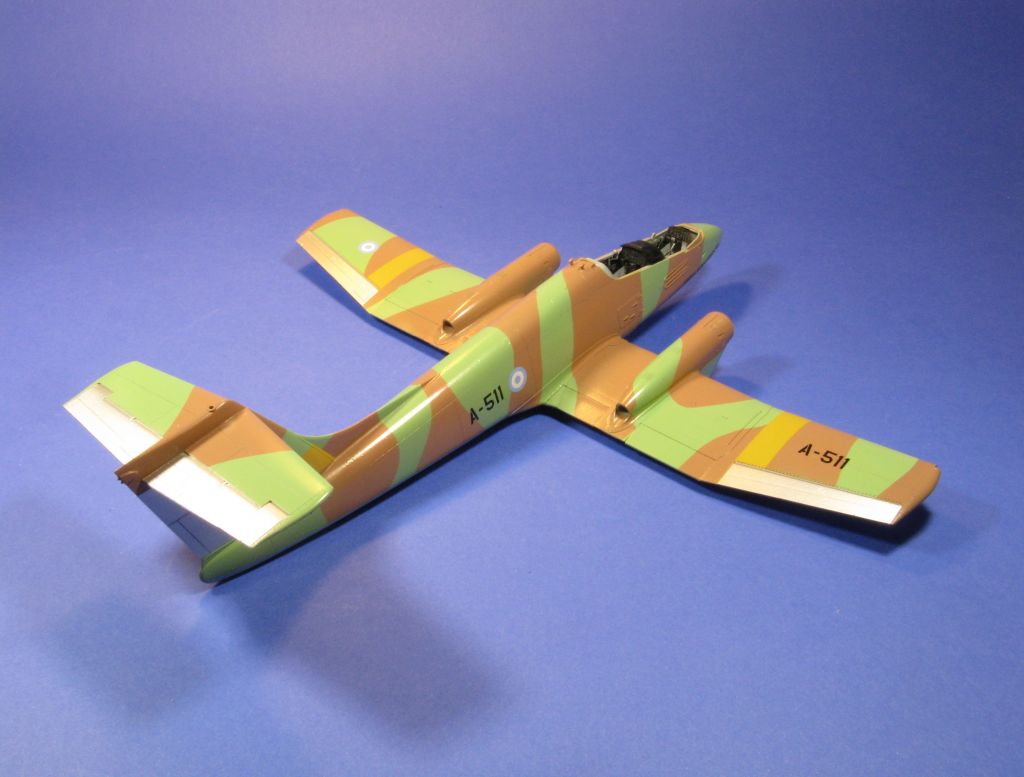
I also chose to build my model with the flaps up. You will have to modify the flap attachment point and the flaps actuators by removing a bit of plastic on all the parts.
I also didn’t want the pilot climbing steps to be shown, so I modified the part to be in the retracted position and filled in the ‘open rectangles’ on the fuselage side, which are pilot steps.
A point to highlight is that the -D version had some navigation lights added to the fuselage (they are provided in the model as clear parts, nice touch Kinetic!). But these navigation lights were not installed in the -A airframes, so you will have to fill them out. This is not listed in the instructions.
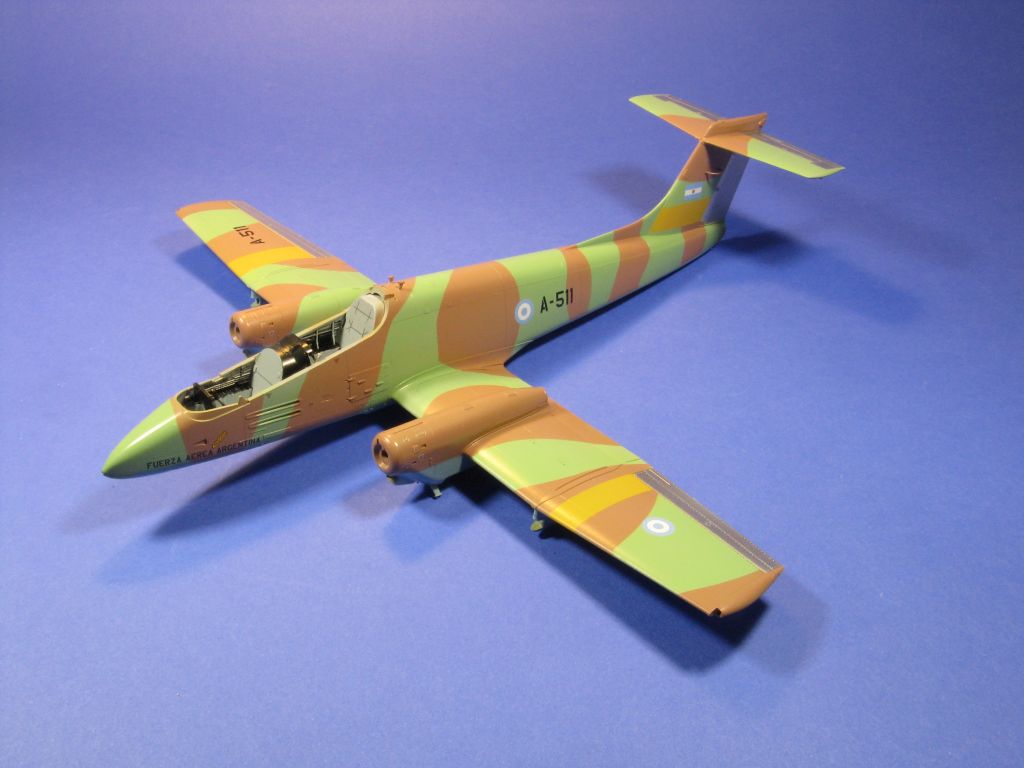
After inspecting the assembly the seams for gaps or steps (they were none, except on the belly access hatch) I primed the model and painted it. Another note to make: I’m pretty sure the painting instructions have a mistake on them. While no pictures are known of the A-511 while camouflaged, there is ample evidence that the field-painted Pucaras had all the ailerons and tail moving surfaces left in bare metal as to avoid altering their balance. Only the Pucaras painted at the factory had the ailerons and tail surfaces painted over. Based on my personal research (and I might be wrong) A-511 was camouflaged in the Patagonia, with locally sourced paints while in-route to the Falklands.
I also decided to keep the weathering to a minimum. These airframes were exposed to the weather while in the Falklands, but they didn’t stay there that long (the conflict was short and many airframes were destroyed within weeks of arrival, with A-511 barely making it one week before being destroyed). Besides at the Falkland’s latitude during the winter there is limited exposure to sunlight, so not much chance for the paints to fade.
When applying the decals -which are designed by Two Bobs and printed by Cartograph- I have to point out a couple of things:
The squadron coat of arms is printed in grey. That is correct for post-Falkland war era. During 1982 the coat of arms was still red.
The decal sheet has no number associated with the decals themselves, although the instructions do show the numbers. Knowing where the service stencils are supposed to go it is a tad difficult but certainly doable.
Despite those minor issues with the instructions about where each decal goes, the decals themselves behaved perfectly and responded very well to the MicroSet/Sol combo with no silvering at all.
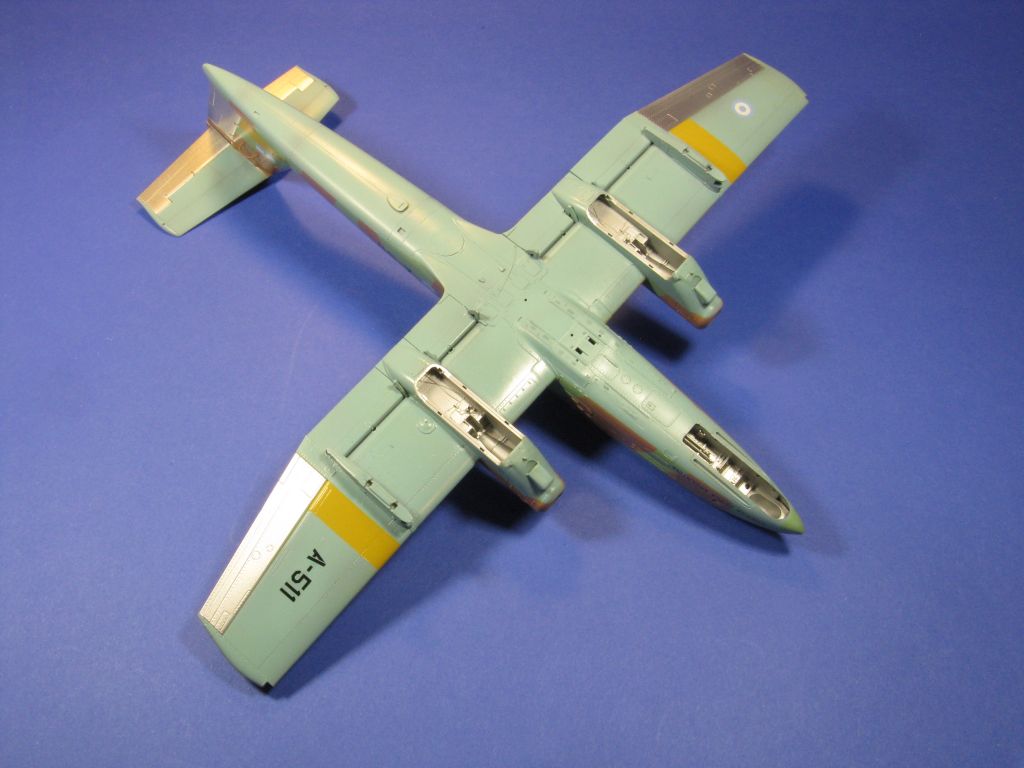
While working on the painting and decaling I also started working on the landing gear. Again, the fit of the parts is fantastic and you cannot go wrong if you follow the instructions.
On the propellers themselves I’ve ran into the possible only issue that the molds were at fault. The propeller spinners didn’t quite fit into the propeller spinner backplate. It was very easy to sand the inside of the spinners to make the fit properly.
I wanted my Pucara to have some ordinance so I got them from the spare boxes. I choose to arm it with some rocket pods and iron bombs. I’m reasonably certain that the loadout is appropriate for the Pucara during the Falklands War era.
One final detail is that the ejector chute for spent bullets was not installed in the Falklands, based on my own research of period photographs. Hence, I left out parts D41 and D42.
In summary, construction of this kit is as uneventful as you can find a kit to be, which speaks volumes of the engineering quality of the “Kinetic Gold” series. The instructions have what I consider a few minor inaccuracies (which I did my best to describe above).
All things considered, this is a fantastic model of an airframe I never thought it would be made into a main-stream, state-of-the-art plastic kit in 1/48 scale.
Highly recommended.
I would like to thank Lucky Model and IPMS/USA for the review sample.


Comments
Add new comment
This site is protected by reCAPTCHA and the Google Privacy Policy and Terms of Service apply.
Similar Reviews