
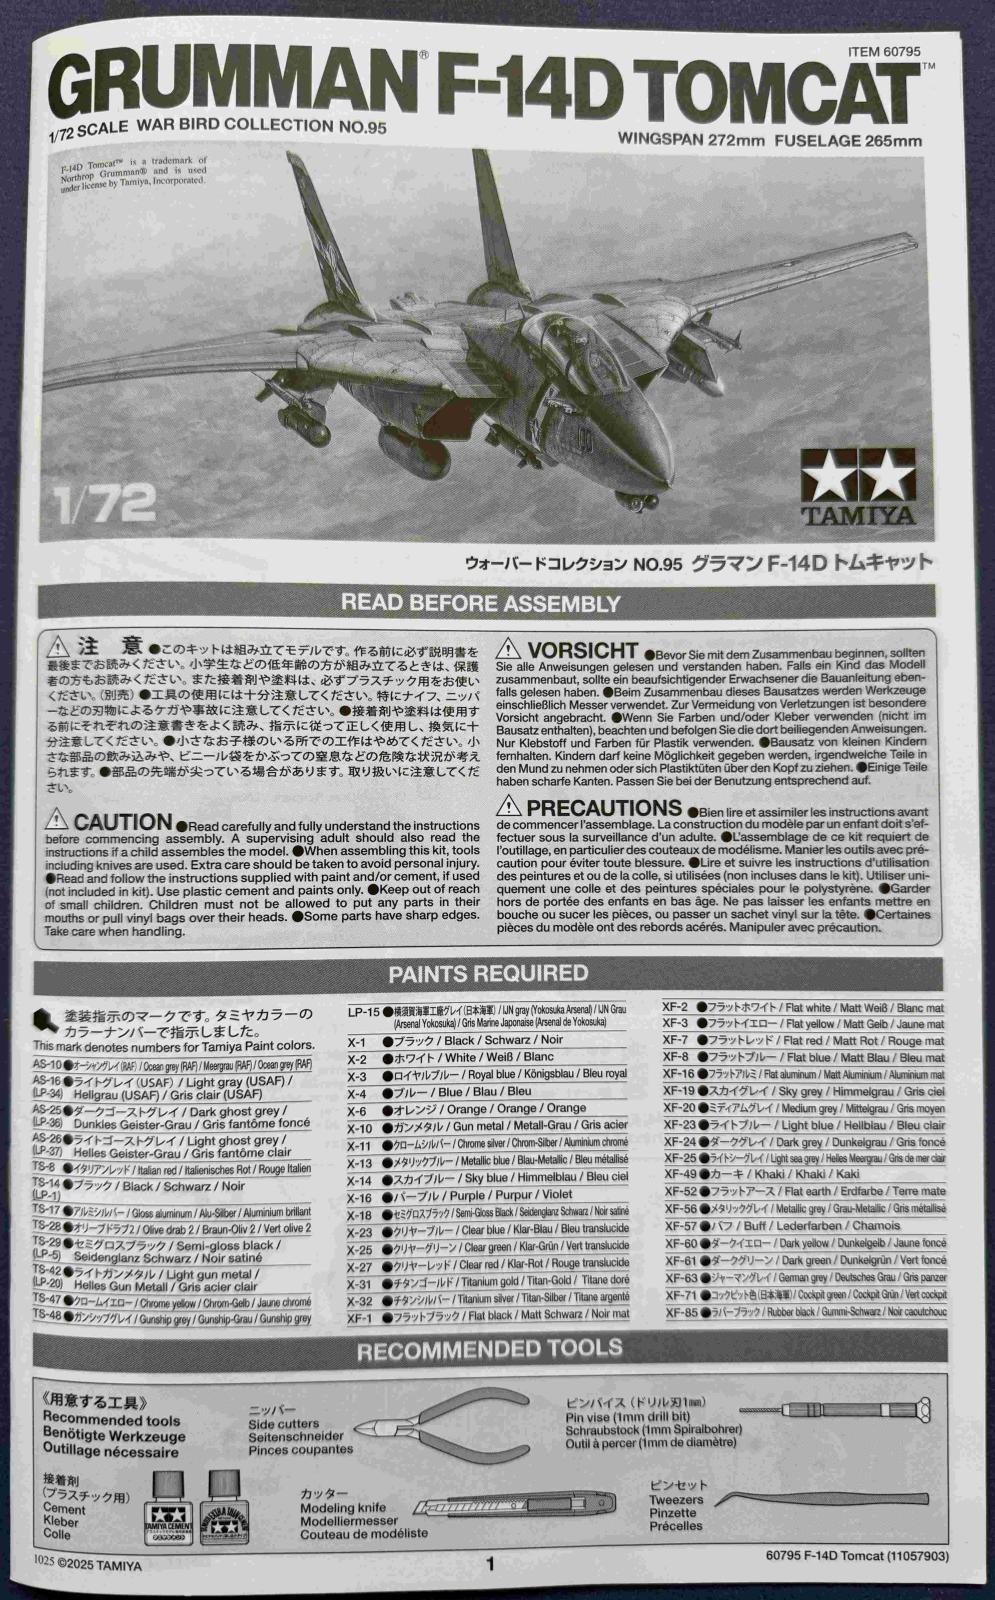
Grumman F-14D Tomcat
From the Manufacturer’s Website:
Our 1/48 scale F-14D Tomcat model kit is one of the most detailed modern plane kits we’ve produced. We’ve now taken what has been learned from its development and production to bring model builders the same level of detail to our popular 1/72 scale lineup while also providing a streamlined building experience!
The Tomcat enjoyed an active career from the early 1970s until 2006; initially given a fleet defense role, in the 1990s the Tomcat’s superb range saw that role expanded to include strike missions, and then later that decade the addition of the LANTIRN targeting pod meant it could undertake long-range bombing runs using laser-guided ordnance. The F-14D was the final variant, which inherited its F-14B predecessor’s General Electric F110-GE-400 engines and was given major upgrades to avionics. It reached units from 1992, serving in the skies over Iraq and Afghanistan. It finally retired from U.S. Navy service in 2006.
- 1/72 scale plastic model assembly kit. Wingspan: 272mm, fuselage length: 265mm.
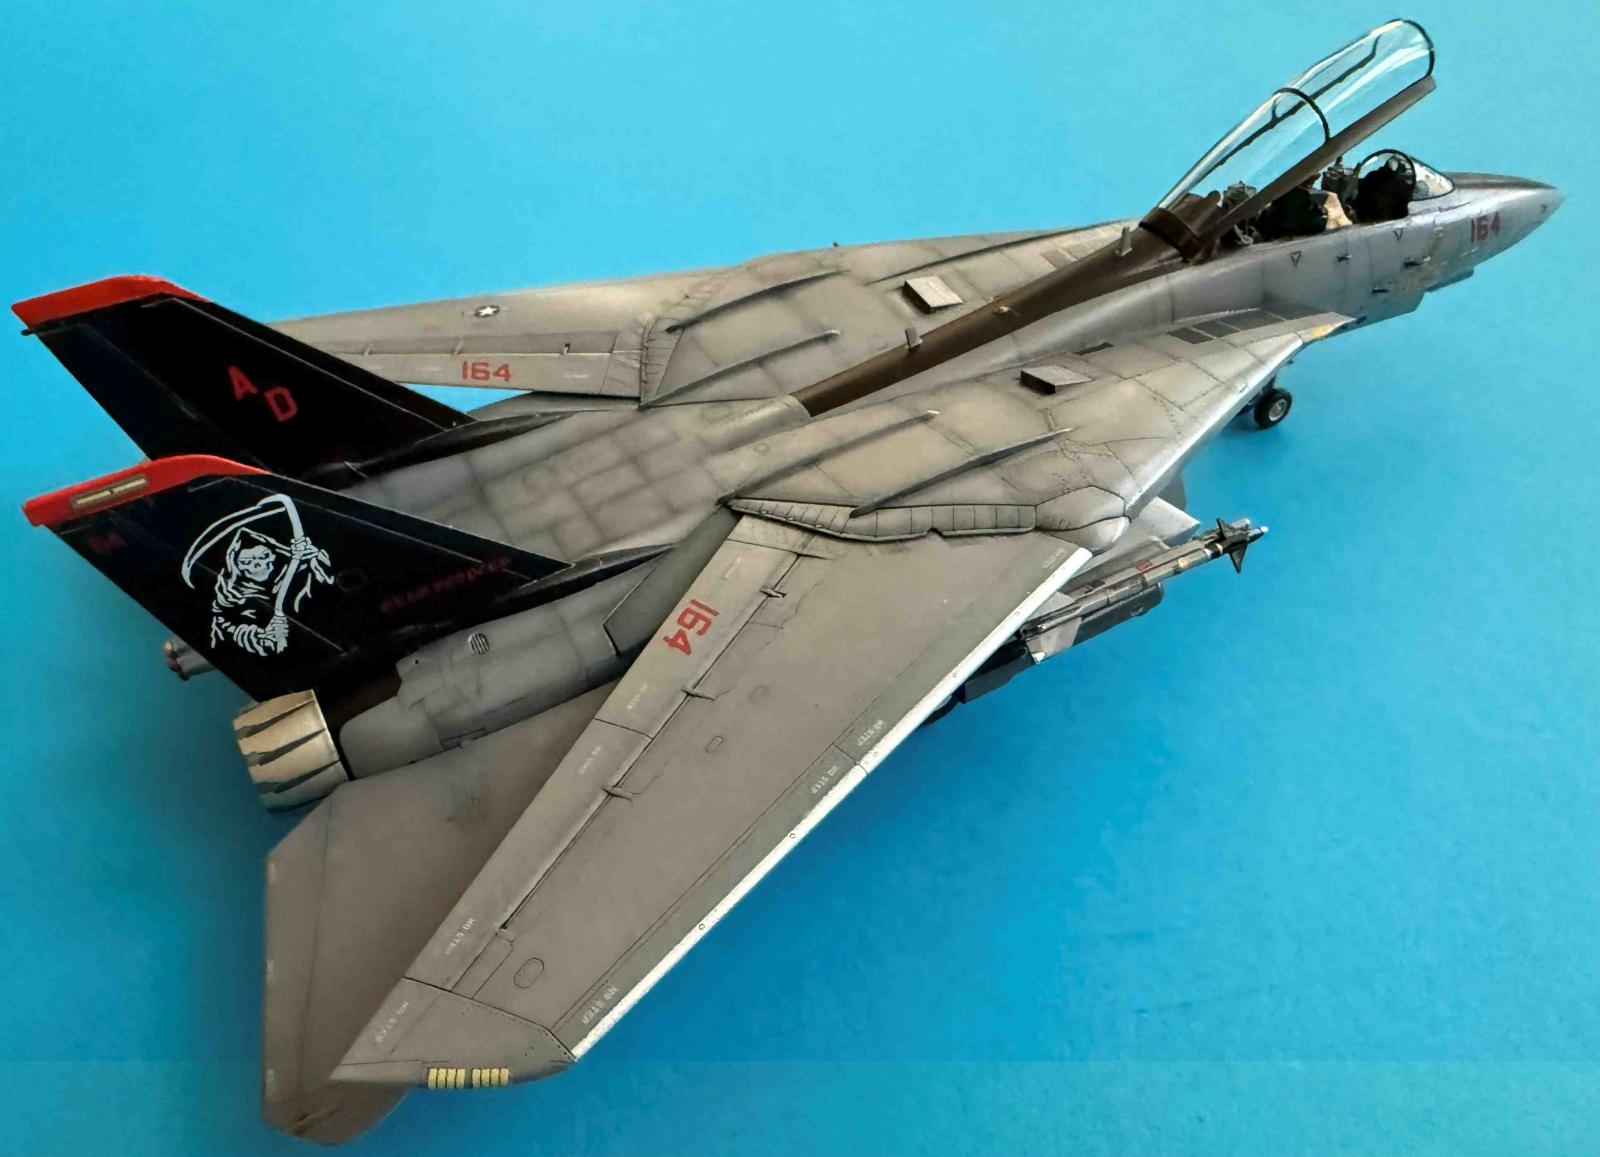
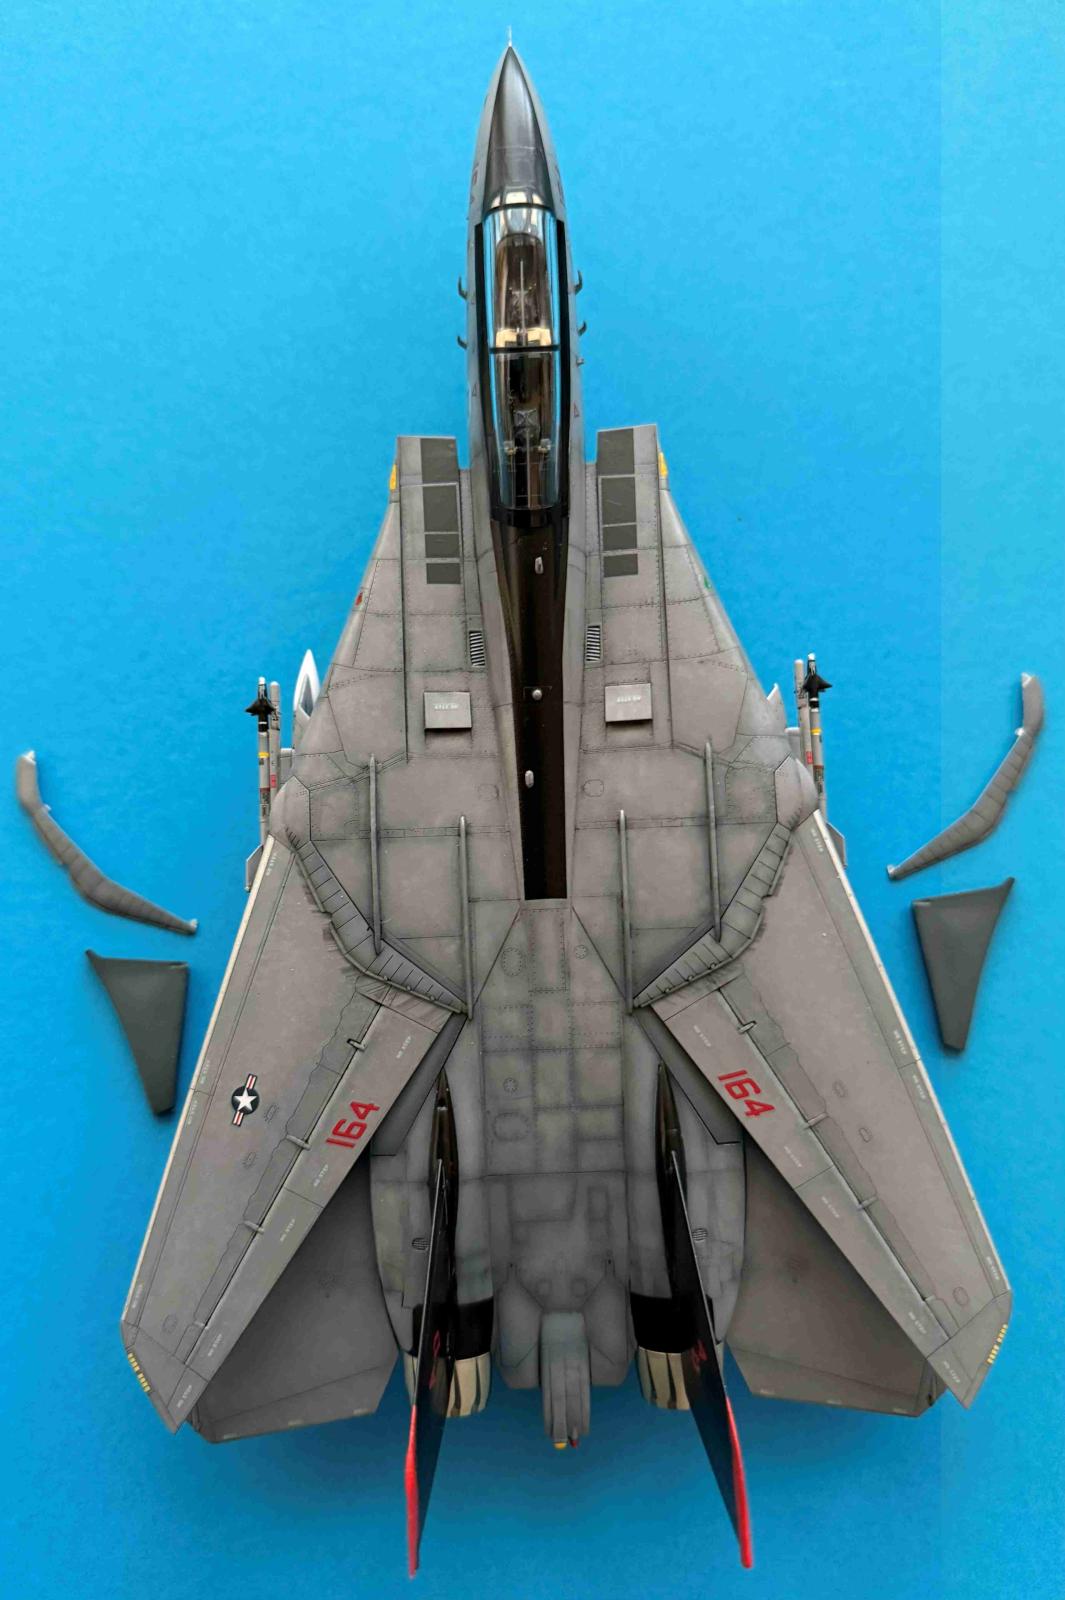
- Variable sweeping wings are depicted!
- Distinct parts - interchangeable after completion - depict sealing plates and air bags with the wing in various positions.
- Canopy, air intake side sections and fuselage sides are slide molded to ensure their shapes and surfaces are accurately depicted.
- Horizontal stabilizers move thanks to poly caps.
- The modeler has a choice of open and closed fuel probe (on the right of the nose) and boarding ladder and step (on the left fuselage).
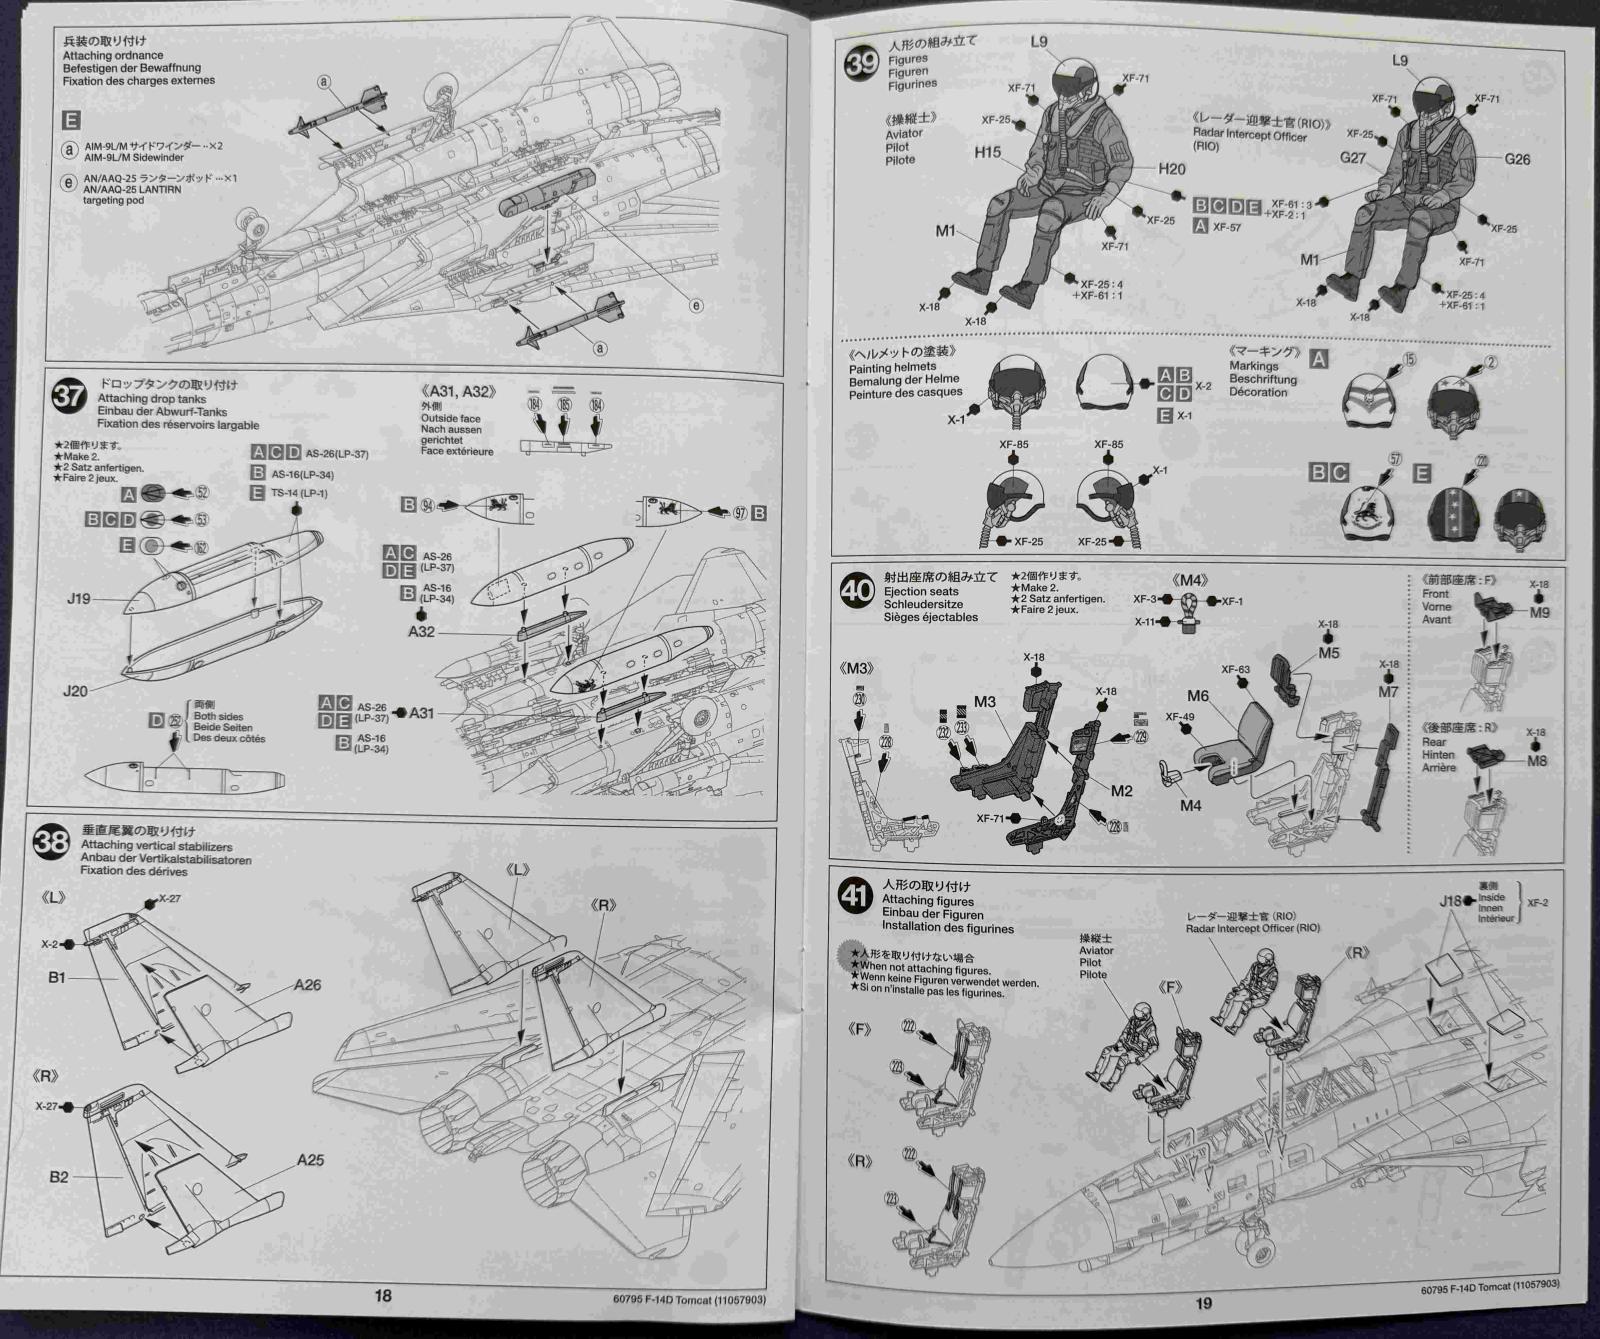
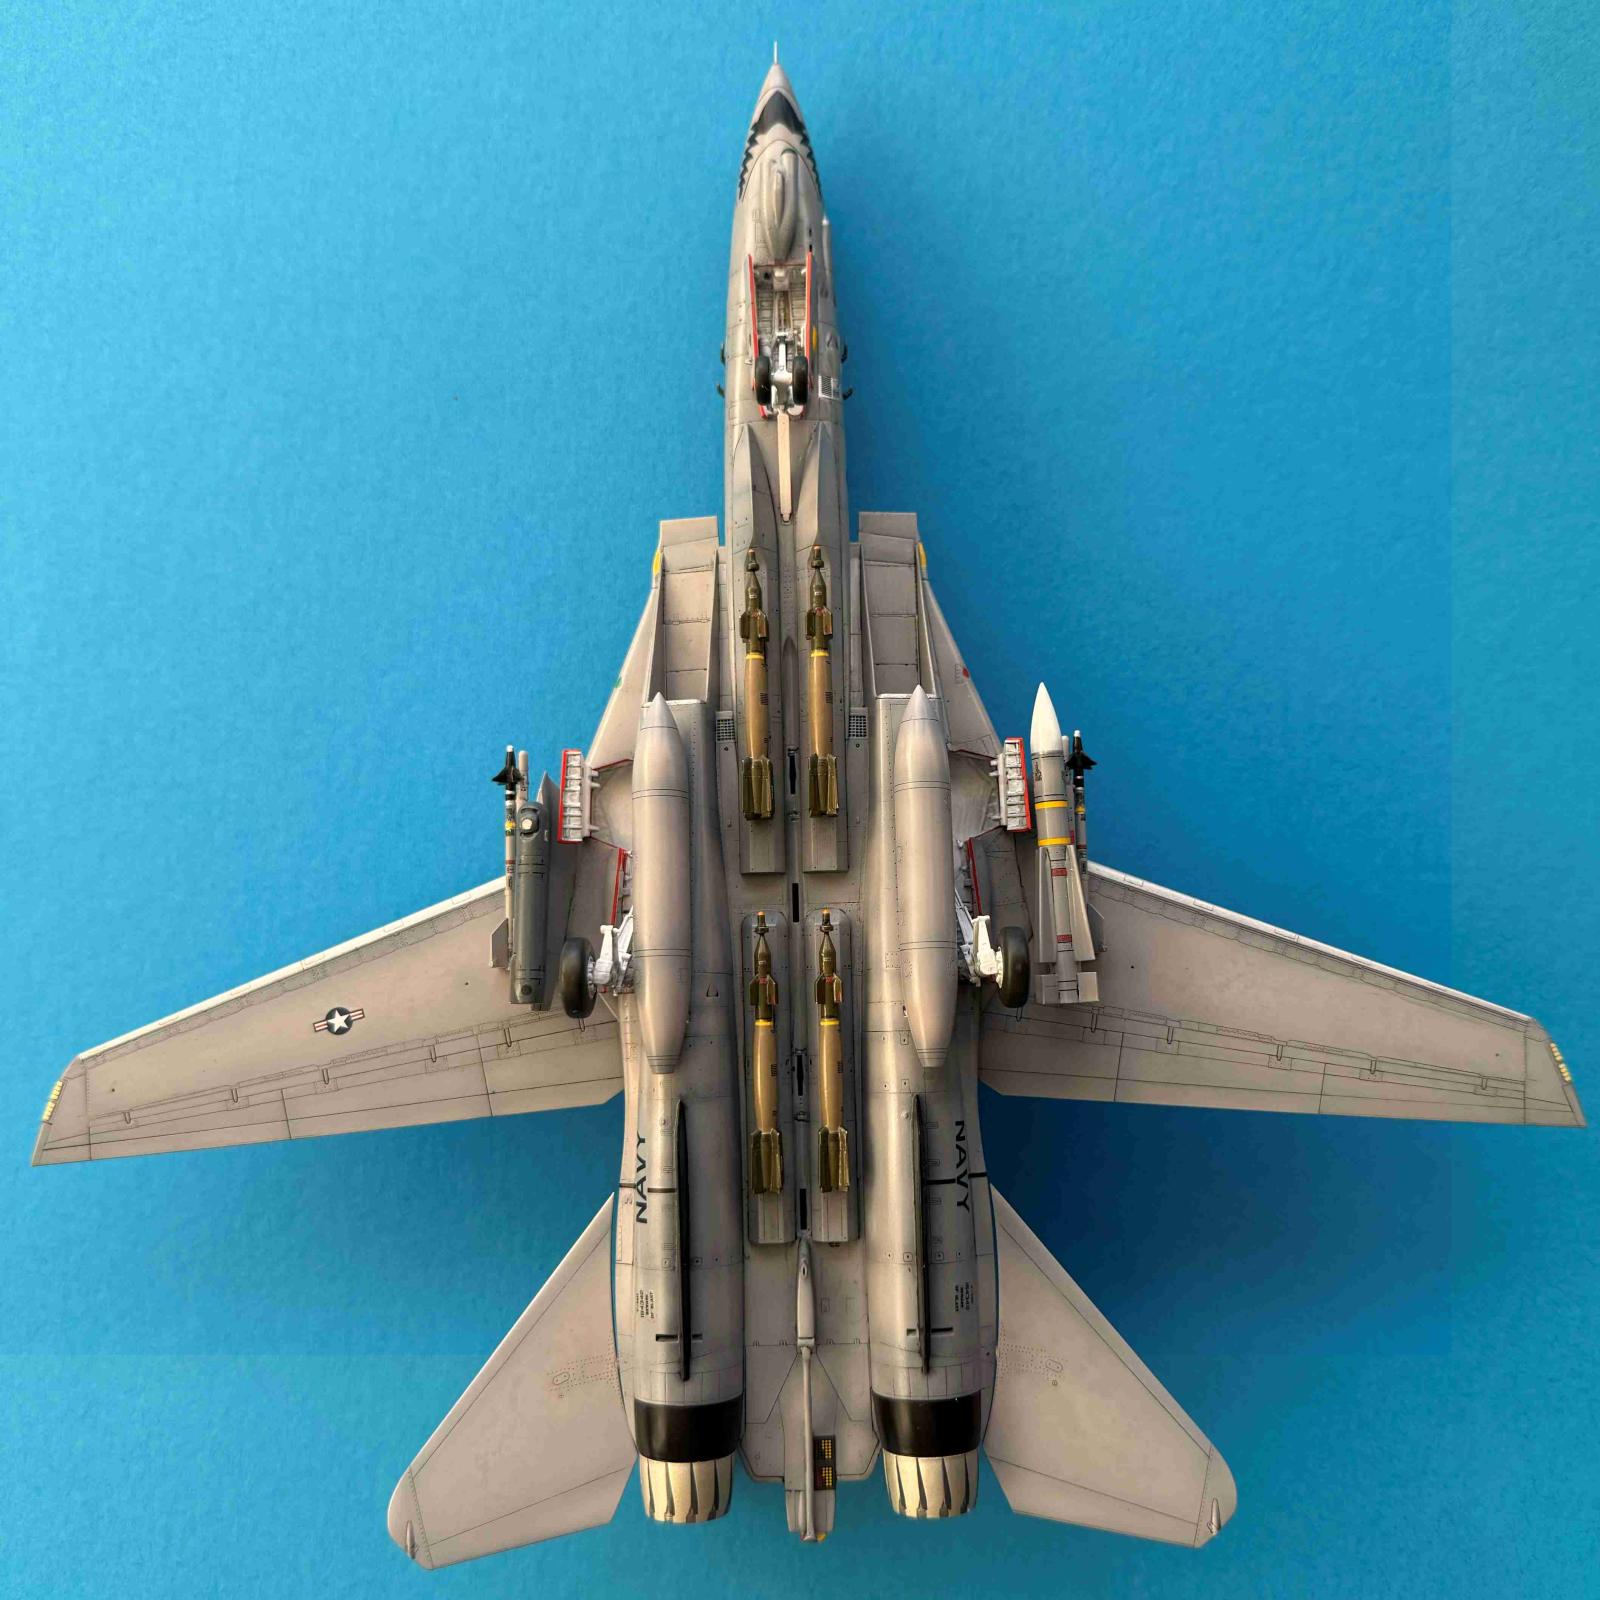
- Parts are included for recreating laser-guided bombs, LANTIRN pod and air-to-air missiles.
- The model comes with 2 seated crew figures and 5 U.S. Navy marking options.
The Kit
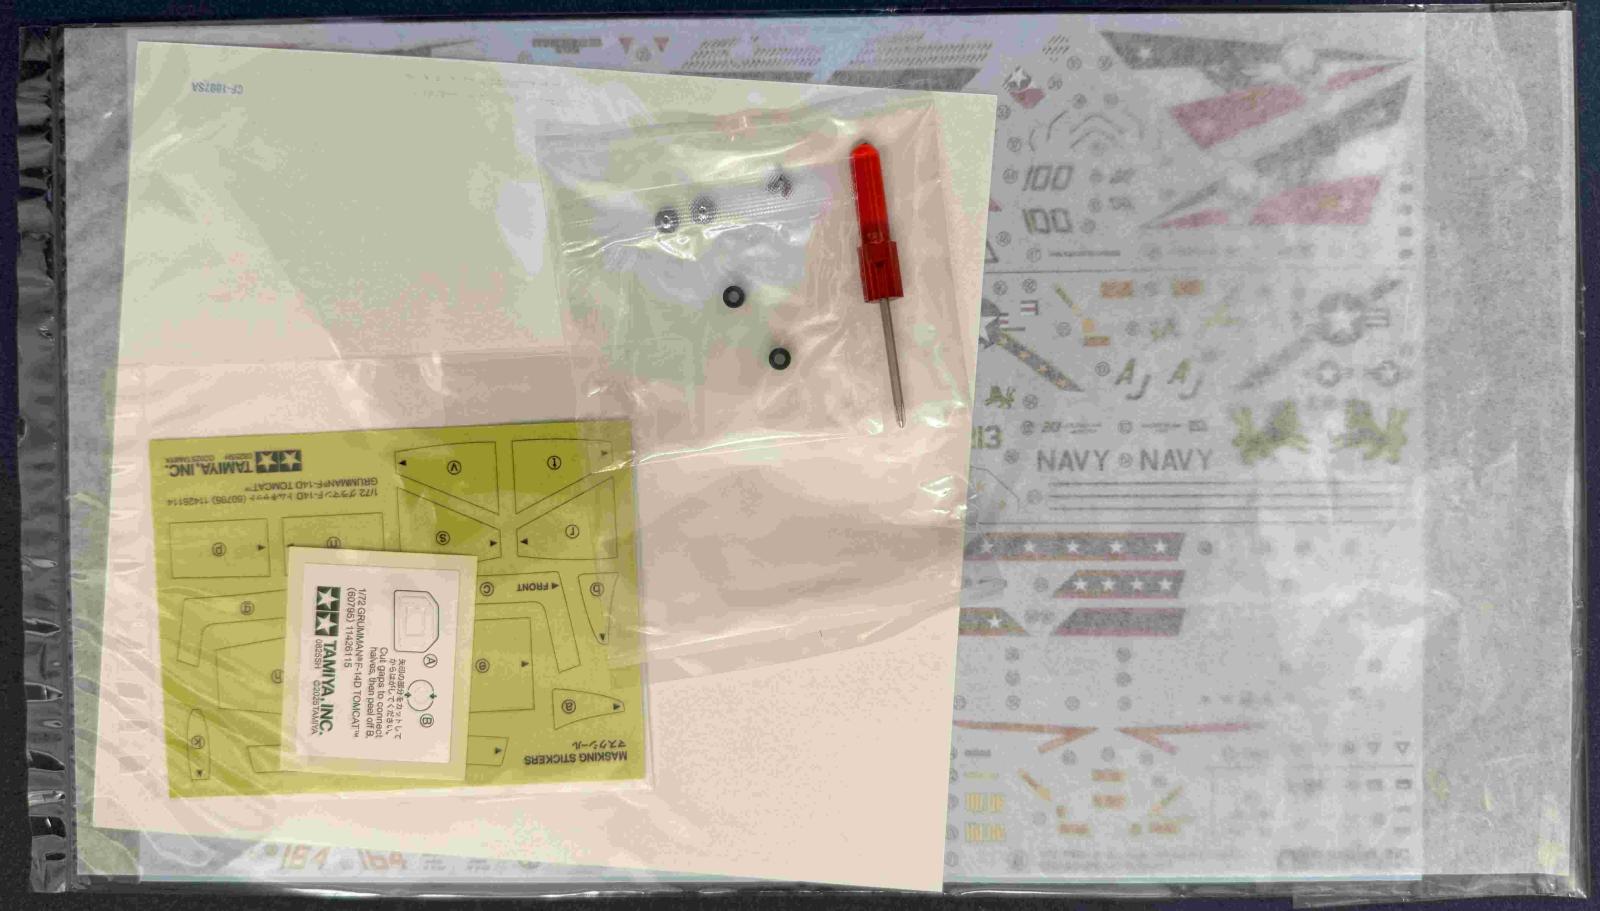
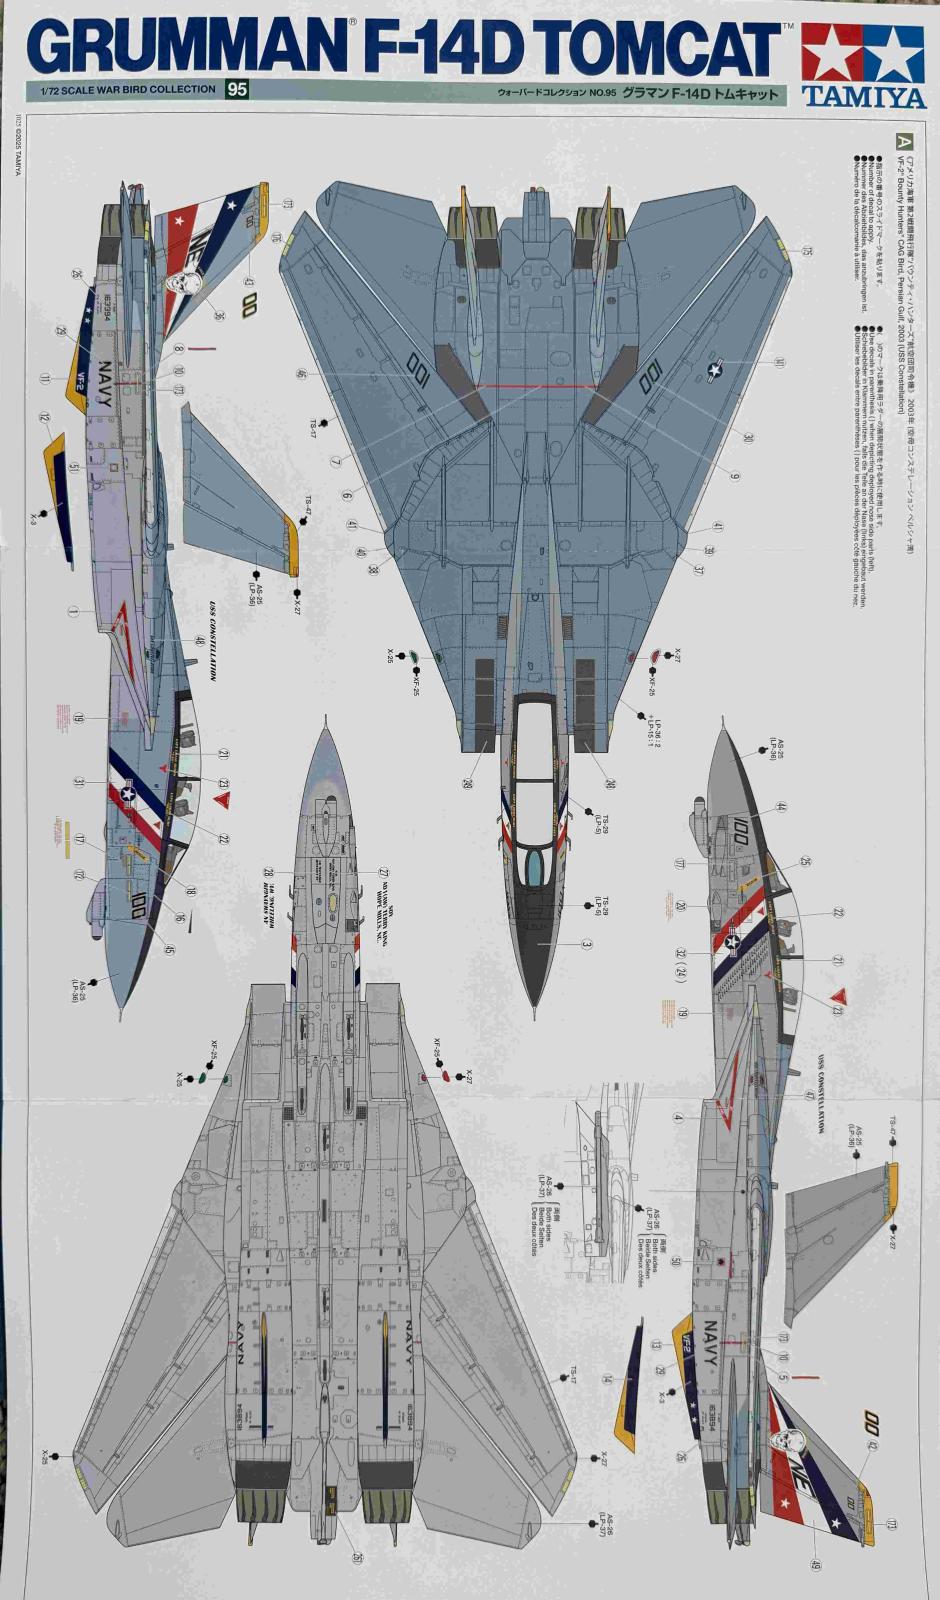
The Tamiya Grumman F-14D Tomcat kit is a part of 1/72 Scale War Bird Collection and includes several crisply molded sprues in light grey styrene, a clear plastic sprue, decal sheets, a masking sheet, a small silver label, poly caps, 3 small screws and a small screwdriver. It also has a black and white instruction sheet with 24 pages and 50 assembly steps, a folded B&W sheet with a brief overview of F-14s history, and a large colorful folded sheet with 5 marking / painting schemes. The painting options include the following aircraft:
- VF-2 “Bounty Hunters” CAG Bird (USS Constellation), 2003
- VF-213 “Blacklions” CAG Bird (USS Theodore Roosevelt), March 2006
- VF-213 “Blacklions” CAG Bird (USS Theodore Roosevelt), March 2006 in a low visibility scheme
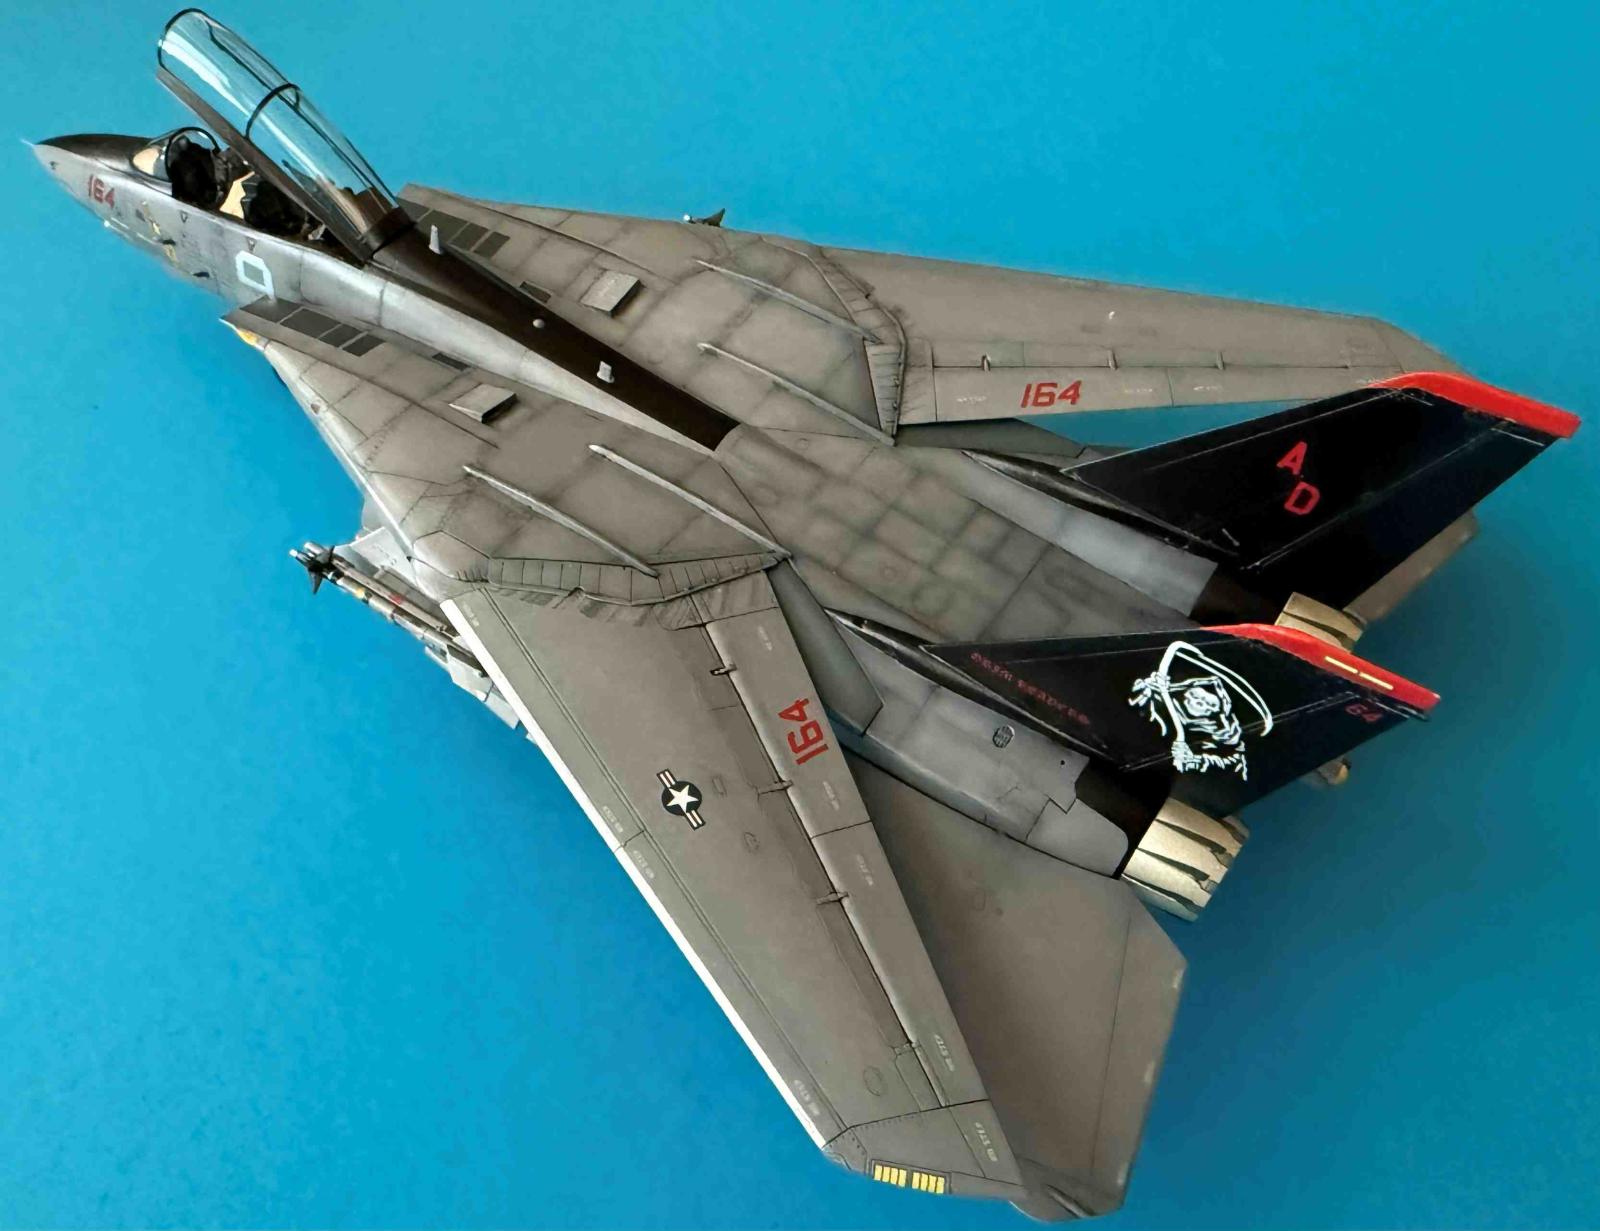
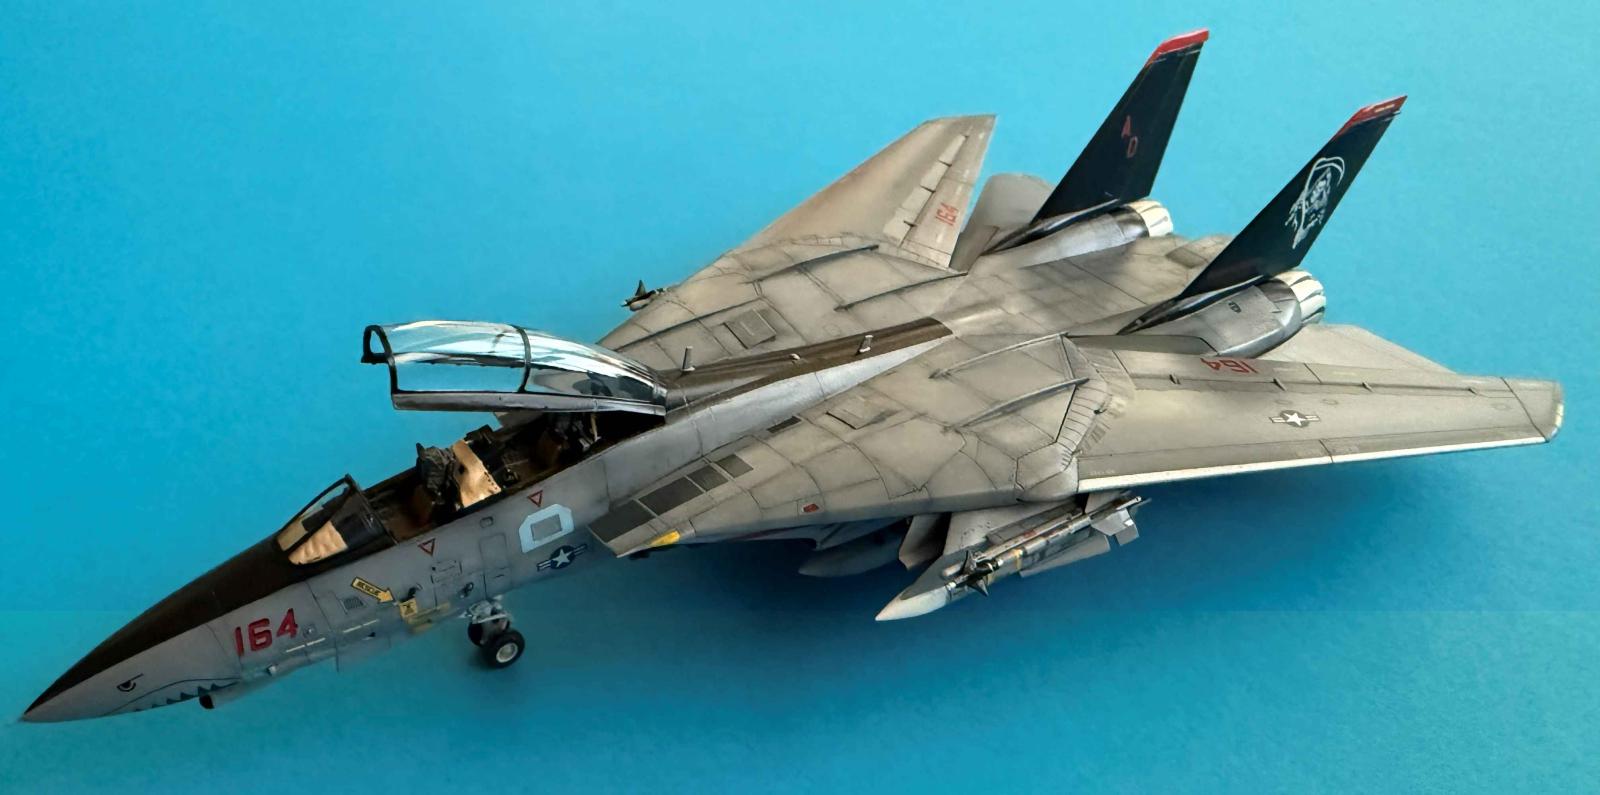
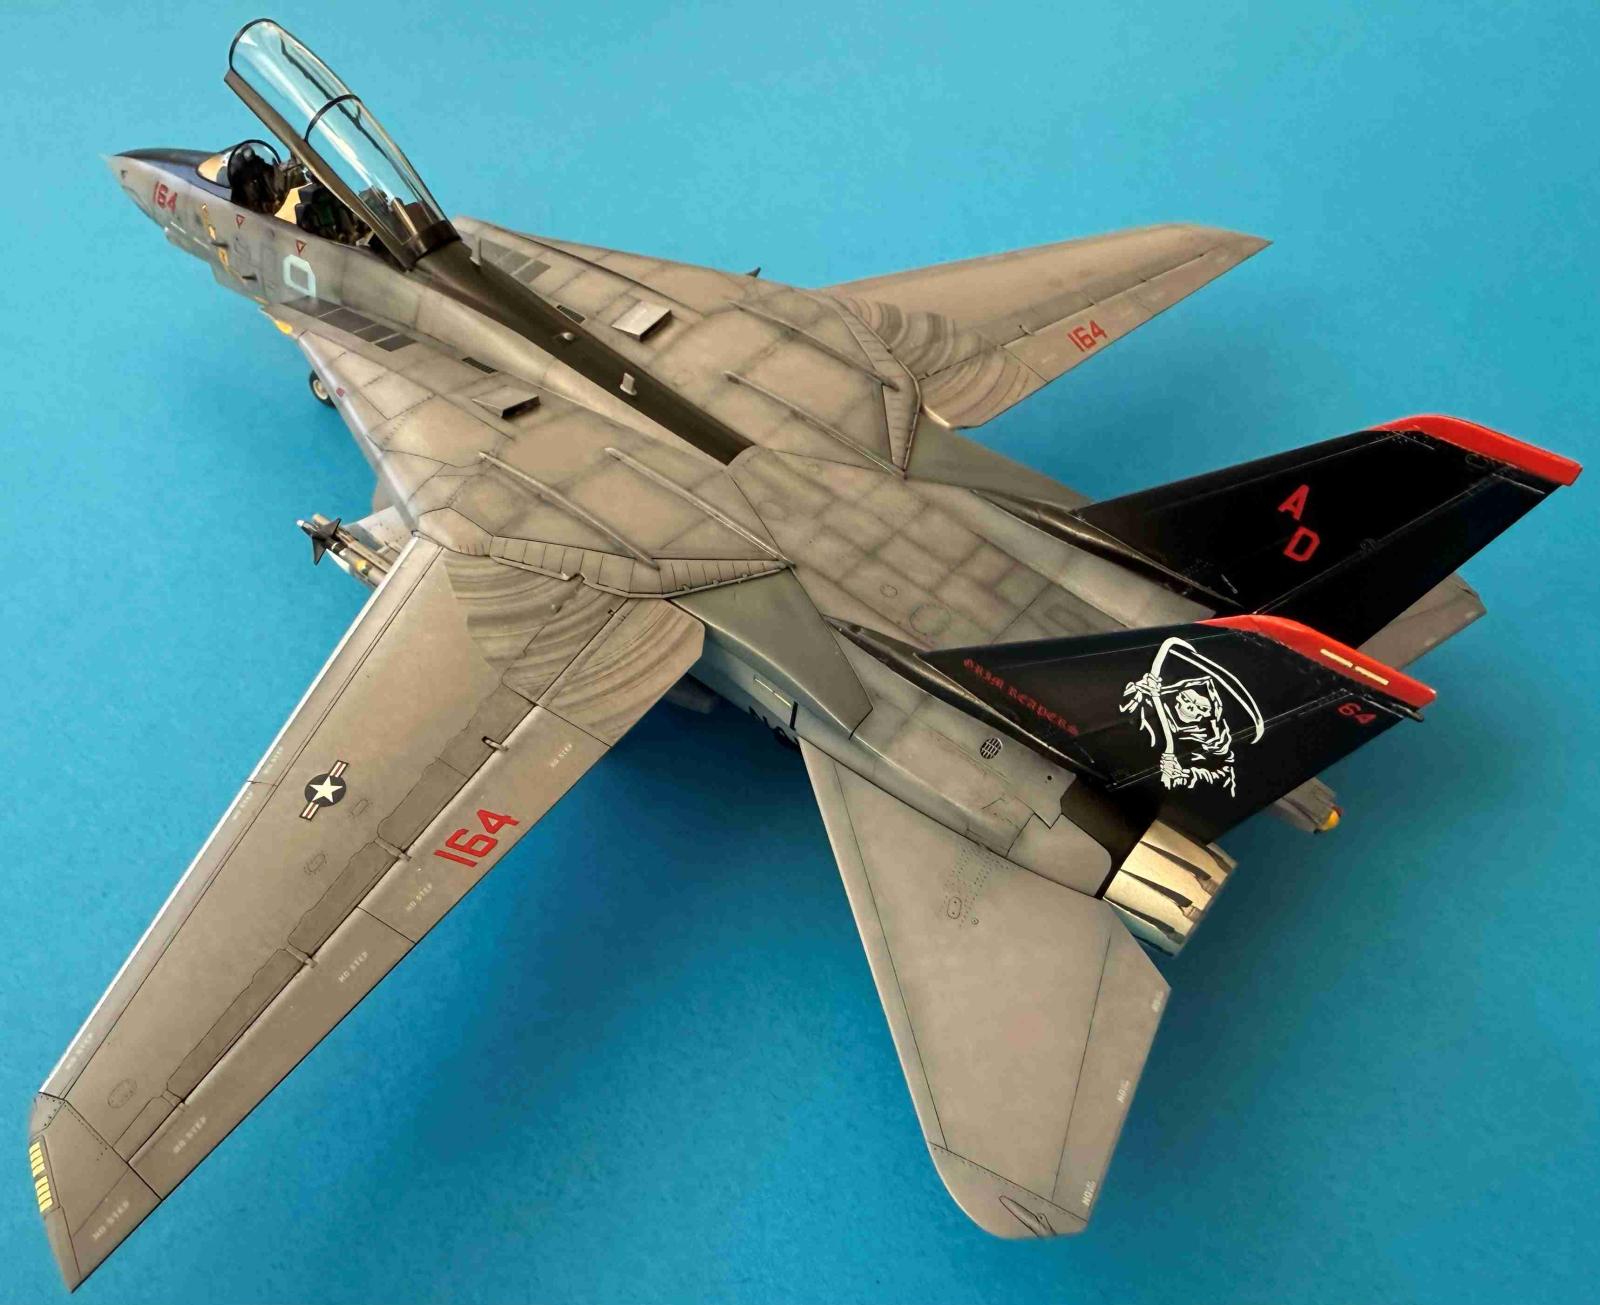
- VF-101 “Grim Reapers”, 2004
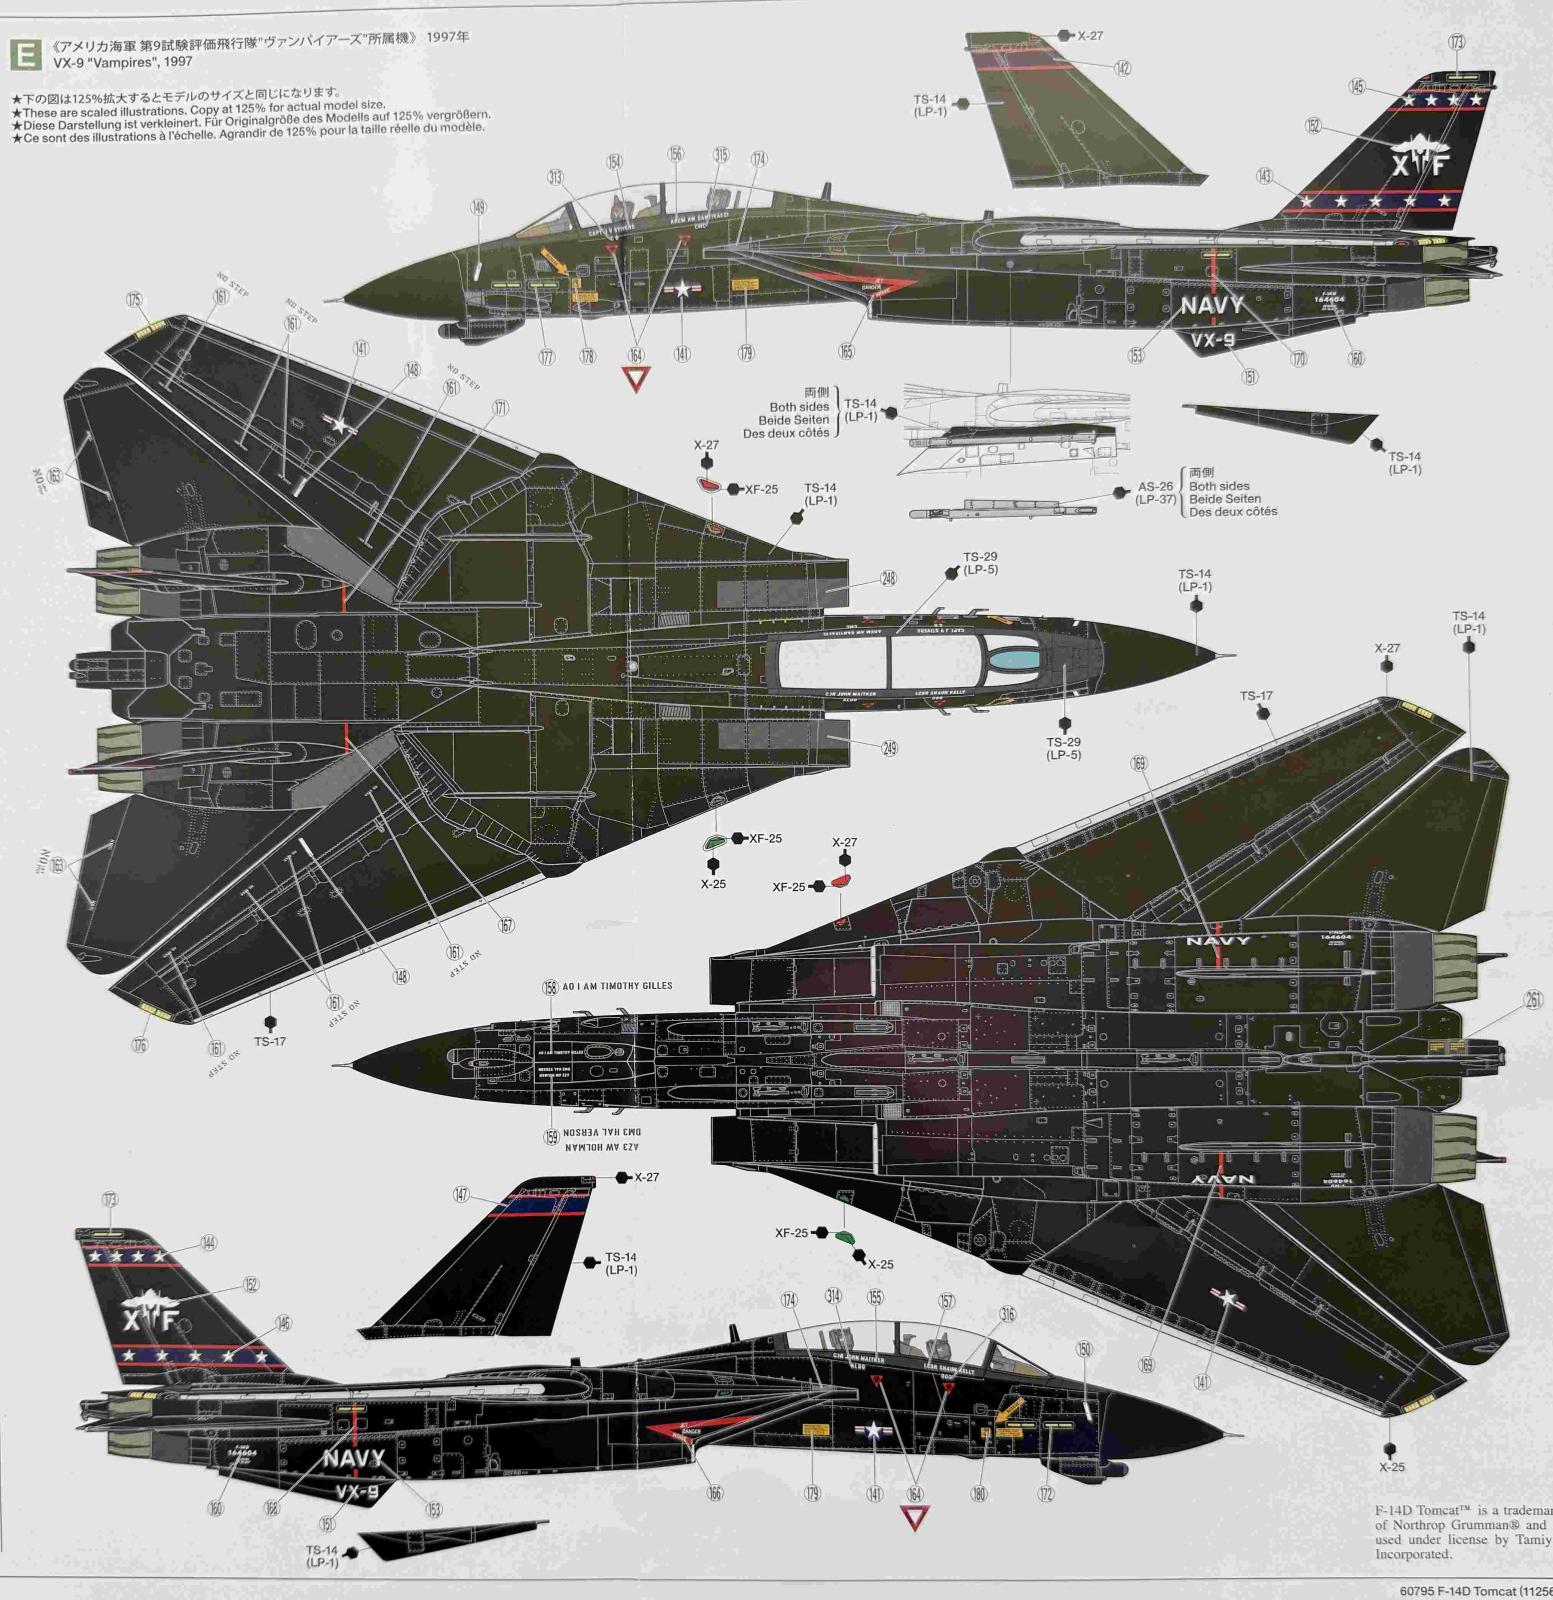
- VX-9 “Vampires”, 1997
The manual’s front page provides a long list of required paints, all Tamiya brand. Page two has a ’Tech Tip’ of how to apply masking to the clear canopy. Only the outside masks are provided for that part, though.
The Tamiya America website also has a link to the assembly manual: 60795ml-1510-40cb.pdf.
Construction
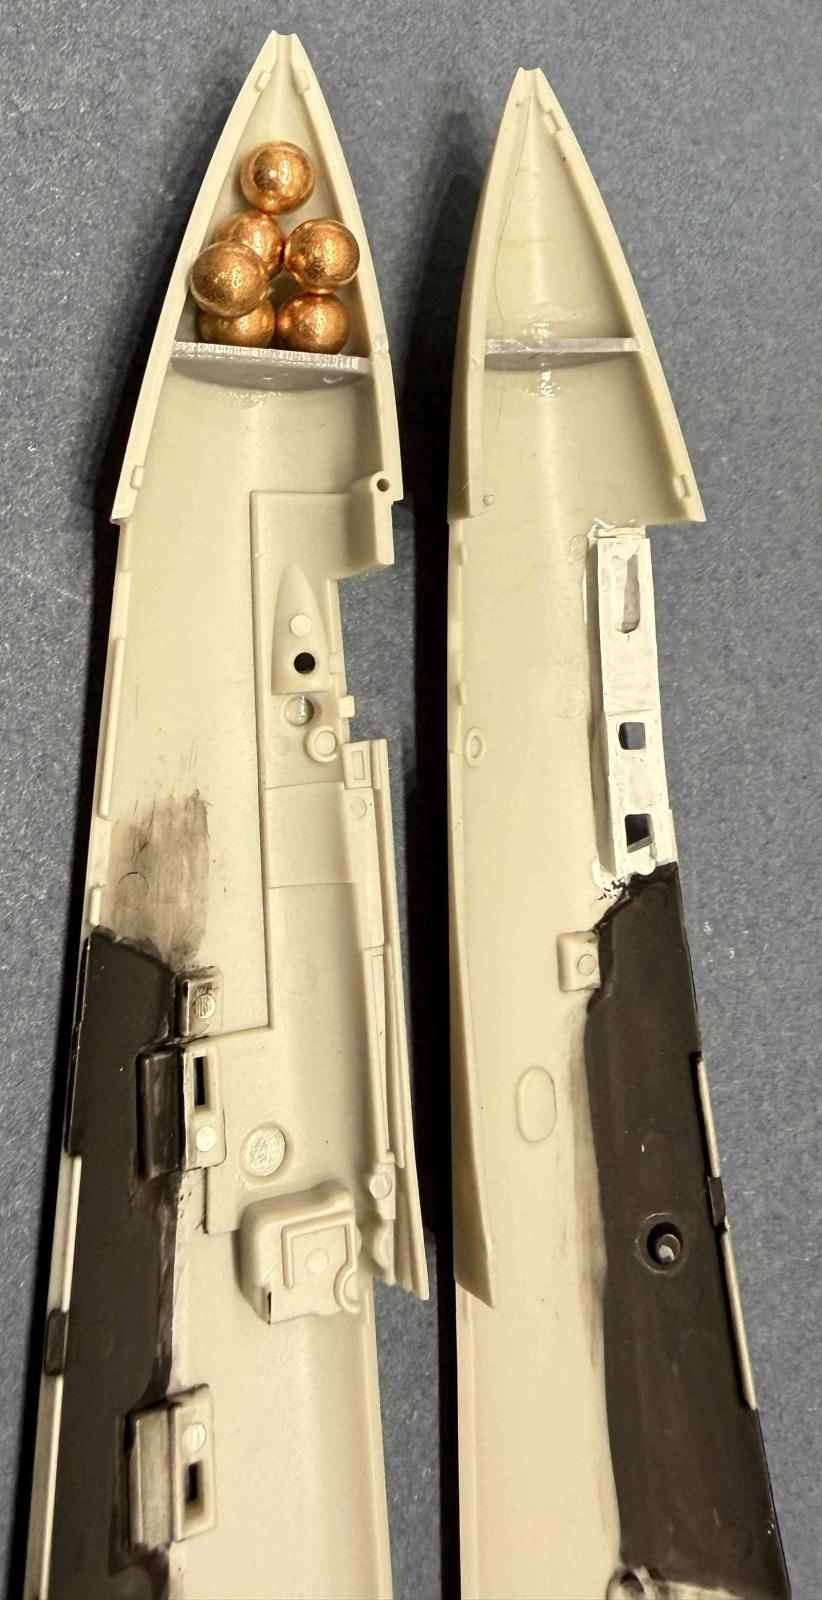
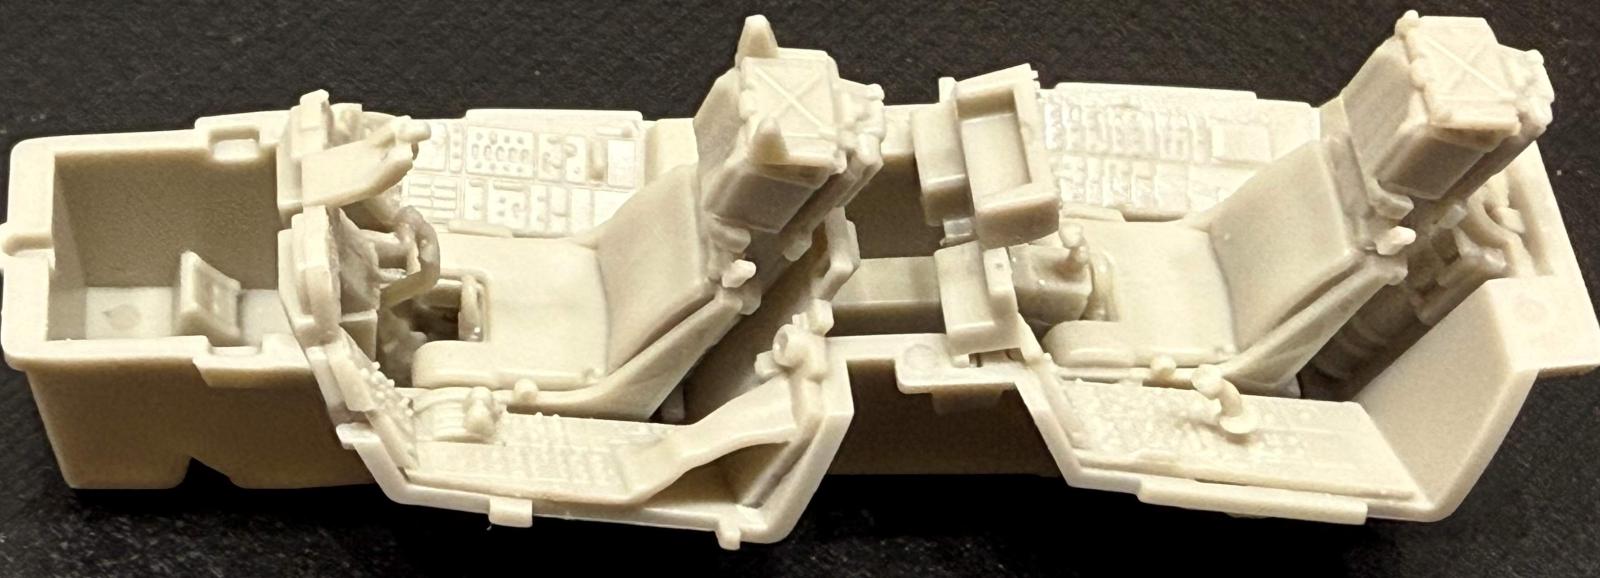
Before I started the kit assembly process, I decided on the specific paint scheme and selected a marking option ’D’ for the Grim Reapers unit. There are some differences between the marking options and some subcomponents used during assembly. However, these differences are pointed out in the instructions. Instructions are busy, and I actually missed drilling two holes in part A44 in step 18. Fortunately, it was fairly easy to locate the two holes and drill them later. The construction starts with the cockpit assembly, and it takes 5 steps to complete. The steps include painting subcomponents and applying decals for various cockpit instruments. The assembled cockpit is then attached to the top of the nose landing gear bay in step 6. Those two components then fit into the nose halves in step 7. Everything fits perfectly like a glove. Wow! Impressive already. There is a silver panel sticker to be attached to one side of the nose. I chose to attach it after the model was painted. The silver panel sticker is a very nice touch, though. Before gluing the nose halves together, I decided to add some weight to the front of the nose to avoid a potential ‘tail sitter’ situation, although the instructions do not suggest adding any weight, so most likely it was unnecessary. Step 8 finishes the cockpit and nose assembly.
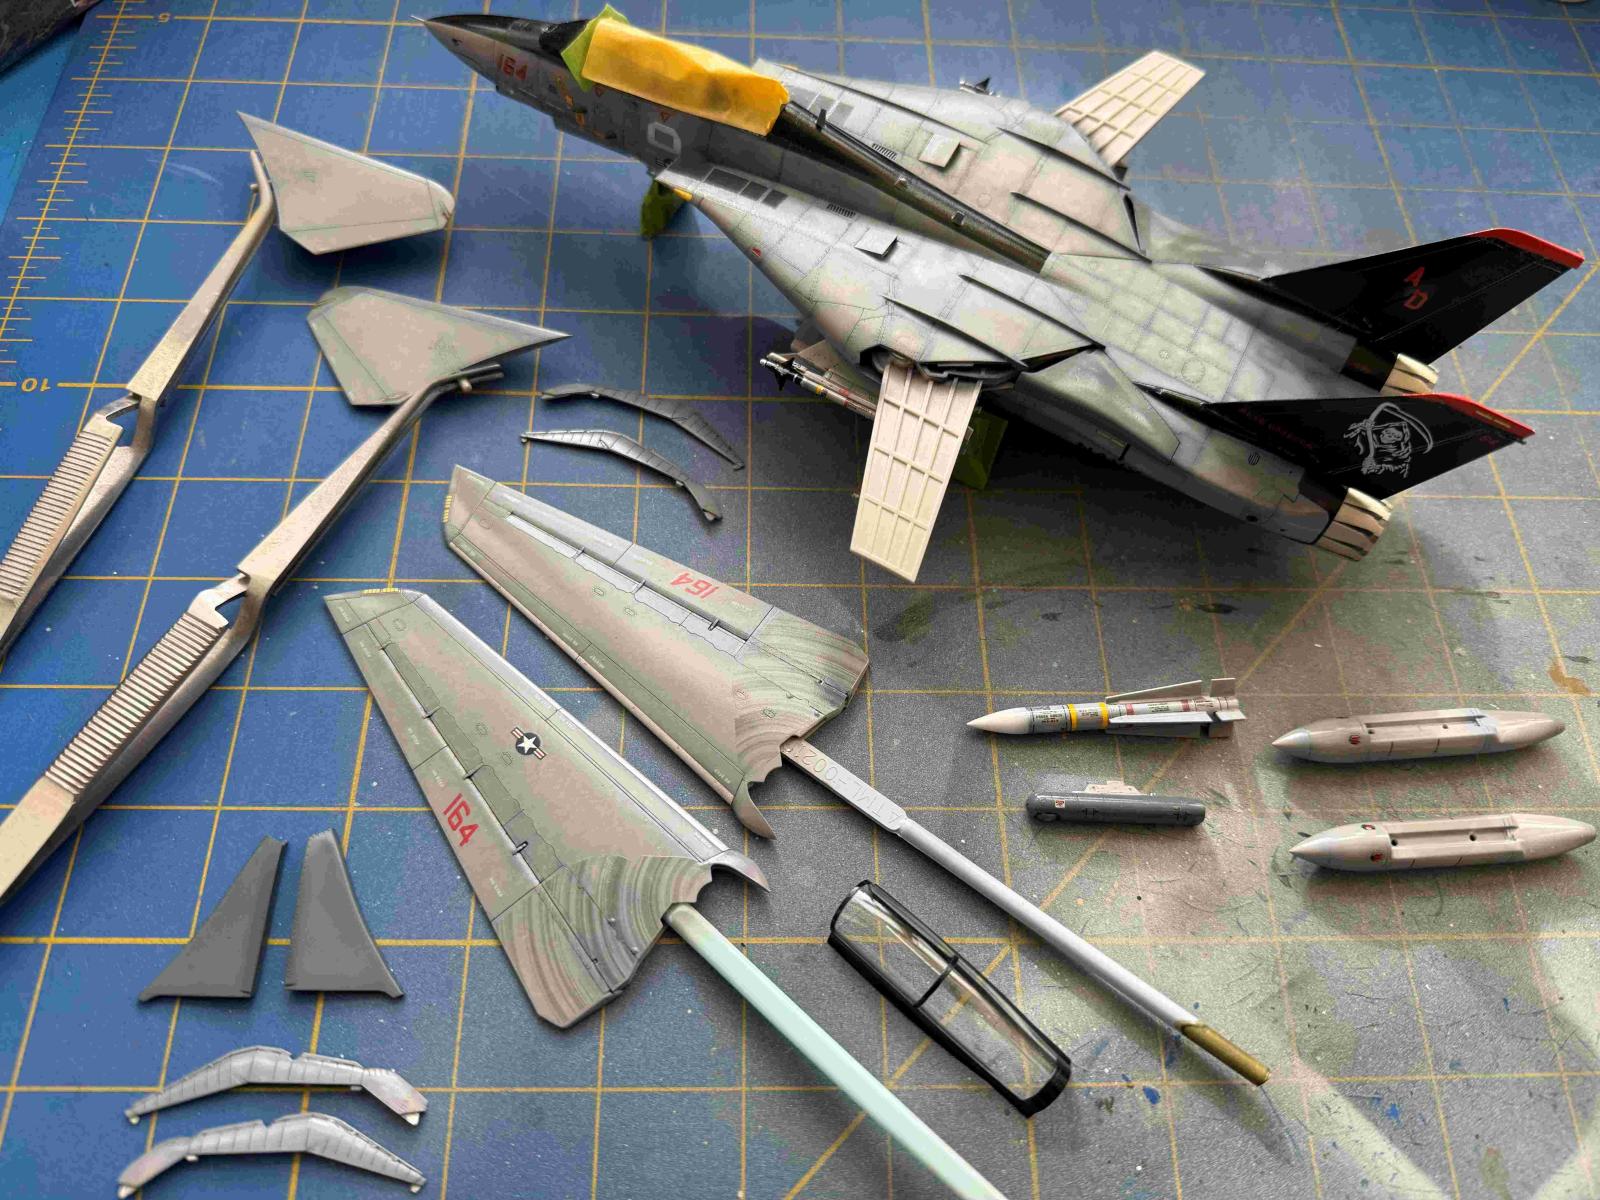
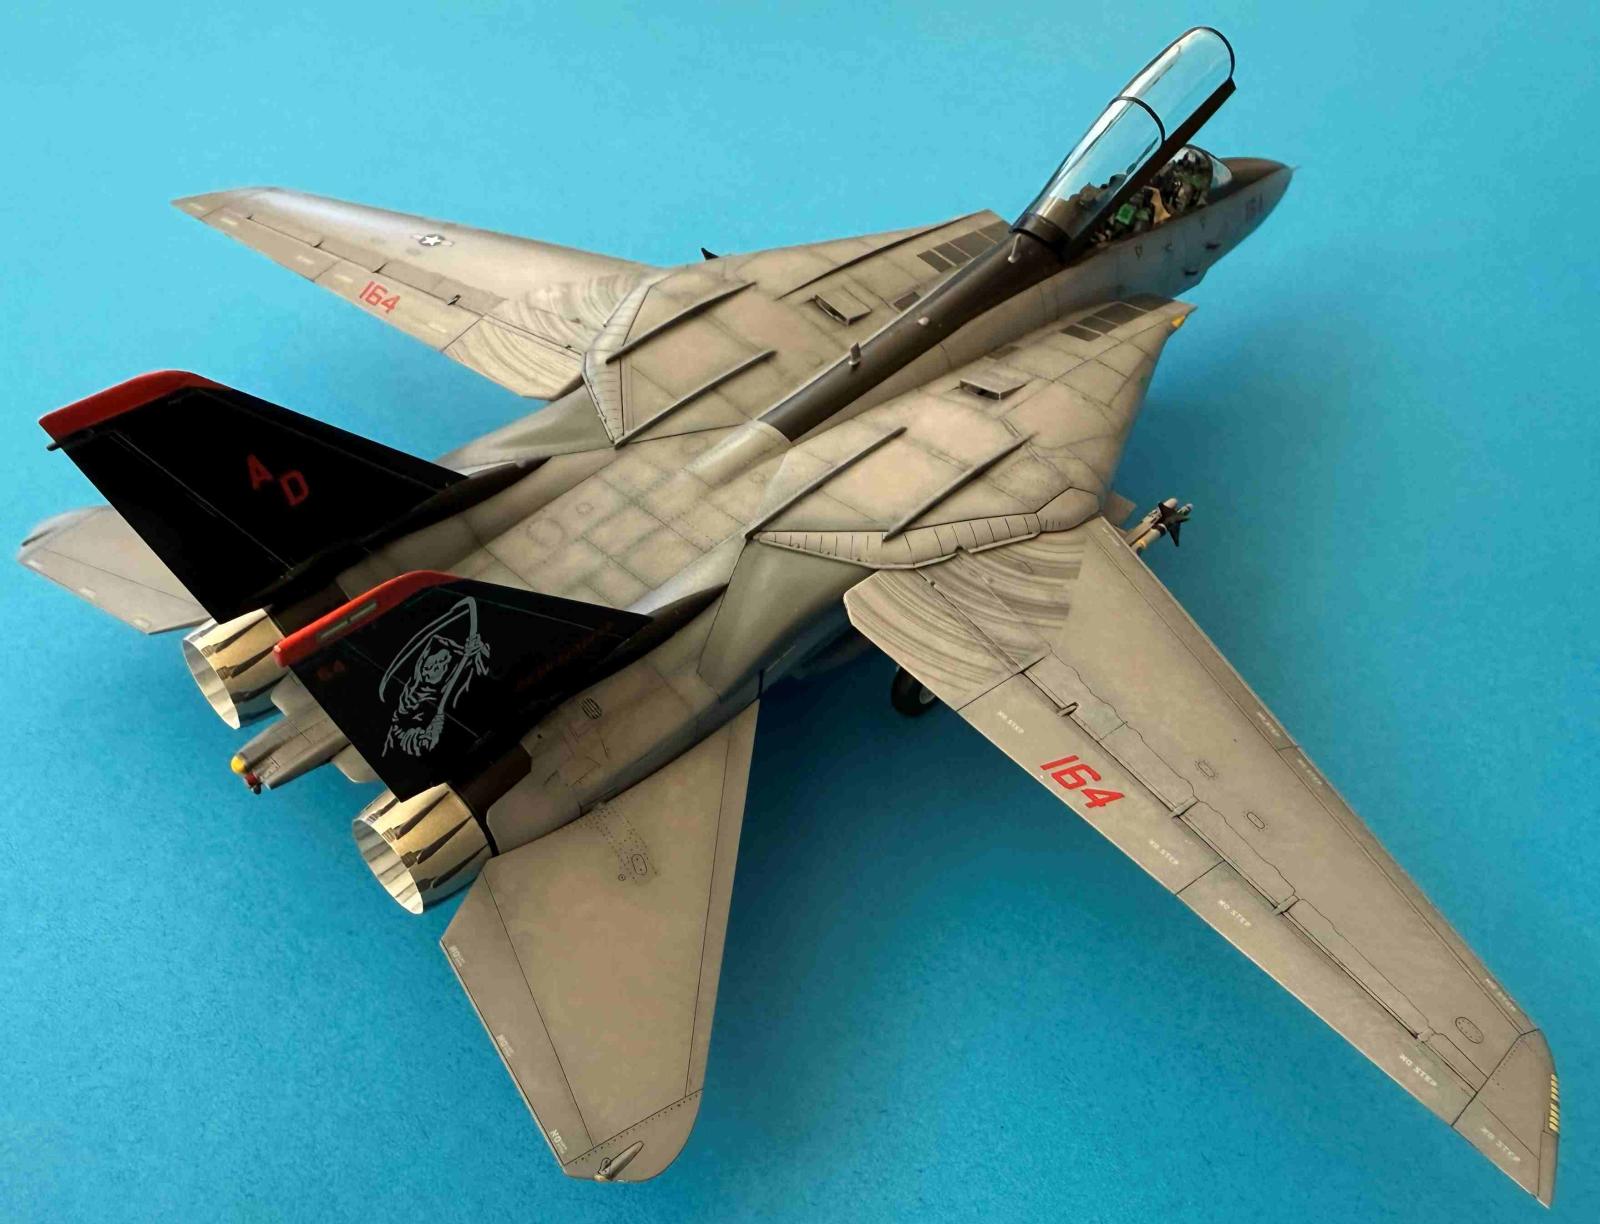
In steps 9 through 13 we have to assemble the fuselage. It starts with putting together a folding wing gear-like assembly utilizing the provided parts and screws. This mechanism is quite ingenious and operates smoothly. In step 10, several 1mm holes have to be pre-drilled for a later attachment of the weapons pallets. Steps 14 through 20 guide us through the engine air intakes and exhaust nozzles assembly. Tamiya provides masks for the inside of the air intakes. They come very handy. In step 20, the nozzles (part K5) must be painted, and several decals attached to simulate the engine nozzles overlap the structure. This was an excellent choice on Tamiya’s part, as it simplified the painting and the finished look is splendid. I decided to attach the exhaust parts later after the entire plane was painted. This way I did not have to mask parts G8 and G11 or the exhausts. I assembled the other components in steps 19-20. All the assembled parts throughout these steps had a perfect fit. Steps 21 through 27 cover landing gear and covers. There is nice detail in the front wheel bay, but the main landing gear wells are a bit oversimplified. There are many hydraulic or electric limes running on the sides of the main landing gear wells in the real aircraft and none of that is represented in the kit. The landing gear assembly involves gluing 7 parts, including wheels, so it is a fairly complex structure with 3 attachment points to the fuselage. I was amazed to find out how precisely these 3-point structures fit to the fuselage. Also, it is worth mentioning, that the attachment of the nose to the fuselage was so exact that I had a hard time finding the connecting line to apply liquid glue to the connection. Simply outstanding. Wings assembly is captured in steps 28 and 29. There is a nice set of decals representing the rubbing lines on the extended/folded wings. This would have been very difficult to imitate. Thank you, Tamiya, for the great decal to represent these markings. I had to paint the wings and apply these decals later, and it was necessary to use Tamiya’s strong decal setting solution there as there are a couple of bumps on the wings’ structure. The decals conformed to the surface very well after the setting solution application. Wings are constructed in such a way that they slide over the extensions (assembled in step 9) protruding from the fuselage. This allows for changing the wing configuration from extended to folded later on. It also makes painting of the wings a breeze. There is a section in the instructions before step 30 that explains the ordinance configuration for each of the 5 markings. I wanted to display as much ordinance as possible for my marking option that otherwise suggested no armament present. Therefore, I did not follow the recommendation. This was because I consulted Tamiya’s 1/48 F-14D instructions and decided it was possible to attach various ordinances to my version as well. The diagram will be handy otherwise. Steps 30 through 37 are dedicated to the ordinance and its attachments. There are many tiny stencil decals for the various weapons. The process of attaching them can be lengthy, but it is worth every bit as the finished look of these components is outstanding. I especially enjoyed finishing the large Phoenix missile. I attached the painted and decaled ordinance at the very end of the assembly process after the entire plane was painted. Step 38 is for attaching vertical stabilizers and the kit’s design makes it for a very easy and flawless assembly step to attach them at a specific angle. Perfect design again. Did I already say, thank you, Tamiya? Steps 39 through 41 cover the pilot figures and the ejection seats. All parts fit perfectly again. I was not sure if I wanted to display my kit with the pilots, so I did not include them in my build. However, the pilot and the ‘Radar Interceptor Officer’ figures are excellent and there are specific tiny decals that can be added to their painted helmets based on the unit insignia — just spectacular! I suggest assembling two J18 parts in step 41 to the fuselage top much earlier, probably just after step 13. I almost missed attaching them as I found them on the sprues much later and thought they were leftover parts.
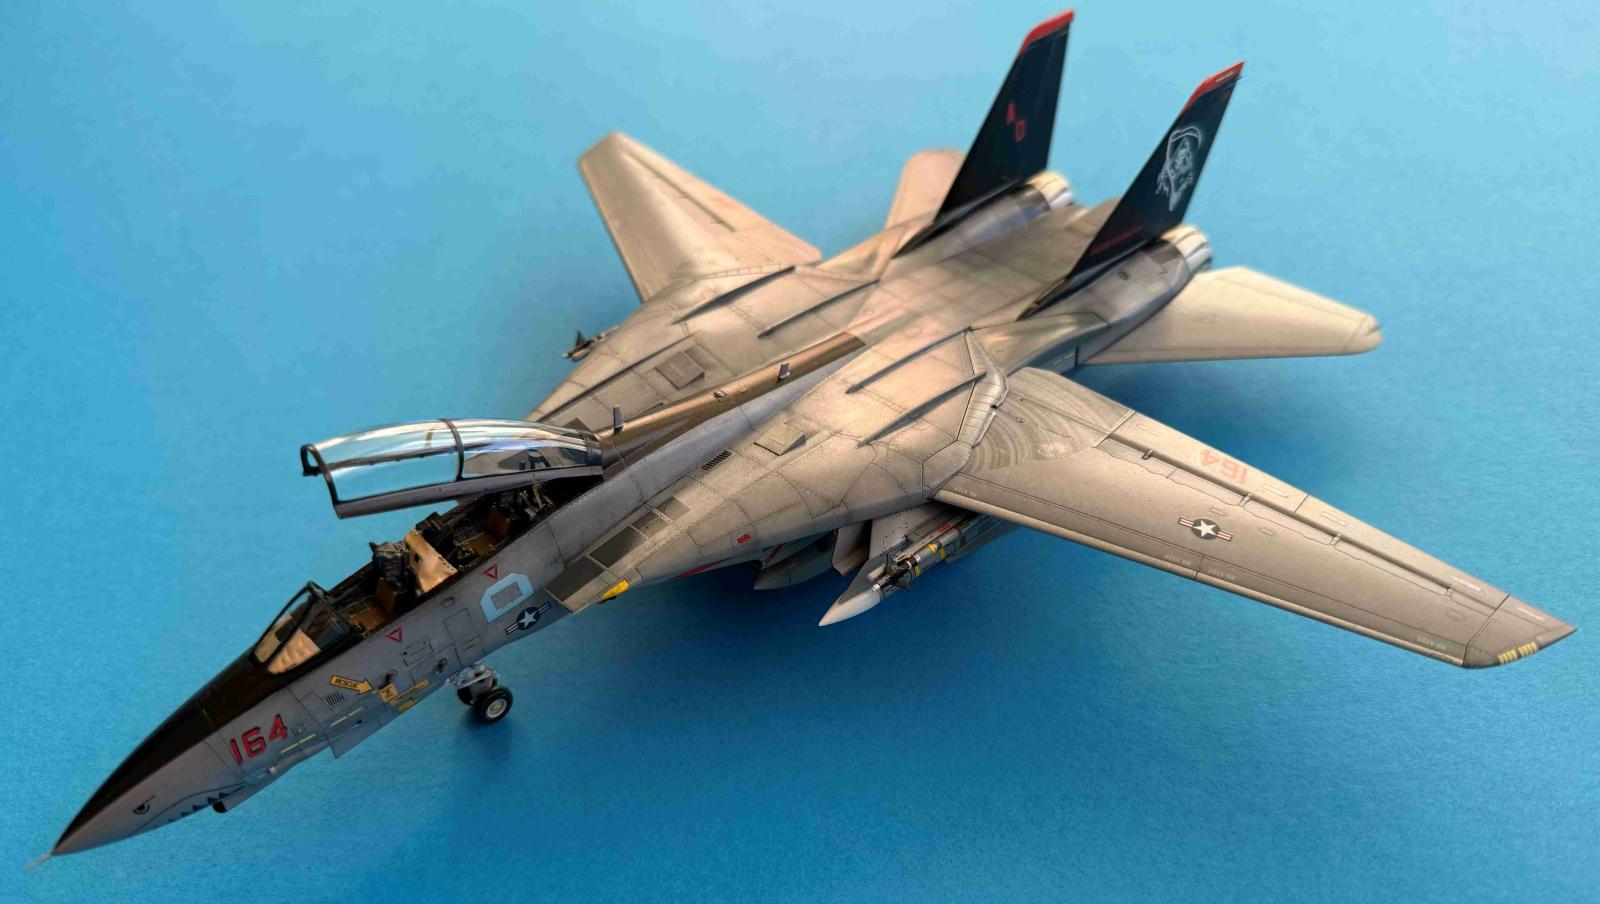
Steps 42 through 48 describe how to finalize the cockpit assembly, whether to use a deployed ladder and open steps with it, and to decide on the extended or closed refueling probe. I decided not to extend these parts. Step #44 requires painting the front windshield with Tamiya’s X-23 clear blue. Since there are no masks provided for the inside of the canopy, I retraced the shape of the mask used for the outer side and masked the inside of the canopy before painting it. In step 45 we have to apply a narrow silver decal strip to the inside of the canopy. Tamiya provided extra decals for it in case we find it difficult to apply them there. It was very helpful as one of my decals detached when I used clear gloss over it. It was my fault as I used a moistened Q-tip to apply the clear gloss too soon. The canopy can be positioned closed or open and the closed configuration fits exactly to the cockpit’s shape. What great quality! The final steps 49 and 50 explain how to configure and use parts to switch from open wings to closed wing configurations. These interchangeable parts fit perfectly. As an additional bonus, we also get two wheel chocks on the G sprue. Another nice touch.
Painting
I primed the assembled model with Tamiya white primer. Although I tried to use as many Tamiya paints during the construction as possible, I do not like to mix paints because I believe measuring mixed quantities can be inaccurate. Tamiya suggests mixing several colors to achieve the desired shade. Therefore, to avoid mixing paints, I used the Hataka US modern aircraft paint set following the USAF color designations for the camouflage colors. Painting was followed by markings and stencils. Again, there are many of them. Please note that there are 300 decals on two sheets. Of course, they have to be divided between the five marking options. But there are many stencil decals that still have to be applied. Many are very useful, though, like the wing formation/position lights and many more, because painting them would be very difficult. Despite the many stencils, these decals bring an aesthetic value to the finished model. A couple of notes about decals, though. First, I found it very helpful to have black decals for the front of the nose, part of the fuselage under the cockpit, and behind the cockpit. However, there was still a small gap that had to be painted black under the front of the canopy, and it would be great to have a small decal to complement that whole section. Secondly, I noticed that the left wing for the marking ‘D’ had the US star reversed. I could not find references for this particular aircraft to tell whether it was intentional or not and decided to apply that decal differently. The same marking is depicted for the same scheme in the 1/48 kit. A note explaining the star’s orientation, whether indeed it was intentional or not, would have been beneficial.
Summary
I did not know what to expect from this kit when I started building it and it exceeded my every assumption and expectations. The Tamiya F-14D Tomcat in 1/72 scale is an outstanding kit in my opinion. This is probably the best plastic model kit I have ever built. This is primarily due to the precise fit of parts. The fit and engineering is just spectacular. The assembly process reminded me of the best moments in my model building career when I could not wait to see the final result while enjoying every moment leading to it. Thank you, Tamiya, for providing such enjoyment and pleasure building this kit. I am still speechless after this experience and when I look at the finished model, I can only admire it thanks to your amazing and precise design. Please bring more Tomcat variants to the market. It will be almost impossible for me to resist the temptation to get yet another version and enjoy the experience again. I highly recommend this kit to any modeler as it is just pure joy to build. I also recommend consulting a book “F-14 Tomcat in detail & scale” by Haagen Klaus during assembly as it will provide great reference material with many close-up pictures for potential Tomcat builders.
My sincere thanks go to Tamiya for bringing such a gem to the plastic model building market, and Fred Medel, Tamiya America Marketing Manager, for generously providing this kit to review as well as IPMS/USA for allowing me to review it.


Reviewer Bio
Tomasz Menert

I grew up in Poland and immigrated to the US 35 years ago when I was in my twenties. Ironically, I majored in English here, but I have fond memories related to my interest in aviation. What spiked my interest in reviewing items were the books on some familiar subjects. For example, I received a glider pilot license in Poland and one of the books Pablo Bouleo mentioned in the 'stash' is from MMP (PZL-104 Wilga 35A, Single No. 46). In my glider training, the plane towing us was the PZL-104 Wilga! So, anything around Polish subjects like PZL Combat Fighters, etc., would land you a quick and thorough review just because I had an exposure to some of the topics. Not to mention an uncle who flew a total of over 4000 hours in Mig-21s. Therefore, I want to thank you both for giving me the opportunity to join this review. group.
Comments
Great build review.
Great review, I've saved it so I can reference it during my build. I've ended up with two of these kits, one will be VX-9, I've not decided on the second yet. Now I'm tempted to get another 3 so I can build all five variants.
Add new comment
This site is protected by reCAPTCHA and the Google Privacy Policy and Terms of Service apply.
Similar Reviews