
French FT-17 Light Tank (Cast Turret)
The 100th Anniversary of the tank going into combat takes place in September 2016, and as this anniversary draws closer I have become fascinated with these first creaking, clattering vehicles of death; part of the first modern industrial war in history. And while the British Army’s rhomboid shaped monsters that took part in that engagement at Flers-Courcelette during the Battle of the Somme were the first tanks to see service, the diminutive French FT-17 can legitimately lay claim to be the great grandfather of the modern tank: the first fully tracked armored vehicle with a rotating turret. And as luck would have it, Meng Models have produced a simply magnificent model kit of this seminal vehicle. Not only is this model exquisitely detailed, it is fully detailed, as it comes with a very complete interior.
What’s in the Box
Firstly, let me say what a lovely box Meng has packaged this kit in! Extremely sturdy, in order to protect the parts within, with a lovely full color painting of the FT-17 on the box top, done in a satin finish.
- 10 Sprues worth of parts in tan injection molded plastic
- 68 dark gray/blackish plastic track links
- 2 cast metal parts
- 2 metal axles
- 4 metal springs
- 1 fret of photo etched brass parts
- 1 sheet of decals
- 1 set of instructions, 6.5” x 10”, 21 pages which includes color painting and markings profiles
The tan plastic parts are very well detailed, flash free, and devoid of any ejection marks or sink marks that can be seen once the kit is assembled, with one exception - the track links. Detail is exceptional on all the parts, and photo etched parts are kept to the bare minimum, without sacrificing detail. Allowing one to put all this lovely plastic and metal together, is a set of excellently executed instructions, well laid out, easy to comprehend, and without any mistakes that I could find.
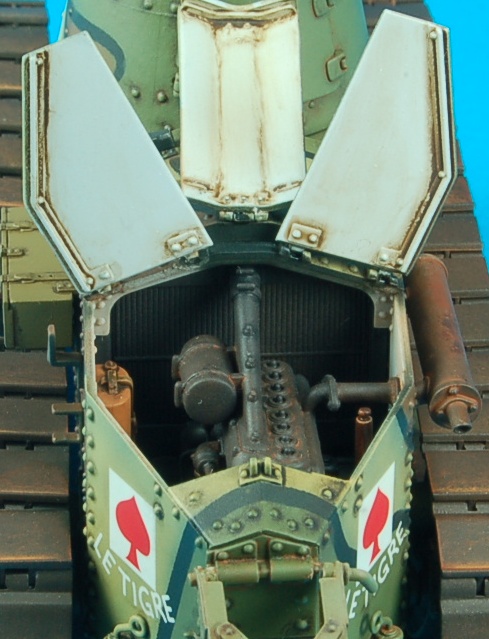
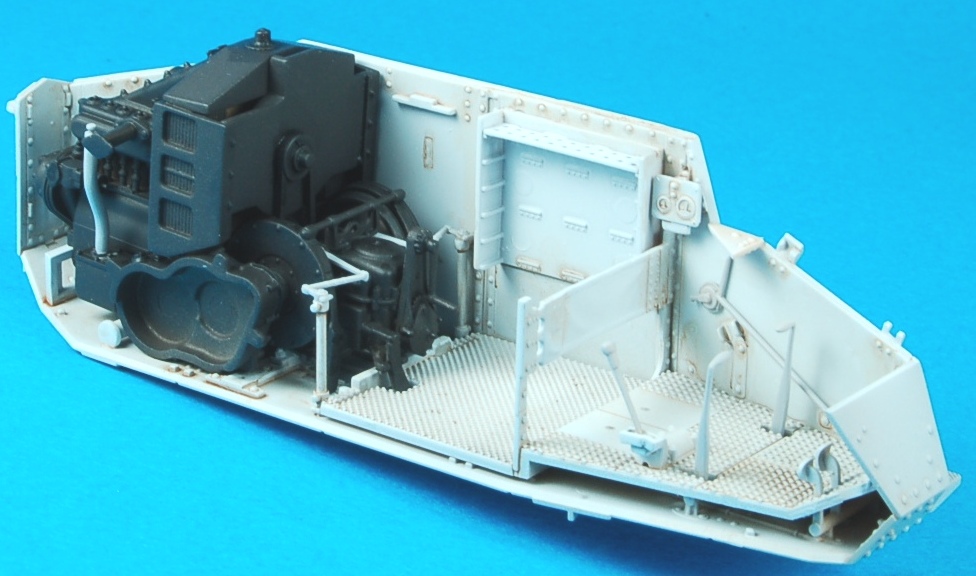
Construction of the FT-17 commences with the transmission and engine, plus radiator: lots of small parts, and lots of detail painting. However, you will find that if you study the instructions carefully, and are mindful of what you are doing, everything fits together with the minimum of fuss!
Section 1 through 3
Then comes the driver’s compartment in the front of the tank, leavers, pedals, seat cushion, back rest, and yet more engine bits and pieces. One thing to recognize early on is that there are a number of alternative parts for the interior, based on the historical period you are building the kit from. The FT-17 served from WW1 through to the invasion of France 1940 and beyond as a vehicle captured and pressed into service by the Germans. Markings are included for a WW1 vehicle, two 1940 vehicles, and a 1944 vehicle. I built up the main engine/transmission parts as one unit, and painted it Tamiya XF-84 Dark Iron.
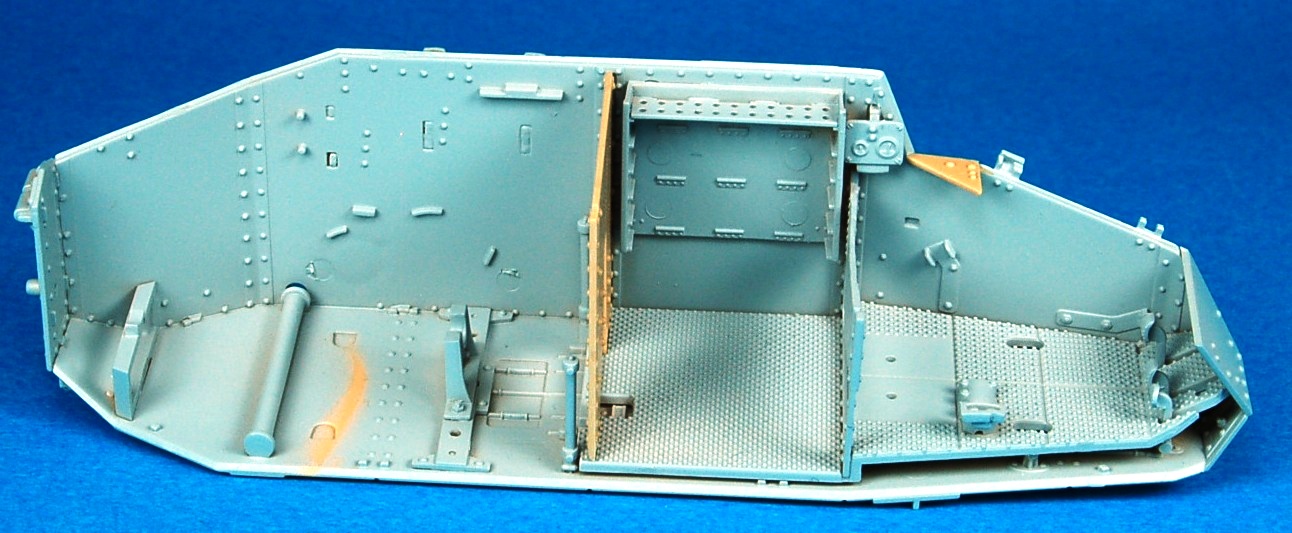
In Section 4, 5, 6 and 8 I assembled much of the rest of the interior parts, keeping them in three main sub units: left side, right side of the hull (parts A10 and A7) and hull floor (main parts A19 and B1) plus a few other separate parts such as the driver seat cushion B29. The main interior sub units were painted overall Tamiya XF-2 Flat White (all parts were first primed with Mr Surfacer 1200). A dark wash was then applied liberally to highlight all the detail, as well as serving to fade the bright white paint.
Section 7 and 9, Right and Left Exterior Assemblies
Make sure that parts B41 and B42 are installed the correct way up, as it is possible to do so upside down. I also replaced the kit supplied metal springs that attach to the cast metal suspension unit on each side of the tank, as I felt the kit ones were a bit wimpy. I simply took some lead wire of the appropriate diameter, and wrapped it around a suitably sized drill bit and cut the resulting coil to size. I wasn’t actually happy that the suspension part was in fact made out of cast metal. It didn’t seem required to be so for strength, and metal parts have little give if you need to slightly reposition them, and of course require super glue to attach them to the surrounding plastic parts.
We now come to Section 11, the main hull assembly section. It is here that you discover how well this kit is engineered, as with careful test fitting and slight trimming here and there, all the previously built and painted sub assemblies fit together ever so nicely! In Section 12, 13 and 14, the road wheels and general running gear assembly sections, you have again to check for alternative parts, in the form of large metal or wooden front road wheels. I also again replaced the kit supplied metal springs in these sequences with handmade replacements from lead wire.
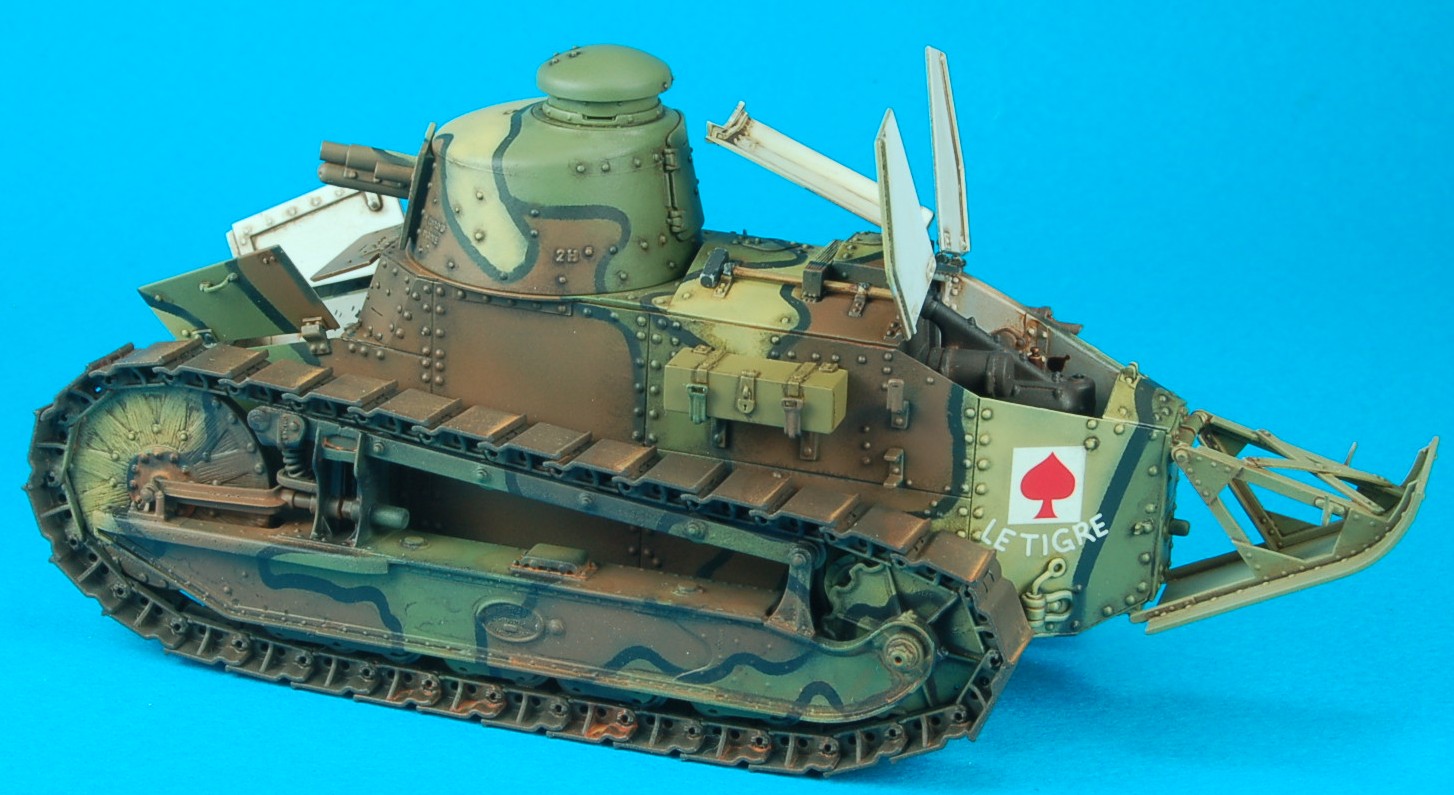
Section 15 sees the modeler building the rear vehicle skid, with more alternative parts to choose from. All goes together wonderfully once the decision has been made on which vehicle you are building. Section 16 assembles the link by link tracks. Each has a small mold pimple that needs carefully removing from the top side of the links that are visible once the kit is assembled. Nothing a sanding stick and sand paper didn’t fix. The links simply “click” together without cement, though I ended up applying model cement once they were all together and attached to the running gear, in order to strengthen the bonds.
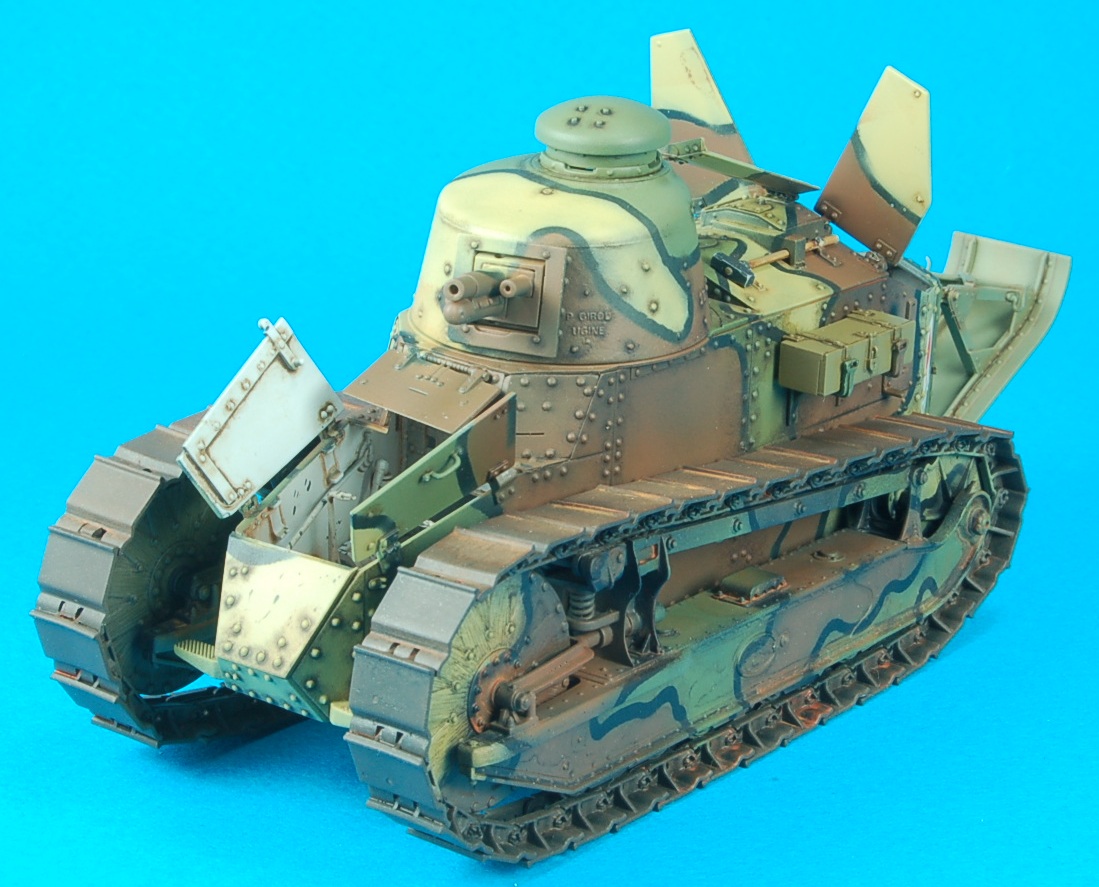
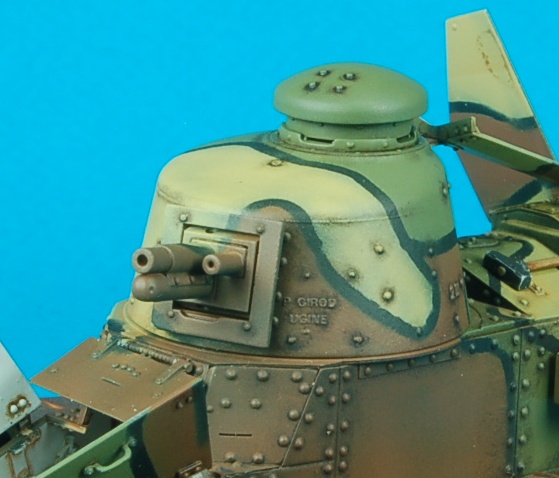
Section 17 and 18 have Meng providing the builder with the opportunity to attach the various front and rear hatches either closed, or open to show off all the interior detail the kit provides. Section 19 through 21 covers the assembly of the small turret, complete with finely detailed casting marks and what appears to be a mold mark on part J17, the main turret part. However, by closely examining various reference photos of preserved FT-17’s in museums, I determined that this wasn’t a mold mark, but a casting mark, so don’t remove it by mistake! More alternative parts come in to play with the turret assembly, either a WW1 cannon for the main armament, or a Post WW1 machine gun. Since I buttoned up my turret, I didn’t bother with more than a rudimentary assembly of the main interior parts, though Meng gives the modeler the option of displaying the rear turret doors open, in which case you can put all the goodies together for a nicely detailed turret interior straight from the box.
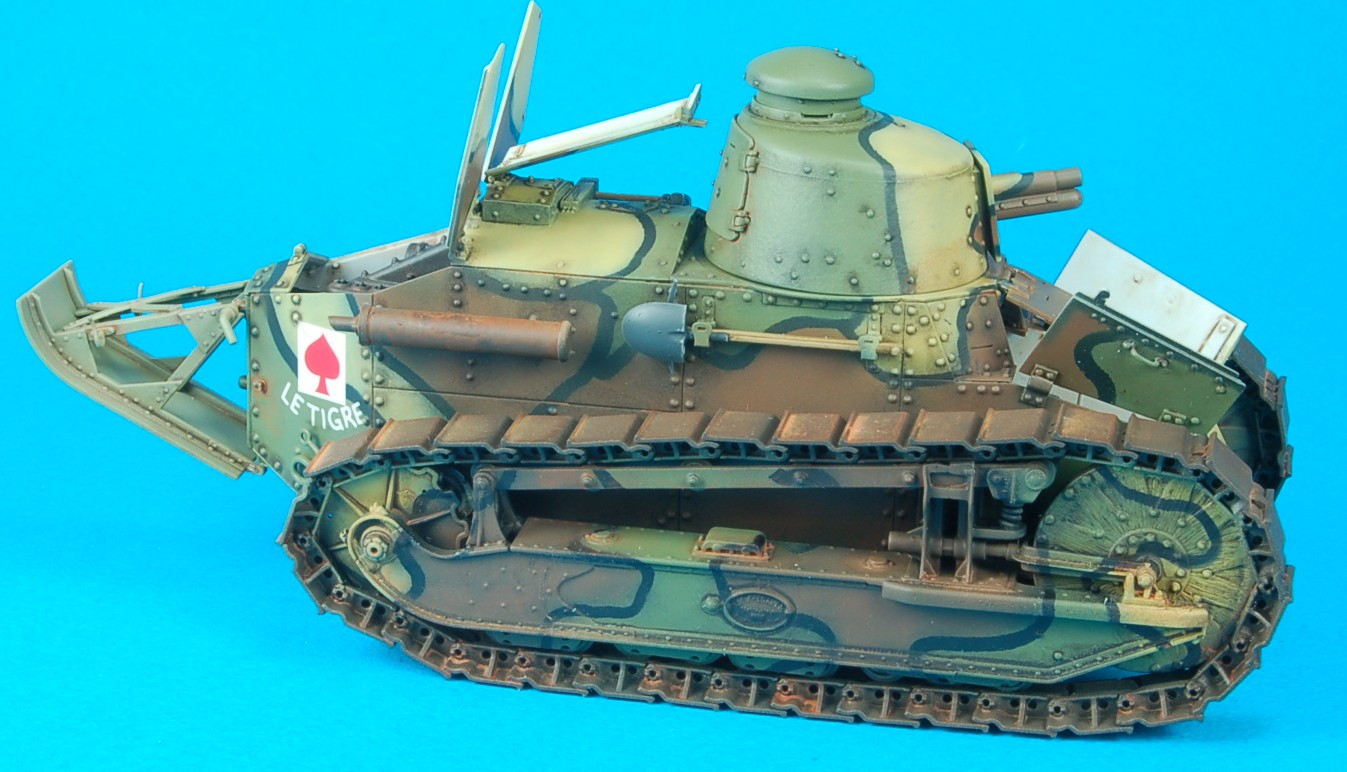
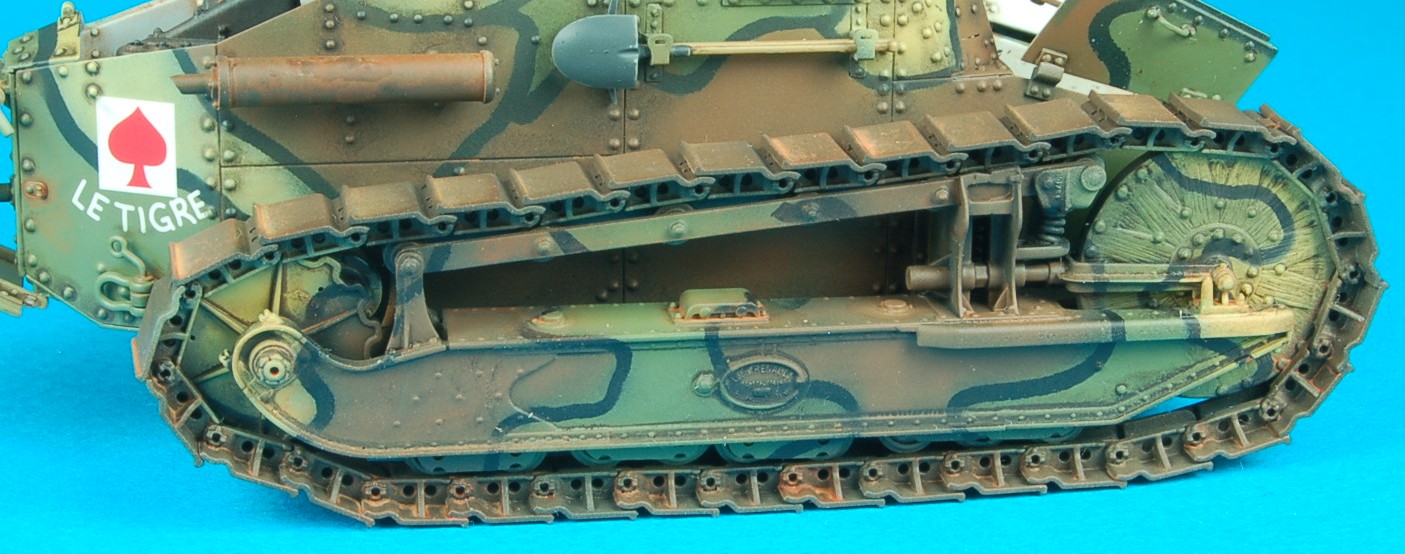
Now with the model assembled in a series of sub assemblies (main hull, turret, and left and right side running gear and track), I painted all the exterior parts with Mr Surfacer 1200 to give the parts a uniform surface to apply the paint to (given we have plastic, PE, cast metal and lead wire parts). Prior to this, the already painted interior sections were masked off. Then an overall black coat of paint was laid down over the exterior parts. As a reviewer, I could have taken the easy way out when it came to painting this model, and chosen Paint Scheme D, an overall Panzer Grey Luftwaffe vehicle from 1944 France. A second scheme was a Finnish FT-17 from February 1940 in a three tone Red-Brown/Green/Tan scheme with white wash winter camo laid in a mottled scheme over the top. A third is a three tone wavy scheme of Tan, Red Brown and Khaki, 4th Platoon, 1st Company, 29th Tank Battalion, French Army, May 1940. However, as I said earlier in this piece, I had fallen for the WW1 tank, as a WW1 vehicle. This involved the most complex scheme out of the four provided: a vehicle from “Le Tigre” Regiment of the French Army in an overall Red Brown, Tan and Green layout, with black outlines. I figured the best way to do this was to utilize a complex aftermarket masking product from a firm called J’s Work.
As with most complex paint schemes, the masking and painting process was rather laborious, but the end result, I believe, was well work the effort. I utilized Tamiya colors throughout the painting process: XF-1 Flat Black, XF-60 Dark Yellow, XF-64 Red Brown and XF-58 Dark Green, each suitably lightened where appropriate. I believe this scheme could have also been achieved using the product Blu-Tack rolled out into “worms” together with carefully cut masks from Tamiya tape.
Once painting was complete, and the masks removed, a series of oil pin washes were employed to highlight the lovely rivet detail. When dry, the sub-assemblies were glued together and the front and rear hatches suitably displayed in their open position. I also added a few pin washes with a suitable “rust” colored oil paint, just to add a little visual interest.
Overall then, this is a magnificent kit of an extremely important WW1 tank, one that served well into the 1940’s. The fidelity of detail is excellent, the fit of the parts highly commendable, and equal to any other firm in the model business. The decals, by Cartograf of Italy, are well printed, in register, and lay down very well. Despite the full interior, the kit went together very well, and anyone with modest modeling skill should be able to turn this kit into a lovely little model.
Hats off to Meng for such an excellent job! And my sincere thanks to Meng Models for allowing IPMS USA to review this superb kit.


Comments
Add new comment
This site is protected by reCAPTCHA and the Google Privacy Policy and Terms of Service apply.
Similar Reviews