
Electric Hand-Held Polisher & Sander
Points To Ponder
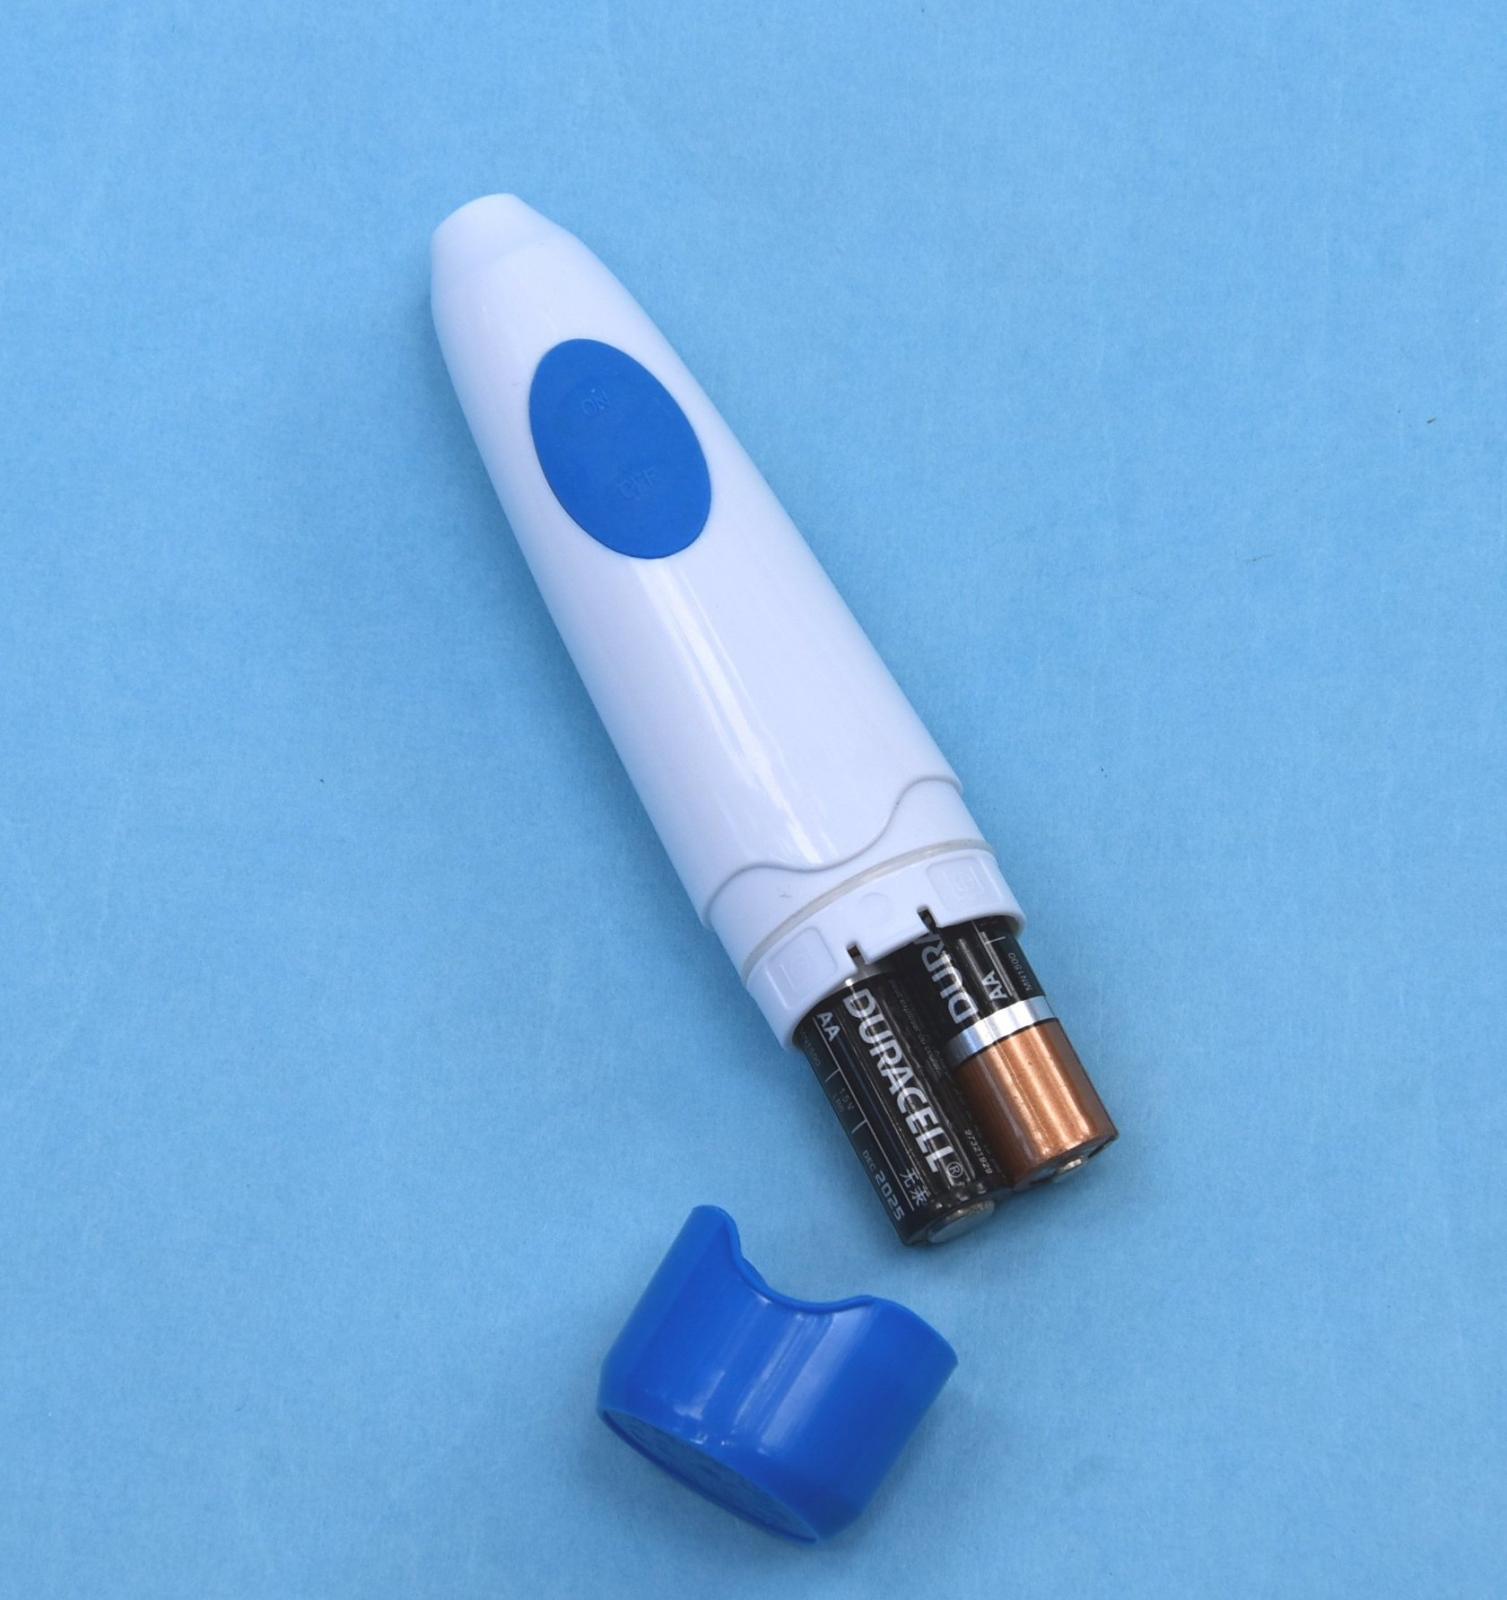
The UMM “Polisander” (a combination of a polisher and a sander) is another unique tool available to the modeling community by UMM. The tool is powered by two AA batteries that are placed into the handle. Batteries are not included in the product. Note that the batteries, as usual, are inserted with one (+) end up and the other (-) end down. There are some indicators molded into the handle showing which battery tray is positive and which is negative.
The product box is small and sturdy, approximately 2x2x7 inches. The contents are bagged in zip-locks baggies, with the handle in one bag and the attachment head in the other. In order to insert the batteries carefully remove the blue base using the two indentions molded into the rim of the base, pushing the base away from the handle, no twisting necessary.
When the power is turned on the machinery causes a vibration in the mechanism that results in the sanding or polishing motion of the gold-colored arm. Be sure that the tool is powered down before inserting the attachment head into the handle, or before storing the tool after a work session. The tool is good for both righties and lefties.
Some Assembly Required
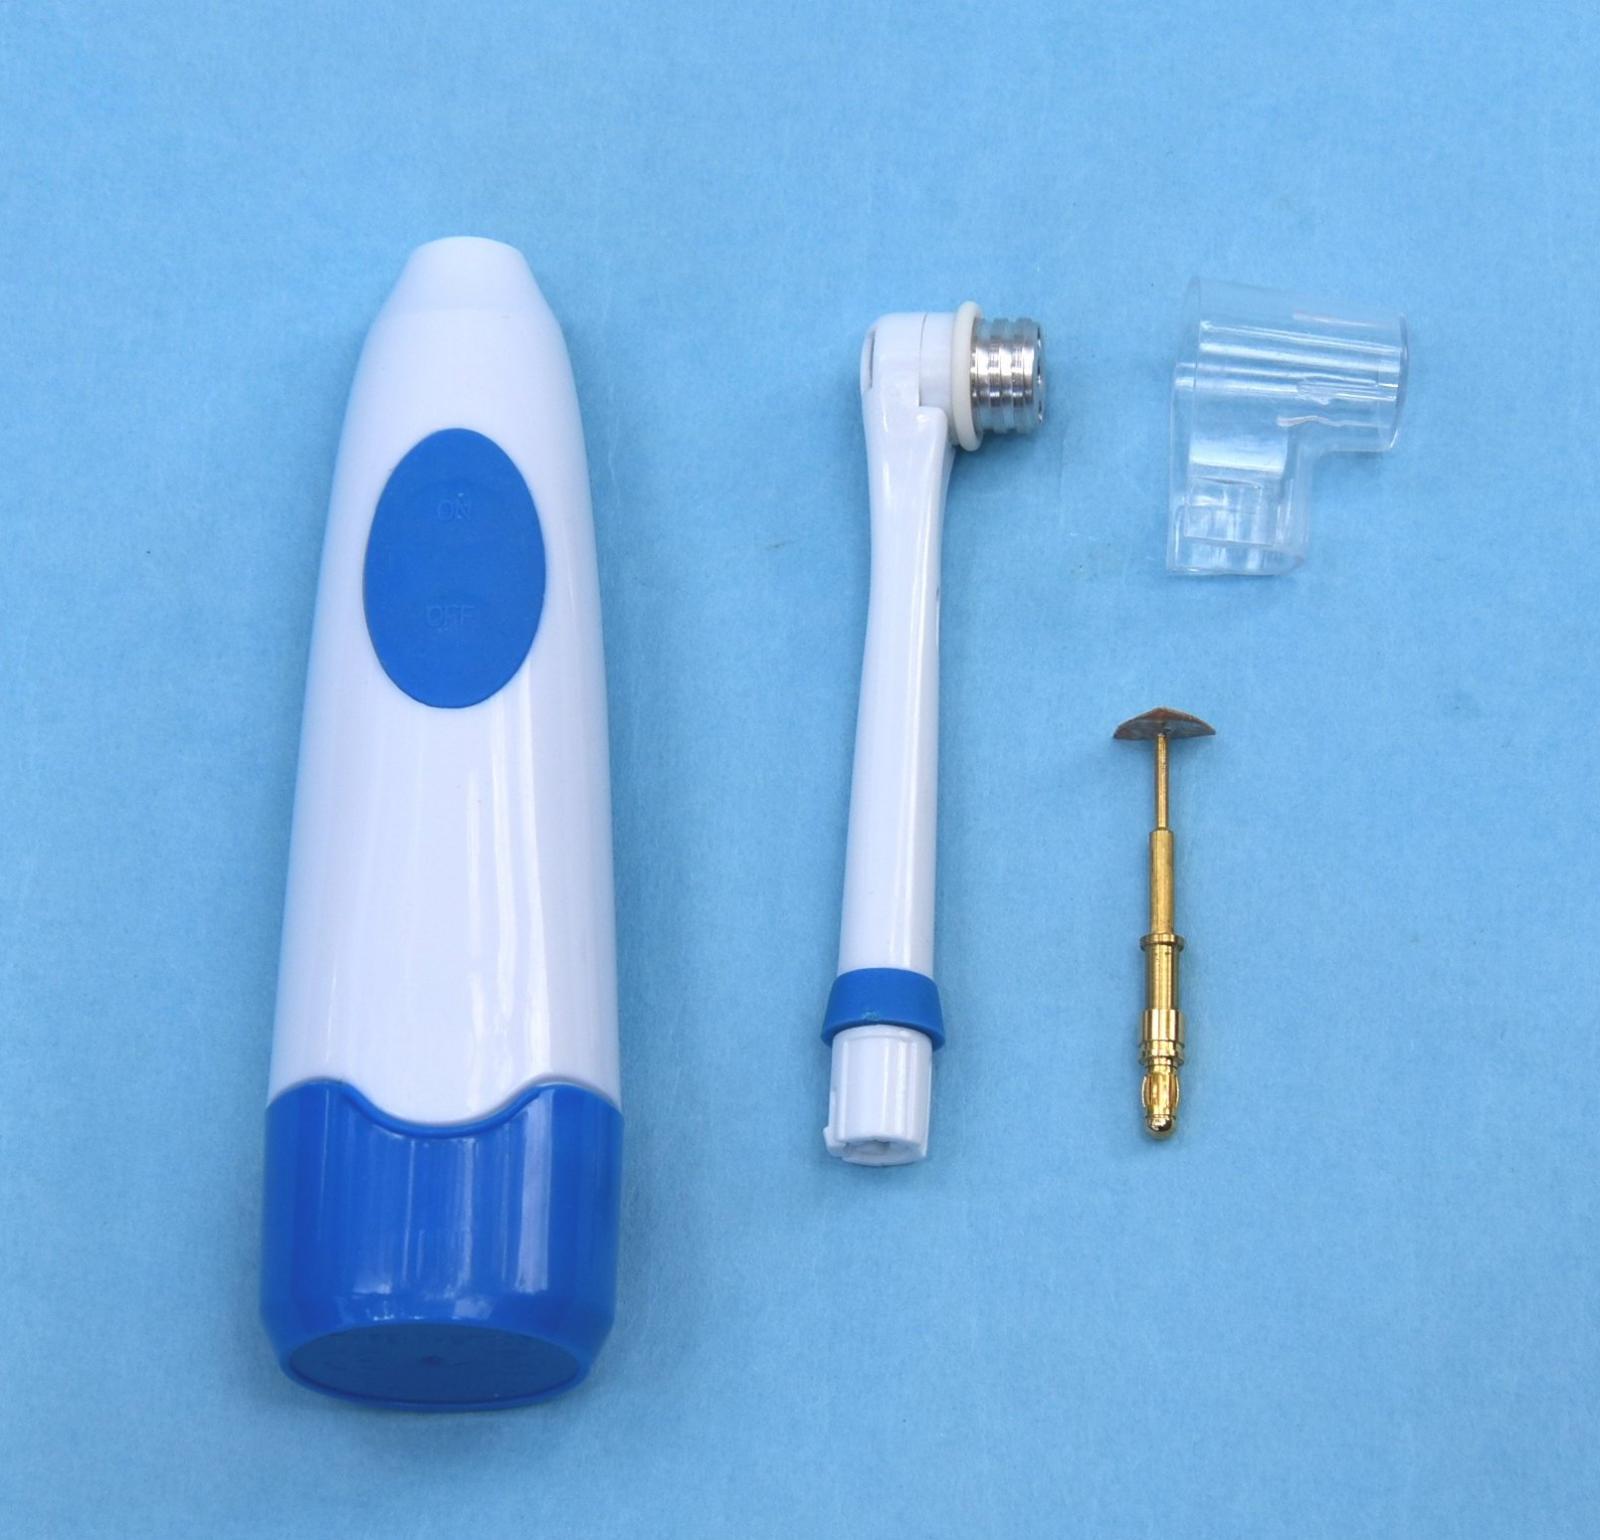
You are not working with a heavy-duty earth mover here, so some caution, plus a gentle touch, will prolong the life of your Polisander. As seen in the image marked, “001”, remove the parts from their respective bags. In image “002” you can see that, as previously mentioned, one battery is inserted (+) end first, while the other is inserted (-) end first. After inserting the batteries press the blue base of the handle back into position, closing the battery compartment.
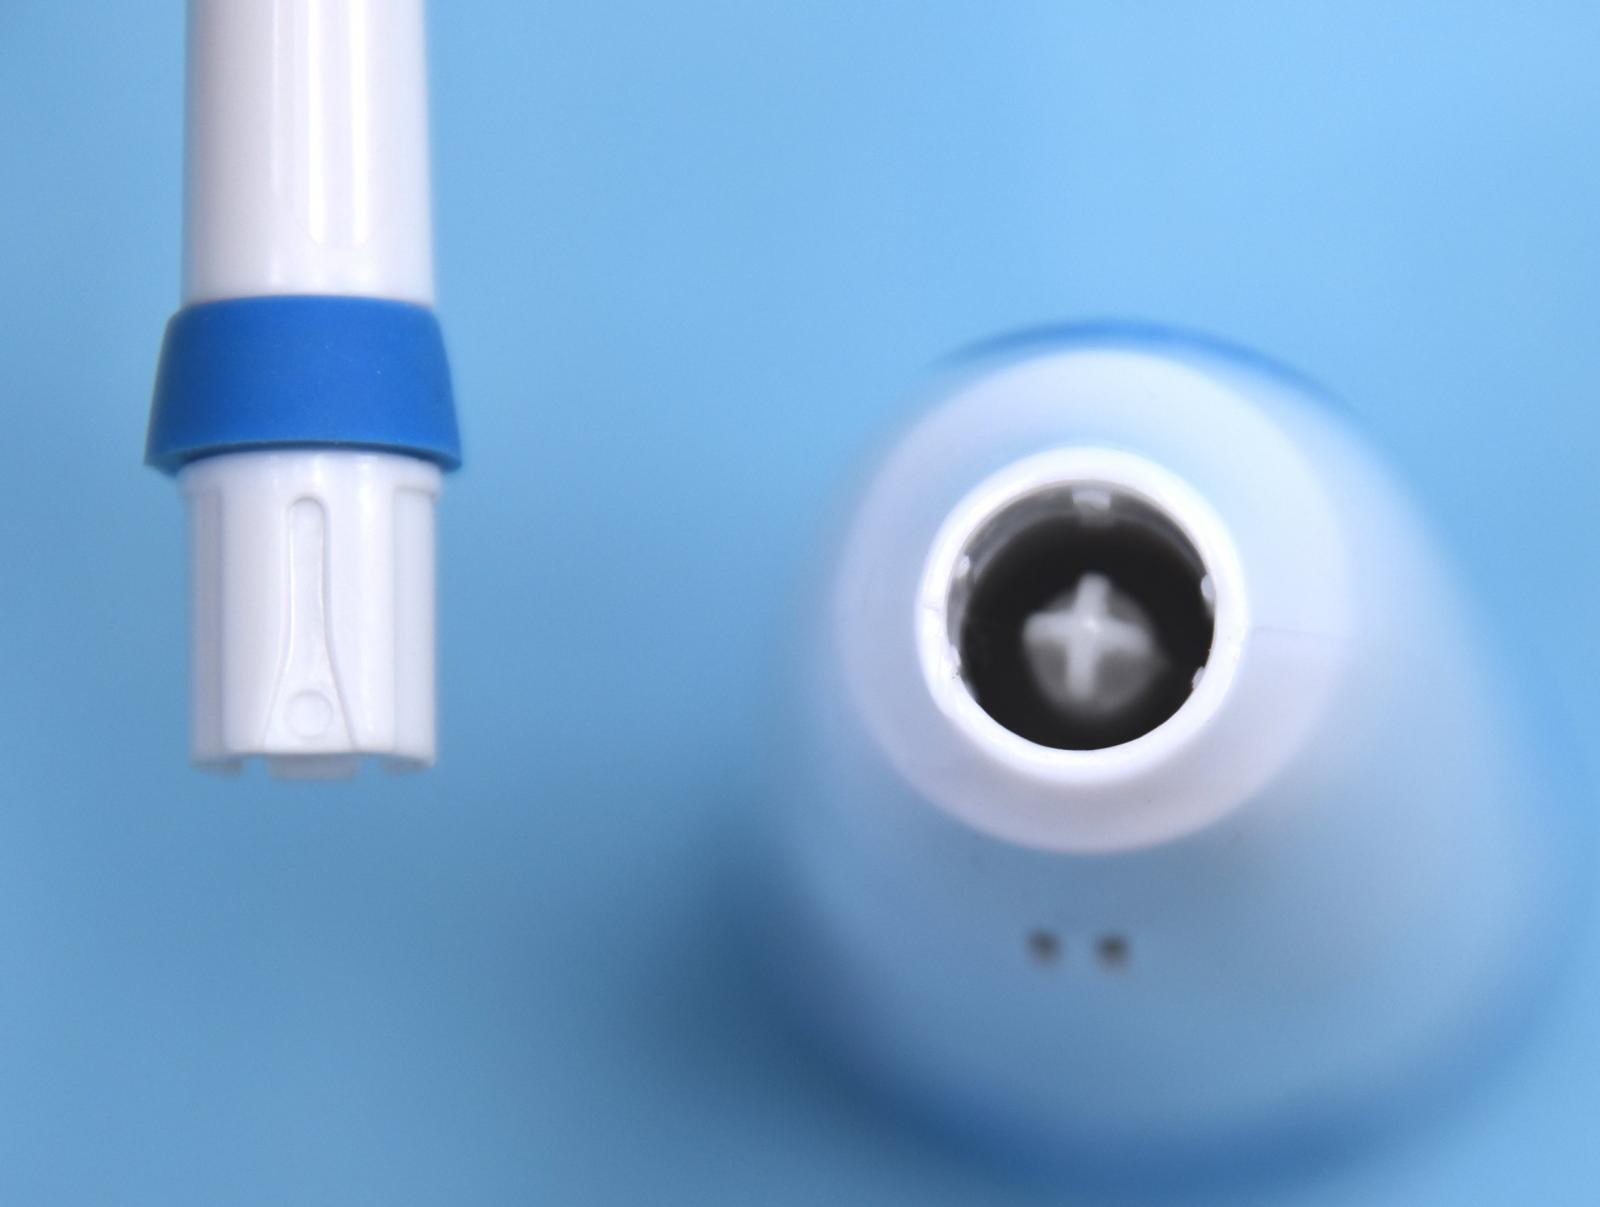
Now comes the only step in preparing the tool for use that may seem a bit tricky. In image “003” you will note that when looking down the “throat” of the handle you will see a locating pin with that pin being in the shape of an “X”. In that same image, you will see that, molded into the attachment ring of the head is a slot that narrows to help guide the attachment ring. Looking back at the locating pin, you will note that it has been put into alignment with the bigger of the locating ridges inside the handle’s attachment ring. Simply press the head into the handle once that alignment has been achieved. I used a set of fine tipped tweezers to achievement that alignment and it took all of about 5 seconds.
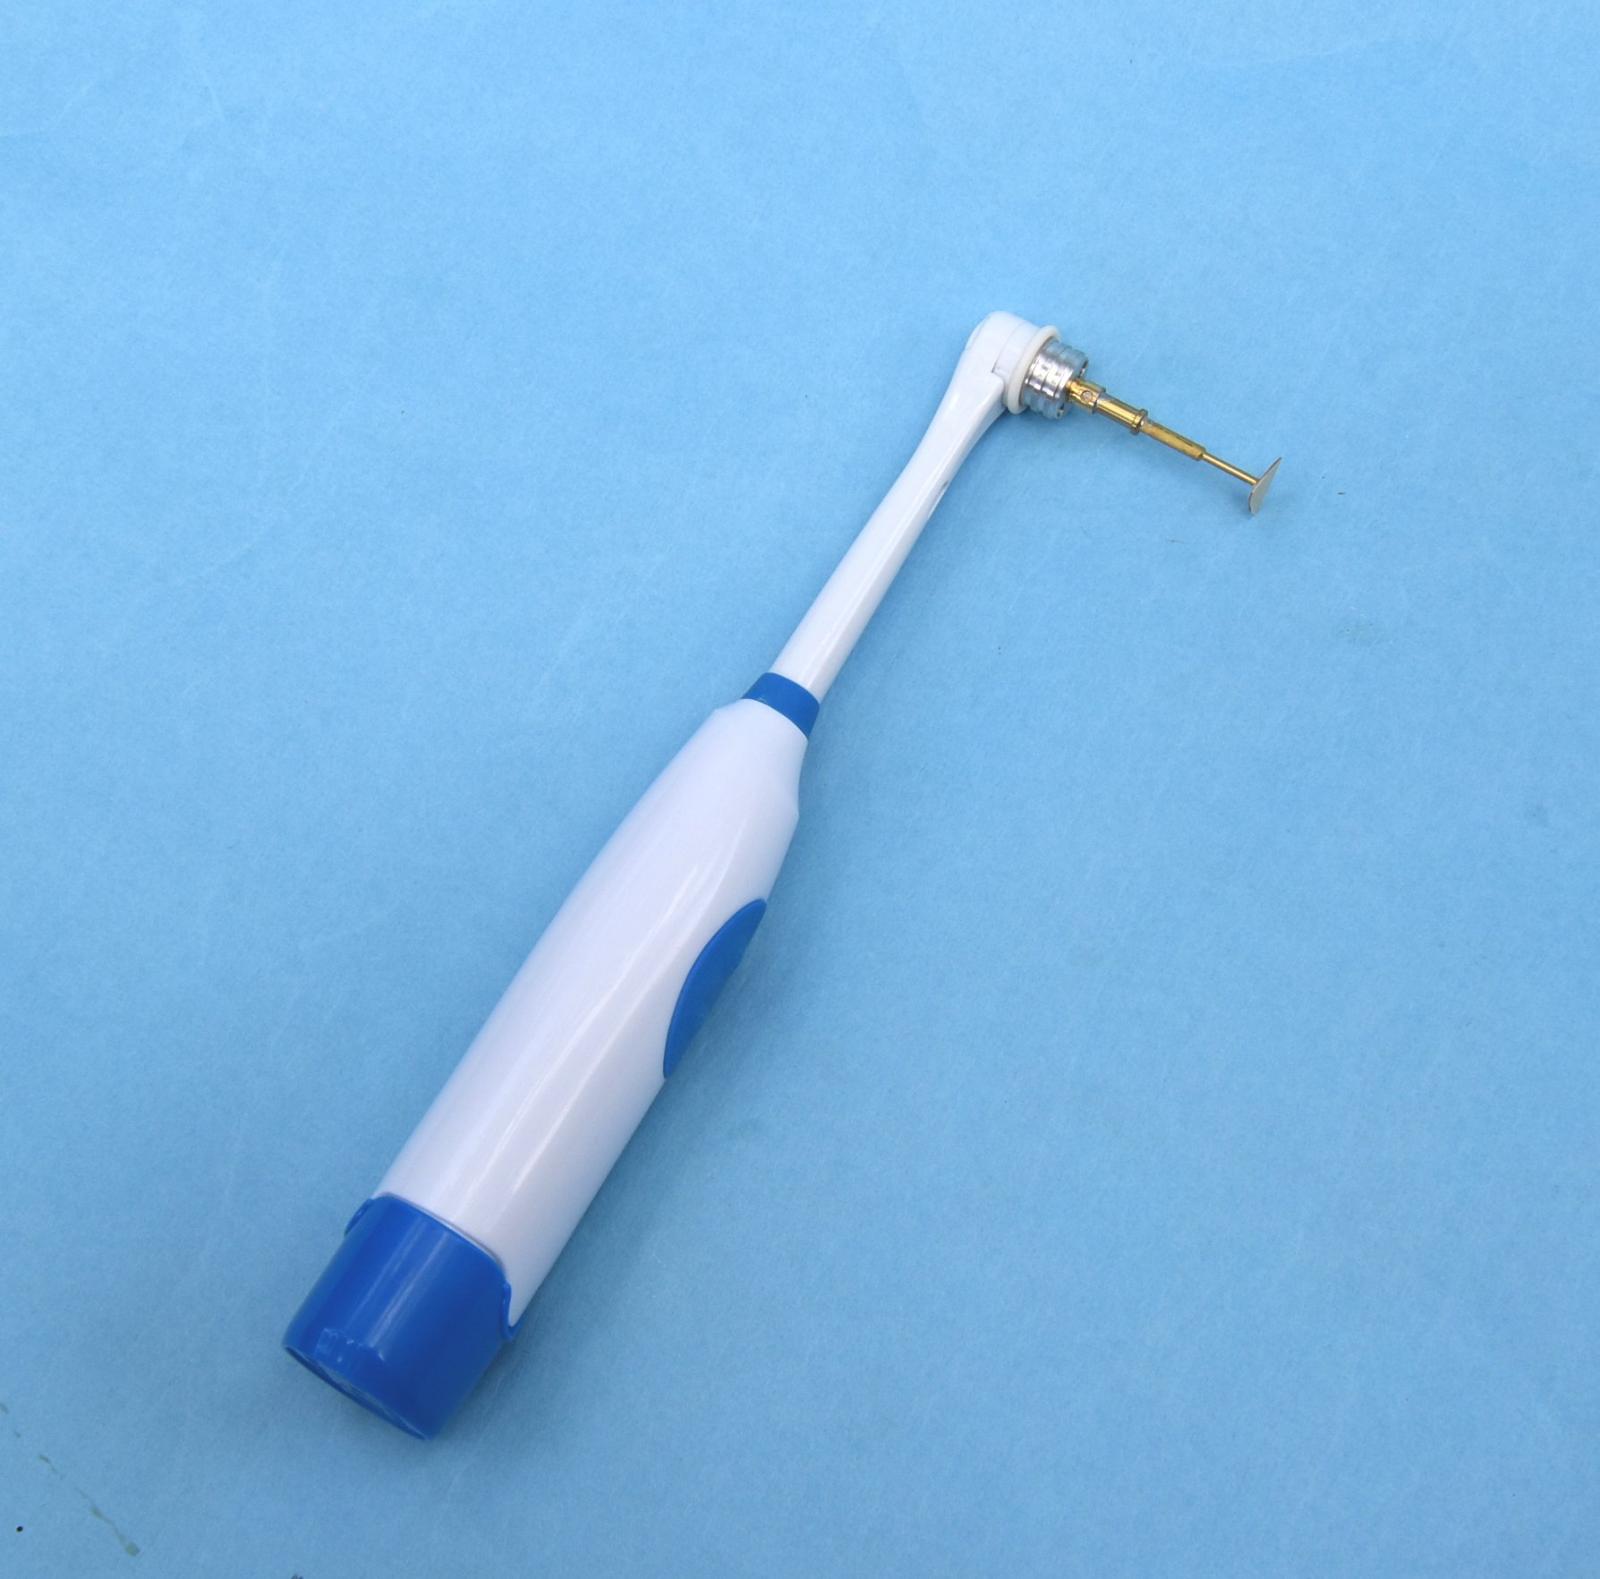
Image “004” shows the hand and the head assembled. At this point, you can push the “On” button to make sure that the mechanism functions. You will feel a slight vibration and hear a very soft noise if all is well. If not, pull the head out of the handle and try working on the alignment of the head again.
Image “005” shows the clear, protective cap still in place on the head. Remove it. Gently push the Polisander arm (the brass-colored part) into the hole in the head as seen in image, “006”.
You can now use double-sided tape to attach your sandpaper or your polishing material to the triangular surface on the end of the Polisander arm. Or, if you wish, you can attach the sanding/polishing material prior to mounting the Polisander arm into the head.
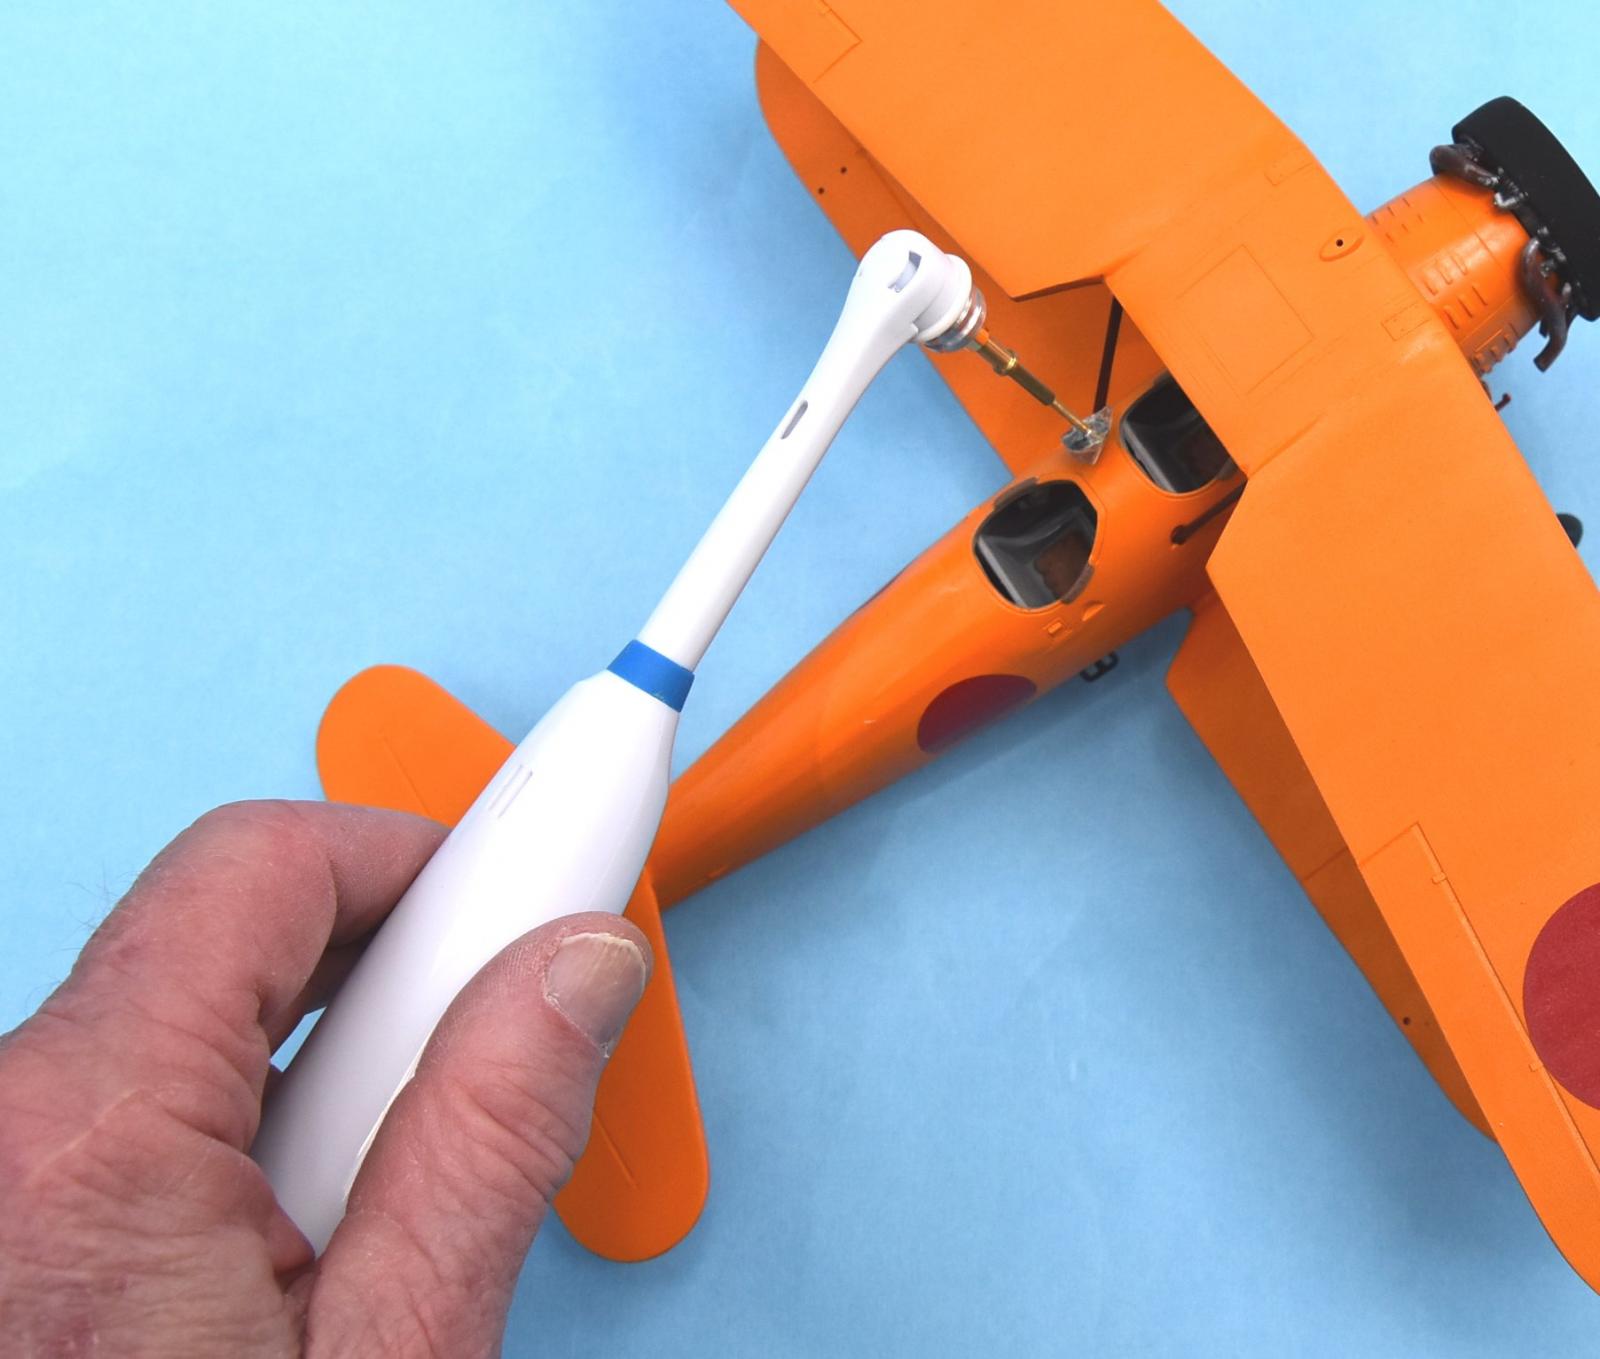
You’re ready to go! Let the grit of the sandpaper do the work rather than trying to increase the pressure you use to apply the tool to the model. As you can see in image “007” the Polisander will be able to reach even those remote areas found on some modeling projects.
Finally, I recommend that when wet sanding, you apply a little water to the project rather than dipping the Polisander arm into water. In the “tests” that I conducted I found the Polisander to be easy to hold and control, and that the tool works very well. T
Thanks to UMM for providing this tool for review by IPMS. The UMM Polisander is highly recommended for its price, ease of use, and “reach into difficult spaces.”


Comments
Add new comment
This site is protected by reCAPTCHA and the Google Privacy Policy and Terms of Service apply.
Similar Reviews