
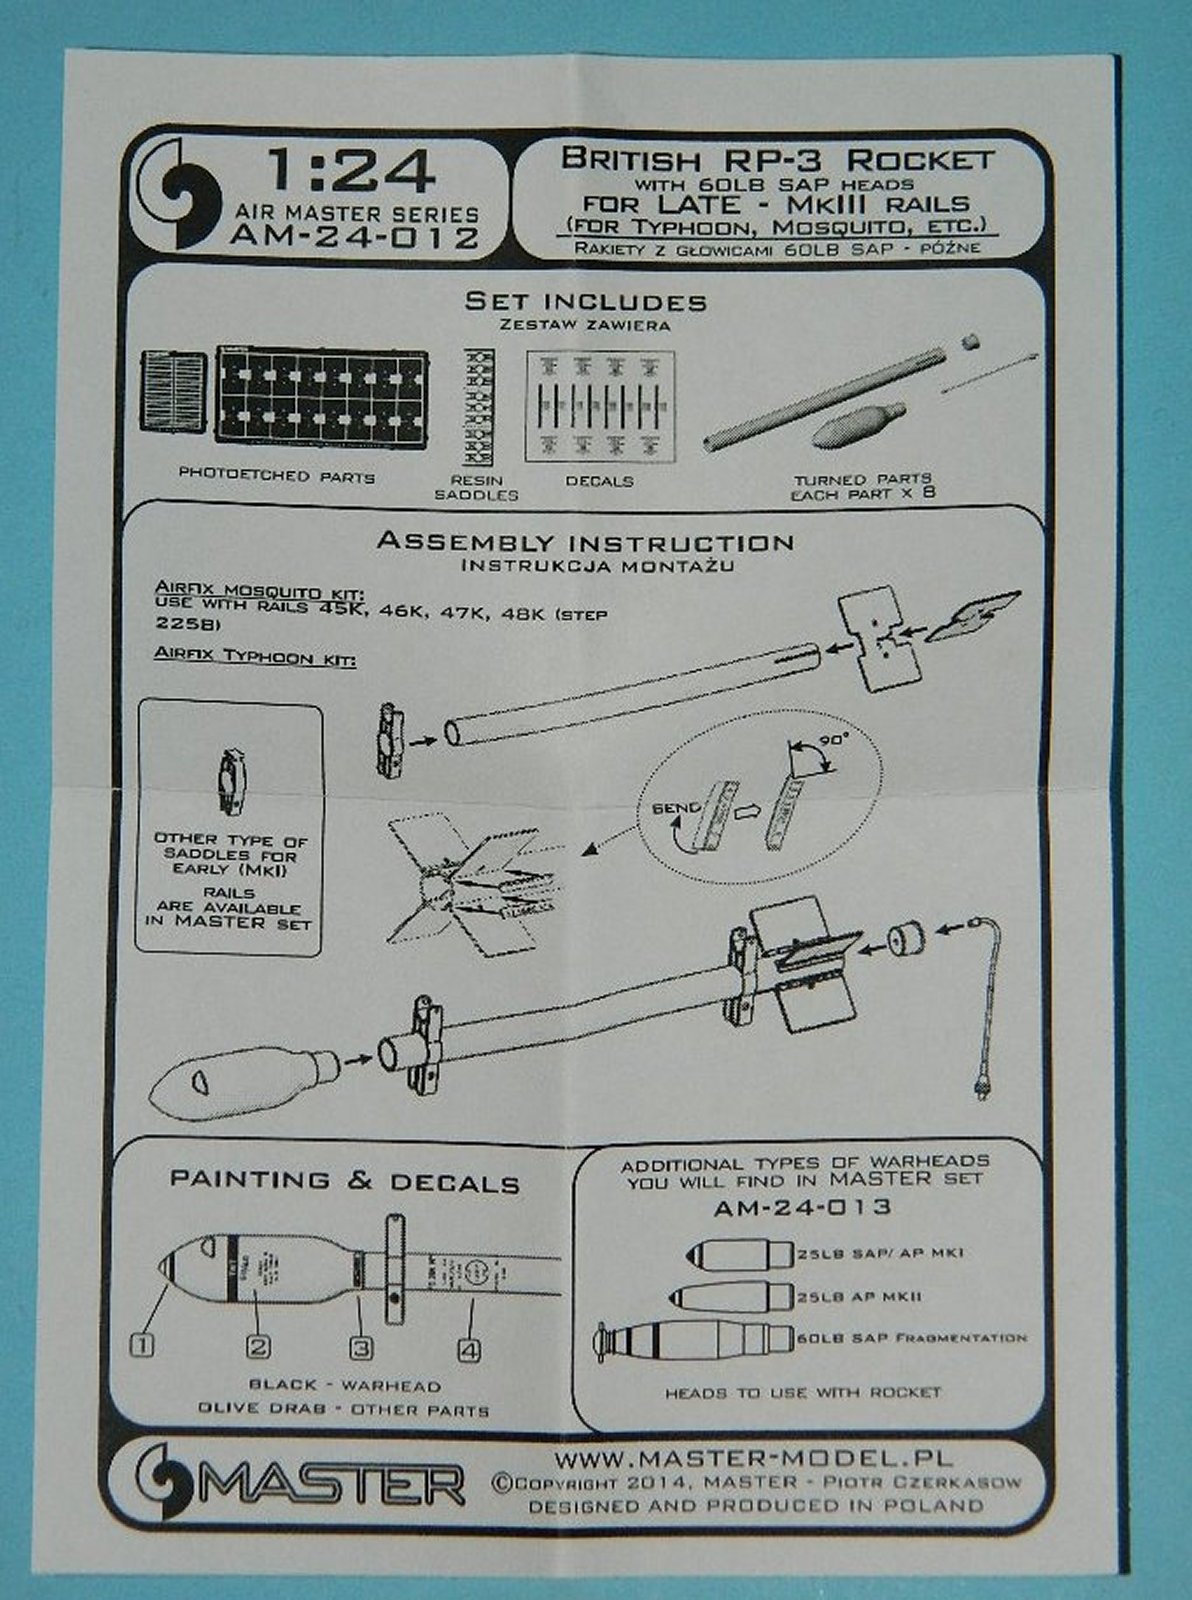
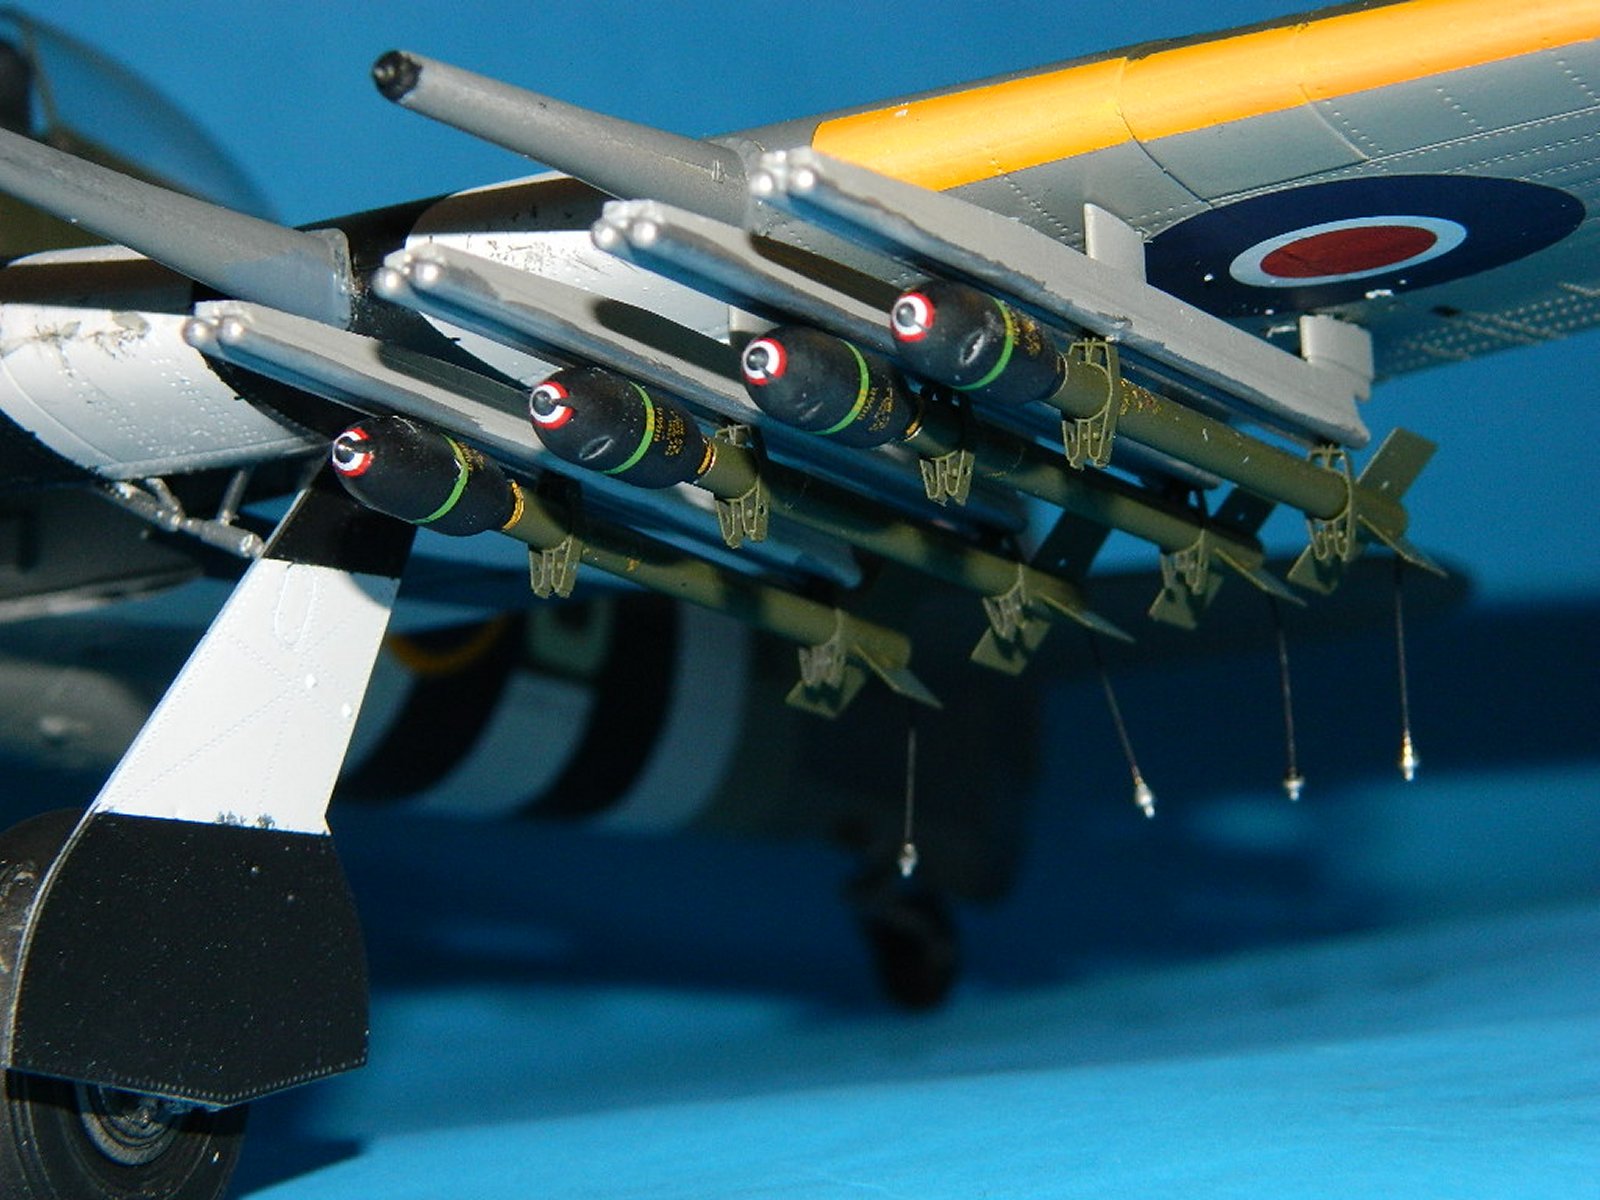
British RP-3 Rockets with 60lb SAP Heads for Late MkIII Rails
The owner of Masterwork truly knows Micro-metal machine work; This is the second review of three sets from Master Model which are all common in design but different in utility; IPMS USA sincerely appreciates Master’s support of our reviewer corps, and thanks to our leaders for sending these my way!
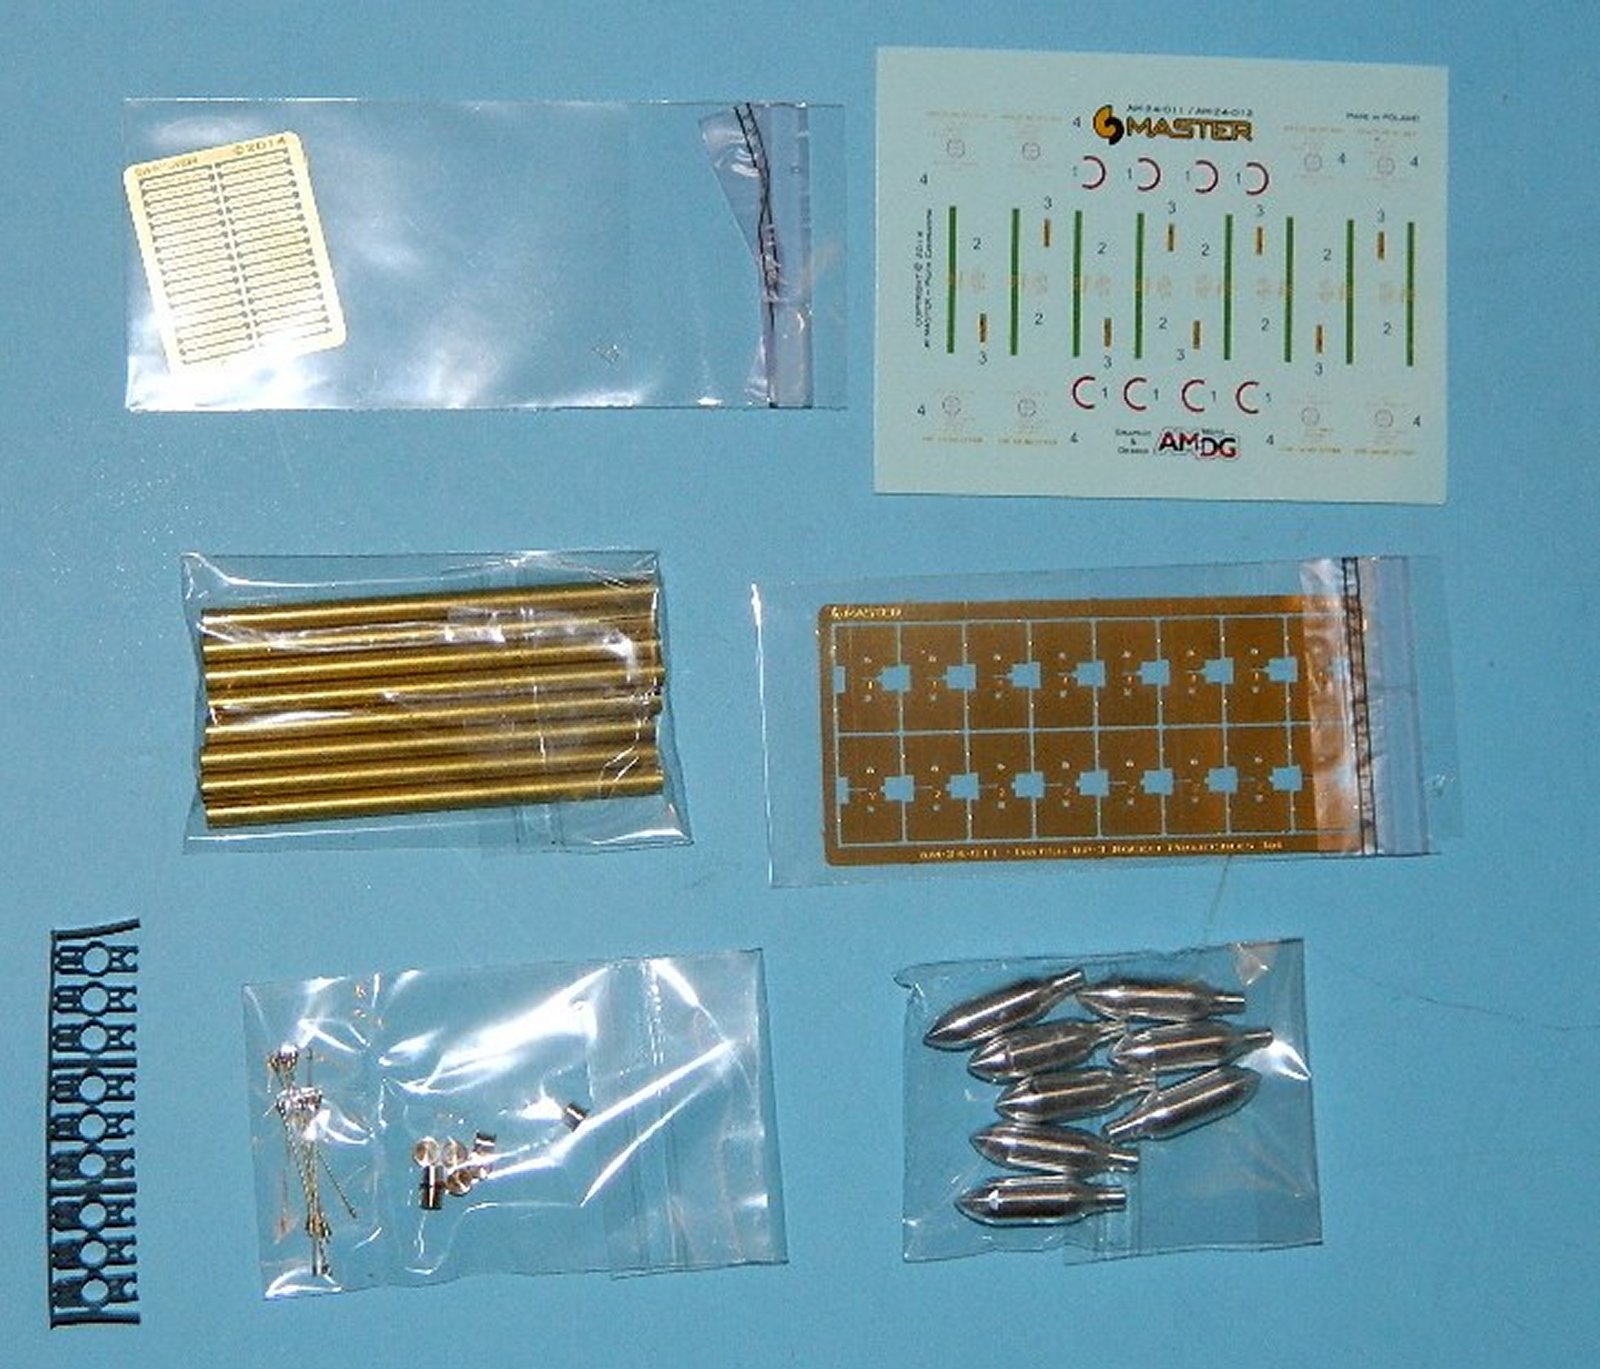
All parts are individually bagged by item within the generic display header bag; this prevents damage and ensures you have the correct bits to finish the set.
The difference in this set (24 0012) from the first set (24 0011) is the design of the
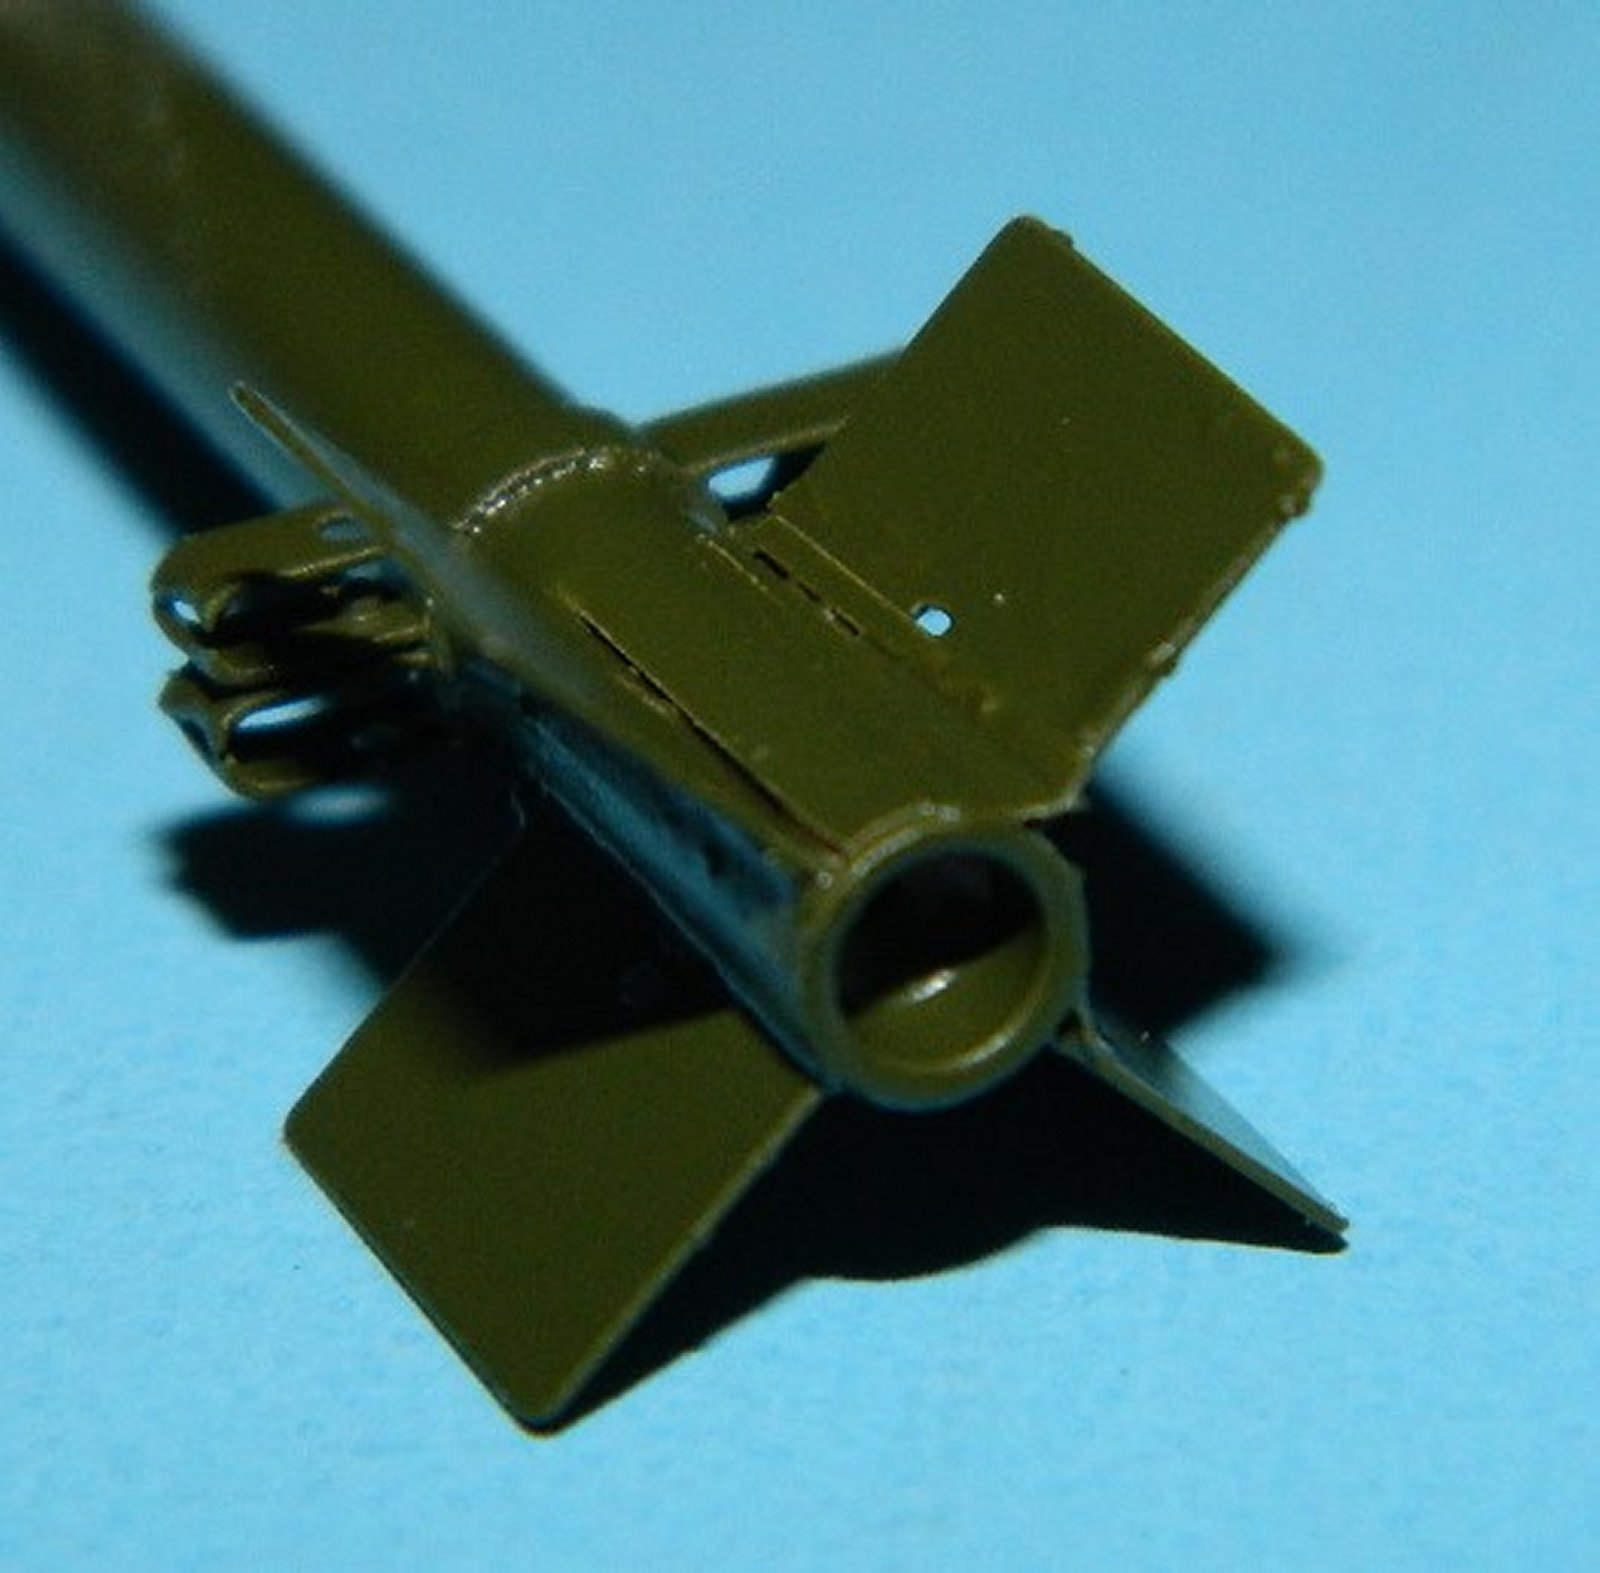
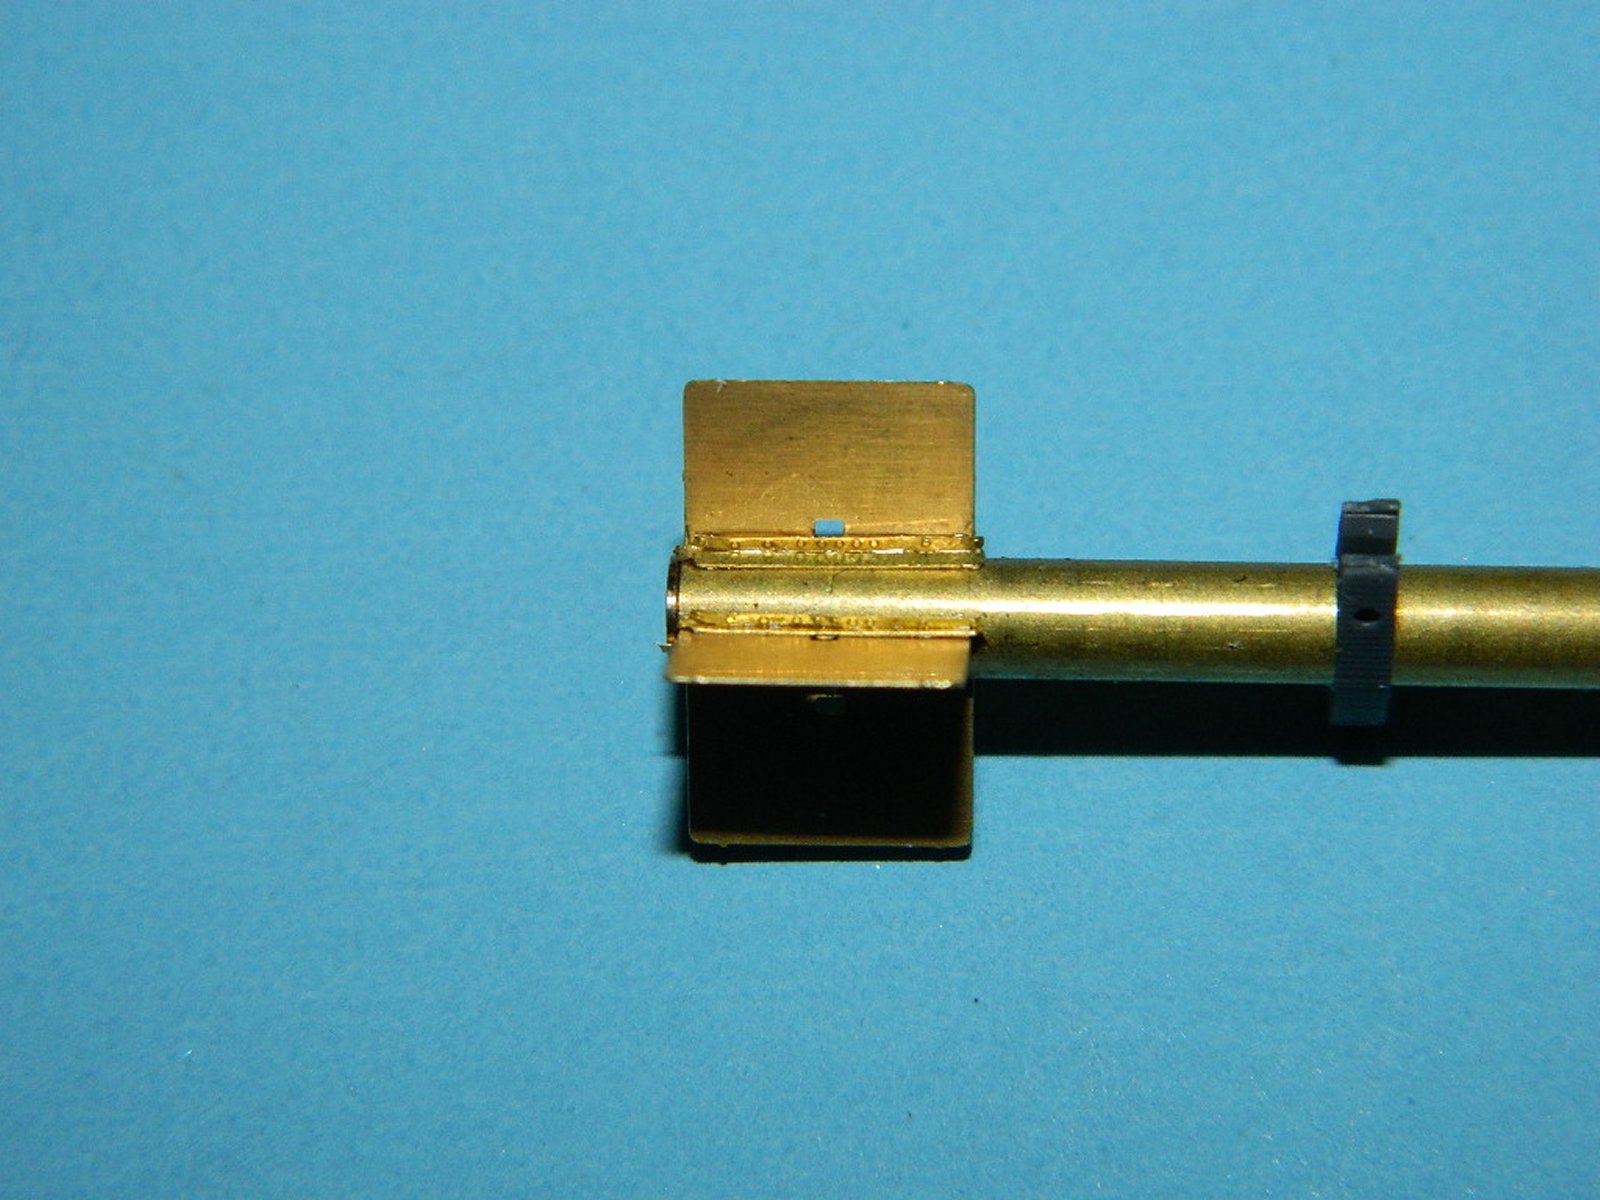
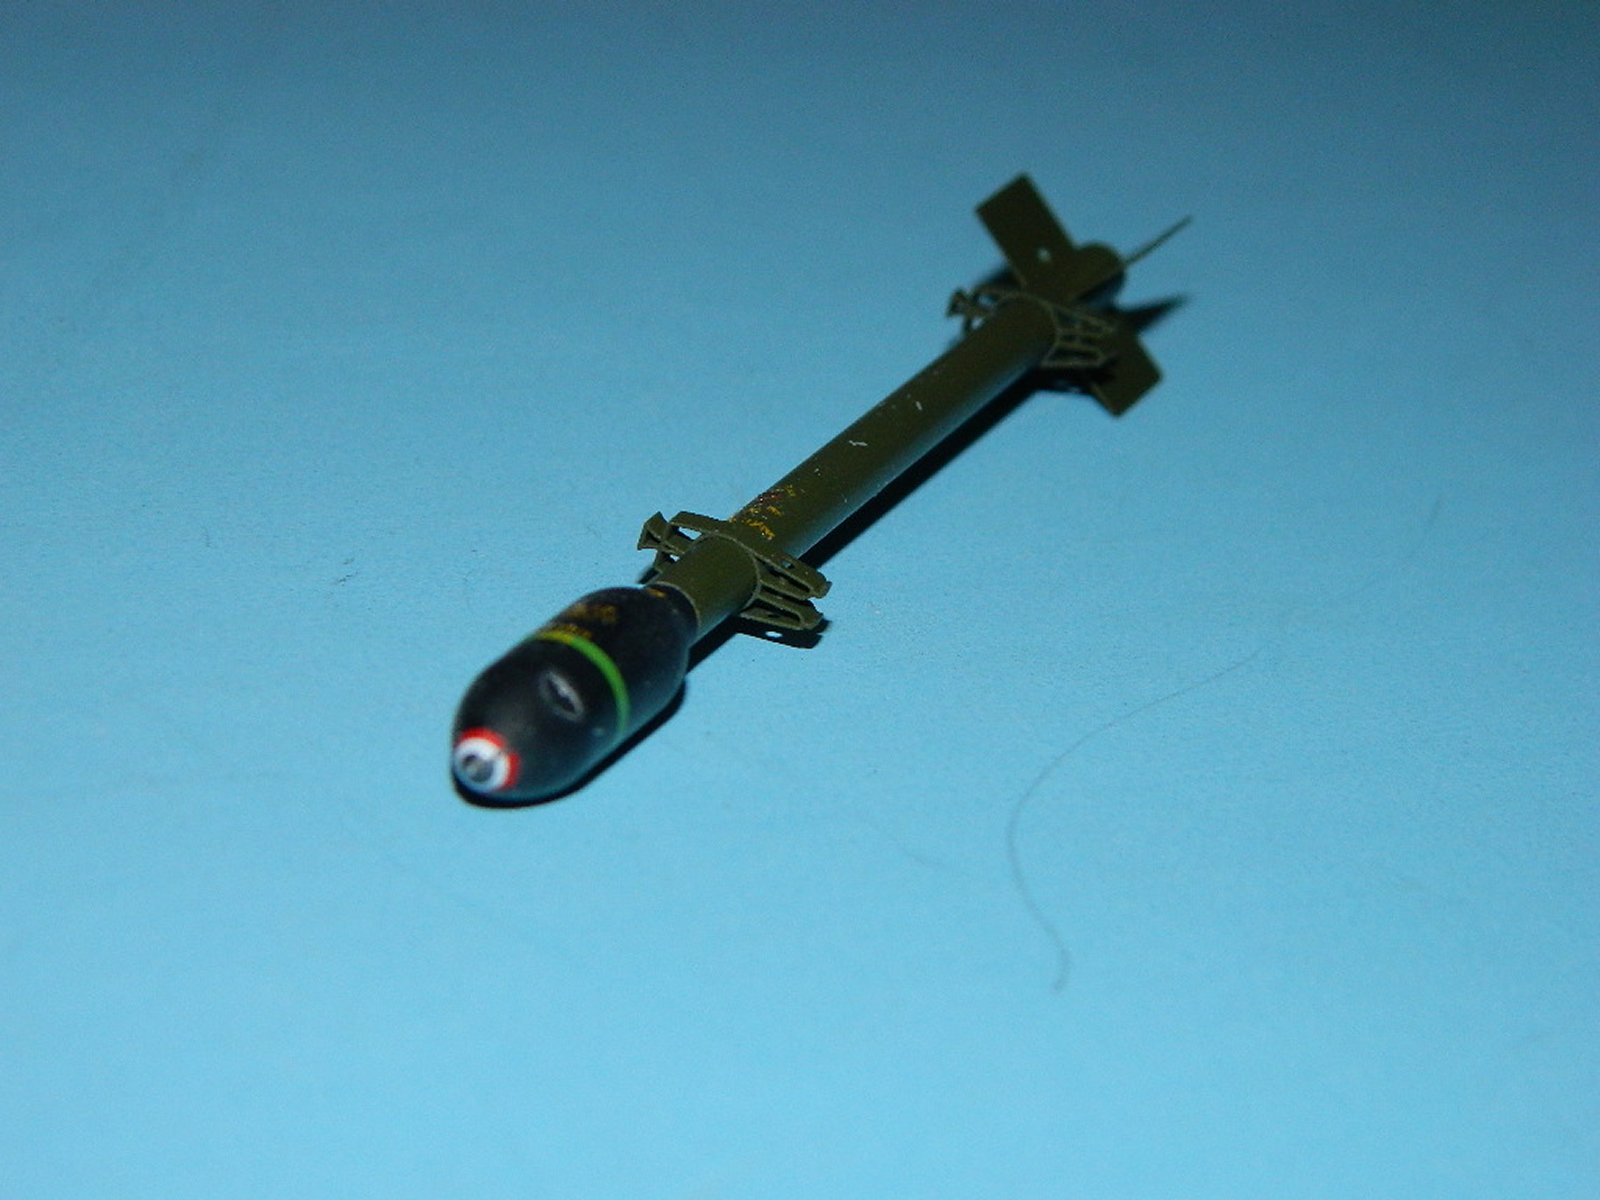
This set contains eight sections of brass tubing, with rocket fin mount slots milled into the tail section, turned brass exhaust plugs with the igniter hole already drilled, igniter leads, (unbelievably detailed pigtails!), 16 Photoetch interlocking fins and fin support gussets, turned aluminum SAP (Steel armor piercing) warheads with installation wrench cutouts, and excellent decals to finish. But wait, there’s more!... Included is an amazing set of launch lugs, which appear to have been manufactured by 3D printing. These fit snugly around the brass rocket tubes… and add immeasurably to the effect of realism.
Details: Superb! There are numbers etched into the fins, and the delicate (and extremely tiny) fin mounting gussets between the rocket tubes and the fins adds a bit to the finished product; there are even rivet holes in these! I installed one set in one rocket, and was duly impressed that (1) I was able to get them on without destruction, and (2) they stayed in place. A great way to practice surgeon skills, these were…
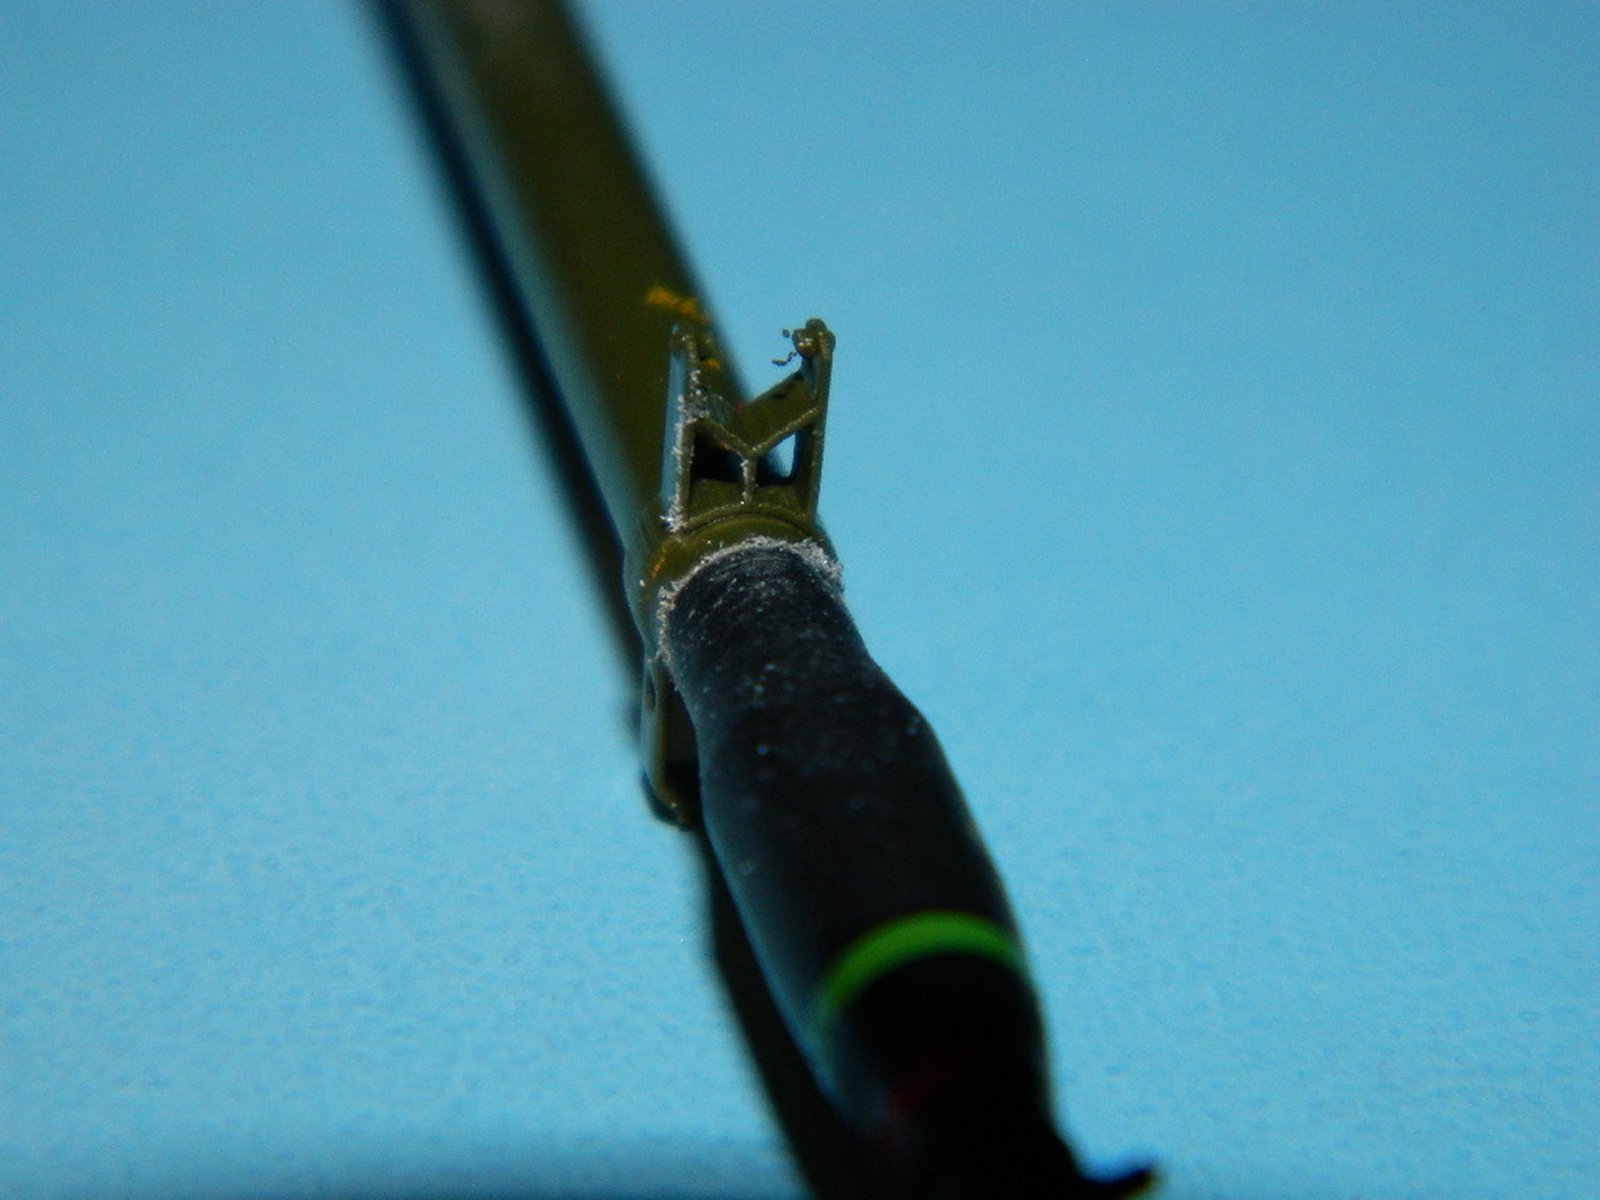
The rocket nozzles are a supreme bit of machining, as they are hollowed and beveled on the inside, with a flange around the extreme end to prevent them from being pressed too far into the rocket motor. These also hold the fins in place! One drop of superglue was all it took…
This was one time I tried using acrylic floor finish for the installation of these non-structural, but interesting details. Not so good, then I remembered I had a new bottle of Gator’s grip glue… I used the thinned Gator’s grip with better results than the floor finish. I purchase it directly from Gator Loup, the gent who makes it, and it works great on PE. (Merci mon Ami!). The methodology for installation was eased by the fact the PE gussets have extremely thin center hinge points, so you can dip them in the glue, use a toothpick with a small amount of glue on it to grab the part, place it on the root of the fin, and then push the part into the joint between the fin and the tube with a knife edge. Not too difficult there is only one per fin (not on both sides), so it goes quickly.
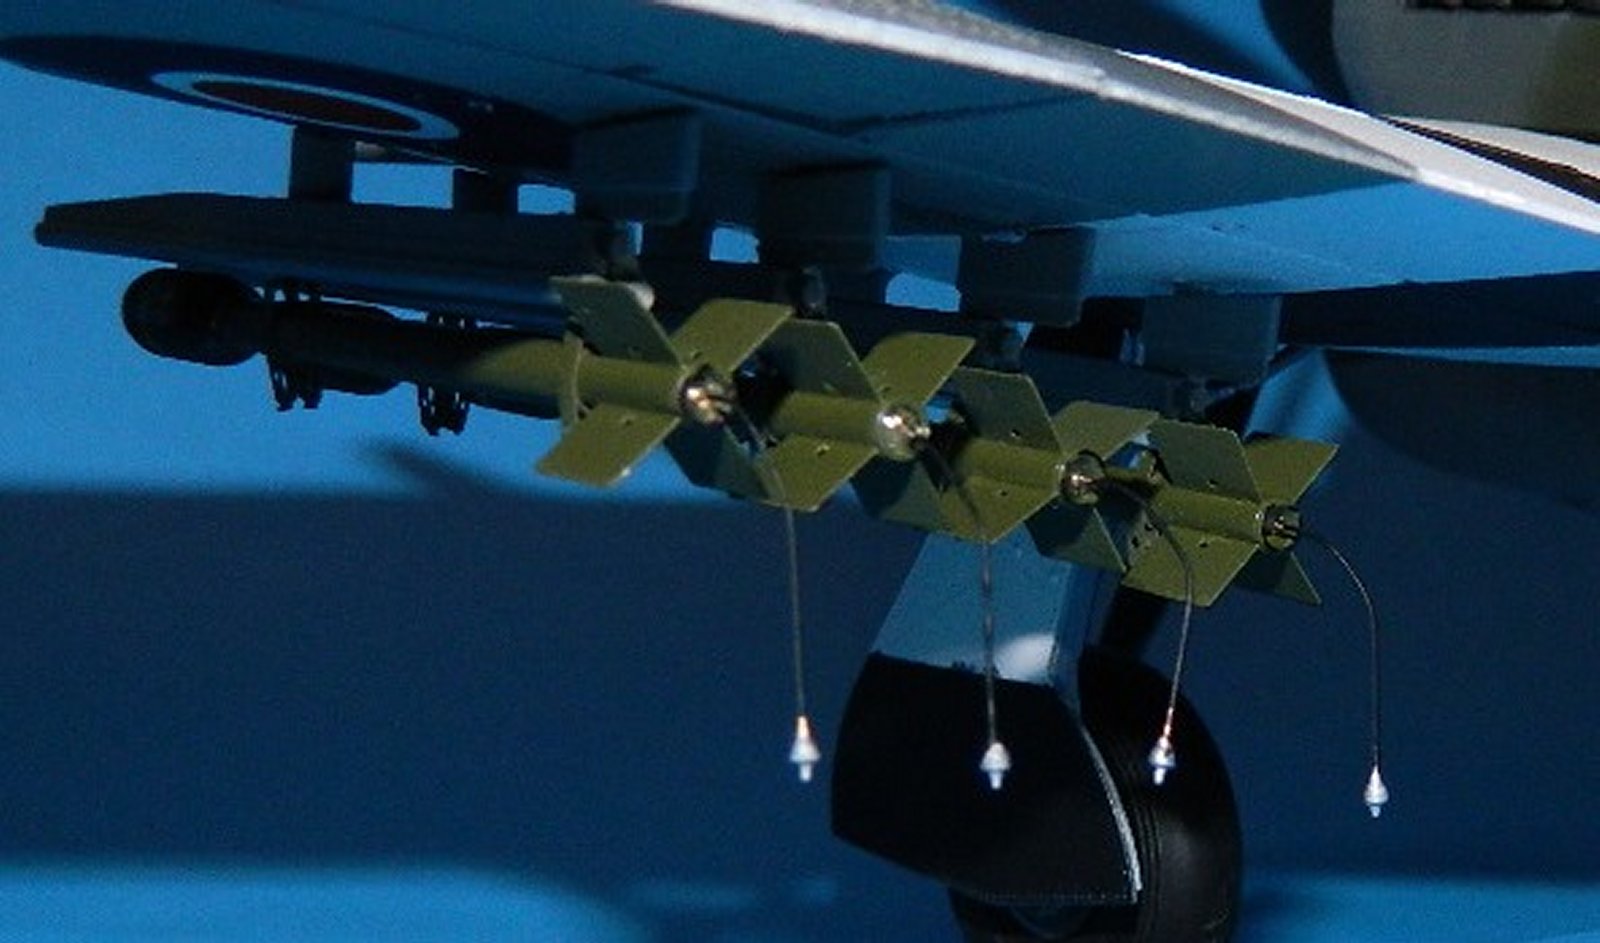
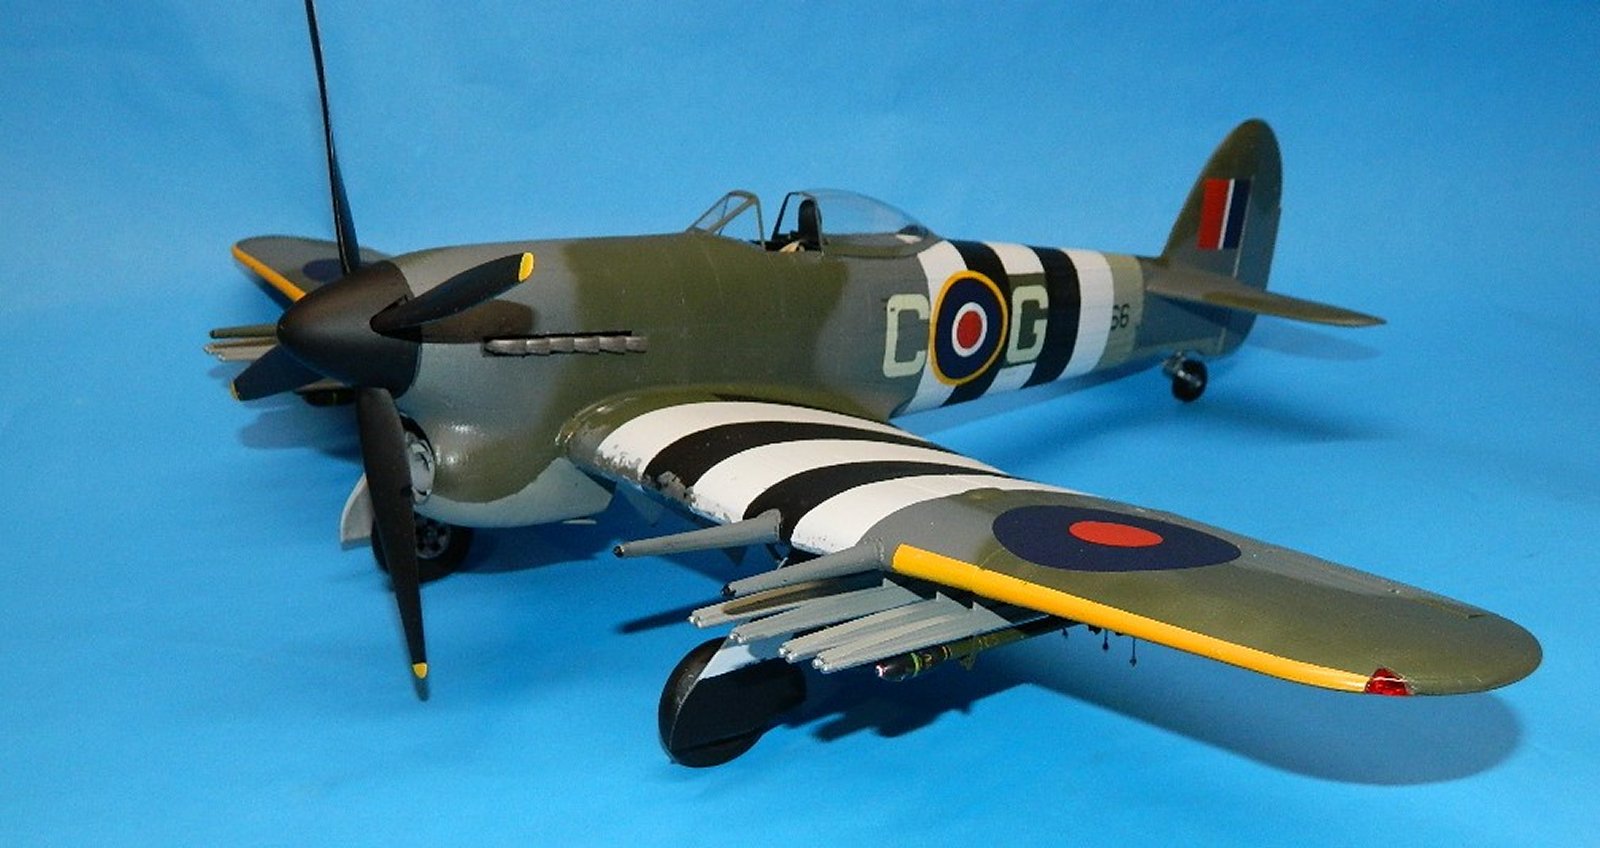
These rockets are intended to be installed on the single-rail, late version of the Typhoon rocket launchers. These rails were also fitted on some Mosquitos.
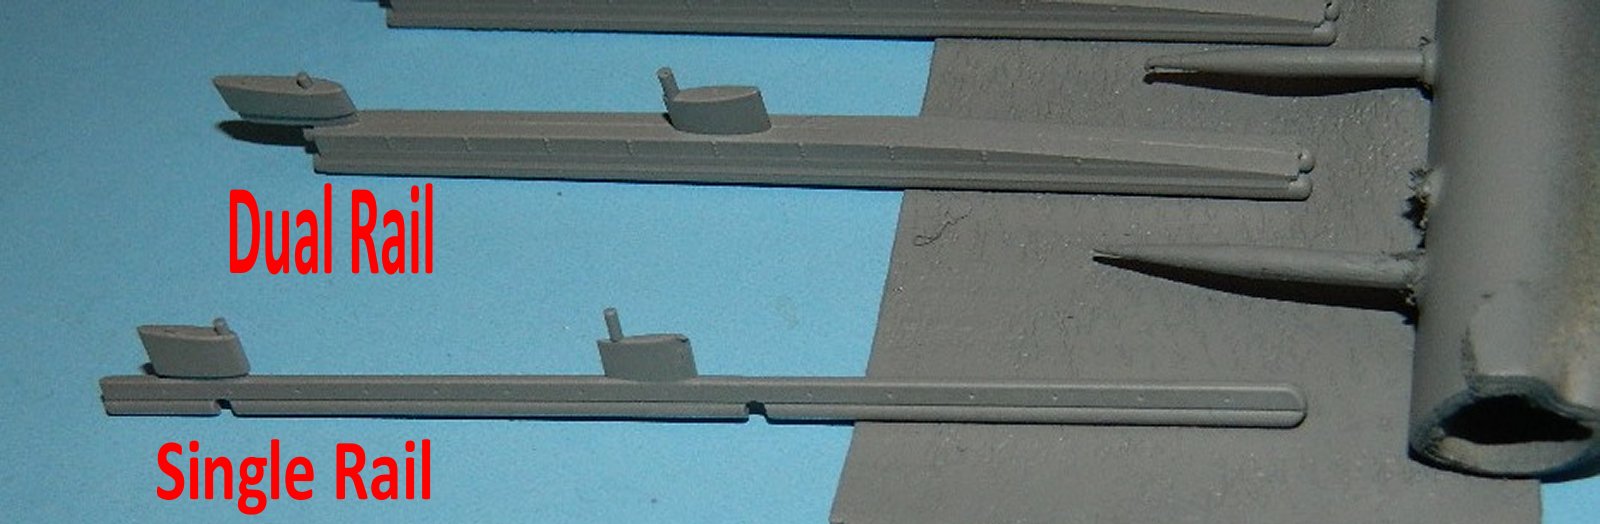
A note about the delicate but strong rocket rails. As noted before, these appear to be 3d printed… and the finess is beyond what I have ever seen before. You could not build these from PE; no way! Each lug is hollow and fits perfectly on the rocket. Look at the kit rocket verses the final Master product… no comparison! These lugs differ from the early version in that the rails are singles verses doubles… it’s that simple. AND, the mounting lugs on the later rockets are placed further forward on the rocket tube than on the early version. They have a different design as well…
The aft mounting lugs fit approximately 1/16th of an inch from the front part of the fins, with the attachment point in the center of the “X”, and the forward launch lugs fit on the rails approximately 1/8” further forward from where they would fit on the early, dual-rail launchers. Use the kit rockets to do the measuring, and they will fit on the rails just fine.
Painting was a primer spray coat of Tamiya gray primer, using the open rocket ront as a convenient place to paint over cocktail sticks embedded in a row on a dry-cleaning tube. The final paint was Tamiya Olive Drab 2 from a spray can.
The warheads were superglued to a piece of wood, and primer painted in the same manner, with flat black to finish. The flat finish was, once the paint had cured, rubbed with a cloth to provide a semi-gloss finish; I installed the warheads on the front of the rockets, then decals were applied. The extreme nose rings in particular fit very well… an impressive effort.
Flatcoat for final finish, install on the rails on the aircraft, then superglue the launch lugs in place… igniter pigtails are the final step, plugged into the hole in the rocket nozzle. They can be left hanging as they were not “plugged in” until the aircraft was ready to go. To simulate the aircraft in flight or ready to takeoff, glue the plug into the wing electrical socket, as the wire is flexible enough to bend nicely.
Up front, these are a bargain for that “final detail” on a model. The machine work and craftsmanship are flawless; this level of detail can bring a “good” build up to “great”, with contest-winning capability. Another magnificent effort from Piotr and Iwona at Master Model and full marks for a complete package; thanks again for providing these sets to IPMS USA!

Comments
Add new comment
This site is protected by reCAPTCHA and the Google Privacy Policy and Terms of Service apply.
Similar Reviews