
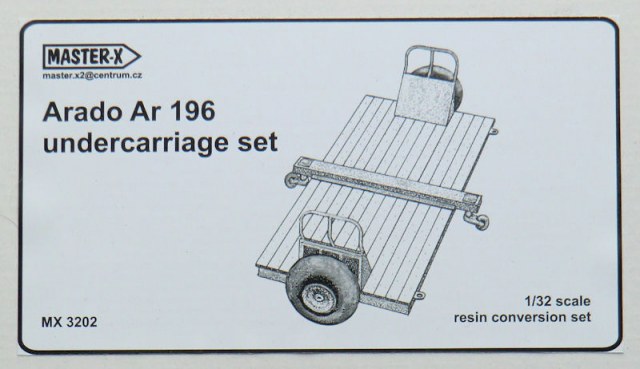
Arado Ar 196 Undercarriage Set
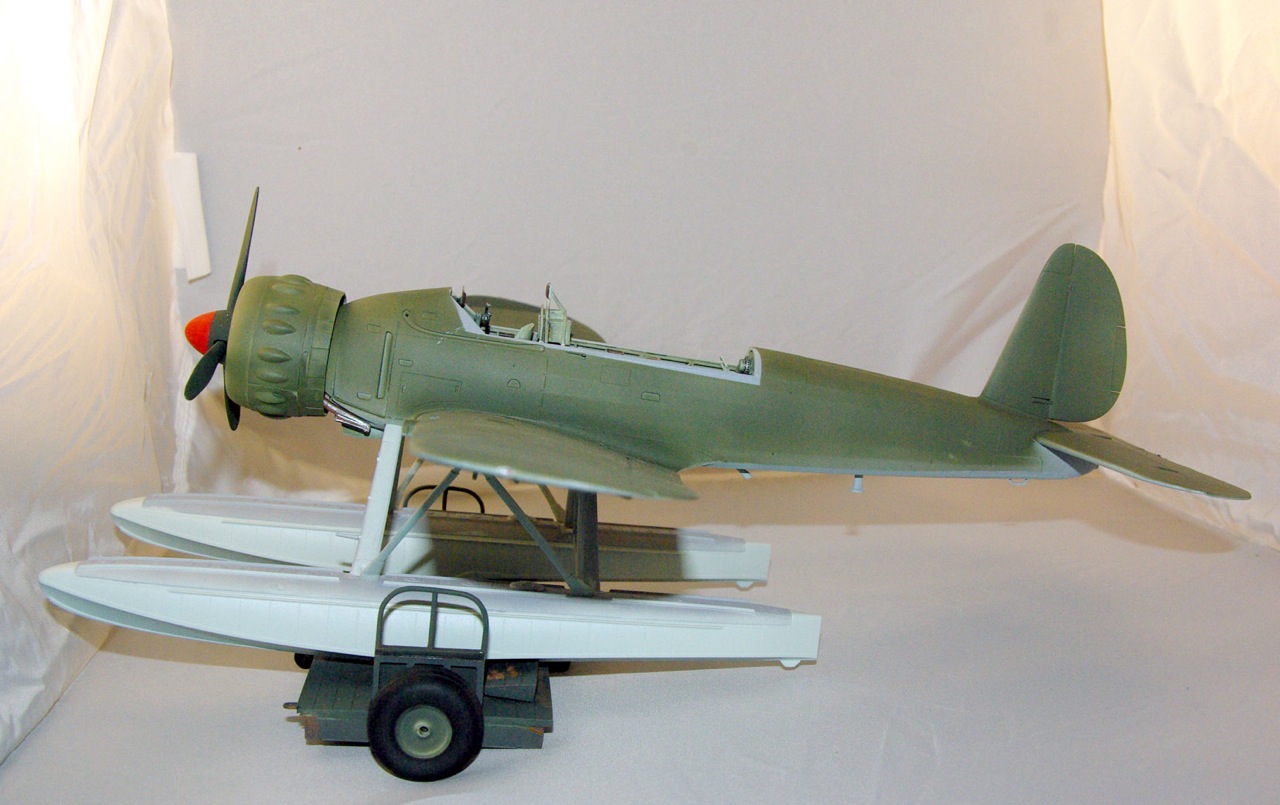
Master X, an eastern European company, has released a high quality resin beaching trolley/trailer for the excellent and affordable Revell 1/32nd scale Arado Ar 196 float plane. The combination of the two provides a nice solution to the tricky question of how to display Revell’s masterpiece if you don’t want to purchase a $90 resin catapult by HPH, or leave it sitting unrealistically on the tarmac.
Opening the Box
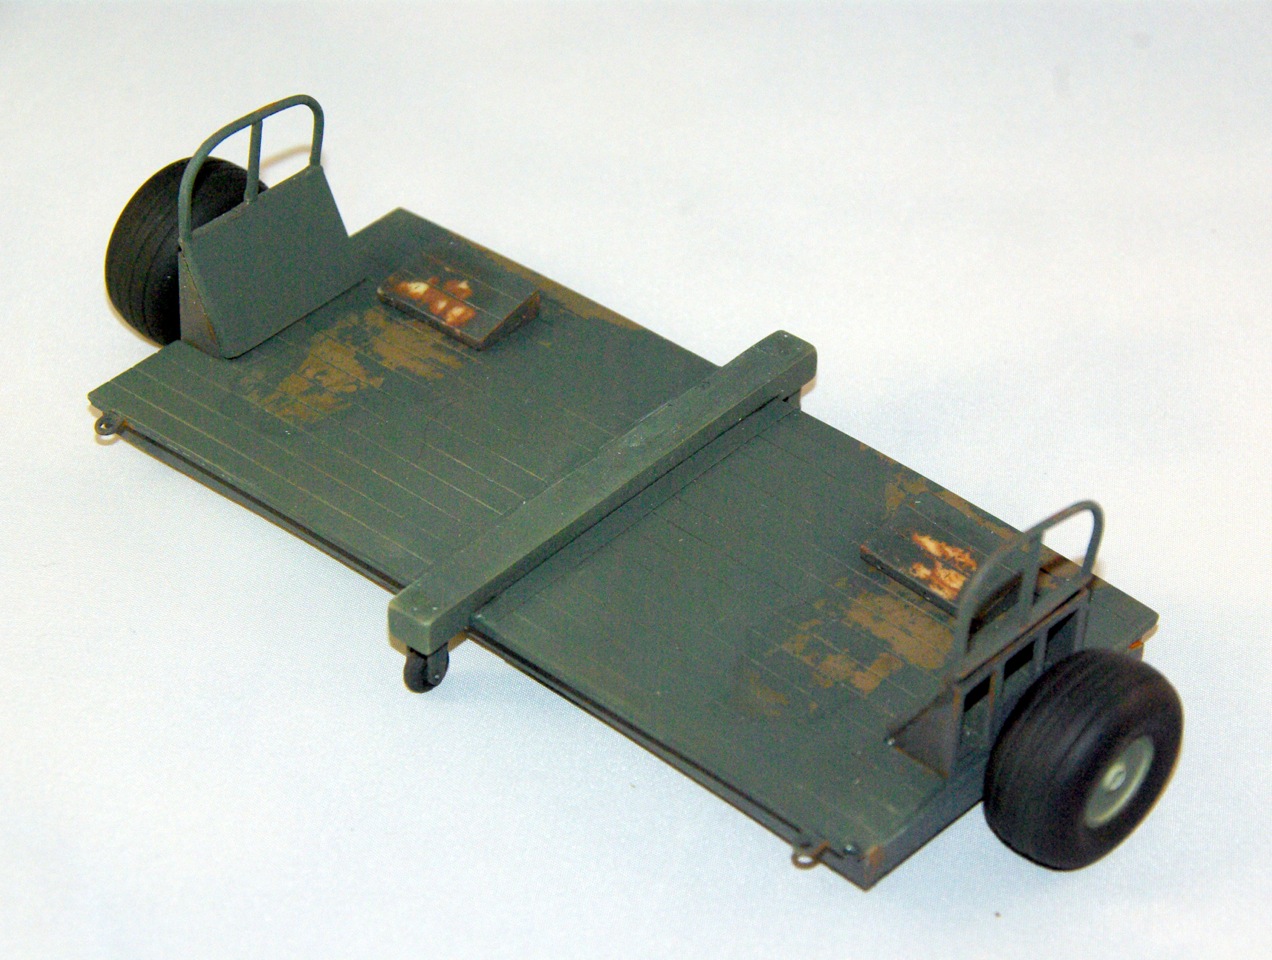
The box contains 17 resin pieces, and a half-sheet of paper with drawings of parts with lines showing where each goes.
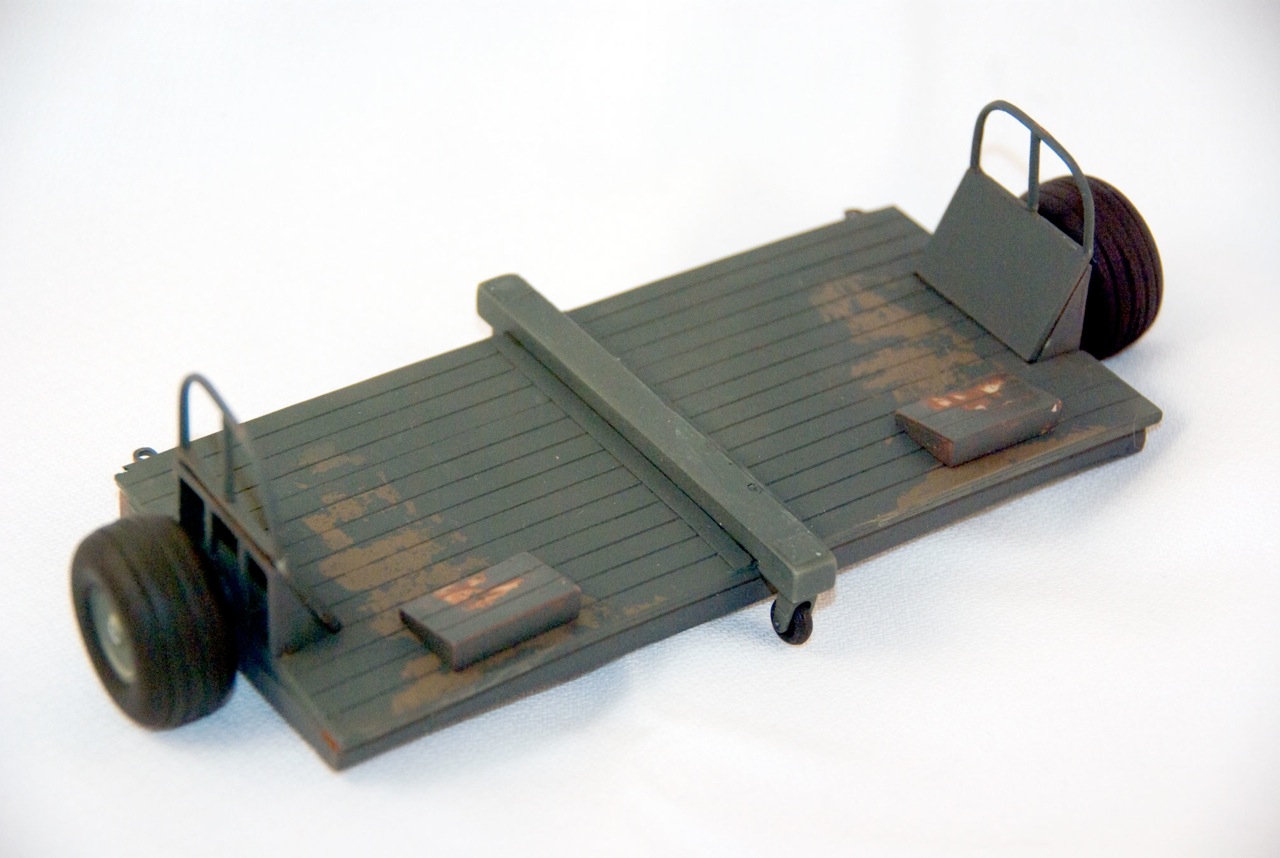
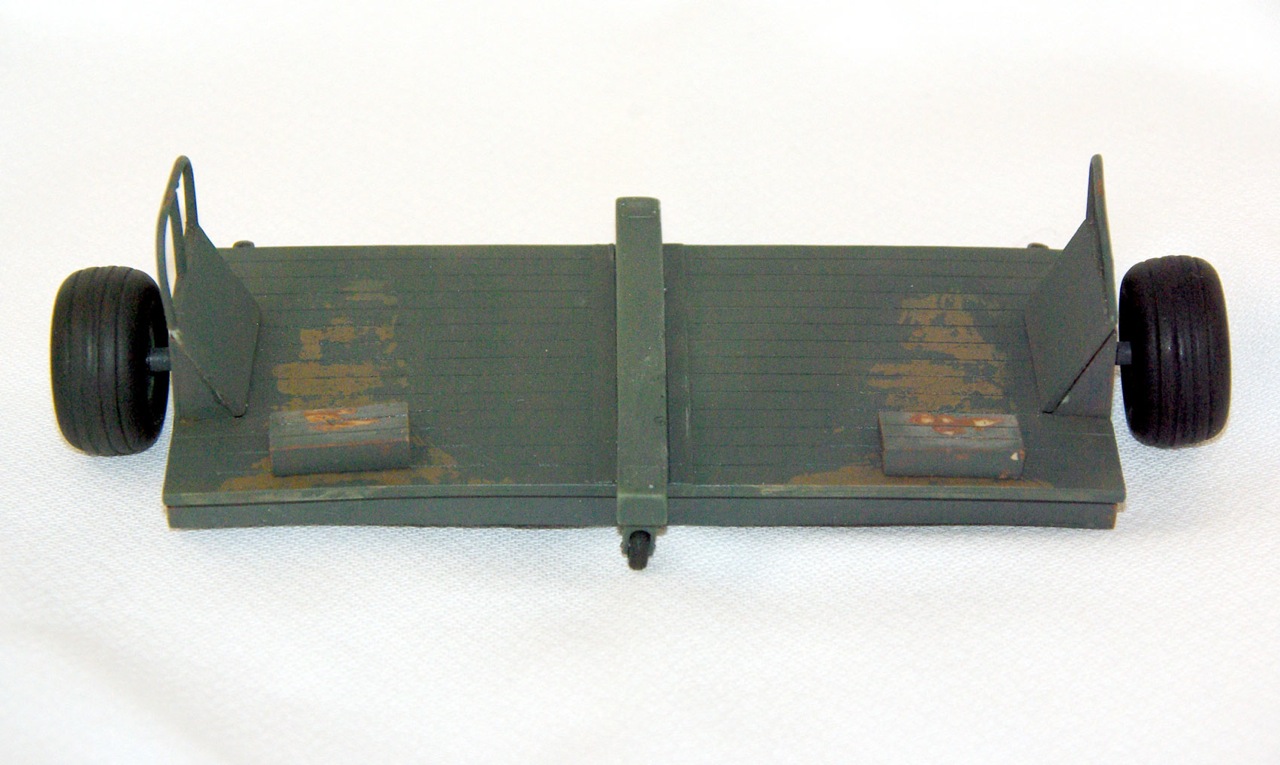
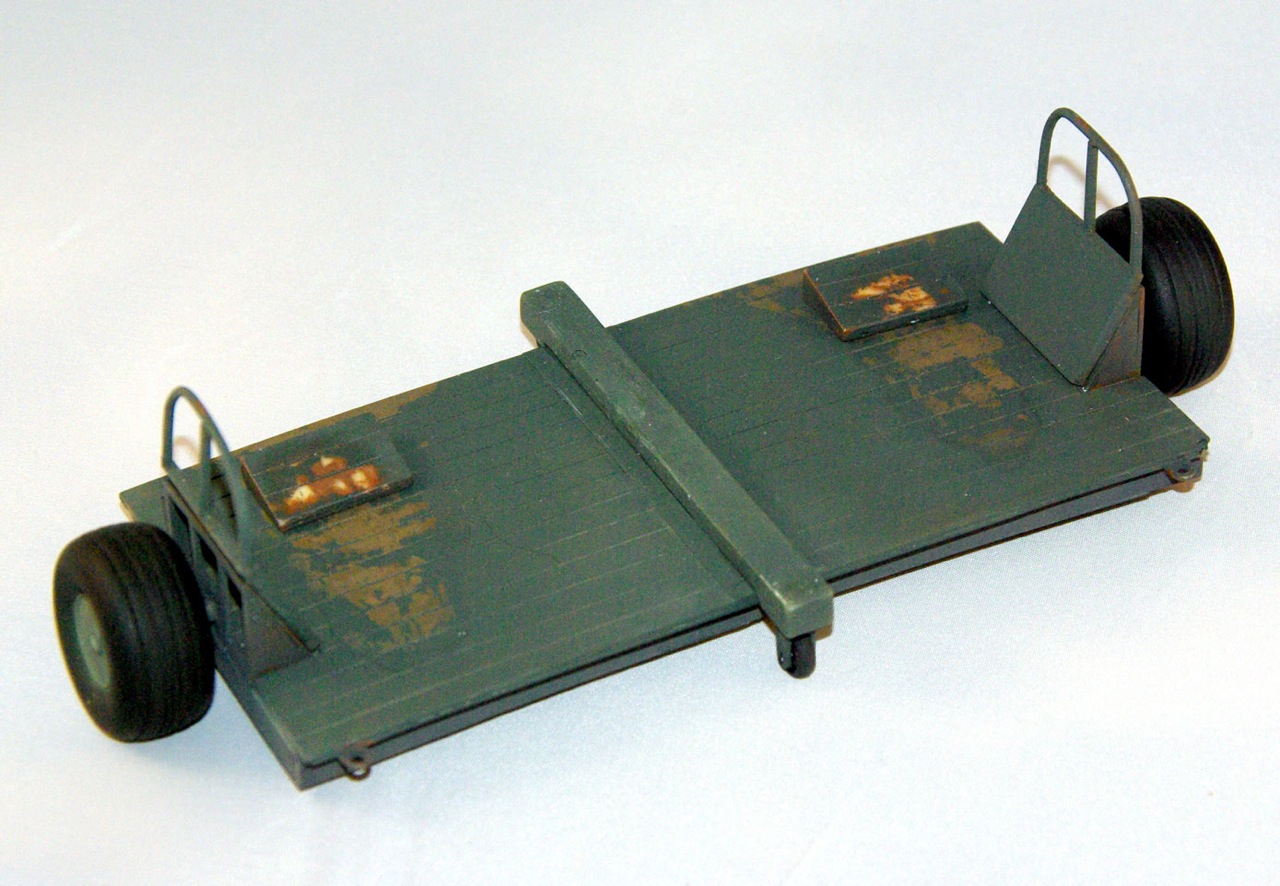
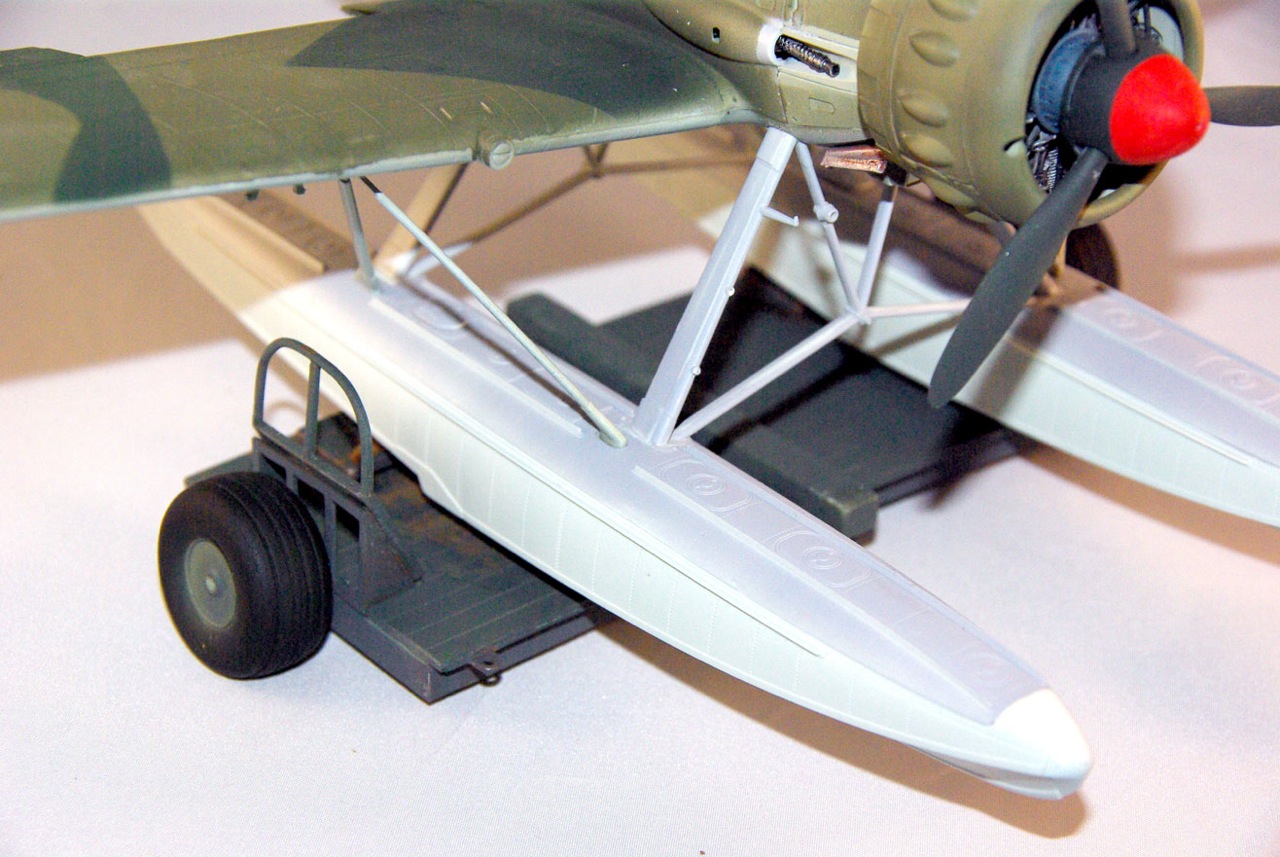
The parts include the frame and deck of the trailer, the main wheels and guide wheels, and the “fenders”, presumably for preventing rocks from being kicked up into the underbelly of the aircraft.
The pieces are all attached to casting blocks, as is typical for resin kits, but Master-X has taken care to make the attachment points very thin, which makes quick work of separating and cleaning the parts. For example, cutting the wheel wells free involved just two passes of a sharp knife. Given that I have worked with resin kits sporting delicate parts which have been cast directly to large blocks of resin, I have to give Master-X kudos for their approach here.
The quality of the castings is good, but on my model there were some air gaps on several parts that required a tiny bit of putty. There are none that compromise the integrity of any parts, but the modeler should be aware that they should look the parts over, and if any holes are found, they will need to fill them with CA, and possibly a Bondo-type filler for some of the larger spots. I didn't knock myself out fixing the holes, so those portions of my model have a little extra 'character'.
While I don’t have any scale drawings with dimensions, the trailer does look to be the correct size. Comparing historical photos of real beaching trolleys, my Revell Ar 196 sitting on top looks believable in scale.
Assembly
The first and most time-consuming step is cleaning up the castings. It took me around an hour-and-a-half to get the flash cleaned up sufficiently to proceed.
On my kit, I noticed the frame had a natural slight curve to it, as did the deck. I noticed that when the frame was fitted to the deck with this curve heading in the same direction, the fit was much better. I wet-sanded the frame’s top and bottom to improve the appearance after my butcher-job of removing flash, and so that the top of the frame and the bottom of the deck meet with as few gaps as possible.
Then I got to looking at the deck of the model; in particular, at the two slots that had been cut into the surface where each wheel assembly would go. The slots were clear through, and went clear through what looked like a structural support bar underneath. So this support bar on either side of the model was cut into three pieces. That seemed a bit odd, and I was going to fume about how this couldn't be “authentic”… and then realized that the bar in the casting isn’t for appearance (unless the model is to be displayed upside-down), it is for aligning the frame to the underside of the deck. It was then that I realized what the correct assembly sequence was:
- Frame under the deck: The frame actually "snaps" around the support blocks under the deck, so I clamped the entire assembly together, and applied ultra-thin CA glue with a toothpick, letting capillary action suck the glue between the frame and the deck.
- The bracket with the wheel spindle: This goes on next through the slots cut in the surface of the deck, and sits down on top of the frame below. The two triangular flanges of these brackets sit partly on the frame as well, helping to keep the whole spindle unit aligned.
- Fenders: The fender pieces with the curved tubular bar at the top need to be glued along the length of the wheel spindle bracket’s top, down along the brackets that go down to the deck, and the bottom of the fender needs to be glued to the deck.
I actually waited on adding the fenders until after I had painted the deck and the fenders separately, just to assure complete paint coverage.
With respect to where on the deck the wooden blocks should go, the instructions could be better, and the picture on the front of the model’s box does not show the wood blocks at all. The blocks are supposed to go toward the outer edge of the deck where the floats of the plane run, at the rear of the trolley - the side opposite the side with the lash-down eyes. They support the plane’s floats behind their “step” point. When the plane is being pulled from the water, they effectively grab the back of the plane’s floats and help prevent the plane from sliding off the trolley. Rather than gluing them in place, I left mine moveable, which I expect they were on the real vehicle (and hence the weathering of the wood under the blocks). Also this provides me with some options with respect to the display of my aircraft on the finished product.
For my last nitpick, the guide wheels have a hole in them, but there is no associated hole in the caster-bracket in which they are to be mounted. I pulled out my trusty pin vise and drilled a tiny hole with a #80 drill at the end of the bracket, and worked my way up to a #64 drill, so that I could put a small piece of Evergreen styrene dowel through the bracket for mounting the wheel. This was probably not strictly necessary, but I thought to keep the wheel mounted straight and even on both casters that it was a good idea, and it was very simple to do.
Since the instructions are merely pictures, there are no recommended colors or assembly sequence suggestions. I attached the tires and wheels last, so the entire unit could be painted after assembly, without having to do anything tricky to paint around the tires.
Painting and Finish
Because I planned to weather the deck of the trailer to look like it had that grey color that wood gets when it has been roughed up and dragged in and out of the water, I first sprayed the deck with Tamiya XF-59 Buff, then sprayed the model with my wife's hairspray (don't tell).
I mixed Tamiya X-6 Orange with XF-64 Red Brown to create a rusty color, and painted it on all of the joints in the frame, the lash-down eyes, and the fender and fender frame.
I could only find black-and-white historical photos of the trailer, so I decided to use a black-green base color, Humbrol #91 Black Green Matt, and after an hour I washed off wear marks on the deck with water on a stiff brush.
I then masked the wheel and painted the tire with Tamiya XF-69 Nato Black, and painted anything metal Humbrol #32 Dark Gray. I then thinned out the Dark Gray here and there around the places where I had painted the rusty-color with a hobby knife to create a rusty tinge.
Conclusion
I enjoyed the kit quite a bit. It is a nice addition to my (as yet unfinished) Ar 196 model, which I think Revell of Germany did an incredible job on. The beaching trolley kit's thin attachment points to the casting blocks on all the resin pieces is something that I wish all resin manufacturers would follow. All of the nitty complaints I have with the model would be solved by including a better set of instructions. The instructions should be more detailed, and suggest a sequence of assembly. Then again, if they did that, this review would be a quarter-page long, and I would be searching for things to say.
I would like to thank Master-X Models for providing this review kit, and IPMS USA for the opportunity to build the kit.


Comments
Add new comment
This site is protected by reCAPTCHA and the Google Privacy Policy and Terms of Service apply.
Similar Reviews