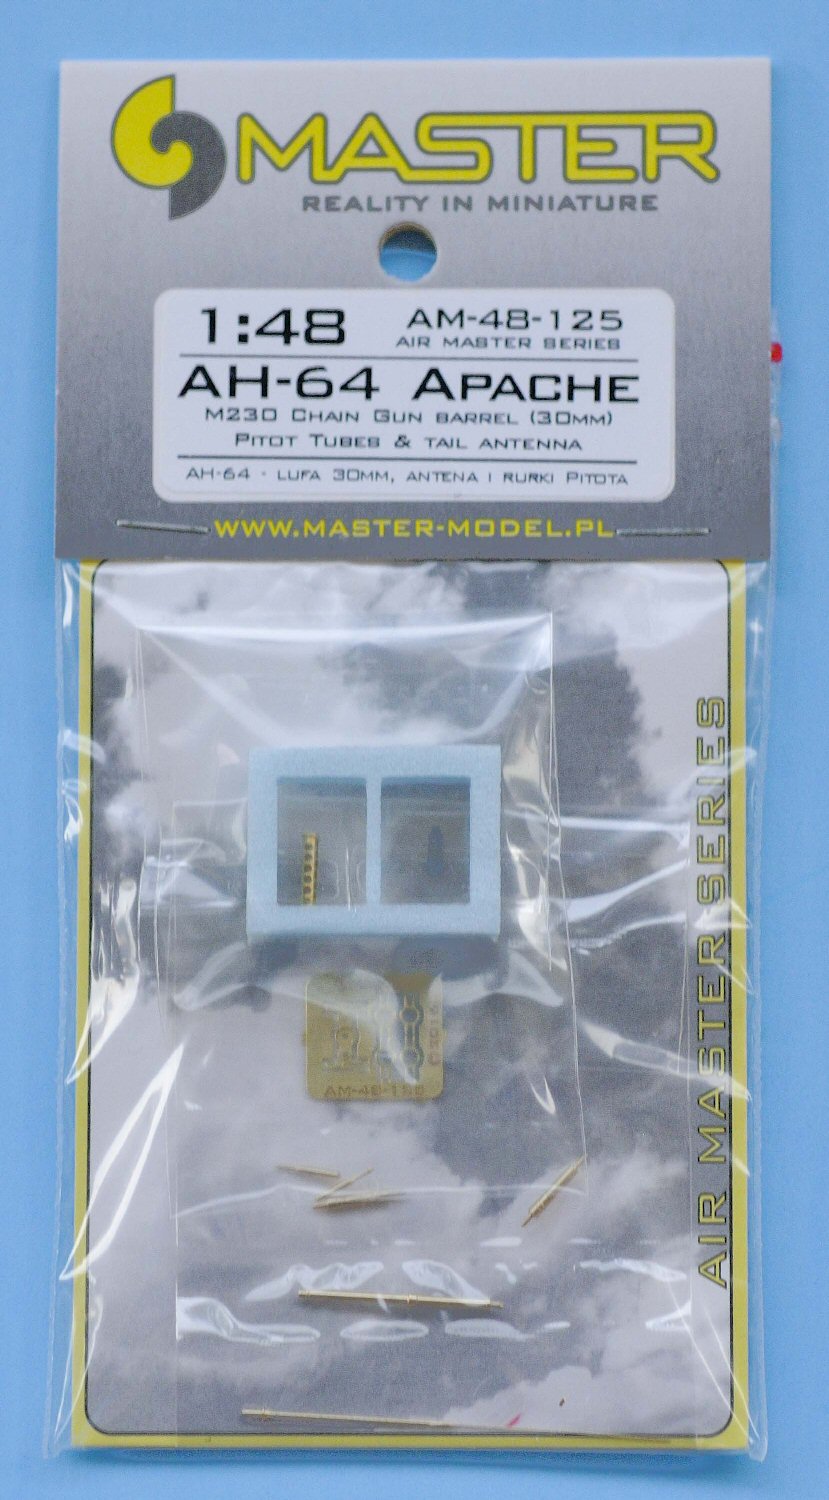
AH-64 Apache M230 Chain Gun, Pitot Tubes, and Tail Antenna
This Master Model set provides a huge leap over any of the injected molded parts available on any 1/48 kit. I based this review on the older Monogram kit from 1986, but it applies to any of the 1/48 kits on the market. This set includes a turned brass tail antenna (not included on the Monogram kit), two pitot tubes (again not present on the Monogram kit), and the forward part of the M230 Chain Gun. The M230 Chain Gun parts include eight parts, but one of the parts is a spare. You can easily see the crisper detail available in the comparisons in the attached pictures.
Notable is the thin heat sealed pouches to separate the different machined brass parts that Master Model uses that makes the parts easy to review and then stuff back into the re-sealable package securely. I simply cut down one side of the pouches, then reseal with take when done. The resin muzzle and the brass cooling jacket are secured in a high density foam block that is backed with some sort of adhesive tape to minimize them being moved around, or crushed for that matter. You will want to be careful handling the metal and resin parts as their small size makes them an easy sacrifice to the carpet monster. The resin muzzle is especially easy to break due to the side venting holes (as I did), so be sure to handle with care.
This Master Model set provides you a single tail mounted antenna. There is no assembly for the tail mounted antenna, but you will need to drill a 0.6mm (~74 carbide drill bit) hole into the assembled fuselage tail and mount the antenna. I would actually suggest you wait till the model is nearly complete to actually mount the tail antenna. The fit is great and mounting it earlier just risks breaking it.
This Master Model set provides you with two wing mounted pitot tubes. There is no assembly for wing pitot tubes, but you will need to drill a 0.7mm (~71 carbide drill bit) hole into the assembled wings and insert the pitot tube up to a marking line on the part. Just follow the instructions and only a few minutes per wing to complete.
The M230 Chain Gun assembly is a bit more complex as you are going to get to practice your folding skills. This assembly is fairly robust except for the resin muzzle. I would strongly suggest attaching the resin muzzle at the end of your build to ensure that it does not break. It is very fragile due to the venting holes. My first step was folding the back mount for the gun assembly. This was a simple right angle fold on each side. The other photoetch piece is a simple fold over for the forward ram retainer and then spot glue to secure the halves together. My next step was to slide the folded ram retainer to the forward mount on the gun barrel, slide the cooling jacket on, and then mount the barrel on the rear ram retainer with a touch of super glue. Next up was to make sure both the forward and rear ram retainers were aligned and not twisted. Once done, another touch of super glue.
The rear of one of the rams was then inserted into the rear ram retainer and slid into the forward ram retainer. Make sure the ram is parallel with the barrel and then secure with superglue. Duplicate that effort for the other ram, making sure than both rams are parallel with the barrel and in the same plane. Now is when I massaged the rear ram retainer vertical supports and used a wood toothpick to form them around the rear of each ram. Voilà! The photoetch wrapped around the rams quite well.
Once done, with the assembly, I used a razor saw to cut off the kit gun barrel assembly and sanded the mount smooth. I then used the tangs on the rear of the Master gun barrel assembly to mark where I would be drilling the three 0.5mm (~77 carbide drill bit) holes. I had to go back on the outer two holes I drilled and enlarge them with a 71 carbide drill bit to assure proper alignment, but that did not end up being an issue since the base of the gun assembly was much wider. As I previously mentioned, save attaching the muzzle for final assembly to minimize damage. Keep in mind the muzzle vents should be exiting horizontally to the gun.
Be sure to use your favorite thin CA (super glue) or epoxy, as the normal plastic glues or solvents will not react with the resin or brass. Due to the size of the parts, this is one set where you don’t want to use a gel, or thicker super glue. You will also want to be careful painting the parts to retain their sleek nature.
Highly recommended! This set is a super upgrade over the injected kit parts, especially if your kit doesn’t have them to begin with. This excellent set will easily enhance any 1/48 AH-64 you choose to build.
Thanks to Master Model and IPMS/USA for the opportunity to review this set.


Comments
Add new comment
This site is protected by reCAPTCHA and the Google Privacy Policy and Terms of Service apply.
Similar Reviews