
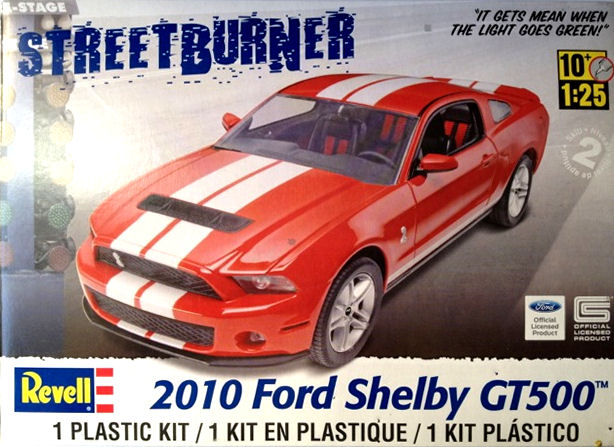
2010 Ford Shelby GT 500
Introduction
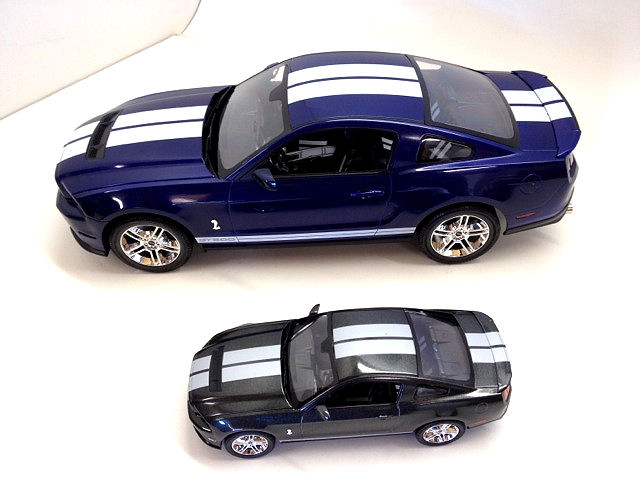
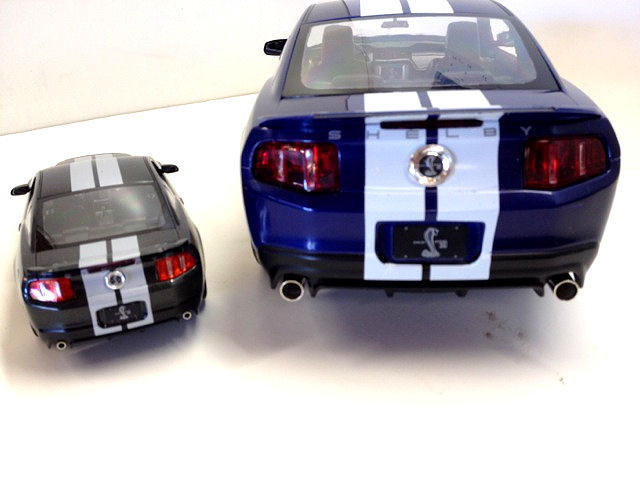
If this subject looks familiar to you, it should. This is the smaller brother of Revell’s 1/12 scale monster I reviewed a few months ago. If you want to know my history with the Mustang, please see that review. In short, I’ve been a Mustang fan since I was a kid, especially Shelby Mustangs. Yes, this is the car that, when it was introduced as a 1964½, started the “pony car” craze that’s been carried on since by the Mustang, Camaro, and Firebird. The Shelby name needs no introduction to car fans and most anyone else. Shelby Mustangs have established a race-proven record of performance. Combine that with basic good looks and the now traditional double racing stripes and you’ve got an unmistakable classic.
The Kit
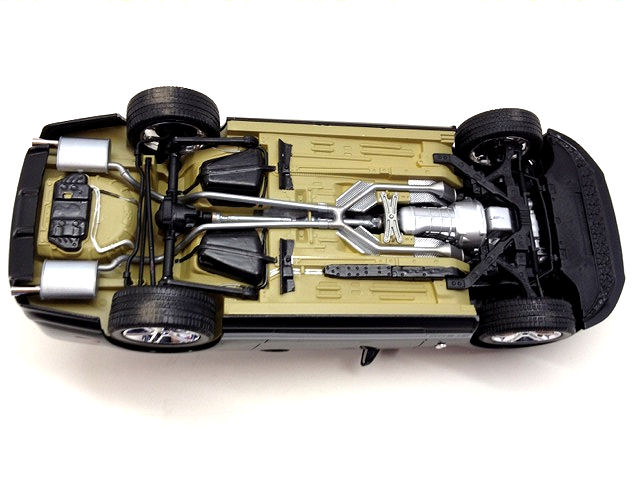
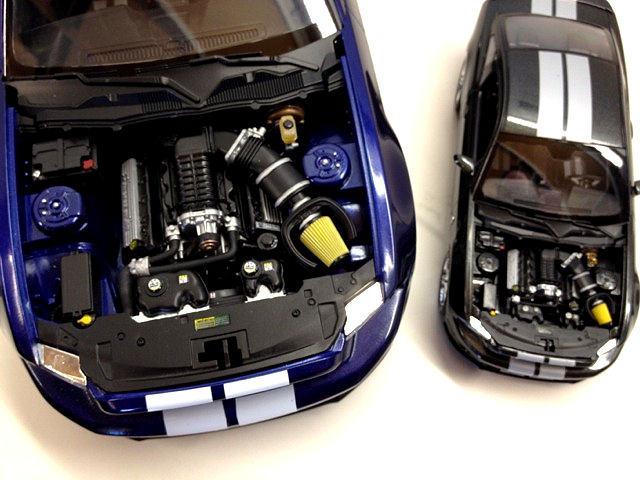
This appears to be a scaled-down version of the 1/12 kit. The size difference means some things are not in this kit that are in the larger one. For example, all the parts are cast in white, clear, or chrome. The door handles are cast with the body, as opposed to being separate parts, and the rear tail lamp lenses are cast clear in lieu of red. The grilles are molded solid, as opposed to open on the large kit. The surprises come in the form of the same metal exhaust tips and two stripe colors on the decal sheet that open up the color possibilities over the larger version of this kit. Everything else appears to be a scaled down version of the big brother.
The Build
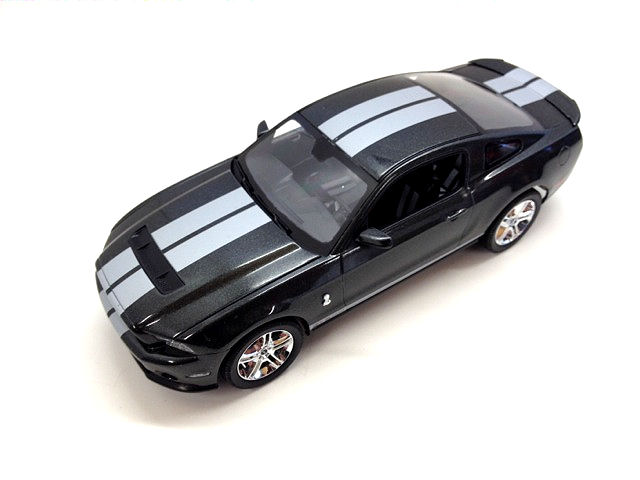
The build sequence is pretty much the same as the larger kit. I found it took no time at all to get the engine/chassis combo painted and assembled. Everything fit just fine. The sub-assemblies are just like the 1/12 scale kit and, frankly, are easier, as this is more like the size I’m used to. Also like the big kit, the seat stripes are included as decals. The front and rear body caps have very small contact surfaces, so glue them and let dry thoroughly before sanding, etc. I decided not to primer the body but to polish it out with micromesh and paint the polished bare plastic.
The Paint
I decided on a black body using the silver stripes. I would have liked to use Tamiya’s black lacquer, but it has not been available for a while here. I settled on Testors “Blazing Black,” lacquer. It can be sprayed over plastic without primer and smoothes out very nicely when dry. The cap was black so I figured I was set. When I sprayed the first few coats on I noticed it was metallic and then I realized this was more like a gunmetal metallic color than a true black. I doubt any Shelby wears this color, but it looked good, so that’s what you see. Be patient, just because this is lacquer doesn’t mean it will completely dry quickly. After waiting overnight, I masked out the areas to be painted satin black and imagine my horror when I peeled up the paint and the tape had marred the finish! With a combination of micromesh sanding and automotive polish, I managed to smooth it out. Waiting would have been easier.
Finishing Up
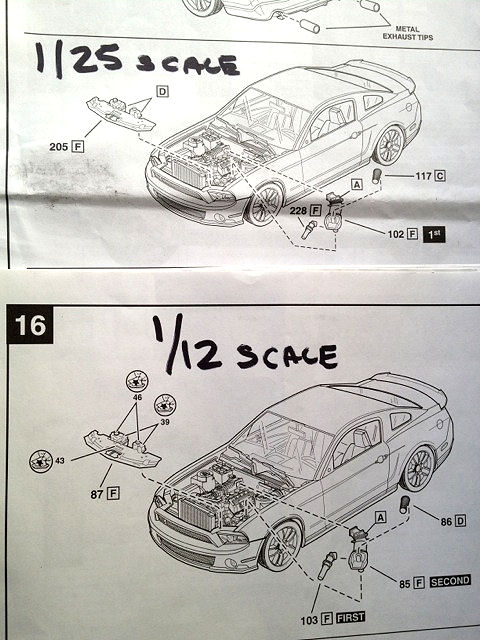
Once that nightmare was fixed, it was decal time. They went on, for the most part, very smoothly. I had some issues with the stripe decal on the front bumper not wanting to flatten out. Also note that the decals for part number 205, the radiator shroud in step number 11, are not referenced in the instructions, but are included on the decal sheet. See the included photo of the 1/12 instruction for the correct number/placement. After decaling, it was a matter of joining the body and chassis and sticking on the glass and various bits. Everything fits as it should. I used the wheels as is, although they are a bit on the bright side. Oddly enough, the wheels did not sit on all fours. I had the same issue on the bigger version.
Conclusion
Except for the paint issues that were of my own doing, I really enjoyed building another Shelby GT 500. Everything fits together well and, as with any good quality kit, patience will reward you. I would give this a 9 out of 10 for the stripe decal that wouldn’t cooperate. In retrospect, it should be cut into separate sections so it can lay flat. If you’re a Shelby fan and you don’t have a lot of shelf space (like you need for the 1/12 scale version,) this is a must-have. Thank you, Revell, for yet another enjoyable project and to IPMS/USA for letting me fill my pony car stable.
Comments
Add new comment
This site is protected by reCAPTCHA and the Google Privacy Policy and Terms of Service apply.
Similar Reviews