
Jim Pearsall
Reviews By Author

|
Hawker Hunter PitotPublished:
Master Model of Poland produces small brass parts for detailing models, be they aircraft or ships. They have parts for aircraft in 1/32, 1/35, 1/48, 1/72, and 1/144, mostly pitot tubes, refueling probes, and gun barrels. The pitot part is a very fine piece of brass. The piece is much finer than the kit part. I didn’t have a 1/144 Hunter on the shelf, so this review required that I build the Revell Hunter. As long as I’m building it, I may as well do it as part of my “Suez 1956” project. That’s why the Hunter has those red and yellow stripes, negating any camouflage effect. Pitot InstallationOnce the kit was almost finished, I got out the Master Model pitot and took the pictures. It was an easy installation. Revell gives you a little notch at the wing… more |

|
F-106 Pitot TubePublished:
Master Model of Poland produces small brass parts for detailing models, be they aircraft or ships. They have parts for aircraft in 1/32, 1/35, 1/48, 1/72, and 1/144, mostly pitot tubes, refueling probes and gun barrels. This product is a single pitot tube for a Revell 1/144 F-106. The instructions are quite simple. 1) Cut off the kit pitot. 2) Drill a hole for the brass part. 3) Install the brass part, using CA glue. 4) Paint the part. This Master Model pitot was welcome because I had broken the pitot on my F-106, and replaced it with a piece cut from a straight pin. The replacement was too short and way too thick. The Master part fixes both of these shortcomings. I was able to bypass part of the instructions because I pulled the pin replacement out with a pair… more |

|
BAC Lightning Pitot TubePublished:
Here’s another of those handy little add-ons to save a model from the “shelf of not quite right models”. In this case, it’s a replacement for that pitot tube which got broken off (or was never there) on a current project or a long-finished model. In this case, I asked for the Master Model pitot for my Revell Lightning F.6, which I finished a few years ago. When I looked on the shelf, I found it didn’t have a pitot tube. Master’s instruction says to take the pitot assembly and remove the plastic pitot tube from the mount. Well, the mount was gone too, since it’s all one part on the Revell kit. So I scratch built a new mount. This is not a huge project. It’s very, very tiny, in fact. I started out by stretching a piece of sprue. As the stretch cooled, I bent one end to… more |

|
Me-163 KometPublished:
The AircraftThe Me-163 was the first (and only) rocket powered fighter used in combat. It was also the first aircraft to ever fly at 700 mph, in 1944. As an interceptor, the 163 was less than outstanding, with only about a dozen Allied aircraft shot down, for a loss of 9 Komets. The rocket engine used “C-Stoff”, hydrazine hydrate and methanol and “T-Stoff”, hydrogen peroxide. These were interesting to me because they are “hypergolic”. This means that they need no ignition source. Just mix the two chemicals in the combustion chamber and they burn. This proved very interesting when there was a hard landing and fuel lines leaked. There were also incidents when a fueled Komet would blow up just sitting on the tarmac waiting for the pilot to arrive. The Kit… more |

|
F-105 PitotPublished:
Here’s another of those handy little add-ons to save a model from the “shelf of not quite right models”. In this case it’s a replacement for that pitot tube which got broken off (or was never there) on a current project or a long-finished model. I recently reviewed Master’s pitot for a 1/144 F-104 which didn’t have a pitot tube. This one is for a 1/144 F-105 where I had manufactured a pitot, but it wasn’t quite right. The pitot I manufactured was from a straight pin, and it was too short and too thick. The Master Model part took care of this. I used a pair of small pliers to pull the old pitot out of the nose of the F-105. This left a hole ready to accept the new part, except the new part was much smaller than the old one. I filled the hole with gel-type CA, let it set… more |

|
F-104 PitotPublished:
Master Model of Poland produces small brass parts for detailing models, be they aircraft or ships. They have parts for aircraft in 1/32, 1/35, 1/48, 1/72, and 1/144, mostly pitot tubes, refueling probes and gun barrels. This product is a single pitot tube for a 1/144 F-104. The instructions are quite simple. 10 Cut off the kit pitot. 2) Drill a hole for the brass part. 3) Install the brass part, using CA glue. 4) Paint the part. This pitot was particularly welcome because the Revell F-104 I built a while back didn’t have a pitot. So I was able to skip step 1. That doesn’t mean I could completely pass it, as I had to use a sanding stick to flatten the point on the nose cone so the drill wouldn’t slip every time I tried to drill the hole. Also, a .3 mm hole is pretty big… more |
|
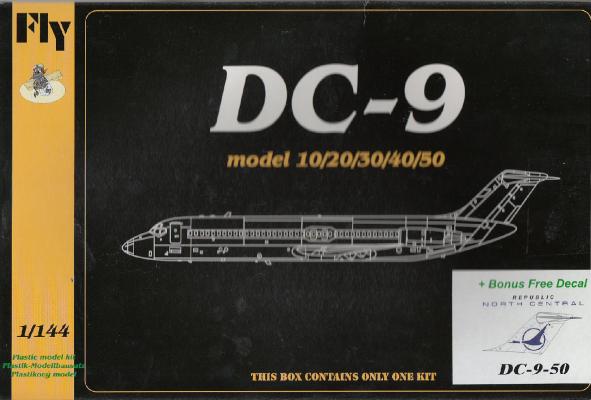
DC-9-50Published:
Fly Model is a new company to me, but you’ll probably hear from them more in the future. They offer a number of interesting and off-beat models in all the popular scales. They have a 1/32 Hurricane Mk I, a 1/32 Westland Wessex, a 1/48 BAC Jet Provost, three different 1/72 Messerschmitt Bf-108s, and about 25 different 1/144 DC-9s. This list only scratches the surface. You might want to look at their web site. They have an interesting resin kit of an “Abstosswagen” in 1/35. It took me some looking, but it’s a railroad flat car for hauling tanks. Never heard of that before! The DC-9-50 KitThe kit comes in a pretty plain black box labeled DC-9-10/20/30/40/50 with a sticker which tells you which version of the DC-9 and which markings are included. The sprues for… more |

|
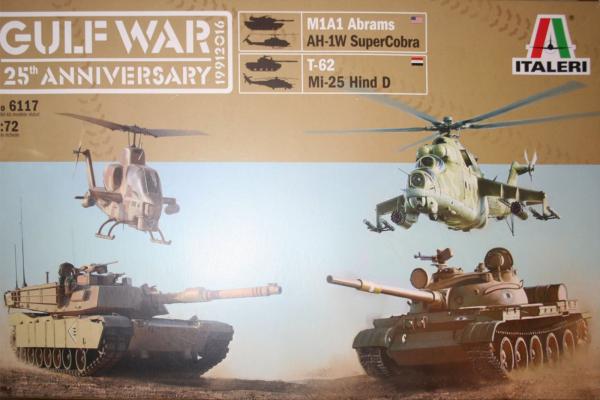
Gulf War Anniversary Box Diorama Set: Part 3 - US M1A1 AbramsPublished:
This is a diorama set which observes the 25th anniversary of the Gulf War. The kit comes with 4 - 1/72 models; The US AH-1 Cobra, the US M-1A1 Abrams, the Iraqi Mi-25 and an Iraqi T-62. Because there are 4 models in the set, and we have time limits, the helicopters are built by Mike Hinderliter, and the armor by Jim Pearsall. The review will appear in 4 parts, as each of the 4 kits is finished. M1A1 AbramsBack before the turn of the Century (about 1997) I was employed by the Gulf War Declassification Project in Virginia, just outside of Washington, DC. I got to read and work with many interesting documents, many of them secret, and occasionally Top Secret. Since I had the clearance, I was the one usually picked to manage returning the TS stuff to the Pentagon… more |
|
Gulf War Anniversary Box Diorama Set: Part 1 - Iraqi T-62Published:
This is a diorama set which observes the 25th anniversary of the Gulf War. The kit comes with 4 1/72 models; The US AH-1 Cobra, the US M-1A1 Abrams, the Iraqi Mi-25 and an Iraqi T-62. Because there are 4 models in the set, and we have time limits, the helicopters are built by Mike Hinderliter, and the armor by Jim Pearsall. The review will appear in 4 parts, as each of the 4 kits is finished. The T-62The T-62 is a Main Battle Tank, developed from the T-55. The big improvements of the T-62 were a smoothbore main gun which could fire high velocity armor piercing rounds. Iraq had T-62s in the 1980 Iran-Iraq war, and they were successful against M-60s and Chieftains. But advancements in Coalition equipment, particularly the US M1A1… more |

|
MiG-21 (Late) Main WheelsPublished:
Often the kit manufacturers produce wheels for the kits which aren’t as accurate as some modelers demand. The term AMS comes to mind here. Anyway, Res-Im has produced improved resin wheels for the late model 1/144 MiG-21. Only the main wheels are done for this set, as all of the 1/144 MiGs I found had the gear leg molded onto the nose wheel. This shows up in the photo below which shows the Airfix wheels and the Res-Im wheels, with the nose wheel firmly molded onto the gear leg. There’s no real assembly to this set, you just paint the wheels. Additionally, there are no instructions, but they aren’t needed. I painted the wheels first before I removed them from the pour sprue. Then I cut the wheels off the sprue, cleaned up the attachment points, and finished painting the… more |