
Supermarine Spitfire Mk. XVIe
Introduced in the latter half of 1944, the Mk. XVIe variant of Supermarine’s legendary design was optimized for low-altitude operations, featuring a Packard-built Merlin 266 powerplant, clipped wings, teardrop canopy, packing a pair each of 20mm cannon and 12.7mm machine guns, and toting either a pair of 250-lb bombs or a single 500-pounder. The Mk. XVI was the last Merlin-powered Spitfire variant to roll off the assembly line, and saw service with the RAF and a number of other nations into the 1950’s.
Tamiya’s rendition of this less-known “Spit” variant follows closely on the heels of their Mk. VIII and Mk. IXc releases, both of which have received the highest acclaim from the modeling community. The Mk. XVIe perpetuates that sterling reputation. I agree with Ed’s assessment from his Mk IXc build and review– perhaps “the best model kit ever produced.” Although my modeling tenure is twenty years shorter than Ed’s, our combined experience is over a century, and we both heartily agree on the amazing quality of this family of Tamiya Spitfires.
Frankly, I just think those Tamiya engineers and toolmakers are showing off. Again, echoing Ed’s thoughts, “WOW…and…Snap” accurately sum up this kit-producing work of art. Opening the box and sifting through the plethora of sprue, photo-etch, hardware, vinyl, printed material, masks, and decals reminded me of childhood Christmas mornings rifling through all of the goodies from Santa. Injection molded parts consist of 24 sprues – 22 molded in gray, 1 in black, and 1 clear. Recessed detail is of perfect proportion, as are the engine cowling pieces, which are molded to scale thickness. Another 3 “sprues” of vinyl parts include tires and brake lines. The photoetch compliment of 2 frets is superbly executed and includes harness, cockpit and engine details. Two sheets of full color decals are included and contain a full set of stencils and markings for 3 RAF aircraft – No.349 Squadron and No.485 Squadron, Summer 1945; and No.1 (Pilots) Refresher Flying Unit, March 1949. A couple small bags of hardware contain reinforcing rods and pins, nuts, bolts, and poly caps. Rounding out the motherload is the printed matter – the 36-page instruction manual, a full color profile of the No.349 Squadron bird shown on the box cover, and a full-color 15-page reference booklet packed with great detail photos of multiple Spitfire variants.
On to the “Snap.” At the outset of assembly, I must confess I was a bit overwhelmed. I had hoped to build “efficiently” by getting a lot of painting done early, working parts of a color all at once, then moving on to the next color. With 22 gray sprues, I abandoned that idea after about 30 minutes of searching and sifting for parts requiring interior green and aluminum, and decided to “build by the numbers” and blow through the instructions -- taking each of the 72 assembly steps roughly in sequence.
Once underway, this strategy proved very efficient. Each step generally draws parts from no more than 2 sprues and from one or both PE frets. Tight engineering tolerances of the parts leads to little clean-up and even less putty or filler. Building truly was “a snap,” although cement was required, and broke out into three distinctive “sub-assembly” builds – cockpit, airframe, and engine.
The cockpit is a model in and of itself, consisting of 67 parts and accounting for the first 14 assembly steps. No exaggeration, here – perfect fit everywhere of injection-molded, PE, and decals. The instrument panel build-up of injection-molded, decal, and photo-etch is one of the most stunning I’ve seen “out of the box” in 40 years. Only thing arguably absent was the pilot’s seatback cushion.
Airframe assembly captures the cockpit subassembly, and carries through the full suite of positionable control surfaces (ailerons, elevators, and rudder), optional position landing flaps, wheel wells and landing gear, armament bay covers, radiator shrouds, and optional 250-lb bombs, and accounts for the next 28 assembly steps. Again, exceptional fit requiring only a small touch of filler on fuselage and wing seams. The only disappointments with the kit engineering, however, are in this area. The landing flaps are infested with very shallow ejector pin marks which are a challenge to completely remove without marring the delicate detail. Much to my chagrin, I really butchered mine, and will be replacing them with some Eduard PE flaps intended for the Mk VIII (stay tuned for a future review). The other disappointment was with the alignment of the main wheels. Trusting in the near-perfect engineering through Step 39, I chose to follow the prescribed build sequence and attach wheels to the struts prior to installing the struts to the airframe. To show for it, the main wheels toe in toward the bottom. My understanding of Mk XVIe design was that they should be perpendicular to the ground.
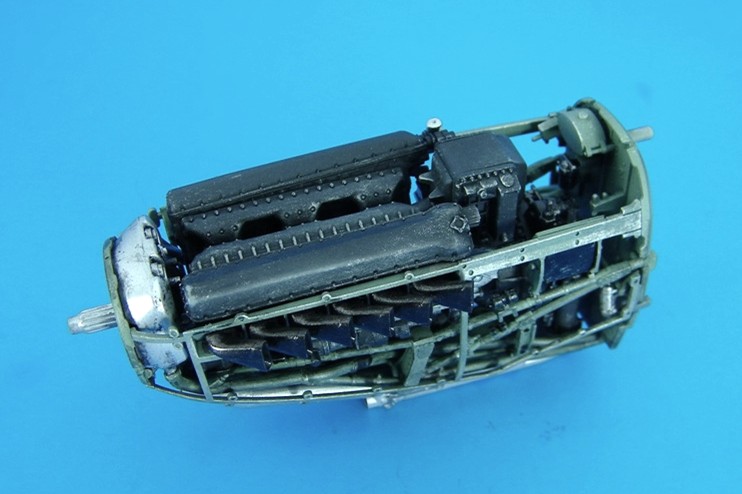
Rounding out the bulk of the build was the Merlin 266, its mounting structure, and cowlings -- 17 Steps and 117 pieces. Again, “snap!” No filler needed anywhere forward of the firewall. Absolutely gorgeous, although one of my buddies will quickly cite the absence of plug wire harnesses. Harnesses or not…the Merlin is spectacular! Some fiddly-bit assembly “dotted the i’s and crossed the t’s” to complete the construction phase.
For the finish, I chose a combination of Tamiya, Polly Scale, Model Master Acryl, Model Master spray lacquer, Future, oil washes, and pastel artist’s chalks. Cockpit and other interior green surfaces were coated with Polly Scale’s Interior Gray Green, drybrushed with Testors Steel (from the square bottle), and given an oil wash. The engine was painted with Acryl Flat Black, highlighted with a Gunship Gray mist, drybrushed with Steel, and washed with oils. The airframe was primed with Testors White Primer lacquer, and then overcoated with Tamiya Neutral Gray (undersurfaces), Acryl British Ocean Gray, and Polly Scale British Dark Green and Sky Type S (spinner). Future provided a gloss decal base and decal sealant prior to the oil wash. A 50/50 blend of Future and Acryl Flat were applied in two light coats after the oil wash, and then again to seal in the pastel exhaust and foot traffic stains.
Decals were typical of other Tamiya offerings, a bit thicker than some other manufacturers’ decals, but of good color and register. Tamiya even included decals for the yellow prop tips, which I tried – but won’t try again, due to brittleness and the need to go back and do a lot of touch-up where parts of the decal flaked off. Also tried the yellow leading-edge ID band decals, which weren’t too bad, but aren’t as smooth or convincing as painted bands would be. Most decals settled down after a couple applications of MicroSol, and only one cracked (underside roundel) and was easily repairable. A couple decals needed some intense scoring and massaging to finally settle down into the fine surface detail, but were subdued with a bit of persistence.
Finally, would I recommend this kit, or not…hmmm? Although it’s clearly the finest kit I’ve assembled in over 40 years of modeling, it is a lot of model! That said I give this my absolute highest recommendation for any modeler with fundamental building skills and some basic PE experience – and the ability to stick with 72 Steps for 60-80 hours of build time. This can easily be a modeler’s “build of a lifetime” right out of the box!
My sincere thanks to the good folks at Tamiya USA for providing this sample kit and to the IPMS Reviewer Corps Commandant for entrusting me with the build and review. This has, to date, been my OOB “build of a lifetime!”. I wonder if the new Tamiya 1/32 P-51D will be able to eclipse it. Only one way to find out…

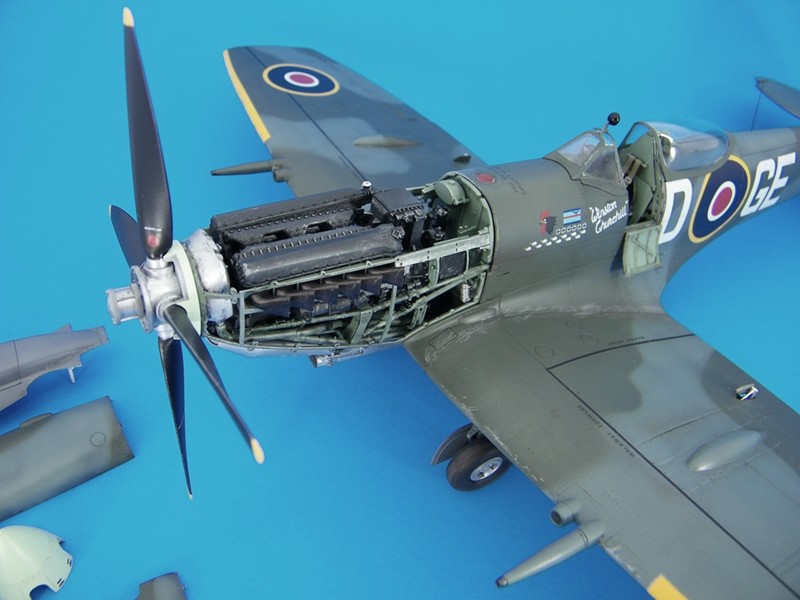
Finished model "unbuttoned" port side forward half

Finished model "unbuttoned" port side forward half
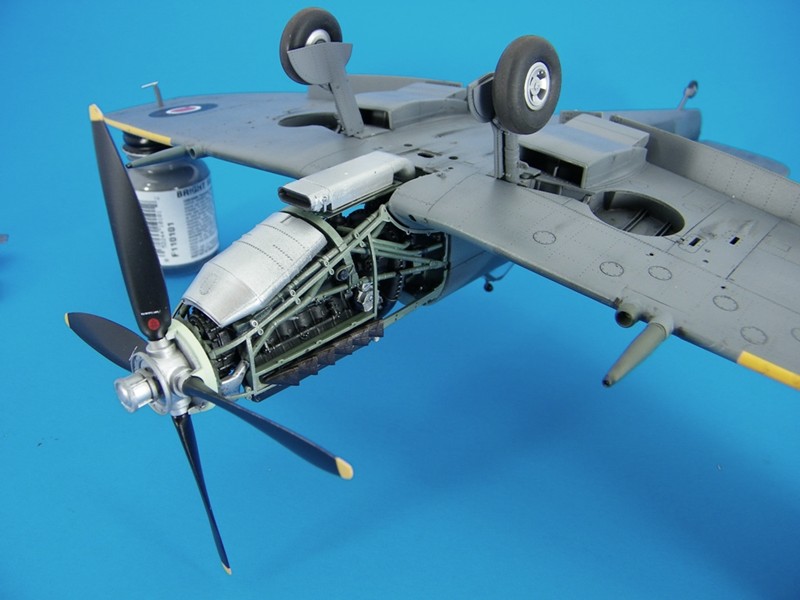
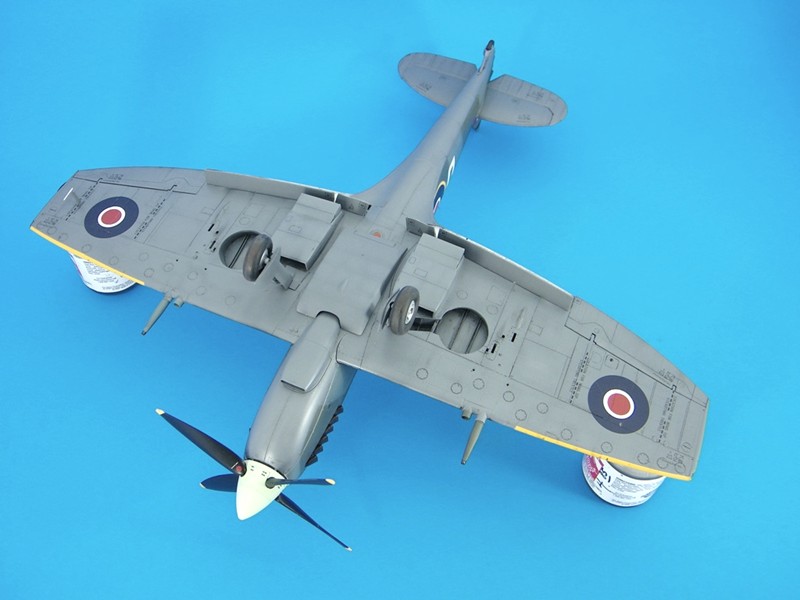
Finished model "unbuttoned" underside view
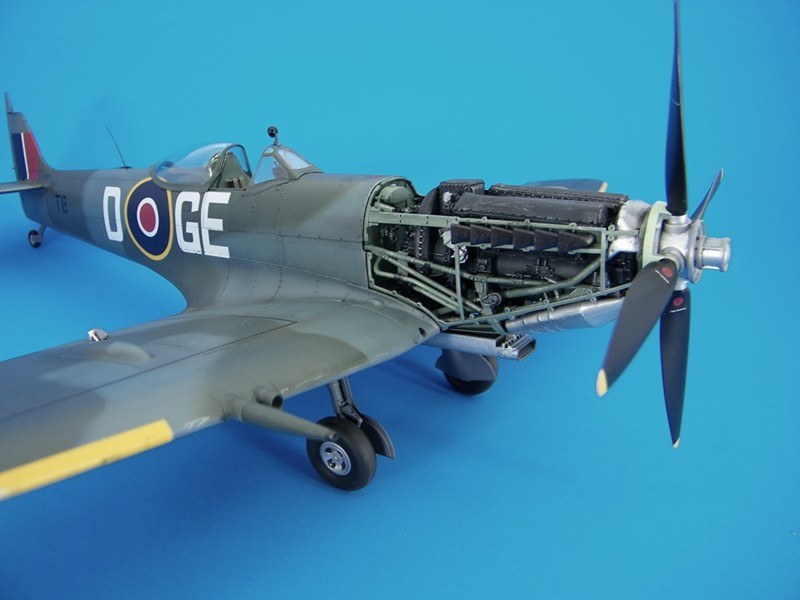
Finished model "unbuttoned" from front starboard quarter

Finished model "unbuttoned" top view center section
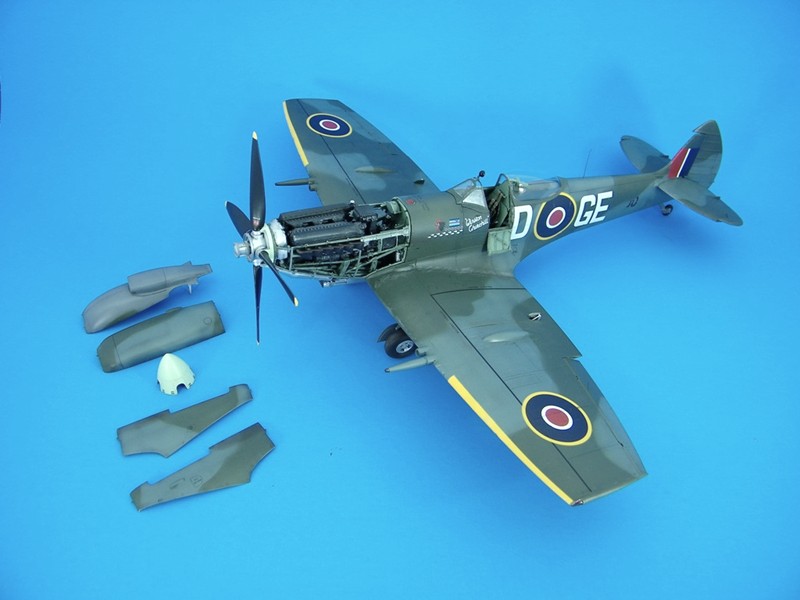
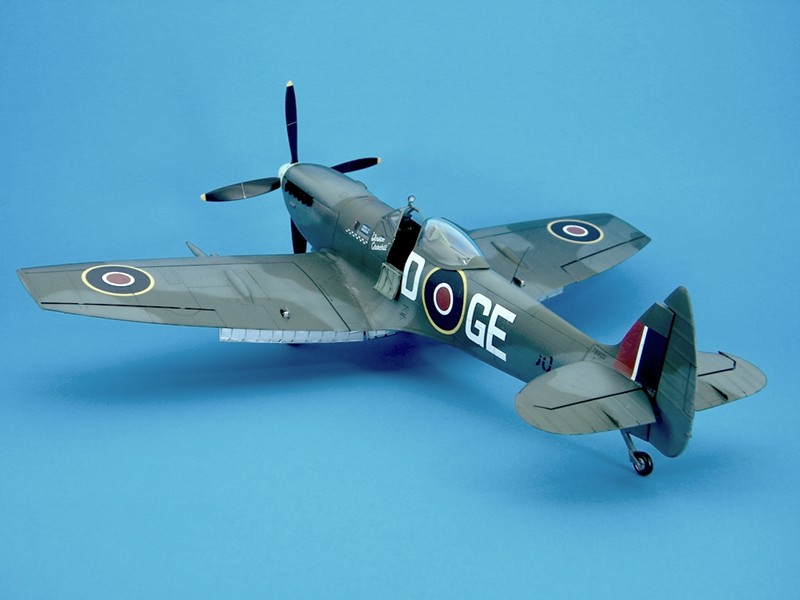
Finished model "unbuttoned" top view
Buttoned up bottom
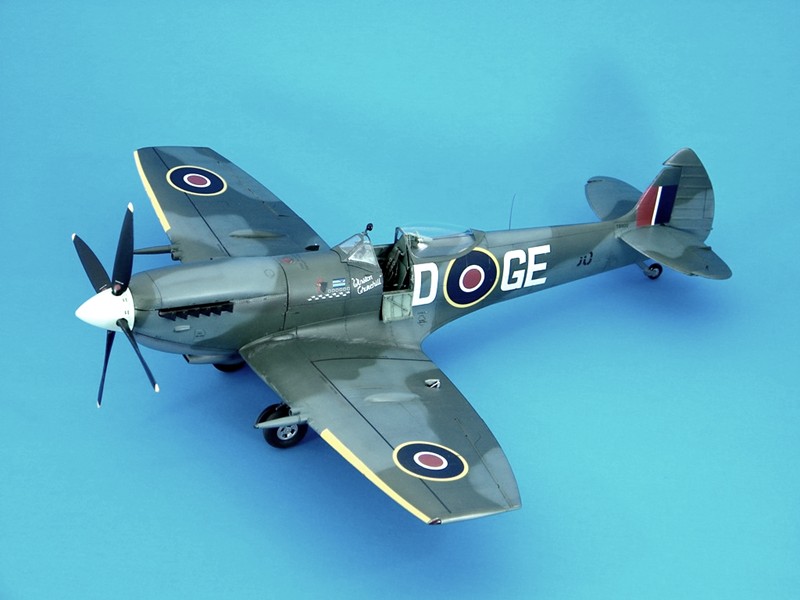
Buttoned up left front
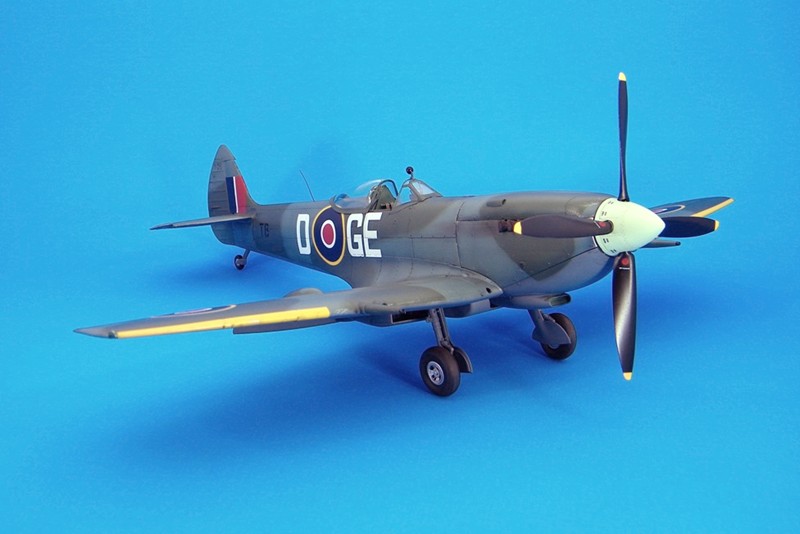
Buttoned up left froreart
Buttoned up right front
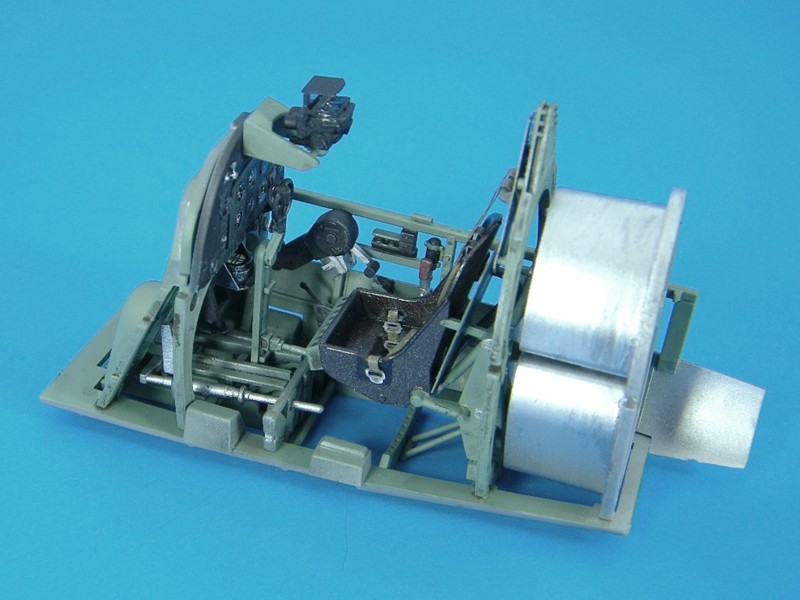
Cockpit left view
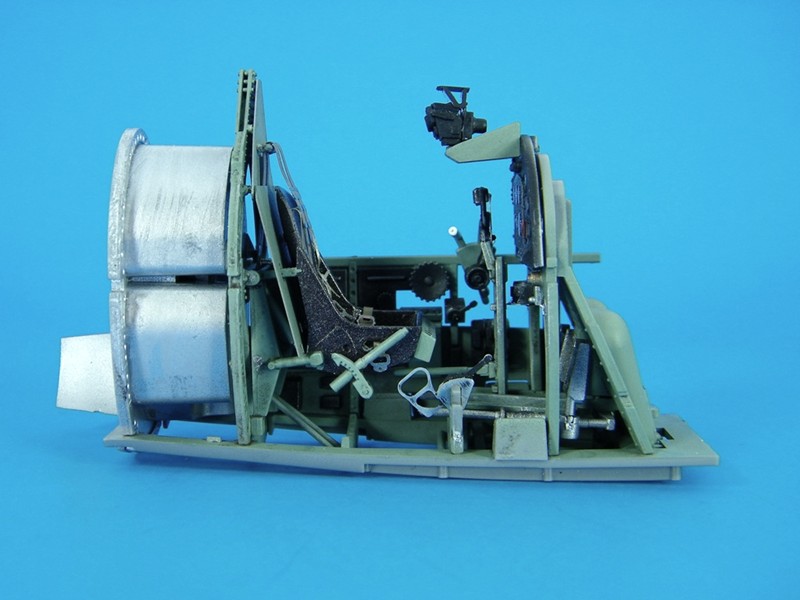
Cockpit right elevation
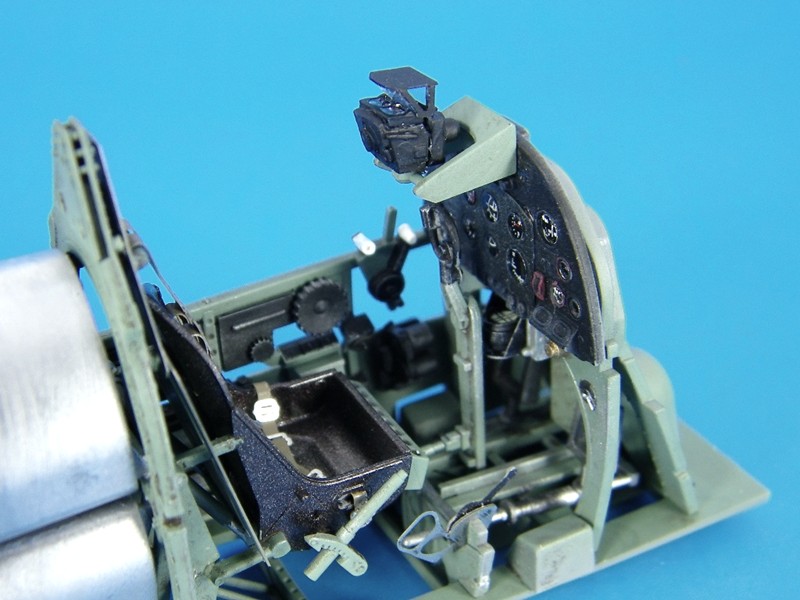
Cockpit right view
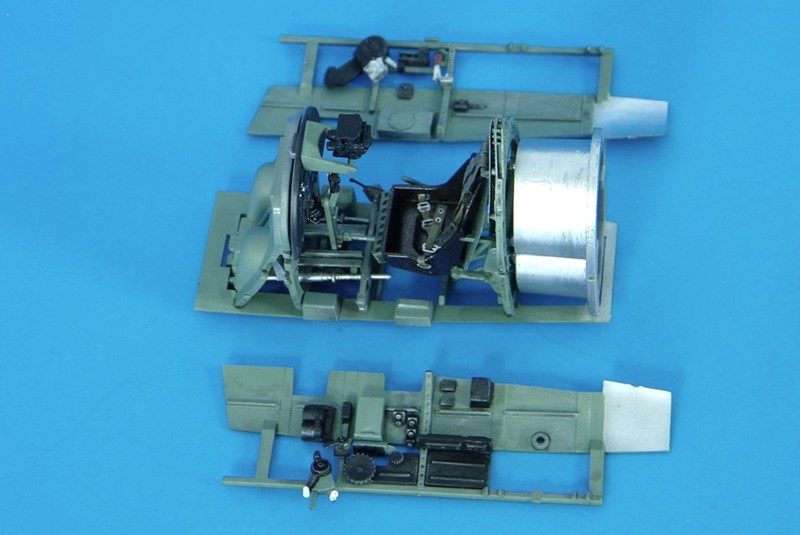
Cockpit components
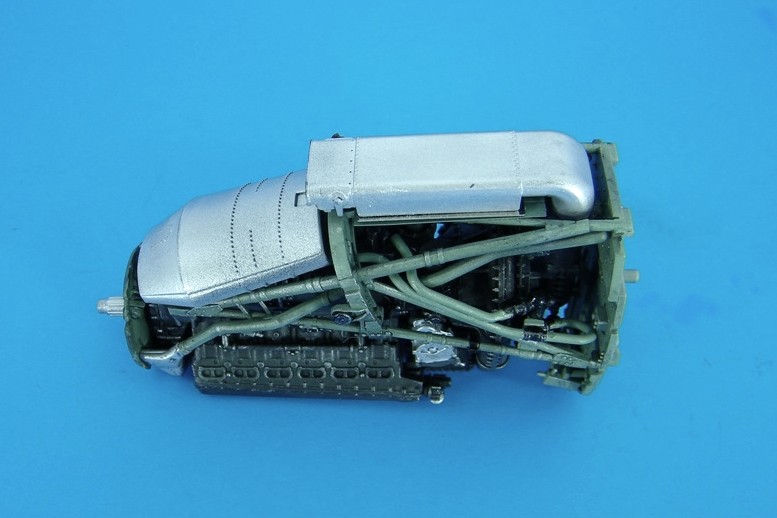
Engine bottom
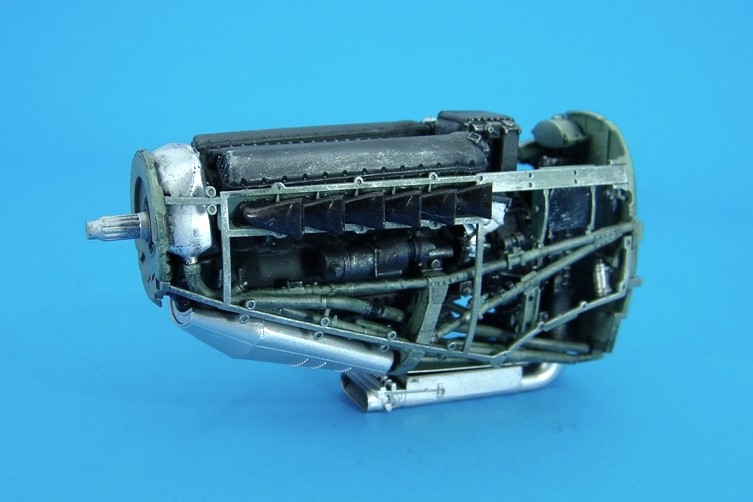
Engine left side

Engine right side
Comments
Add new comment
This site is protected by reCAPTCHA and the Google Privacy Policy and Terms of Service apply.
Similar Reviews