
Mirage III E/R
Italeri recently released the first ever kit of the Mirage IIIC in 1/32nd scale – an elegant and iconic aircraft of the cold war that served (and continues to serve) in a variety of air forces around the world. Now they’ve come out with the Mirage III E/R variant. This version of the full-size craft was first marketed in 1964 and featured a slightly longer fuselage - about a foot - in order to increase the size of the avionics bay situated aft of the cockpit. This also had the consequence of increasing the internal fuel capacity a bit, which was good as the Mirage III was always known for its relatively short range. All this bumped the cockpit forward a bit, and the difference shows in that the rear of the cockpit just aligns with the top lip of the intakes, whereas it sat further back on the IIIC.
For the sake of this review, I happened to recently obtain copies of Revell’s now-venerable version of this aircraft in the same scale, first issued in 1975. As a result, I’m able to make some direct comparisons between the two kits, especially since I’ve also built the older model several times over the years. To be fair, I must honor Revell for making such a production choice way back then. It was a bold choice in a bold scale, and for a kit of its age it still stands up well. However, on to the new release.
The box comes with a number of sprues in a surprisingly soft gray plastic, an extensive clear sprue including camera windows, a small fret of photoetch, two sheets of extensive decals and a lovely construction booklet with CAD drawings and full-color aircraft profiles as well as ordinance for decal placement.
The first notable difference between the classic and the Italeri issue, of course, is in the level of detail. Take the cockpit area, for instance. Revell’s kit was pretty spartan, to say the least, with an indifferently molded ejection seat and flat decal control panel. The new issue provides a beautifully rendered ejection seat with separate photoetched belts, and the control panel and other details are equally lovely.
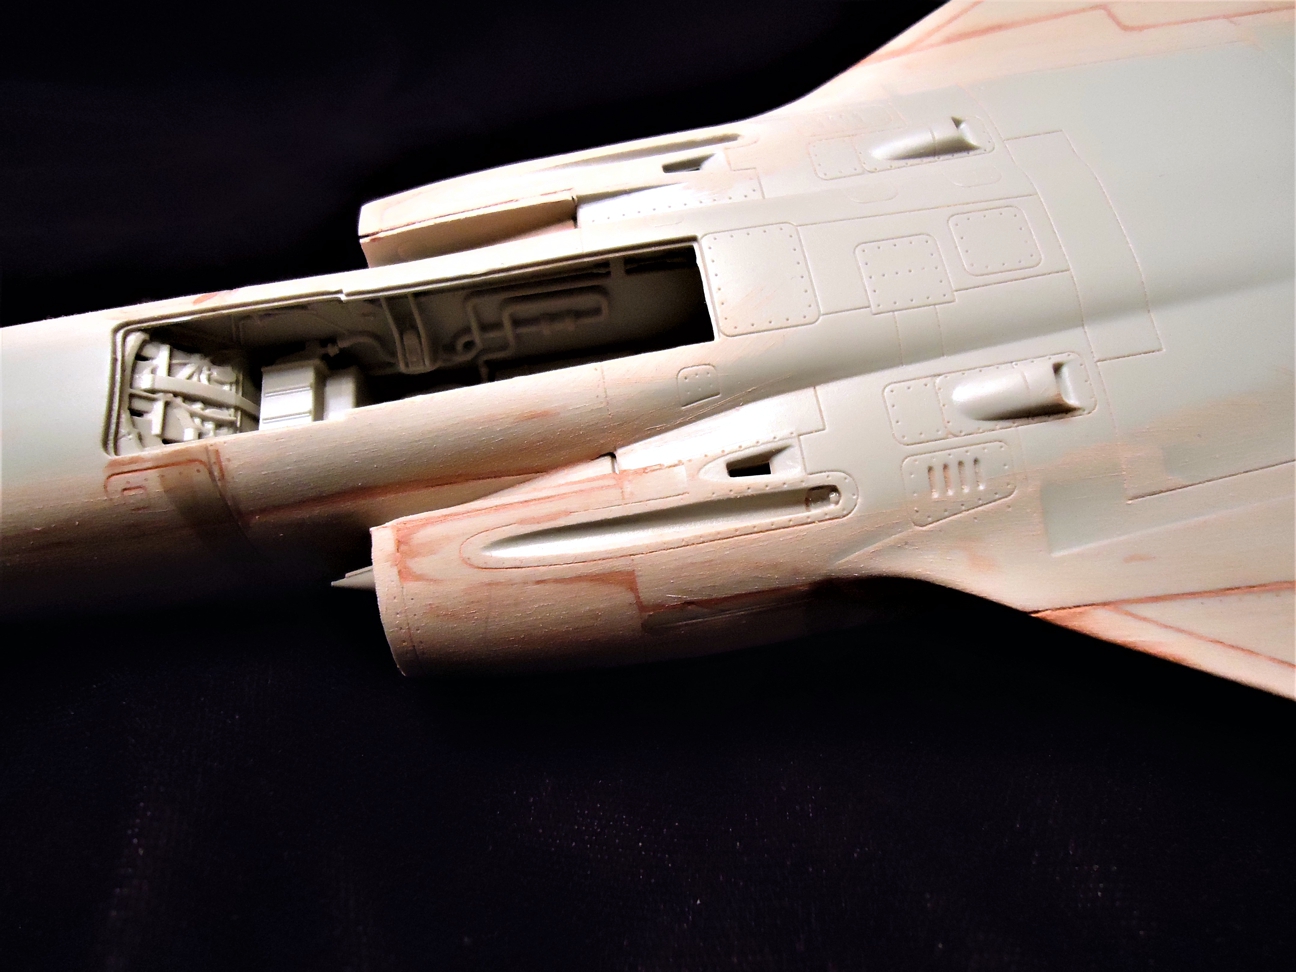
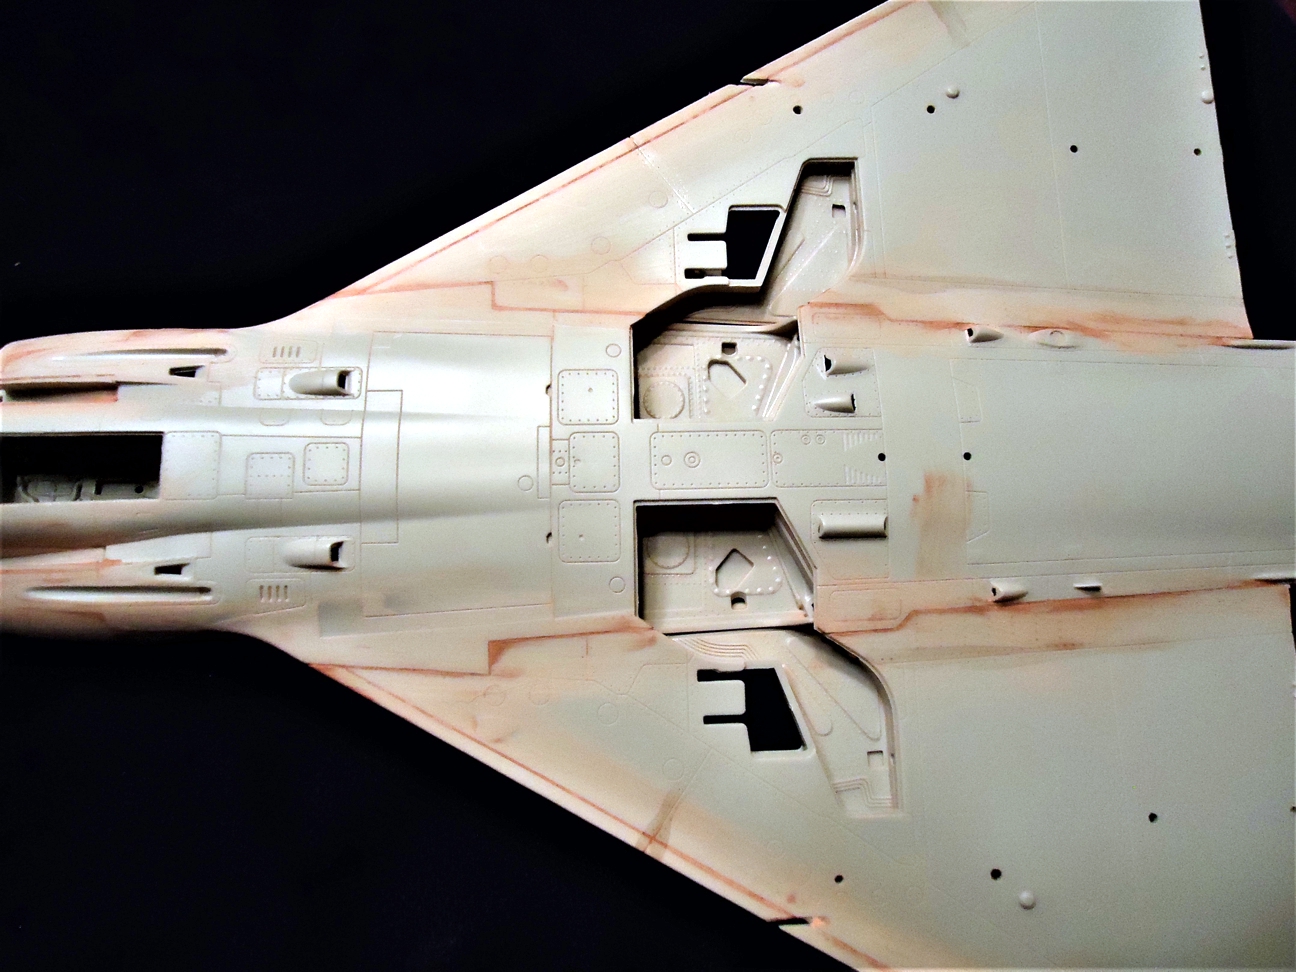
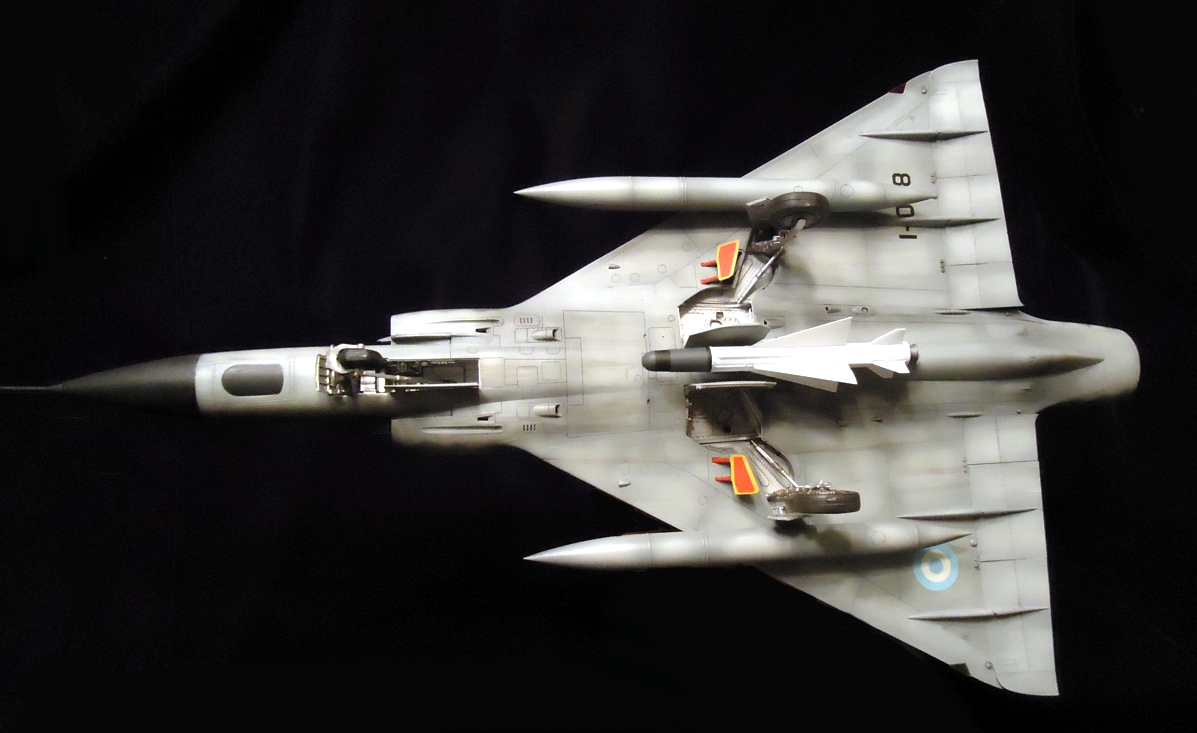
Other areas where the additional new detail stands out is in the wheel bays and cannon troughs. In terms of armament, Italeri includes the sprues from their Mirage IIIC release, which includes two different types of drop tanks, various air to air missiles as well as the large Matra AA missile. Also included are two drop tank/unguided missile combos for ground attack.
One feature which brought a glow to my heart is the two different reconnaissance noses supplied – both featuring opening doors with interior detail. I had long ago thought of scratching this interior stuff for my Revell kit, but was always put off by the lack of information, this having been the pre-internet era. Italeri has provided for this at last.
Tackling the assembly, the cockpit went together without a hitch, although no mention was made in the instructions about replicating the rather odd moss green of the original.
As I said, the ejection seat is excellent and came with photoetched seat belts which went on without a hitch. Italeri then gets rather involved in the engine/intake trunking, which appears quite complete, although none of it will be visible in the final build. The underbelly cannon troughs, which are essentially no more than dimples on the old Revell release, are full-depth and feature a small cannon barrel insert to complete the look. Once done with these, it’s time to close up the fuselage.
This is where the trouble started.
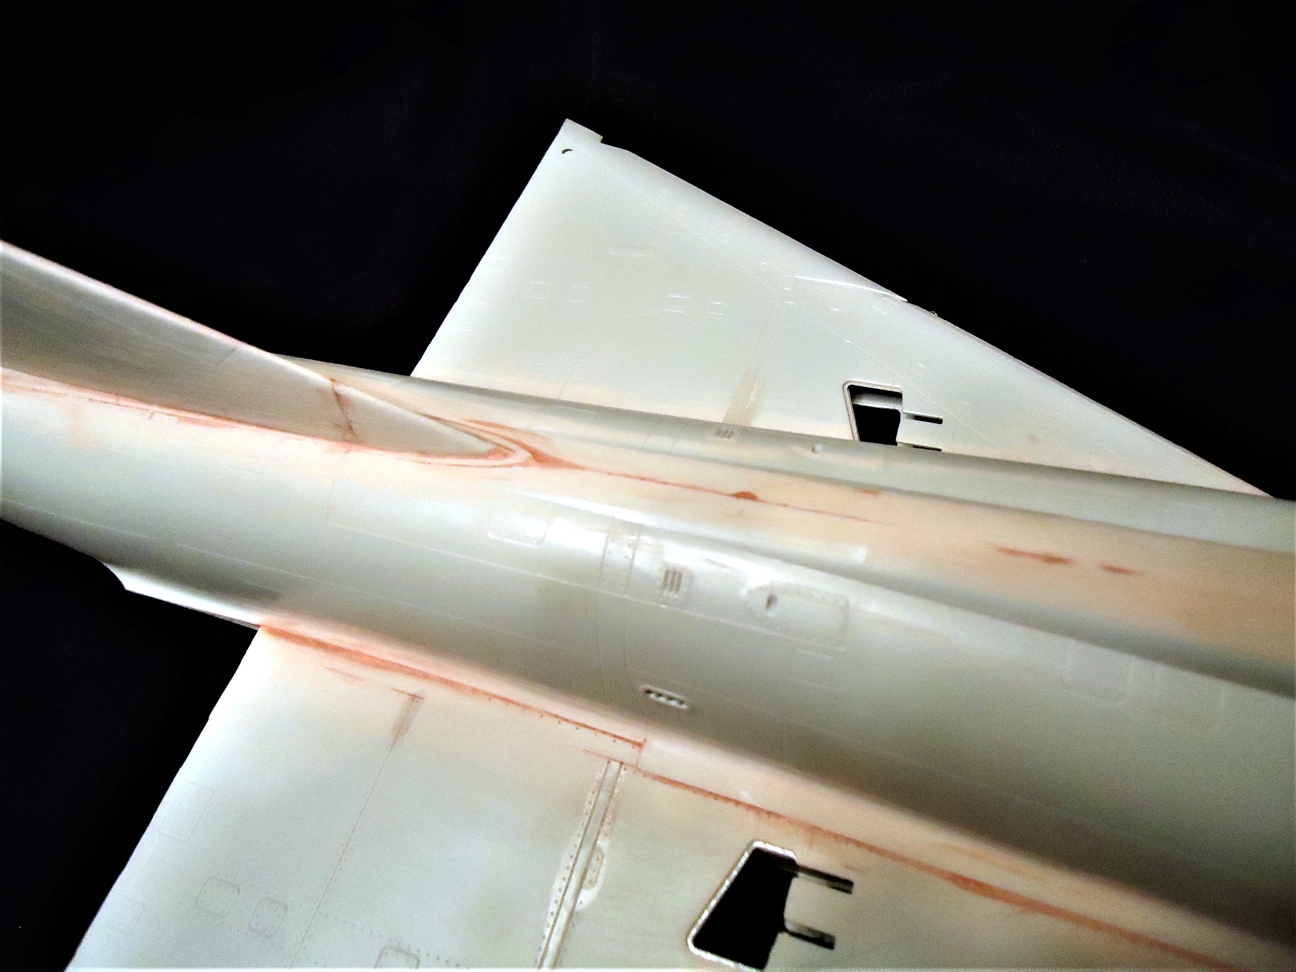
The fuselage features a left and right piece with a long underbelly piece going in from the bottom. No matter how meticulously I glued one end of this piece in position, it was 2 to 3mm too long on the other end and also included a nasty warp. Tacking it down inch by inch, I finally opted to let it stick out on the forward end as the lesser of two evils. Finding this all a bit disconcerting, I then test fit the standard fighter nose as well as the tail cone just to check them out. Both fits were terrible, ultimately requiring considerable applications of putty to get them to blend. What was going on here? This fit problem continued with the intakes, which also required a generous amount of putty. By the time I’d finished blending all these features together I’d lost a considerable amount of surface detail, only some of which I was able to rescribe. Nonetheless, this experience left me a bit shaken. I don’t expect these kinds of issues with a new and fairly expensive kit from a major manufacturer.
Thankfully, I found no particular trouble with the wings or tail, although the sensor insert on the front of the fin proved to be a sloppy fit. The various stores provided fit together without a hitch, as did other items such as wheels. In terms of fit, then, all the problems seemed to focus on the fuselage.
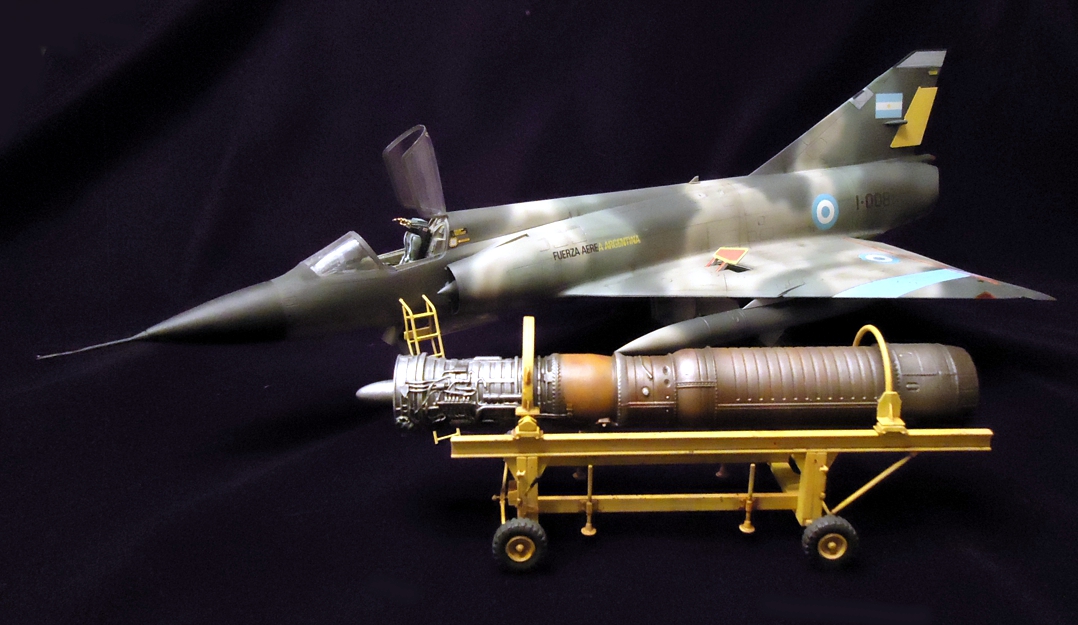
Girding my loins (as it were) I proceeded with the assembly and was pleased to discover no other major fit problems. Despite my issues with the fuselage, the rest of the assembly proved to be relatively straight-forward, although the softness of the plastic made some of the smaller pieces relatively fragile, requiring care in sprue removal and cleanup. Even though the kit provides a truly spectacular choice of recon noses, I elected to go with the standard fighter nose. I admit I passed on the superb decal sheet choices in order to pursue one of my all-time favorites: an Argentinian Mirage from the Falklands War period. The fact that Italeri included the large Matra AA missile decided the issue for me. To be honest, my choice of stores for this one is a bit suspect -- I rather doubt the Argentinians utilized the supersonic drop tanks for this configuration, but they were so lovely I just had to have them.
A real plus for the kit turned out to be the engine cart. Although Revell’s issue included a similarly removable engine, there was never any way to display it effectively. Italeri, on the other hand, offers a detailed service cart that just begs to be used. Both engine renditions are small on parts counts, but the surface detail of the Italeri version is so good that a bit of careful painting was all that was needed to make this a real showpiece in and of itself.
Things went ballistic at the tail end of the build. As I was adding the canopies, I discovered to my horror that the windshield simply would not fit onto the fuselage. Apparently, in my desperate attempts to get the body of the aircraft assembled, I had distorted the frontal area to the point where I’d seriously altered its geometry. Either that or the cockpit/front wheel bay combo was too tall, distorting the fuselage. So in my endeavors to get it aligned I fractured the windshield severely and even then I had to re-putty the areas around it to make it look halfway decent. In truth, I’m not sure what I could have done to fix this, short of vacuforming a new canopy.
The last item added was the pitot tube, which was fragile enough to break even before I got it off the sprue – another example of problems with the choice of plastic. I’ve already ordered a metal replacement as this is simply an accident waiting to happen.
In the end, though, you do get something that looks very much like a Mirage. Despite my frustrations with the fuselage assembly, the final result is certainly pleasing to the eye, and I’m quite happy to be able to add it to my collection, although the cracked windshield is going to relegate it to the back of the shelf, alas. I’m curious to see if the recon noses fit on the old Revell issue, as I’d really like to put these parts to some use.
Ultimately, I have to admit seriously mixed feelings about this kit. There is no doubt that the level of detail is superlative. However, in the case of the fuselage assembly, this was let down by an extremely poor fit, which meant that a lot of the meticulous surface detail was lost in the final preparation, as well as the frustrations with the windshield. Having thought about this quite a bit, I believe that the drafters did their jobs properly, but the design was marred by the molding and the choice of plastic, which permitted areas of subtle flash which were hard to detect but seriously affected the final fit. In addition, the inordinate flex of the plastic permitted me to seriously distort the fuselage during assembly.
Plus features not found on the old Revell kit:
- Indented panel lines and accurate surface detail
- Extremely detailed and attractive cockpit, including an excellent ejection seat.
- Realistic cannon troughs
- Realistic tires with flattened areas
- Positionable air brakes
- Droppable flaps and positionable rudder
- Excellent recon noses with internal detail and cameras
- Great choice of stores
- Engine cart and boarding ladder
All these features show what advances have been made in the almost 50 years since Revell released their version of this beautiful aircraft. However, it is somewhat ironic that the fit of the newer release is, if anything, less precise than the fit of the older model. Considering the relative ages of the two releases as well as the cost of the newer item, this should not have been the case. I suspect many of the difficulties I encountered in this build would be easily rectified by changing to a plastic formula more akin to Hasegawa or Tamiya. Until then, I would recommend due to caution to anyone tackling this otherwise beautiful kit.
My heartfelt thanks to IPMS/USA for a chance to examine this new kit as well as to Italeri for graciously providing a review sample.

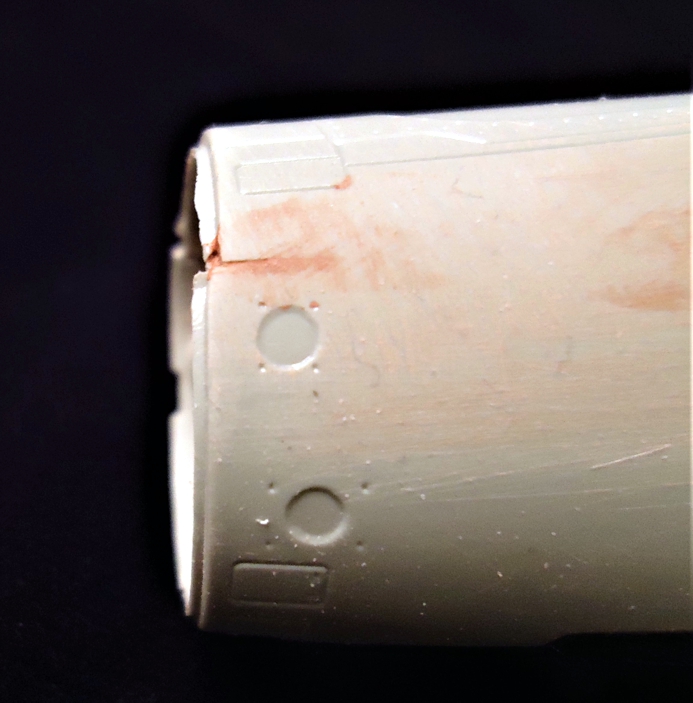
Nose assemble fit
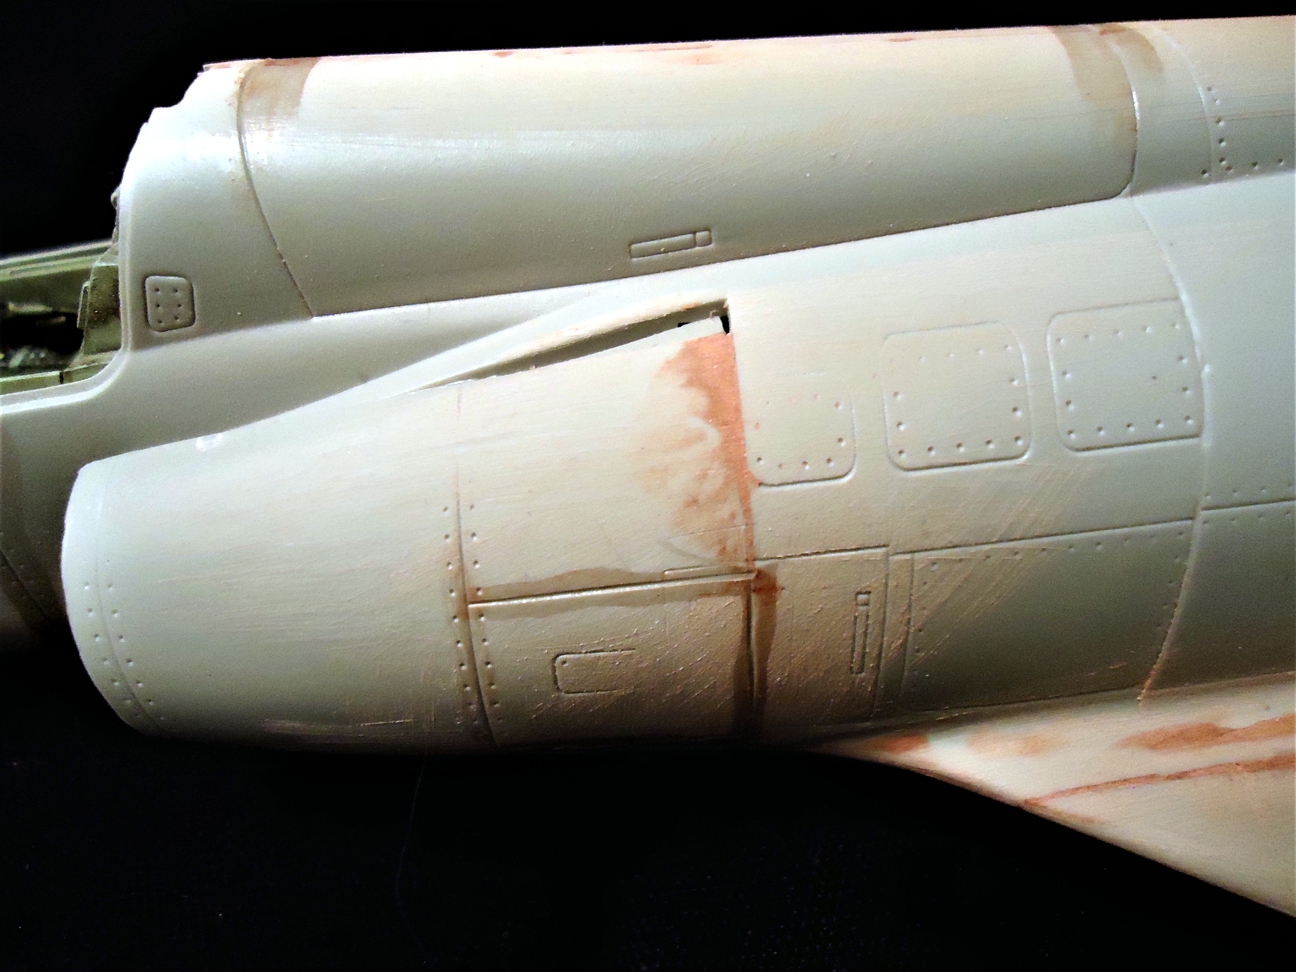
Air intake assembly
Upper fuselage assembly
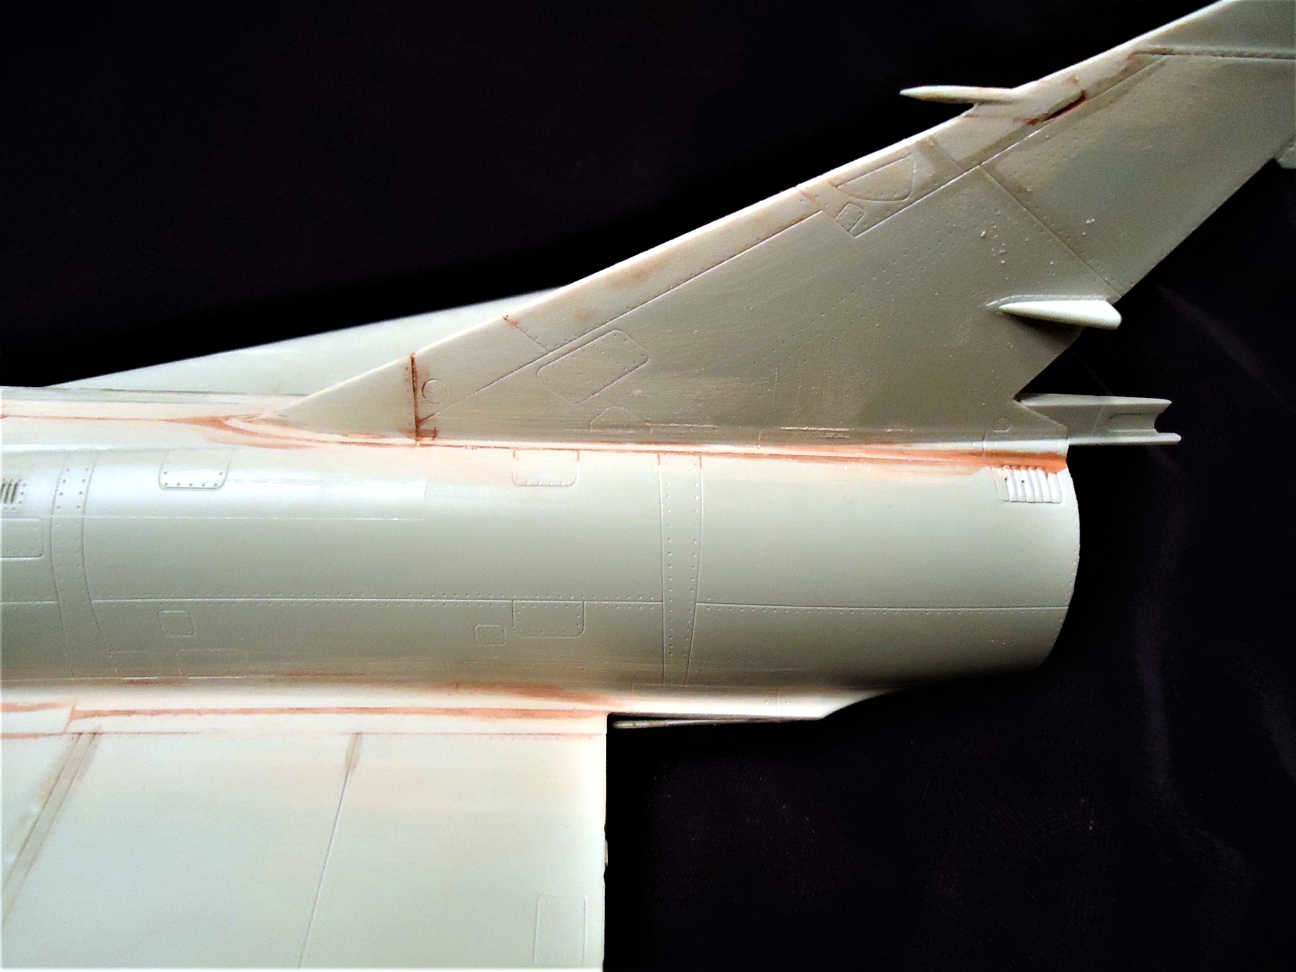
Tail assembly
Lower fuselage assembly
Lower fuselage assembly
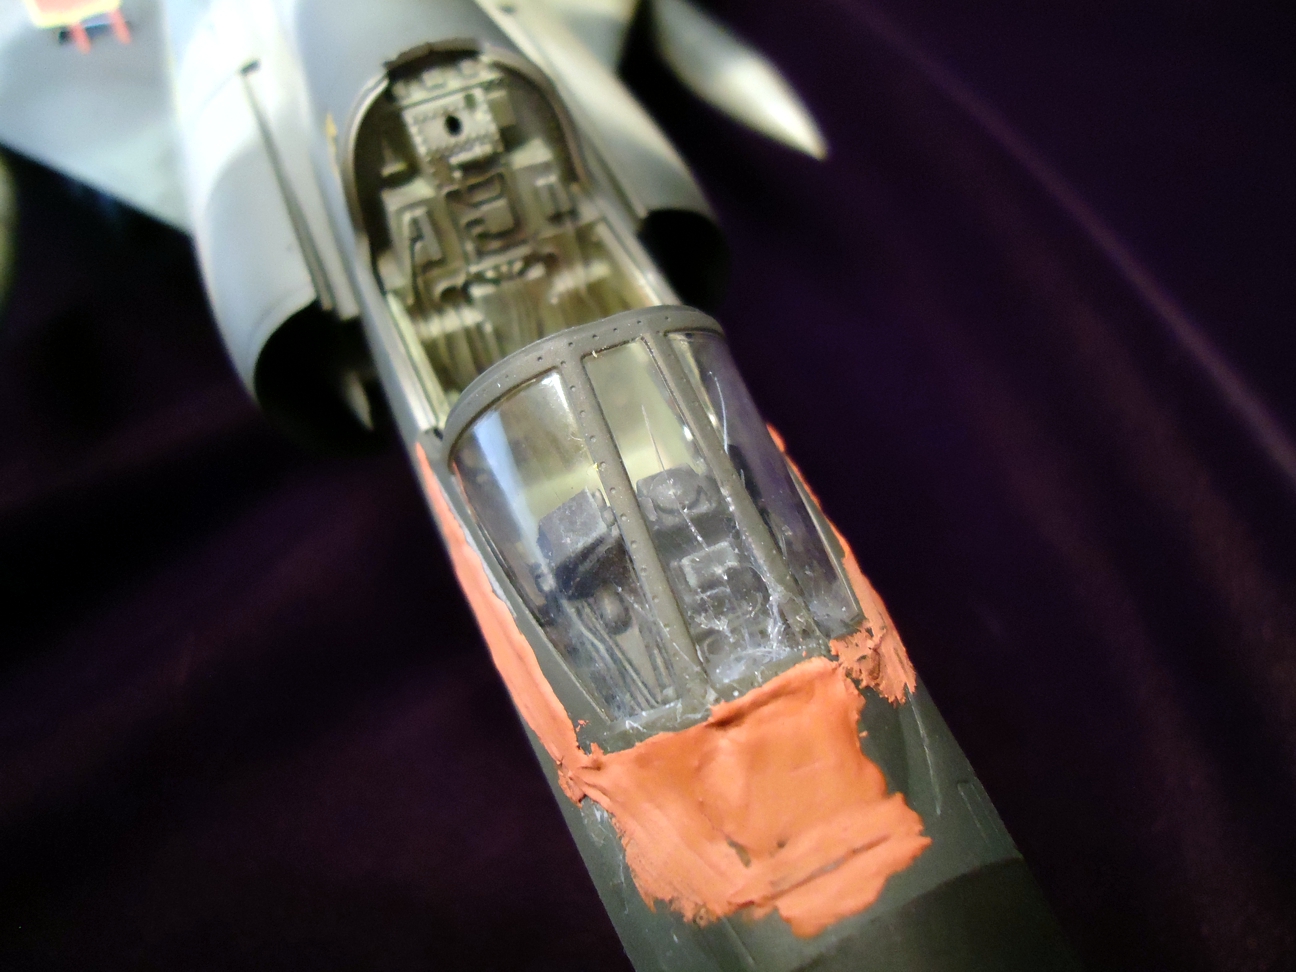
Cockpit glass woes
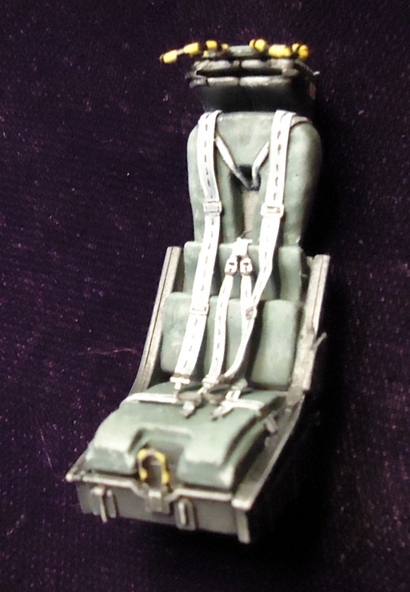
Ejection seat
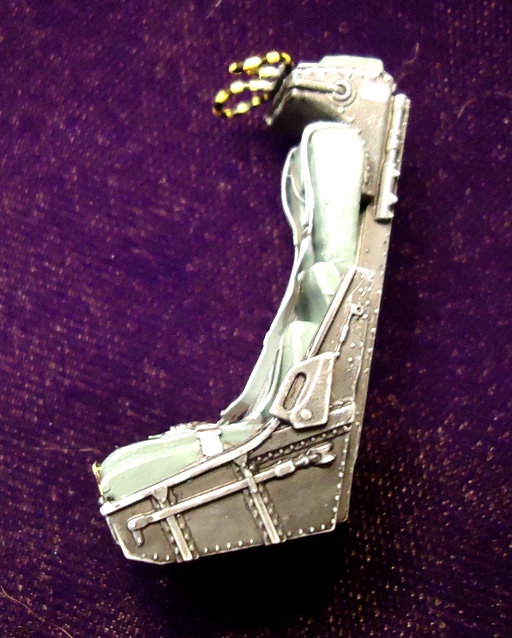
Ejection seat
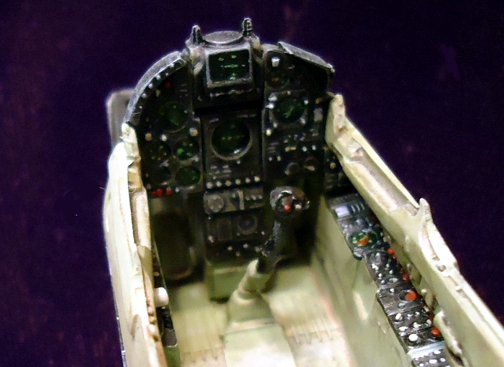
Cockpit and instrument detail
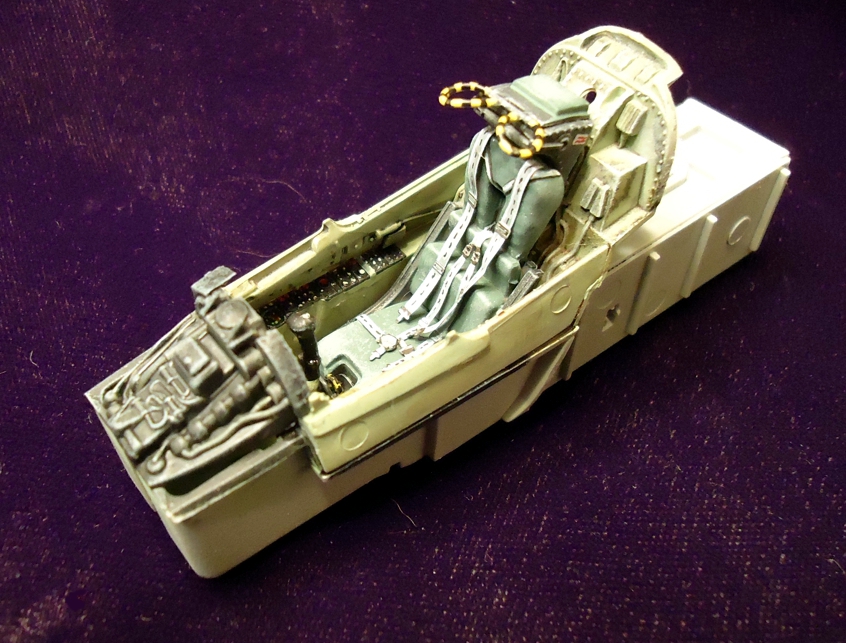
Finished cockpit assembly
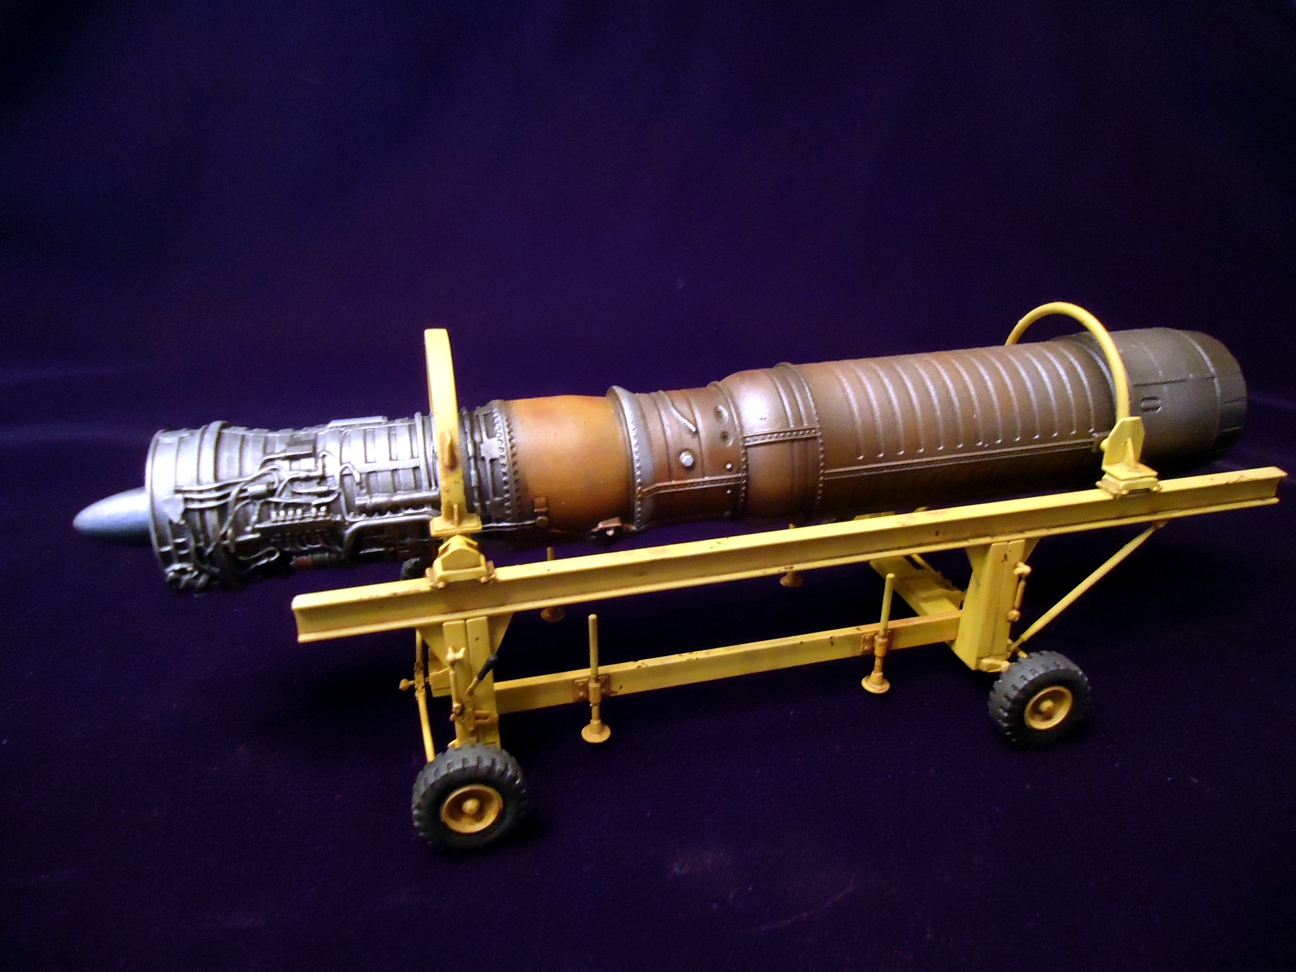
Engine mounted on stand

Engine mounted on stand

Finished model
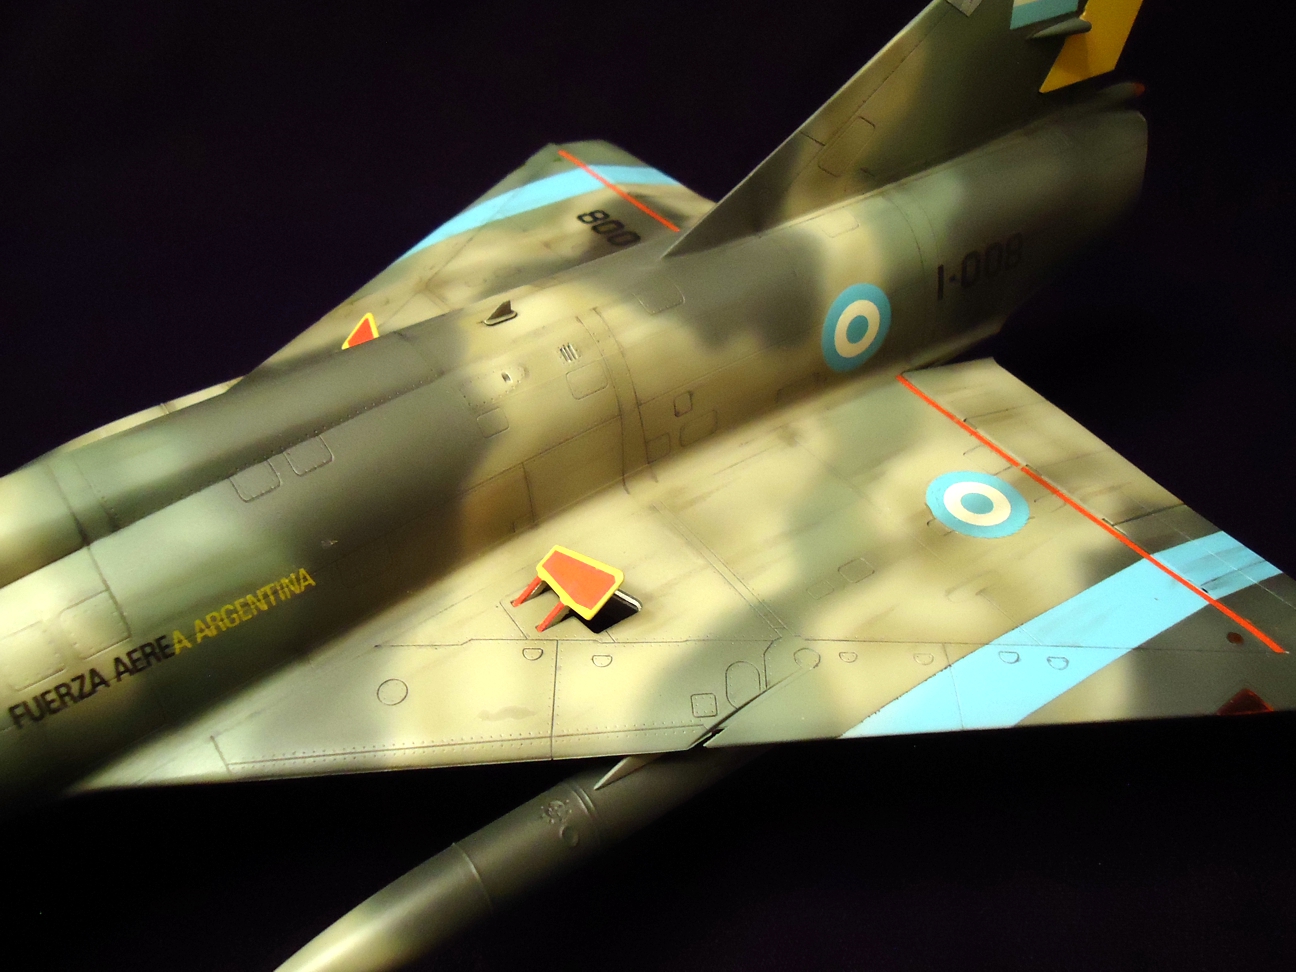
Finished model
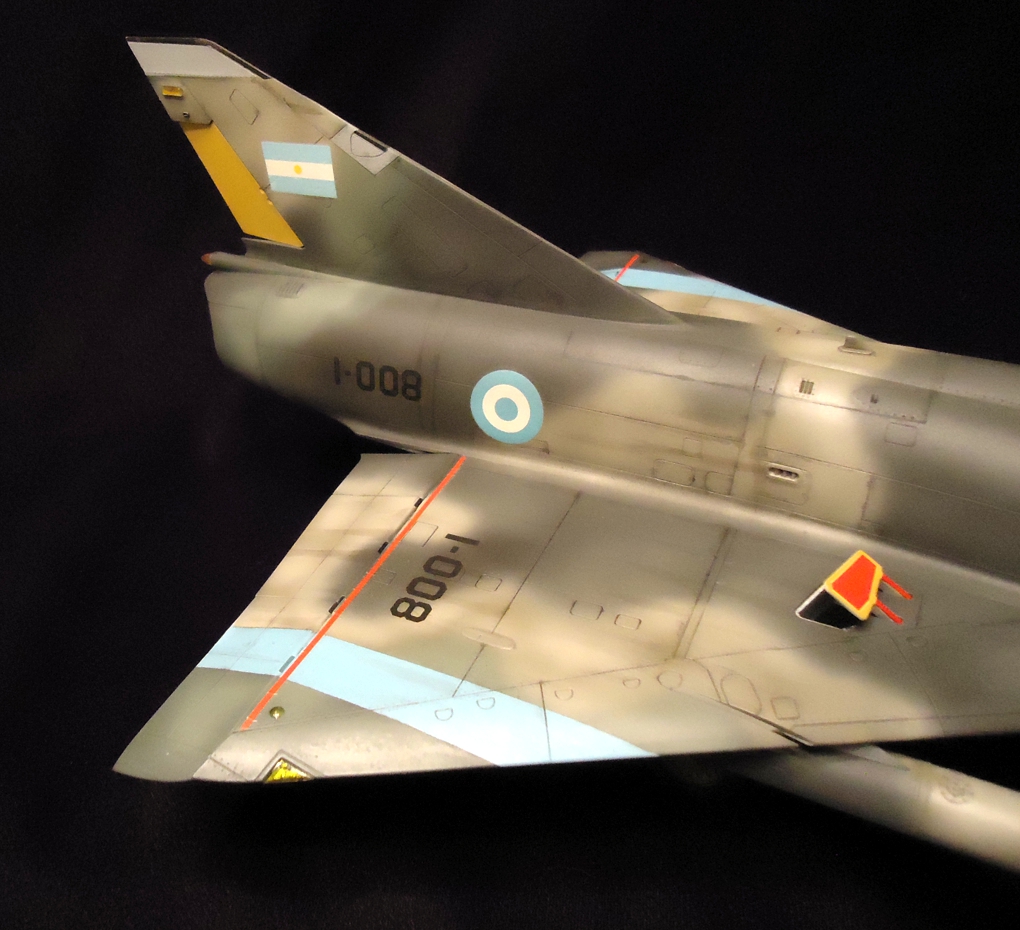
Finished model
Finished model
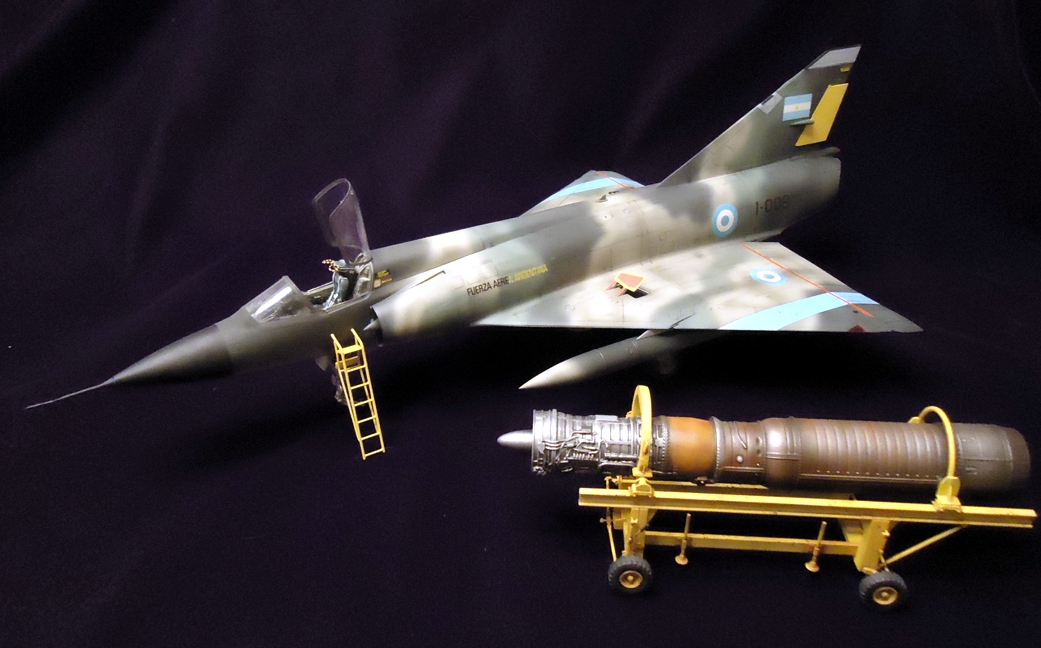
Finished model with engine
Comments
Add new comment
This site is protected by reCAPTCHA and the Google Privacy Policy and Terms of Service apply.
Similar Reviews