
HP52 Hampden B.1 and HP.52 Hampden Paint Set
paint set - 3090 (12.99)
The Handley Page Hampden was a British medium bomber that entered service with the RAF in 1938 and served with some distinction until late 1942 as a bomber and 1943 as a torpedo bomber. Noted for its distinctive fuselage shape, earning it the nickname “The Flying Suitcase,” the aircraft was named for an English Parliamentarian of English Civil War fame.
Previously kitted mostly in 1/72 by several companies, this is the first mainstream IM kit in 1/48 of the Hampden (ignoring - if you can - the abomination that is the short-run FM kit…) and ICM are to be congratulated for their audacity in producing this unusual but worthy aircraft in this scale.
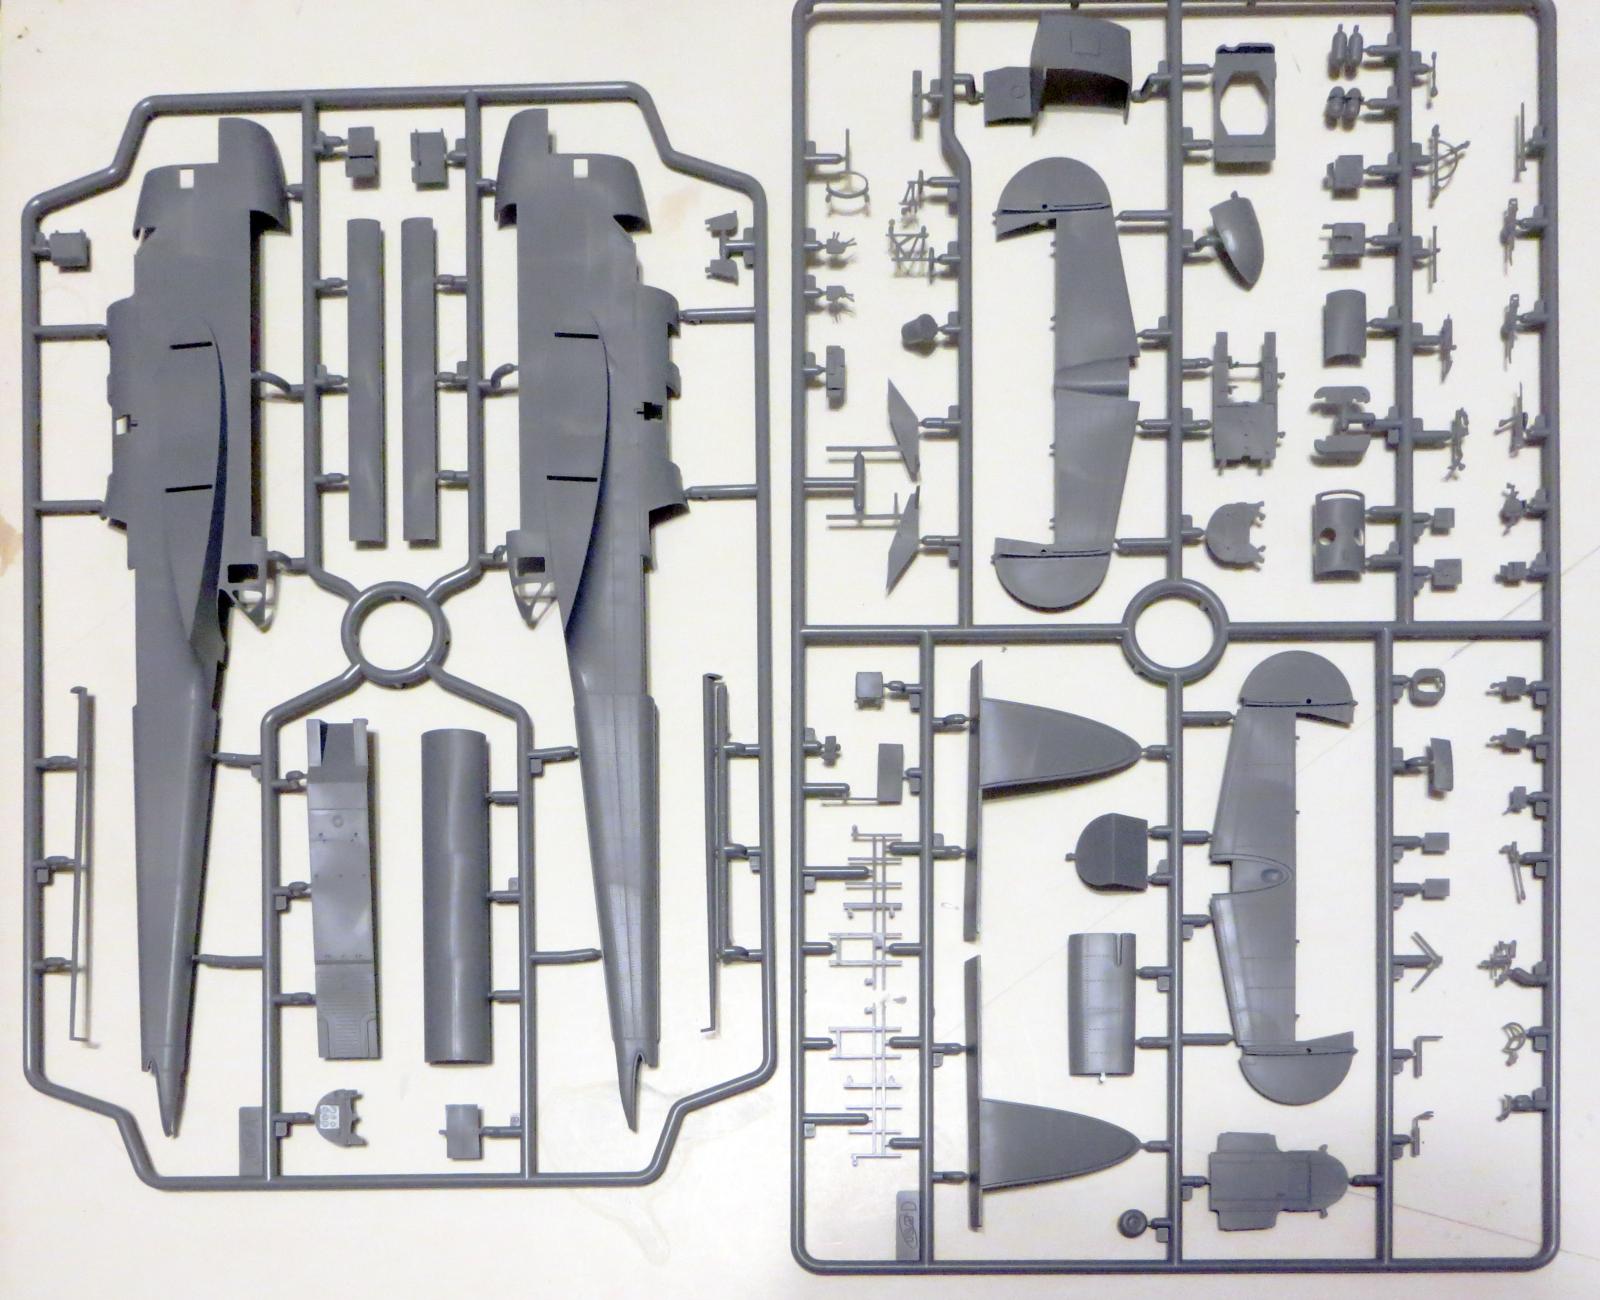
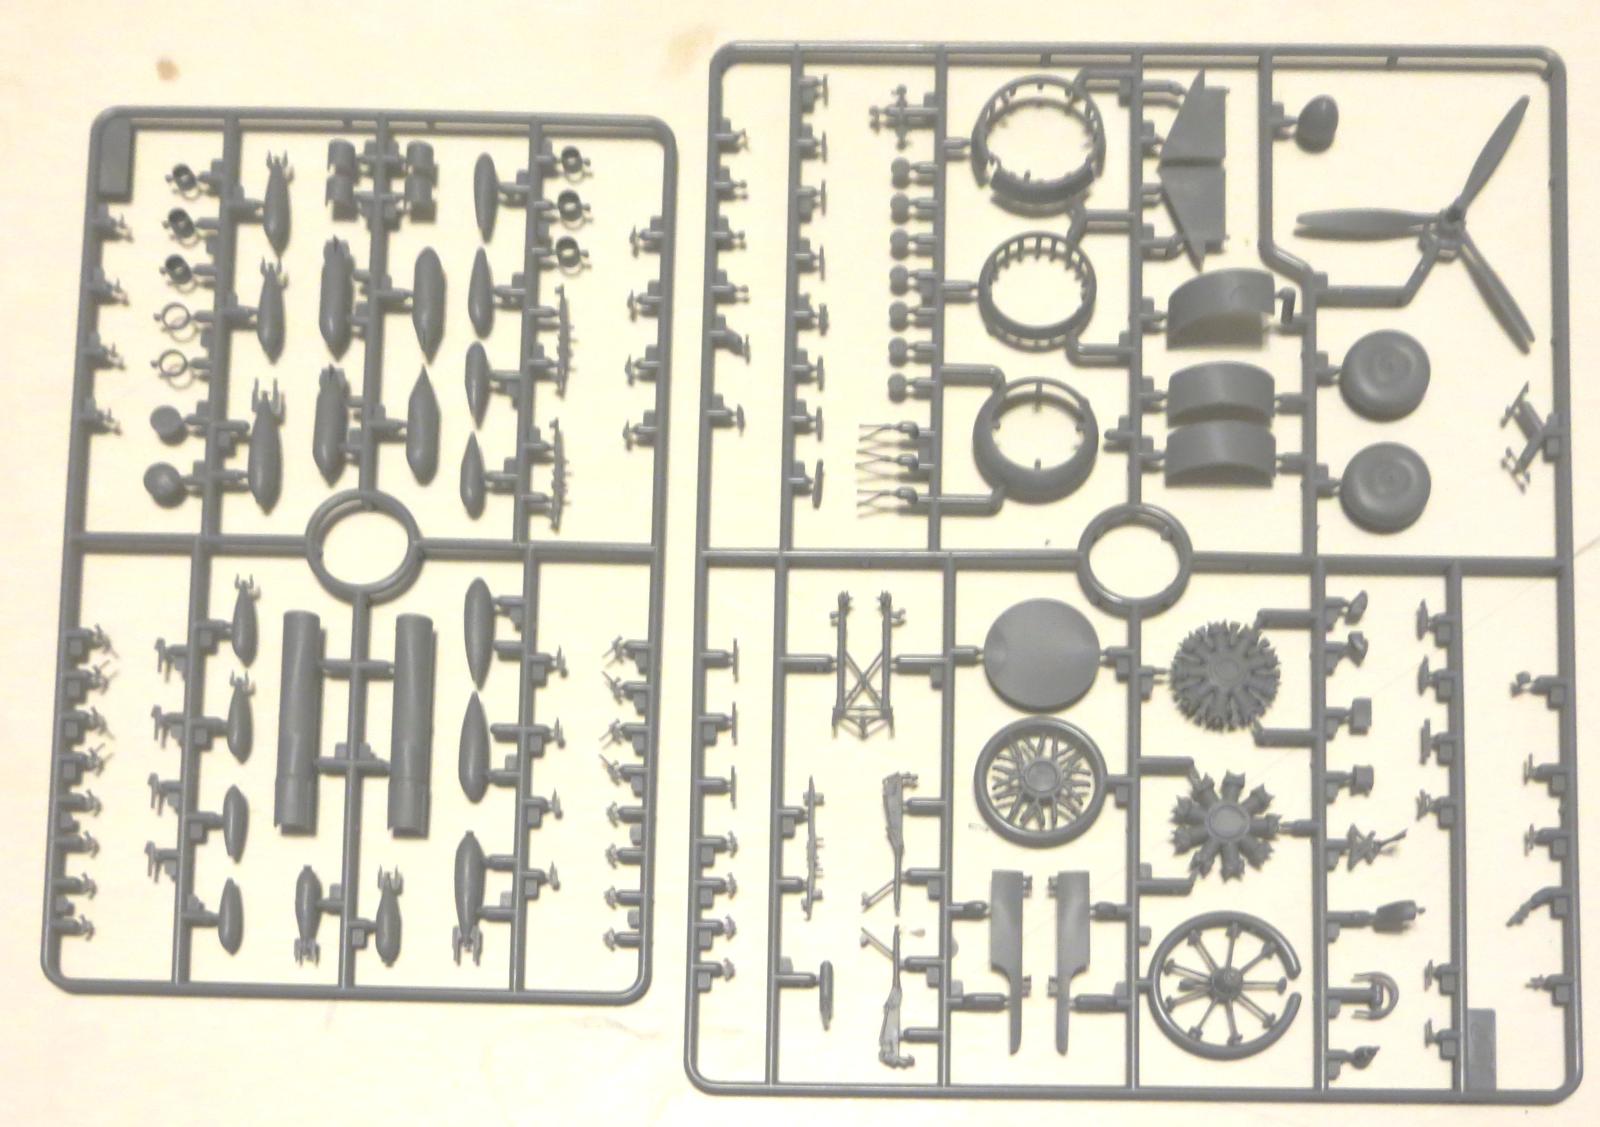
The kit comes in ICM’s standard white box with a full-colour illustrated slip cover. Inside the box, there are six grey runners for the aircraft, plus two clear runners; in addition, ICM have included three runners of their British WWII Armament set, featuring various early war bombs including 250lb and 500lb bombs. ICM states that there are 350 parts and I have no reason to doubt it! A large decal sheet with four options and a comprehensive instruction manual are also included.
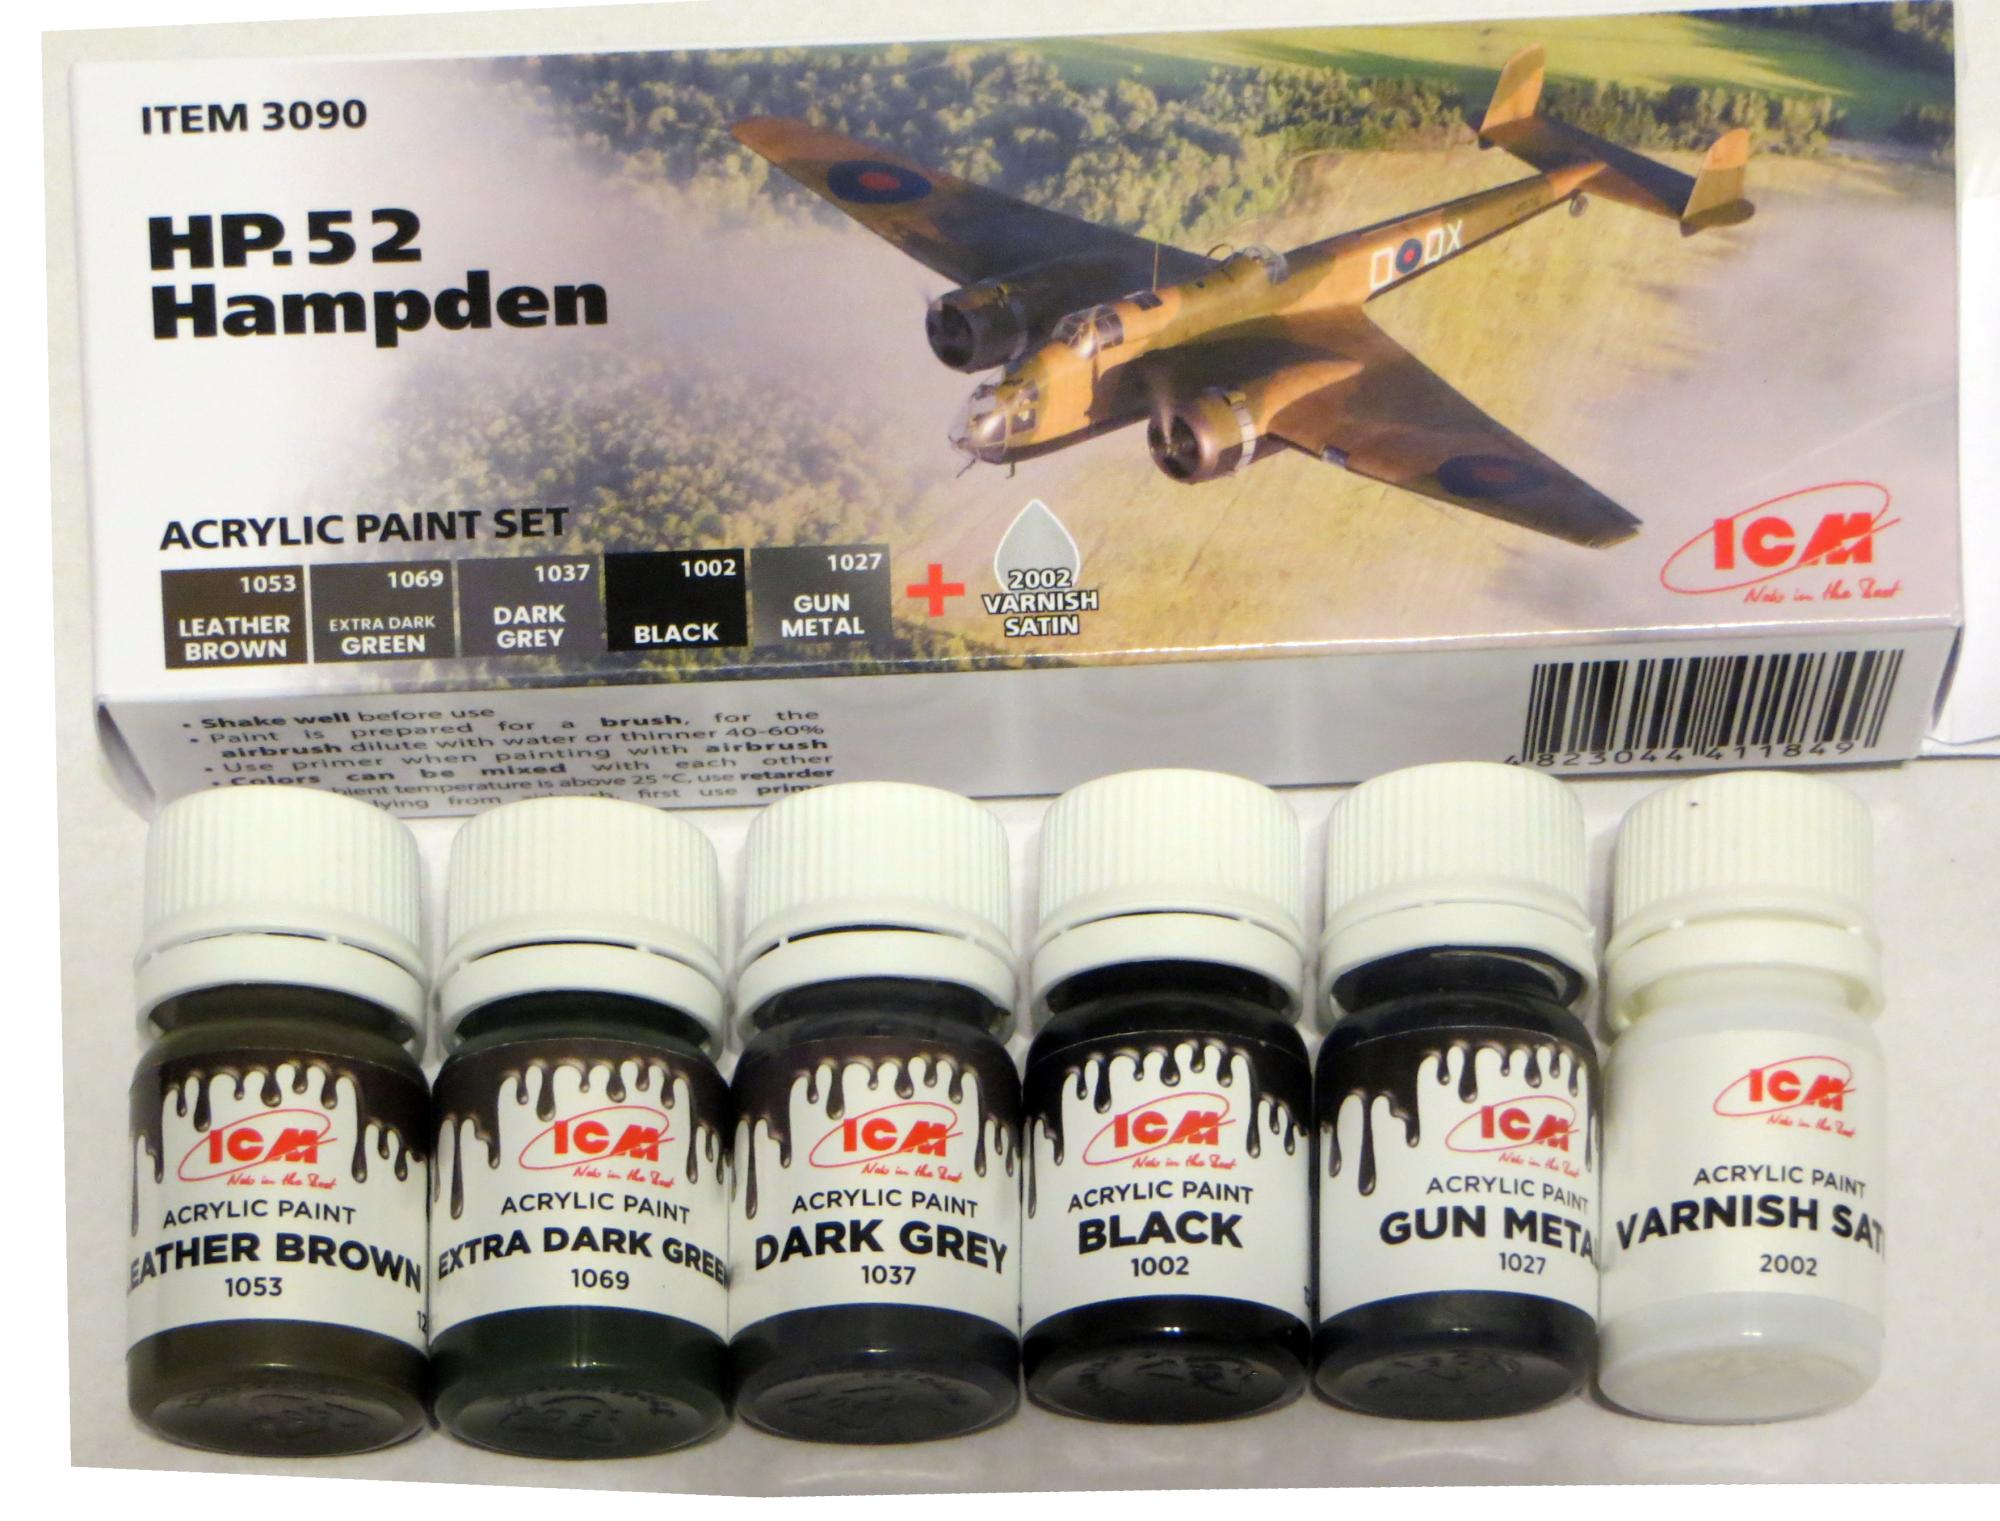
I was also sent ICM’s dedicated paint set for this kit, Set 3090. This includes 5 colours and one varnish. These are listed by ICM number and name and what I believe to be their intended British Standard equivalents:
- 1053 Leather Brown – RAF Dark Earth
- 1069 Extra Dark Green – RAF Dark Green
- 1037 Dark Grey – ?? (not listed in the kit’s instruction sheet}
- 1002 Black – RAF Black
- 1027 Gun Metal – gunmetal
- 2002 Satin Varnish
Interestingly, a dark grey is included but not listed in the kit’s instructions. It will presumably be used in a future re-boxing of the torpedo bomber version - and this set doesn’t include colours to represent the interior green, or the yellow undersides for one of the decal options; I sourced the yellow from another ICM paint set. As usual, the paints are very good for brush-painting and will thin with water for airbrushing. They are very nice, but none are really suitable matches for this use.
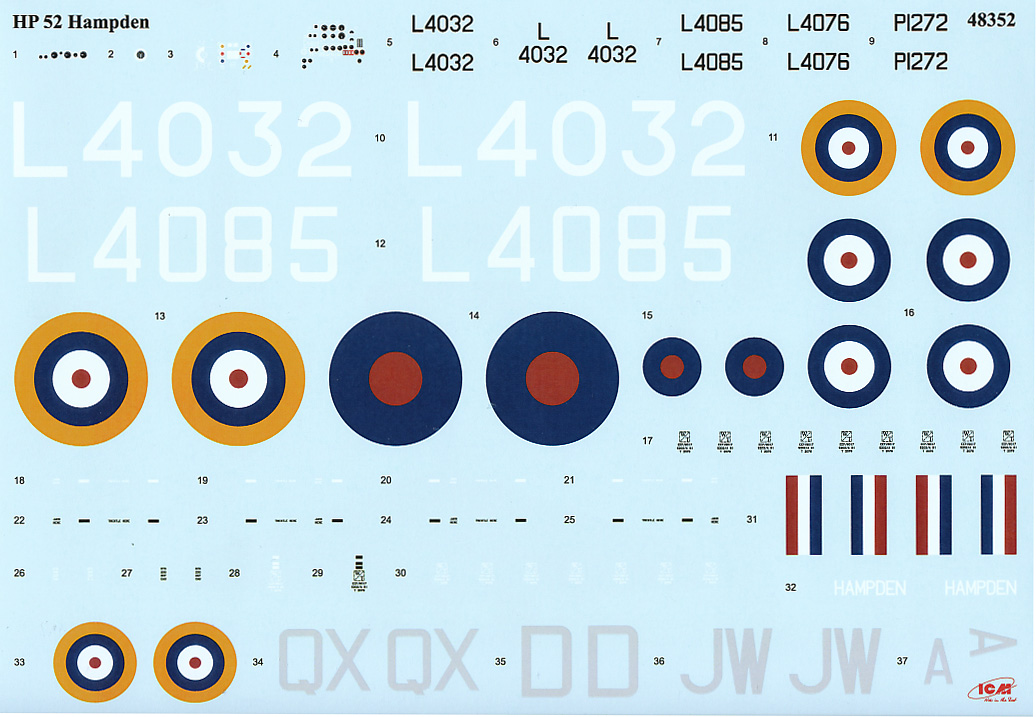
The four decal options for this kit are:
- L4032 First Production Hampden, Radlett, June 1938
- L4085, No.44 (Rhodesia) Sqn., RAF Waddington, February 1939
- L4076, No.50 Sqn., RAF Waddington, September 1939
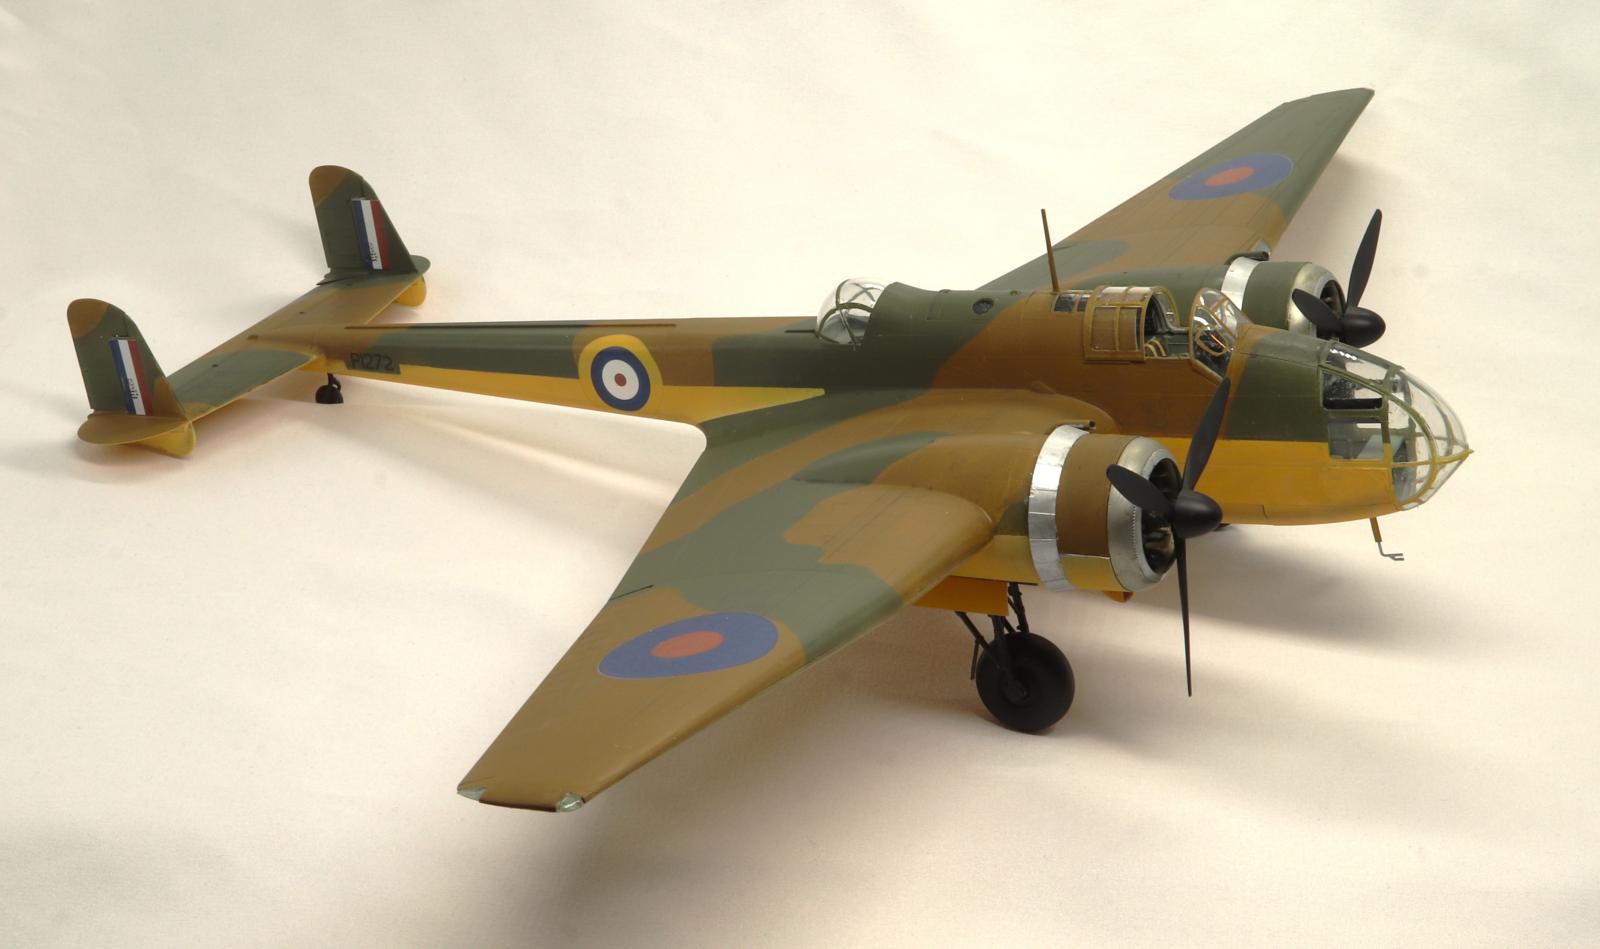
- P1272, Torpedo Development Unit, RAF Gosport, December 1939
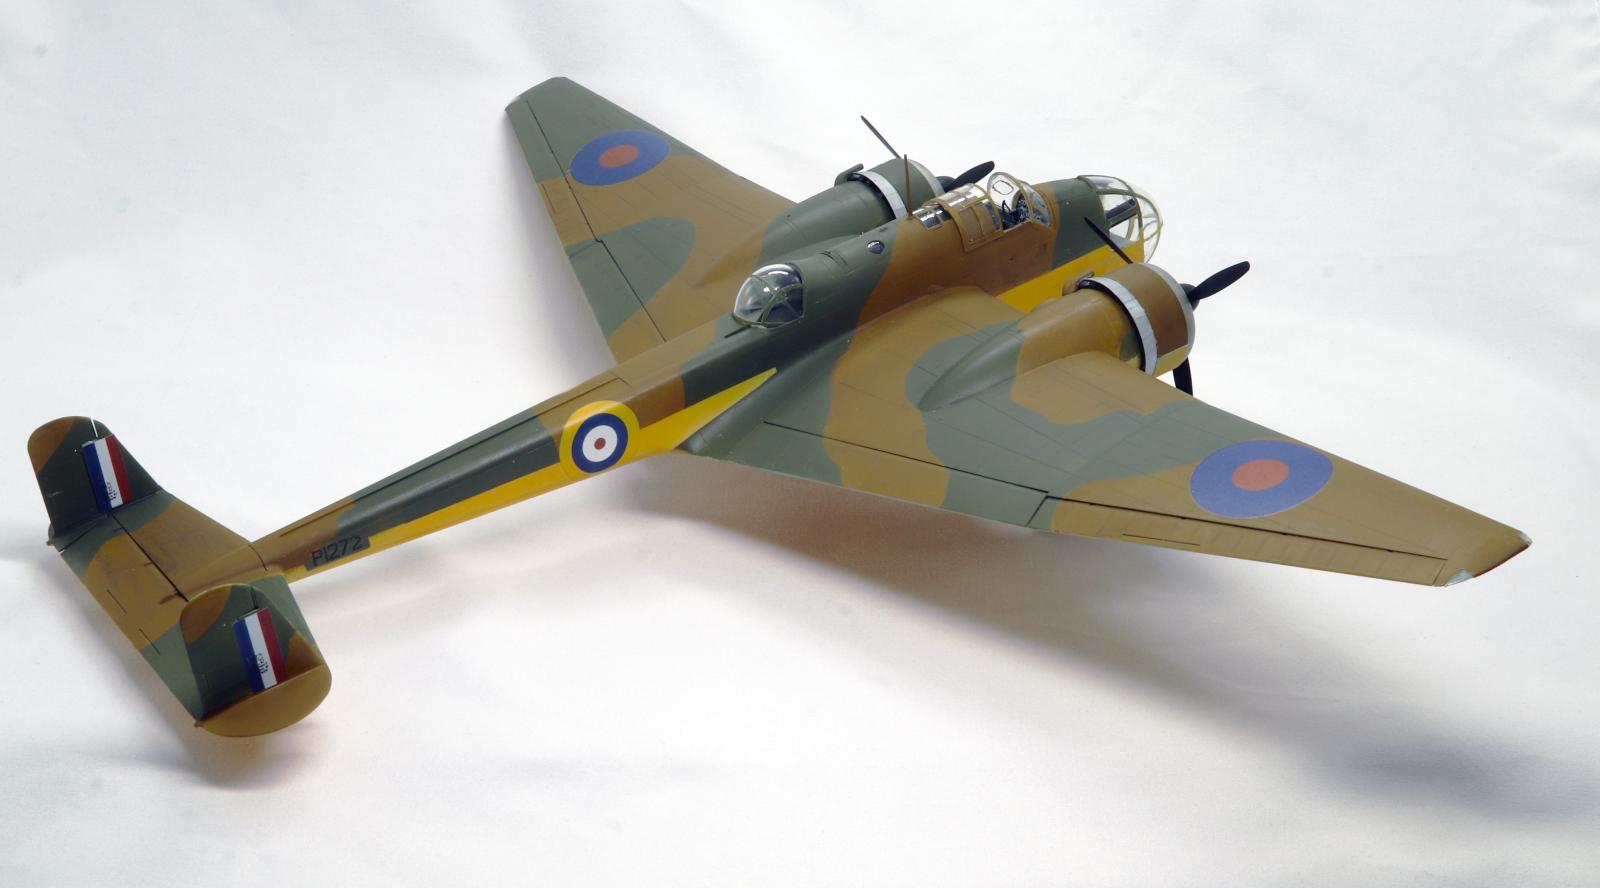
All options feature the then standard RAF upper camouflage colours of Dark Earth and Dark Green, with a trio of bombers with Black undersides and one development machine with Yellow undersurfaces. The bombers have subtle differences in markings chronicling the development of markings schemes during the late pre-War and early Wartime periods and all are included on the large decal sheet.
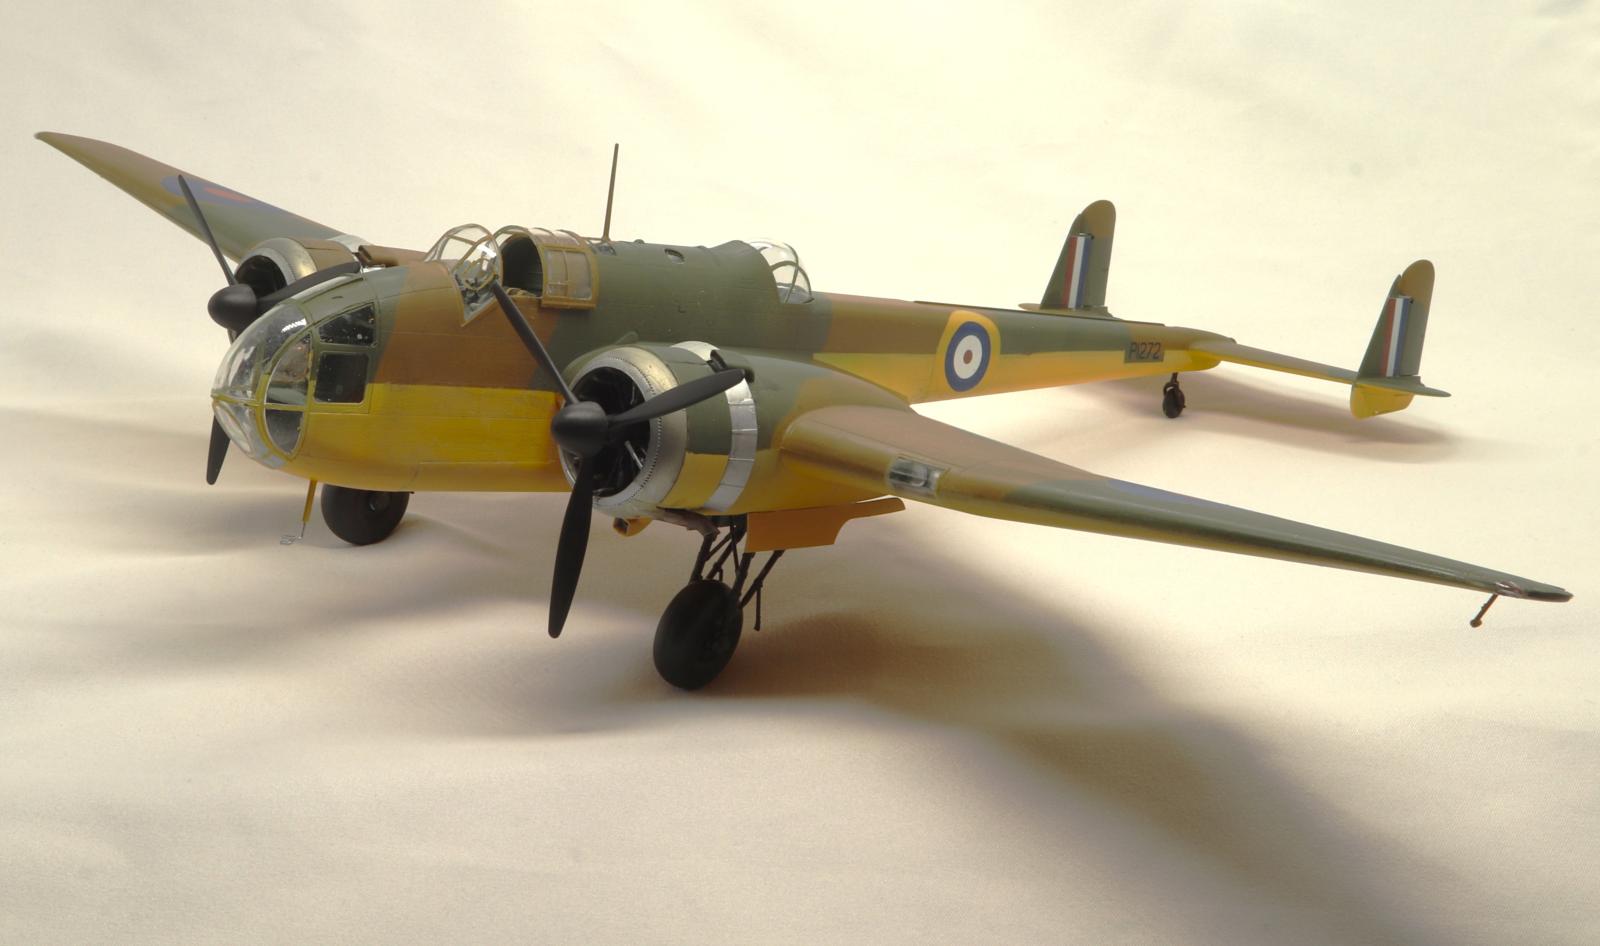
I chose to recreate the last scheme, for the Torpedo Development Unit at RAF Gosport, as in my childhood, I lived on the Royal Naval housing estate that was built on that landing ground back in the seventies; the hangars survive to this day as part of a naval engineering establishment and those were across the main road from our house. So it’s pretty cool to think that I lived and played on the ground where this particular Hampden took off and landed all those years earlier!
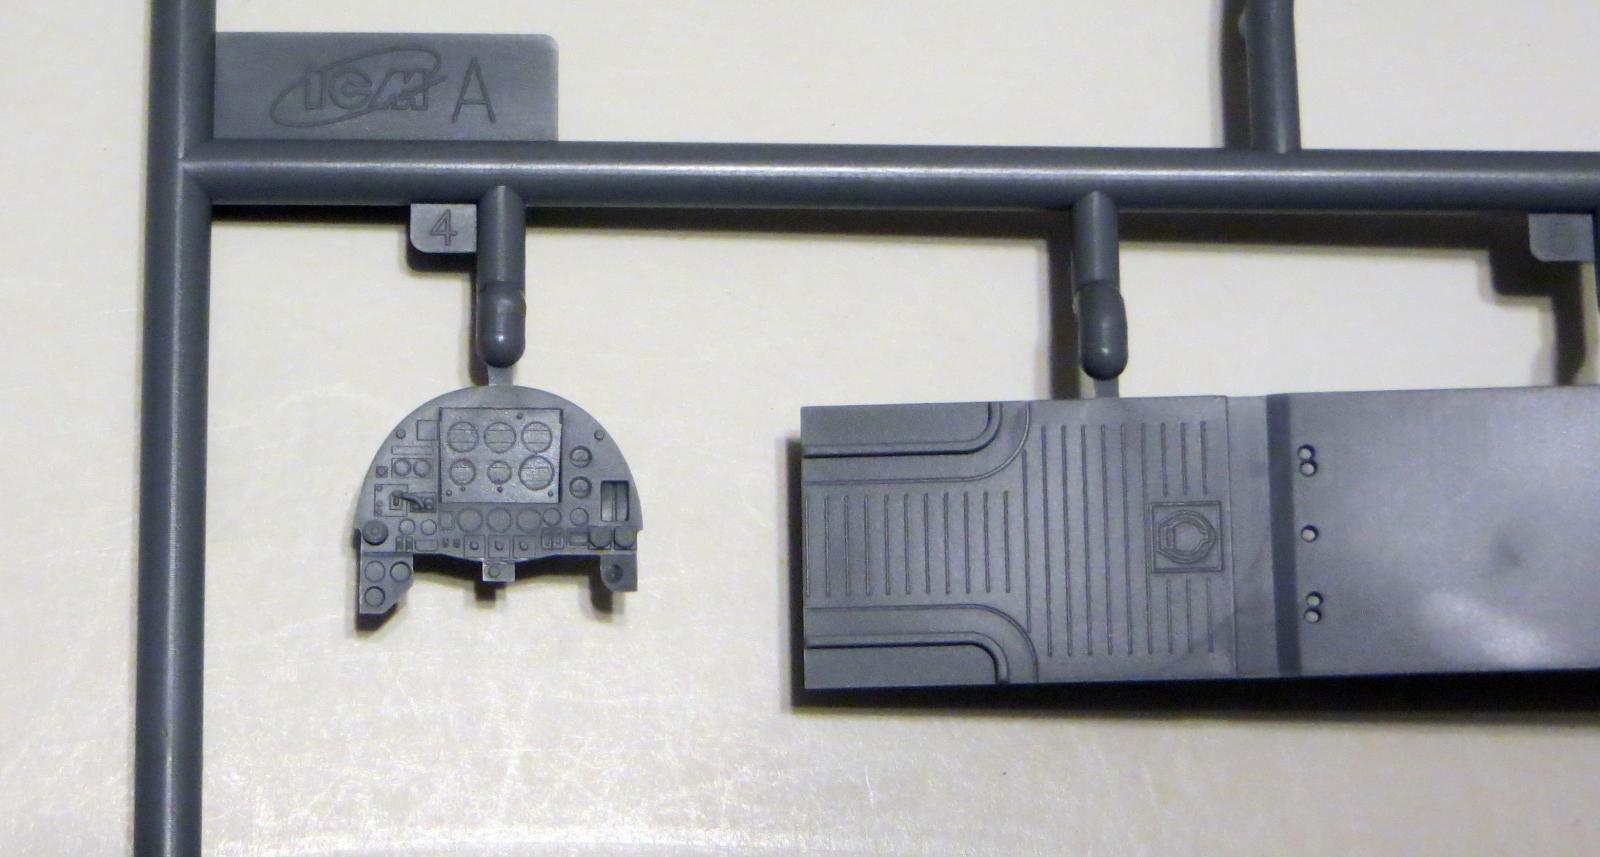
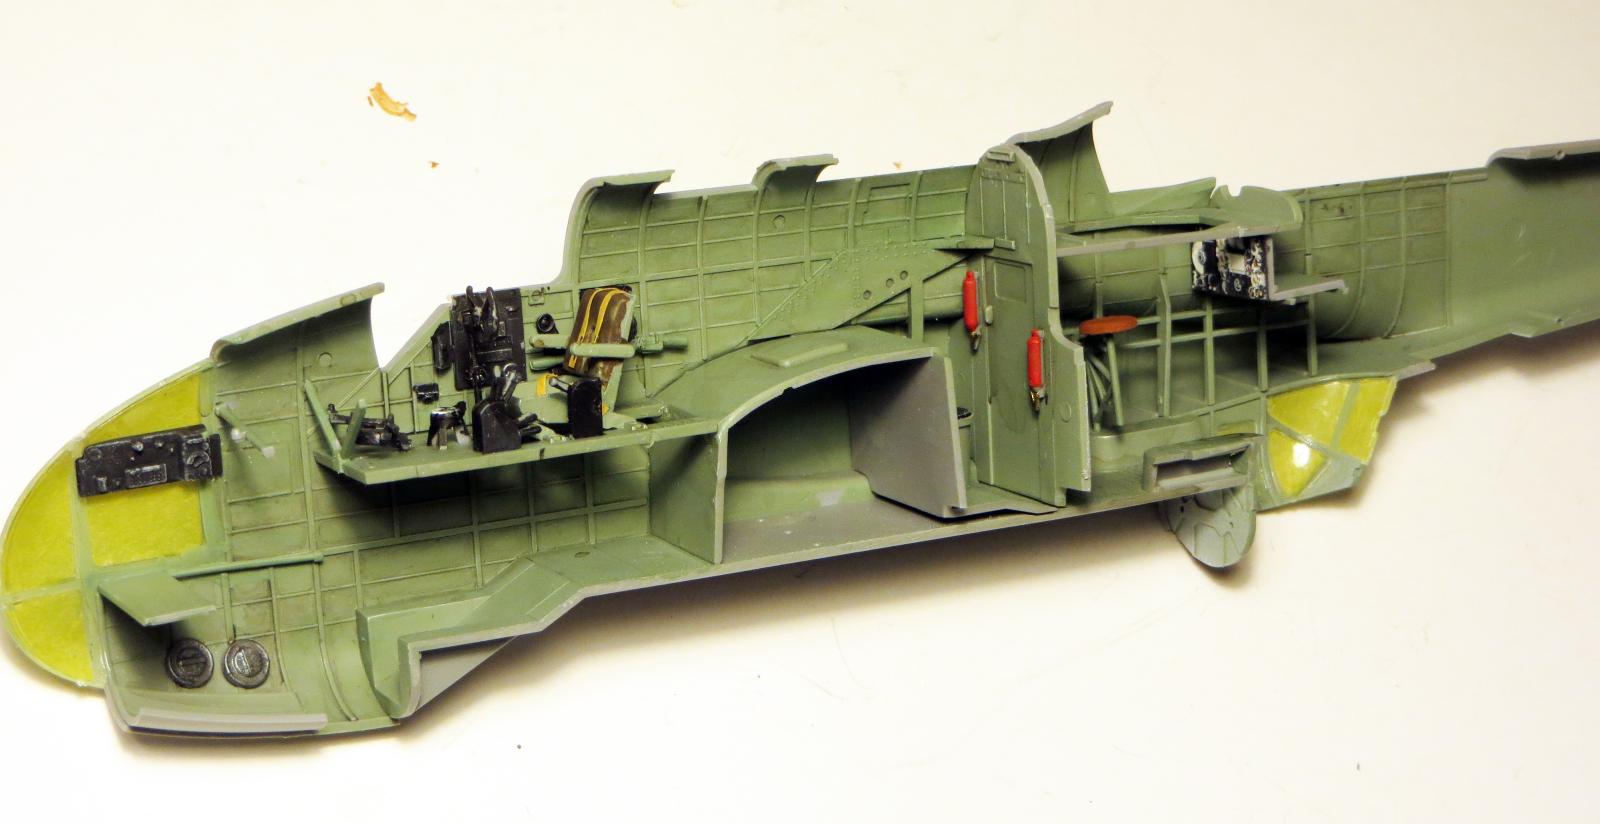
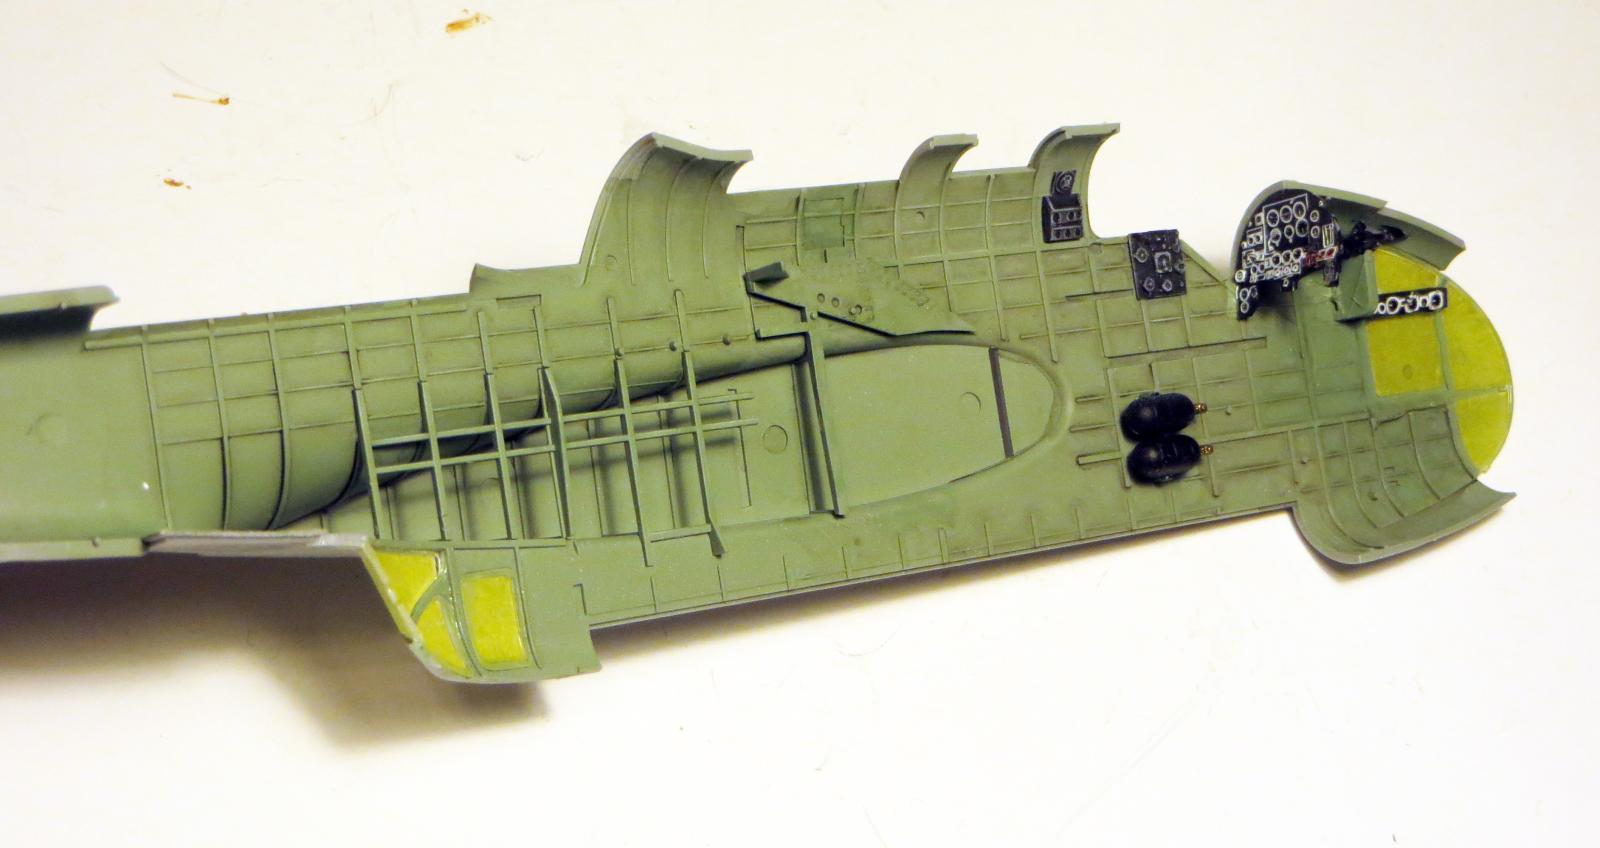
Construction began with the fuselage interiors. These have stringer detail already moulded in, to which further parts are added. A floor/bomb bay roof is constructed and includes an Elsan toilet and gunner’s seat. The pilot’s cockpit floor has several parts added, including a four-part seat, control column and wheel, rudder pedals, throttle quadrant and more. The IP has some excellent moulded detail to which a decal is added if desired – this looks pretty good when in place. The only thing I added here is a harness for the pilot, from kabuki tape. All in all, the interior detail looks very nice and is pretty comprehensive – unlike the recent Beaufort, for example. While the AM resin guys will undoubtedly go to town, I think what ICM has included is perfectly adequate, aside from the harness, and it can be shown off as the pilot’s canopy can be posed open. The interior was sprayed Vallejo RAF Interior Grey-Green with details picked out in Black, Leather and Red as appropriate.
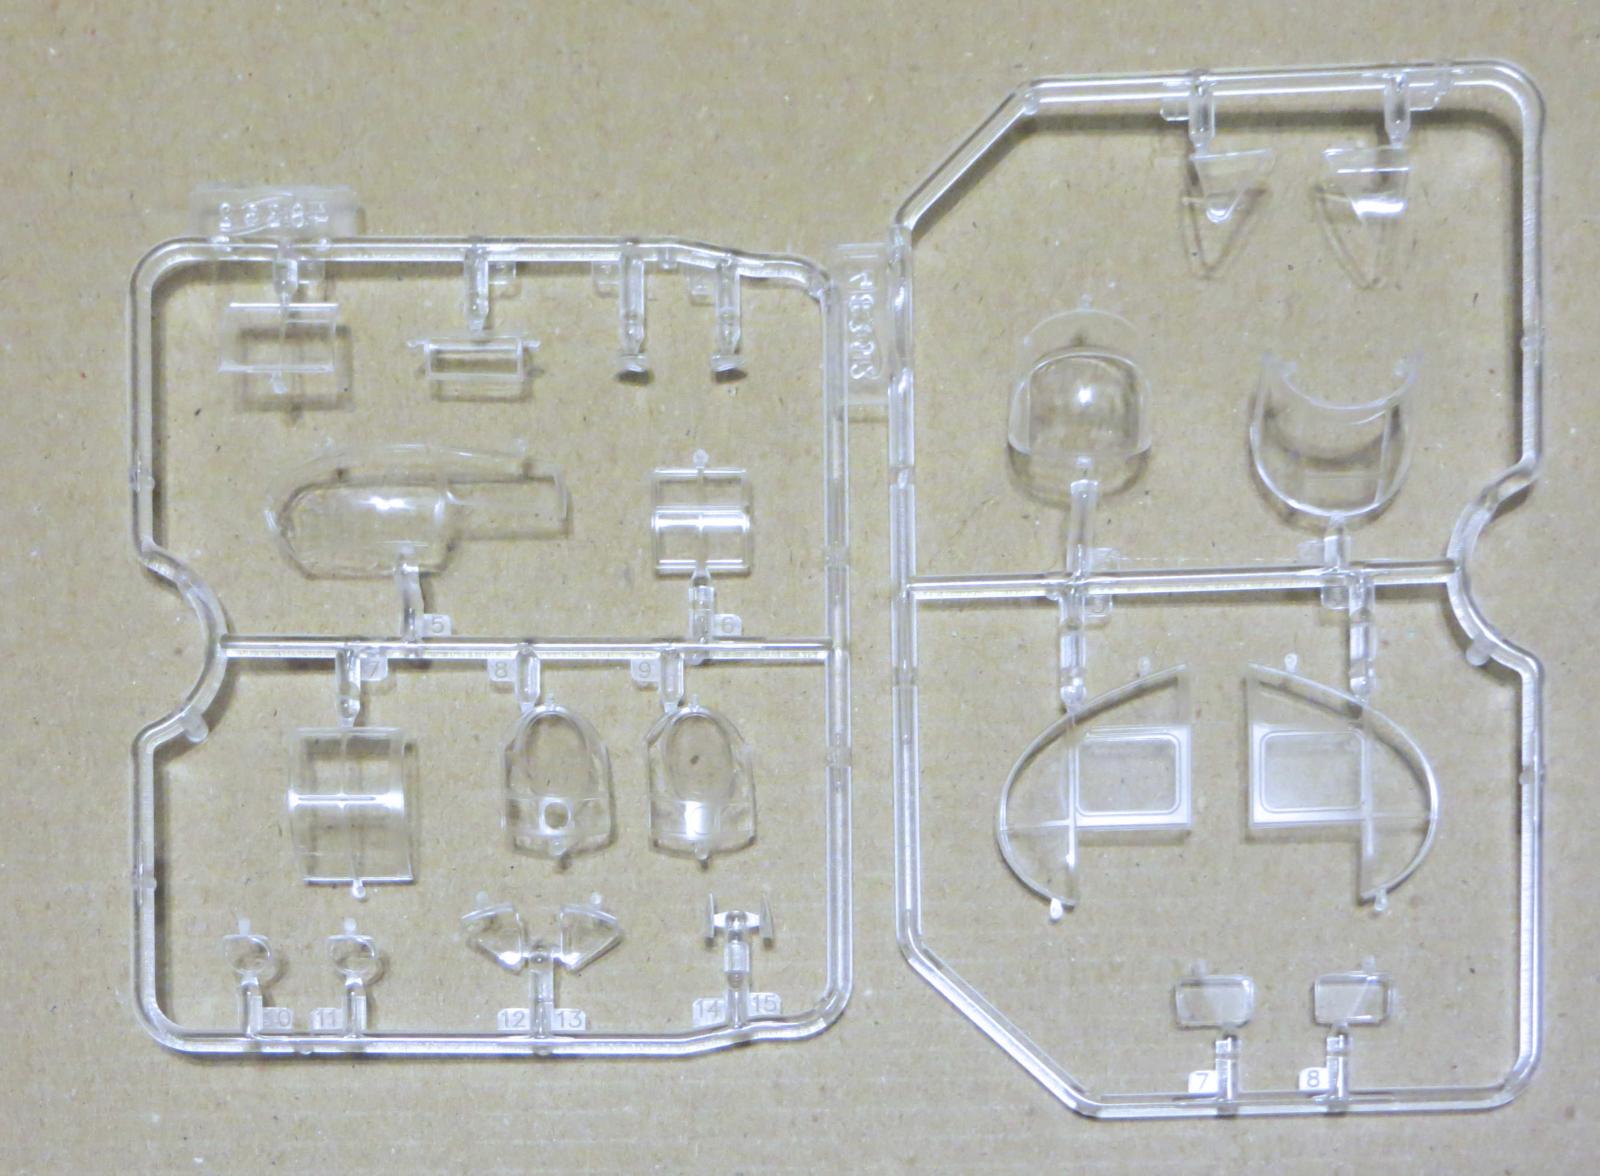
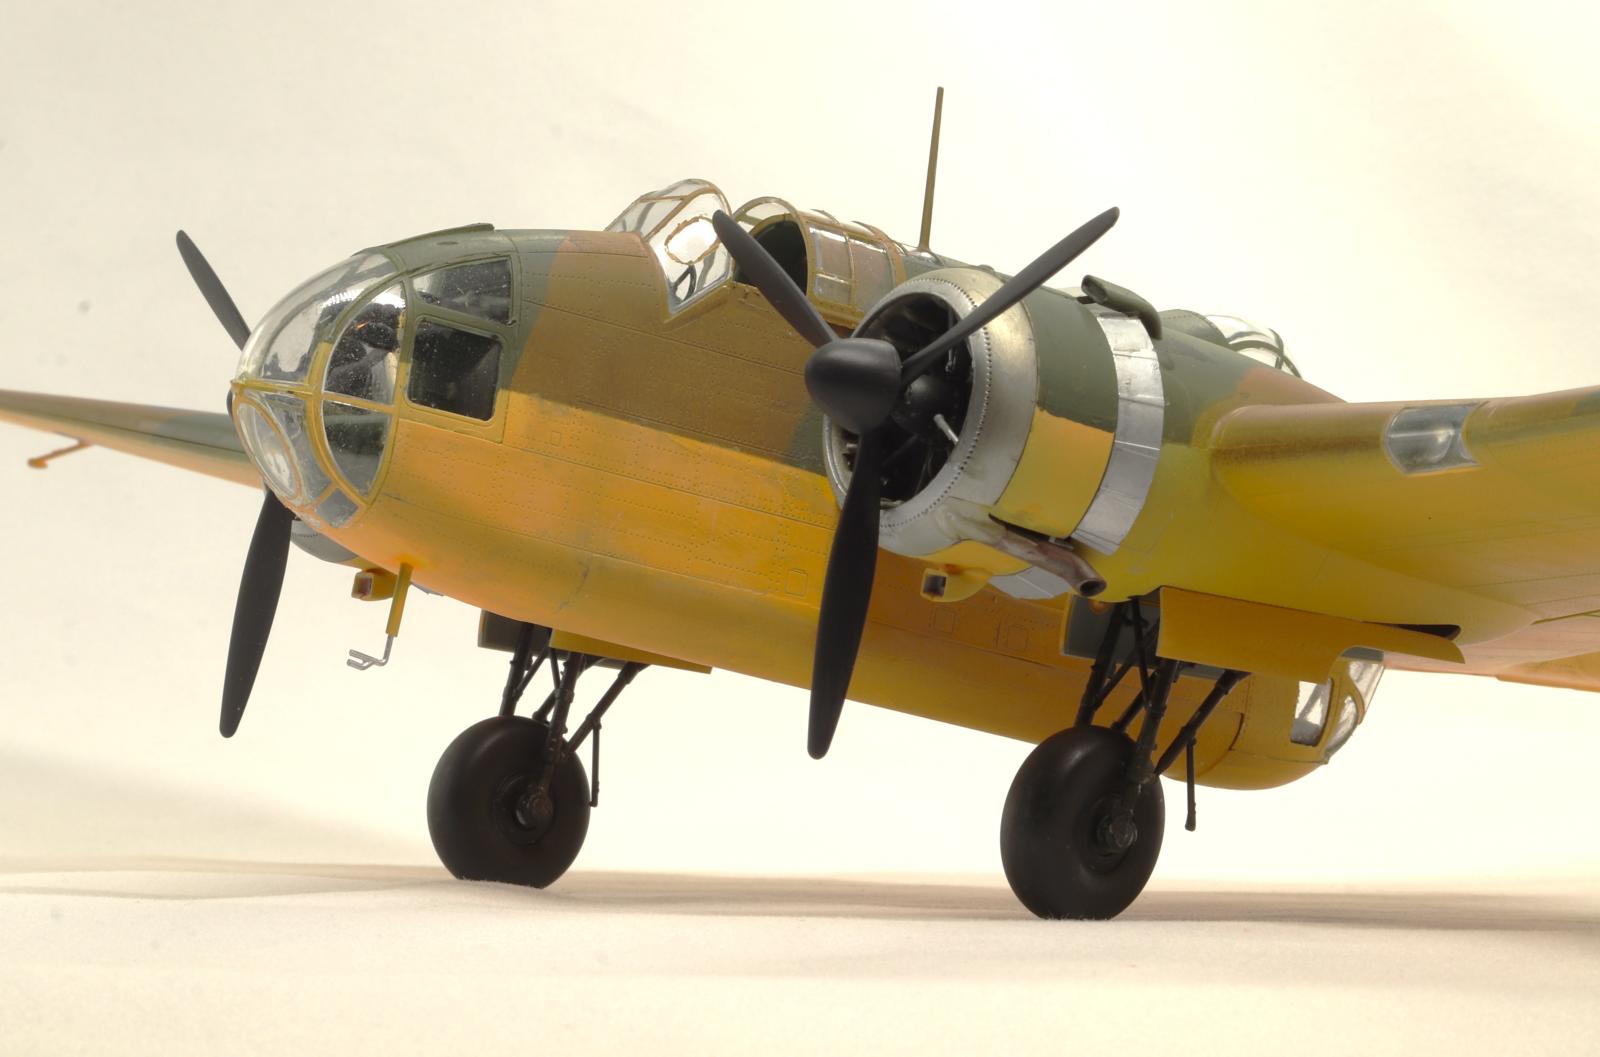
The nose of the Hampden is very glassy, so ICM have included the nose section as a construct of clear parts. A set of glazing mask templates is included in the instruction book, as is standard for ICM. These have worked pretty well for me in the past, but given the extensive glazing on this aircraft, - there are over 50(!) panels in all to mask - I decided to acquire a set of AM masks and as the usual Eduard mask set wasn’t available at the time of the build, I bought a set from UKScaleModeller in Britain; check out their eBay store for more products. Made with standard Kabuki-style tape, these arrived very quickly, were easy to use and fitted very well – top marks to UKScaleModeller! A coat of RAF Interior Grey-Green was sprayed over the exterior glazing prior to adding the parts to the fuselage.
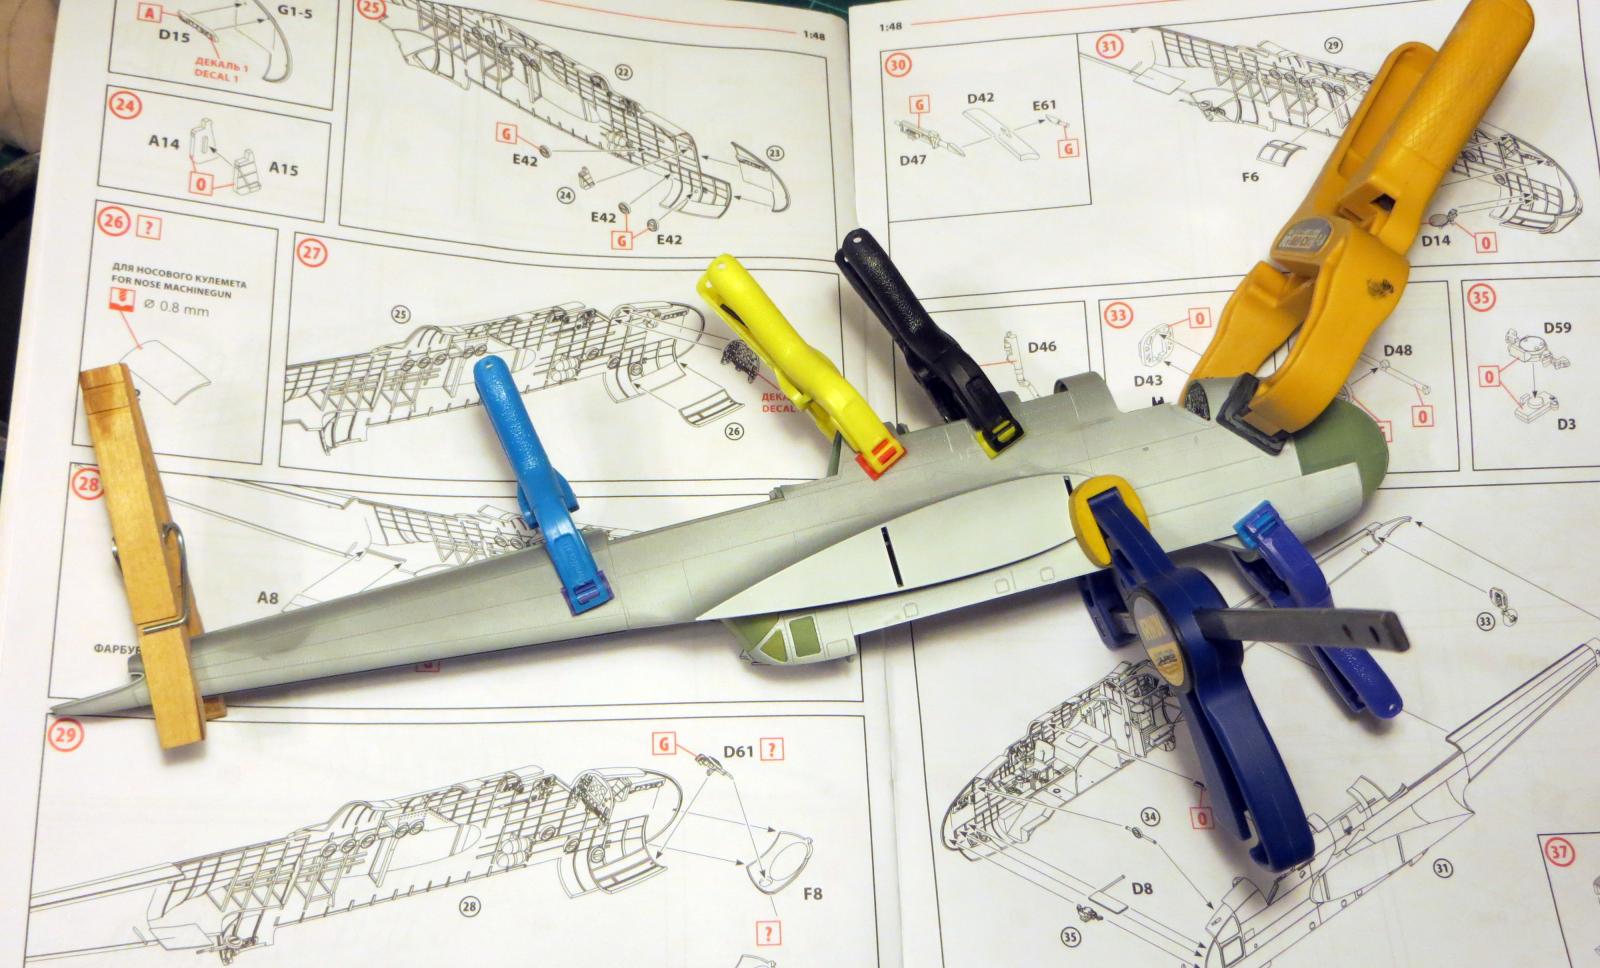
Once all the interior detail sub-assemblies were completed, the fuselage was assembled. ICM’s tolerances are quite tight, but I had no issues joining the halves. The fuselage was completed by adding various glazing parts and access covers, plus the bomb bay doors – you have the option of open or closed, but as I was modelling a torpedo trials airframe, and neither the torpedo nor mounts were included in this boxing, I opted for the closed option. There isn’t a lot of detail for anyone contemplating the open option for a bomber aircraft – this is one area that will really benefit from aftermarket parts. The clear parts fitted well, but some of the access panels required a little filler; I used Perfect Plastic Putty for easy application and clean up. As the chosen machine was a trial aircraft, I left off the machine guns – even operational bomber aircraft on the ground often only positioned these just prior to a sortie.
The canopy for the pilot’s cockpit is moulded in two halves and ICM thoughtfully includes a plastic template to assemble these over. It is also able to pose open; I tack-glued it shut for painting and removed it to pose open when the model was complete.
The tail assembly is painless and slots into the rear fuselage with a satisfying click. The rudders are separate parts, above and below the tailplane, and these can be posed deflected, so I did.
The wings are tackled next. These have a standard breakdown of port and starboard uppers and lowers, with separate moving surfaces; flaps would not normally be lowered while the aircraft was parked. Short front and rear spars are added for strength and positioning. The main undercarriage bays have little detail, and ICM has you adding the fragile main undercarriage leg assemblies at this point – and yes, I did manage to break one later in the construction process, and re-attaching it was a real pain. Frankly, this is – literally and figuratively – the weakest point of the kit, as the attachment points are weak and vague and while adding the U/C later in the build is technically possible, it makes this fraught process even more problematic. Somewhere along the line, I got the alignment slightly off, so the port undercarriage is slightly twisted. All in all, a good argument for aftermarket parts. Ailerons and flaps are two-part constructs and fit well to the wings.
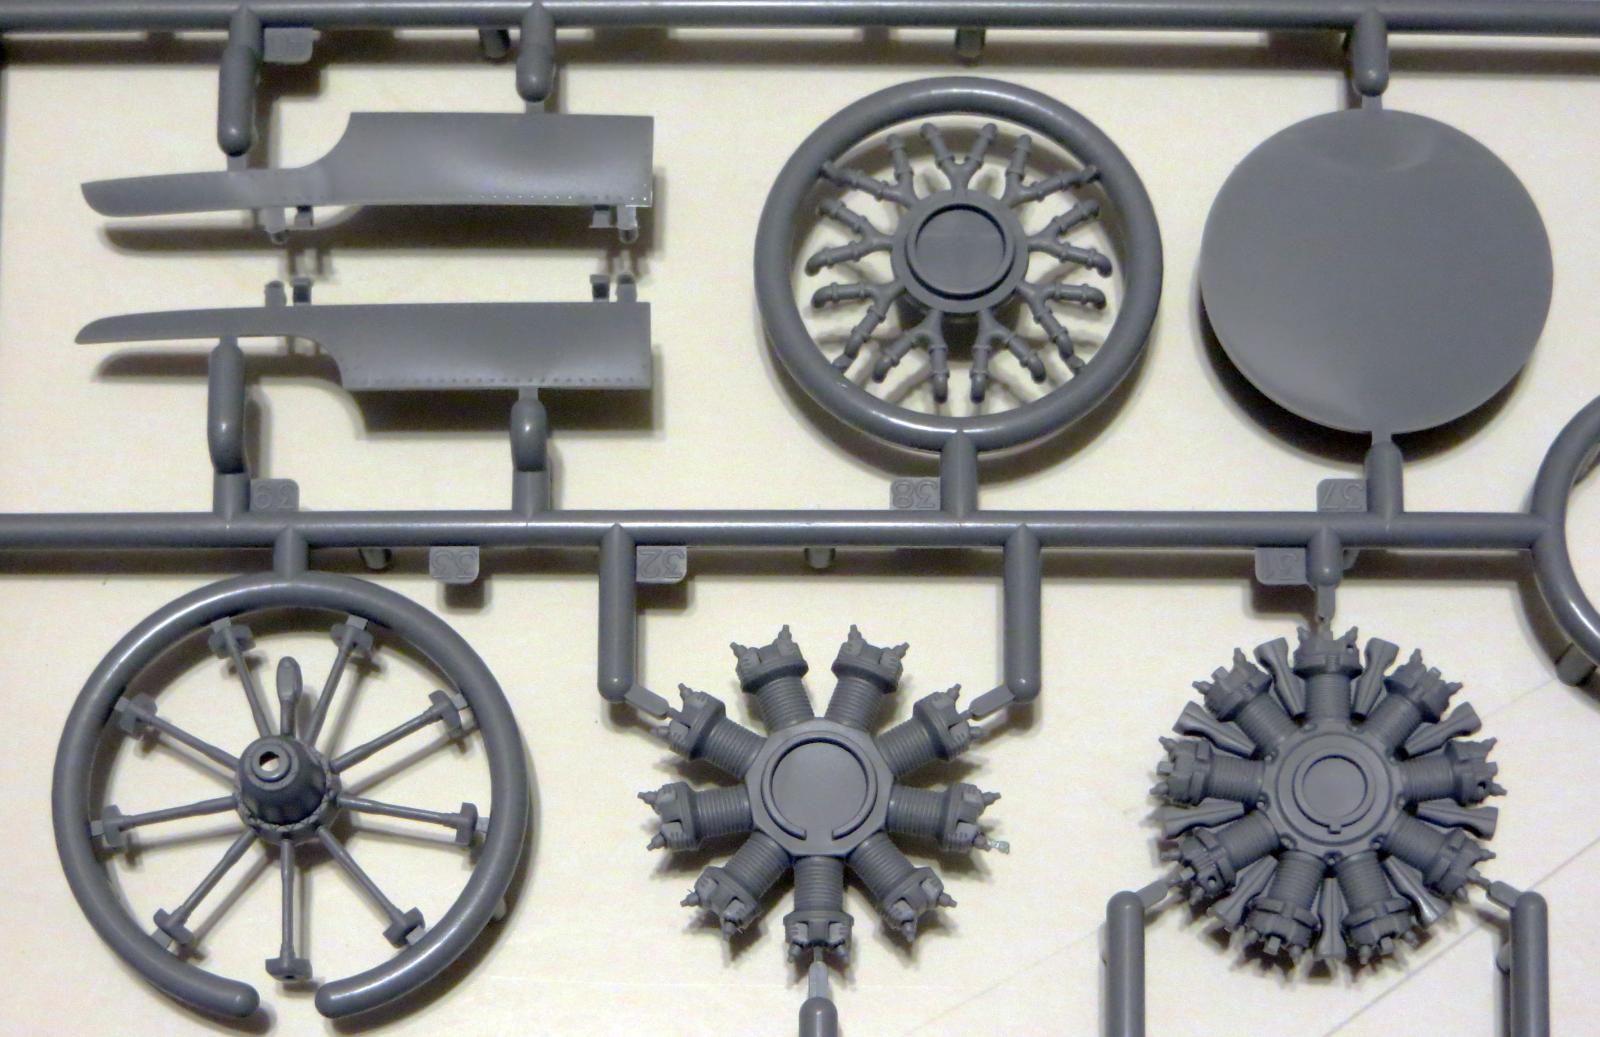
The two Bristol Pegasus 9-cylinder engines are created using 11 parts each and are nicely detailed. The distinctive exhaust collector ring is in two parts with a separate exhaust. The engine cowlings are three-part units that could, in theory, be left off to show off the engine detail; I elected not to do that. These are added to the wings with a ring of cooling gills, and it all looks very nice when painted and in situ. However, once again, ICM’s instructions are a bit vague, and the attachment points are not the strongest. I would suggest assembling the engines, cowlings and cooling rings as a complete ‘power egg’ unit before attempting to add these to the wings, leaving the propellers to the end. I also removed or shortened the attachment points for the cooling gill rings as these just hindered attachment to the wings.
The fit of the wings to the fuselage is very good, with just a smidgen of filler required on the undersides; the wing spars are a big help here. With the airframe complete, ICM turns to the various bombs that could be carried. These are on the included British WWII Bomb set included with the kit. Each bomb is made up of five parts; as the machine I chose to depict didn’t use them, I didn’t build them, but they do look good on the runners and will surely be useful for future projects! Perhaps ICM could be persuaded to add a series of WWII airfield vehicles to their range – they do, after all, like to create dioramas in a box….
After priming, the model was painted using Vallejo Model Colour Dark Green and Dark Earth on the topsides and a home brew mix of their Golden Yellow and Orange on the undersides. A coat of gloss varnish was added prior to decaling. The few decals required for my chosen machine went on very nicely, though the decals are a bit thin and tend to curl on themselves if you don’t slide them into place from the backing paper. After a dark sludge wash, a final coat of matte varnish finished the model.
Overall, this is a nice kit for a long-neglected subject; it has very nice interior detail, fine surface detail and a good choice of markings options, though I have reservations about ICM’s vague part placement instructions, the poorly-thought out undercarriage and the fiddly engine/cowling/cooling gill construction. Not a kit for a beginner, but very highly recommended for those with experience. I look forward to seeing what ICM will release in the future!
My thanks to the fine folks at ICM for the review sample as they continue to work through difficult conditions in their homeland.


Comments
What happened to the rest of my photos?
What happened to the rest of my photos?
Fixed
They were too small
Add new comment
This site is protected by reCAPTCHA and the Google Privacy Policy and Terms of Service apply.
Similar Reviews