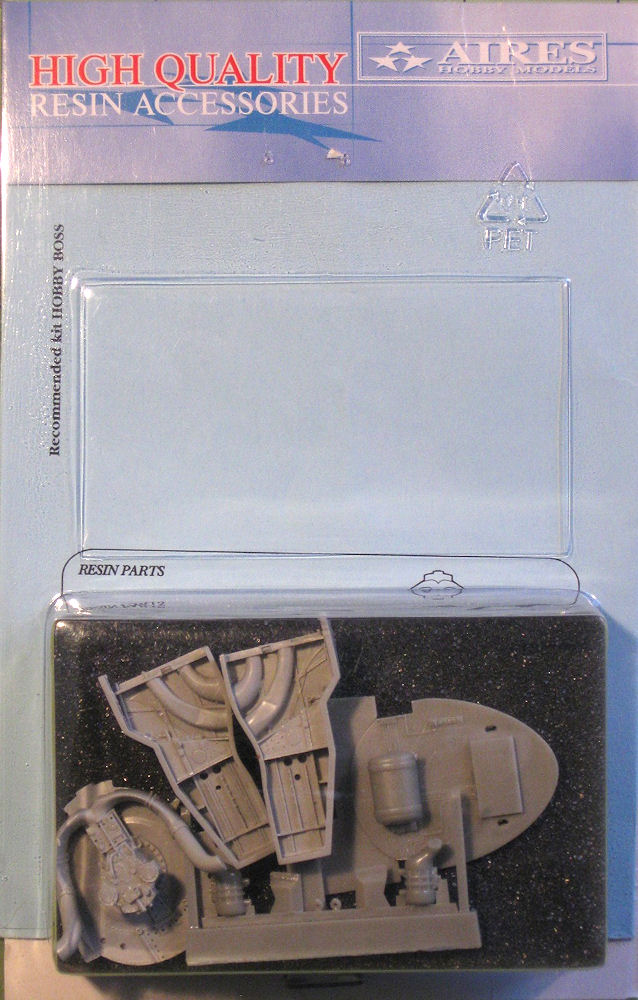
F8F-1 Bearcat Wheel Bay
Thank you to David Lajer of Aires / Quickboost and the IPMS Reviewer Corps for the privilege of reviewing this delightful aftermarket resin set. The Hobbyboss F8F kit is wonderful in its own right, but replacement of the kit wheel wells with the Aires parts and the other pieces in the set allows a much cleaner and more detailed presentation.
The Package
The set is packaged in a typical blister pack, with a foam insert backing. An engine-mount firewall and cockpit firewall are included, along with two wheel well units and a casting plug holding 6 additional detail parts. The casting detail is very fine and crisp. While inventorying the parts and comparing them to the instruction sheet, I noticed that the 2 rings (RP 3) on the plug were not complete. I couldn’t find any additional loose pieces in the package. The rings are part of retractor assemblies that I was able to easily recreate with 0.020 plastic rod later on. A simple set of instructions is provided, showing the basic layout and arrangement of the resin and kit parts. The resin color is medium brownish-gray, a nice contrast to the kit color.
Construction
Like all aftermarket resin sets, planning the installation is critical. The kit’s wheel wheels need to be removed, but other than that, there are no major “kitpartectomy” procedures. I was able to score through the kit wells on the lower wings from the inside of the wing half with a No. 11 blade. However, I managed to chip off the splitter plates on the leading edge air intakes. Fortunately, replacing the plates with plastic sheet parts later was fairly simple, and actually made for better looking plates! The resin wells have a bit of a casting plug on the part back, which needs to be sanded off to fit them properly inside the wing.
After dry fitting the wells and moving on to the fuselage parts, I discovered an intriguing challenge. Two air intake pipes run from the leading edges of both wings, close to the wing root, and are prominently visible as nicely detailed features in the resin parts. But the pipe parts by necessity are split between the wells and the fuselage interior parts, making it tricky to align them. The kit wing-to-fuselage attachment design is excellent. The approach I took after dry fitting the wells is as follows:
- Glue the wing halves together.
- Glue the fuselage halves to the now-assembled wings.
- Modify the fuselage halves to allow the wheel wells to slide through from inside the fuselage into the wing.
- Assemble the firewall and other resin and kit parts for the fuselage section, except for RP 1 and RP 5, and install the assembly in one fuselage half.
- Tweak the loose wing well into a position with the air intake pipes aligned.
- Wick some CA into the well/wing edges to secure the well in the wing.
- Glue RP 1/RP 5 into place through the well opening.
- Glue the fuselage halves together, of course after you complete all the other interior kit work (don’t laugh, I almost forgot a thing or two).
- Repeat the well aligning and gluing on the other wing.
As you might imagine, there is a lot of dry fitting and confidence building involved. I was somewhat hampered by the lack of reference photos in my library, but one internet-sourced photo of an unknown vintage F8F suggested that the wing-to-fuselage intake joint is a flex coupling. This can be replicated with a little bit of darkened white glue in the resin joint. You will also need to consider your painting style in the sequence.
Whenever kit parts (struts, braces, tanks) were called for and used in assembly, there were no complications at all. The surface detail is excellent and there were no bubbles found anywhere. Given the fine detail, I suspect that what happened with the rings (RP 3) is that parts are very fragile and may have gone unnoticed as damaged. In my opinion, I do not consider this situation a drawback or negative about this set at all. I would rather have the risk of finely detailed parts being damaged than having to modify heavy-handed durable materials.
I highly recommend this kit to anyone interested in building an F8F. I have been lucky enough to hear some of them fly, and I certainly could reminisce about the low fly-by sound of the intakes as I worked on the model! This set is an excellent value for the money.
Thank you again to David Lajer of Aires / Quickboost and the IPMS Reviewer Corps for the privilege of reviewing this delightful aftermarket resin set. I hope what I learned will help you!
Additional description for photos below:
- Fuselage well assembly, cleanup not complete.
- Wheel well is loose, and ready to be tweaked into position and glued with the air intake pipes aligned. RP 1 is not installed yet, but will go into the fuselage, joining with the forward pipe.
- Fuselage well assembly showing surface details, cleanup and final detailing not complete.
- Note wheel well slot on left is unmodified, slot on right accommodates resin wheel well.
- Comparison of modified kit with resin well.
- Cool resin on arrival!


Comments
Add new comment
This site is protected by reCAPTCHA and the Google Privacy Policy and Terms of Service apply.
Similar Reviews