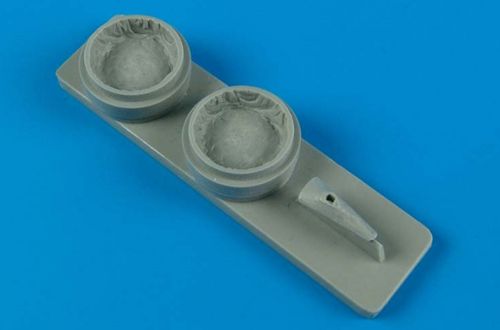
Curtiss P-40B/C Wheel Bay Set
Aires has provided a resin wheel bay set for the Curtiss P-40B/C (recommended kit – Airfix Curtiss Hawk 81-A-2). This includes both main wheel wells and a canvas cover for the tail wheel support. When the early Curtiss P-40’s left the factory, they had a canvas cover in the wheel wells that kept debris from entering the wing. From what I have read, it was common that this was removed by the crew chiefs when the planes reached the front lines. It may not be easy to check, but try to for the plane you are modeling. All three Aires resin pieces were cast without any flaws and were easily removed from the casting with a razor saw.
Aires’ instructions have you remove the Airfix wheel bay walls; using some snips, I was able to do this quickly, as the Airfix plastic is soft. Scraping with a curved X-acto blade cleaned up the area. That’s all the Aires instructions tell you to do, but the resin part will not allow the wing halves to close. You will have to sand quite a lot off and I have one photo that shows how much has to be removed from the Aires resin part, as well as some grinding on the wing lower inside surface. You will need to sand the resin wheel bay with a curve to match the wing’s curve so the upper wing will fit. You will also need to sand a taper on the resin wheel bay to match the taper on the wing from the root toward the wing tip. Finally, there is a taper that needs to be sanded from the thicker wing’s leading edge to the thinner wing’s trailing edge. It took me an hour, going slowly, dry fitting as I went along, finally to get the wing halves to close properly. Knowing what and how to do it allowed me to do the other side in just over 15 minutes. I have one photo showing the Airfix kit wheel bay as they offer it and another with the Aires resin wheel bay in place.
By comparison, the resin tail wheel cover is a piece of cake. Cut it out, clean it up, and glue it on the model. There is just one fly in the soup, so to speak. Aires does not provide any tail wheel doors. You have three options. First, you can cut off the tail wheel doors from Airfix part 11B and glue them on to the Aires resin part. Second, you can take Airfix part 4B, the closed tail wheel doors, use a rat-tail file to thin the inside surface, cut them apart, and then glue them to the Aires part. Third, you could just make your own out of some thin sheet plastic.
I’m afraid I cannot recommend this resin wheel bay set by Aires for the average modeler. While it does add detail in comparison to the kit wheel wells, the directions and the effort required to achieve a good fit make this a set for experienced modelers. Additionally, casting the tail wheel cover with doors attached, or just including the tail wheel doors as separate parts, could possibly have been better. I’m not saying don’t buy this product, but you as a consumer should be aware of the challenges associated with it.
I want to thank IPMS/USA and Aires for the chance to review this product.


Comments
Add new comment
This site is protected by reCAPTCHA and the Google Privacy Policy and Terms of Service apply.
Similar Reviews