
Cockpit for B-57G Night Hawk
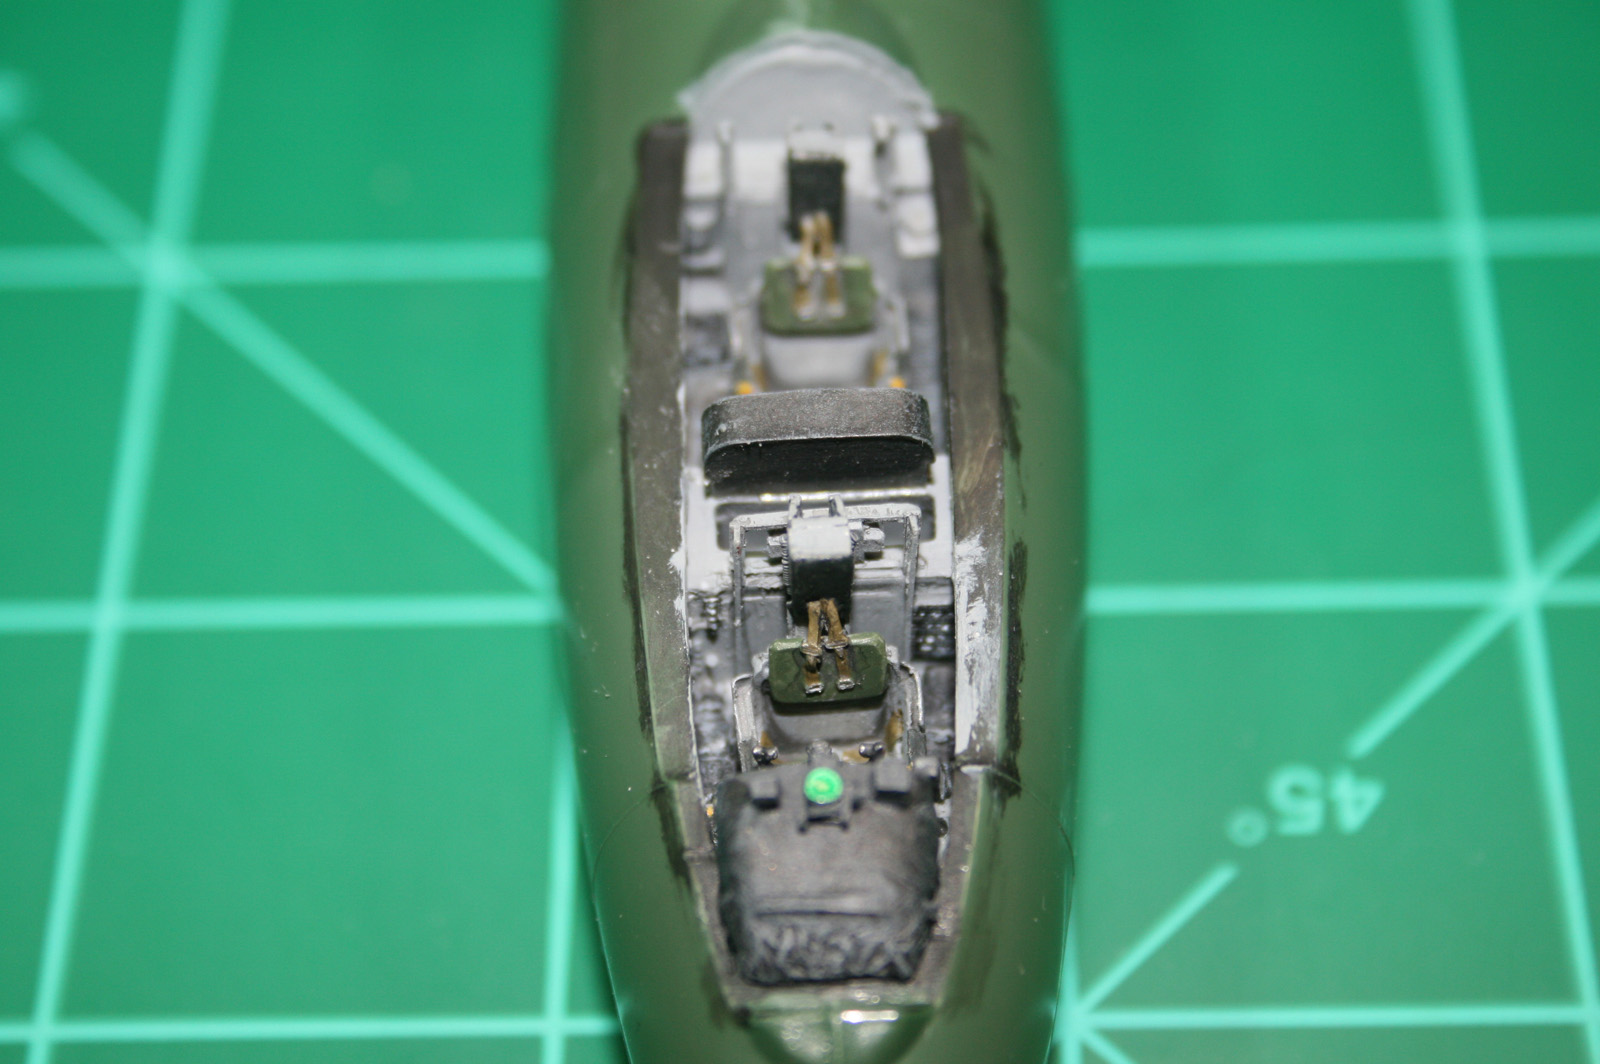
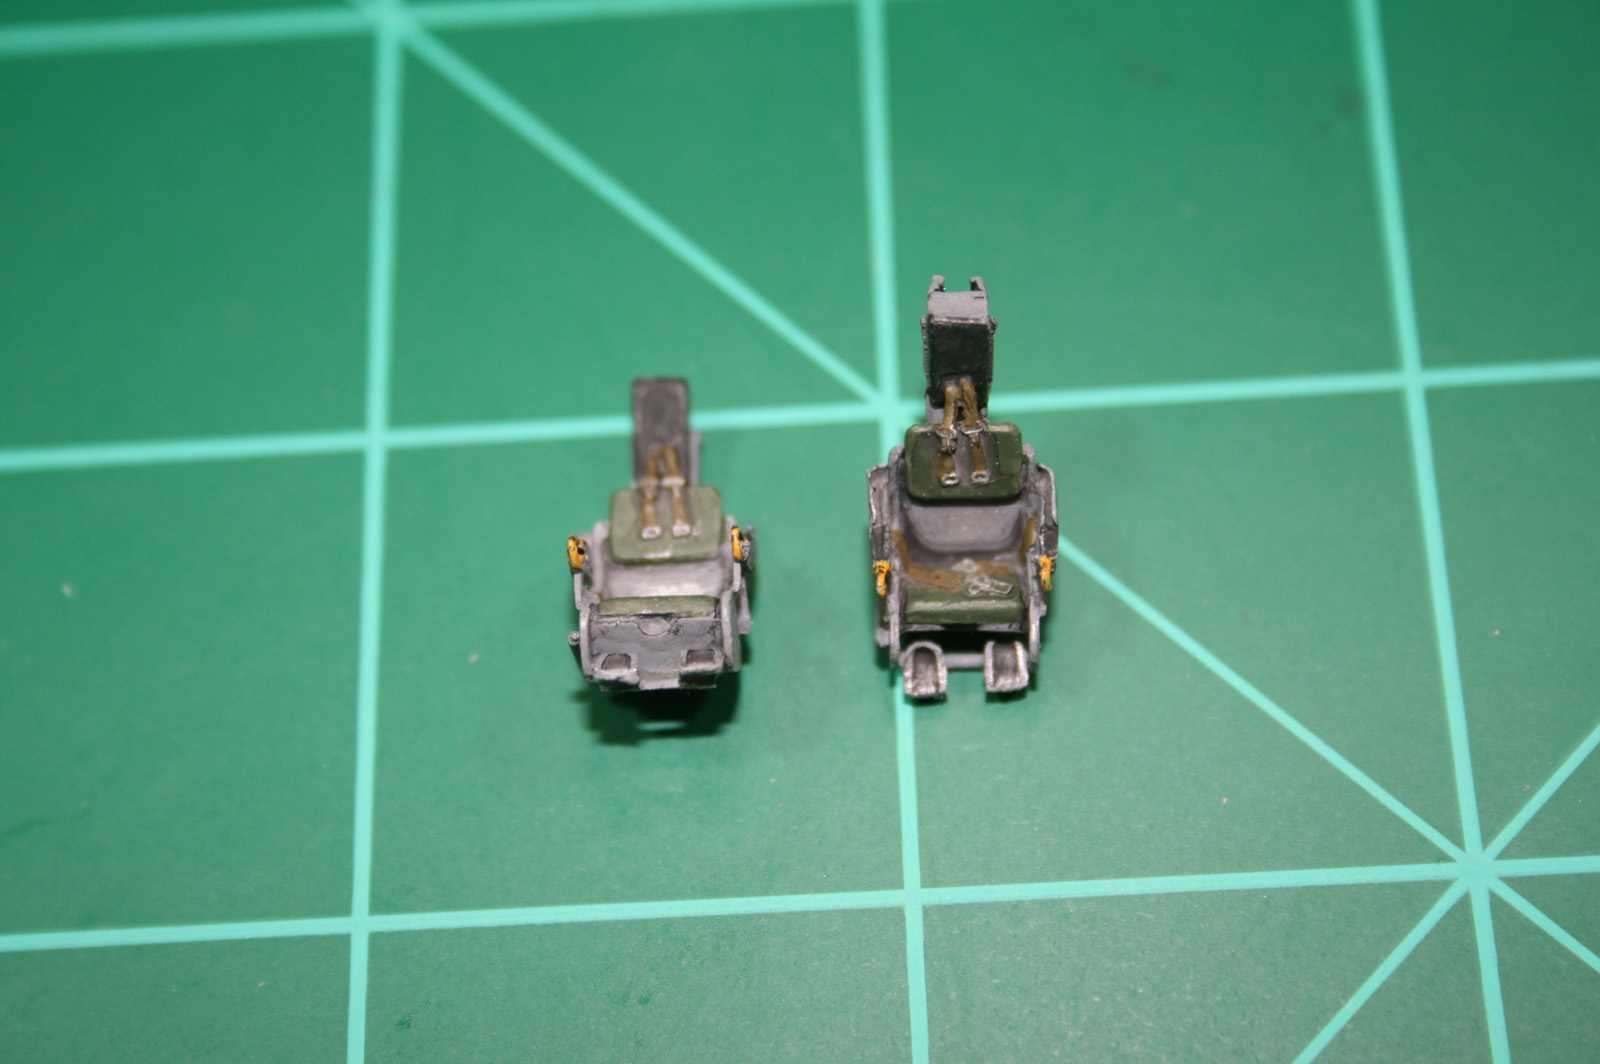
This set is a replacement cockpit for the Italeri B-57G Canberra night strike aircraft cockpit. It is well cast in a medium grey resin with no pinholes or short casts. Light flash was present on a couple of the parts but was easily removed. It should be noted that care must be exercised when removing the pour plug from the bottom of the cockpit since, if you remove the plug completely up to the level of the bottom of the cockpit, the resulting floor of the cockpit is very thin. The set consists of the cockpit tub with detailed side consoles, side walls, and bulkheads, two pretty accurate, well detailed seats, front instrument panel, rear instrument panel relevant to the B-57G, throttle and gear levers (very fragile), a canopy strut jack, and a canopy support bow. This last piece has an extension that rests against the top center of the middle canopy bow. This extension is very fragile and prone to breakage. However, I did not use this piece, since the pictures I have show a more angular canopy support mechanism. The instructions are typical Pavla, showing color callouts for all the parts, including the side consoles and instrument panels.
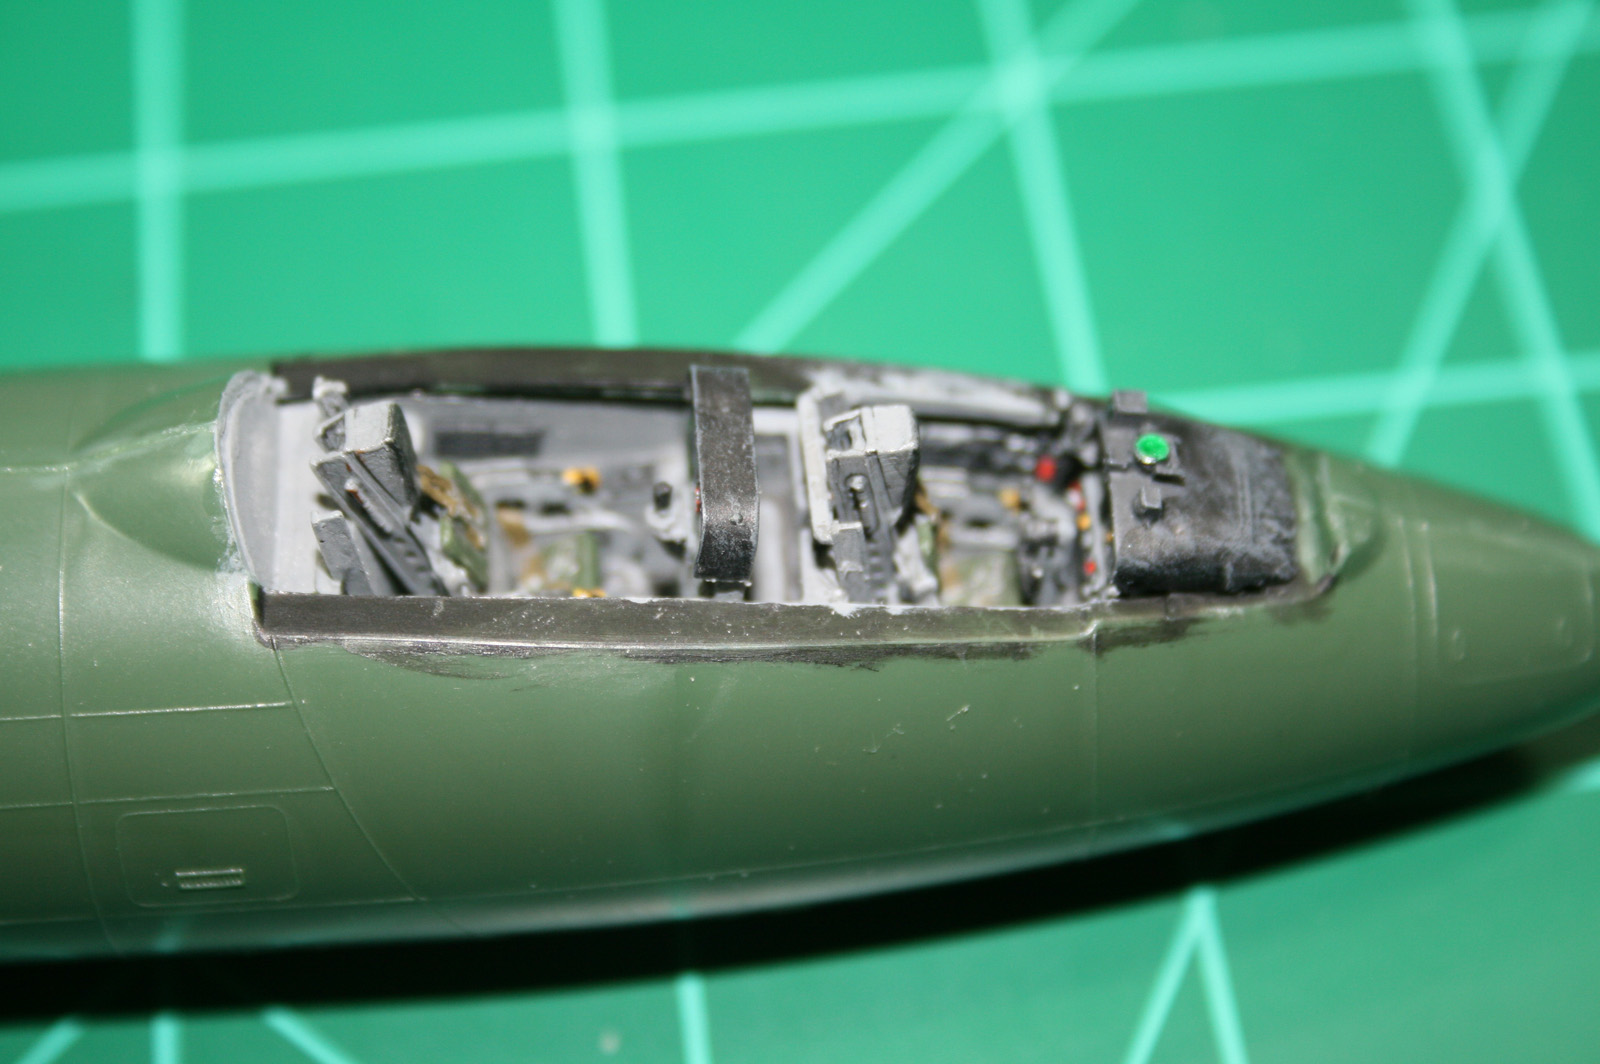
The instructions also tell you to cut out plastic at the upper rear of the cockpit area and the glare shield area at the front. Ensure you cut enough out at the back or this will force the cockpit down and create a gap around the sides. Also, the area to be cut out at the front is a little difficult to judge exactly. There are no dimensions shown for what to cut, so cut the least possible to remove the raised portion, then trim back as necessary after you put the cockpit in. If you do not mount the instrument panel/glare shield assembly far enough forward, there is not enough room between the panel and the seat for the control column. If you mount it too far forward, you will have difficulty installing the wind screen. Mine took a bit of judicious sanding of the front of the nicely molded glare shield cover and brace to get the wind screen to fit.
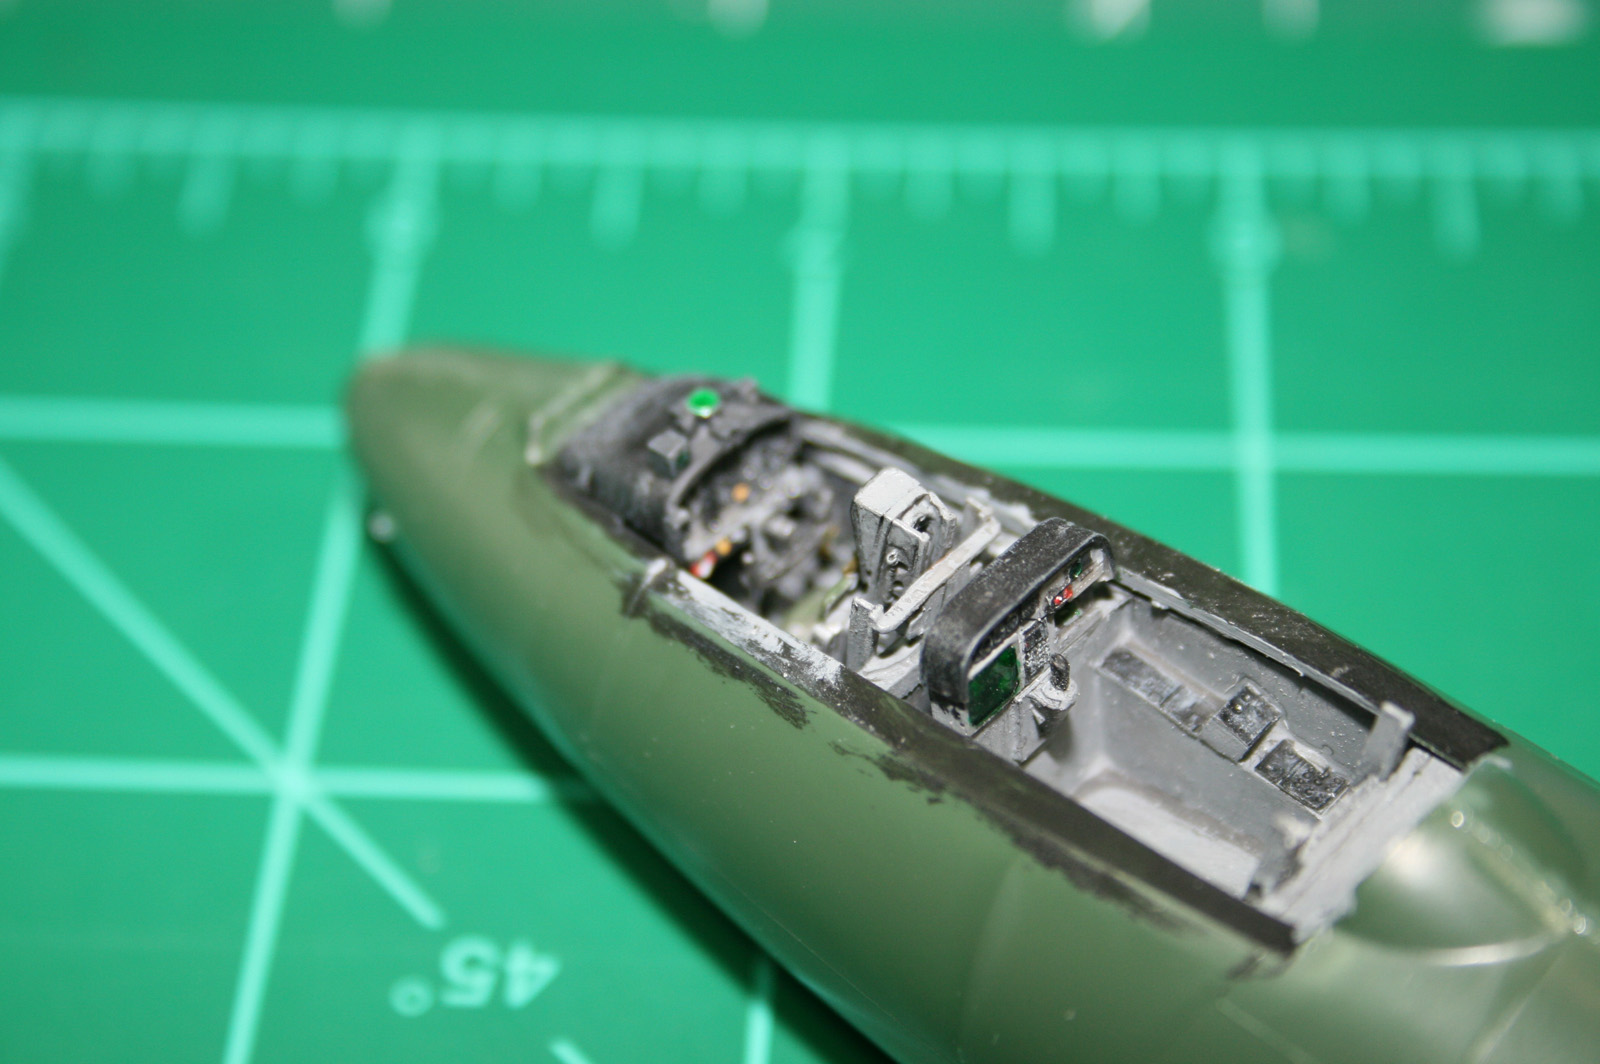
First up, naturally, is painting the cockpit tubs and consoles. I used Model Master 36231, dark gull grey for the tub, with NATO black for the side consoles and the switch and circuit breaker panels. This was followed by a dark grey wash then highlighting of the switches, knobs and handles with white, red, yellow, and grey. The instrument panels were painted in similar colors. The seats, different than the seats in regular B-57s, were painted with 36231, then various shades of olive drab and olive green for the cushions, then olive for the lap belts and grey-green for the shoulder harnesses and NATO black for the head rests. The seats were then given a dark grey wash, followed by dry brushing in appropriate lighter greys and greens and aluminum for the metal parts of the harness and areas that would be worn. The front cockpit floor does not have a hole where the control yoke goes, so one was drilled after determining how much of the floor the seat covers. I had to sand a bit off the back of the front seat to get it back far enough to get the stick between the seat and the instrument panel. Speaking of the control yoke assembly, it was painted grey, with a black yoke. There is a cable that runs from the yoke around the upright to the floor. Don’t think it’s flash and remove it. It’s supposed to be there. I painted mine very dark grey. As an aside, I will say that I very seldom use pure black for anything. I think the color difference is too stark in 1/72 and will almost always substitute a very dark grey I’ve mixed myself from 36081 with flat black added until I think it’s dark enough. I always keep a couple of variations of that around for this kind of use.
The only real difficulty I had with the set was getting the front sides of the cockpit to mate up with the plastic sides of the cockpit sills. I think it is due to not removing enough plastic at the rear of the opening. I had this problem with both cockpits I’m using (B-57B and B-57G) but I think it’s more down to my installation technique than the parts themselves.
As mentioned previously, the last piece the set would have you use is the canopy strut and cross support. The cross support is curved, whereas the pictures I find show a ‘V’ shaped cross support. I’ll be using the canopy strut and the kit cross support.
The kit has a mixture of pretty nice detail and no detail. The flaps have internal detail, the wheelwells have moderate detail, the cockpit has decent detail on the instrument panels and absolutely none on the side consoles. This set is a major improvement over the cockpit detail offered in the kit. It paints up nicely, the seats look the part, and everything taken together will make the cockpit of your next Canberra a real focal point.
Thanks to Pavla for catering to my addiction for detail and for providing the set for review. Thanks to IPMS/USA for allowing me to review it.

Comments
Add new comment
This site is protected by reCAPTCHA and the Google Privacy Policy and Terms of Service apply.
Similar Reviews