
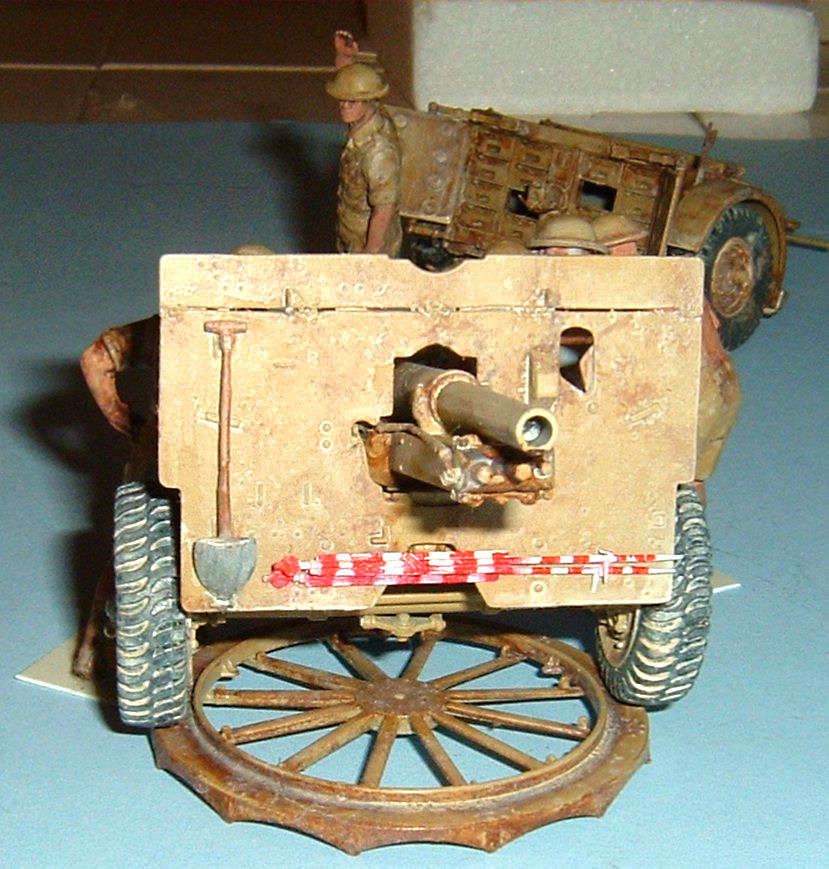
British 25-Pdr. Field Gun Mk.II w/Limber & Crew
First, I owe an apology to you and to Dragon for my delay in building and reviewing this long-overdue British 25-Pdr. QF Field Gun Mk.II w/Limber & Crew - Smart Kit. Long overdue in that this fine kit finally replaces the venerable 35+ year old Tamiya 25-Pdr. Tamiya’s kit is comparatively toy-like and its figures scale rather short, 5’2” scale troops. Its big advantage was that either separately or as a package, Tamiya also provided a Quad Gun Tractor. In just over 210 gray injection-molded parts, Dragon provides only the 25-Pdr, limber, and crew. And DML sets the bar high as this is one of the best, easiest to build artillery models I’ve had the pleasure of building.
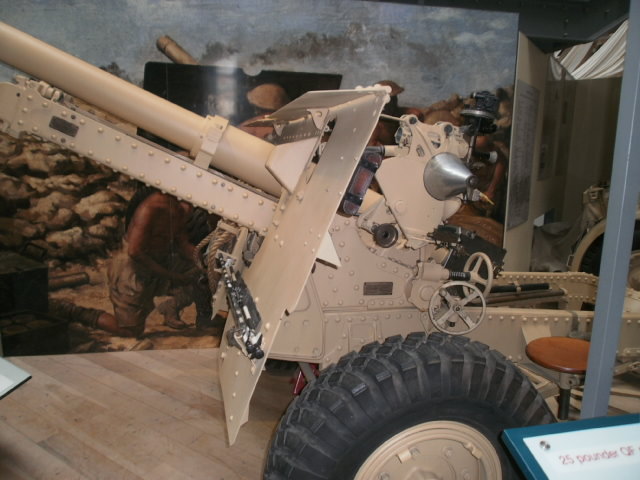
The BEF fought in France with 18/25-Pdr hybrids, as the first Mk II’s weren’t issued to the 8h Army Field Regiment, Royal Canadian Artillery, until April, 1940. The Mk II Quick Firing 25-Pdr was first used in Norway, but thereafter served as the main gun of the Royal Artillery thru WWII until it was retired from front line service in 1967, being retained for training thru 1975. The 25-Pdr could throw a shell weighing 25 pounds 10-13 kilometers. In 1942 it was adapted to add a two-port muzzle brake (though not used in the Pacific by Australian or New Zealand forces). Some 13,000 were built worldwide.
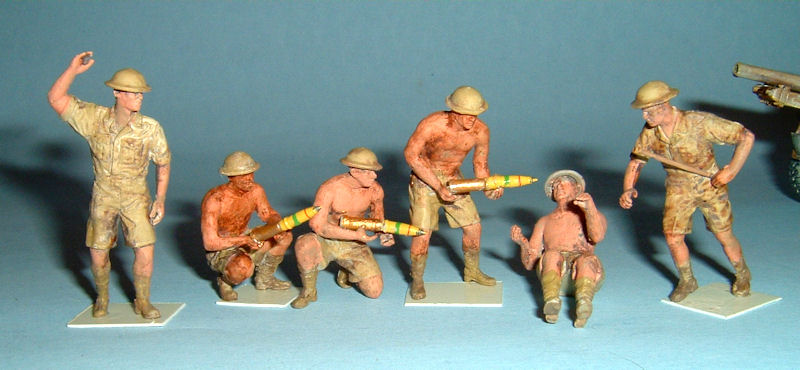
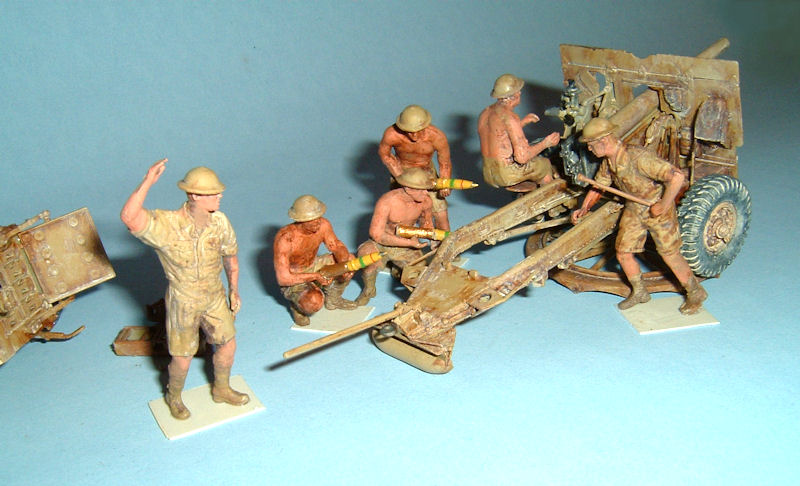
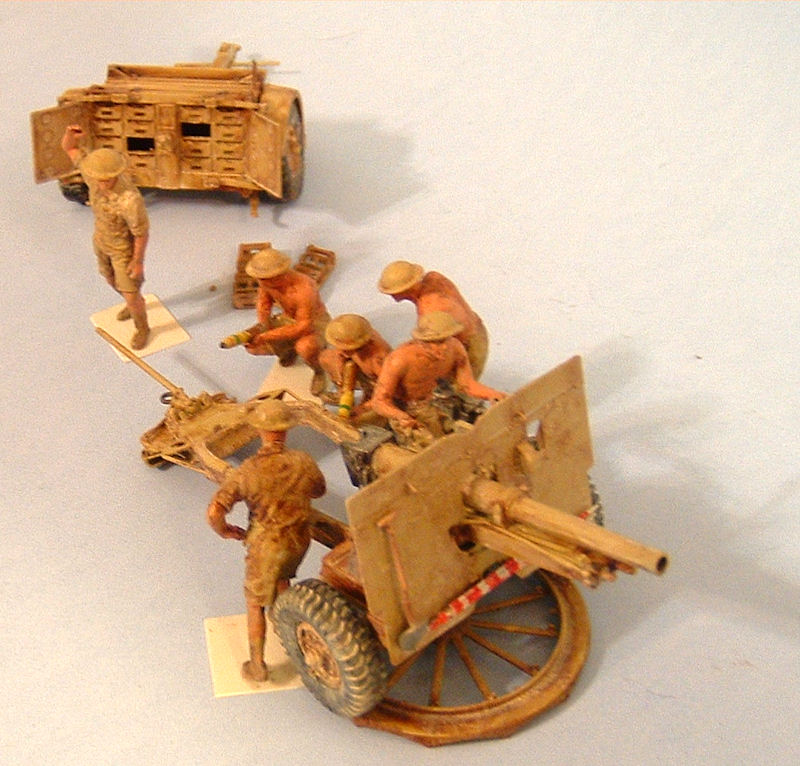
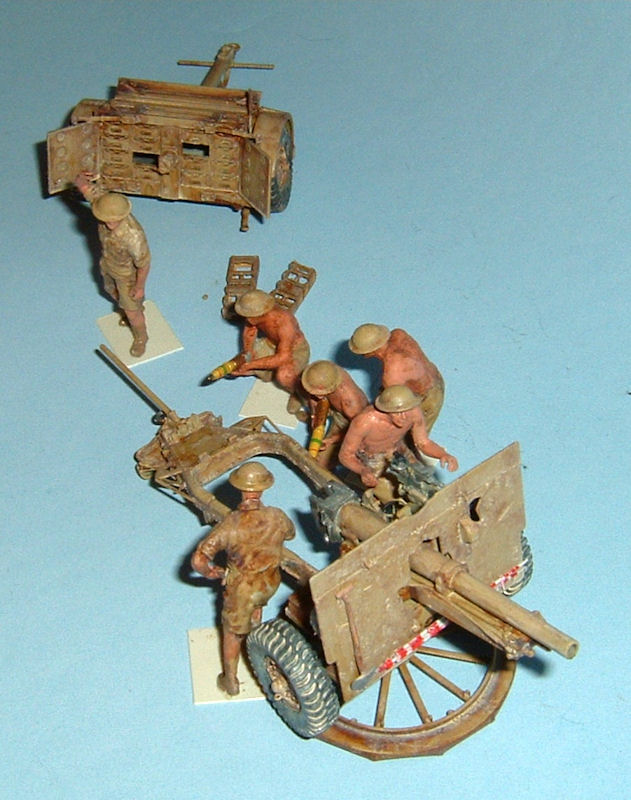
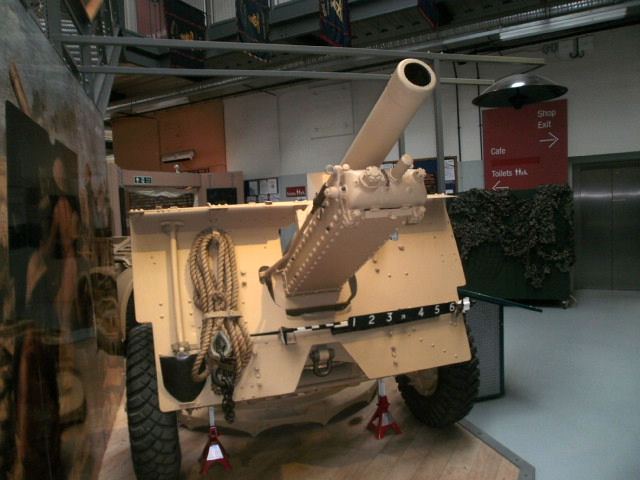
They were usually coupled to an ammunition limber, “Trailer, Artillery No. 27 Mark I” or later model. It stowed up to 32 rounds of two-round ammunition in trays. The kit provides two trays and three two-part rounds. It also provides the six-man gun crew dressed for a North African diorama scene. They comprise the detachment commander, breech operator, layer, loader, and two ammo handlers. According to the drill book, “…they positioned themselves correctly when in action… on the right, one man only, No. 2 should be operating the breech and wielding the rammer, which he normally tucks under the left arm when not in use. To the rear of the gun the No. 1, a sergeant, should be on one knee or standing to take charge of the detachment, check that the cordite charge has been put in the cartridge cases which are shown to him before loading, and to indicate the state of his gun to the battery command post by the position of his right arm. When firing in the normal indirect role the detachment would often stand rather than kneel, and it would be unusual to have an officer with binoculars in the gun pit, except during the closing stages of a desperate anti-tank action, in which event he would be helping a depleted detachment to load or lay the gun.” Accordingly, Dragon allows you to pose the crew properly, with the loader and two handlers sticking the two part rounds together just before firing.
Each figure consists of six parts. Some of the heads have a multi-cut shape to mate to their necks that require care and a smidgeon of putty. They are all “flat-headed,” so must wear headgear. Other reviews have pointed out that the crews’ helmets look like caricatures of the real British helmets. Specifically, the brims are way too big. Luckily, my Dragon set of British Infantry, Normandy 1944, Set no. 6212 came with two sets of helmets – one set bare, and one set with webbing. I tossed those provided by DMLs 25-Pdr and replaced them with the bare set.
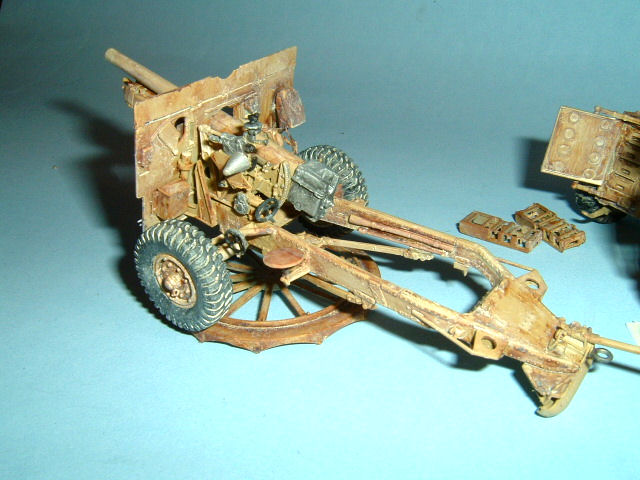
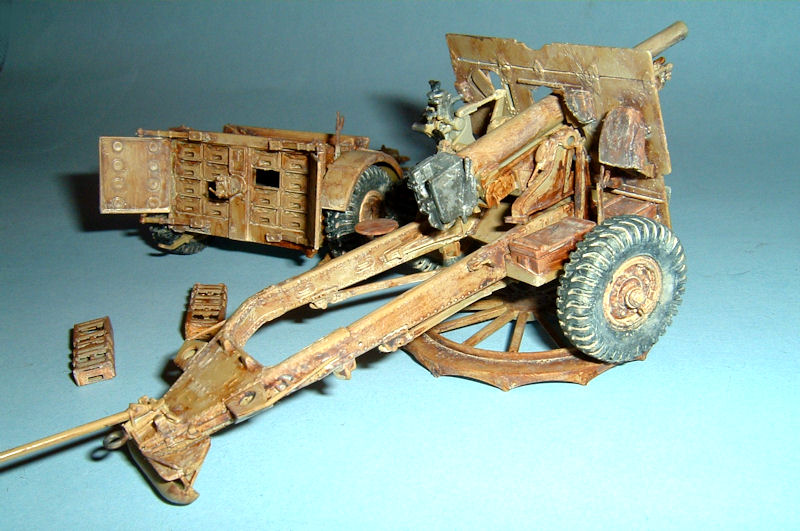
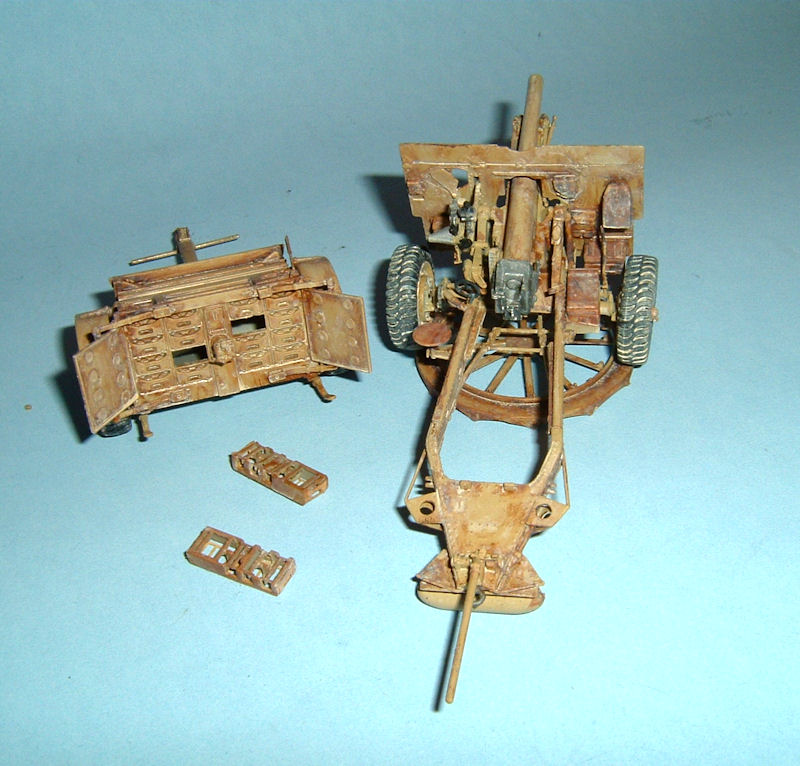
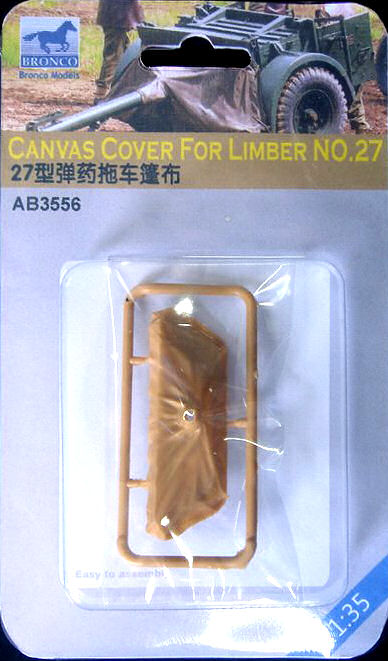
If you choose to “limber up” and pose the 25-Pder in tow, the sight should be removed and placed in the stowage box, and the whole of the sighting mechanism, breech, and muzzle should be covered with their canvas covers that you will have to create. Dragon offers the modeler a few other choices to build the model in transit mode, such as closing the doors, positioning the barrel, and the amazing circular gun platform. Bronco provides a canvas cover for the front of the limber.
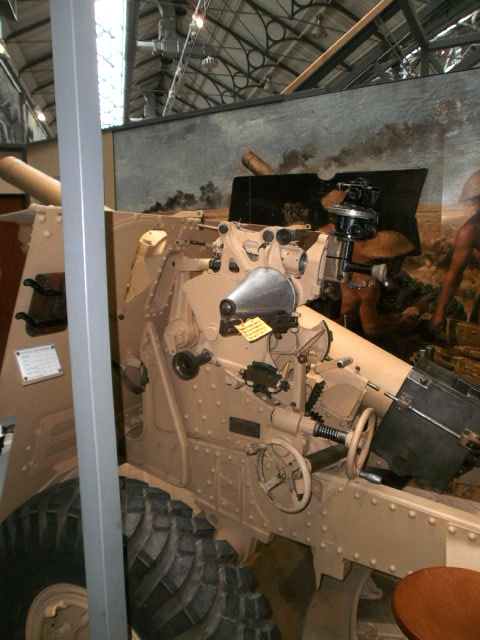
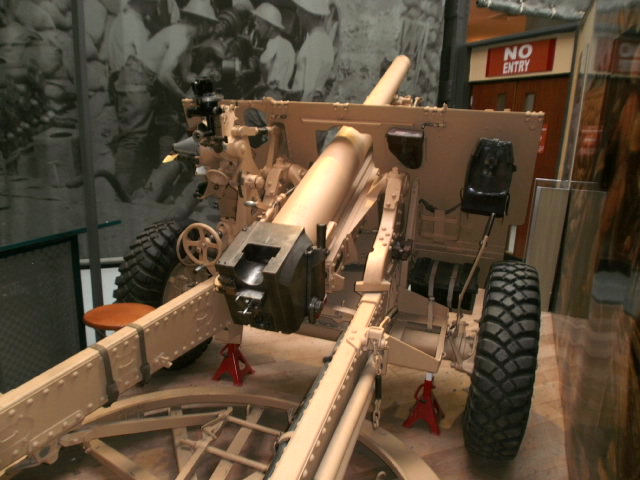
Looking at the model itself, it “…was carefully researched using original guns as references, thus giving the model unparalleled levels of accuracy. Not only is the gun precisely dimensioned and detailed, but as a Smart Kit it offers an excellent balance of easy assembly. Wherever possible, components are separated into as few pieces as possible thanks to the widespread employment of slide-mold technology.” I was impressed with the scale-thin molding of the gun shield and its molded detail. Missing is the rope attached to the front of the gun shield and seen in most photos of the 25-Pdr. You can borrow the one Tamiya provides with theirs, or fashion your own from your favorite scale rope. The separate upper shield panel can be assembled folded over, and the view port cover can be slid over to be partially or completely closed. The hollow muzzle, elevating gun barrel, tool boxes on the gun trails, gun cradle, and hand wheels are well-defined; slide-molded gun trails are beautifully detailed with crisp rivet detail throughout; separate tools are fully reproduced, nuts are sharply represented on road wheels, and tires are made from DS. The seat A34 should be painted a wood grain.
But alas, Dragon has a reputation for poor instructions, and once again they fall short. How exactly A43 and A42 fit over or under the carriage axle is a guess, as are positioning A11, A12 and A14. The only putty I needed was to help A18 blend into A45/A46 (and a little on the figures). As elsewhere, references become invaluable. Where does B2 affix onto B13? The attachments to the back of the gun shield are some of the colorful parts on the real 25-Pdr but DML doesn’t provide any color call outs. Most are leather or wood. The stowage box created by B10/B15 must be placed off to the right a little so the gun carriage has room to affix to the shield later. Get it right or it will block the wheel.
Where the tow arm E28/E32 connects to the front of the limber, as well as the wheels to their axles, the slot and tabs should have been more robust. They’re a couple of areas where I had to use cyano Zap-a-Gap cement. As simple as the limber is, it held a few challenges. First, you purists may not be happy that it is hollow. If you cement the doors open to see the ammo trays (and two empty slots), you may be bothered that there is nothing behind the trays. I believe the springs E15/E16 should be E17/E18, so dry fit to see what fits. Where exactly parts fit onto the back of the limber's wheels is hard to discern, and parts E4 and E5 need to fit centered to the limber sides so the tires will fit later.
A tiny sheet of Cartograf decals only provides for markings on the 3 rounds. I would have appreciated additional spent rounds, and unit and rank decals for the crewmen wearing shirts. A small photo etch fret is included but the parts are not critical to the build. There are no markings for the gun or limber or crew, but I imagine a little more research would have discovered colorful examples to model. Instead, painting directions are for a sand overall Unidentified Unit, British 8th Army, North Africa 1941-43 (I lightened Model Master Enamel Middlestone); and an olive drab Royal Canadian Horse Artillery, England 1940, similar to the US OD (which cannot use the figure set). DML refers to Aqueous Hobby Colour, Mr.Colour and Model Master Colors.
Dragon has indeed simplified a complex weapon and made it possible for any modeler to build it easily. With clear instructions, it would be foolproof. Looking at the old Tamiya kit’s instructions, I noted that Tamiya provided a multi-page booklet complete with photos and clear illustrations. Perhaps that’s the way to go? I can heartily recommend this kit to all experienced modelers who can afford the best. For almost $40, you get the best kit ever of the 25-Pdr and its limber and N. Africa crew, but you’d have to spend at least that much again for a state-of-the-art Quad Gun Tractor (I believe released by Bronco?).
I can’t thank DML enough for rediscovering the WWII Allies as a change from one German release after another. It would be great to see a DML Quad Tractor, or any of the still neglected Allied WWII tanks and soft skins, as well as non-German Axis vehicles. Many different Churchill variants remain to be kitted, as they did with the Sherman. In fact, pretty much all of the major English tanks and AFVs have either never been done in injection molded plastic or exist in a poor state of art that would truly benefit from Dragon’s superb quality. Imagine, all new, state-of-the-art 1/35 Crusaders, Achilles, Comets, Challengers, Archers, Bishops, a U.S M15A1 AA half track, and more! And to scale them down to Braille Scale (1/72) with Honeys, Lees and Grants, Valentines, Matildas, Humbers and Dingos, A-13s as well!
Thanks to DML/Dragon for the review sample and IPMS/USA for the review space.
References
- The 25-pounder Field Gun 1939-72, by Chris Henry, Osprey New Vanguard No. 48
- Model Maker Magazine UK October 1963 pg 504
- Military Modelling Magazine UK July 1975 pg 413
- British & American Artillery of World War II by Ian V. Hogg
- http://www.missing-lynx.com 2011 Cookie Sewell review
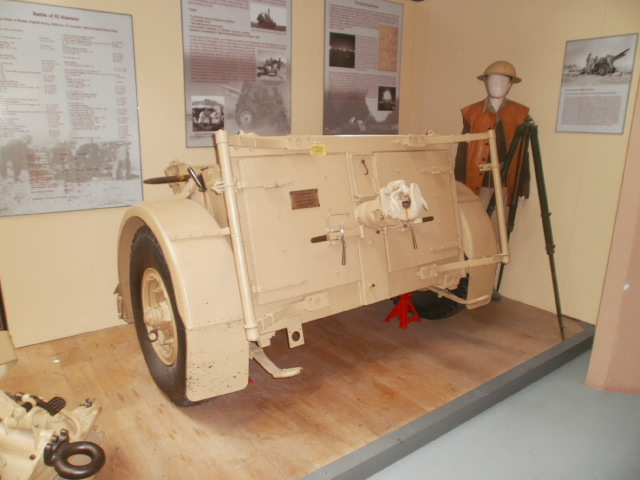
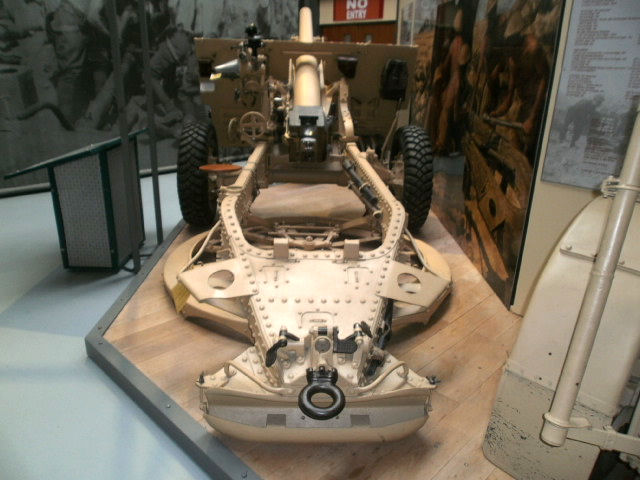
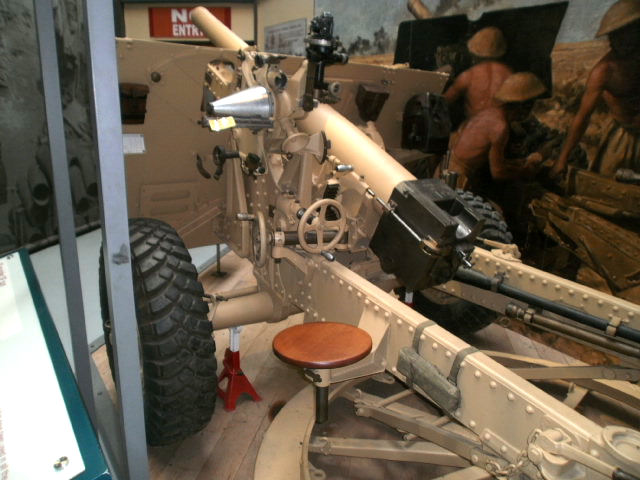
Also below are photos I took at “Firepower,” the Royal Artillery Museum at Woolich, outside London.


Comments
Add new comment
This site is protected by reCAPTCHA and the Google Privacy Policy and Terms of Service apply.
Similar Reviews