
B-47E Cockpit Set
The B-47 has long been one of my favorite aircraft. I remember the first aircraft history book I got as a kid had a picture of the B-47 taking off with RATO packs in full thrust. A very impressive picture indeed.
Looking at the plastic modeling side of the B-47, there are kits available in 1/144th, 1/72 and I believe there was a 1/48 vacuform kit also (possibly Sanger?). I’ve built the Hobbycraft/Academy kit and even in 1/144th it takes up some space in the display cabinet. I’ve also have the 1/72 Hasegawa kit in the stash for a lot of years with the full intent of scratch building a reasonable cockpit for it some day as well as re-scribing the entire airframe. I’m guessing that I’m not the only holder of this kit that is surprised by the lack of aftermarket addition/replacement parts. I would have thought that at least Eduard would have come out with some PE upgrades, but I have never seen any. True Details does make a nice wheel set, but that’s about all. Along comes Pavla and solves the issue of the cockpit with a recent (actually I think I’ve seen mention of the set for over a year) release. This cockpit set addresses both the issues of the front and rear offices as well as the area of the crew boarding hatch. They also have a nice engine upgrade set that I am in the process of reviewing.
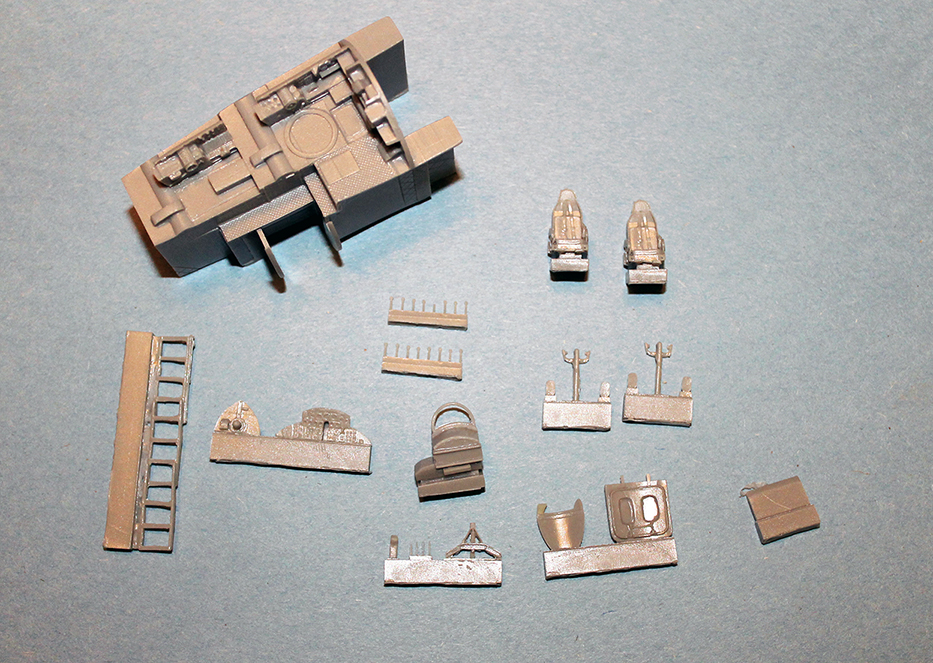
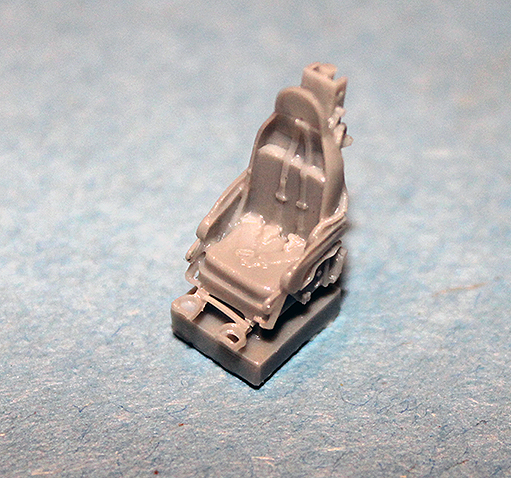
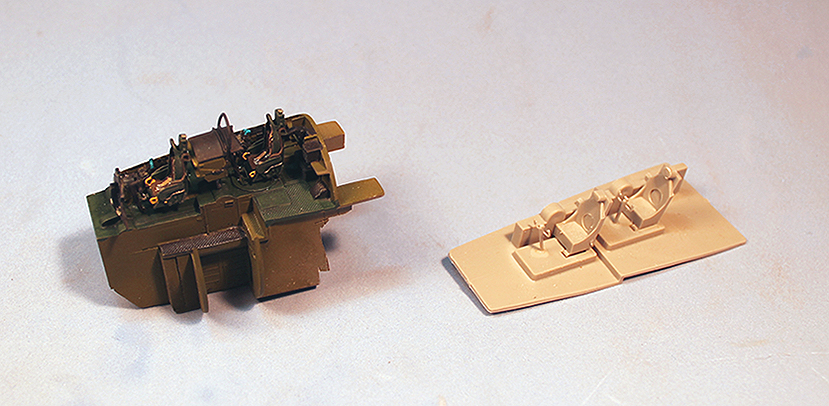
The set has a very large piece of resin that comprises the front and rear cockpits as well as the crew entry way. There are two seats, a boarding ladder, instrument panels, instrument coaming, rear deck details, control sticks, rudder pedals and various other detailing items. No part of the kit cockpit is used at all (not that there’s much there to start with). The instructions are reasonably well illustrated, but I found that they do miss a couple of major items. The set is also supposed to have a replacement vacuform canopy but my set was lacking that item. I have sent an email to Pavla in hopes of getting one.
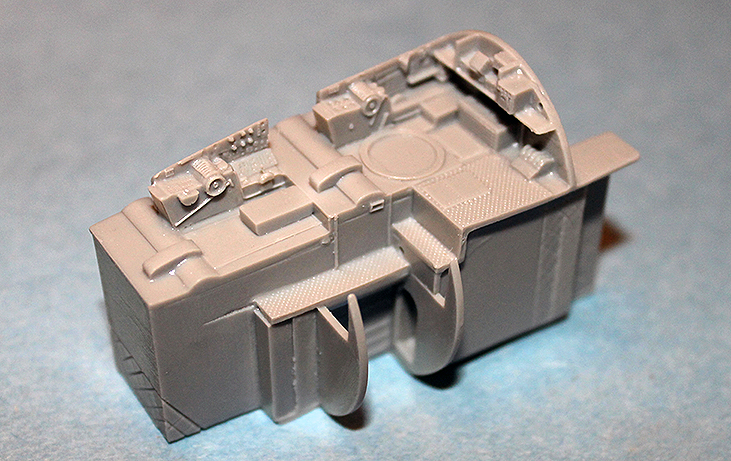
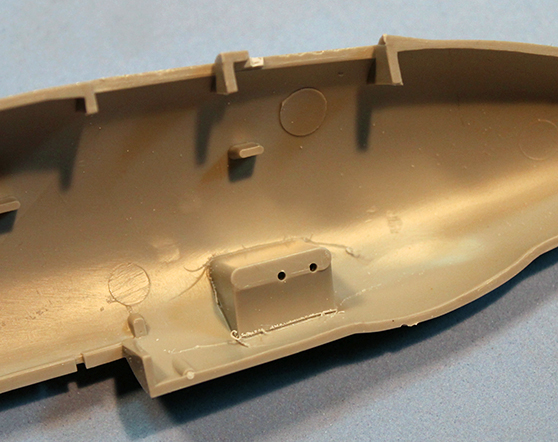
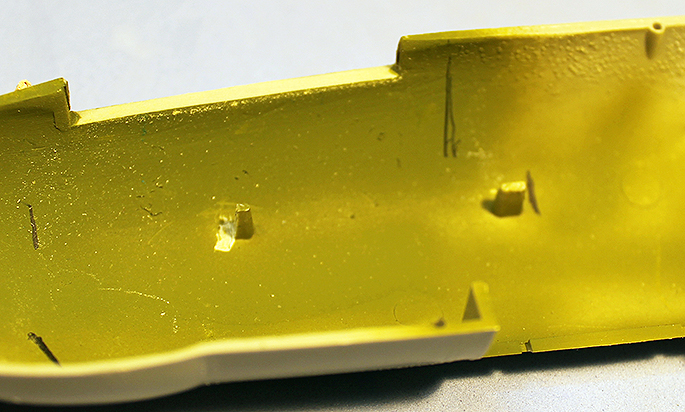
The main resin block has several areas with an XXXX pattern on them that are to be carved/sawed away to allow it to fit into the contours of the fuselage. This can be readily accomplished with a coarse toothed razor saw. The instructions define these areas and also show the areas of the plastic fuselage that must be removed. I found out later, while fitting the completed cockpit, that sanding the cockpit side openings a bit wider will make alignment and placement much easier. One of the big exclusions in the instructions pertains to the crew entry hatch, located on the lower left front side of the left fuselage half. Hasegawa has cast this entry way as a sealed box, but the Pavla set allows a direct view from the cockpit down to the entry, as it was on the real aircraft. A little surgery on the fuselage using scribers, X-Acto blades and some files has this obstacle cleared pretty quickly. It is also very important to not remove the kit cockpit location/attachment tabs as the resin block uses these for proper placement. This is noted in the instructions.
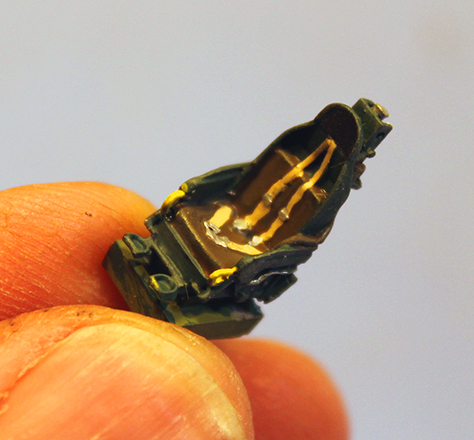
I opted to paint everything an interior green color for the base, as most photos I found appeared to be that shade. I then found some additional info that a darker green, similar to bronze-green, on the cockpit floors and seat frames and made that change. The seats are the same for both the front and back cockpits and paint up nicely. Again, a multiple of colors for the seat pads was found but I went with a simple green/drab color. They are cast with seat belts in place as well as various hoses and adjustments knobs on the seat frame. All pop out nicely with some careful painting, dry-brushing and a dark wash.
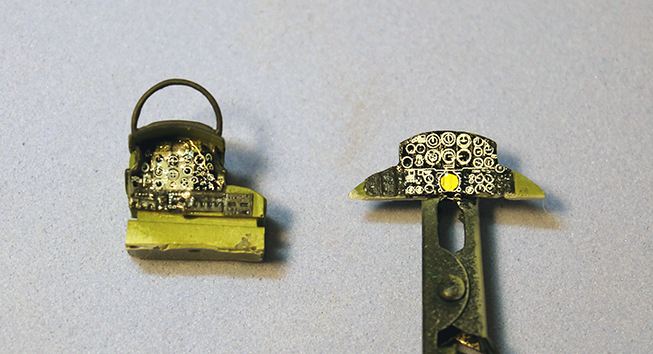
The instrument panels have lots of individual instruments cast into them and are nicely detailed, but it would be quite a task to paint each one or cut out individual decals for each one. I opted to dig through the decal stash and find some 1/72 instrument panel decals that were reasonably close to the cast configuration (close is a relative term based on your requirements for complete accuracy). The panels were painted interior green and black, covered with a coat of future and then decaled. Overall I was happy with the end result as not too much can be seen of the panels once installed in the fuselage. Some PE, with printed acetate gauges would have been a nice addition.
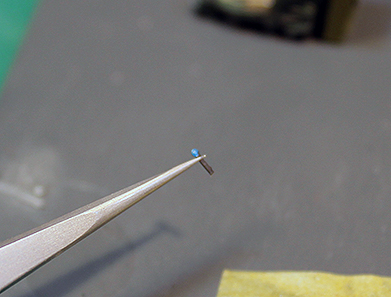
One of the more tedious and difficult portions of this build was cutting and attaching each of 12 throttle handles (6 in front and 6 in back). Each approx. 1mm in length throttle lever must be cut from the casting block (not getting lost in the process) and then glued to the cockpit side panel in a shallow slot. The thickness of these levers is greater than the associated slots so the attachment is tricky. Again, I think these might have been better served with PE, just to reduce the width. I somehow managed to get them all in place and in a reasonable semblance of alignment with one another.
The rudder pedals are also small individual pieces, but with very nice details. These should be glued in prior to installing the seats and instrument panels as access is then limited (ask me how I came to know this!).
The front instrument panel is a fairly small item but has only one attachment point to the main resin cockpit block. Not such a big deal, but, the rear instrument panel incorporates all of the firewall and such that separates the two cockpit and is a much larger, heavier piece. After several times of trying to glue it in place, again at a single point I resorted to drilling and pinning it with some small diameter brass rod. This did help immensely with the stability of the join.
There are no holes in the cockpit floor to define the location of the control sticks so I chose to drill a small recess (once the seats and IP’s were in place) to give this a more positive attachment point. The seats are also left to be aligned via the Mk I eyeball as there are no location marks or pins. With a little time and some slow setting super glue, it can all come together with some dry fitting, pre-planning and patience.
When I was fitting the cockpit block into the fuselage I found that the walls for the crew entry hatch didn’t align properly with the fuselage opening. I had to cut back the front cockpit mounting tabs to allow the entire assembly to slide around a bit for proper alignment. I ultimately also had to remove a little more resin from the bottom of the main block, but all of this was done in a few minutes.
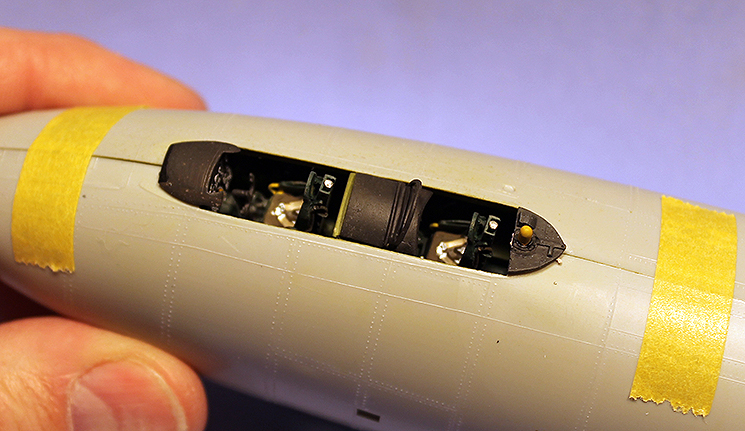
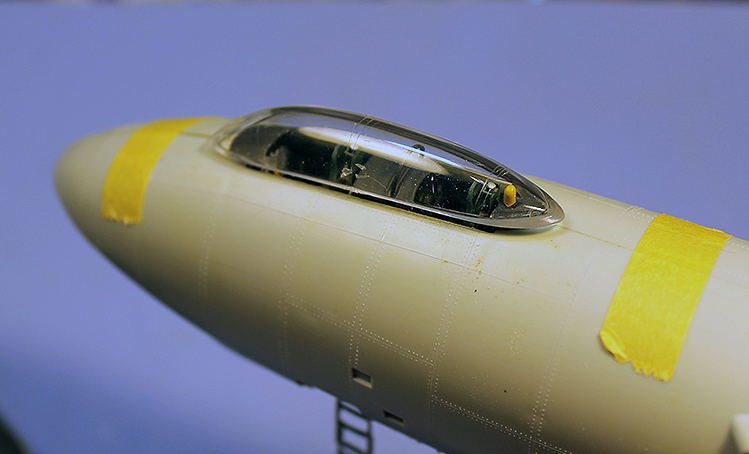
Once the fuselage halves are joined (using tape in my case as I haven’t yet rescribed the fuselage) you find that the majority of this fine set is barely visible! The difference that you can see, is a vast improvement over the standard kit parts. At this point the front instrument coaming and panel behind the back seat are placed on the fuselage. I tried to place the kit canopy over these items but the kit glass is very thick (equivalent to ~4.5 inches in scale!) to rest properly on the fuselage. Here is where the need for the vacuformed canopy comes in. The collapsible boarding ladder is much more accurate than the kit item also and nicely sets off the crew entry way. When looking at the photo of the kit cockpit and the Pavla offering next to one another, there is a world of improvement for a little bit of work.
Overall this set breathes new life into the old Hasegawa kit in a big way (at least for me as cockpits are one of my favorite items on models). Anyone with a little experience in working with resin should have no issues getting this large chunk of resin details into place. I would like to very much thanks Pavla for supplying the cockpit set and IPMS USA for the opportunity to build and review it!.


Comments
Add new comment
This site is protected by reCAPTCHA and the Google Privacy Policy and Terms of Service apply.
Similar Reviews