

Dave Morrissette
Reviews By Author
|
HMS X-craft Submarine Photoetch SetPublished:
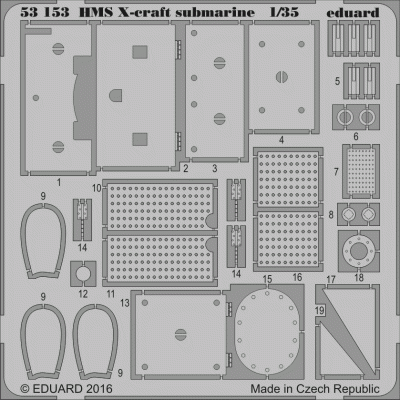
Merit quietly issued a 1/35 X-craft submarine and once I got my hands on it, I was impressed with both the molding and size of the kit. Still, there was some room for add-ons and improvements and Eduard has issued a photoetch sheet to help address some of the issues. Eduard’s sheet is composed of a single sheet with 30 superb parts. The sheet addresses the hatches on the top of the ship by replacing 6 individual parts and adding detail and texture. A little removal of the hinges and these go on smoothly. There are slight folds on four of the parts but this is easy to accomplish with a new #11 blade. Next, the kit propeller is undersized and Eduard uses the kit hub but has you wrap three individual blades around a dowel and add them to the hub. This takes a little… more |
|
LAU-10/ A ZUNI Rocket PodsPublished:
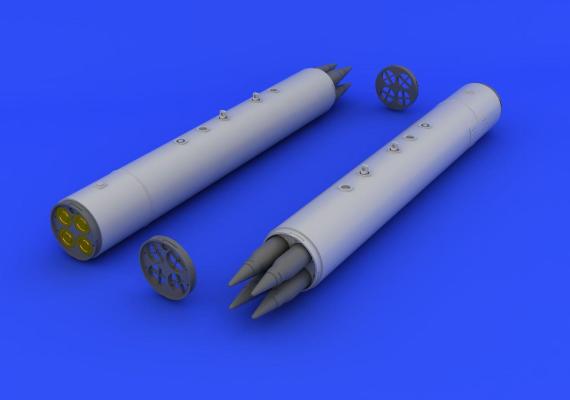
Eduard continues their additions to the 1/32 scale line of armament with a pair of resin Lau-10 Zuni Rocket pods. These pods carried our 5” rockets with folding fins. There are multiple warhead configurations for these rockets. This set comes with one option which look s like standard high explosive. The set comes with fourteen perfectly cast resin pieces, a small photoetch fret and a set of decals for both pods. Prep work is pretty straightforward as casting blocks need removed from the main body, the front and back body ends and the rocket heads. Cast into the back body end are representations of the end of the rocket and its find. There are attached with super glue and fit is good. One thing to note before committing to paint is that the resin does need a good scrubbing with… more |
|
MG 14/17 Parabellum WWI GunPublished:
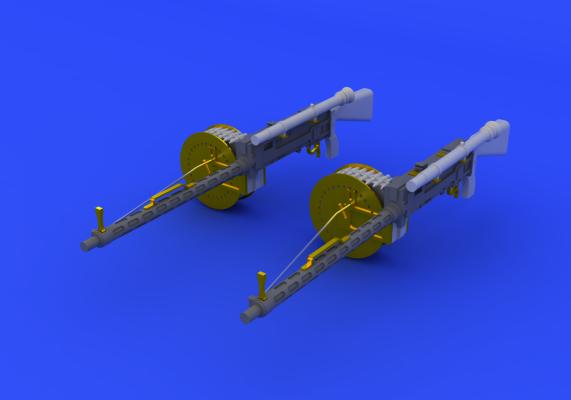
A little background. The LMG Model MG 14/17 machine gun was a 7.92mm gun used on aircraft and Zeppelin in WWI. The 17 designation means that the gun was the 1917 version of this particular weapon. MG-14/17's were used very widely on German multi-seat aircraft throughout 1917 and 1918, particularly as the weapon for the rear gunner/observer on two seat planes. Eduard has produced a resin and photoetch replacement for kit parts representing this gun. Inside the package, you get parts for two guns. The resin parts consist of the stock, the gun itself, the ammo drum and the sight. The photoetch parts consist of the gun sight, handle, the sides of the ammo drum, the supports for the gun sight and the trigger assembly. Assembly takes some caution. The resin parts need to be… more |

|
EA-18G Growler Anthology DecalsPublished:
As the Navy transitions away from the venerable EA-6B’s into the new EA-18G Growlers, the planes have started to get more elaborate markings and kits have become available to replicate the plane. Hasegawa took their excellent F-18F kit and has issued several iterations. Maybe it is just me but most of the aftermarket decal companies have been slow to respond to some of these new releases. Fortunately for us modelers, Furball Aero-Designs is not one of those and has great new releases. This one is for the Hasegawa kit and includes a whopping 12 wonderful growlers and has enough decals to actually build two full planes. Let’s look at what’s inside the package. The first thing you notice is that all instructions are full color and well printed. Each of the 12 planes has a left and… more |
|
OV-1D ScoopsPublished:
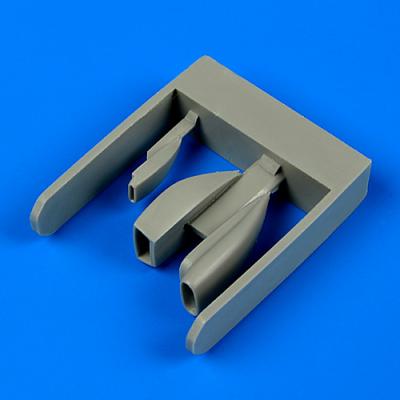
When I first saw that these were released, I was a little confused as they had previously released set 48585 which was a set of scoops. The confusion was solved with a little research. The initial release was for the OV-1 early versions while these scoops are specific to the OV-1D Roden release. Problem solved but there is no mention of which is which on the either set so modelers will need to do the research. On to the parts review. The set includes three scoops with no seam lines and deep insets. Casting is perfect and removal is simple with a saw blade. Installation is also simple with one scoop on the left by the cockpit and the other two on the top of the fuselage. There is an excellent note explaining which Quickboost parts replace which kit parts. As you can see by the… more |
|
Soviet Fighter Pilot with Ejection Seat for Su-27Published:
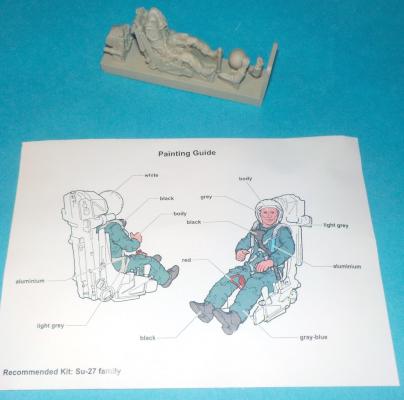
Aires and Aerobonus fill another gap with a Soviet pilot in a K-36 ejection seat meant to be added to Trumpeters very large 1/32nd Su-27. The set includes five well-cast resin pieces - two arms, the head/helmet, the top of the ejection seat and the seat/pilot figure. Preparation is simple, remove the parts from the casting blocks and add the top of the seat and the two arms. There were small amounts of putty at the arms- I used Squadron white putty smooth with lacquer thinner. The head can be kept separate for painting if you like, or glued in place. I primed the piece with Alcad gray primer, cleaned up a few seam lines, primed again, and set aside to dry. Since the pilot is attached to the seat, I actually started by painting the seat with a base coat of black. I then… more |
|
B-25B Doolittle RaidPublished:
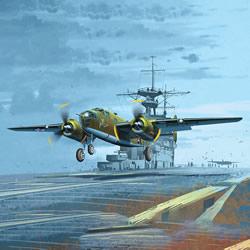
Academy has rereleased the Accurate Miniatures 1/48th scale B-25B in Doolittle Raid markings and it is a welcome sight as this kit was getting rarer as the days passed. Inside the box, you get all the plastic parts associated with the initial release as well as a decal sheet covering all 16 planes. The parts are well molded and even 12-15 years later, they are flash free and excellent. The clear parts are superb also. I will forgo the history as most are well aware of the raid by Lt. Col. Doolittle and his pilots and there are many excellent references and even some fun movies referring to the raid. I have wanted to build this kit for a while ever since trading it off to a friend a while back and jumped at the opportunity to build it. I did include two parts of… more |

|
A-6E TRAM Masking SetPublished:
Masking sets started to show up 10-15 years ago and the first sets were cut vinyl, which worked well on certain things but had difficulty bending around corners and staying in place. Eduard solved this problem a while back by going to low tack yellow tape that is sticky enough to fit into corners and stay put while painting is going on but still leaves no residue. There are precut and usually fit a specific kit. This set fits HobbyBoss 1/48 A-6E TRAM kit and allows masking of several different parts. First, solid masks are included for the two large front windows. The small sides to the front and the main canopy have parts that provide a sharp out frame. The instructions say to mask with liquid masking and this works but I have also used Tamiya tape and that works also. … more |

|
F-86 Ultimate SabrePublished:
In the last several years, Eduard has had great ideas by taking well done kits from certain manufacturers, adding their beautiful photoetch, masking sets and Brassin resin to it and issuing it as a complete set. This is one of those kits and it is a winner! What you get in the package is Hasegawa’s excellent 1/48th scale F-86 Sabre with a masking set for the wheels and canopy. Also included are excellent resin castings for the ejection seat and two frets of photoetch. One is colorized and is used to detail the cockpit with seat belts, multipart instrument panels, and other small parts. The second fret is not colored and contains replacement parts for the canopy deck and details, more seat details, and other smaller bits. Also included is an excellent color instruction guide and decals… more |
|
A-6E TRAM Interior ZoomPublished:
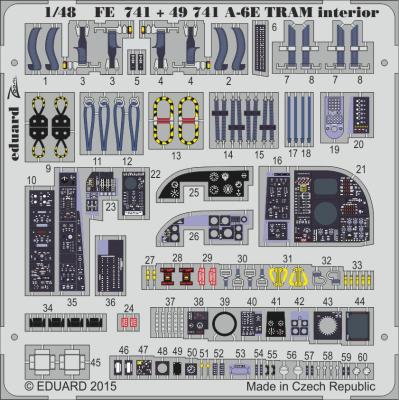
Eduard offers their photoetch in a couple different formats for those that haven’t had the pleasure. They offer the Big Ed sets which are full meal which include multiple frets, masking sets and many, many parts for those that want the ultimate detail on their kits. They also offer the sets in groups which include multiple frets for specific areas such as interiors, wheel wells or exteriors. Lastly, they offer “Zoom” sets which are one fret of colored photoetch to address, usually, cockpits. This set is one of the latter and addresses the kind of barren cockpit in HobbyBoss 1/48 A-6E TRAM kit which is already a wonderful kit. The set consists of one colored photoetch fret with excellent instructions which included a multipart instrument panel, multiple parts for the ejection seats… more |