
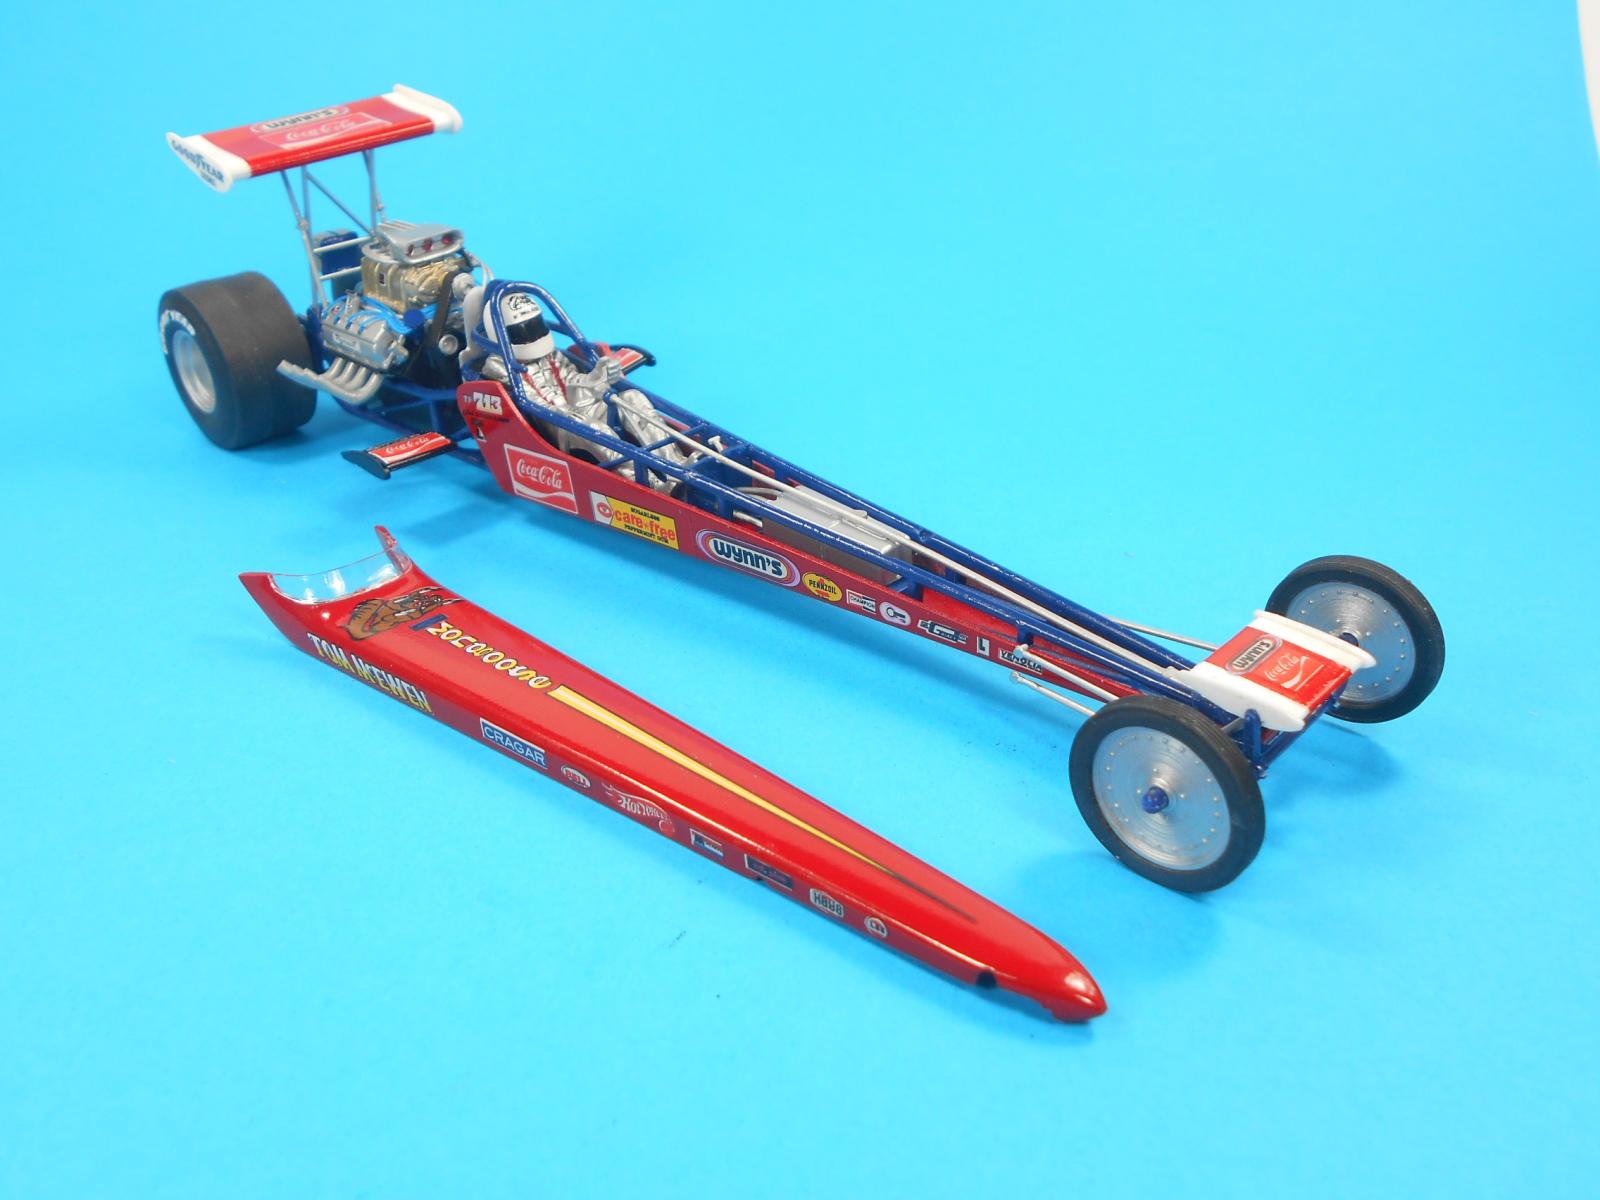
Tom McEwen's Mongoose Rear Engine Dragster
This review covers Tom “The Mongoose” McEwen’s Rear Engine Dragster kit. It’s a 1:24 Scale kit from Atlantis Models #M7529. Rescued from the scrap heap by Atlantis and re-released in 2024 it hasn’t been seen in decades. It’s not for the average builder, but with some forehand knowledge, it’s not that hard to get this nostalgic model on your shelf.
Tom “The Mongoose” McEwan was half of a tag team with partner Don "the Snake" Prudhomme that’s been called The Greatest Rivalry in Drag Racing. Known for his endless promotion, Tom ushered in a new era for motor sports when he got a sponsorship deal with Mattel’s “Hot Wheels” franchise. Aside from being NHRA winners this put the team in the hands, and minds, of nearly every boy in America. It was a stroke of marketing genius - bringing non-automotive sponsors into the sport.
The Model Kit
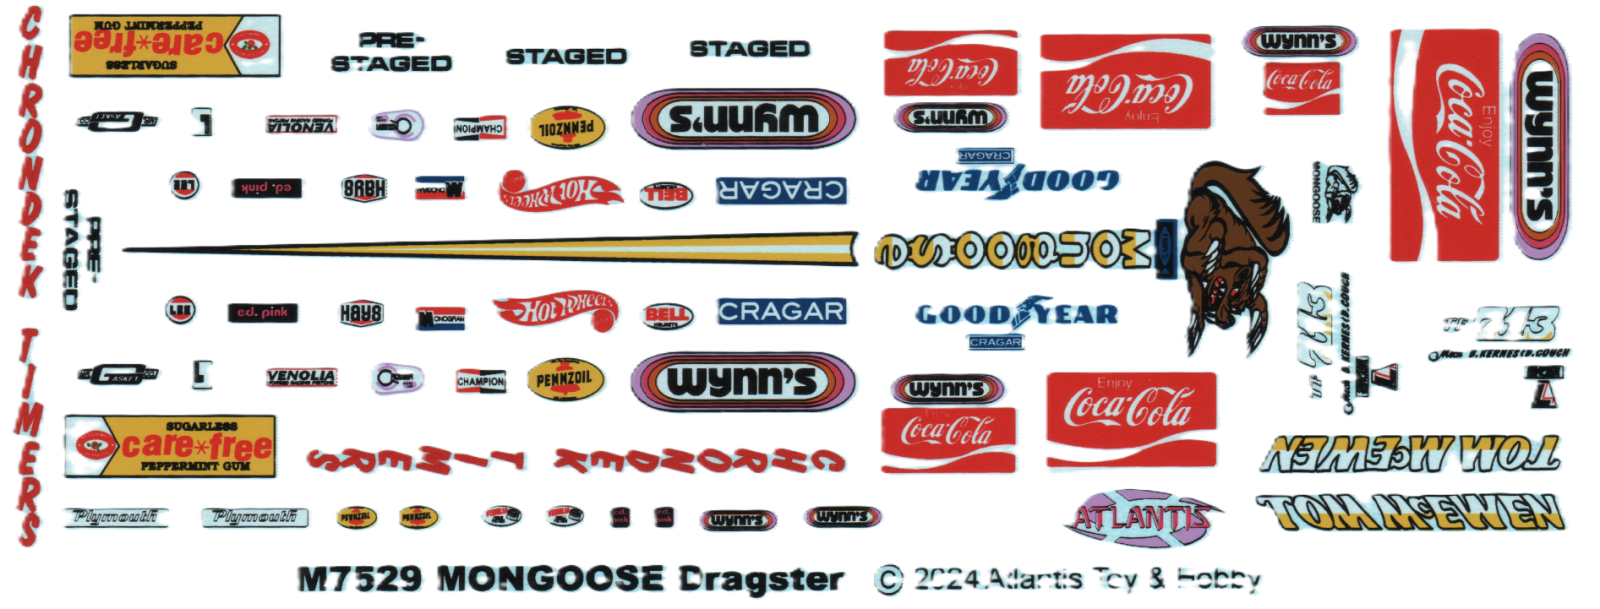
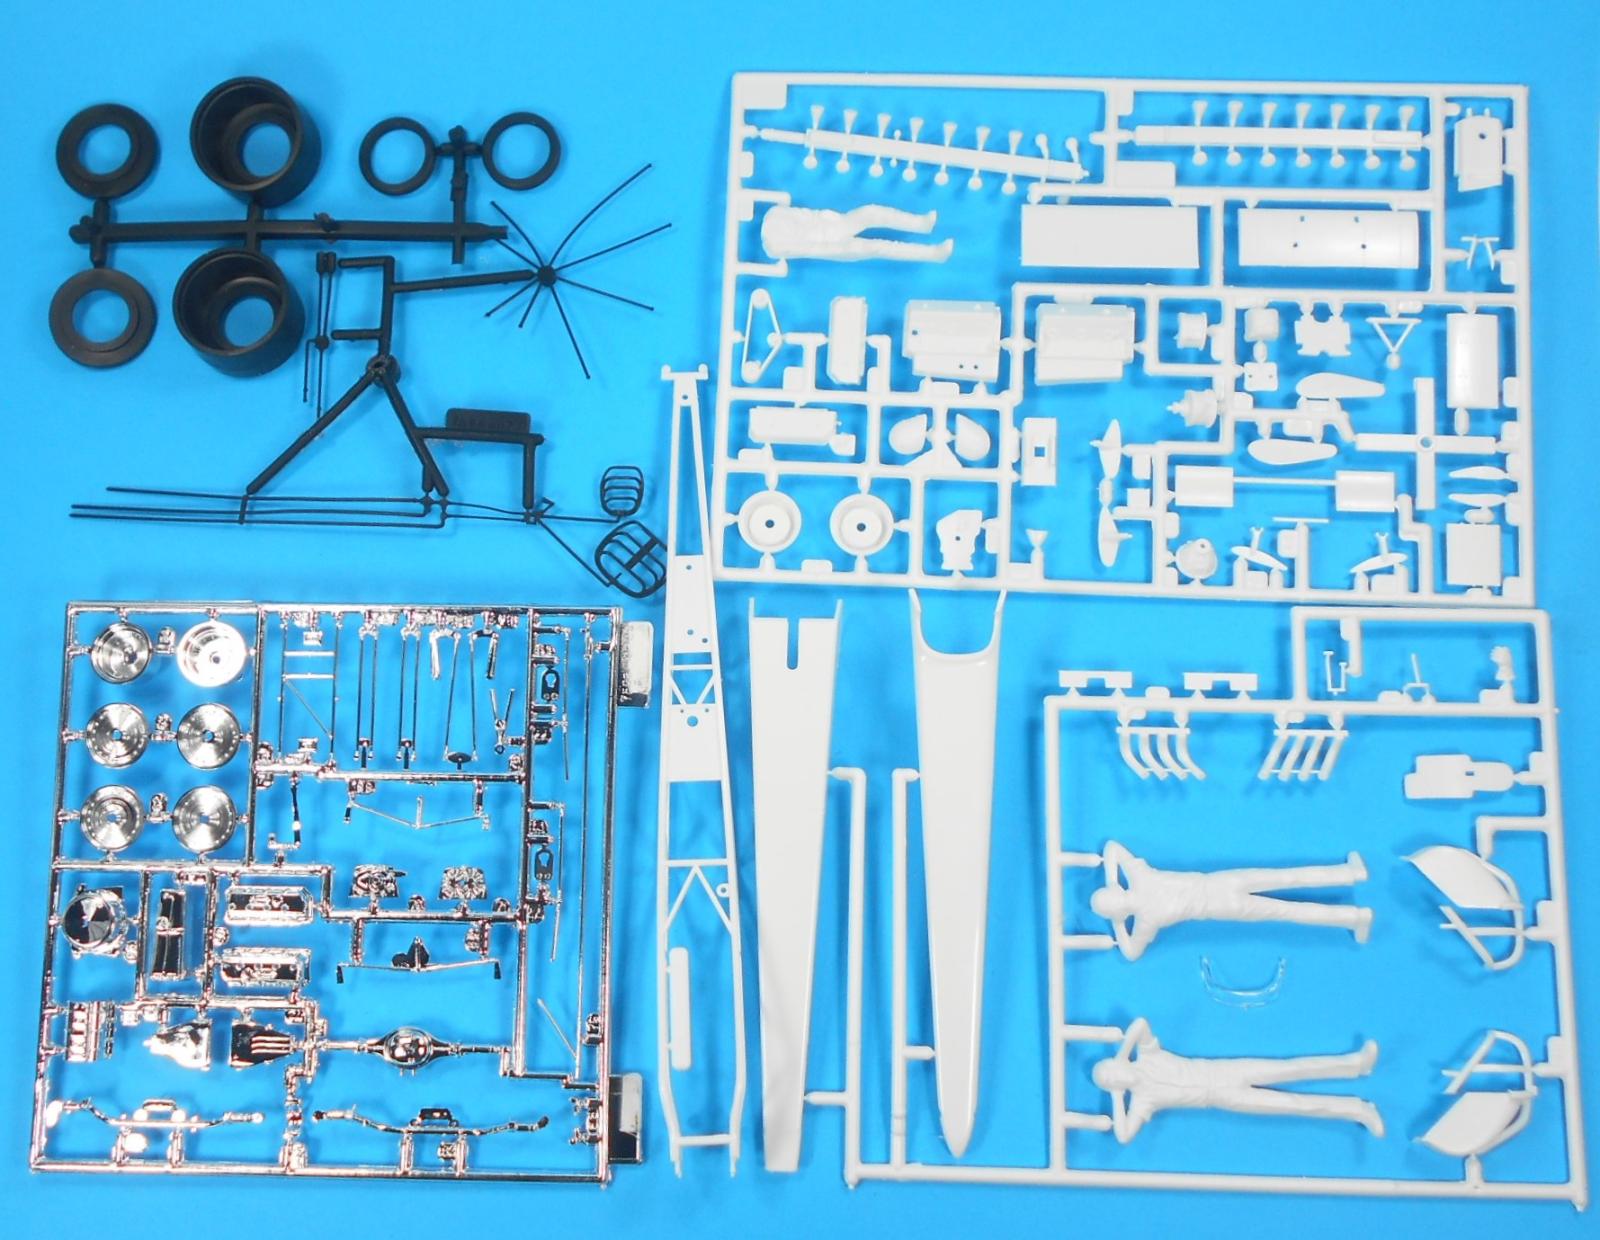
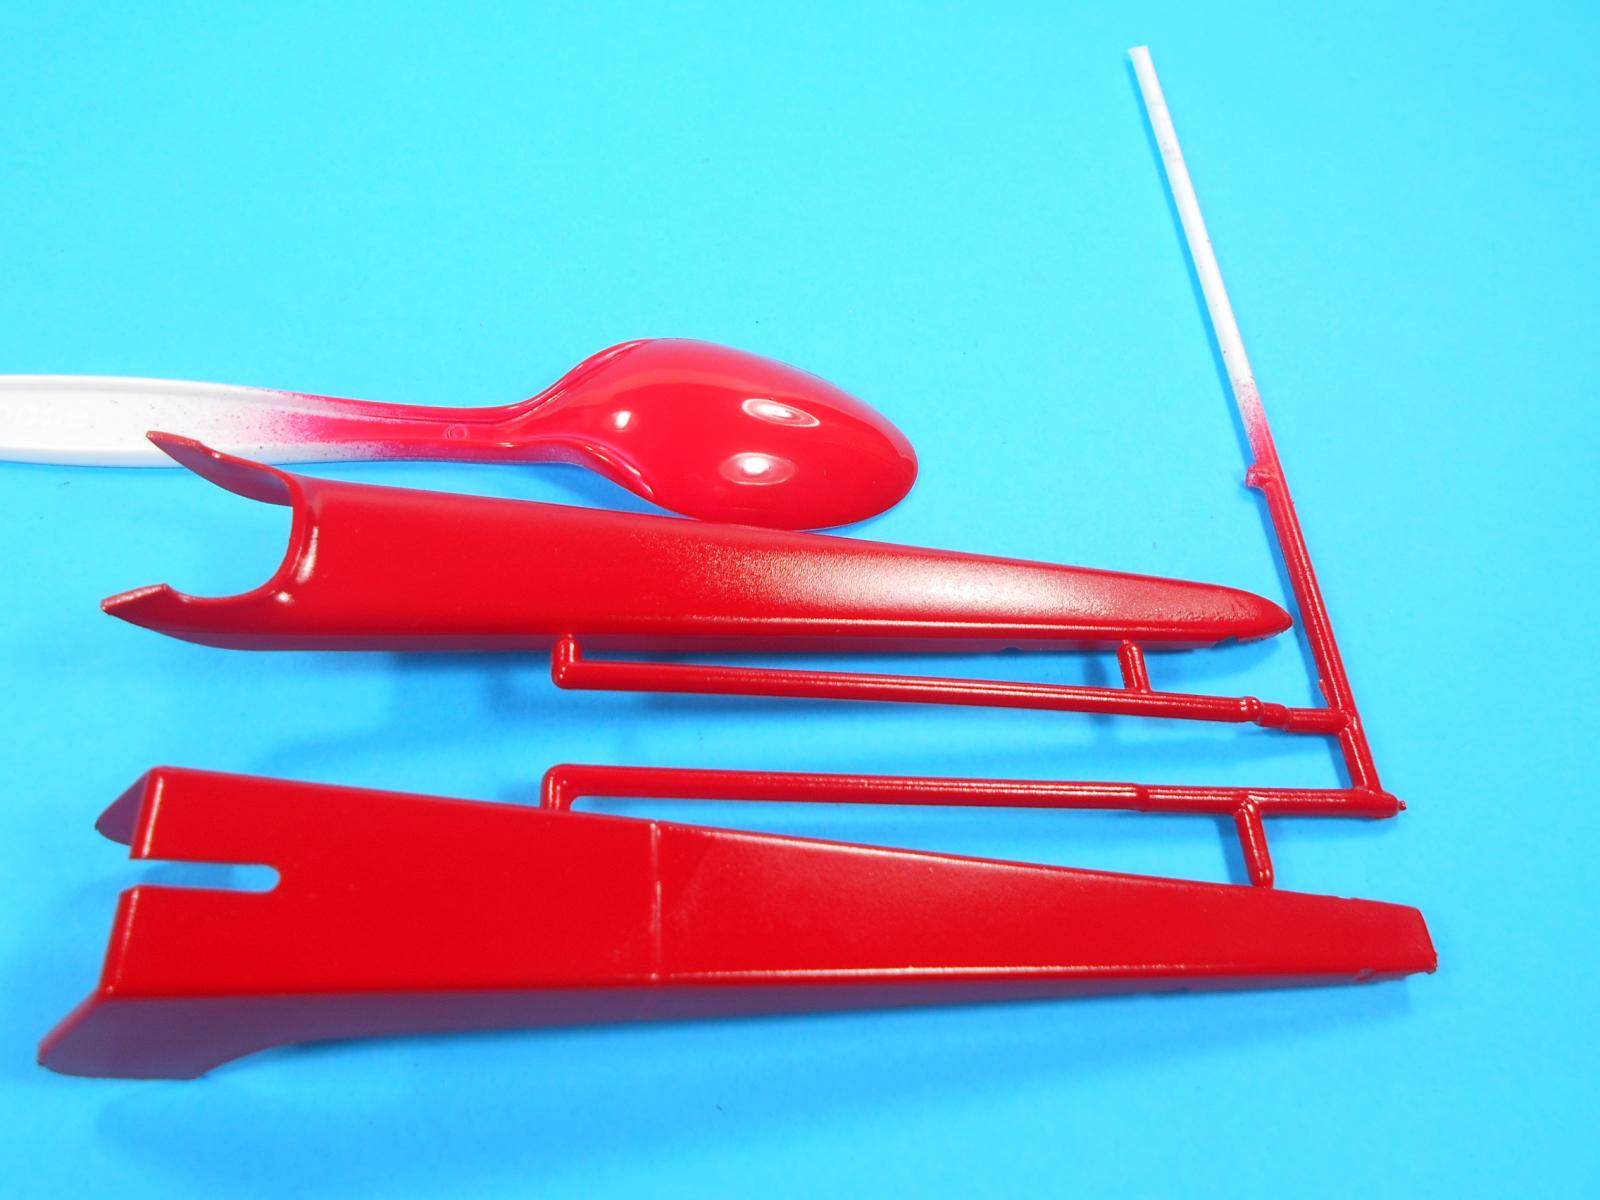
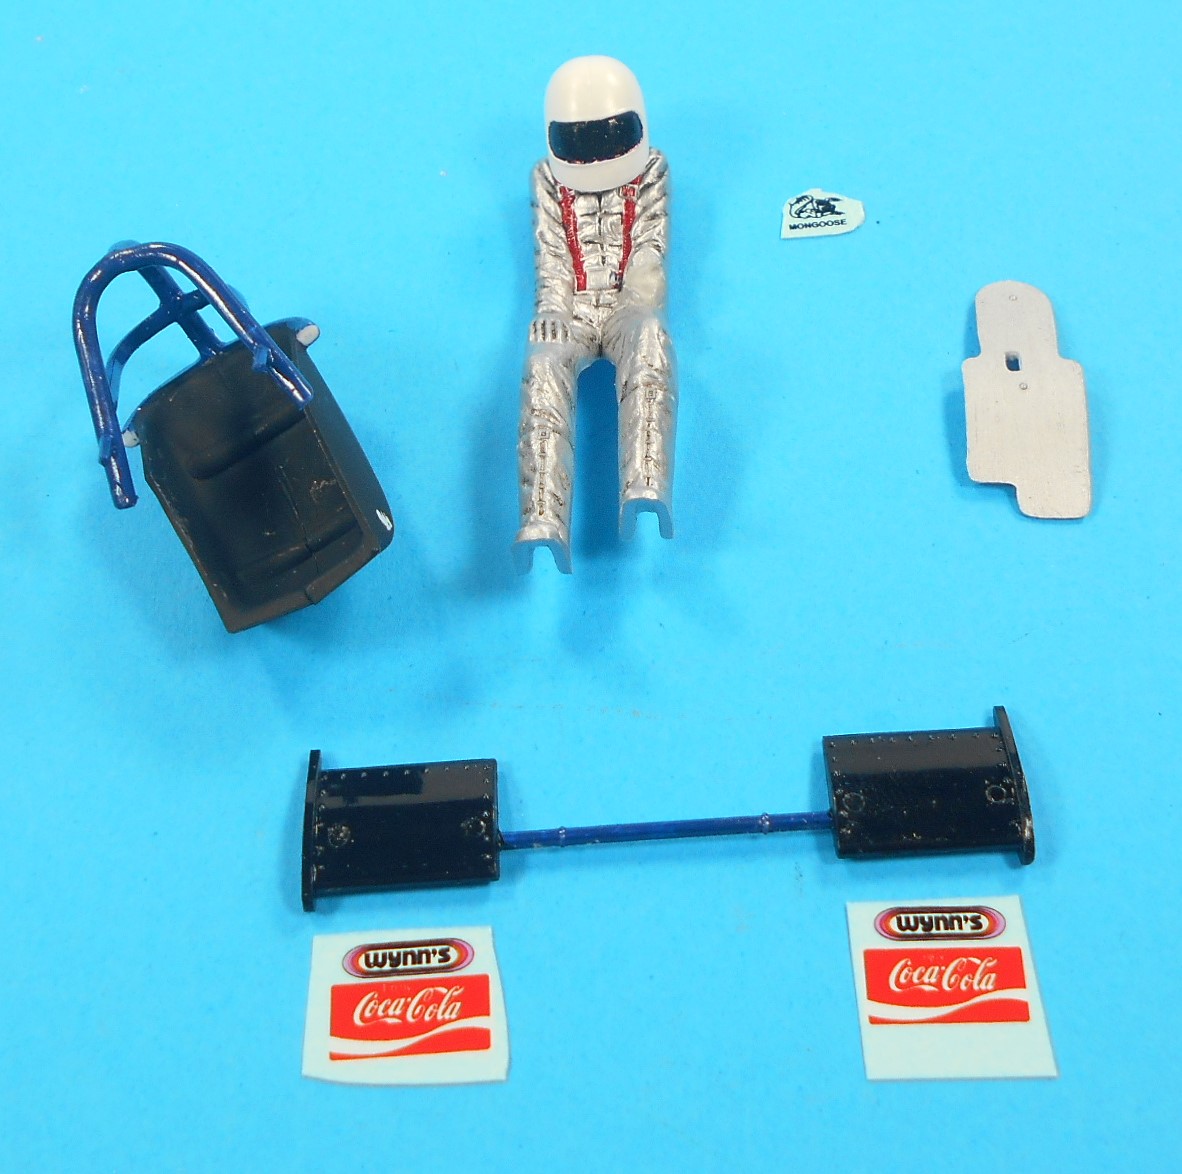
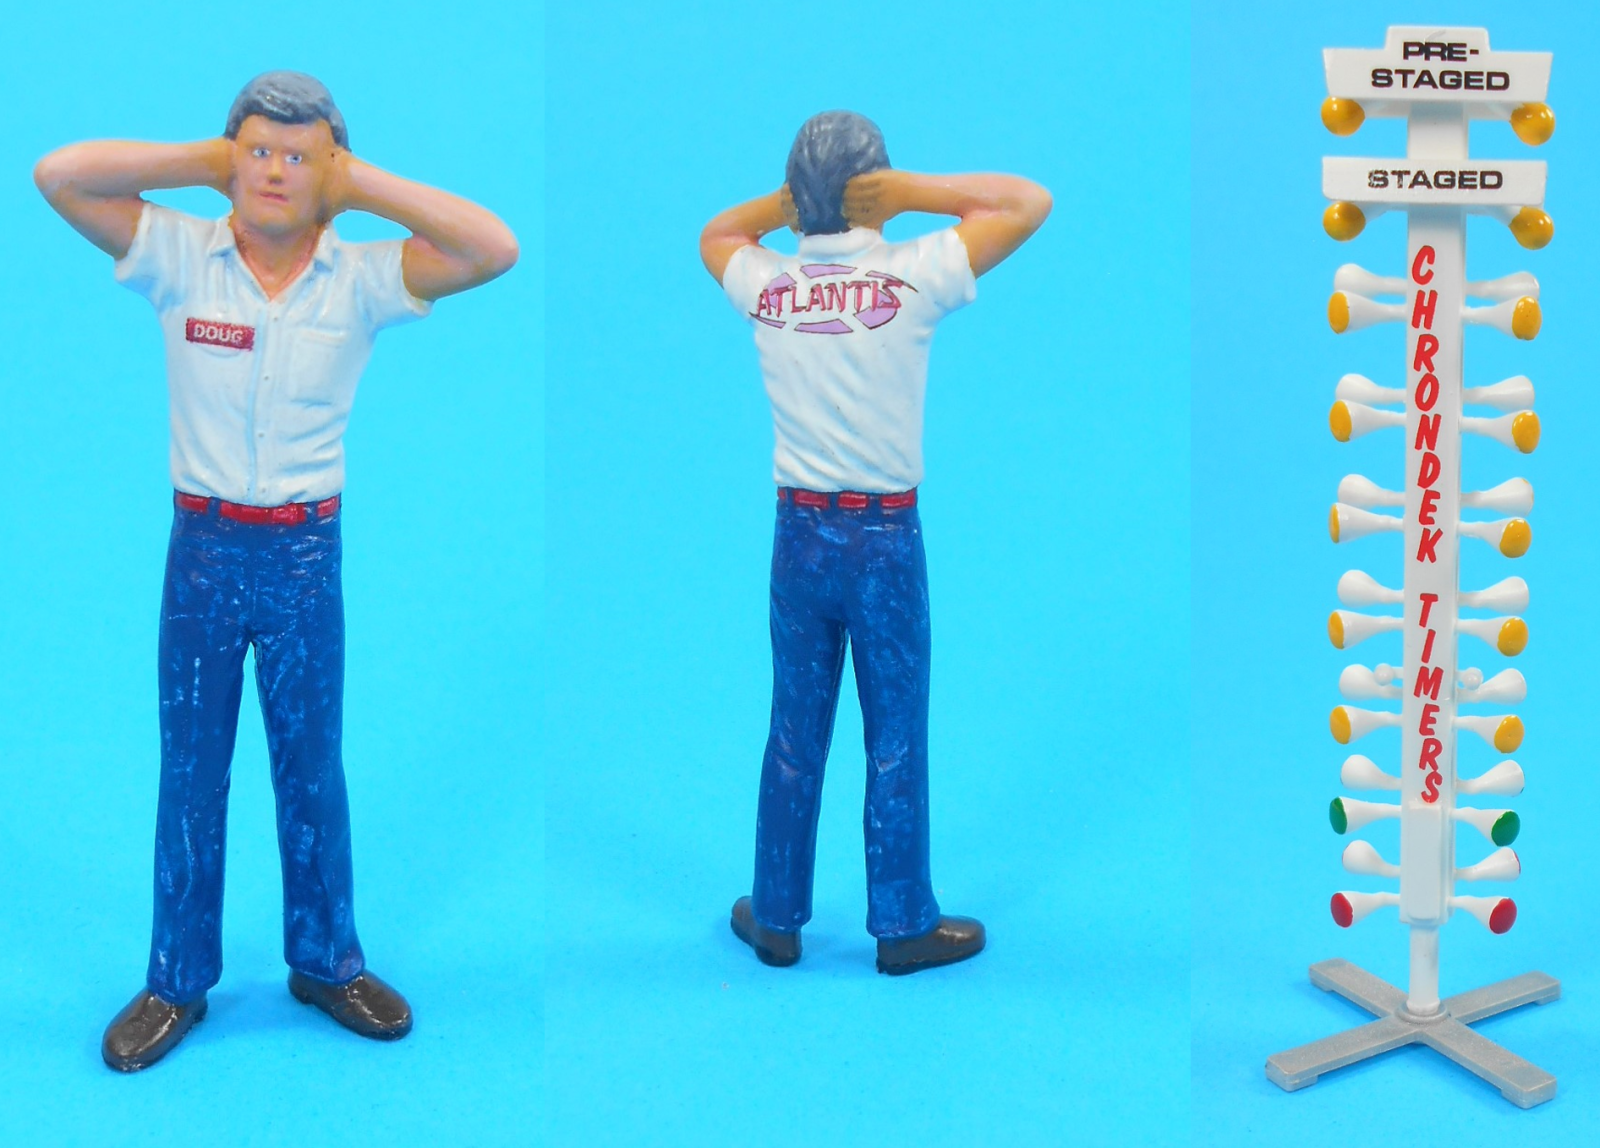
This kit has a number of highlights aside from the dragster itself; the great decal sheet, two human figures with a staging tree and some massive drag slicks for Show-‘n-Go along with a one-piece frame. The only real issue, was the kit supplied stiff vinyl plumbing and ignition wires. I’ll show you how to fix that and make a brand new “old stock” dragster for your display shelf.
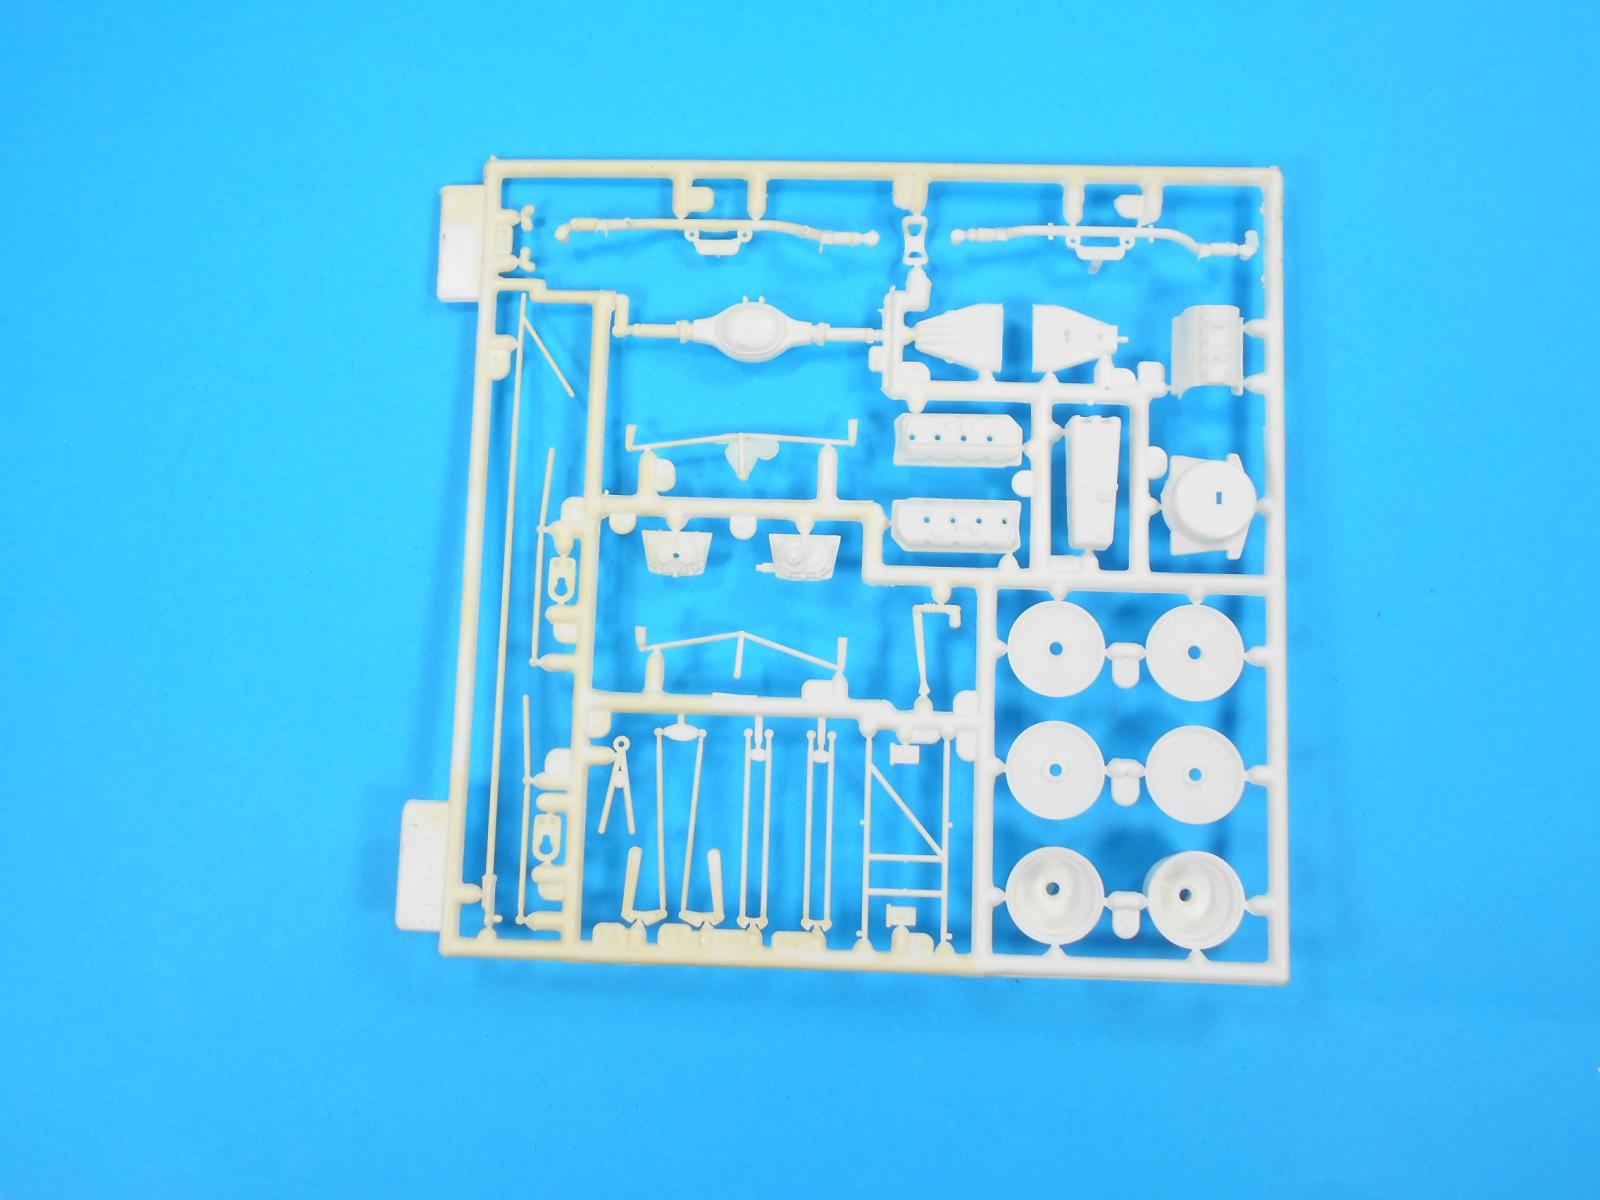
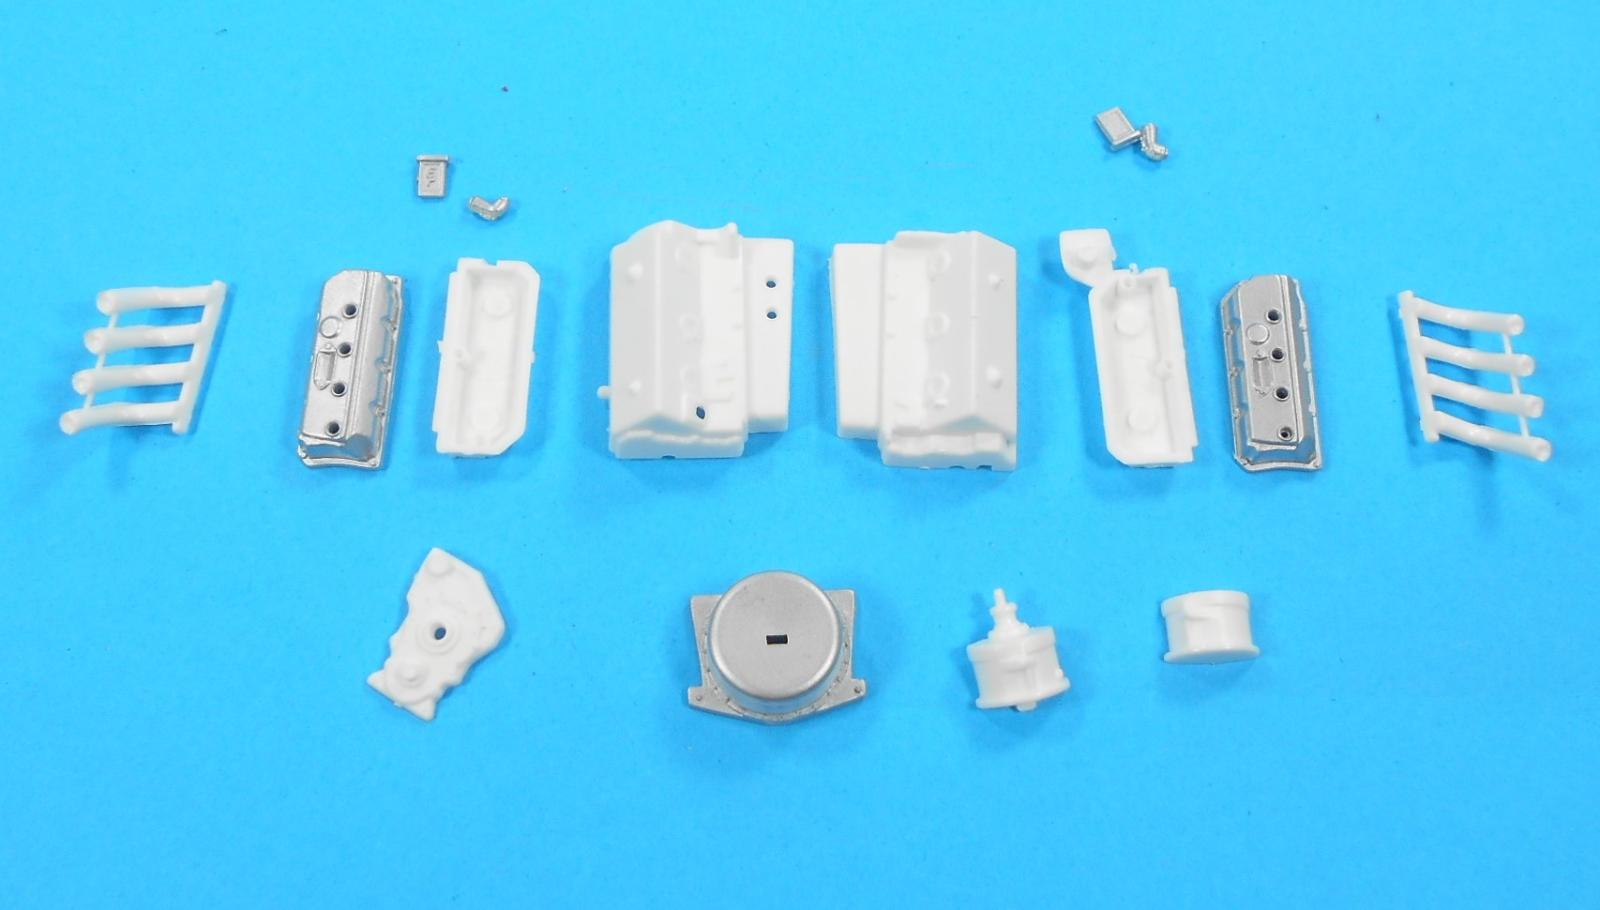
The parts in the kit are relatively flash-free but there are numerous ejector pin marks that need to be addressed for a contest entry. I used some Easy Off spray sealed in a container to remove the plating from the chromed parts, then everything got a coat of white primer. There are extra parts that come from previous releases, so watch the part numbers closely to get the right ones.
Paint the body and wing centers with a gloss red. Most of the frame parts are painted blue. I noticed the plastic used in this kit reacts slightly with aerosol paint. I sanded it off and used an airbrush for that.
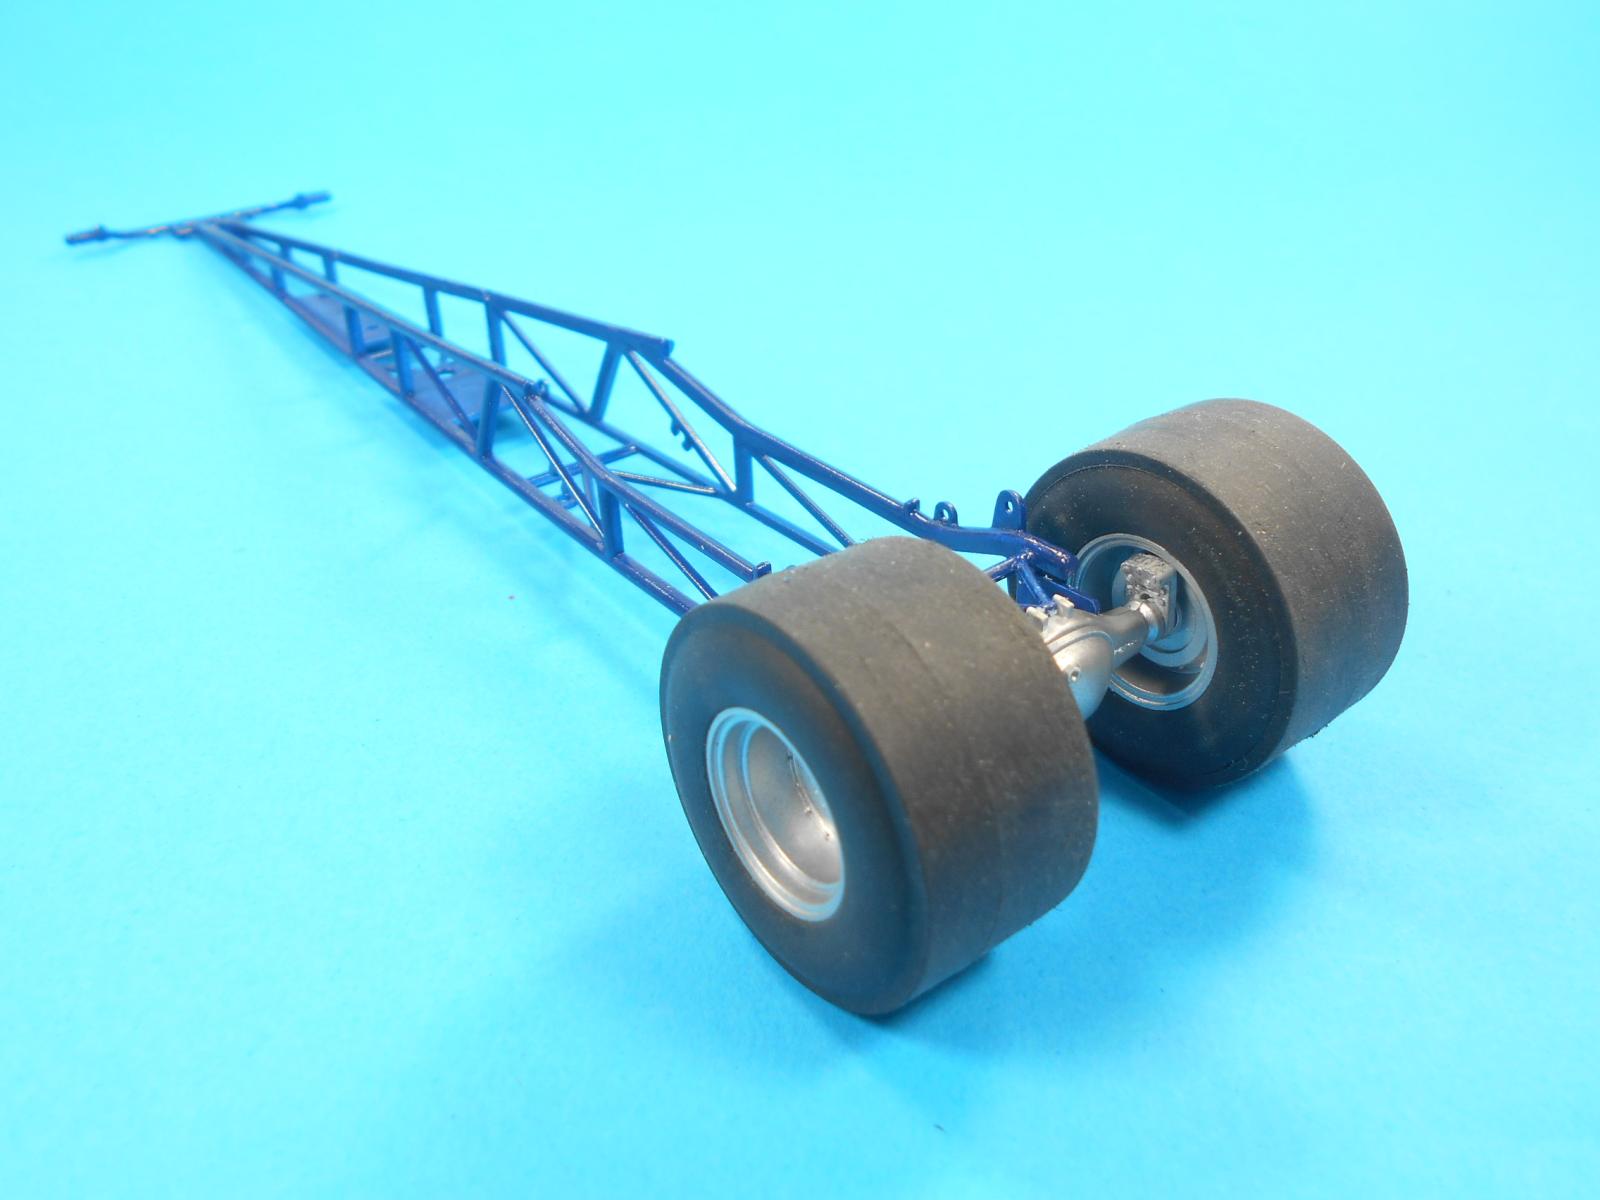
Construction starts with the rear axle assembly. The rear slicks fit together well and gluing the axle to the rear of the frame provides a stable base for the vehicle.
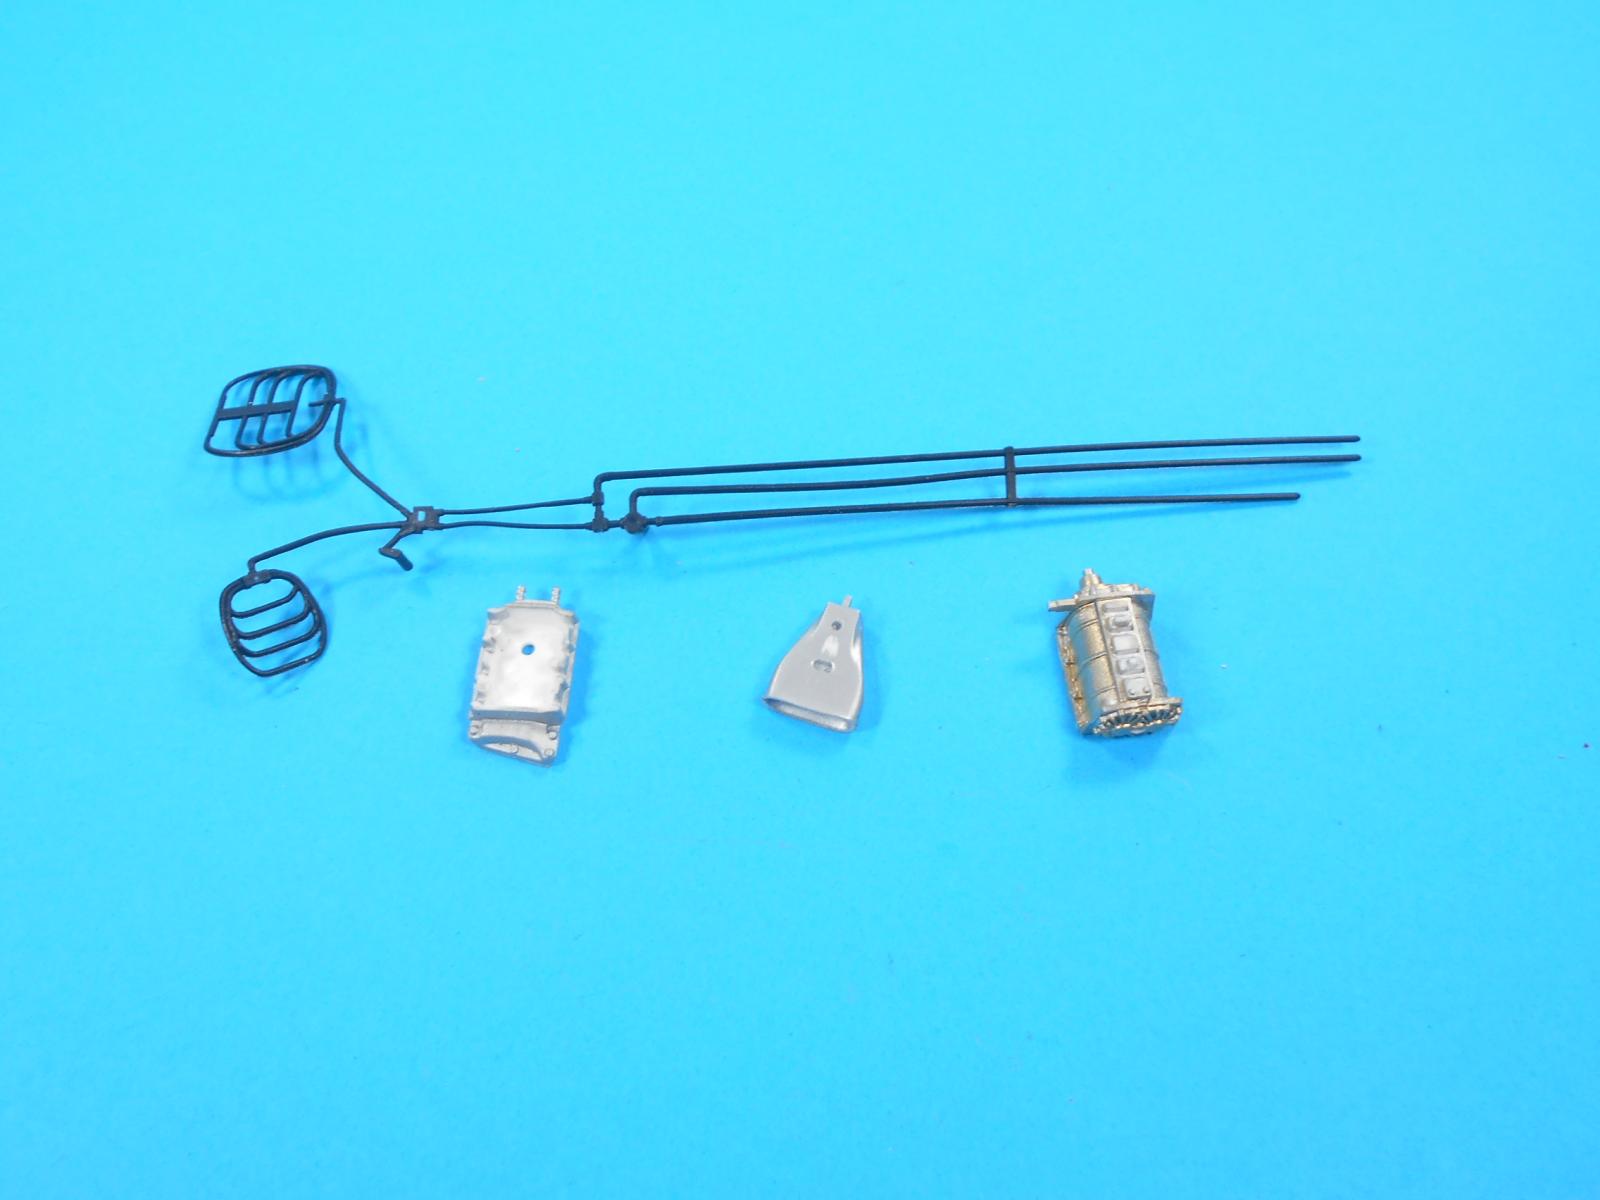
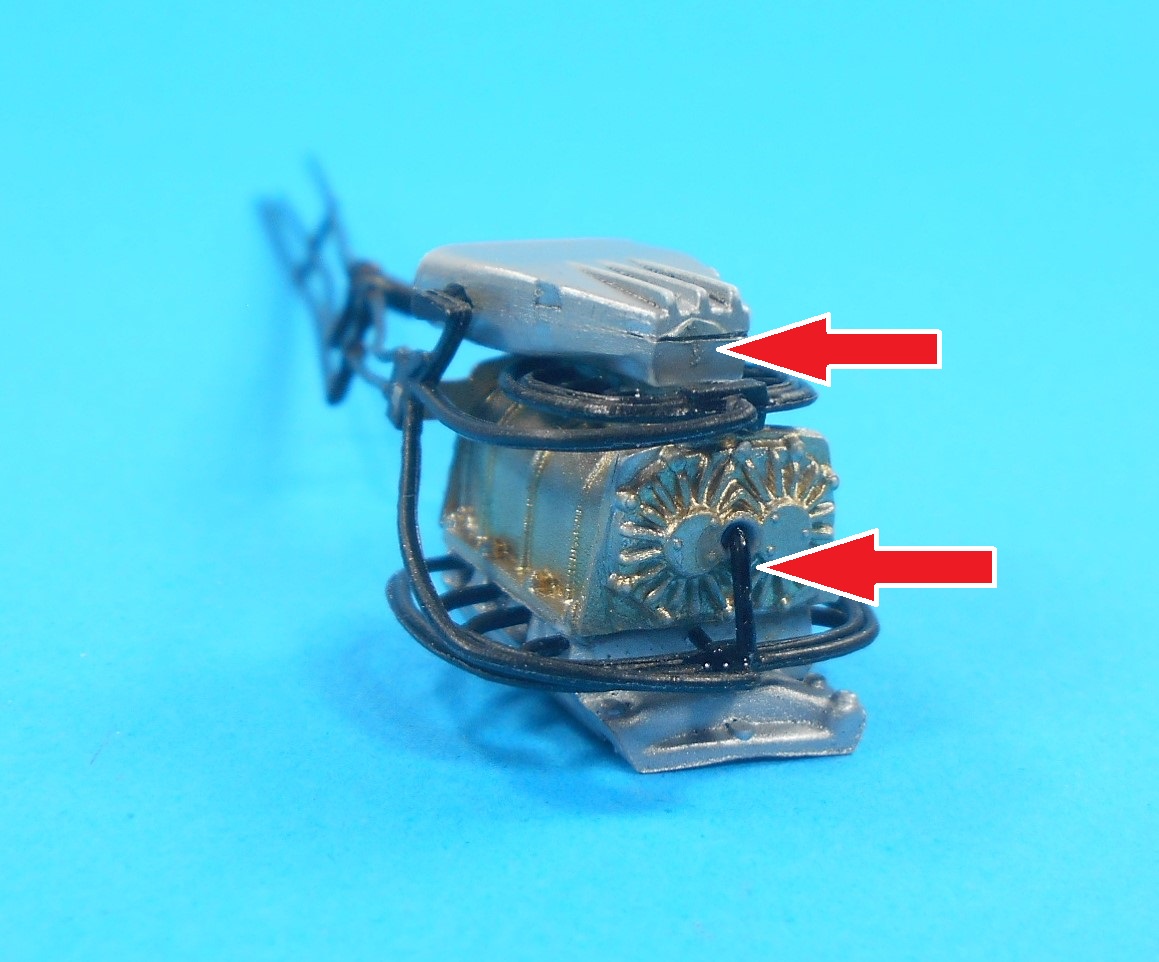
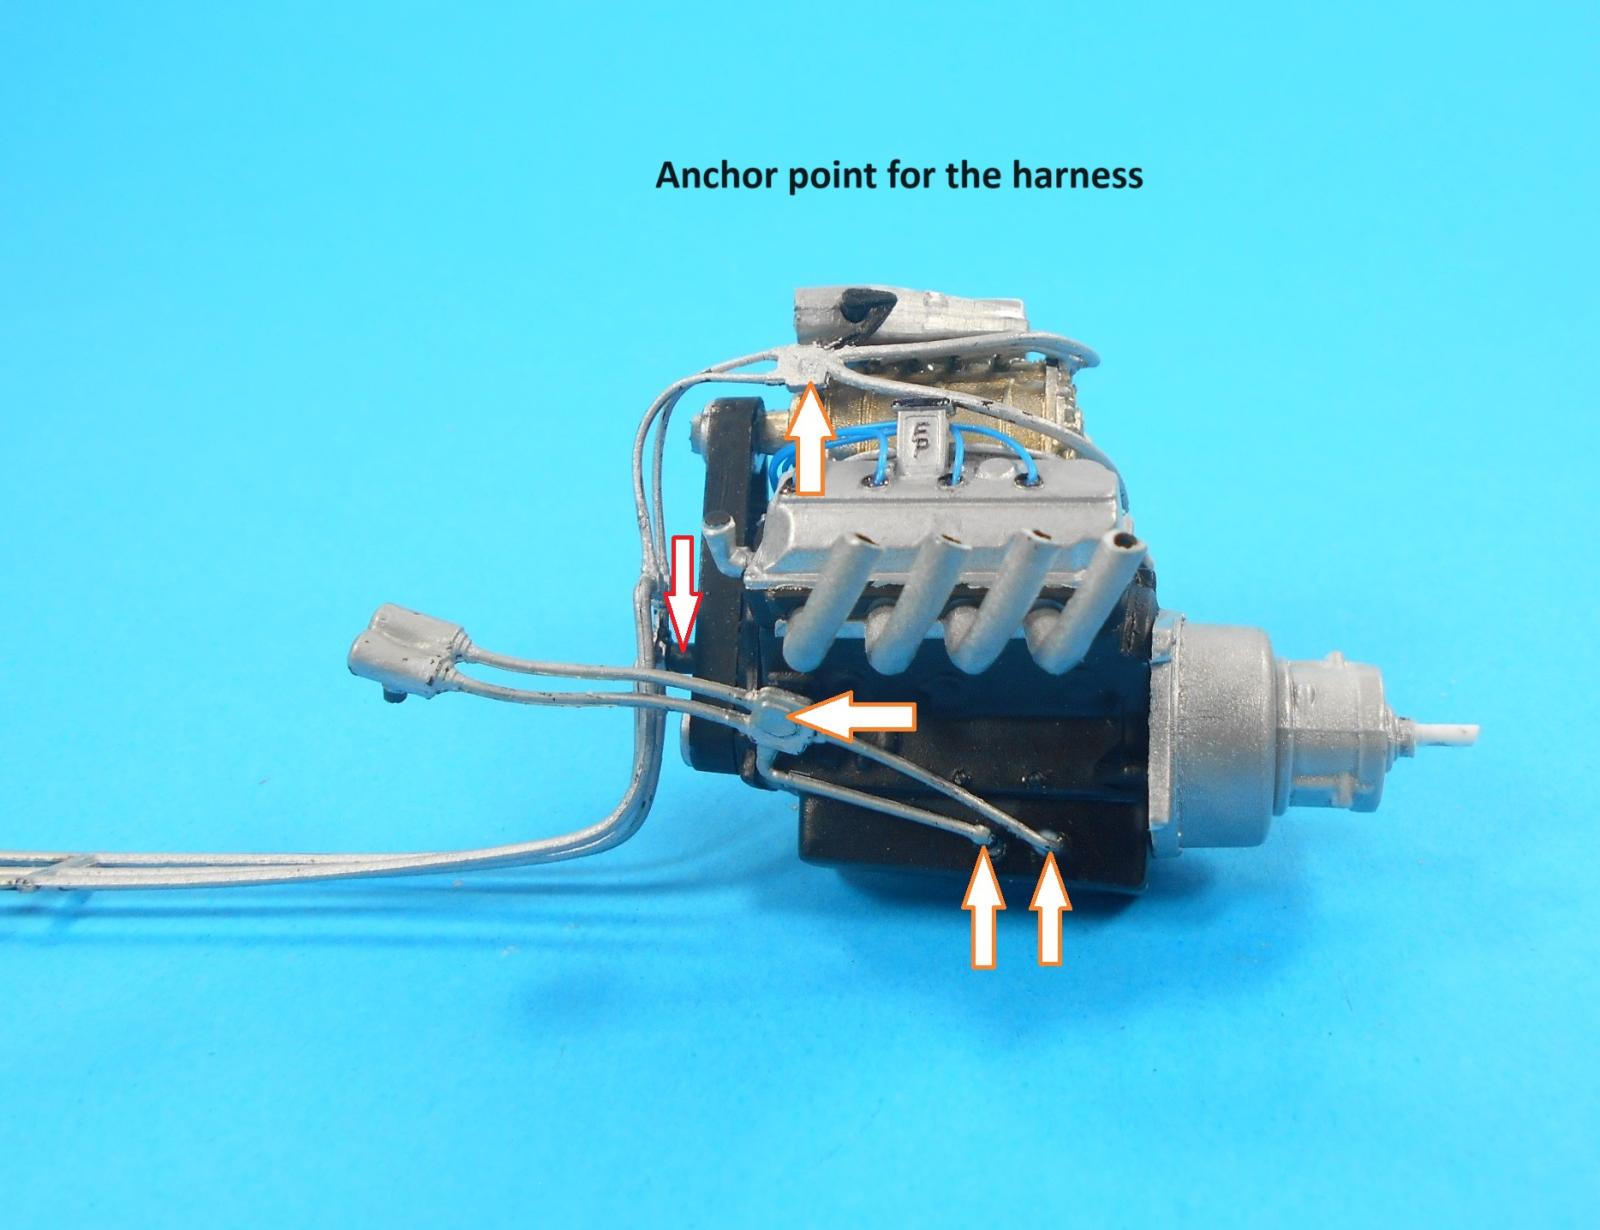
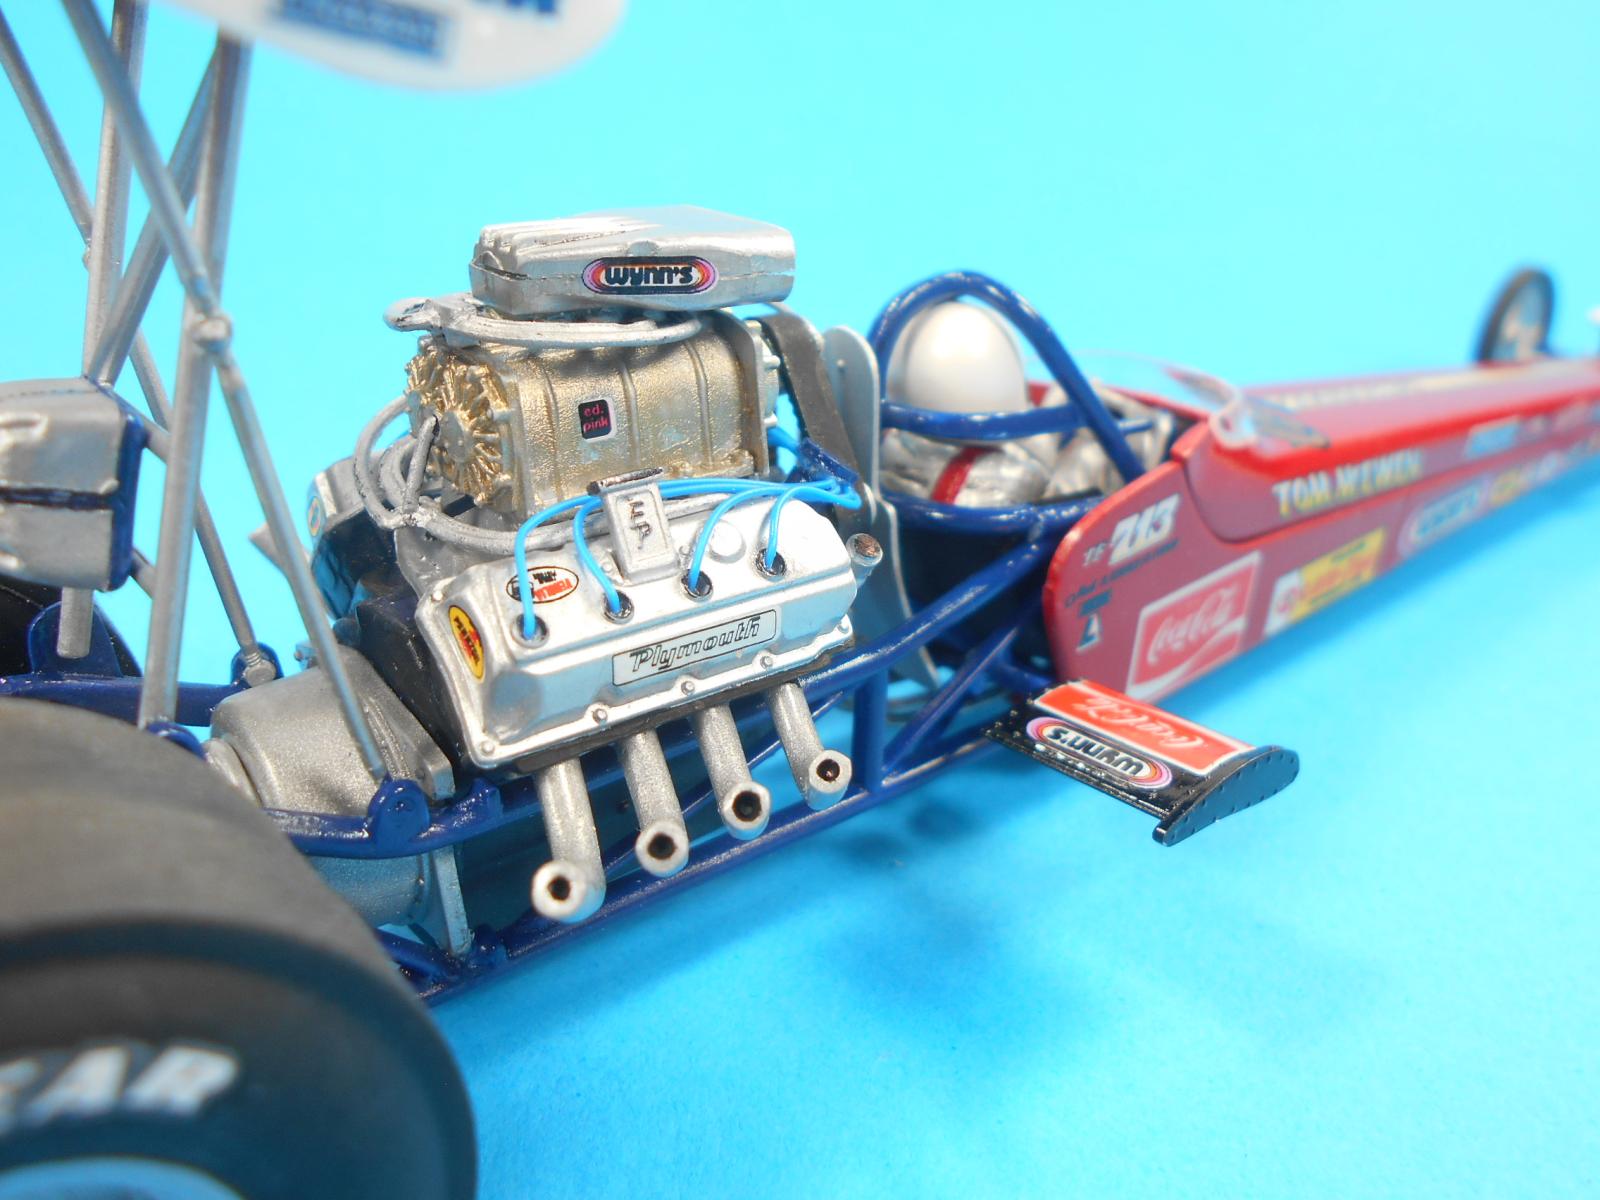
The HEMI engine builds well and has plenty of detail along with ten decals. This is where you want to pay some attention those hard vinyl parts. The fuel system is comprised of two tubing sections that intertwine the intake and blower.They lay in pretty well, but they are supposed to be stretched to points they can’t reach. I added a tube to the port in back of the blower body to reach down to the union at the base and clipped off the tab at the back of the fly-catcher that the harness is supposed to hang on. The rest of the unit can be finagled into position and cemented in place with some C/A glue and accelerator.
I found the spider web of ignition wires was just too stiff to be realistic. I couldn’t get the wires behind the blower belt, so I cut off the distributor stub and installed an aftermarket magneto.
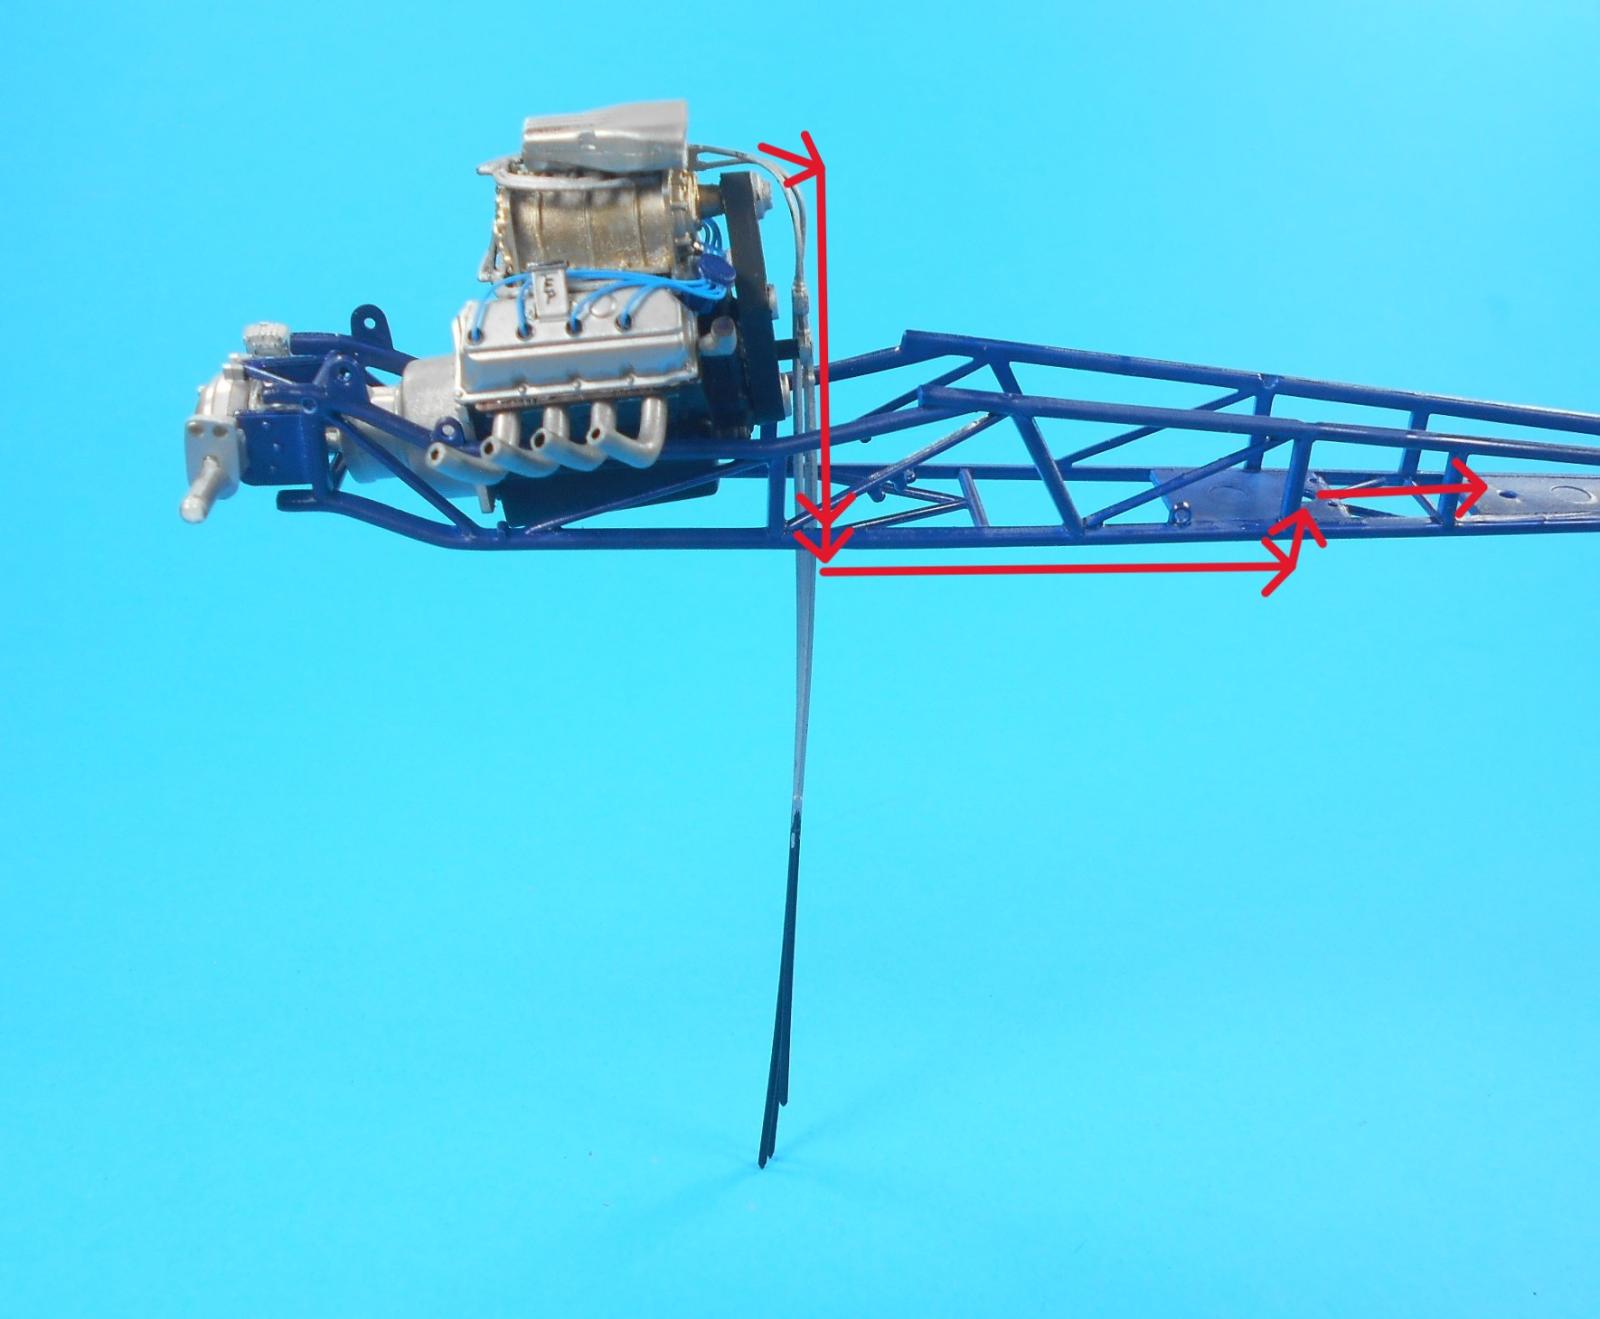
The fuel lines that are mounted on the front of the engine between the blower belt won’t just go straight down without some help. Use a heat source like a candle to bend the lines into appropriate position down through the frame. Then mark them where they would bend toward the front end, just under the bottom of the frame. Remove the engine, and bend them into the correct shape over the heat source. Later, they are drawn back up through a hole frame plate to be routed to the fuel cell.
Trap the lines by gluing the fuel cell down to the forward frame plate while keeping them in the holes in the cell. The pedals, brakes, frame brace, and bulkhead are installed. The bulkhead in front of the gas pedal needs to be trimmed on top to allow relief for the upper body to fit properly.
Prior to adding the seat bucket, the side ailerons should be painted black and inserted through the frame into the C-clips receivers. Paint the driver figure aluminum and add the helmet. Glue him into the seat, add the back plate to the cockpit frame and install the unit to the main frame, gluing the cockpit frame bars to the lower frame top rails.Glue the lower body panel to the frame.
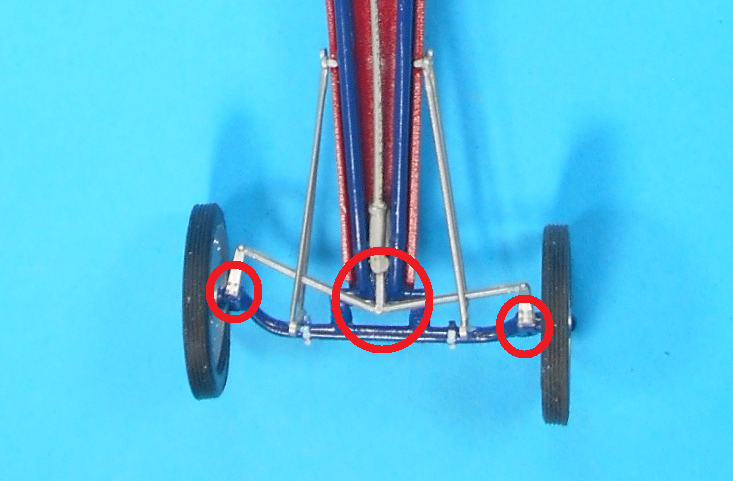
Add the drop axle to the front end using part #81 and add the radius rods whose forward ends butt up, and are glued, to the axle. Note there is only one hole for the upper fastener of the radius rods at the body. The lower ones just hang there in mid-air. Slip the tie rod through the radius rods. Glue the ends to the axle mounts and the center rod just in front of the steering box. Place a spot of glue to the ends of the lower radius rod and tack them to the lower body.
The rest of the construction is straight-forward. The tires and wheels are great looking and go together well but I felt the slicks needed some aftermarket decals to make them appear realistic. The kit's decals are top-notch. The staging tree and standing figure are simple to build. Use some putty to smooth out the seam on the bystander and finish it to your liking.
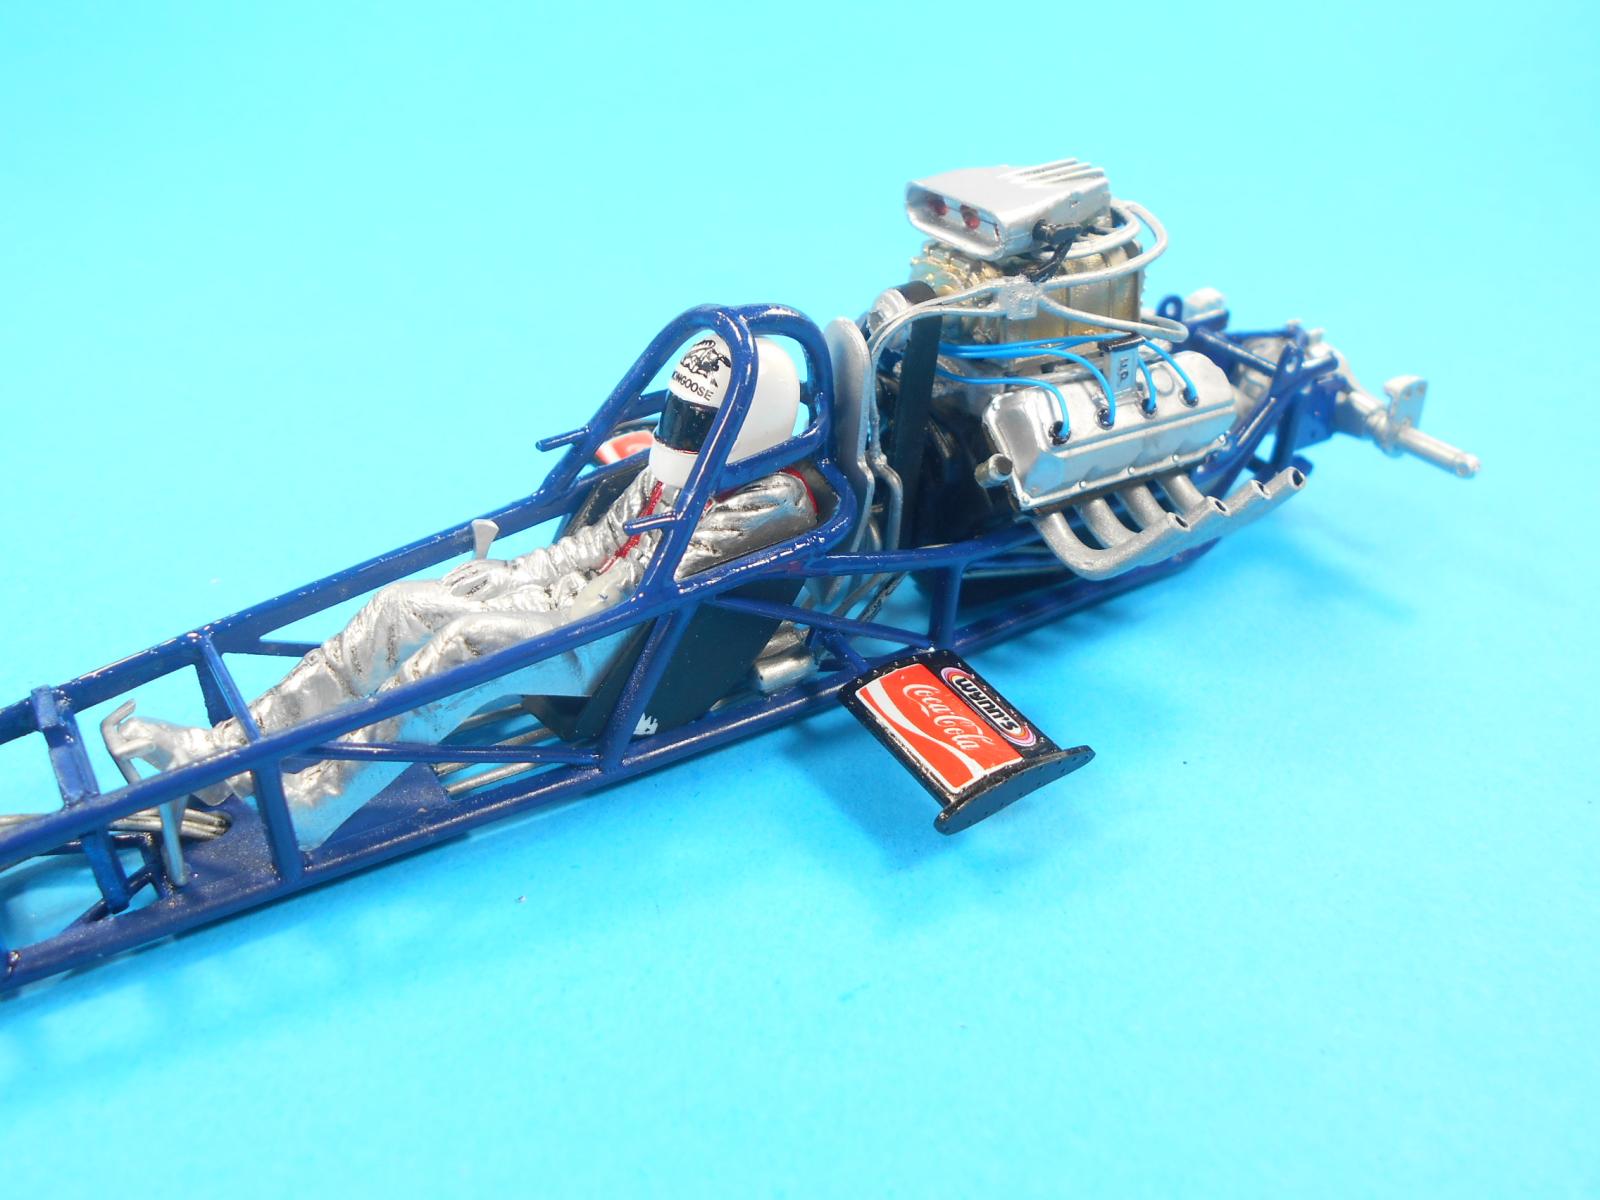
With some proper sequencing, aftermarket magneto, and a heat-bending method for the plumbing, this turns out to be a really nice nostalgia build honoring the great Mongoose.
I really have to thank Atlantis Models for bringing this great looking model back for us to enjoy and the IPMS for making this review available. I hope these tips will help you bring your copy to life as well!


Comments
Add new comment
This site is protected by reCAPTCHA and the Google Privacy Policy and Terms of Service apply.
Similar Reviews