
Mission Models Paint- Part 1 (Thinner, Polyurethane, Primer and Paint)
Company Overview
Mission Model paints – a new way to think about painting.
This review focuses on using Mission Models acrylic paints. I will present a ground up approach to the steps I follow to get the best finish from this new line of primers and paints.
Mission Models Paints is a relative newcomer to the model paint market with 118 custom colors for armor, ships, aircraft and cars in the line. An additional 75 colors will be added soon.
What are Benefits to using the paints?
They have a high pigment density, no chemical odor, are easy to work with, and have great opacity with little tendency to run, sag, or spider when sprayed. And, they’re environmentally safe. An additional benefit is that when sprayed, more paint is concentrated on the area being painted with less overspray.
History
The owner of Mission Models Paint, Jon Tamkin, has been modeling for many years and initially started a tool company (Mission Models) selling high-end modeling tools. The company is now and focused on the Mission Models line of acrylic paints.
The paint utilizes a three-part system: paint, thinner, and a polyurethane additive. When the paint is thinned for airbrushing it will probably appear thicker than what you’re used to. The paints’ high pigment content accounts for the thickness.
Thinner
(See Photo #2)
Mission Models has their own proprietary thinner solution that is used with their paints and primers. As suggested on the Mission Models website missionmodelsus.com, a good baseline starting point for diluting the paint is 70% Paint to 30% Thinner (70:30).
When the paint has been thinned to the 70-30 mix it will look thicker than other paints. Nonetheless, the paint sprays fine through an airbrush. Once you get the basic paint/thinner mix down, you can start experimenting with different thinning ratios.
Polyurethane Mix Additive (Polymix)
(See Photo #3)
The polyurethane mix additive (Polymix) promotes leveling of the paint and helps paint adhesion.
The Polymix should only to be added to the paint. It should not be mixed with any of the Mission Primers. When thinning the paint using the 70:30 ratio, (Paint: Thinner), add two drops of Polymix to your 2-3ml airbrush paint cup full of the diluted paint. As will be mentioned next, Polymix can be added to the thinner ahead of time to eliminate the three-step paint mixing process (below).
Thinner-10 (Mission Thinner Plus 10% Polymix Added)
(See Photo #4)
This is a mixing trick that I picked up from an article on Model Paint Solutions www.modelpaintsol.com/
Add the Polymix to the Thinner ahead of time by preparing a mixture that is 10% Polymix in Mission Thinner or “Thinner-10.” That’s a ratio of 1:10 (Polymix: Thinner). I mix up a lot of Thinner-10 ahead of time and store it in a sealed bottle where it’s ready for use anytime I mix paint. Then, I simply add the Thinner-10 to whatever paint I’m mixing. I prefer to use a ratio of 70% Paint to 30% Thinner-10. You should experiment with different ratios to find the one that works for you. Thinner-10 has a long shelf life and will be active for months.
A question asked is “What happens if you choose to not add the Polymix to the paint?” The paint will not stick to the surface as well and will become fragile when dry requiring a quick clear coat for protection.
The Polymix chemically cross-links with the paint providing amazing durability and negating the ability of water to get under the paint when dry. This makes doing the “paint chipping” trick that uses an undercoat of hairspray difficult with Mission Paints mixed with Polymix. However, not using the Polymix with the paint results in a finish that, when dry, can be “chipped” with small amounts of water.
Cleaning the Model before Painting
Before any assembly of a kit, I degrease the plastic sprues very well to ensure that all grease and mold release is removed. This is really important when you plan on spraying the model with acrylic primers and paints that are more sensitive to grease than are enamels and lacquers. There are many good degreasers out there that include a strong solution of dishwashing detergent, Windex, or alcohol.
Primer
(See Photo #5)
Before applying any primer, it’s best to degrease the surfaces to be painted to remove grease, dirt, or finger oil that’s accumulated on the model during construction. A gloved hand for handling the model from then on is recommend keeping the model clean.
Mission primer comes in six colors, Black, White, Gray, Red Oxide, Pink, and Tan.
The primers are mixed at a ratio of 70:30 (Primer: Thinner). If you’re a drop counter that would be 7 drops Primer and 3 drops of Thinner. Mission Polymix or Thinner-10 (above) should not be used with primers, only thinner. If you’re spraying in a dryer climate, a few drops of Liquitex Flow-Aid per airbrush paint cup will prevent tip dry.
Once the primer and thinner are mixed set your airbrush compressor to 12-15 psi and spray approximately 2-3 inches from the surface using light dry coats building the primer up in layers. Do not try to get full coverage in one pass. Wait for each coat to dry before applying the next coat. You can speed the drying process by using a hair dryer and blowing warm air onto the primed surface.
(See Photo #6)
You will be able to watch as the primer (Black area in photo) starts to dry, it will spread and level out into a smooth layer when dry that will still show even the slightest details on your models surface.
(See Photo #7)
The above photo shows the application of Tamiya tape over the Black Primer
(See Photo #8)
Once the tape was applied, I sprayed over it with Mission Yellow Paint.
(See Photo #9)
When the paint had dried I pulled the tape off and none of the primer was pulled off of the plastic.
Buffing the Primer with Alpha Sanding Sponges and Soapy Water
(See Photo #10)
Once the surface has been primed to your satisfaction and it’s been allowed to dry 3-4 hours, it can be buffed with a 3600 Micromesh Sanding Sponge or Sheet (Alpha Abrasives) and soapy water if you wish. Usually the volume of water is equivalent to a half of a cup of water with three drops of liquid dish soap. You can progress to finer grits of Micromesh to get the shine and surface smoothness you want. Be careful to not rub the surface too hard or you can go right through the primer.
Mission Models Paint
(See Photo #11)
Mission Models Paints are very forgiving and easy to use. Start with a dilution of 70% paint and 30% of Thinner-10. Set your airbrush compressor to 12-15 psi. I will shoot a couple of drops of straight thinner through the airbrush before I add the paint to the airbrush cup.
Apply the paint in thin “dry coat” layers to build the opacity you are looking for. The paint will spread out into a thin and even layer that that builds color quickly but still allows details to show through.
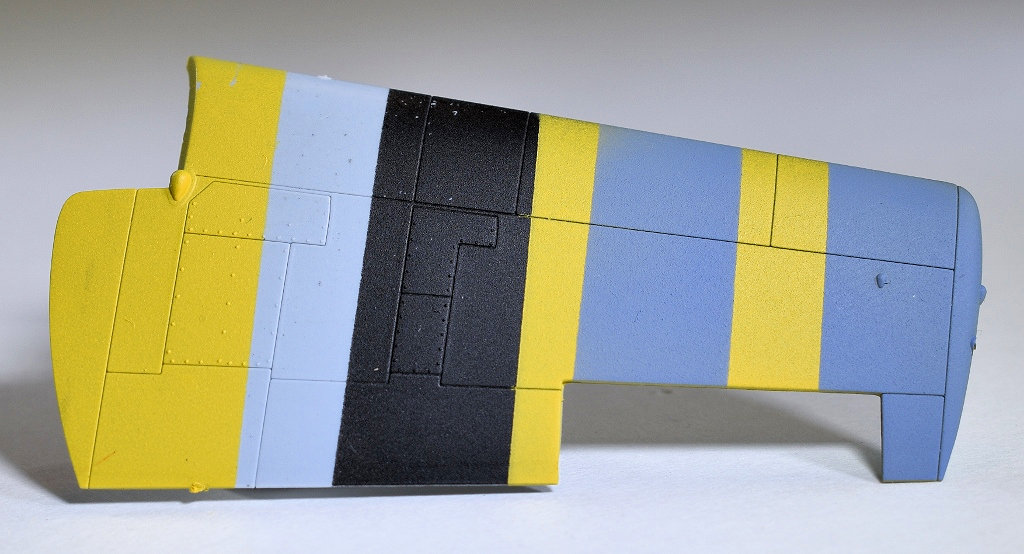
(See Photo #8 again)
In the photo above, I have sprayed Mission Yellow over the Gray and yes, Black primer. I did this to demonstrate the coverage that Mission paints have, even the yellow. I used four light coats and built up enough Yellow paint that the Black primer has very little tinting through the Yellow. As you can see the panel lines and small details still show through leaving the painted surface details crisp.
(See Photo #12)
The next two photos demonstrate the resistance of the paint from being pulled off by tape. The Tamiya tape was applied over the dried Mission Yellow and then the wing was shot with Mission Azure Blue.
(See Photo #13)
After the tape has been removed, it can be seen that the Primer and Yellow are intact. There was no chipping or paint separation when the tape was removed.
Mission paints dry faster with the help of a hair drier. Once the paint has been left to dry approximately 2 hours, you can apply Tamiya tape for masking and when the tape is removed, paint will not be pulled up.
Even though Mission Model paints have a high pigment content, you will need to practice spraying different colors because each color has different characteristics. Some of the colors will appear more translucent than others.
When spraying the paint in 90-degree areas such as vertical stabilizer to horizontal stabilizer or wing fillet to fuselage, Mission Models paint does not have a tendency to pebble up in these areas reducing any sanding that might be necessary.
Preshading if you choose to do so can be managed with thin multiple layers of paint to get the level of preshading you desire.
Applying Paint with a Paintbrush
Mission Models paint can be applied with a paint brush. Thinner should not be added to the paint, the paint needs to be as thick as possible. I will put a drop of un-thinned paint on a piece glass and put a drop of Thinner-10 mix next to it. Then I drag a small amount of the Thinner-10 mix into the paint with my paintbrush and mix it to the consistency I want. Apply the paint with smooth strokes and do not recoat until the paint has completely dried.
Summary
I have tried to give you a basic understanding of Mission Models paints and other materials to use with them. I’ve have had no problems with the systems for diluting and spraying using Mission Primers and Paints that I’ve detailed here. I’ve read articles and watched videos where a people didn’t use either Mission Thinner or Mission Polymix and/or did not initially start with a ration of 70% paint to 30% Thinner and, surprise, didn’t have good results. Then, based on this experience, these people come to the conclusion the Mission paints aren’t for them. That is a real shame because Mission Model Paints are truly a different kind of model paint that behaves forgivingly when sprayed and durably when dry.
If you are looking to try an Acrylic paint, then I highly recommend trying Mission Models paints. Make sure you clean and degrease your subject as indicated above before applying any primer or paint and you will have a good experience.
I want to thank Mission Models and IPMS for the ability to review this product.
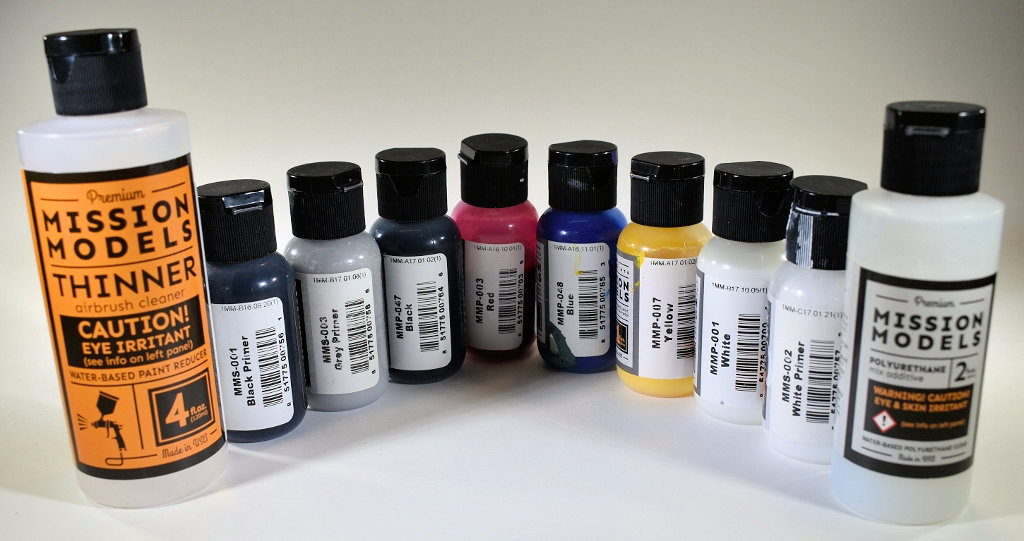

Photo 1- All Paints
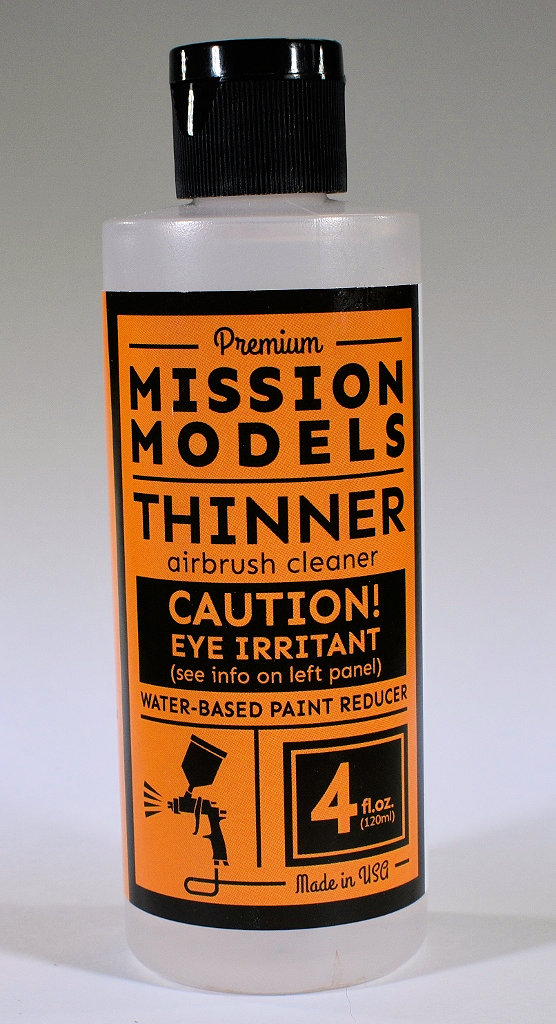
Photo 2- Mission Models Thinner
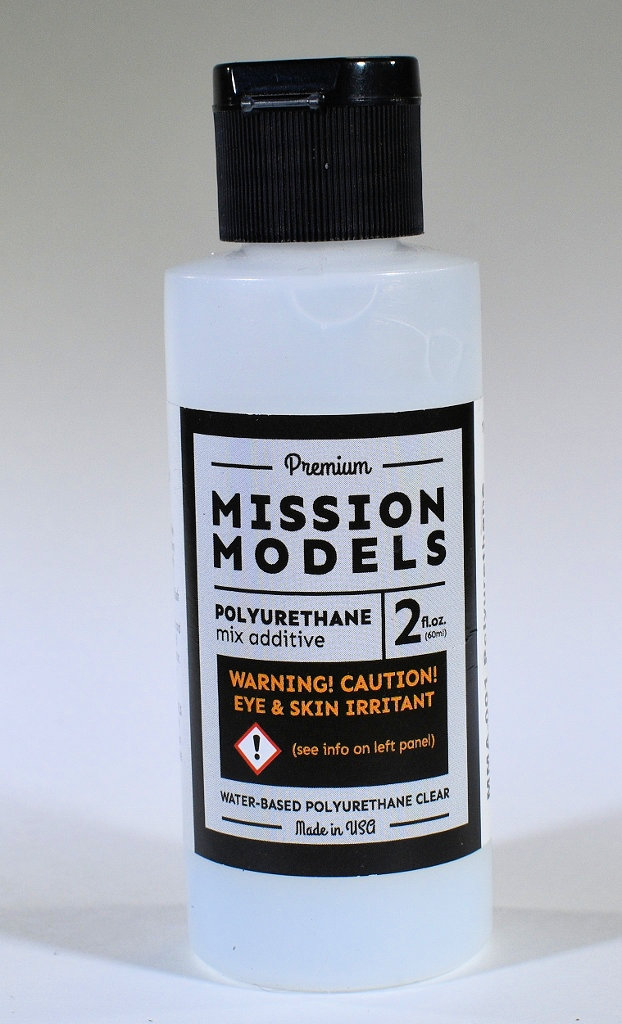
Photo 3- Mission Models Polymix
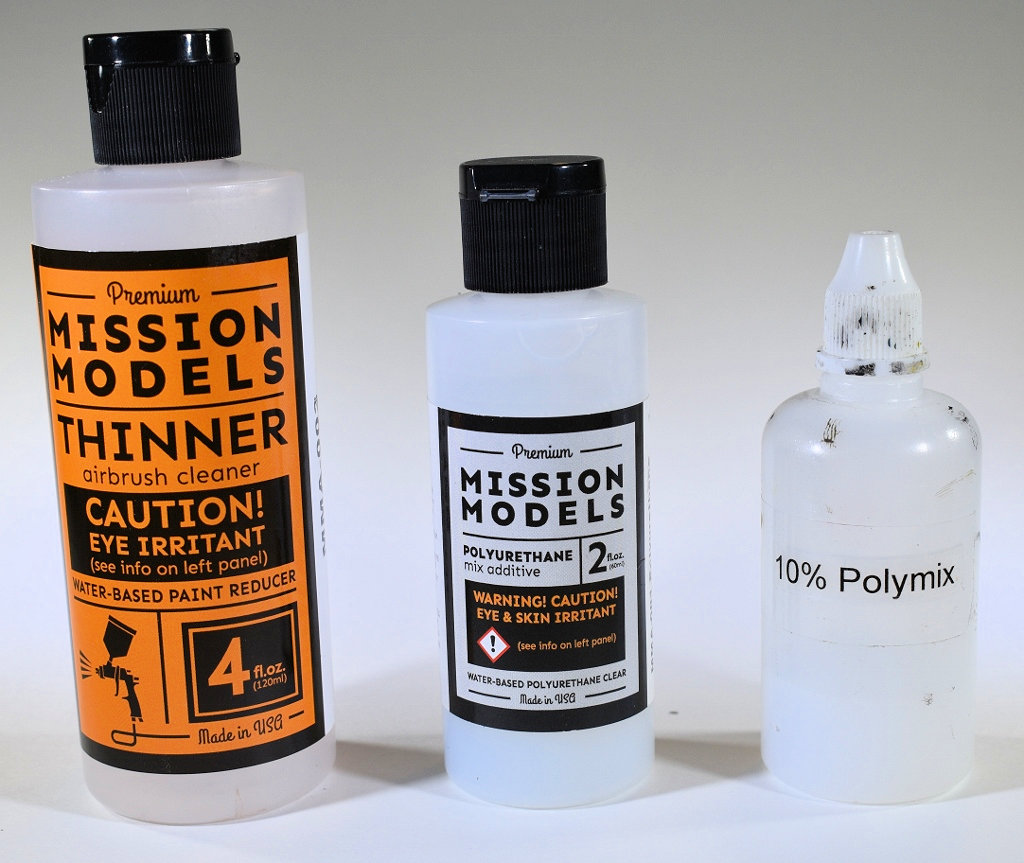
Photo 4- Mission Models Thinner with 10% Polymix Added

Photo 5- Mission Models Primers
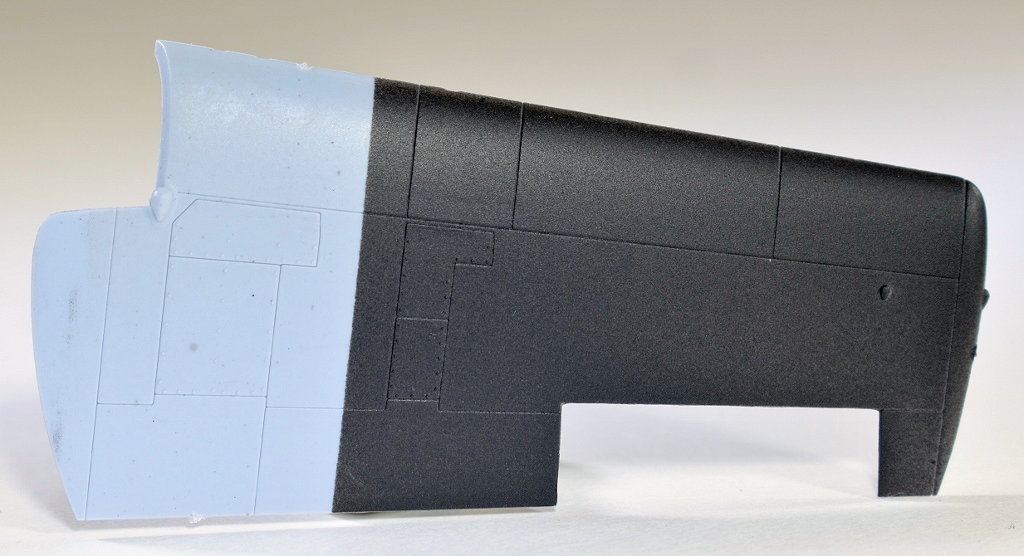
Photo 6- Mission Models Primer Sprayed
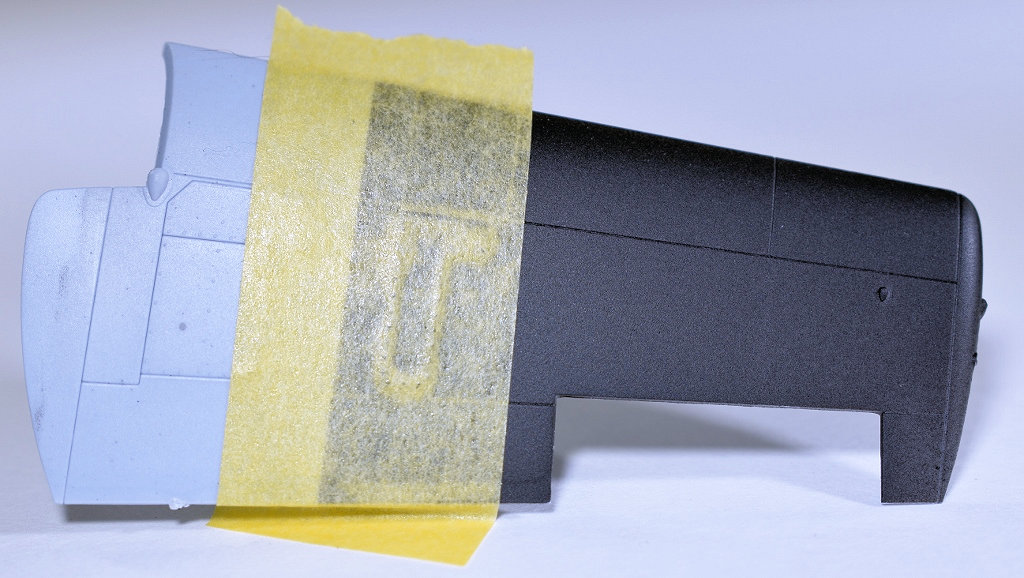
Photo 7- Mission Models Primer Leveling and Smoothing
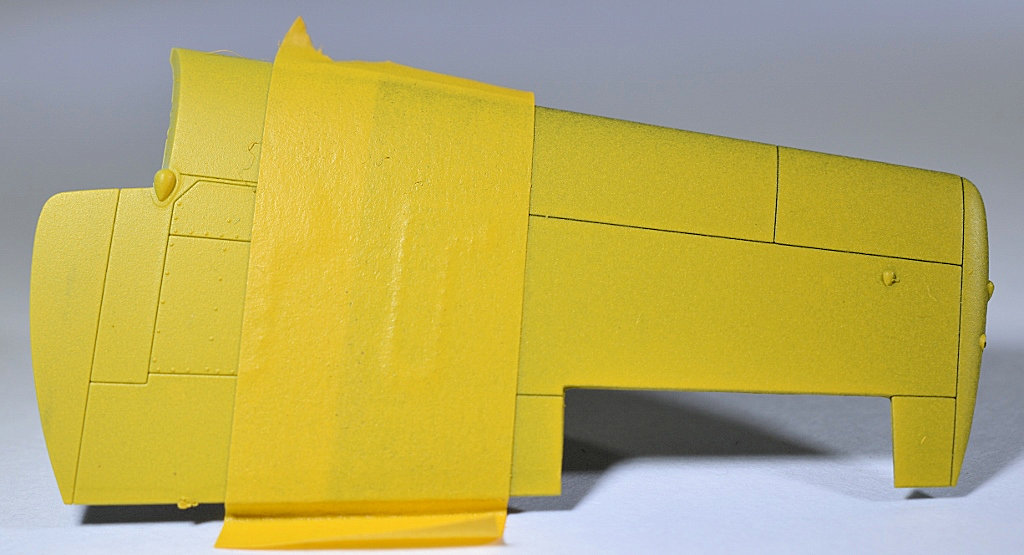
Photo 8- Tamiya Tape over the Black Primer
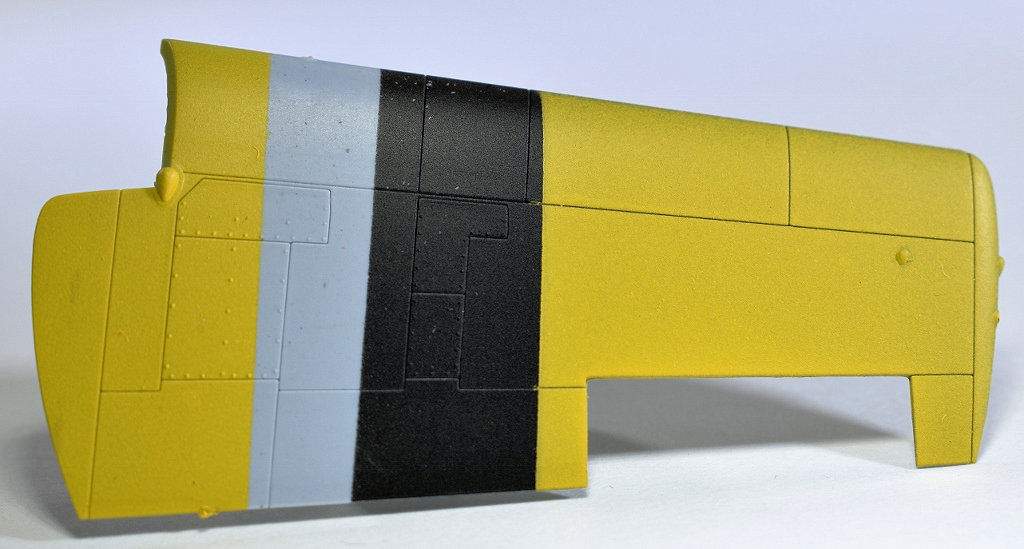
Photo 9- Mission Models Yellow Sprayed
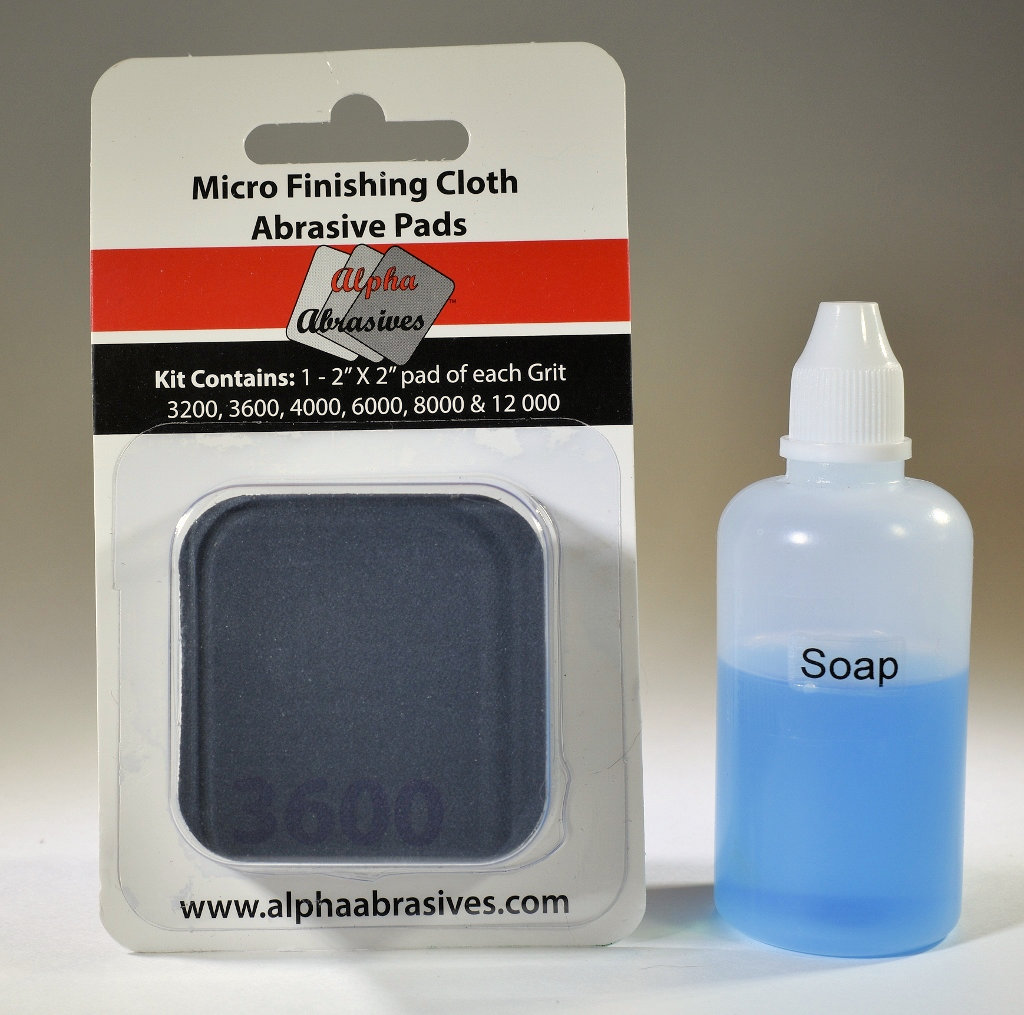
Photo 10- Material for Buffing the Primer
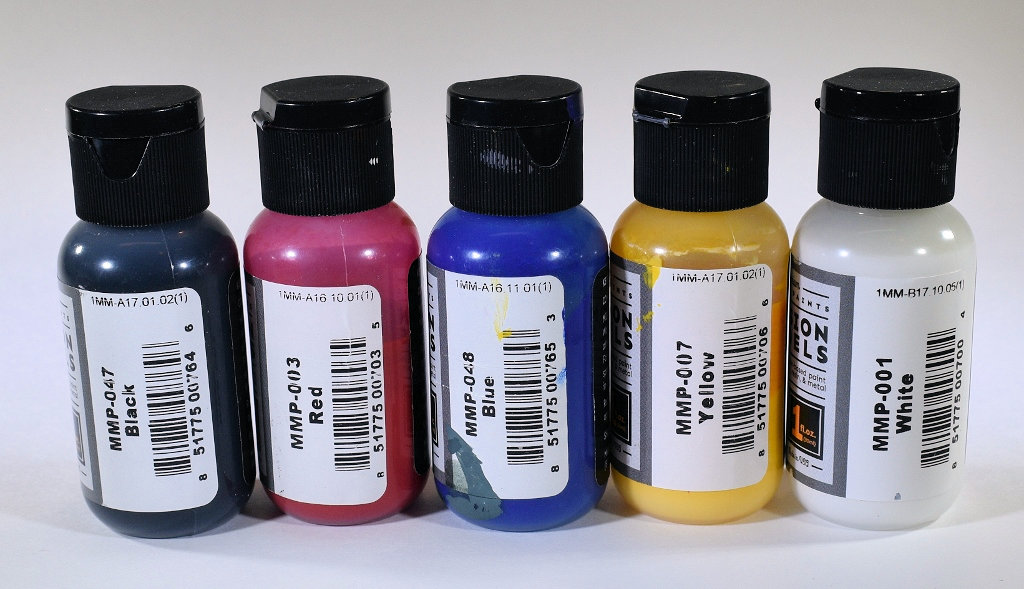
Photo 11- Mission Models Paint
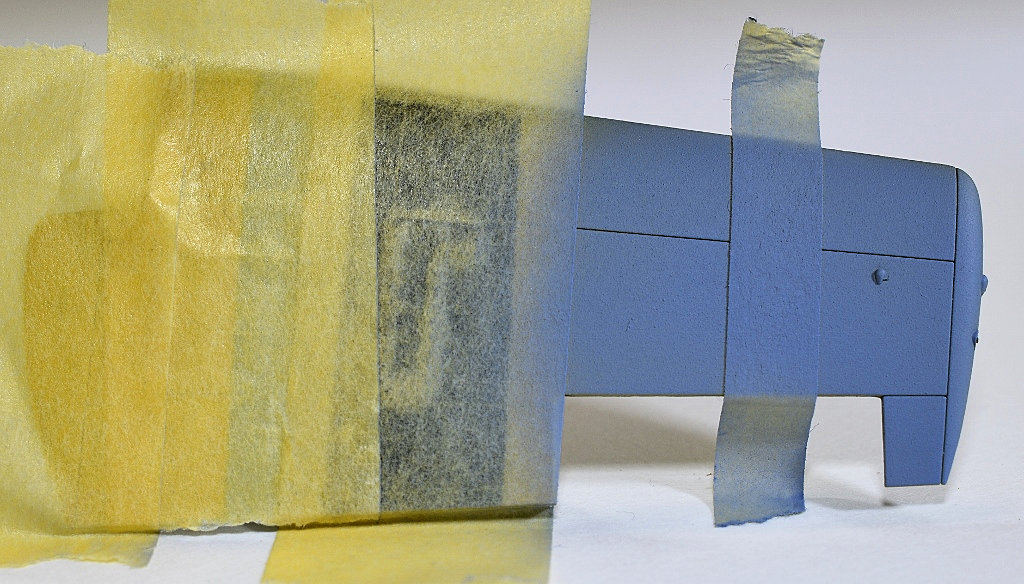
Photo 12- Preparing for Paint Adhesion Test with Tamiya Tape
Comments
Only cures when "Wear a ... respirator" thinner and Poly added,
And only sticks to their primer. To paint something black, you'll need a bottle of black primer, a bottle of black paint, a bottle of Thinner, and a bottle of their "Poly" product. And you'll have to wear a NIOSH / MSHA respirator and not handle food or drink, or smoke, while using the Mission product. Sort of like the old Flowquill model railroad paints, with their prorietary "diasol" thinner.
When I bought black, white, tire gray, blue and yellow from a retailer, they didn't warn that the paint only sticks to Mission's primer, and that it didn't cure without adding the reducer, which requires a respirator when you use it. And it wasn't just the retail web-site. Mission's own material does warn, deep within hundreds of other words, that their primer is required and the "paint" won't stick to plastic without thier primer. But that isn't printed on the label on the paint, or stated clearly and unambiguously by their retailers. Or in their own catalog. They also don't say, clearly and unambiviously, that the poisonous, respirator-required reducer / thinner is REQUIRED to get the paint to cure, and that they strongly recommend their "Poly" be mixed in as well.
Its all presented in a misleading "science experiment" format, where you can apply the paint, and add varying amounts of the Reducer for different results, and vary the amount of Poly as well, also to suit yourself. LIke some self actualization baloney from the 1970s. I don't want a pigment and carrier that requires unspecified mixtures of two other products, one poisonous, which I can work out to my own satisfaction. I intended to buy a water-based acrylic hobby paint that I could apply in my home without protective equipment, to color little plastic model parts that could be assembled into planes, cars, ships, etc.
The primer is claimed to cure out of the bottle, but the "paint" is unlike any Acrylic model paints you may have used before. It doesn't thin with water, it MUST be mixed 70:30 with their Reducer. The reducer label warns it contains 2-Butoxy Ethanol and states "Wear a NIOSH / MSHA respirator". This is nothing like Tamiya Acrylic, Gunze Sangyo Acrylic or Vallejo Acrylic hobby paints.Or any acrylic craft paint, including Testor's. Or the late, lamented Polly Scale and Testor's Acryl II products.
I can verify the primer is 100% required. Without it, the pigment won't anchor to the plastic. Brushing a coat over plastic is guaranteed to fail. It flakes and falls off. Brushing coat #2 over coat #1, after letting #1 dry for a day, lifts coat #1 and leaves a mix of new and lifted pigment with dramatic differences in color density. At least soap and warm water clean it off.So then I brished on black and white primer. Sililar to other acrylic model points- not one-coat coverage, but it can be brushed out smooth. Now with the primer down and given 24 hours to dry, I apply the pigment. Give it a day too. Progress, the first coat of pigment doesn't lift the primer. So I'm all encouraged and I apply pigment coat 2. Nope! That lifts pigment coat 1. THe meaning behind all the evasive weasel words is laid bare. The pigment isn't a paint. It doesn't cure. You must add the poisonous Reducer, its not optional at all. .Probably the Poly ins't optional either. Mix 1 part Poly with 10 parts Reducer, and mix 3 parts of that with 7 parts of the pigment and there's your paint.. Remember your mask!
Or better yet, find an actual, water based, acrylic modeling paint, one that isn't toxic, and learn to use it.
Very Fiddly....
This paint is a real challenge to work with. Initially just needed some specific Luftwaffe colours so brought the required ones. Then found the paint just lifts off without a primer (by lightly brushing it) so you have to prime every single part, even though you might not need to prime them with other brands. Then even on primer it will still scratch off easily. Then you buy the thinners and poly and try to experiment with the ratios. If you don't spend ages mixing in the poly you will get random drops of it on your model..... Then different colours behave differently... It also takes ages to dry. Honestly I have spent probably $100 on the different shades and thinners and poly and I am probably about to give up on it and buy another brand to replace it all.
Add new comment
This site is protected by reCAPTCHA and the Google Privacy Policy and Terms of Service apply.
Similar Reviews