

Dave Morrissette
Reviews By Author
|
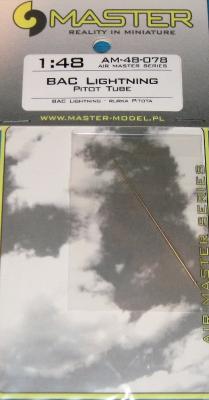
BAC Lightning - Pitot TubePublished:
Master Models now provides coverage of the Airfix 1/48 Lightning kit with a perfectly formed replacement pitot tube. Master Models is well known for their superb turned brass parts and this set is another fine example. The set is one part of perfectly turned brass to replace the kits parts. Here's a great picture of the pitot tube and how far it sticks out from underneath the front of the plane. The instructions are great. In this case , the kit part is cut off of the support, a small hole drilled and the new part inserted. As you can see by the comparison pictures, the kit parts is straight, much thinner and too scale and also has the durability of brass. Another hit for… more |

|
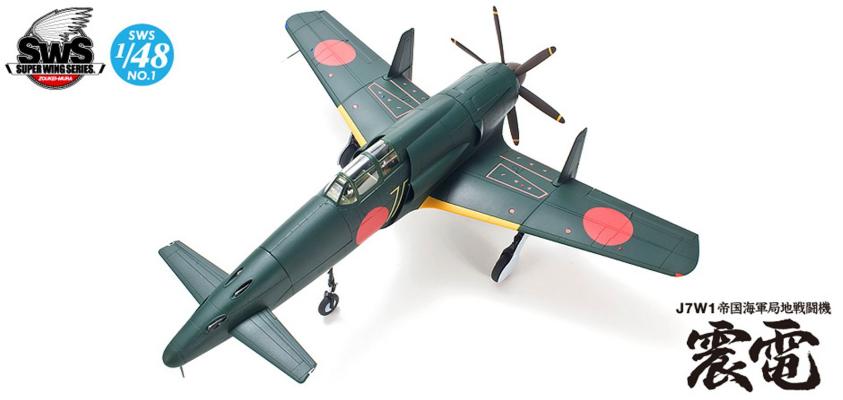
J7W1 Shinden - Final Construction and Painting - Part 2Published:
When we left off at the end of part 1, the gun bays, cockpits and main airframe were done, and we needed to cover the engines and prepare the airframe for painting. Moving on to this round of the build, the sides and tops covering the engines are added. This is easier on the 1/48 kit as there are fewer parts, only 7 versus the 11 found on the 1/32 scale kit. In either case, hiding the engine below the covers is difficult, if only because it is so well done. The back is added along with the air scoops, top cover and a little putty, at which point we are done with the aft of the plane. Next up is finishing the nose. To start with, add the canards, nose tip and front gun cover, and glue it all in place. I also added weight to the nose, and filled the open spaces with shot. Make… more |
|
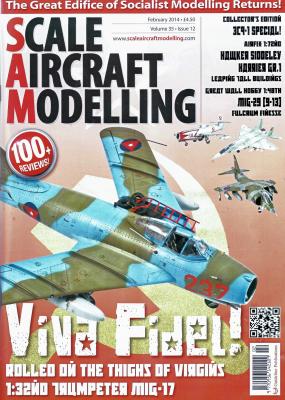
Scale Aircraft Modelling, Vol. 35, Issue 12Published:
Each issue of Scale Aircraft Modelling follows a basic design and format. There are usually two feature articles, an “Aviation in Profile” piece, industry news and a series of “Compact Build Reviews.” The feature articles for this issue cover the build of a Trumpeter 1/32 Mig-17 in Cuban markings and a 1/32 Revell Bf-109G-6. The Mig-17 build, by Brian Wakeman, covers the construction and painting of one of Trumpeter’s early efforts. He modifies the kit with five Profimodeller sets and one Eduard set. The kit is then finished with a bright Cuban paint scheme and great weathering. The other feature article is from Jay Laverty, and covers building the Revell 1/32 Bf-109G-6 (early and late) kit. Mr. Laverty concentrates on painting and weathering with some… more |
|
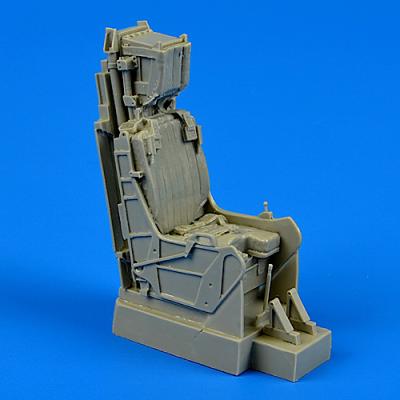
A-7E Corsair II Late Ejection Seat with Seat BeltsPublished:
Quickboost adds to its long line of ejection seats with a late model A-7E Corsair II ejection seat with molded in belts. The seat comes in four pieces with two being the side on the seat top and one a handle on the right side of the seat. All the parts are perfectly cast. Assembly is simple with the canopy breakers being removed and added to the top of the seats. The handle is added. One warning here, I added mine and it was broken off with the handling by the end of the photos. The seat is designed for the Trumpeter kit so I built it for comparison. The Trumpeter seat isn't bad but in comparison to the Quickboost seat, it is lacking detail. The top of the seat is much better detailed in the Quickboost set. Quickboost is definitely an upgrade to the Trumpeter kit. This… more |

|
Mars Attacks Martian WarriorPublished:
Mars Attacks! Most people will first remember 1996 Tim Burton film. it really started as a trading card series released in 1962 by Topps (the baseball card people). It became the most popular non-sport series ever. Mr. Burton kept the Martians in the film very similar to the trading cards and Moebius has duplicated that in this kit. The kit consists of 43 gray parts and 2 clear parts for the Martians helmet. The kit has a nicely detail base with toasted human on it, a lamp post and a Martian warrior straddling the corpse. The kit assembles in four parts- the base, the victim, the lamp post, and our Martian. The base has the victim molded in and separate hands and head. I used a gray primer which was a good base for what is mostly concrete. I added several washes and dry… more |
|
J7W1 Shinden - Interior and Engine - Part 1Published:
Zoukei Mura made a huge splash several years ago with their Shinden, Skyraider and continued the exceptional releases in 1/32 scale. They have now entered the 1/48th scale market with a J7W1 Shinden. Zoukei Mura has a company philosophy of showing all internal detail in their 1/32nd kits to make the kit not only detailed but a learning experience for the modelers. This 1/48th scale kit is no different but I wanted a comparison review to their 1/32nd scale Shinden and decided to build them both at the same time and compare. Let's take a look at the kit- 5 sprues of all grey plastic, not the usual different colors. There is also one clear sprue. All the sprues are very crisp and the panel lines are engraved and just right for the scale of the plane. There is a decal sheet and the… more |

|
YF-23 - Markings for Both PrototypesPublished:
Hobbyboss released the YF-23 Black Widow kit in 1/48th scale to some fanfare. It is a great kit of a unique subject. IPMS was lucky enough to review it while the kit is great, the decals leave a lot to be desired as far as accuracy. The wing warning labels are black, the tile grids by the intakes are missing and the tail markings are more for a fictitious active fighter. There are also miscellaneous badges missing as well as only having markings for the gray version. The black PAV1 version which briefly wore the red black widow hourglass was not represented at all. Never fear, Kursad Albayraktar and… more |
|
Mk. 82 Bomb with Airbrake, EarlyPublished:
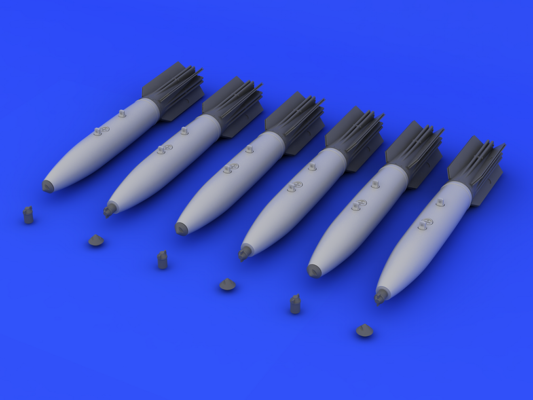
Eduard has started making resin sets and has started issuing weapons sets. This set contains the parts for six Mk. 82 bombs with the early airbrakes. It consists of 24 resin parts with each bomb being 2 parts. This will allow more versions of the bombs to come out. There are also two types of fuses for the front of the bomb. The set also includes all needed decals and instructions. Molding is top notch with very nice detail on the air brakes and also the attachment lugs. Assembly is started by cutting the bomb body and the tail from the sprues. The more square the cut here, the better the assembly. Each part is squared and glued together. I had to use a little putty on the body seam. I cleaned this with lacquer thinner and got a good seam. Painting is simple as… more |
|
US Navy Torpedo Loading CartPublished:
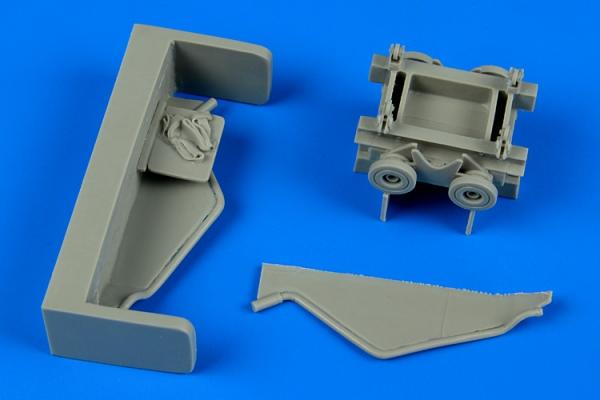
Aerobonus continues their excellent diorama releases with a US Navy Torpedo loading cart. I searched the Internet and found out it was also used to load bombs. The kits is molded in four parts of Aires dark gray resin. There is the main body which is molded in one piece. There is a sizable pour stub to remove but it is all on the bottom and easy to remove. There is one sprue which contains both handles and a insert for the center with molded in straps. The handles are very thin and fine and they need very slow careful removal to make sure they don't break. The resin is good to work with and with some patience, I removed them slowly and sanded the parts off. The insert goes into the center easily. The handles are left and right so make sure they spread enough to get a weapon between… more |
|
F-105 Pitot TubesPublished:
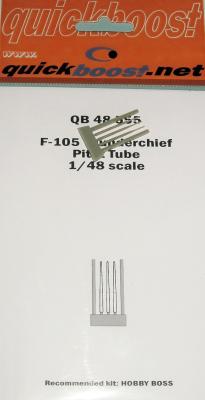
Quickboost has released a set of pitot tubes for the Hobbyboss 1/48th scale F-105. This set is a single sprue of three pitot tubes cast with covers on each side to protect them. The usage is simple; cut the needed pitot tube off and attach to the model. I show it in the photos below beside the Revell kit I also completed for review. There are no seam lines -- so cut, glue and paint. Whether you have broken a pitot tube off, or want to prevent it, this is a nice set for that purpose. And you get three pitot tubes, so there is a reserve. This is a recommended set. My thanks to Aires and IPMS/USA for the review sample. |