
Yak-9K WWII Soviet Fighter
The Yak-9 was a development of the successful Yak-7, which was itself a development of an advanced trainer in use by the Soviet Air Force. Fast and robust, it came into fighter regiments on the Eastern Front in late 1942 and directly challenged the best the Luftwaffe was able to throw at them, although it suffered at first due to poor training.
The Yak9K was certainly the most heavily armed version of this aircraft, featuring a 45mm cannon firing through the spinner along with the standard rifle-caliber machine gun in the upper nose. It proved extremely affective at destroying enemy armor or bombers, although not without cost. The cannon’s recoil was notoriously powerful, and could cause the unwary pilot to lose control, especially at low speeds. It also shook the airframe enough that oil and coolant leaks were a perpetual problem, and the aircraft’s performance was degraded enough that it usually required its own escort. All of these issues, coupled with a consistent unreliability issue with the NS-45 cannon, meant that the 9K variant was actually utilized for only a relatively short period of time.
This kit is the fourth 1/32nd scale foray by ICM into the Yak-9, and features the same excellent features of the predecessor kits. Comprised of a relatively small number of parts for a model of this size, fit is generally excellent as is the level of detail.
Construction begins, typically with the cockpit, starting with detailed side consoles including separately molded control levers and knobs, all being attached to a spider-work frame. The two-part seat is standard for ICM in that no attempt has been made to reproduce the seat harness in any fashion. This will need to be outsourced or scratchbuilt. The control panel also features separate knobs and paints up exceedingly well. A decal is provided for the less bold among us.
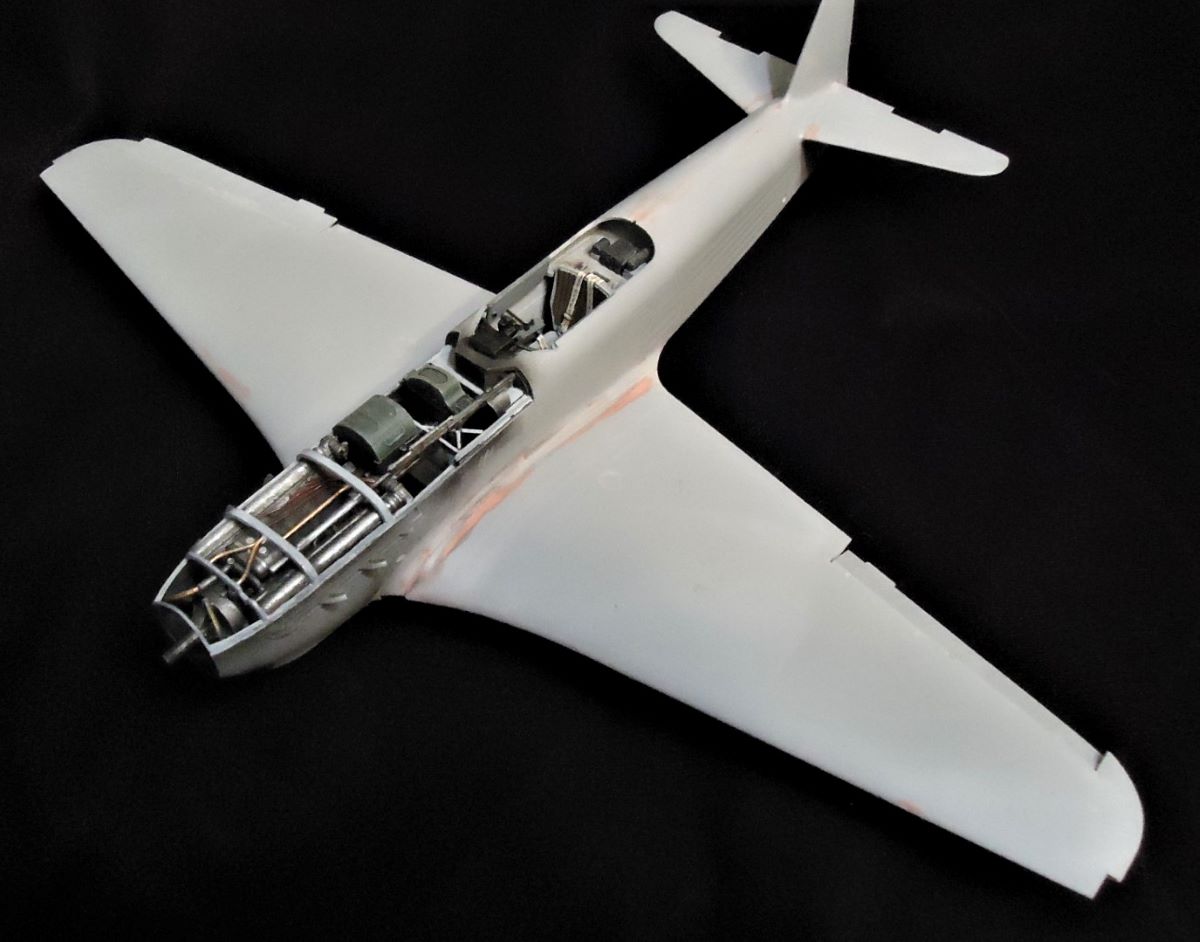
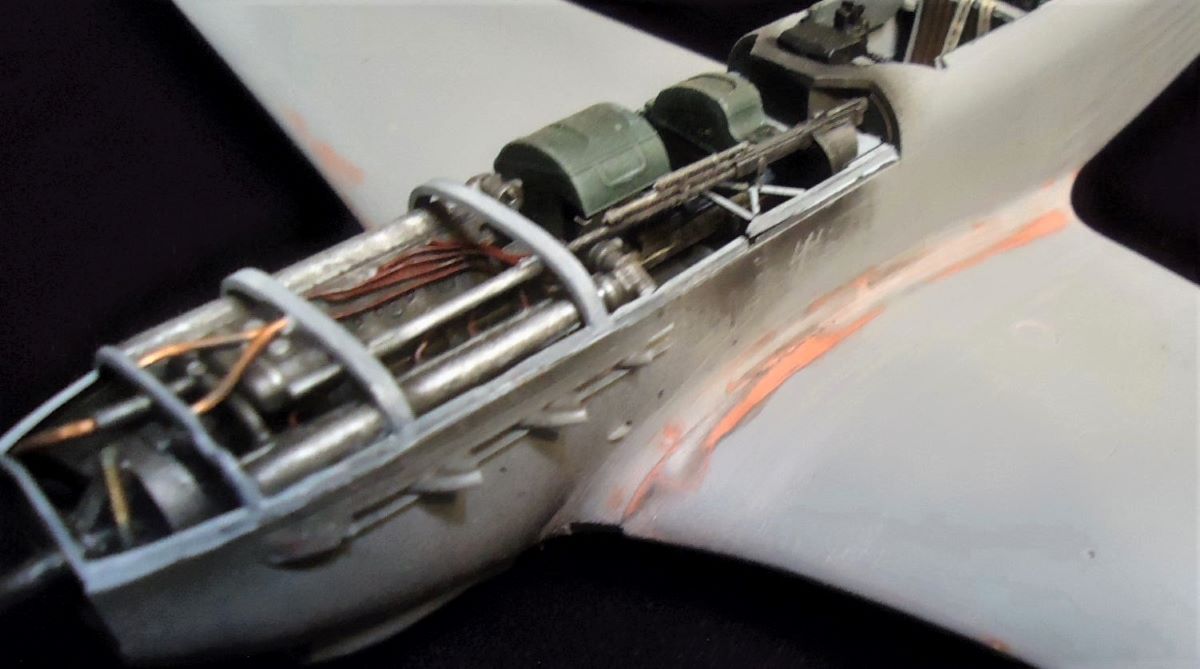
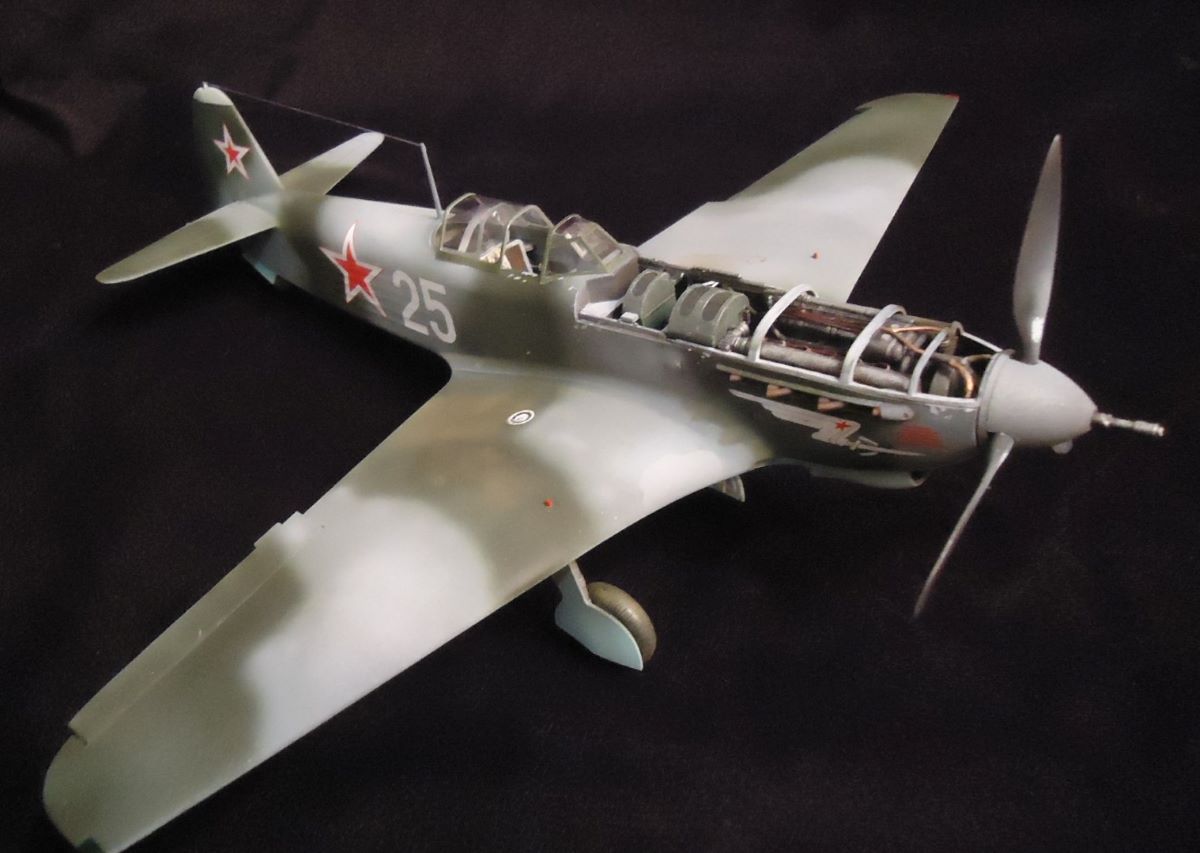
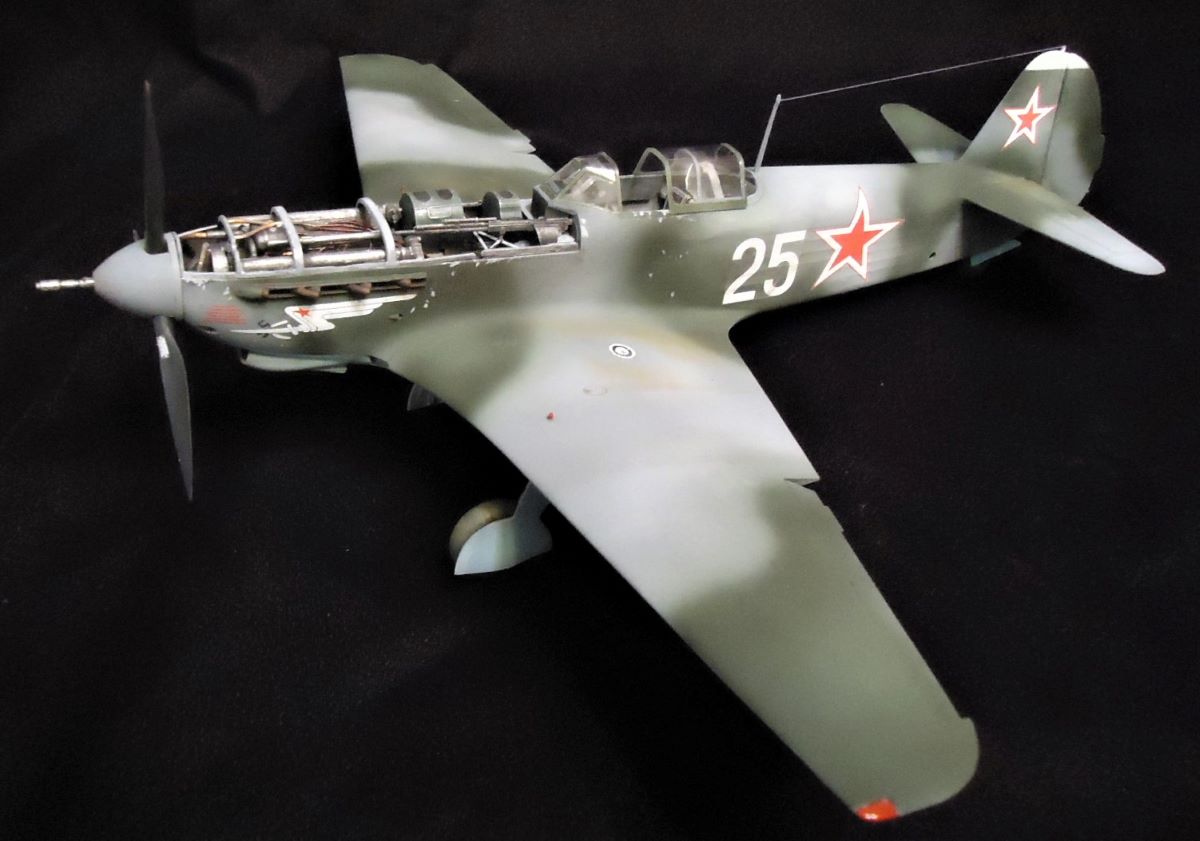
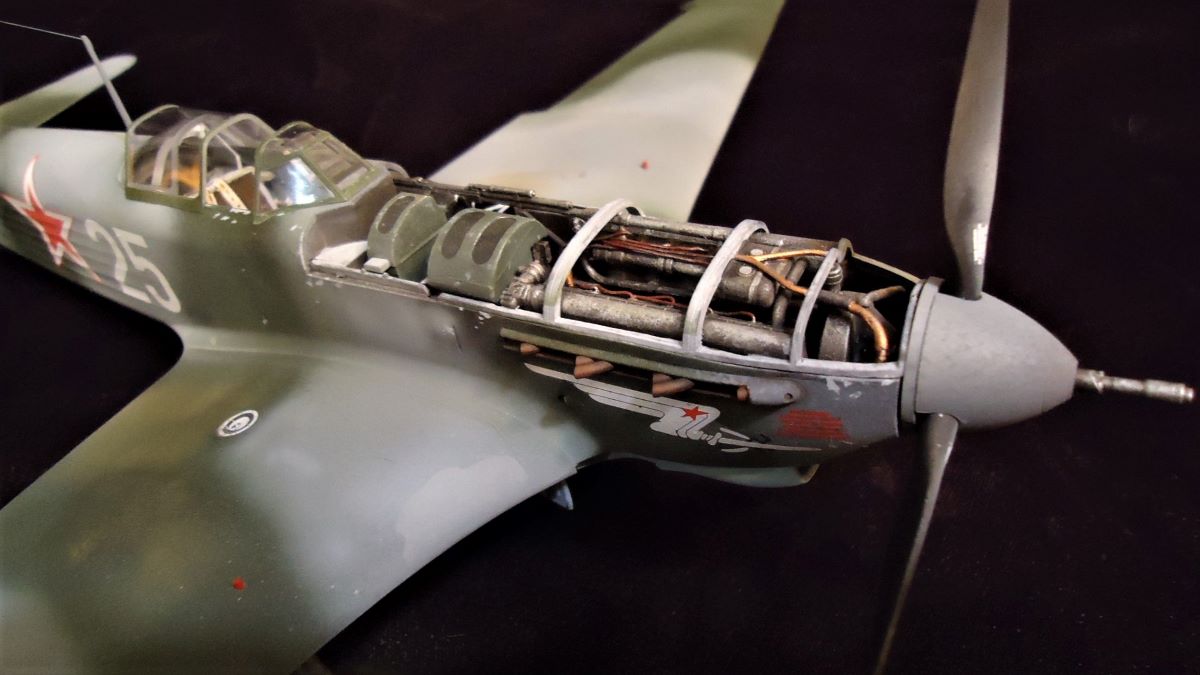
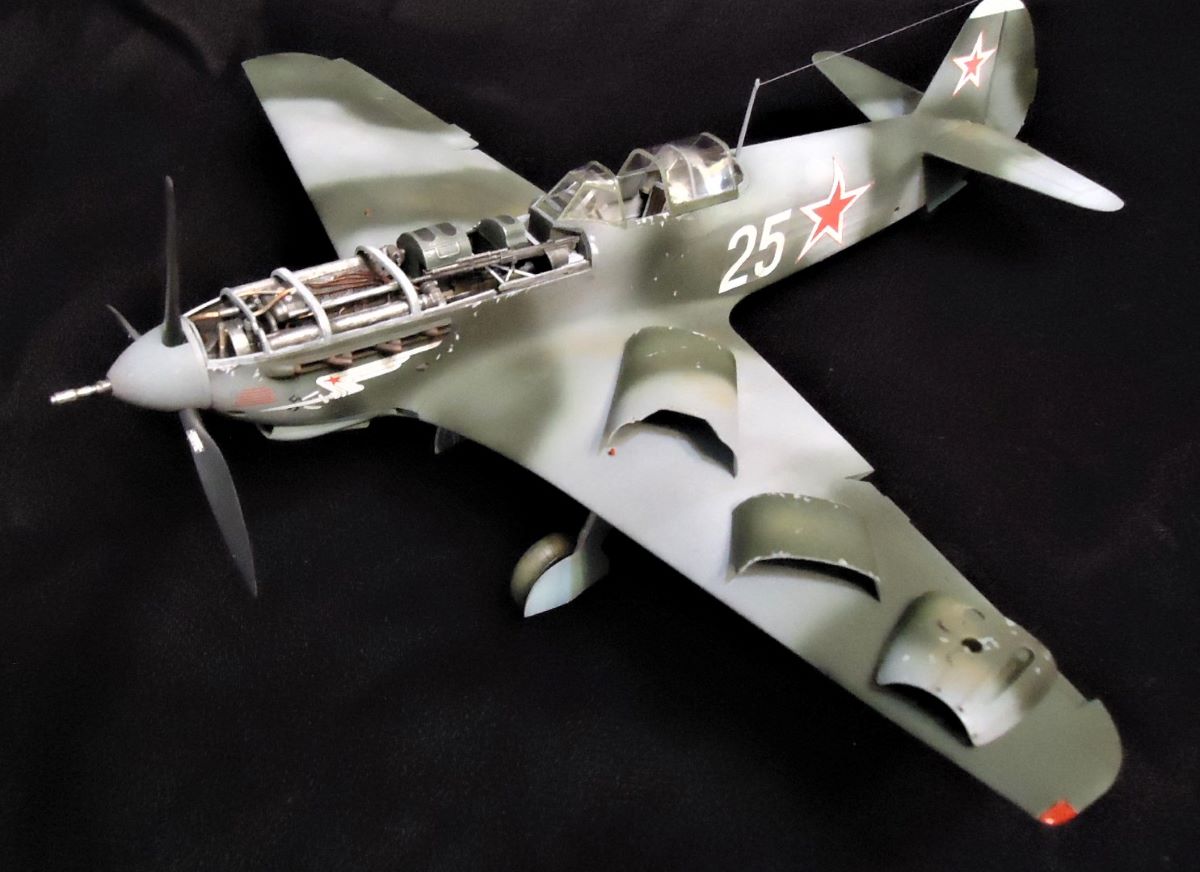
The next step involves the engine bay, and like most ICM 1/32nd scale models, a choice needs to be made whether or not to display this open, and this dramatically affects what parts to include. Personally, I was not going to let this level of detail disappear under a cowl, so opted for the open feature with only some modest wiring added to enhance the engine itself. Separate ammunition cans are provided for both the cannon and MG, and add a lot to the overall look of this part of the model. Beware that part A8 – the cowl frame – was badly crushed, at least on my sample, and took considerable patience to piece back together. However, the end result of all the work was certainly worth the effort. I cut up and detailed the cowl coverings just to see if I could – a fun touch that’s easy to do.
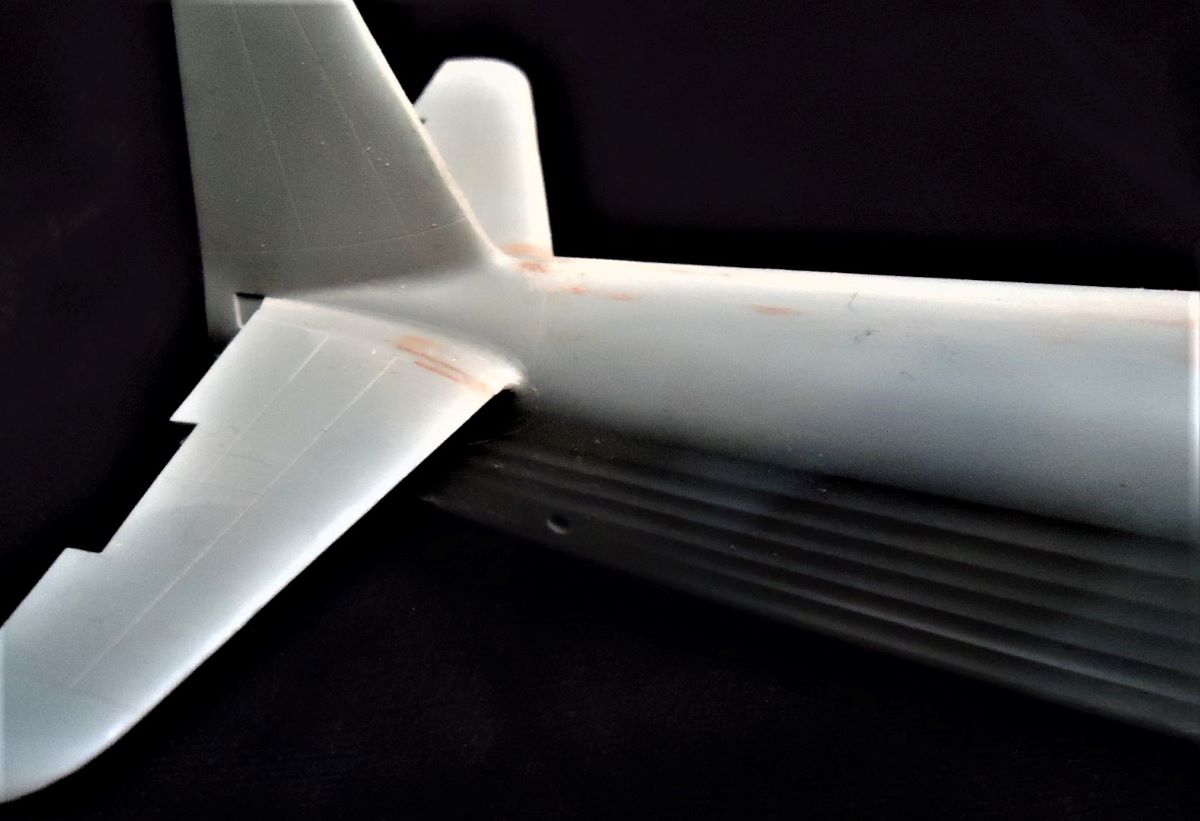
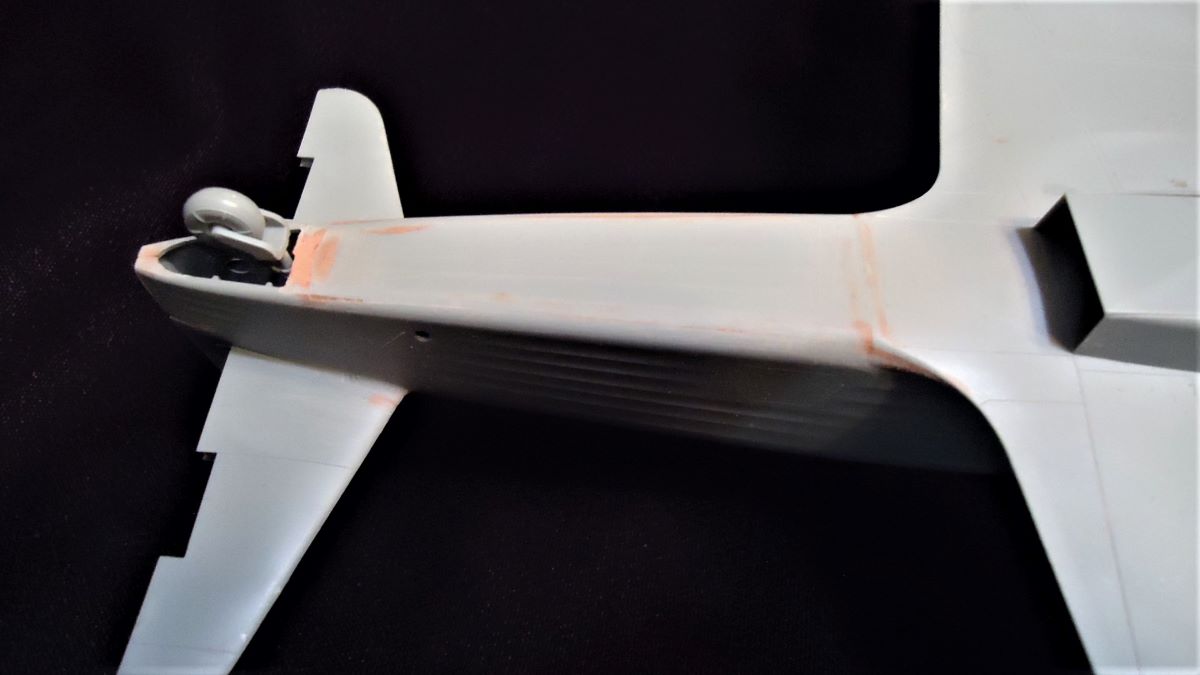
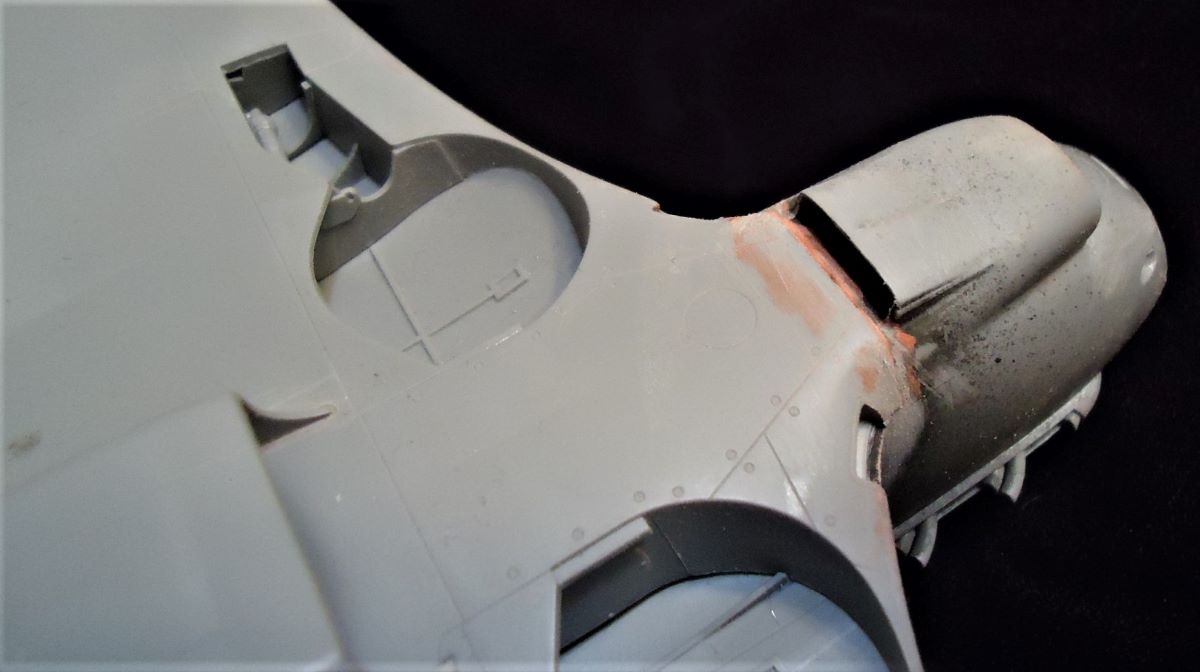
The next step would have you installing the canopy before attaching the wing or other fuselage peripherals. I opted to forgo this step and went directly to the assembly of the wing, which also includes the lower cockpit. All of this fits remarkably well, and features well-detailed landing gear bays in multiple parts. The lower cockpit, which attaches directly to the wing, even includes a flare gun. All control surfaces are separate. Final fuselage assembly includes a separate lower rear panel, and everything fits such that only a minimum of putty may be required around the wing roots. I’ve provided pictures to show where some putty work is necessary.
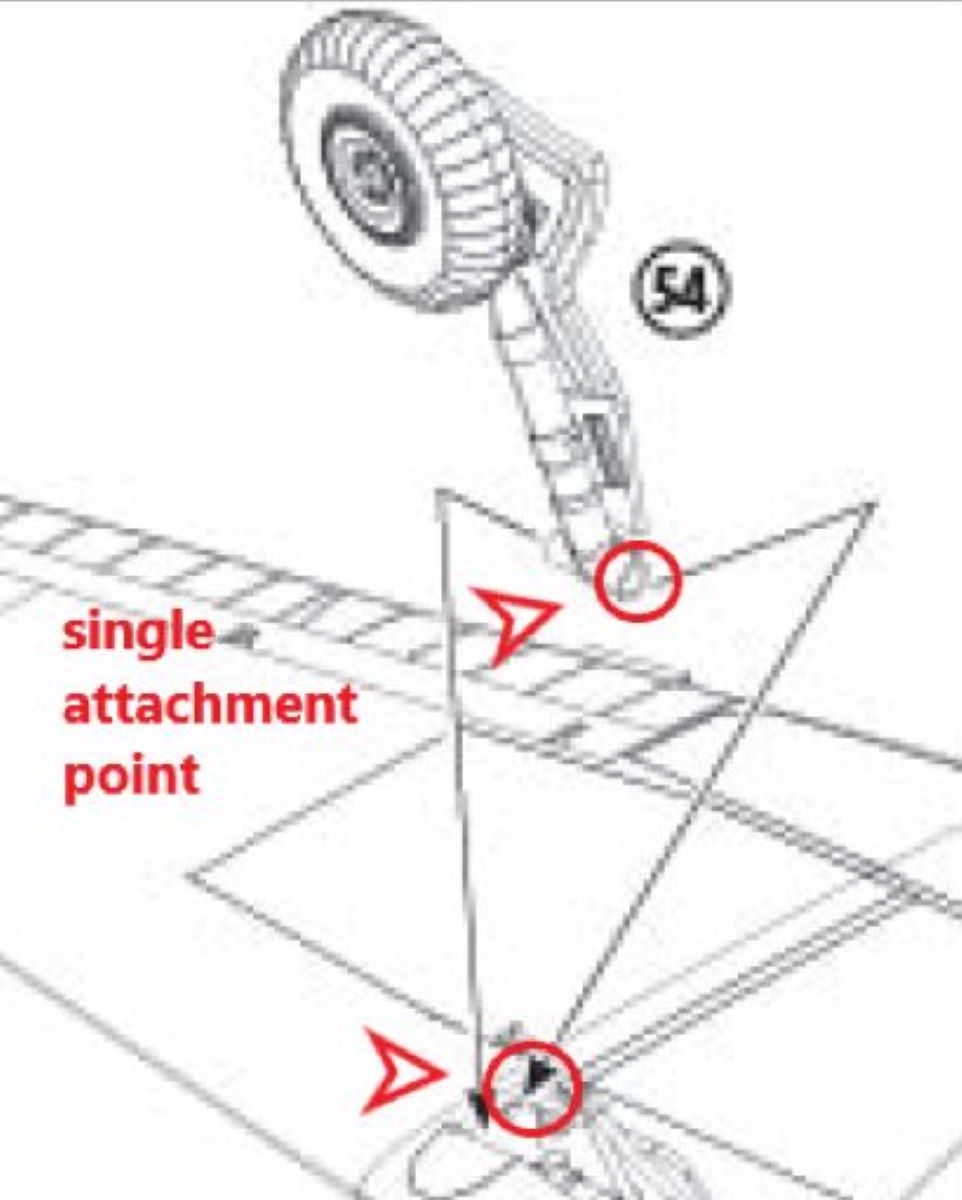
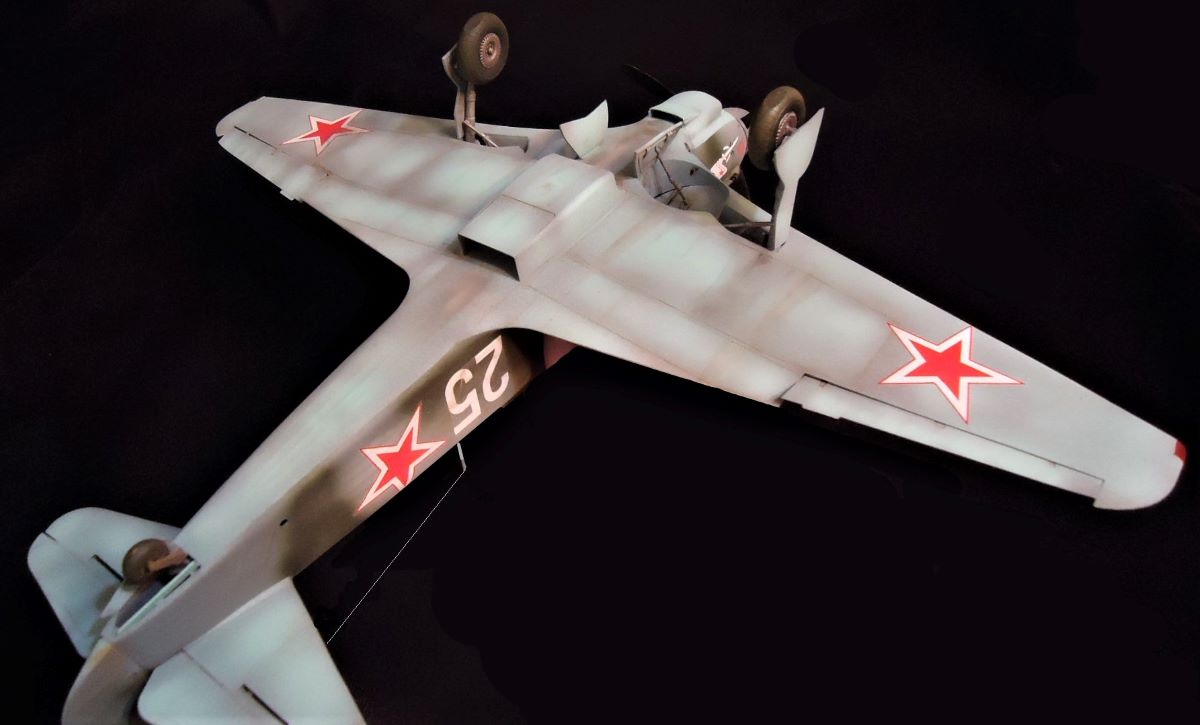
And then onto the landing gear, the only place I really had any difficulty in assembly. In an effort to maintain total realism, the main landing gear only mounts to a single pivot point, rather than straddling the end of the bay as in most models of this type. In addition, since it has to be slid into position after the lower wing is assembled, all they offer is a kind of a “nub” to glue it on. The landing gear braces, flimsy as they also are, also fit on tiny nubs, so overall you have very little gluing surface for the entire assembly, making it quite difficult to even give them an even rake forward. In that regard, you might use the main landing gear covers as a guide to the correct angle. Ultimately, I would up reinforcing this assembly with superglue. I’ve included a shot from the instruction book which shows this single attachment point.
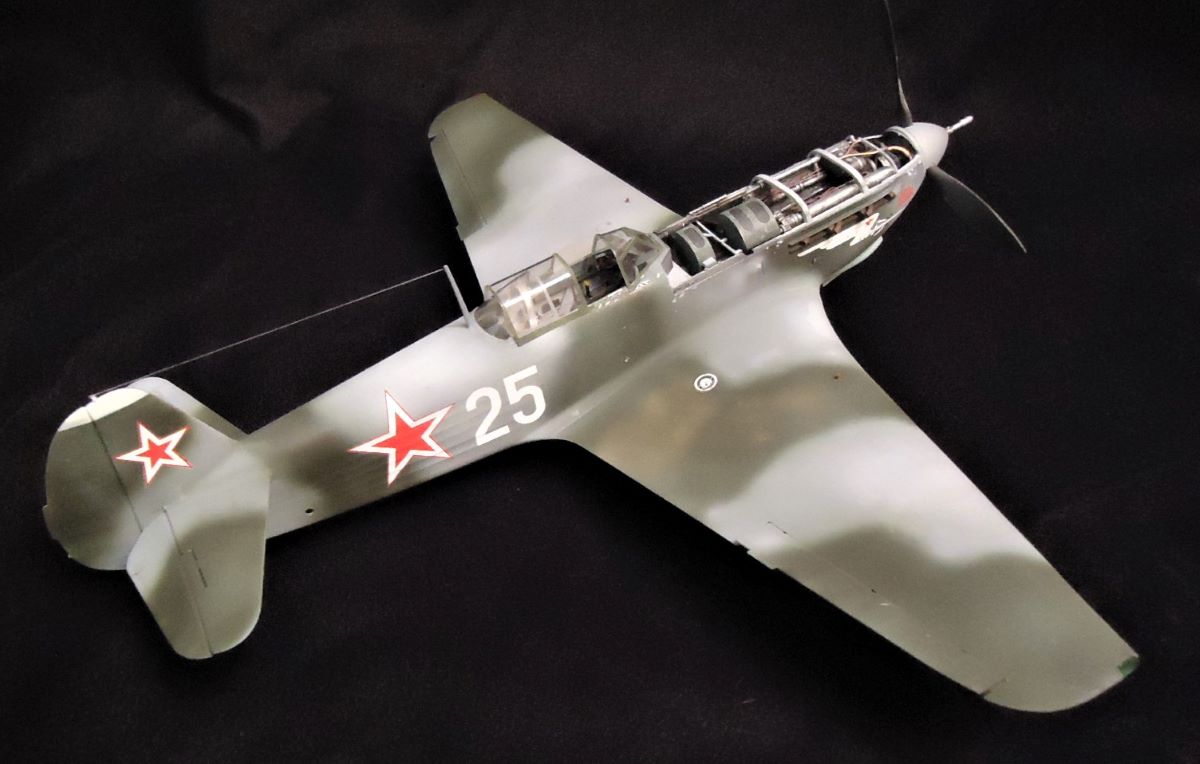
For final detailing, it’s easier to replace the landing gear warning rods on the upper wing surface with small bits of Evergreen rod rather than try to clean up the tiny pieces ICM provides. On to painting, which is a fairly straight-forward process, as all decal selections feature the same basic three-color scheme, although you can add green to the mix, as I did, and still be accurate.
Speaking of which, I discovered something really quite interesting when gearing up for the decals. Neither the box art nor the instruction manual actually show the Russian stars on the aircraft, and at first I thought that this was because of what the aircraft really looked like. I then checked online and discovered that this was not the case. The enclosed decal sheet provides the Russian stars, but they are split like swastika decals often are. I’m not sure what the deal is here, but I suspect that it is now illegal (or simply in bad taste) to display the Russian star in any manner, hence their absence from the box art and instructions. What this means for modelers, though, is that they are forced to try and marry two pieces together for each national marking – a not particularly easy thing to do, as there is JUST enough film on the pieces to prevent them coming together naturally unless one cleverly overlaps one over the other. Since even the unit markings have red stars on them, they have been split up as well. No matter how well you wrestle these down, be prepared to do a bit of cleanup with paint afterwards. All this being said, once on the model the settled down as nicely as any ICM decals do. You may find yourself surprised, as I did, at how colorful this aircraft is when you actually use all the national markings properly. Just out of curiosity, I looked through the ICM catalog and all of their earlier Soviet releases still display the red star markings. Strange.
The end result of all these efforts is a relatively simply, yet highly detailed model of an intriguing and elegant Soviet aircraft from the Great Patriotic War. Generally speaking, assembly provided just a few challenges, as did the decal placement. Either way, I’m delighted to add a later Soviet aircraft to my World War 2 collection, and this one fills a real void. I can recommend it without hesitation if you’re willing to put up with a couple of eccentricities.
My thanks to ICM for making this fascinating aircraft, and to IPMS/USA for a chance to add this beautiful aircraft to my collection. Stay safe, everyone, and happy modeling!

Comments
Add new comment
This site is protected by reCAPTCHA and the Google Privacy Policy and Terms of Service apply.
Similar Reviews