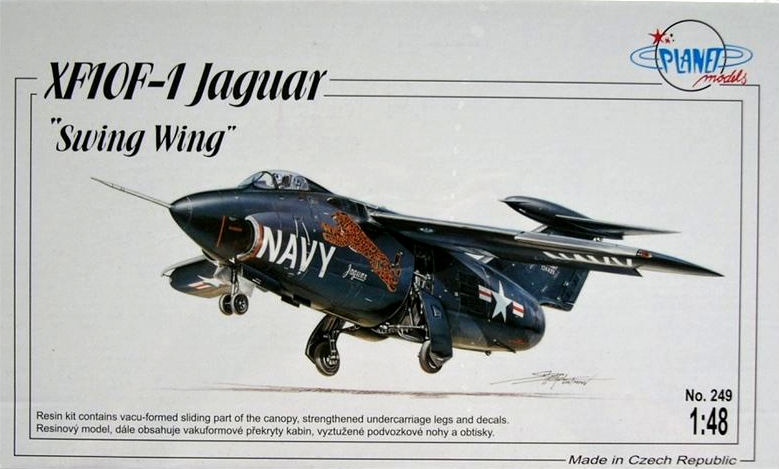
XF10F-1 Jaguar
Everyone knows the F-14D Tomcat and its swing wing design – Top Gun locked that down to the general public. Before the F-14 was built, Grumman produced the XF10F Jaguar, which was the world’s first swing wing fighter. Never heard of it? Me, either, until Planet Models produced a resin kit of it. One reason it never became famous is that only one was ever produced (although a second was started) and, like many early jets, it suffered from being…well, underpowered. Add that to the weird cantilever tail and the other problems, and the plane ended up being a test bed for swing wings, and I can say that lots of good information was learned and ended up in the F-111 and F-14. If you want to see one today, you can’t. Both of them were destroyed, so we have a model left to bring us that part of history.
Planet Models’ kit consists of 40 cream-colored resin parts which are handmade and well-cast. Also included are two great vacuformed canopies, a nice decal sheet, and 7 landing gear parts cast of a much stronger gray resin. This is necessary, as the fuselage is beefy (it had an internal bomb load of 4000 lb) and you need 50-75 grams of weight in the nose to not make it a tail sitter. Prior to anything, the kit was washed with Dawn and hot water and scrubbed with a toothbrush.
The build is straightforward, starting with the cockpit. This is well done and was painted with details picked out. One thing to note, there are no internal color call outs, so I went to Steve Ginter’s book and also to the Internet. Before you close up the fuselage, you need to add both airbrake wells, the exhaust, the tail skid bay, and the front landing gear well. Some of these were pre-painted and installed. I gave a quick sanding to the fuselage halves and checked the join. It was OK but there was some misalignment in the front of the plane and around the cockpit. It was minor and I elected align the cockpit. Super glue was used to close everything and accelerator applied to make sure it cured before it shifted. Fit was good on the interior parts with no interference.
Adding the tail and wings requires a little more modeling skills. For the wings, you have a choice of full span or full sweep. In the interested of space, I swept mine – this is a good-sized plane. To do this, you need to remove a chunk of each wing. The instructions are good here and I marked and cut with a razor saw. The next issue is that the wings are designed as a butt joint, but the fuselage is distinctly rounded. Out came a Dremel and sanding sticks to replicate the curvature that fits into the wings gloves. This was slow trial-and-error and was eventually successful. Prior to adding the two wings, I took two solid brass rods and drilled holes into the fuselage to hold the wings. These extended out about 1-1.5 inches on both sides and were glued in place. The wings were drilled to accept the rods and glued in placed. I would give myself a C+ as it still required some Aves to blend smoothly. Same thing was done to the tail. Since it sits so high and hangs so far of the back, it was pinned with brass to the fuselage and to itself. Again, Aves blended the seams. I was going to have the speed brakes closed but the fit was not good, so I decided to leave them open.
I sanded the fuselage and then added the vacuform canopy, which fit really well. I also added the landing gear which is complicated but is well done. I reinforced the landing gear joints with extra super glue and was ready to paint. First, the entire kit was washed and scrubbed. I then used Alclad Gray Primer and fixed several spots that needed addressing. There is a full color picture of the kit, detailing what outside colors go where and also showing decals location. I coated the landing bear bays and skid well with white and the speed brake bays with red. These were all masked and the entire kit was coated with Humbrol Gloss Sea Blue and left to dry for three days. I masked the leading edges and sprayed Tamiya Gloss Aluminum. At this point I got some tape lift, and then the back and forth went on until I got all the colors done.
The decals went on very well, had good opacity, and settled nicely. I sealed everything with Alclad Gloss and started adding the small bits, such as pitot tubes, landing gear doors, and the nose probe (which was pinned also). Lastly, a semi-gloss Alclad coat was shot and the canopy masking was removed.
This kit is sure to appeal to all Navy fans as well as those of experimental aircraft, and is a very well done resin kit. While not for beginners due to having to shape the wings and pin everything, it will be no trouble for those with a few kits under their belt, and I am sure no one will release another in styrene. This is recommended with those caveats, and I wish to thank Planet Models/CMK for the review sample and IPMS/USA for the chance to review it.


Comments
Add new comment
This site is protected by reCAPTCHA and the Google Privacy Policy and Terms of Service apply.
Similar Reviews