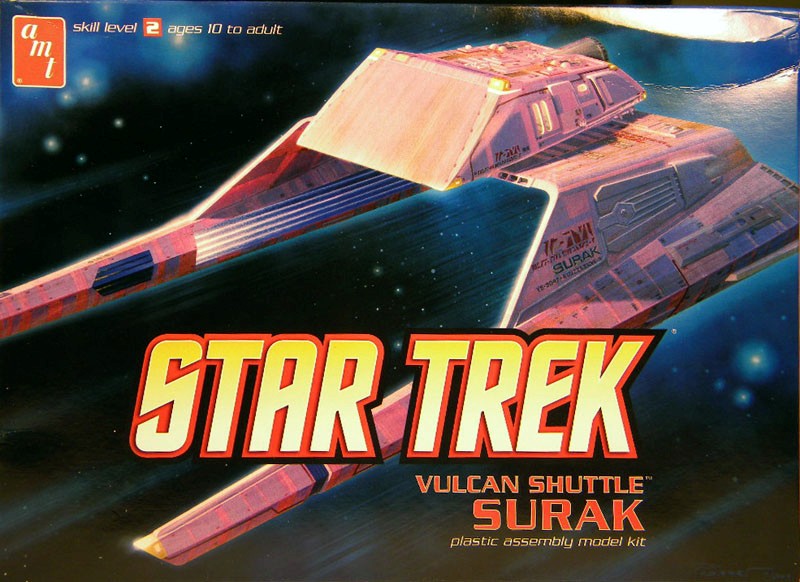
Vulcan Shuttle Surak w/Warp Sled
For Star Trek fans [trekkers], the recent re-releases of the AMT line of Star Trek models has been welcomed with open arms. The re-releases feature all new decals, and in some cases, some new tooling. The Vulcan Shuttle is no exception. First seen in "Star Trek: the Motion Picture", the shuttle Surak is most known for delivering Cmdr. Spock to the newly refitted USS Enterprise NCC-1701. The original release of the Surak featured only a few decals, leaving the modeler the task of masking and painting the complex paneling. Round 2’s new release of the shuttle has solved this.
To start things off, Round 2 went back to the film and retooled the model to more accurately match what was shown on screen. Correcting both size, as well as details such as the docking ports, the new shuttle was molded in a light purple color, which at first glance looks like an odd choice for the ship. However, in doing their homework, Round 2 actually matched this color to the original filming model. More on this in a bit. The other structural change in the model was the addition of two Neodymium magnets which allow the shuttle to dock and undock from the warp sled. But the largest and most noticeable change to the kit was the addition of all new decals to represent not only the original markings, but also all the paneling and new markings for additional ships. But these are no ordinary decals…
To start things off, the construction is fairly simple, just as the original release. There are a couple of fit issues, mostly in the warp nacelles, and the joint between the sled and the nacelles. My sample also featured a few sink holes that needed to be filled. Careful filling, sanding, and cleanup of the seams at this stage will help later on in the decaling process.
Remember that odd purple color? Well, this was done more for the beginning modelers and those who don’t particularly care for painting. The color is a match to the original filming model’s color, and when paired with the decals [and minimal detail painting] give a fairly accurate model of the studio model. The other painting option is for a Federation variant, which requires the model to be painted in Federation grey. Detail painting for the warp grills and some other minor spots can be done at this stage, or after all the decals have been placed.
The kits decals come on two 8.5x11 sheets. The majority of the decals are for the paneling, and are used on both the Federation and Vulcan variants. I have to give Round 2 some major kudos for these decals. They are printed on clear, and unlike most decals you find in kits, are actually translucent. This allows the same decals to be used for both color schemes, changing the color of the panels based on the base color of the model. Thus the panels appear in grey/tan tones over the grey base color, or purple/brown over the purple base. The decals are super thin, but here is where I give a word of caution. The decals in my samples did not seem to be overly affected by Solva-Set, Micro-Set, or Micro-Sol. For very complex areas where the decal needed to snuggle down a bit more, I used the smallest amount of Tamiya super thin glue to soften the decals AFTER they had been placed on the model and dried over night. I also recommend ALL decals be trimmed as close as possible to the color panels, as they are designed to fit only to the edge of the color, leaving approx. 2mm of clear edge all around. Also pay close attention to how you place the decals, as they aren’t always supposed to go edge to edge. Some are designed to have a gap left between decals to simulate another panel. It is at this stage that you can also chose which shuttle you’d like. Decals are offered for two Vulcan versions and two Federation versions from the Enterprise. For mine, I opted for the Haley.
Aside from the extensive decaling sessions, I’m quite pleased with how my shuttle came out. Round 2 does include a nice multi-axis display stand to show off your finished model. Base construction and painting took me just a few days, with the decaling process taking several weeks [working in sections and allowing each to fully dry before moving on]. I highly recommend it to any Trekker, or any modeler looking to do something different, without getting into an overly complex paint scheme of construction phase. My thanks to Round 2/AMT for re-releasing these old Star Trek kits, and IPMS/USA for providing this review sample.


Comments
Add new comment
This site is protected by reCAPTCHA and the Google Privacy Policy and Terms of Service apply.
Similar Reviews