
Vickers Wellington Mk.1C
The Kit
The kit comes in a fairly thin box that has a nice painting of a Coastal Command Wellington bombing a U boat. The scheme seen on the box is number one of the 6 choices that Italeri gives you. Upon opening the box you find a single bag of 5 gray sprues, and one clear sprue. Inside that bag is also a note saying that the kit was made in the Czech Republic. This kit is the MPM kit reboxed. Along with the sprues come a nice large instruction booklet and a very nice decal sheet by Cartograf. Under all that is an addendum to the instructions telling you step 6 is wrong for this version of the kit, and to use the updated parts for the exhaust. (The hedgehog exhaust of the original MPM kit were replaced by regular tubular exhausts.)
Construction
Construction starts with the cockpit. This is a fairly simple affair, as the cockpit is only made up of a few parts. Italeri would have you paint the parts a series of grays and greens, yet the photos of Mk1C’s that I have seen show the cockpit forward is flat black. It’s your choice which you want to do so trying to find photos of the actual aircraft you are making are recommended.
Step 2 is the largest step, where you build both turrets, attach all the interior parts (cockpit, tail wheel well, various boxes in the bombardier’s compartment), then sandwich in both turrets, and seal up the fuselage.
Speaking of the fuselage now would be the time to point out the biggest flaw in the kit: the lack of geodesic construction behind the windows. The Wellington was built using a geodesic structure designed by Sir. Barns Wallace. It is unique and is seen throughout the aircraft. MPM/Italeri reproduced it very well except in the most important part of the build. It should be visible behind the two large windows in the bomb bay. This is not reproduced in this kit.
When looking at the 6 choices for paint jobs, 4 of the 6 show the structure. Only the Coastal Command and the first Czech bird hide the structure by painting over all the windows; the other 4 choices all need this. Now Eduard did make a photo etch aftermarket set, but it may be out of production. I was thankfully able to find one as I wanted to do option 6, the captured German markings. I feel that Italeri could have fixed this simply by adding the structure as a decal for the windows. Don’t let this deter you from buying the kit but just keep it in mind.
Step 3 has you building both wings and main gear wells. Follow the recommendation to sand down the wheel well so that they fit into the wings. I did with a few swipes and they fit great.
Step 4 has you attach the wings and stabilizers, then build the powerplants. For the engines you add all the cylinders to the engine core. I recommend test fitting them into the cowlings, as I had to sand the cylinders down to fit the engines inside. Most of the engine will be hidden by the cowling so it is OK if they are not all even.
Steps 5-7 have you adding landing gear, gear doors, and various other bits to finish the build, so other than adding the cockpit windows and bombardier’s glass which were held off with the rest of the parts to get the Wellington into the paint booth, you are done.
Painting and Decaling
Italeri gives you 6 options when it comes to this edition of the Wellington. All of them are unique and I recommend them all. I chose option 6, which is a captured 311 squadron bird in German Markings from 1941. It looks British, but has German Crosses where the roundels would go. I painted it using Tamiya Acrylics in Dark Earth, Dark Green, and Flat Black. I started with the Flat Black, and then using LF Model's vinyl masking, I masked off the wings and sides in camo scheme “A”, spraying the Dark Earth first, then when dry, the Dark Green. I had previously masked all the windows using an old Eduard vinyl (pre-kabuki tape) mask set I found online. When all the paint was dry, it got an overall coat of Gloss, and then the decals went on. It was here where I found another issue. The directions call for 4 of decal 2 (the German crosses), but the decal sheet has only 2 of them. There are 4 crosses, but they are of two different thicknesses. I made an executive decision to use decal 1 (the thinner crosses) on the wings, and decal 2 where the directions say to on the fuselage sides. Also each code letter is a separate decal, so pay attention to spacing when attaching them. The decals are great though! They are in perfect register, just the right thickness, and have some give in them, so you can move them without worrying too much about them ripping. Definitely the best part of the kit. After all was dry, a coat of dull was applied, and it was time for final assembly.
Final Assembly
I went back to steps 5-7 and added the landing gear, gear doors, ventral antenna, engine air intakes, and these long pipes that attach to the middle of the wing and extend past the trailing edge. All had been pre-painted. While this was drying, I got the wheels cleaned up, built, and painted. The main gear wheels had a lot of flash on them that needed to be cleaned off, and actually needed some seam filling as well. I also got to work on the complex exhaust for the engines (this is where that addendum comes in). Using the addendum and step 6, I found the proper parts, and after building the assemblies, I used a drop of super glue on each to get them to stick in place quickly, as they only attach to the leading edge of the cowl, and I didn’t want them to slip. Then the wheels were attached, and the model flipped when it was dry. The props were painted and added, and on top of the aircraft the ADF and radio antennae were added, along with the astrodome over the bomb bay. This completed the Wellington Mk 1c.
Final Thoughts
This kit has its up and downs. In addition to the above-mentioned issues, I found that I had to use Testors orange tube glue instead of my usual Tamiya thin glue. I had the wings snap off and fuselage break once during the build before I switched to the tube glue. With that being said though, it really does build up into a great looking airplane. So with a little patience and a bit of modeling experience, you can have a great Wellington in a really unique paint job! I recommend this kit, and I want to thank IPMS and Italeri for allowing me to review it.


The kit-supplied Cartograph decal set was the best part of the kit.
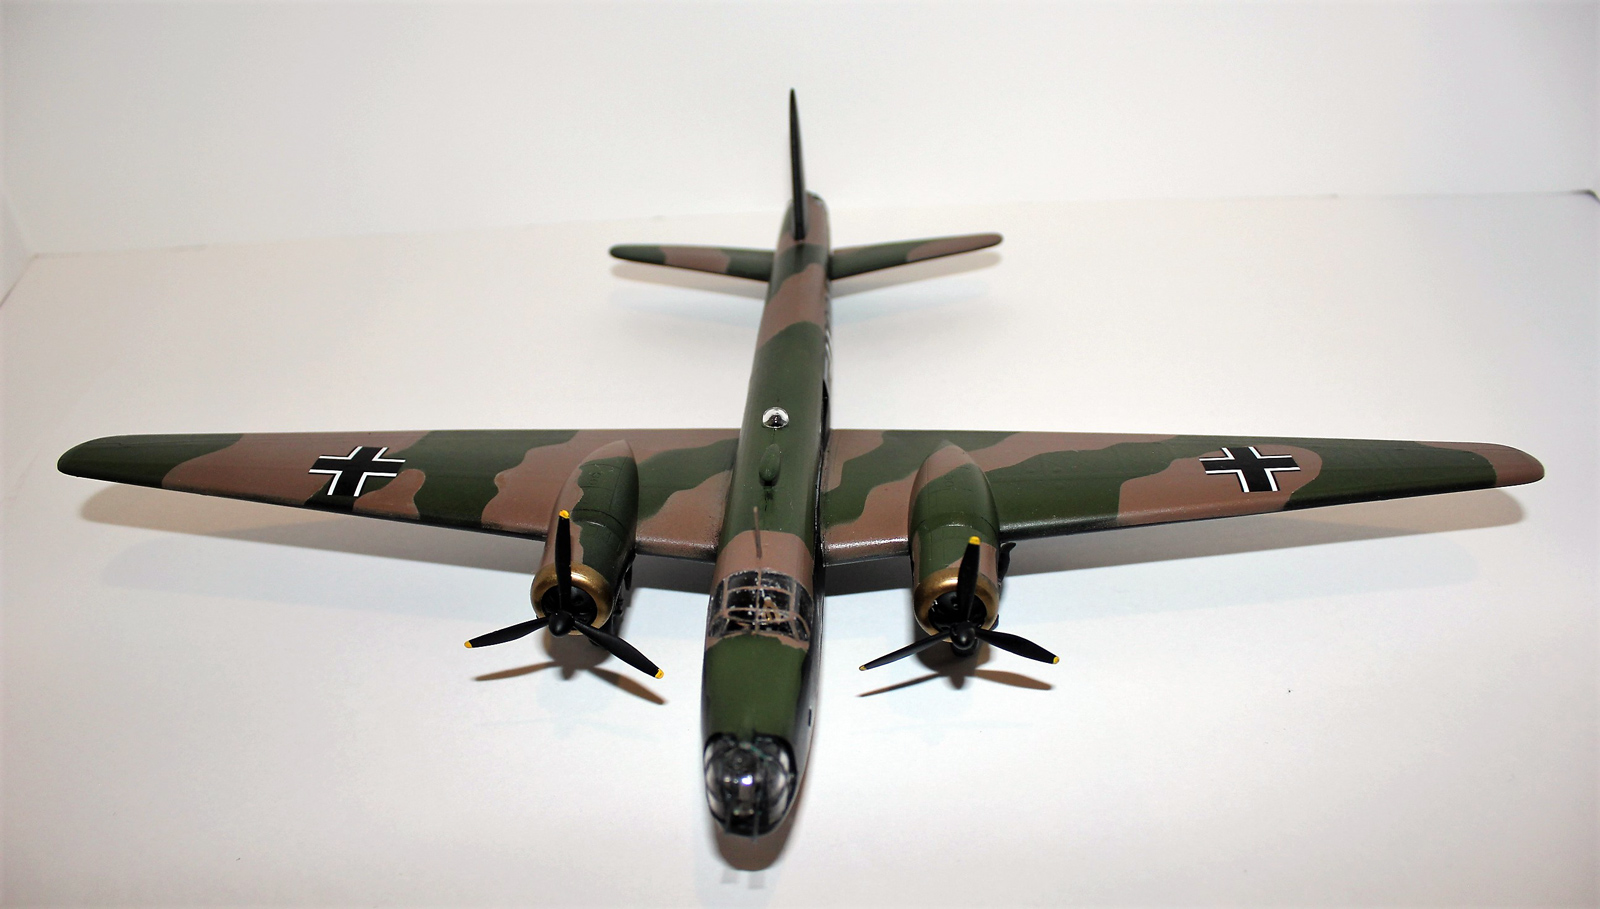
Finished kit, front view.

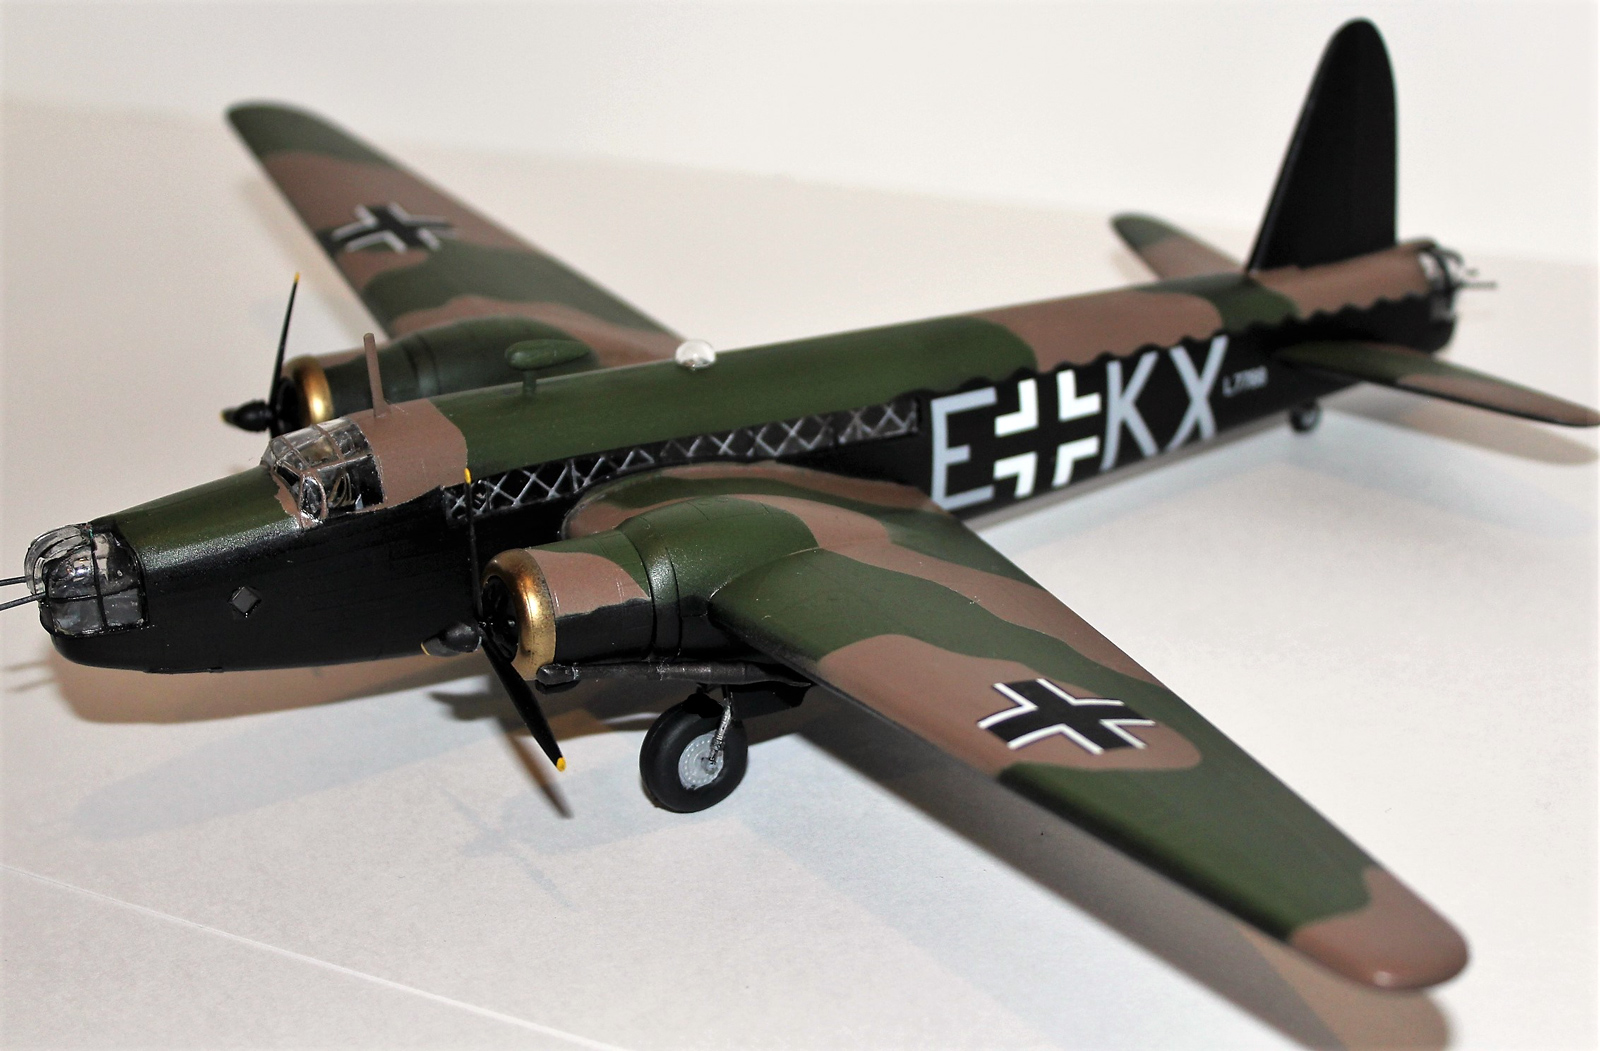
Right-side view of kit finished with the markings of an airframe captured by the Germans.
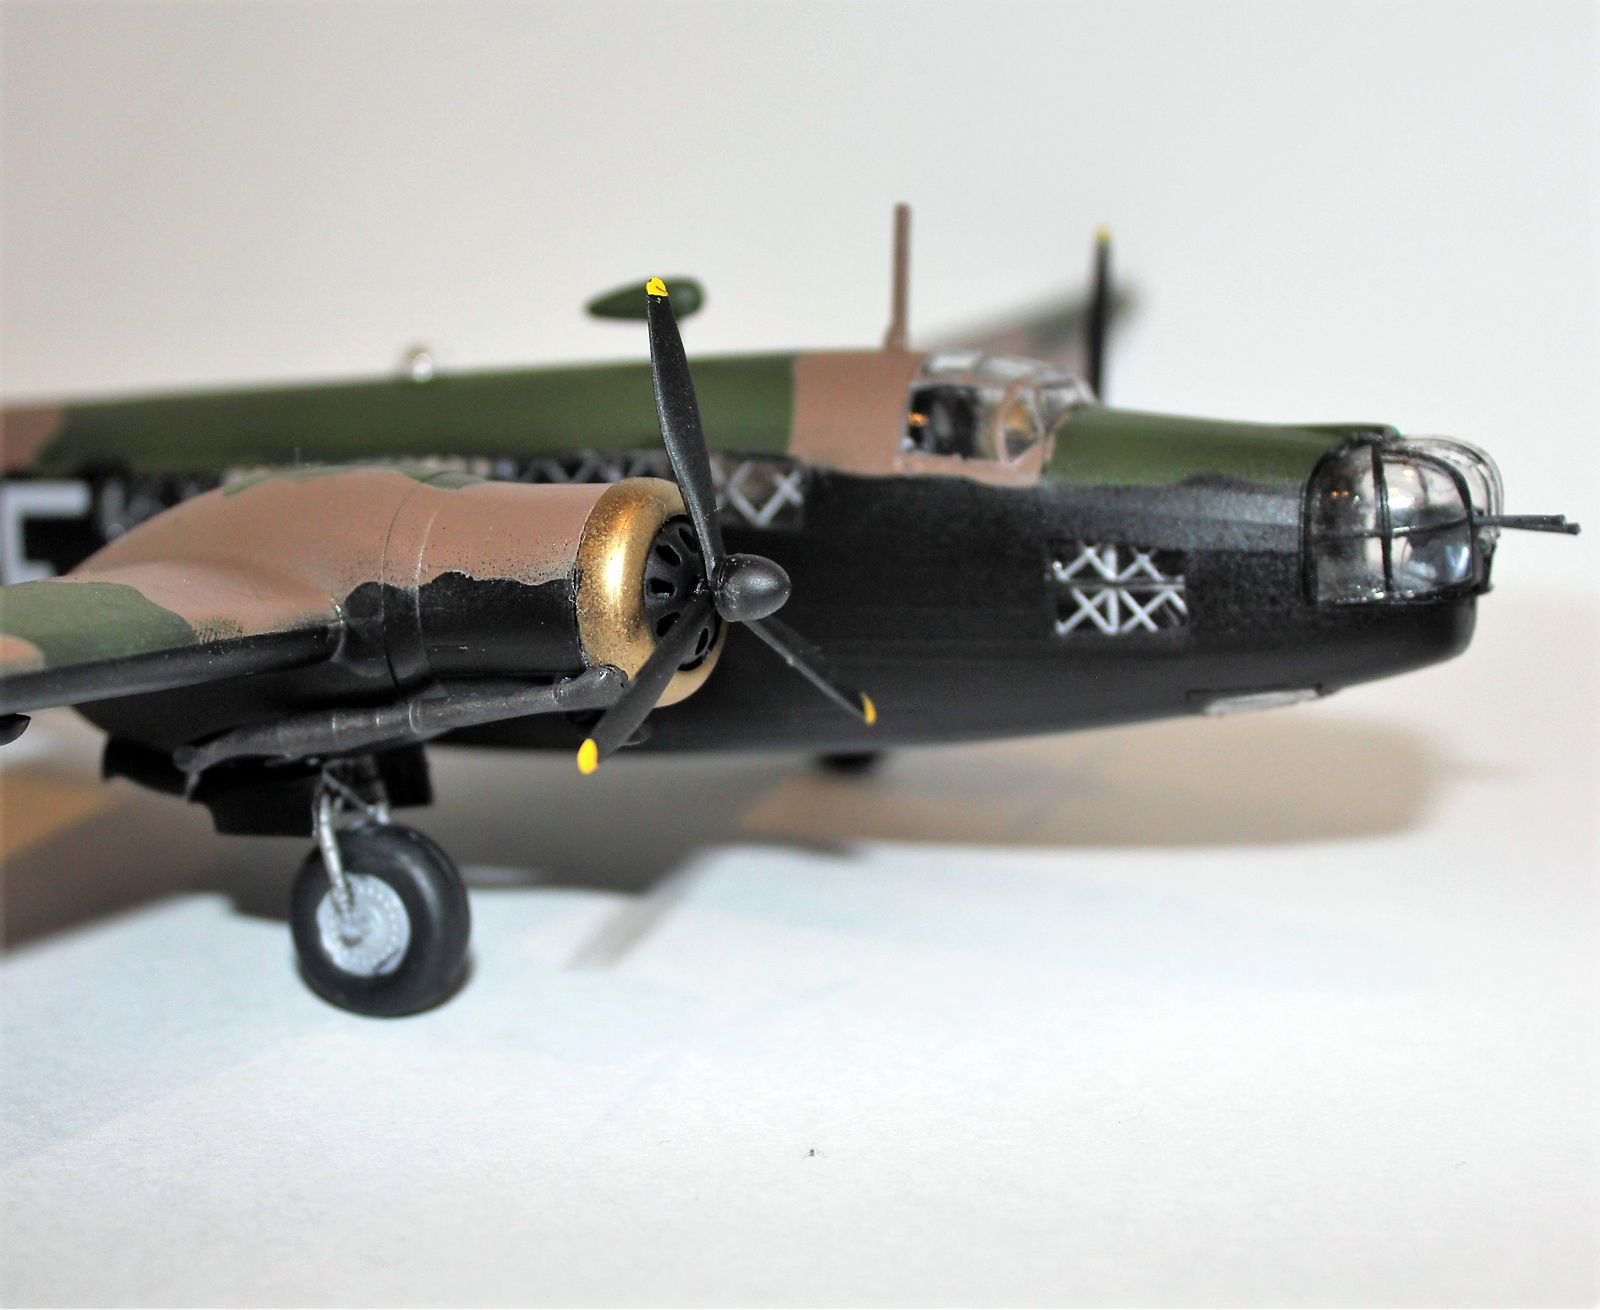
Close-up of cockpit, engines, antennae, and landing gear.
Left-side view.

Comments
Add new comment
This site is protected by reCAPTCHA and the Google Privacy Policy and Terms of Service apply.
Similar Reviews