
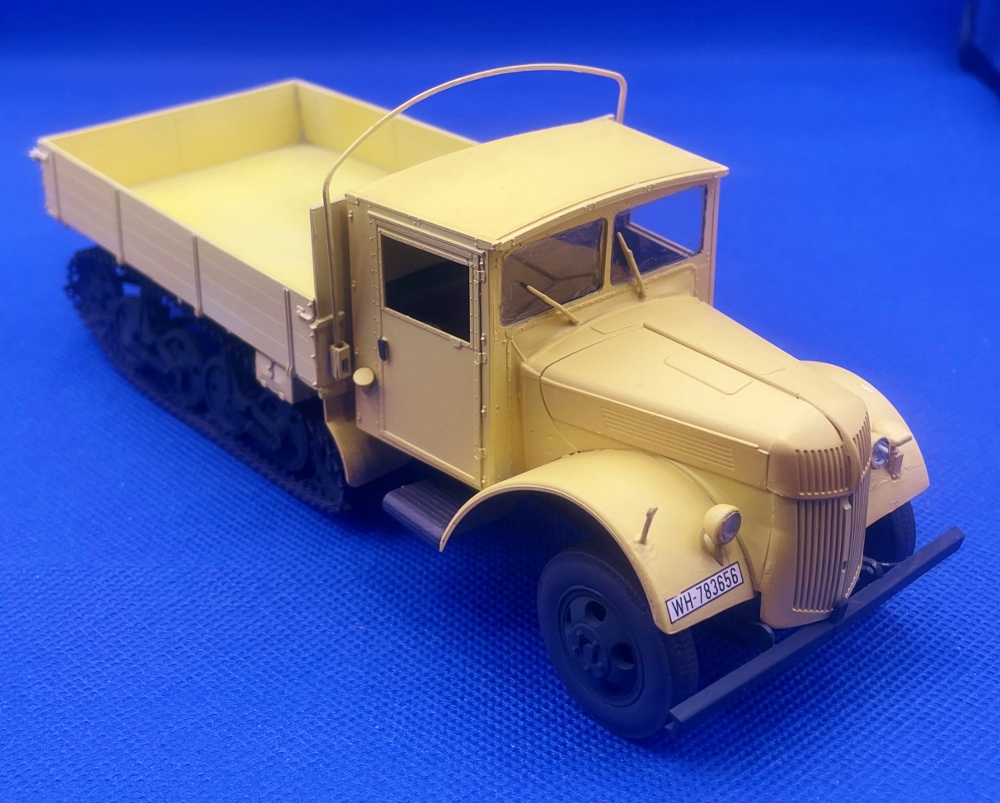
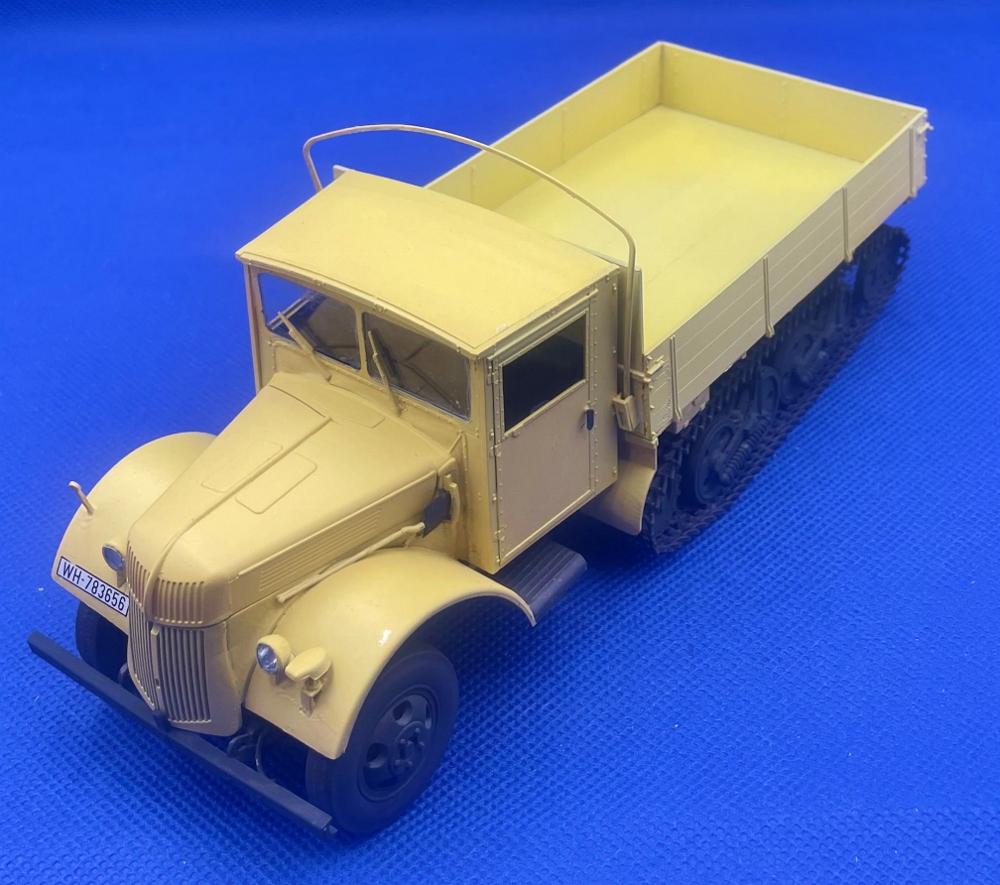
V3000S/SSM Maultier "Einheitsfahrerhaus"
ICM boasts a rich heritage within the modeling community, establishing itself as a well-established Ukrainian-based plastic modeling company. Expanding its selection of modeling kits, ICM presents its newest 2023 release, the 35410 V3000S/SSM Maultier “Einheitsfahgrerhaus’ WWII German Truck. While this kit is a reissue of the 2012 version, it includes additional new parts.
The term “Maultier” (mule) or Sd.Kfz 3, designates a series of half-track trucks utilized by Nazi Germany during WWII. The term “Einheitsfahrerhaus” translates to “standard driver’s cab.”
The following is a brief history of the kit taken directly from ICM’s website.
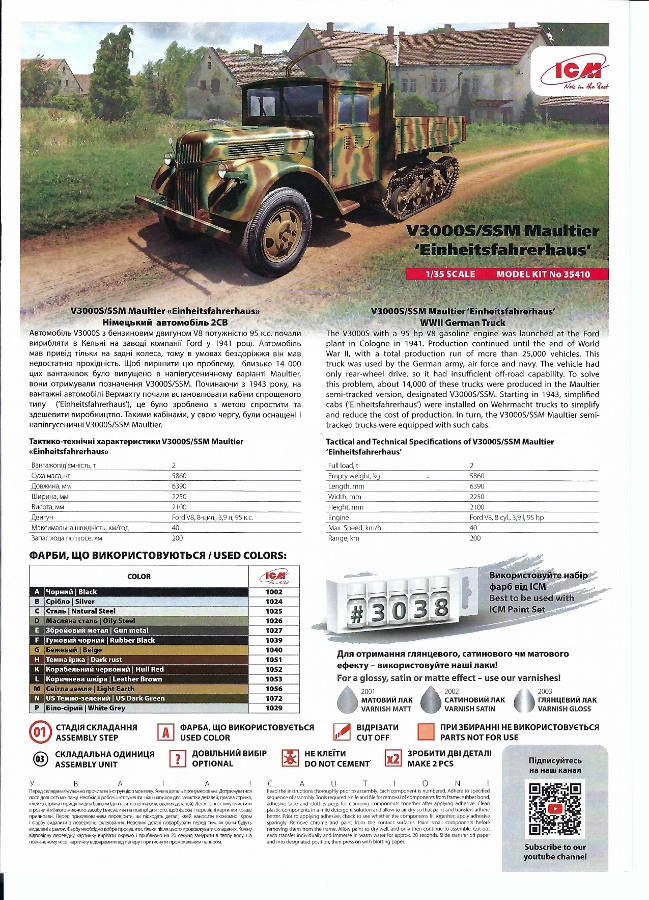
“The V3000S with a 95 hp V8 gasoline engine was launched at the Ford plant in Cologne in 1941. Production continued until the end of World War II, with a total production run of more than 25,000 vehicles. This truck was used by the German army, air force, and navy. The vehicle had only rear-wheel drive, so it had insufficient off-road capability. To solve this problem, about 14,000 of these trucks were produced in the Maultier semi-tracked version, designated V3000S/SSM. Along with the tracks, the Maultier was also equipped with brake levers, which allowed the truck to turn on the spot like a tank. Starting in 1943, simplified cabs (‘Einheitsfahrerhaus’) were installed on Wehrmacht trucks to simplify and reduce the cost of production. In turn, the V3000S/SSM Maultier semi-tracked trucks were equipped with such cabs.”
Box and Contents
The kit is packaged in the standard ICM top loading box with an oversleeve, which has dimensions of 9” (22cm) x 12” (30.5cm) x 1-5/8 (14cm). On the box’s lid, you will find a vibrant depiction of a V3000S/SSM Maultier “Einheitsfahgrerhaus’ WWII German Truck on a country road, while the sides of the box display supplementary illustrations and include a brief account of the truck’s history.
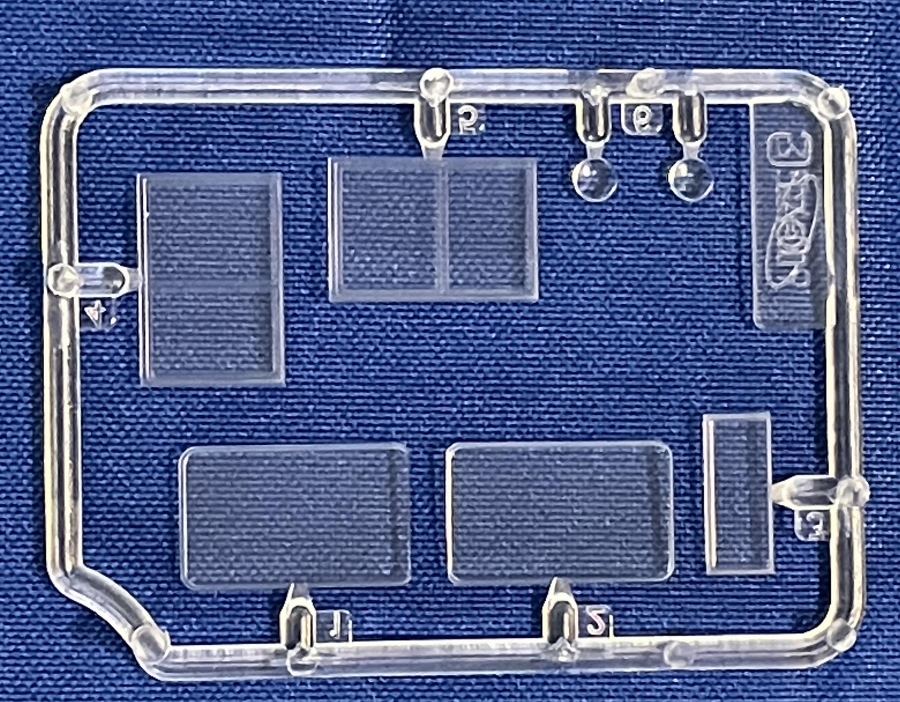
Within the box, you will find a cellophane bag holding five gray sprues, and another package containing clear parts identified as from ICM 35409. Furthermore, there is a compact 4-page pamphlet that details ICM paints, complete with a color chart.
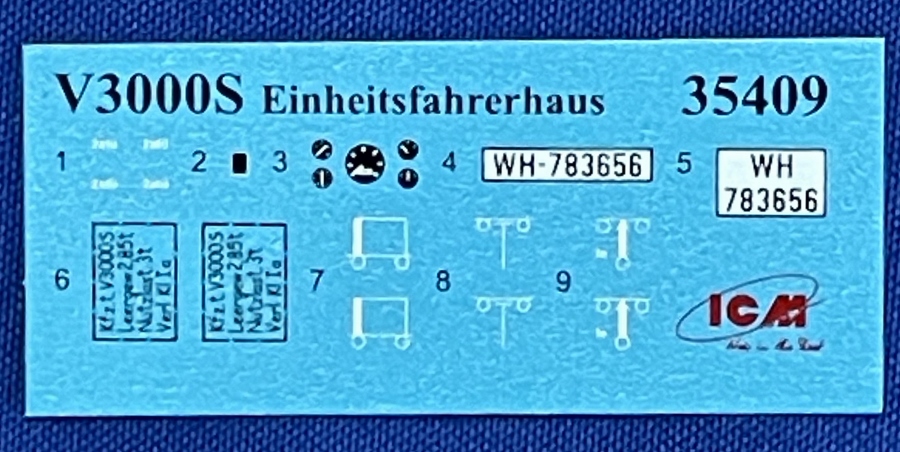
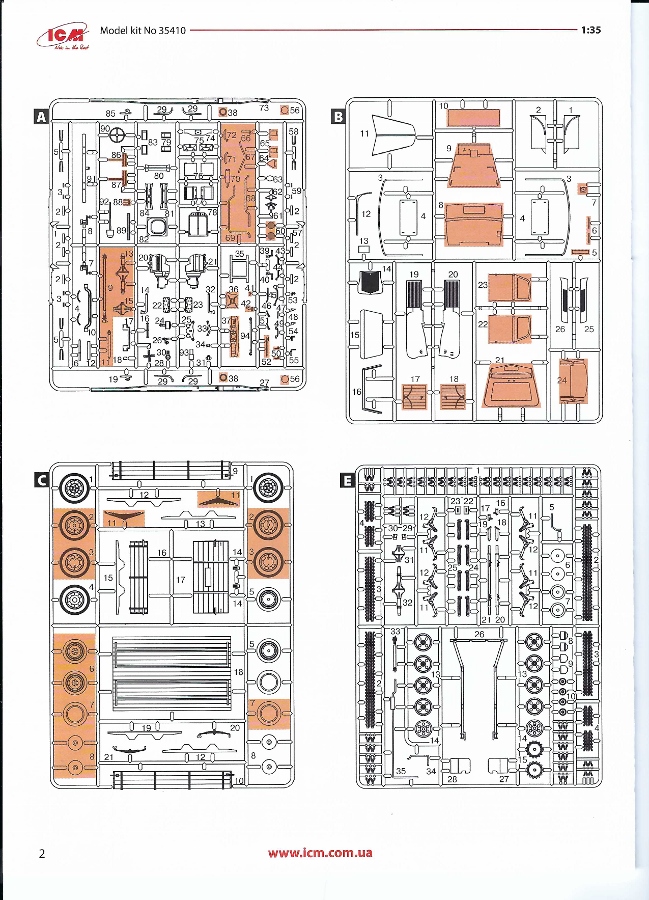
Additionally, there is a 16-page instructional booklet enclosed, featuring a neatly tucked-in small decal sheet. The instructions, following the typical ICM style, are presented in a portrait format with fifty-eight CAD-drawn steps. The initial page provides a concise history of the model, along with color references using ICM paints. Pages two and three show the parts layout with parts not used in orange. There is no photo etch included in the kit. With a total of 336 parts in the kit, the assembly process should be efficient, as is typical with all ICM kits.
The small decal sheet provides markings for three options:
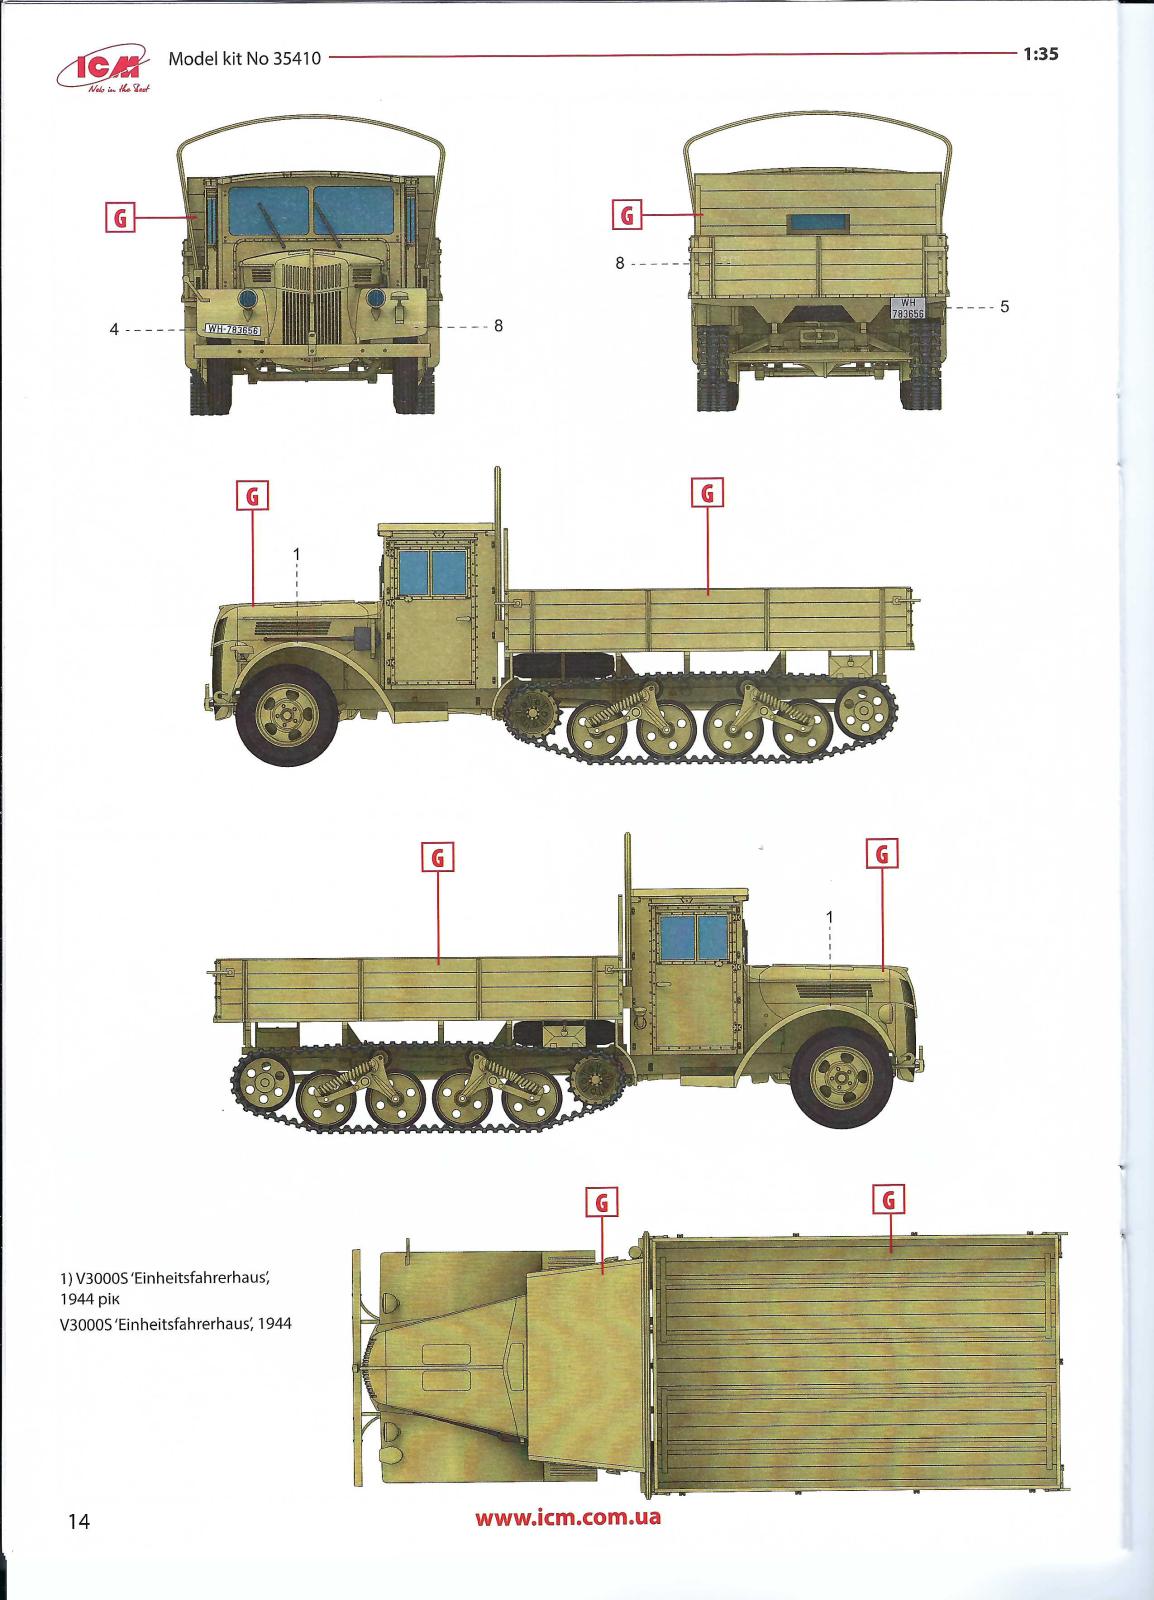
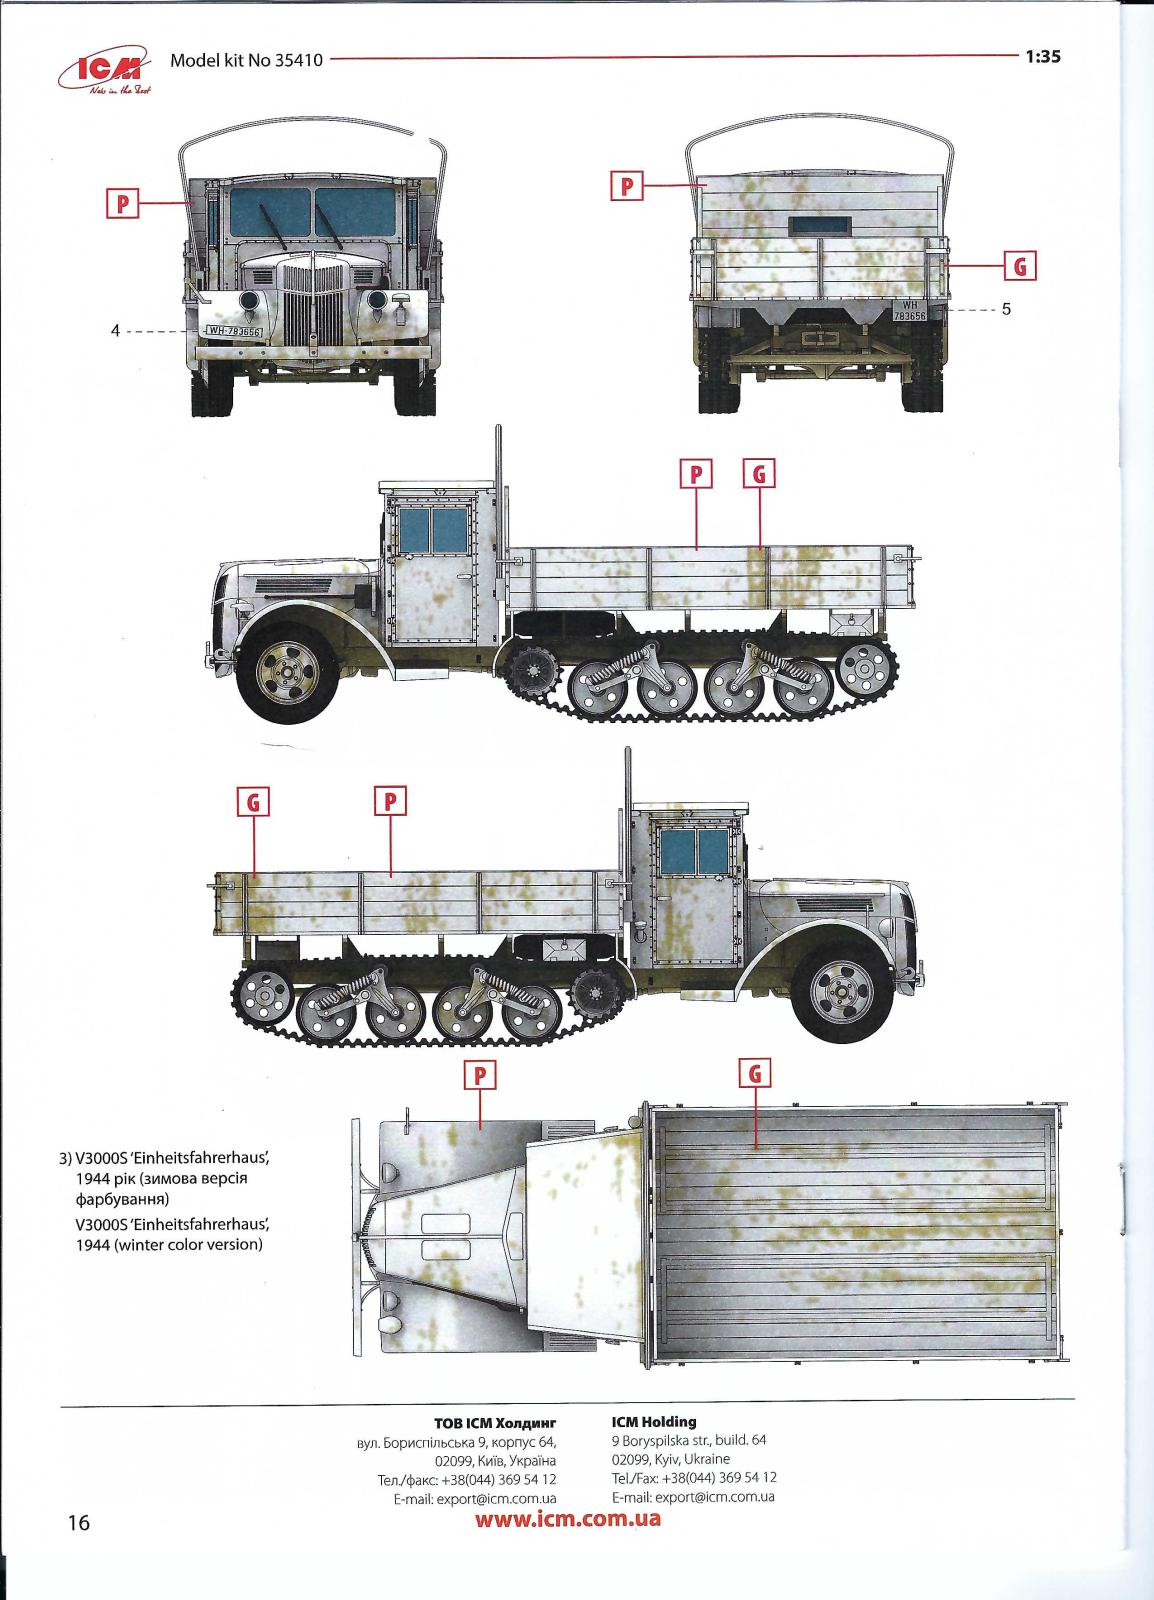
- V3000S ‘Einheitsfahrerhaus’, 1944
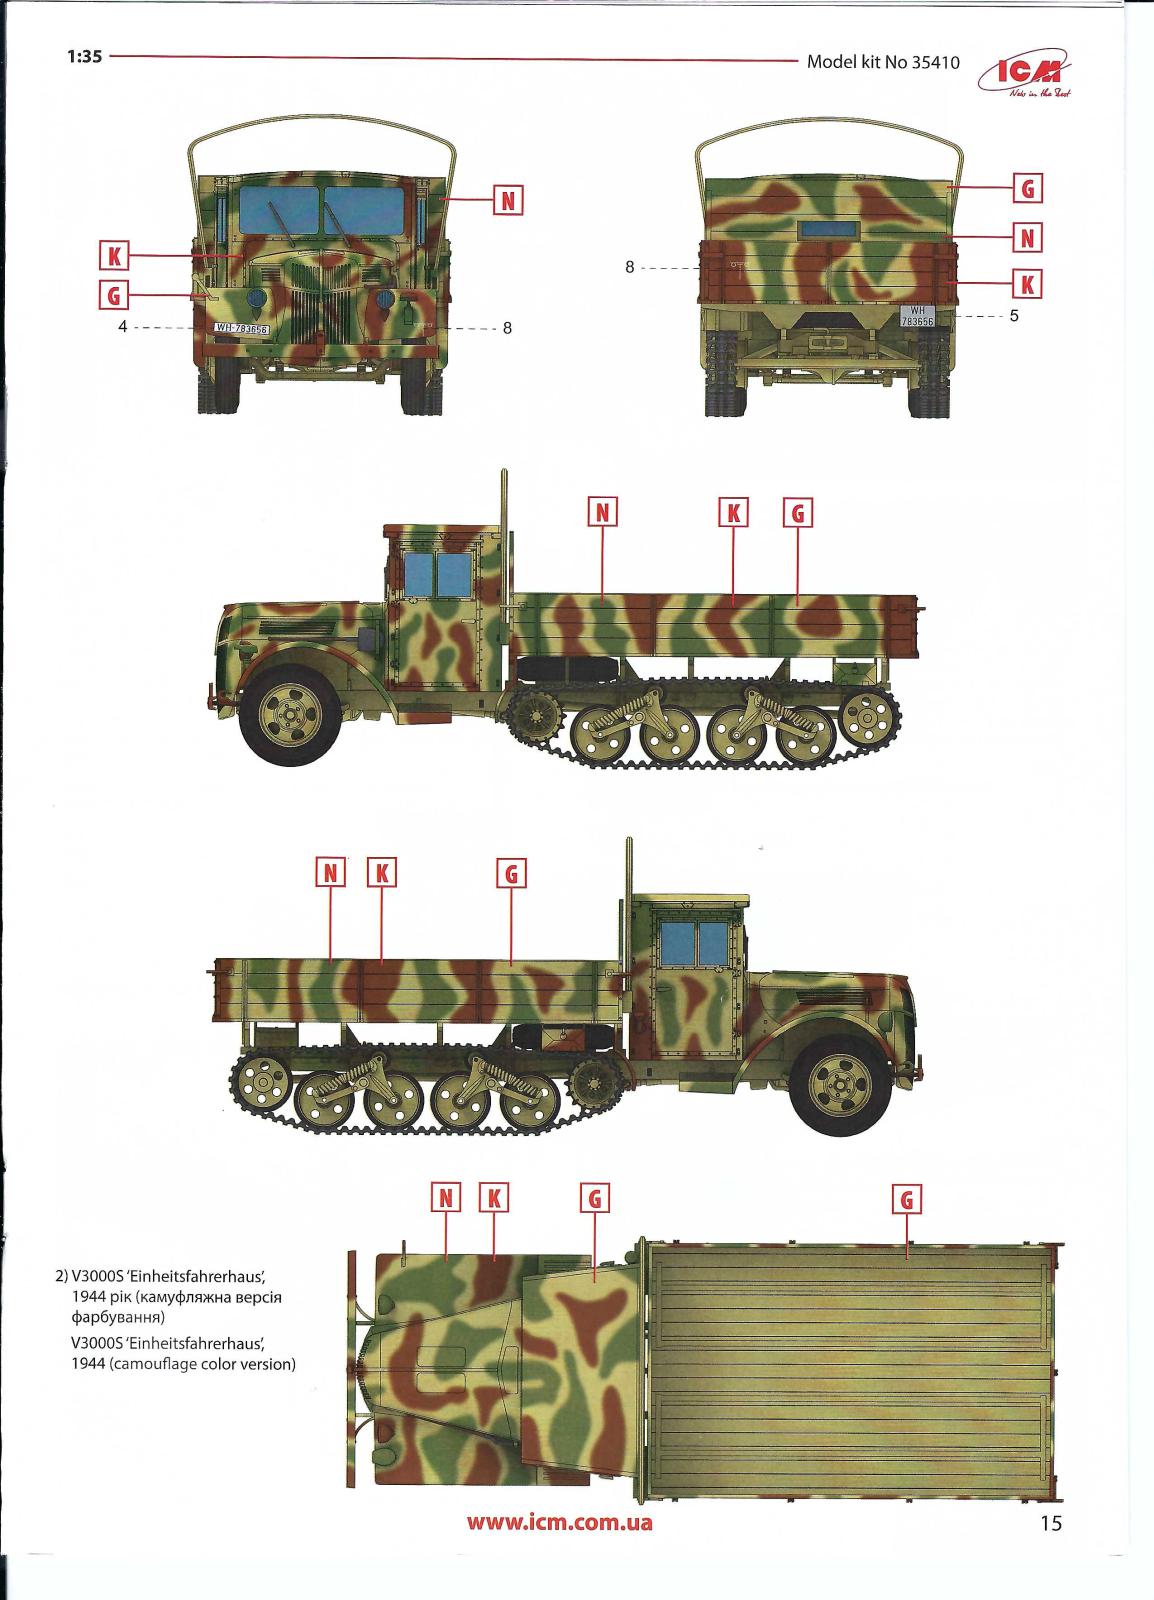
- V3000S ‘Einheitsfahrerhaus’, 1944 (camouflage color version)
- V3000S ‘Einheitsfahrerhaus’, 1944 (winter color version)
Sprue Breakdown:
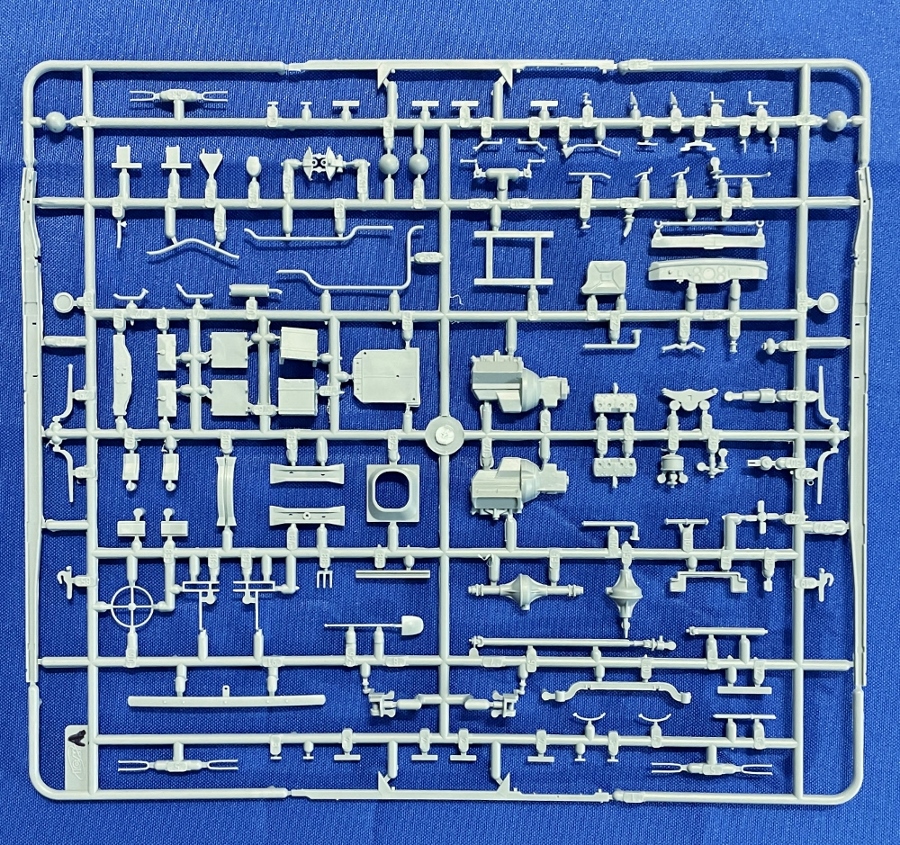
- One sprue (A) containing the engine, frame, dash, and numerous small parts from Kit # 35411.
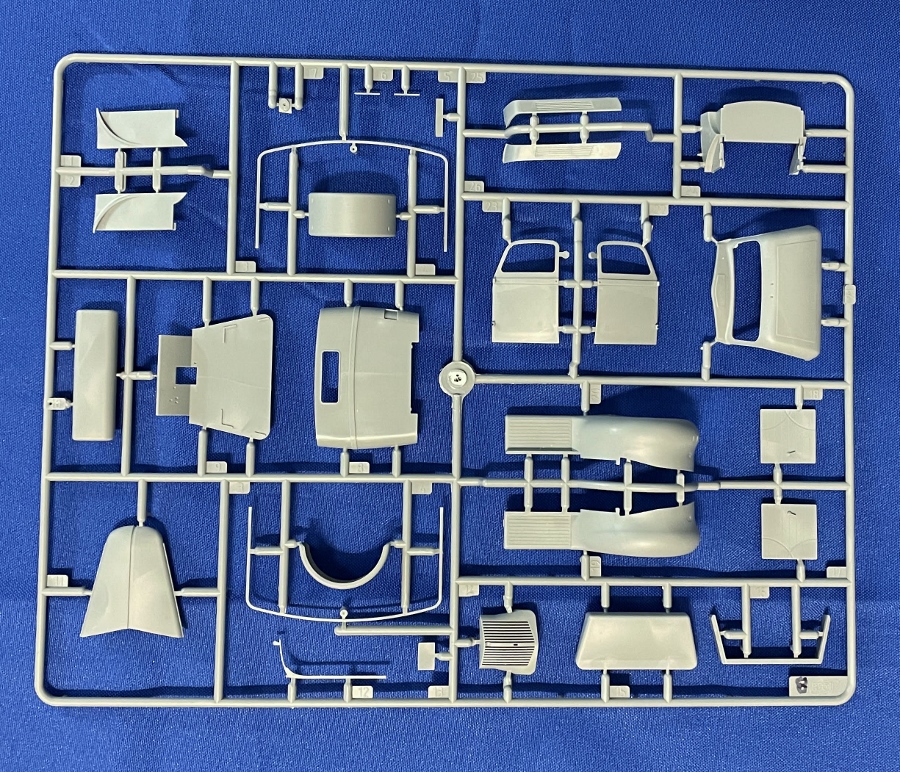
- One sprue (B) containing most of the body parts from kit # 35411.
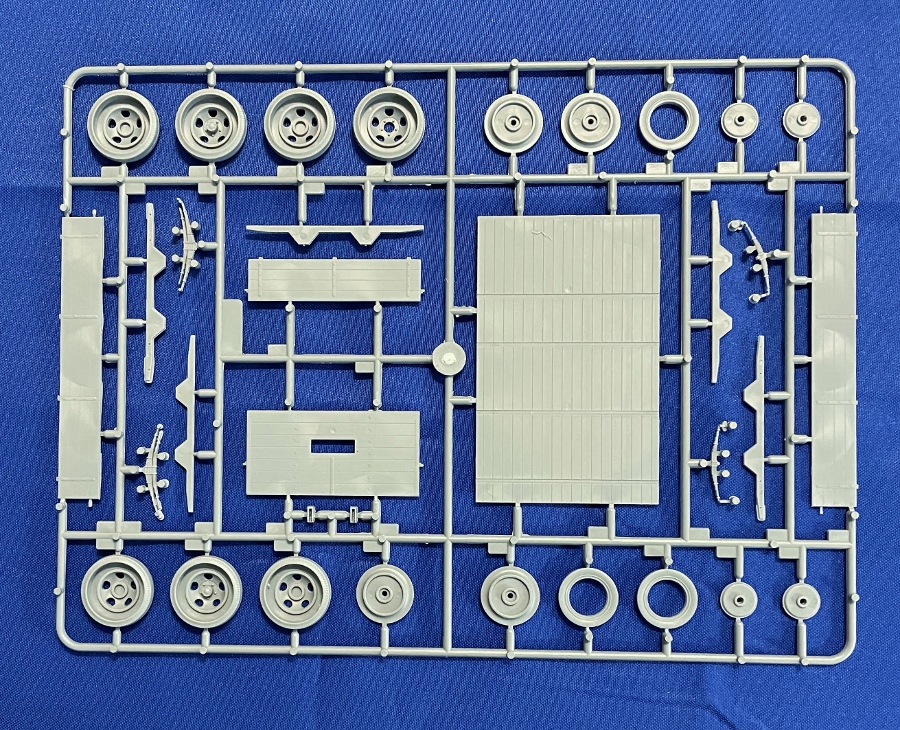
- One sprue (C) containing the wheels, hubs, and cargo box parts from kit # 35411.
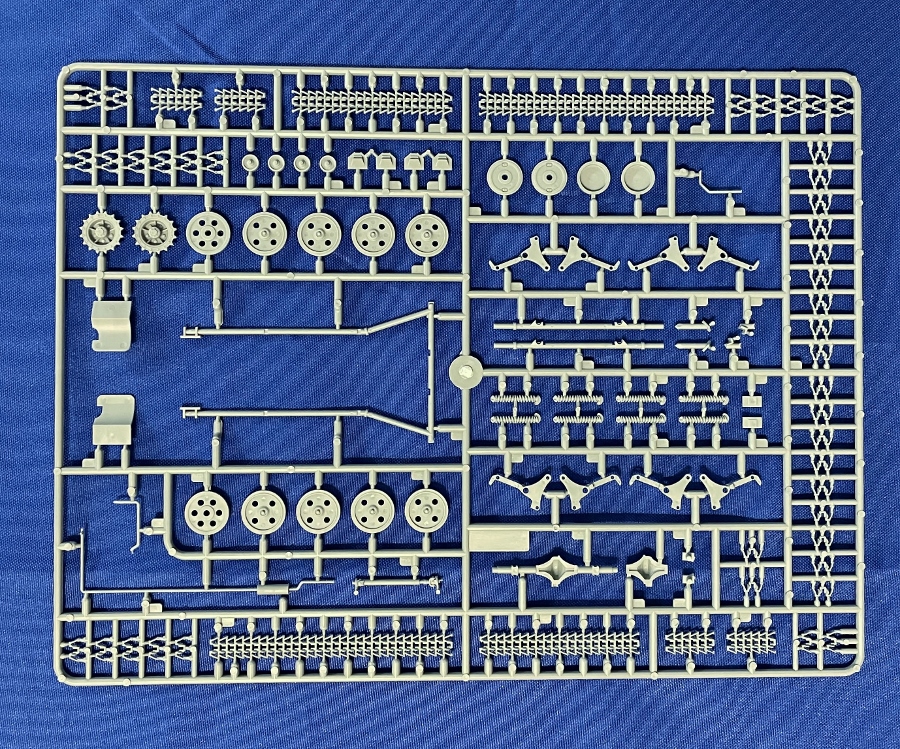
- One sprue (E) containing the individual track links, and other suspension parts from kit # 35803
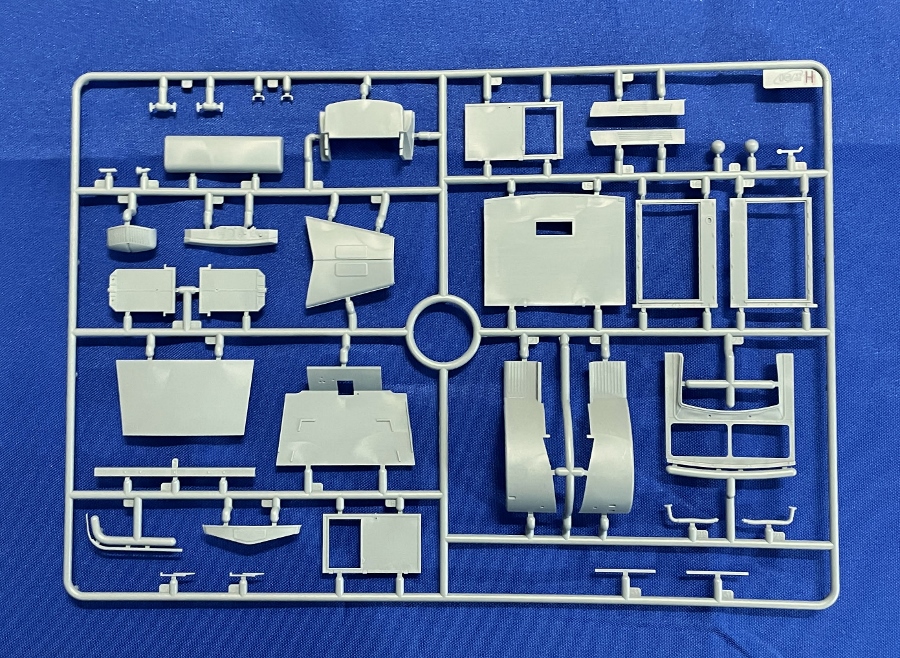
- One sprue (H) from kit # 35409 containing the doors, fenders, and other body parts.
- One sprue G containing the clear parts.
The Build
For the construction of this project, I have opted to incorporate version one, featuring paint in a 1944 color scheme, which includes ICM 1040 Beige. Additionally, I obtained ICM’s paint set #3038 Wehrmacht Trucks. Given my positive experience with ICM paints, in the past, this seemed like an excellent choice.
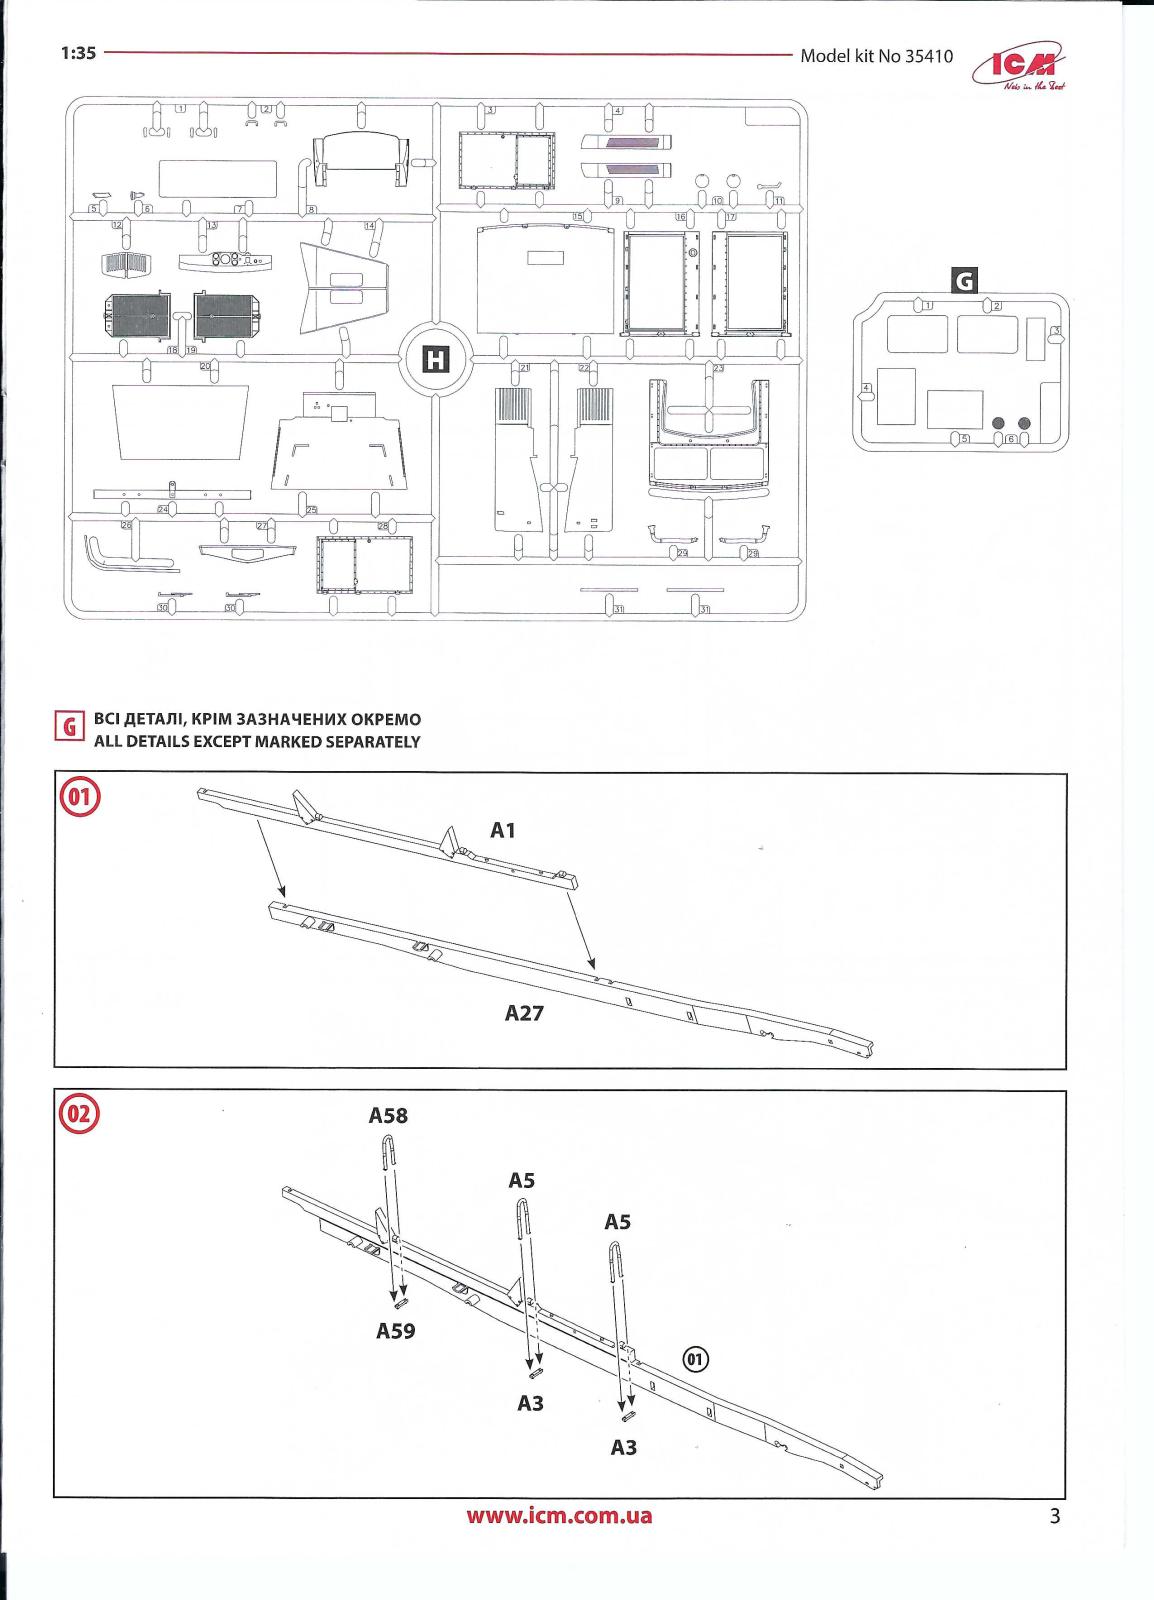
Step 1-9
Some parts on Sprue A, utilized for chassis assembly, seem to have noticeable flash. However, a bit of cleanup effectively resolved these issues. The frame rails in steps 1 and 3 have noticeable punchout holes which will need to be filled and sanded. All remaining steps are simple and easy to finalize.
Steps 10-17
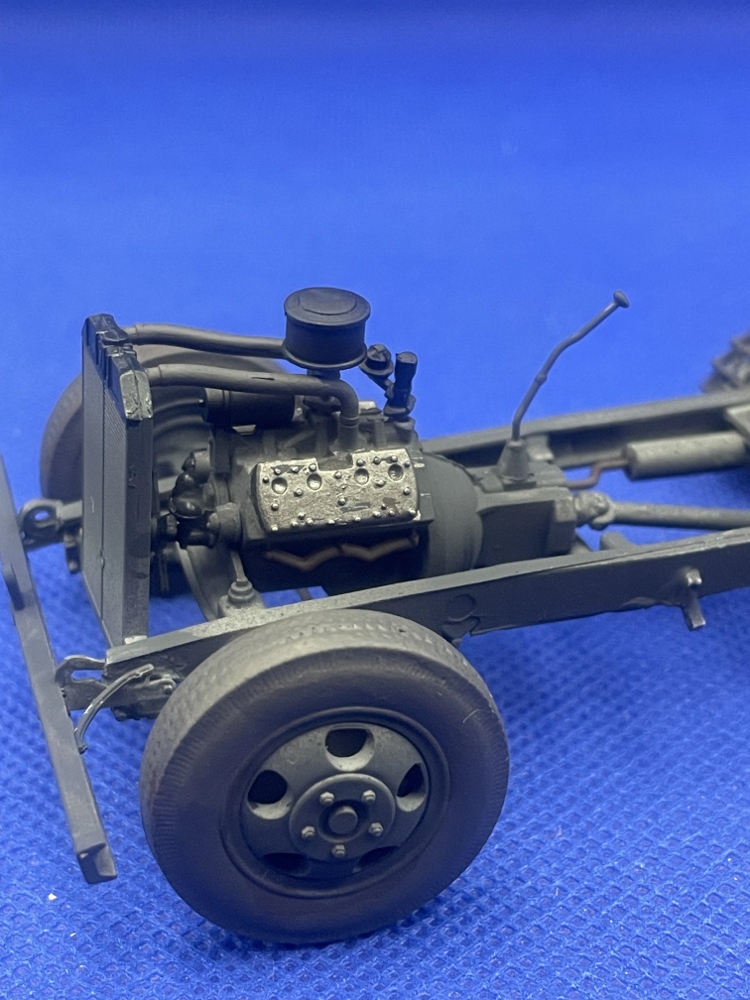
Steps 10-13 consist of the construction of the Ford Flathead V8 engine. The detailing is excellent, and incorporating spark plug wiring and a fan belt should contribute to an enhanced outcome. The construction of the spare tire and its placement onto the chassis, along with the installation of the engine, occurs in steps 14-15. Steps 16-17 consist of adding the radiator and hoses to the engine.
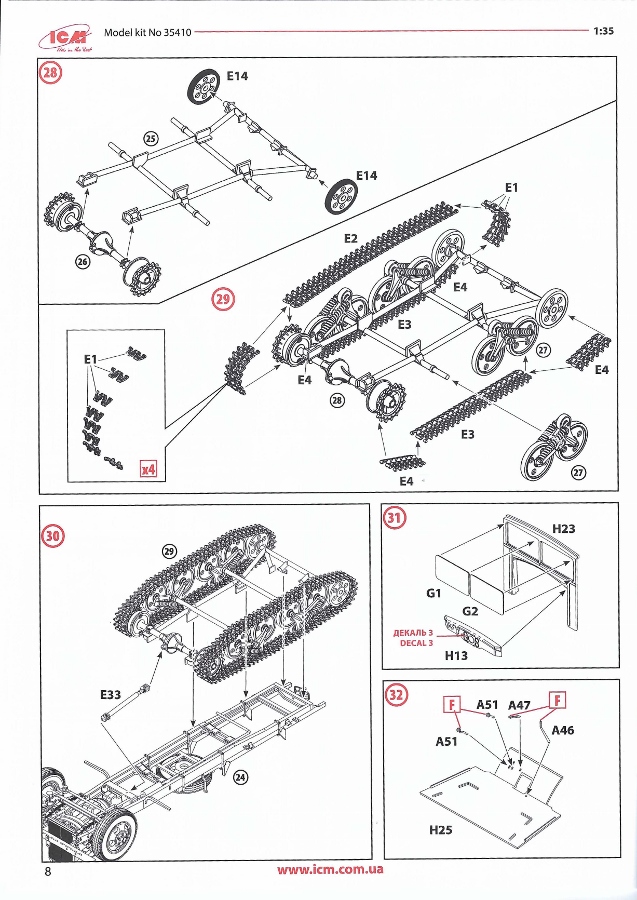
Steps 18—28
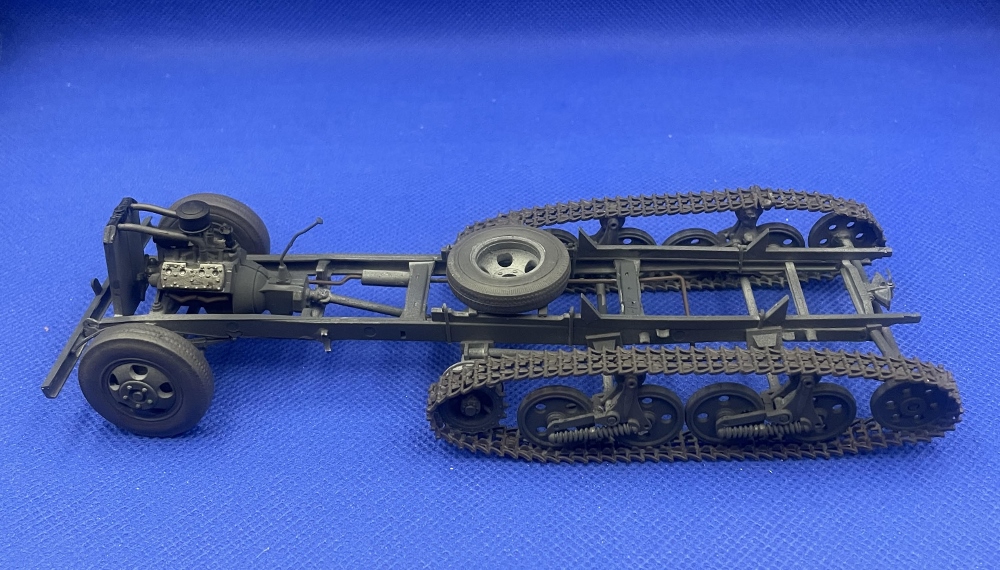
These steps include the addition of pintle assembly, attaching the cab braces to the chassis, assembling the two front wheels, and affixing the front suspension arms. Subsequently, these components are bonded to the chassis. Through some scratch building, it is possible to create articulation for the wheels. Next, a three-piece exhaust system is incorporated. ICM provides a magnified section for precise placement. Commencing at Step 25, the assembly process for the track assembly frame, including brackets, is initiated. Following that, the drive axle is assembled, incorporating the drive sprockets. Subsequently in Step 27, the construction of four bogeys with springs and return rollers takes place. Careful attention is necessary during the assembly of the bogeys to ensure they are constructed accurately. Unfortunately, I discovered that I had erroneously glued the wrong part, and I had to make the necessary corrections. Each bogey is equipped with two springs, demanding a significant cleanup effort.
Steps 29-30
These two steps involve the construction of the link and length tracks. Long runs are available for the top and bottom with short runs glued on to wrap around sprockets and drive wheels. Individual track links are then glued together to button up each end of the tracks. To manipulate the tracks before they were set, I employed Testor’s Liquid Glue. Care should also be taken because extra track lengths are not provided.
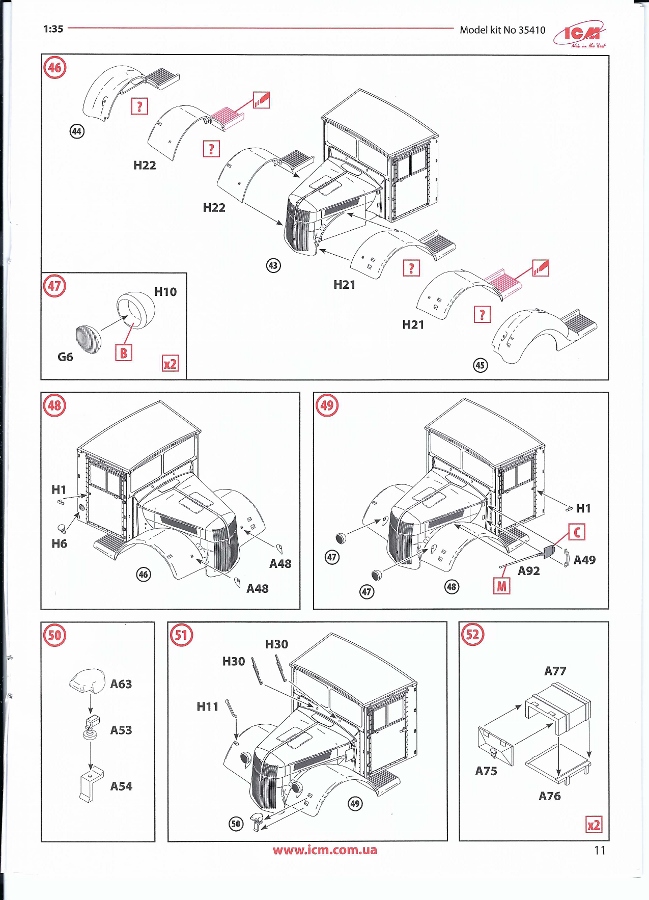
Steps 31-46
Initiating the assembly of the cab, these steps involve addressing knockout points that require filling. The installation of the dash and foot pedals is conducted, accompanied by fitting the bench seat along with its back. The windshield glass is affixed using Abteilung 5-2 Liquid mask applied on both sides. Before sealing the cab with the roof (part H20), the interior is primed with A. Mig Grey Primer followed the application of two light coats of ICM @1040 Beige. Subsequently, after drying, the bench seat is painted with Vallejo Model Color 70.871 Leather Brown, and the pedals receive a coat of A. Mig 033 Rubber and Tires for a realistic tire-like appearance.
In steps 42a and 42b, the modeler has the choice between two distinct styles of hood arrangement. For this particular build, I chose option 42b. Moving on to steps 44-46, there is a selection between two distinctive styles of fenders.
Steps 47-57
In these steps, various intricate details are incorporated into the cab, including headlamps, wipers, Nortek light, door handles, and a shovel. Furthermore, Step 52 involves building the under-bed storage units and constructing the truck bed. Some parts of the truck bed exhibited flash that needed to be removed. The truck bed cross-members, mudguards, and tarp braces are subsequently installed.
Step 58
The construction is finalized in this step by attaching the cab and cargo bed to the chassis. The fit was outstanding, confirmed by previous test fittings in earlier steps.
Painting
The cab was primed with A. Mig Grey Primer then two light coats of ICM Beige 1040. Diluting the 12ml containers with 5ml of distilled water to attain a final dilution rate of 42%. This quantity filled the container. ICM suggests a dilution rate in the range of 40-60%. Another equivalent color to use is Vallejo 70.916 Sand Yellow which closely resembles Beige 1040. The chassis was initially primed with A. Mig Grey primer followed by the application of ICM 1038 German Gray in two light coats.
The chassis was first primed using A. Mig Grey and then coated with ICM German Grey # 1038. The tires were coasted with A. Mig Rubber and Tires # 0033. Details on the engine compartment were highlighted using ICM and A.Mig acrylic paints.
Decals
ICM provides gauge decals which were applied using Micro Set and Micro Sol. There were no observable problems following their application. The decals exhibited sharp and crisp details, characteristic of ICM’s excellent decal quality.
Conclusion
ICM has accomplished a remarkable level of detail, resulting in an outstanding representation of a German WWII Maultier V3000S/SSM half-tracked vehicle. The kit includes decals for three different markings, The only limitation I find is that ICM does not allow for the opening of the hood and doors. However, for the modelers, this should present no significant challenge. Moreover, the assembly of the link and length tracks can be a bit tedious. I recommend starting after thoroughly reviewing the instructions and spreading the track build over several days. Despite these observations, the kit remains an excellent choice for modelers ranging from basic to advanced skill levels.
Thanks to ICM and IPMS/USA for allowing me to review this kit.


Reviewer Bio
Phillip Cavender

Phil Cavender, IPMS/USA #50085, is a retired pharmacist from the Veterans Administration, having retired in 2011. While he explored model car building as a child, it wasn’t until 2015 that he rediscovered plastic scale modeling. His renewed interest emerged while researching his father’s military history, which led him to a local hobby shop. There, he met a former UK military tanker who reignited his passion for the hobby. After relocating to Myrtle Beach, Phil teamed up with six skilled modelers to co-found the Grand Strand Scale Modelers chapter of IPMS/USA. He now focuses on building armor models in scales from 1/35th to 1/16th.
Comments
Add new comment
This site is protected by reCAPTCHA and the Google Privacy Policy and Terms of Service apply.
Similar Reviews