
USN F8-E "The Hunter"
The Kit
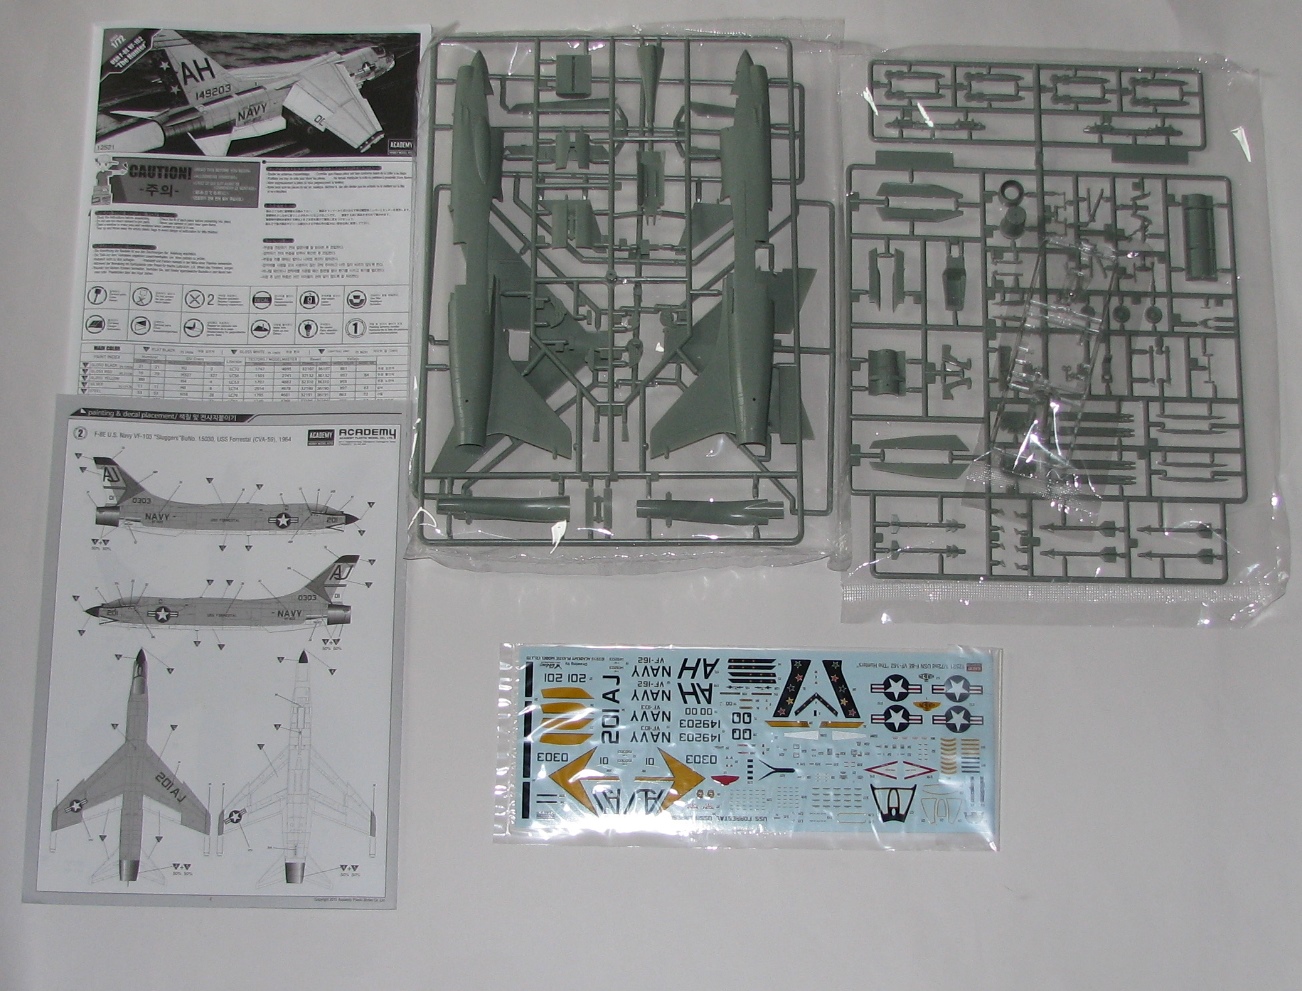
Upon opening the box you are presented with 4 sprues of grey and 1 sprue of clear plastic, a sheet of decals, an 8 page instruction fold out and a 4 page color & markings guide. The plastic is nicely molded with fine recessed lines, no flash and just a few pin marks. The clear parts a thin and very clear. The decals are in register and look very nice.
Construction
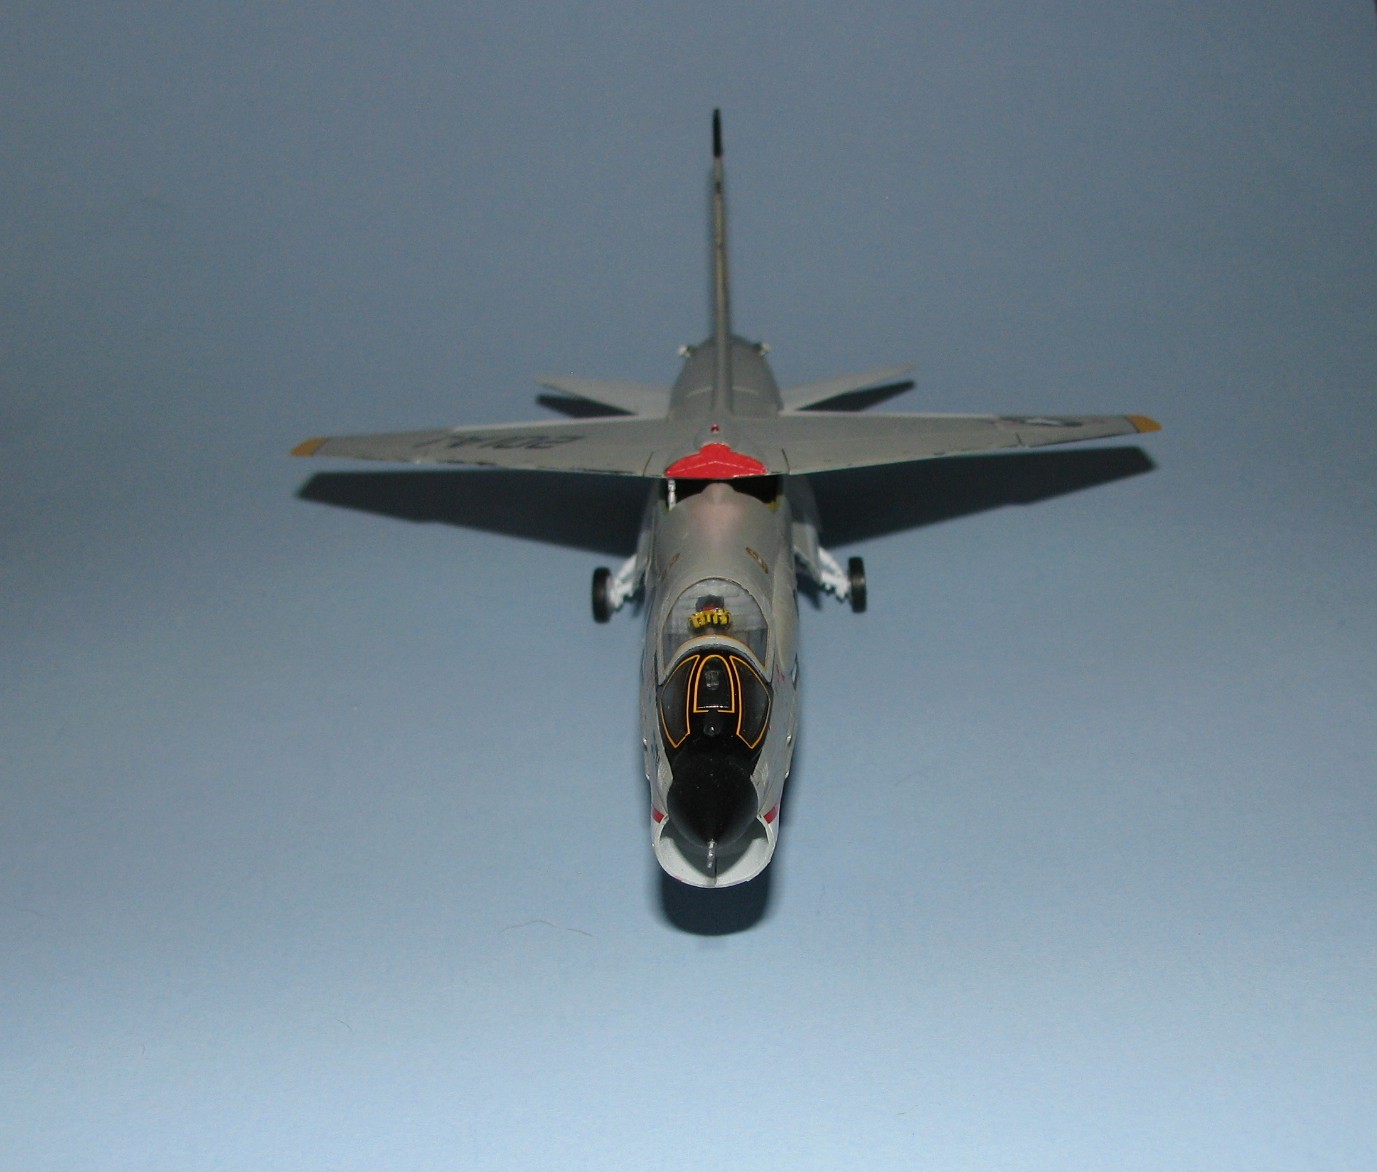
Steps 1-3 deal with everything that goes into the fuselage and the assembly of the fuselage. The cockpit has some detail molded on the fuselage sidewalls and decals are used for the control panel and side consoles. The seat is your typical kit ejection seat and is pretty basic, you’ll need to add your own belts or use aftermarket. Once the fuselage is assembled you don’t see a whole lot, but that seat does stand out and if I build another I’ll use an aftermarket one. There are 6 different sub-assemblies that fit into the fuselage (cockpit tub, engine duct top, intake/nose gear well, speed brake well, wheel bay, tail hook well) and with the exception of the wheel bay, which needed a small bit of sanding, all of these fit very well. One thing to note here is that when I was test fitting all of this, the fuselage halves snapped together so well that it took some doing to get them apart! I chose to paint & decal the fuselage now before adding the wing, stabilizers & landing gear so as not to break off any of those while doing this.…..for me this was a VERY GOOD idea.
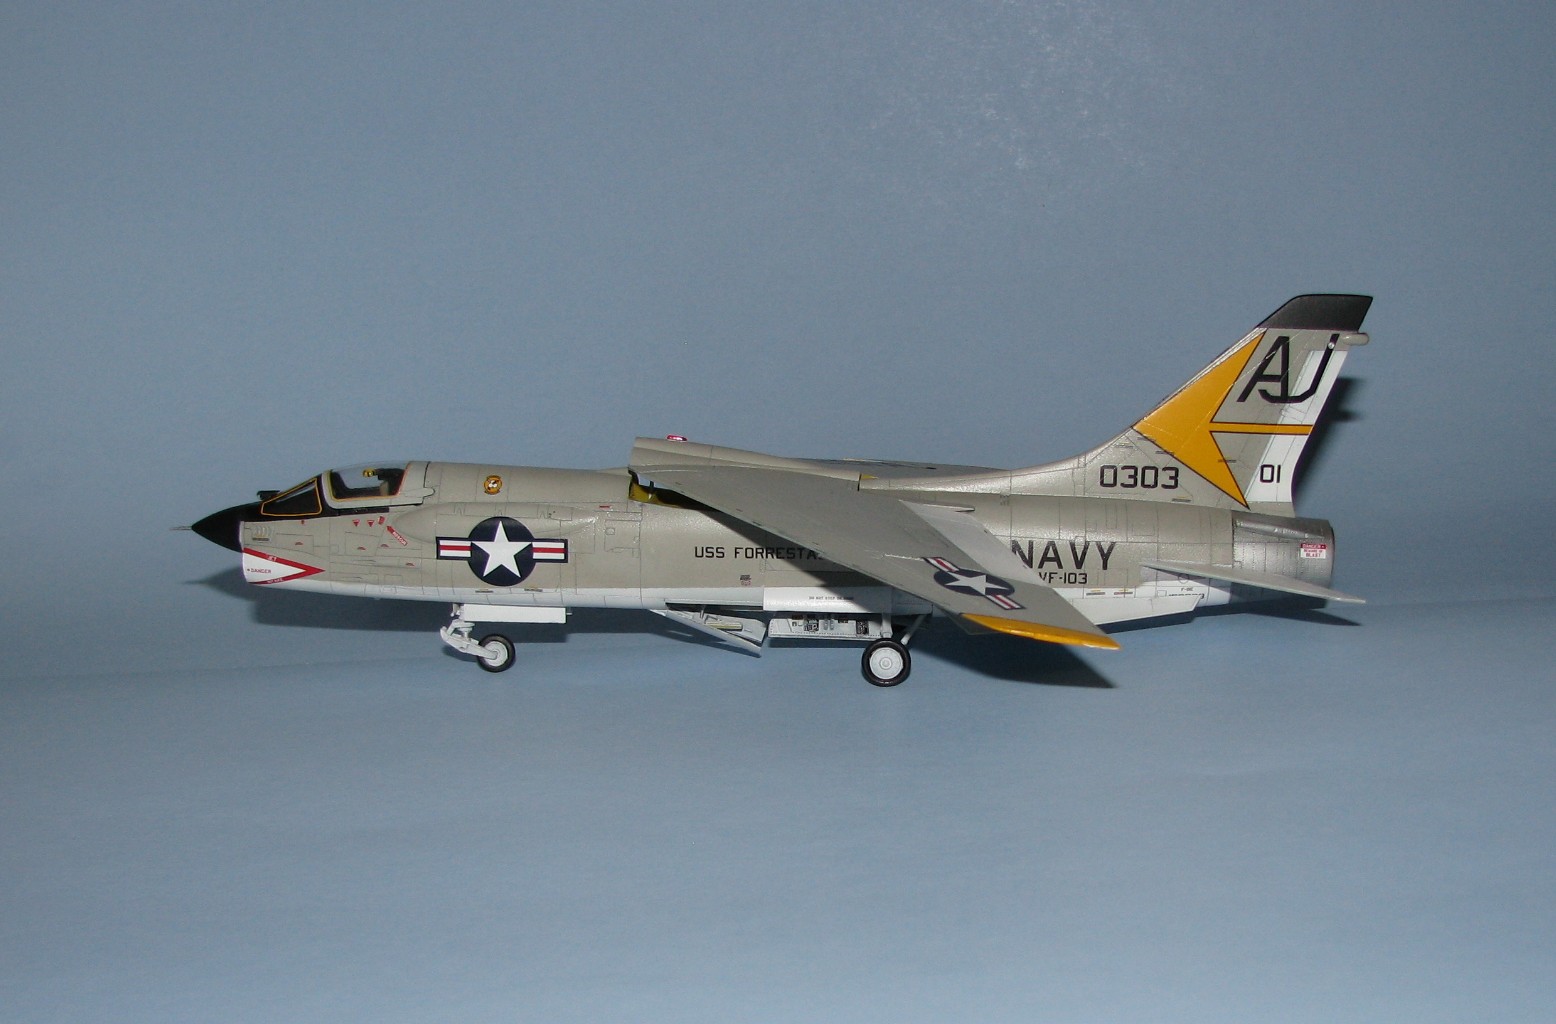
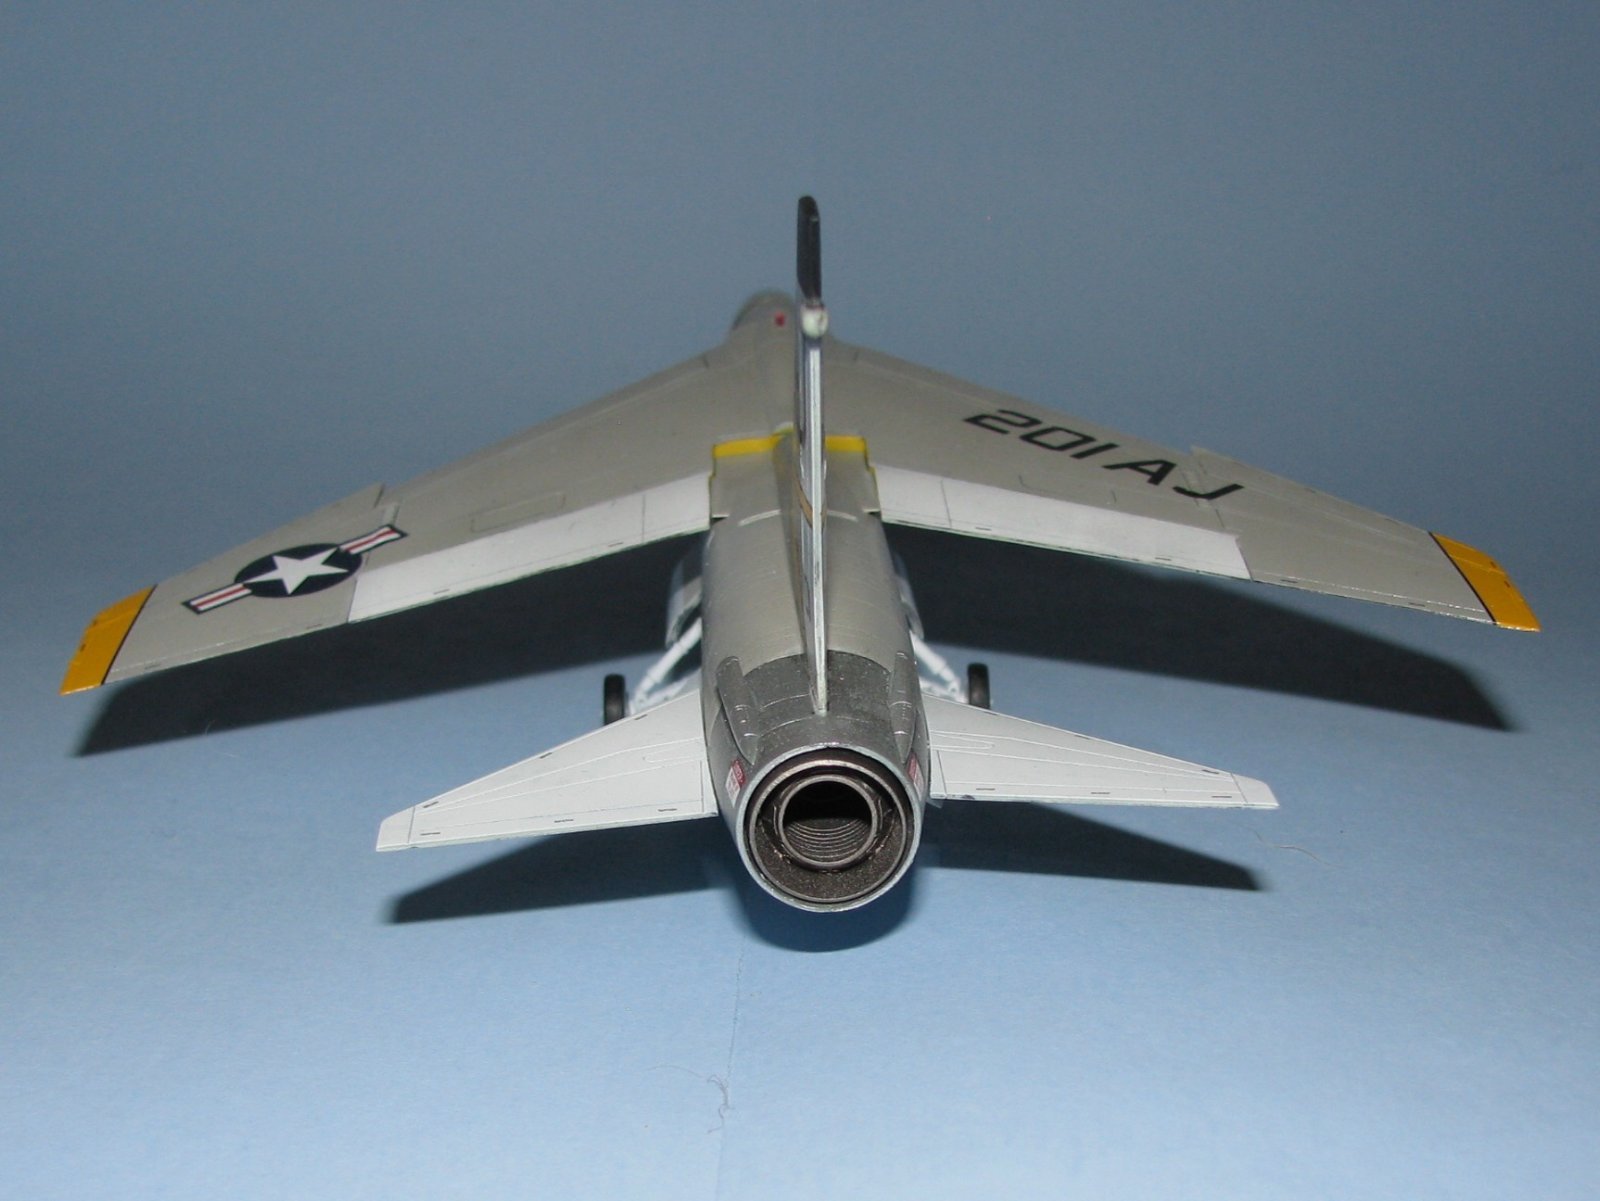
Steps 5 & 6 are the wing assembly and there are 8 pieces for this. 4 of these being the leading edge flaps but the trailing edge flaps are molded on the main wing parts, so if you want to pose those you’ll have to do some cutting. Once finished the wing was painted and decaled, again a good idea on my part as I could see myself breaking something off. I realize the leading edge flaps should be posed dropped if the wing is in the raised position but once my review is done I plan on lowering the wing…..This aircraft has nice lines and I want it that way!
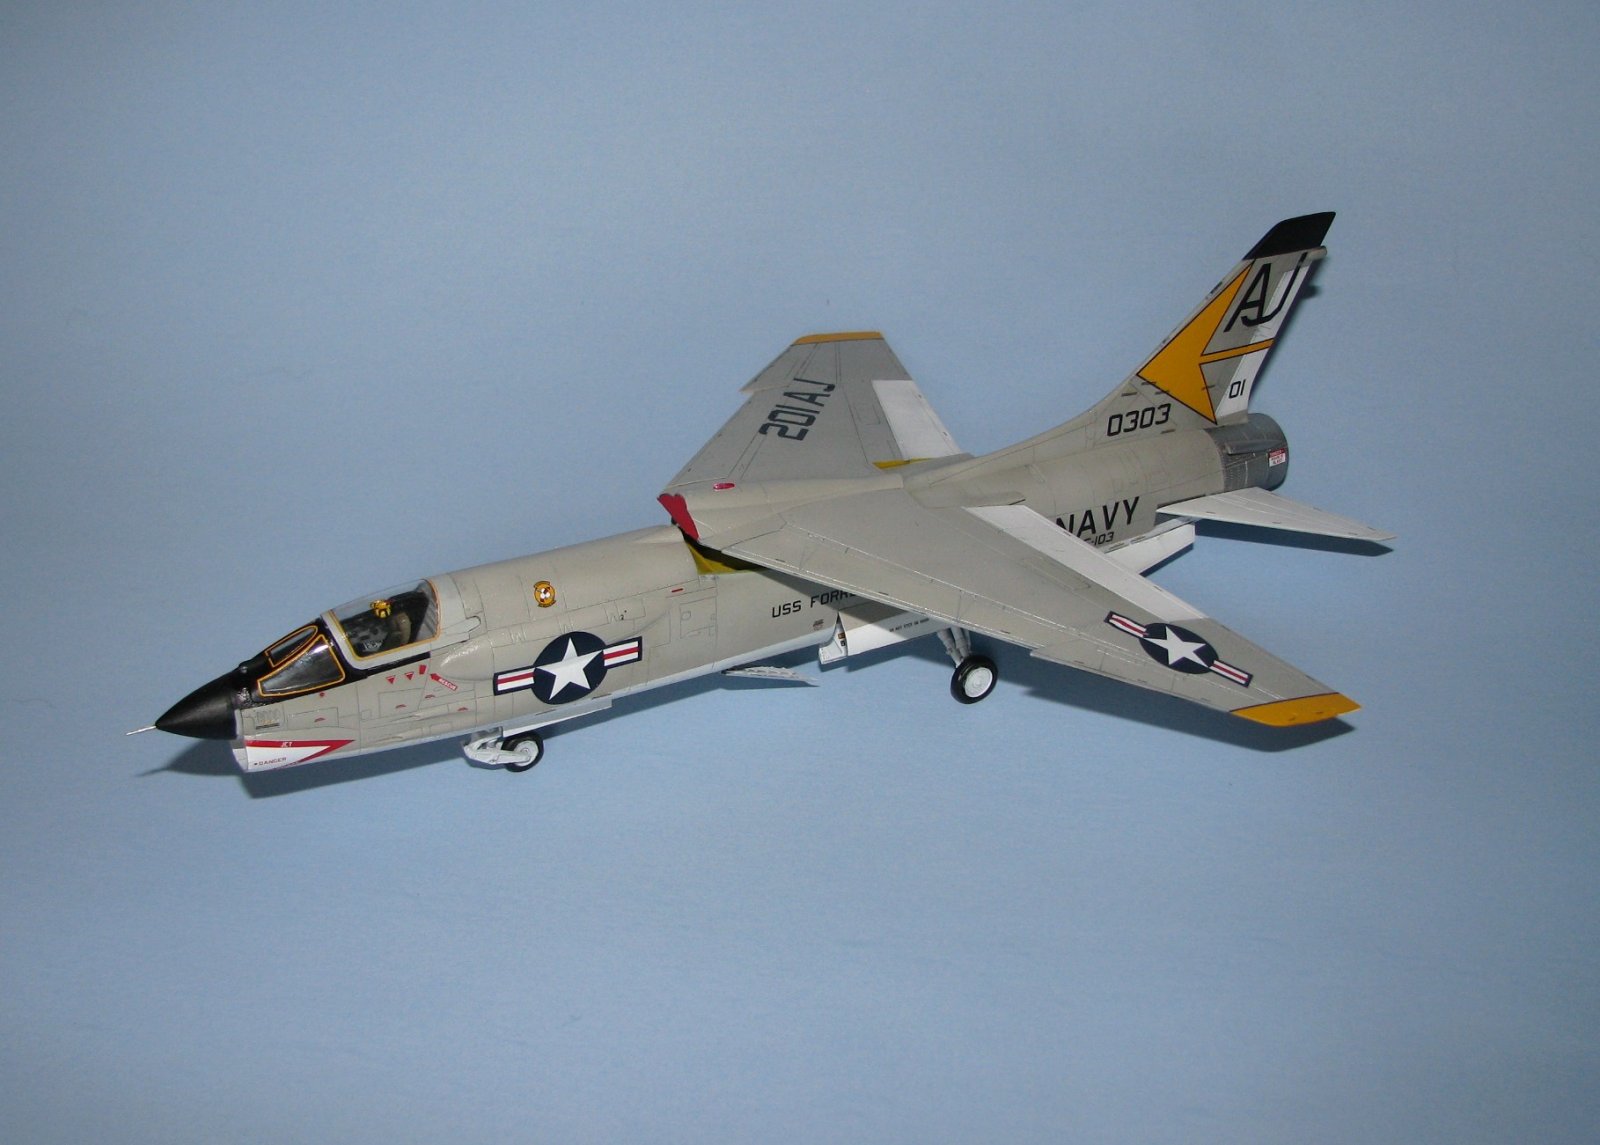
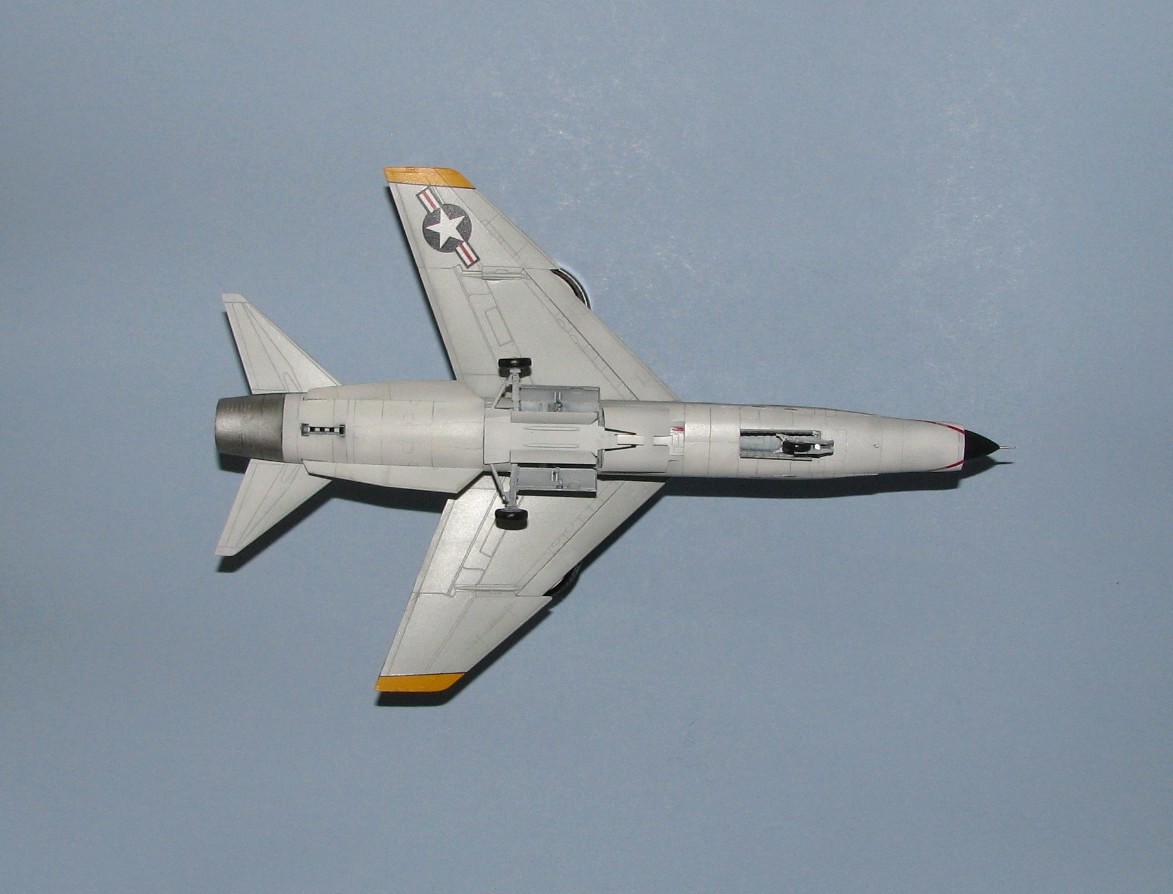
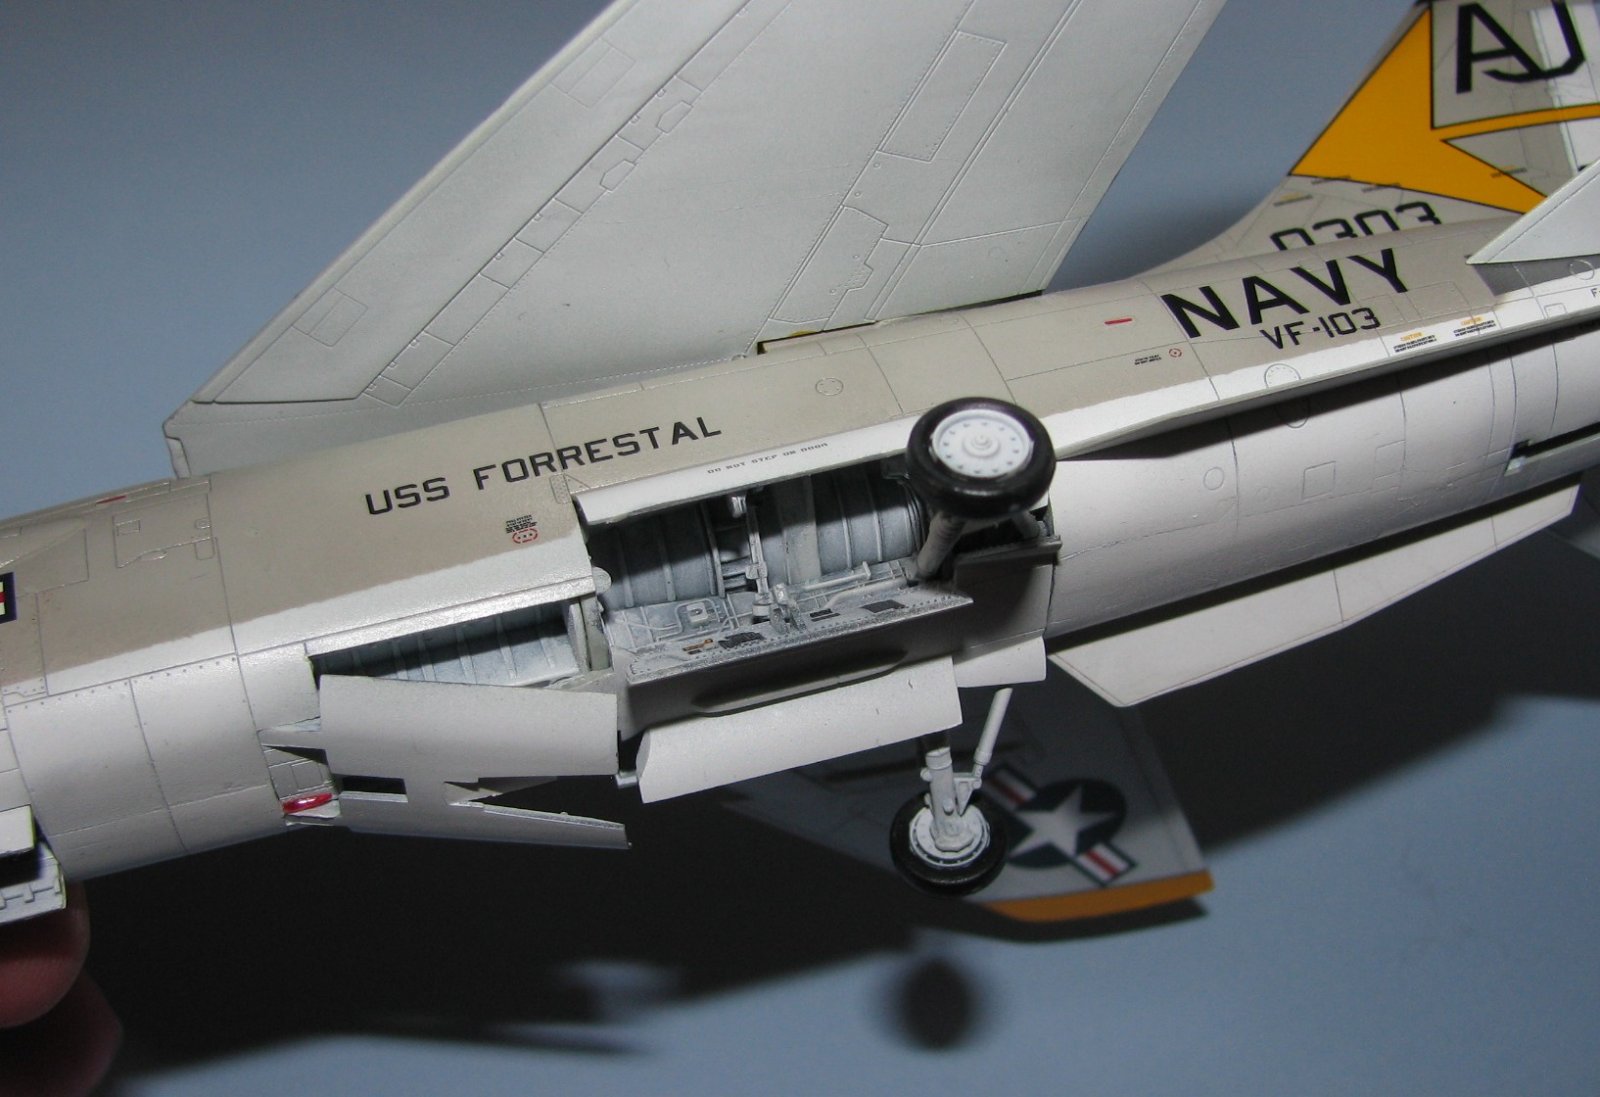
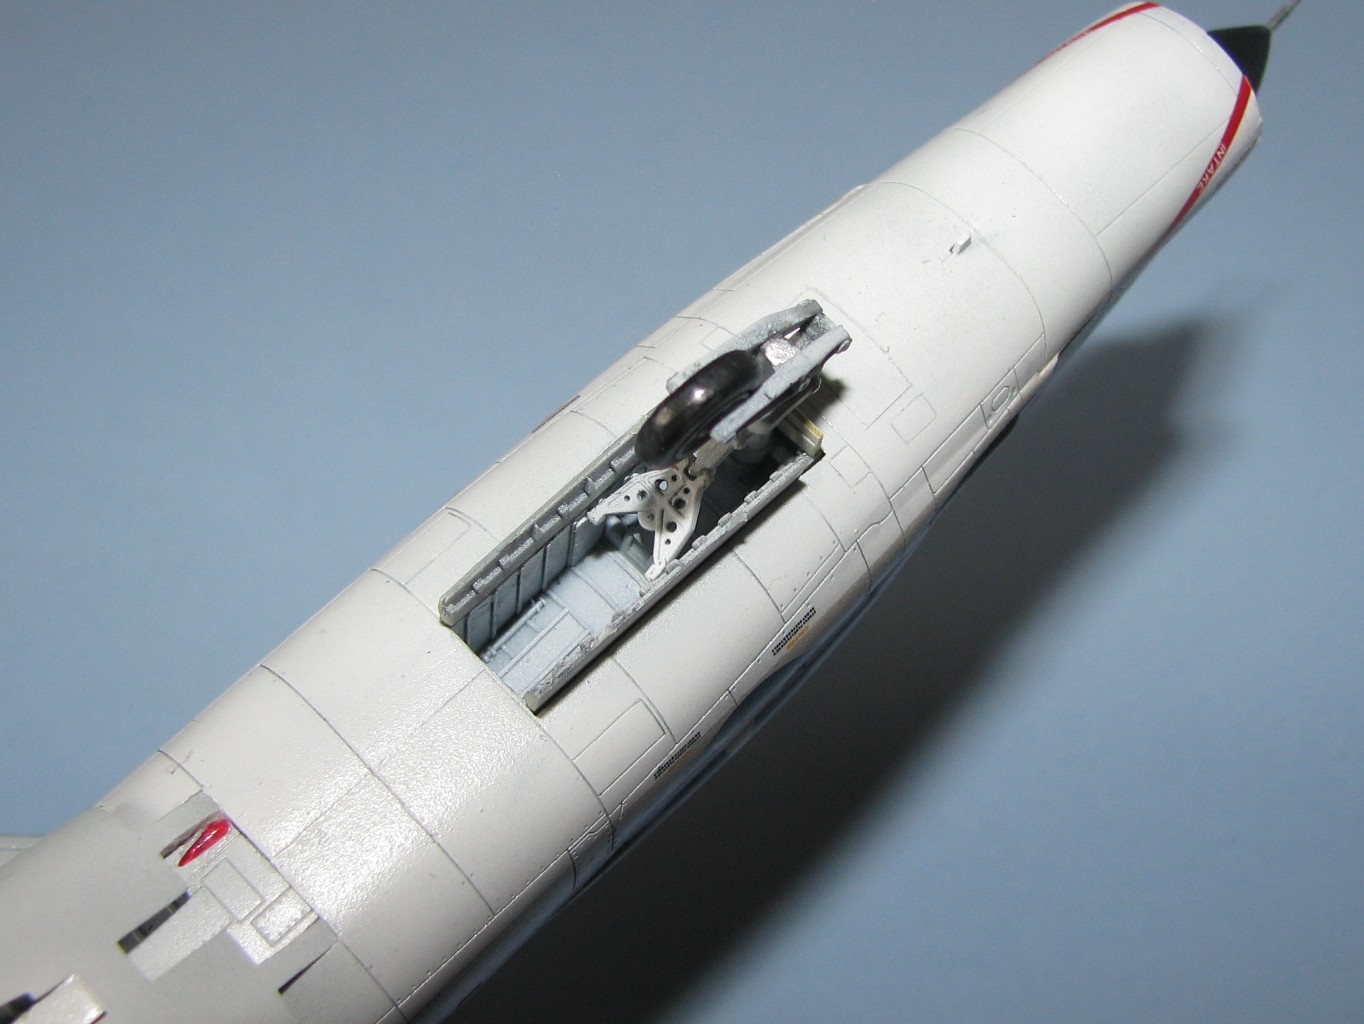
Steps 6-9 cover the underside of the fuselage including the struts, wheels, gear doors, speed brakes & stabilizers. The wheel bays are pretty well detailed (Some of the best I’ve seen) and have some fragile parts (especially C10 & C11) so be careful when working with and also after building as that’s when I broke mine! Everything fit just right and I had no real problems here except with the decals for the struts. The instructions show to use #21 & S23 for the left and #20 & S23 for the right. This is not correct as #20 is the decal used for the wing separation at the hump and #21 are the black lines on either side of the tail for VF-162 bird. I believe S25 is the correct decal but am not 100% sure and as I placed S23 on the large struts (C14 & C13) I left S25 off because it’s too big for the smaller piece (C8 & C9). The instructions for this are a bit confusing so take your time and be careful.
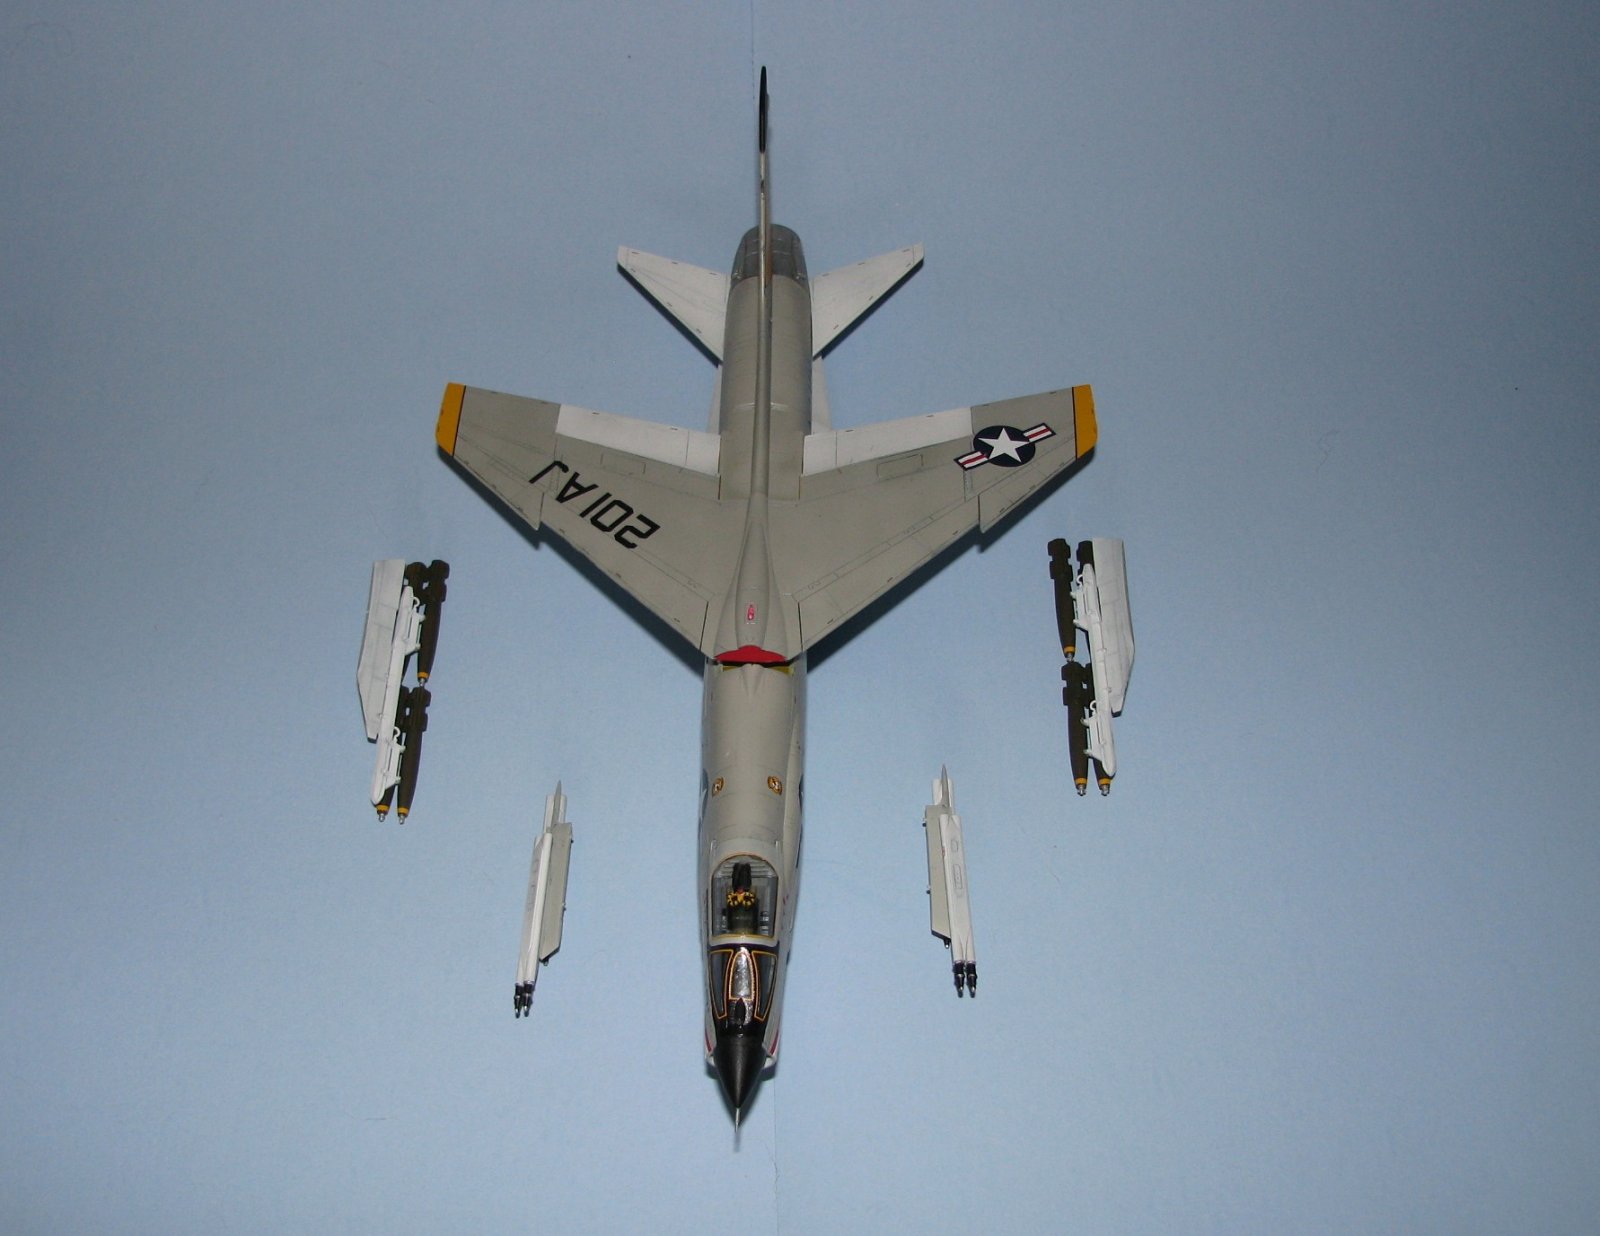
Steps 10-13 are the final ones and are where you add the canopy and ordnance. The windscreen can be painted black or you can use a decal that is provided. I chose the decal just because I had never used one for this. It worked very well (Solvaset helped also!) and I’m happy with the outcome. I finished the ordnance but decided to leave it off, IMHO bombs ruin the look of the ‘Last of the Gunfighters’.
Finishing
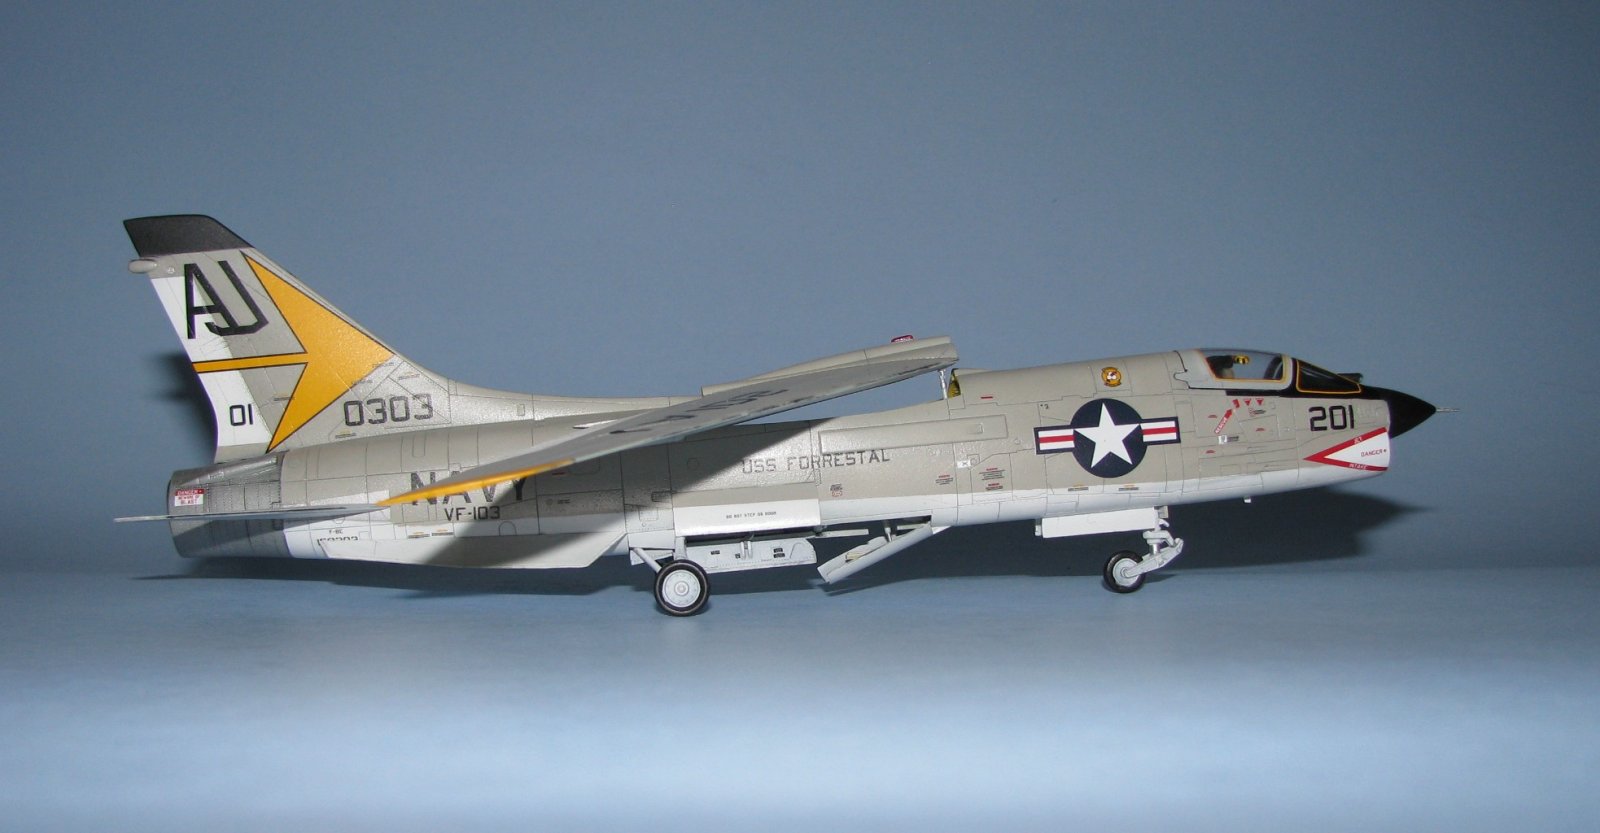
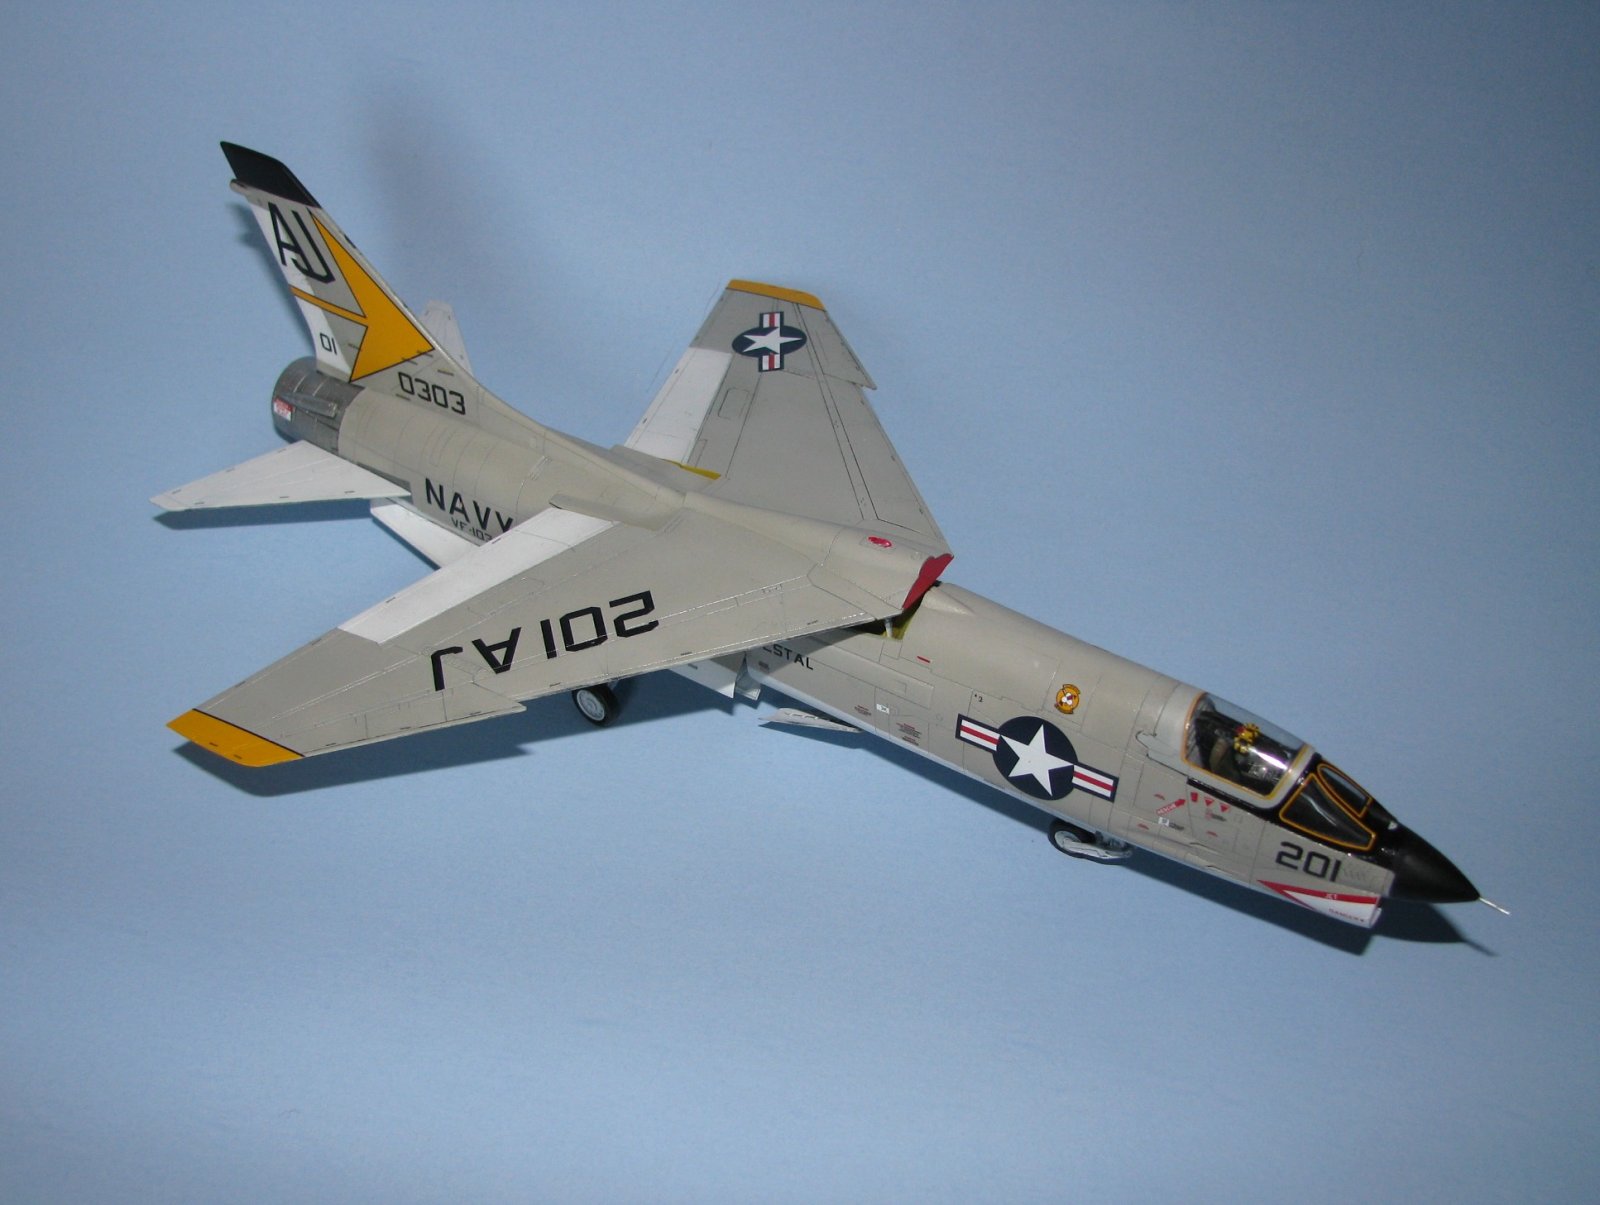
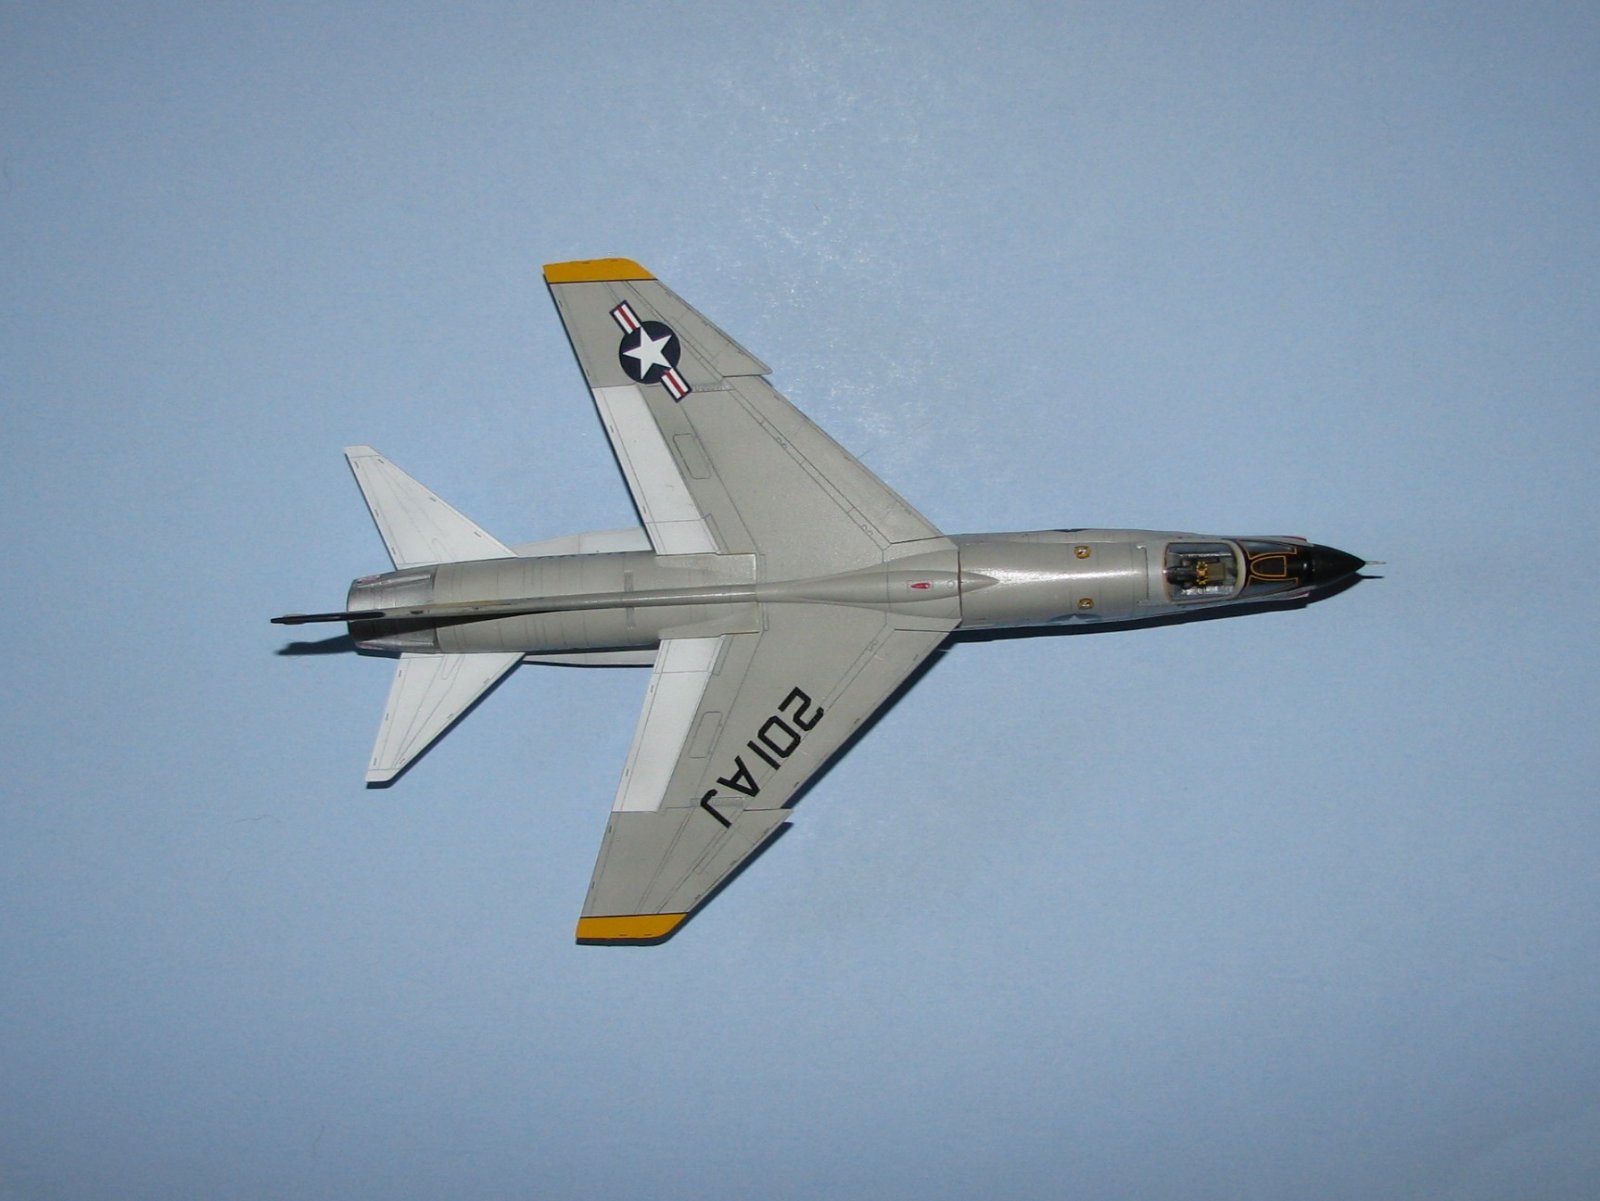
I used Testors enamel Light gull Gray (Mine went bad and you’ll notice a pebbly finish in some areas) and Tamiya Acrylics Flat white for the exterior and Testors Acryl (Dark Gull Grey) in the cockpit on this kit. I used a dark gray for the panel lines and flat black in the wheel wells and speed brake well for pre-shading. After a couple coats of Future the decals, and there are LOTS of them (I hope whoever decided an aircraft needs that many stencils is happy), set down nicely with a little Solvaset to help. You are given two different marking options:
- #1. F-8E U.S. Navy VF-162 “The Hunters” CDR Burt Sheperd, CAG, BuNo. 149203 USS Oriskany (CVA-34), 1966.
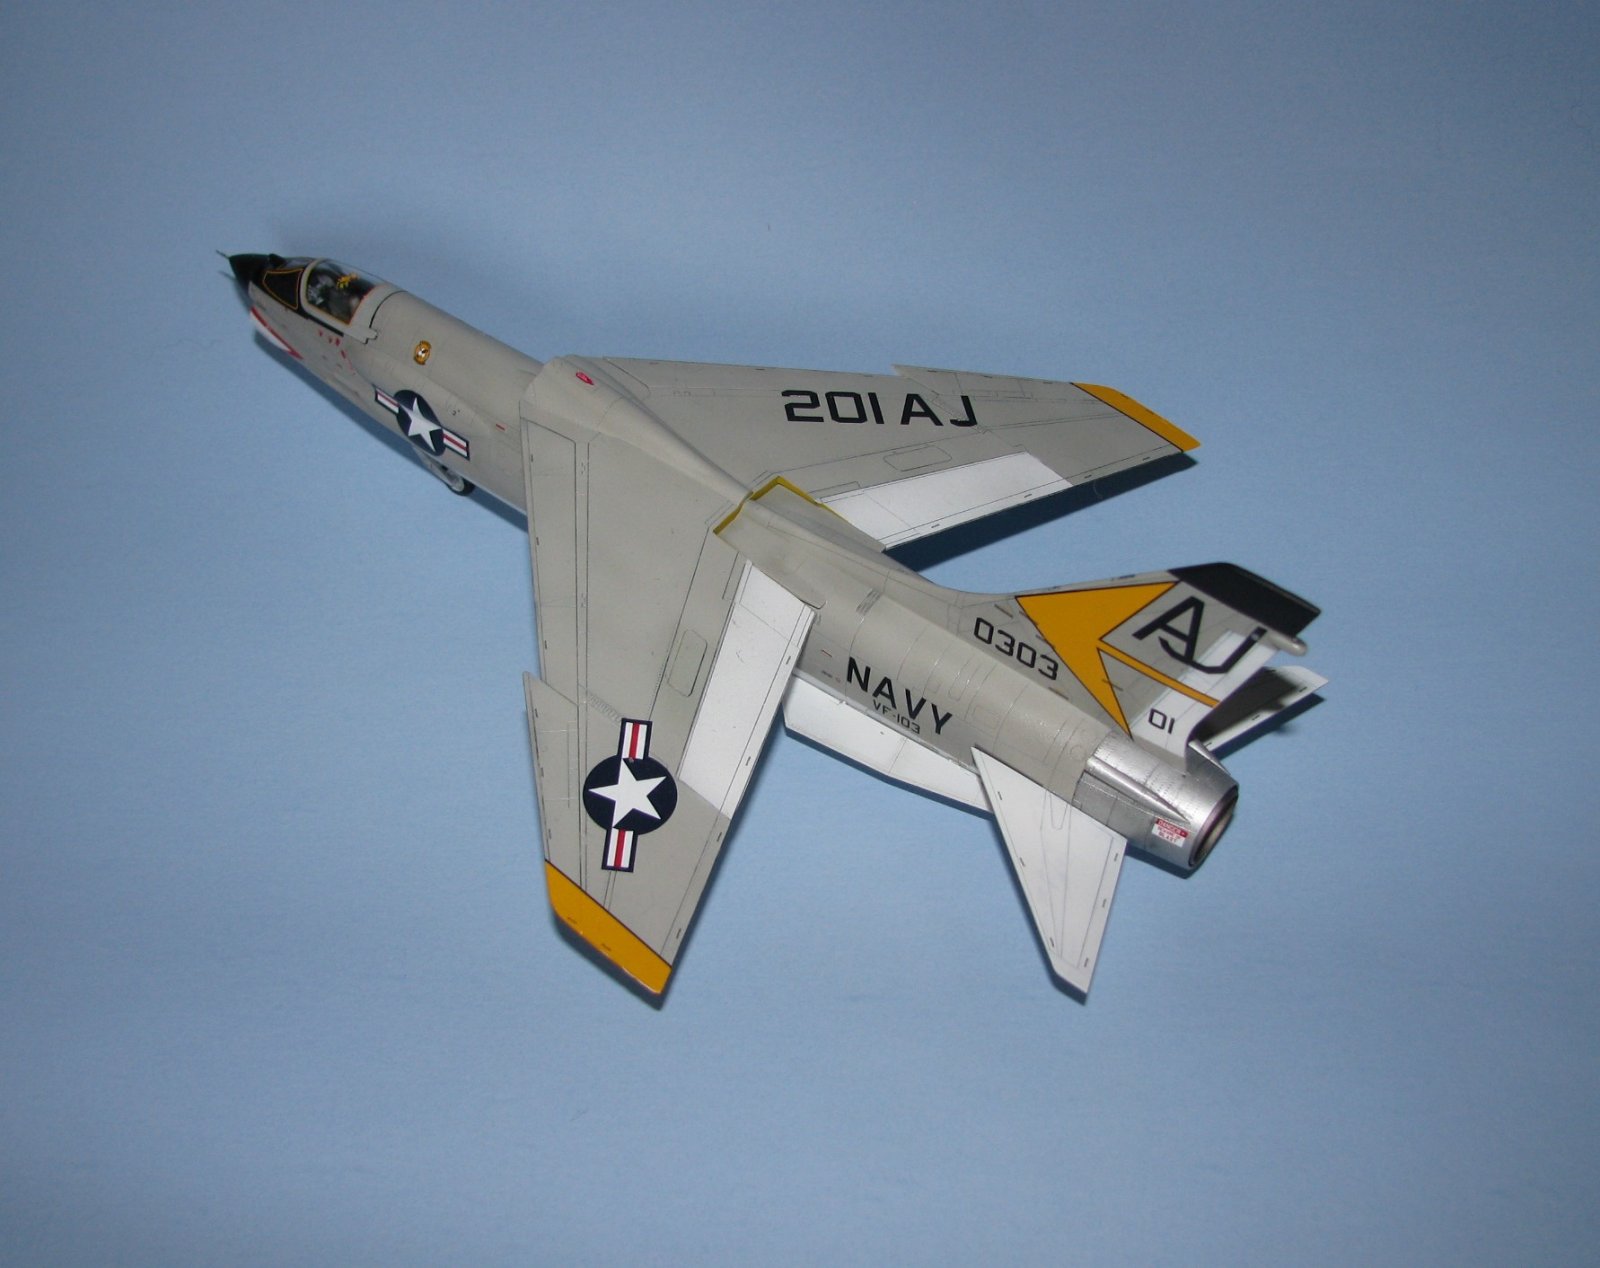
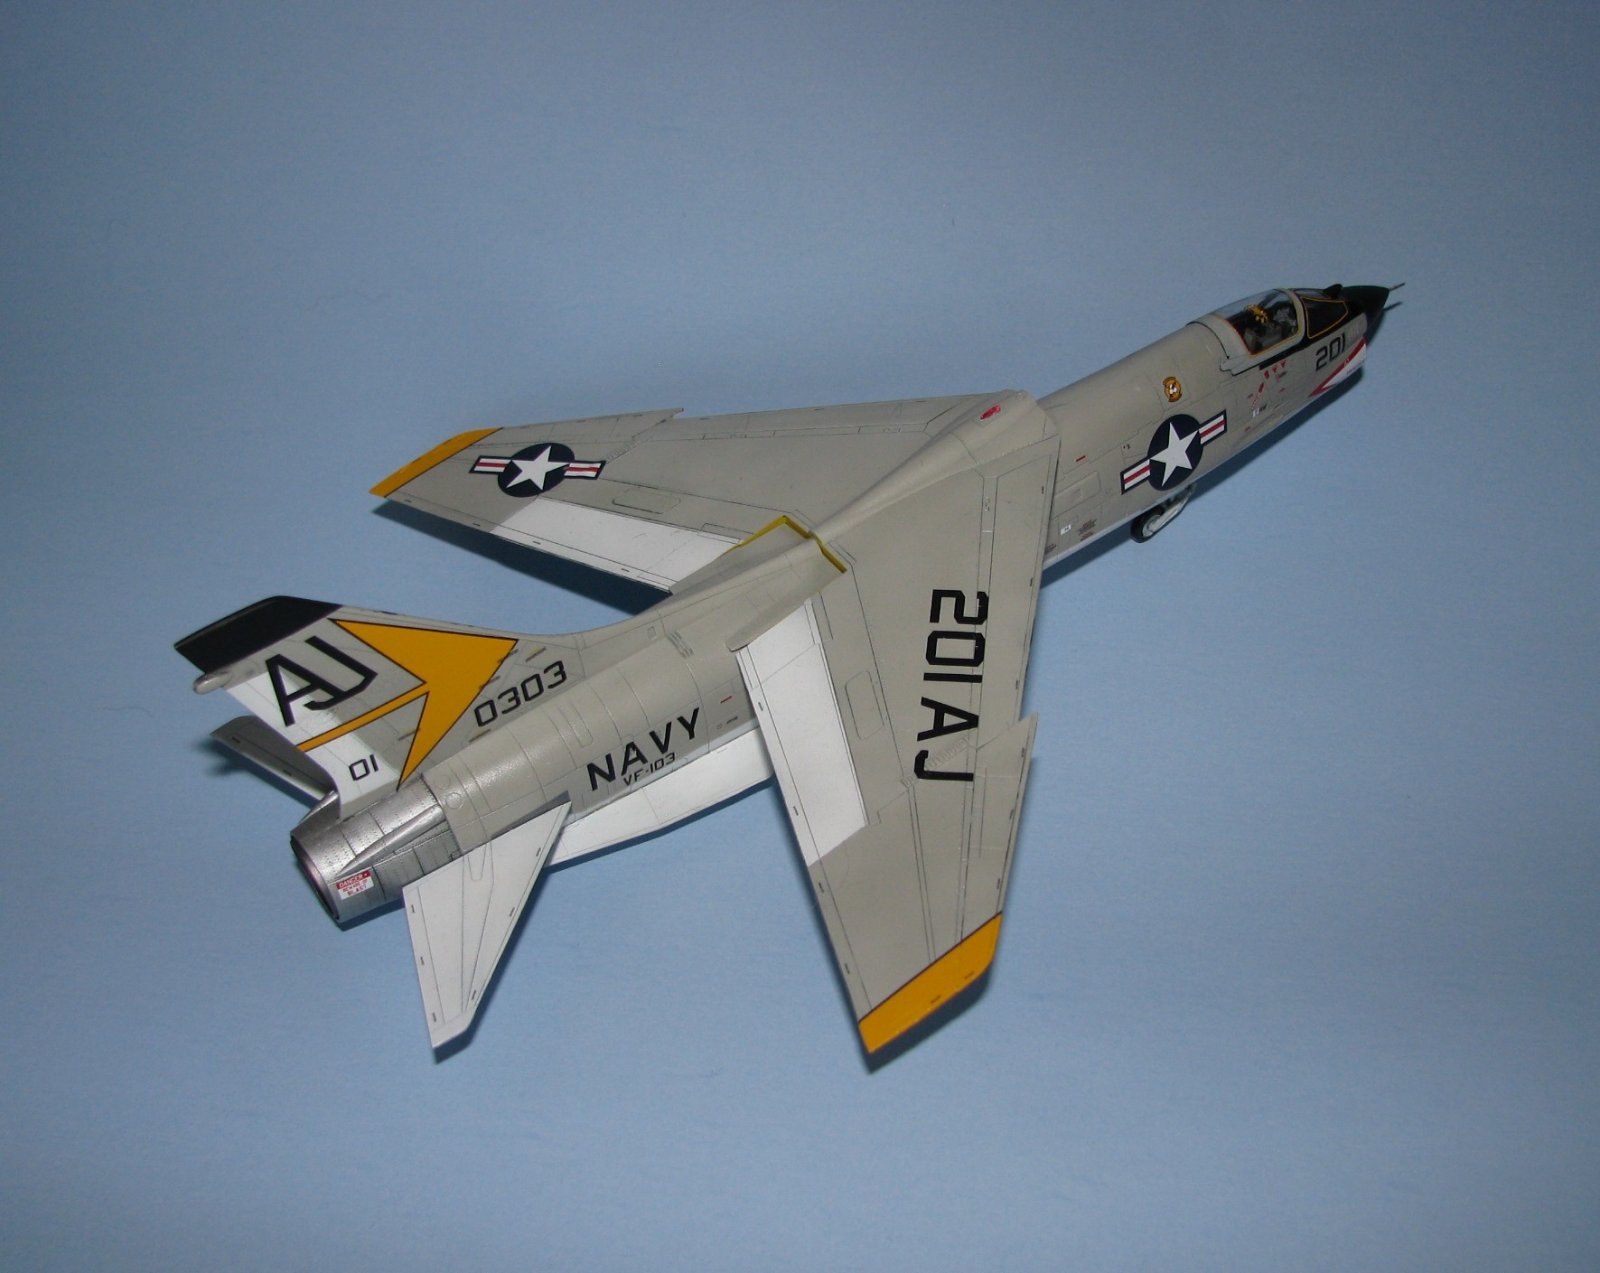
- #2. (The one I chose to do) F-8E U.S. Navy VF-103 “Sluggers” BuNo. 15030, USS Forrestal (CVA-59, 1964.
Conclusion: This is the 6th boxing of the Academy F-8 (E model X 4, J and P) and if you are a fan of the USN/USMC of this time period this is a MUST HAVE kit. I highly recommend this for all modelers except beginners.
I would like to thank Academy/MRC for providing this kit to be reviewed, the review corps for letting me build it and all of you for reading this.

Comments
Add new comment
This site is protected by reCAPTCHA and the Google Privacy Policy and Terms of Service apply.
Similar Reviews