
U.S. Scooter - Airborne
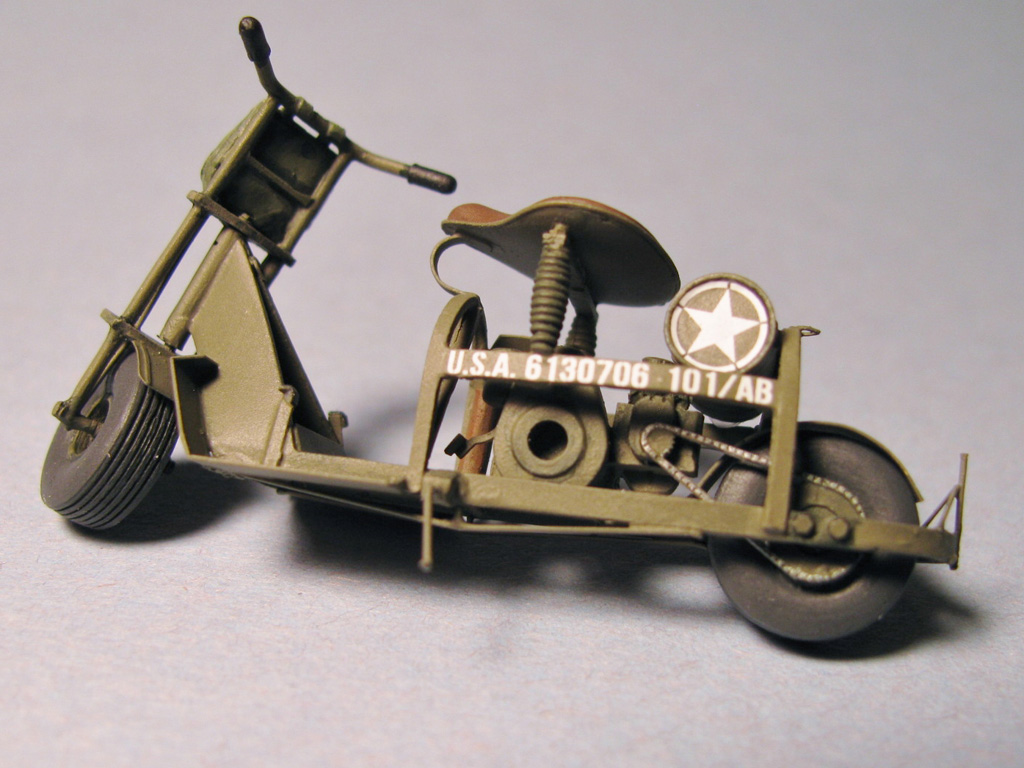
If you are looking for a unique addition for your next 1/35 scale US Army Airborne diorama, please allow me to direct your attention to the Plusmodel offering of a Cushman 53 scooter. The kit comes with decals for a single scooter that was used by the 101st Airborne. This kit was more challenging to build than the 1/48 scale scooters I have previously reviewed, and this kit will also require you have some experience with small photo-etch items. I would highly recommend this kit to anyone wanting something unique to sit next to their 1/35 scale figures or vehicles.
Unlike the two 1/48 scale Plusmodel scooters I have reviewed, the photoetch fret in this kit mentions that the vehicle is in fact, a Cushman 53. Research for this particular scooter started with my book Allied Liberation Vehicles by François Bertin, which discusses the Cushman 53 Autoglide on page 19. It is also much easier to find images of this scooter on the internet than finding those of the other scooters I have reviewed. The company Plusmodel has released scooters in 1/48 as well as 1/35 scale, and in different forms used during their service life.
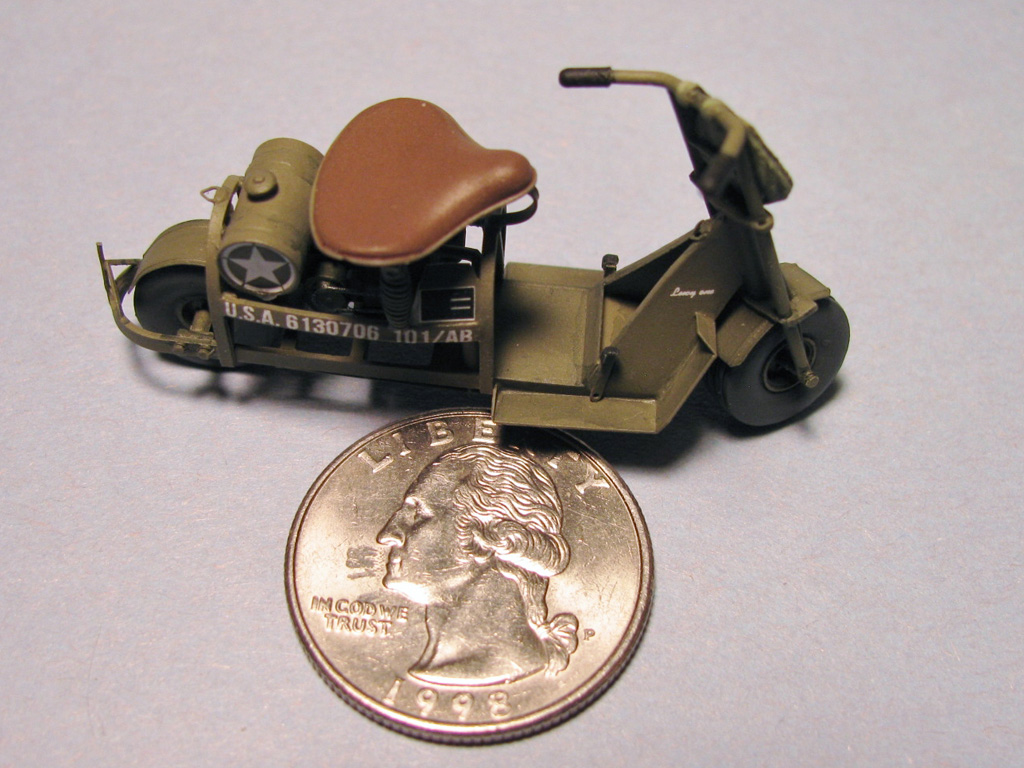
The real Cushman 53 Autoglide measured 77 inches in length, 23 inches in width, 38 inches in height, and had a wheelbase of 57 inches. The engine was a Husky model 16 M 71 with a single cylinder that displaced 15 cubic inches, and had a massive 4.6 horsepower rating. Weighing in at 256 pounds, the scooter could be dropped with airborne troops, leading to it also being known as the Cushman Airborne, and over 4700 of these scooters were produced during world war two.
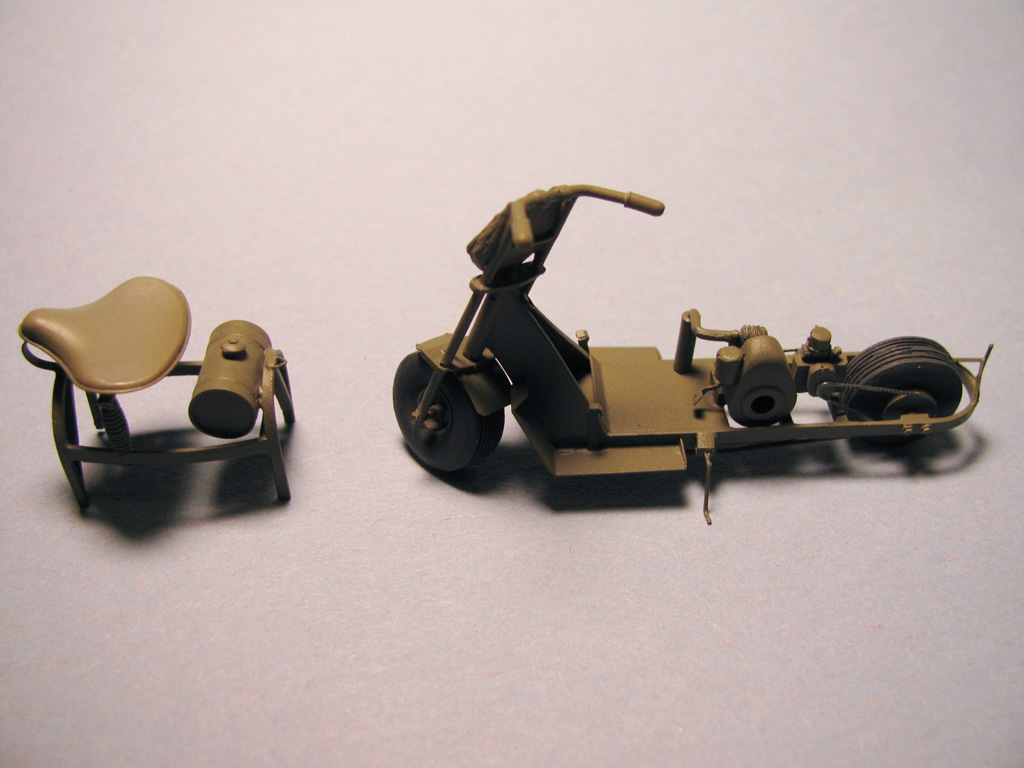
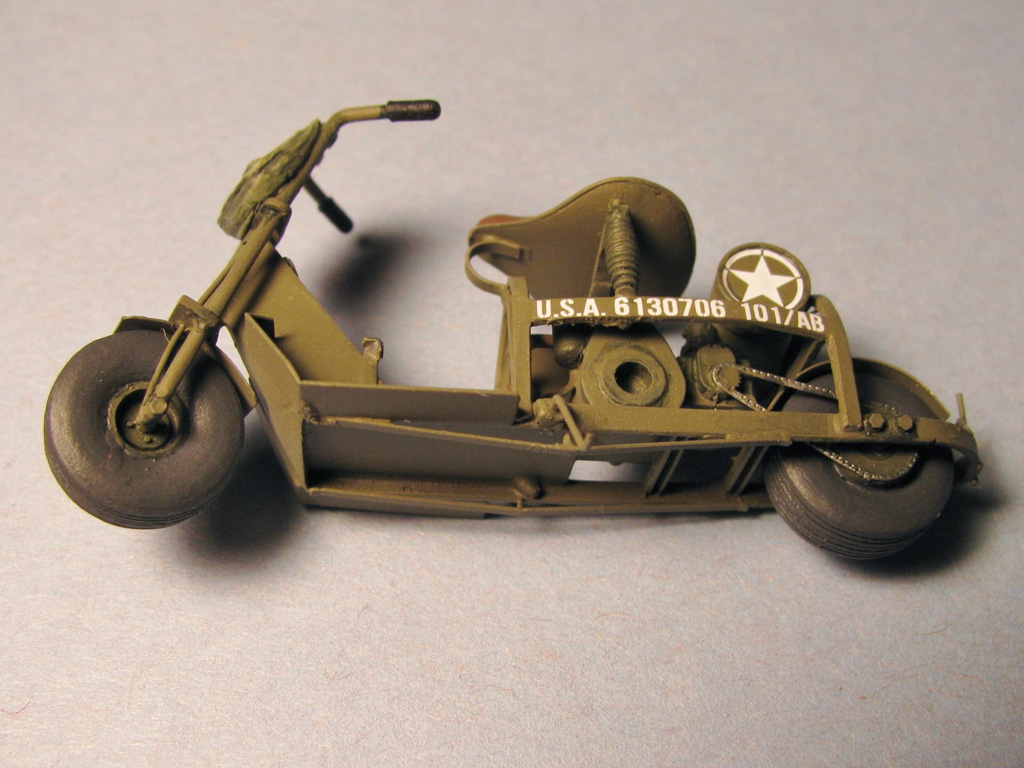
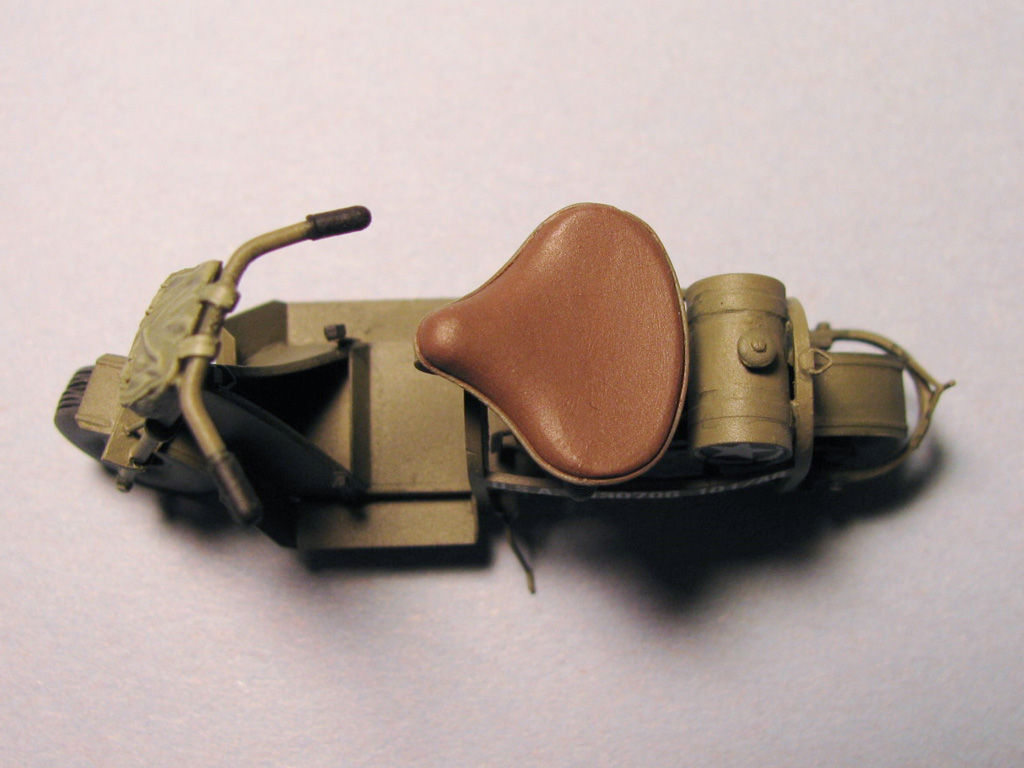
On opening the packaging for this kit, you will find a dozen resin parts, a photo-etch fret with twenty-four items, a piece of wire, decals for a single vehicle, and instructions. The resin parts in my sample had a fair amount of excess flash on them, but they cleaned up easily enough. The instructions are on the inside of a single sheet of paper folded in half, with the front being a color photograph of the completed scooter. The provided decals are for a scooter that served with the 101st Airborne, and their placement is shown on the back page of the instructions.
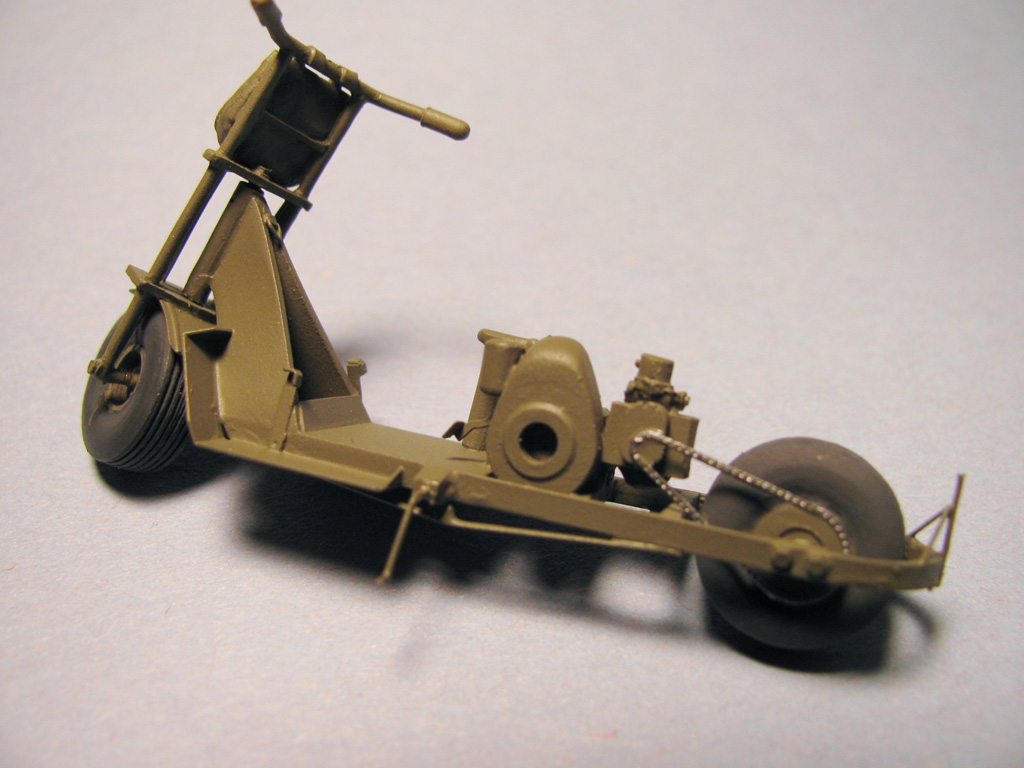
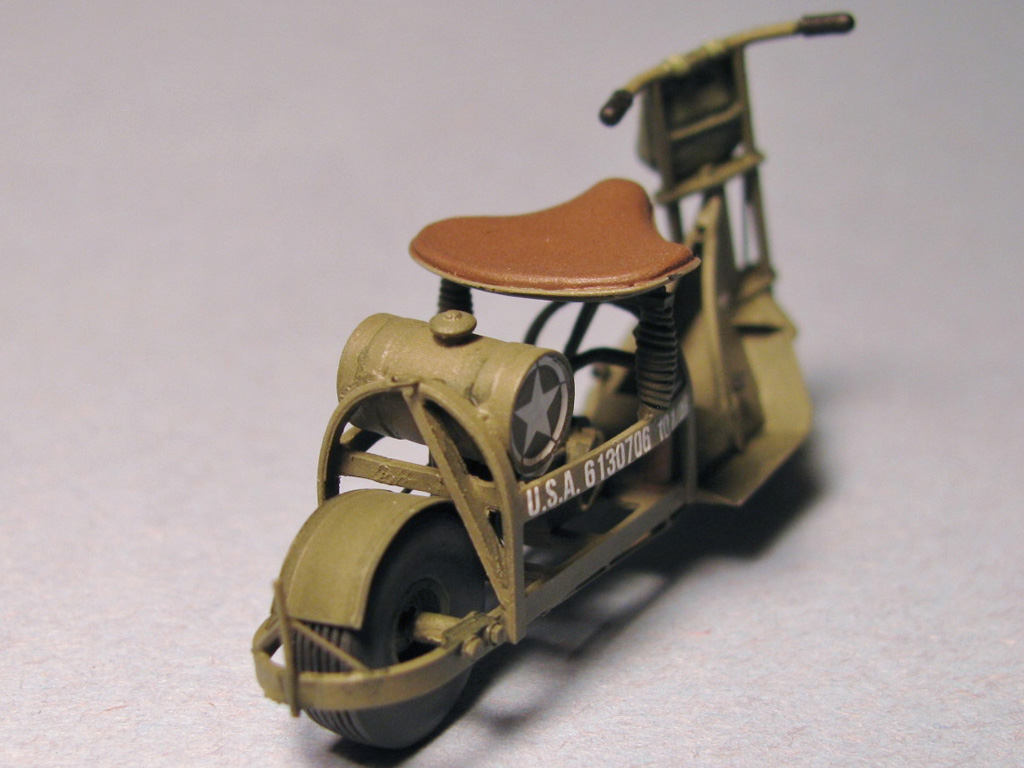
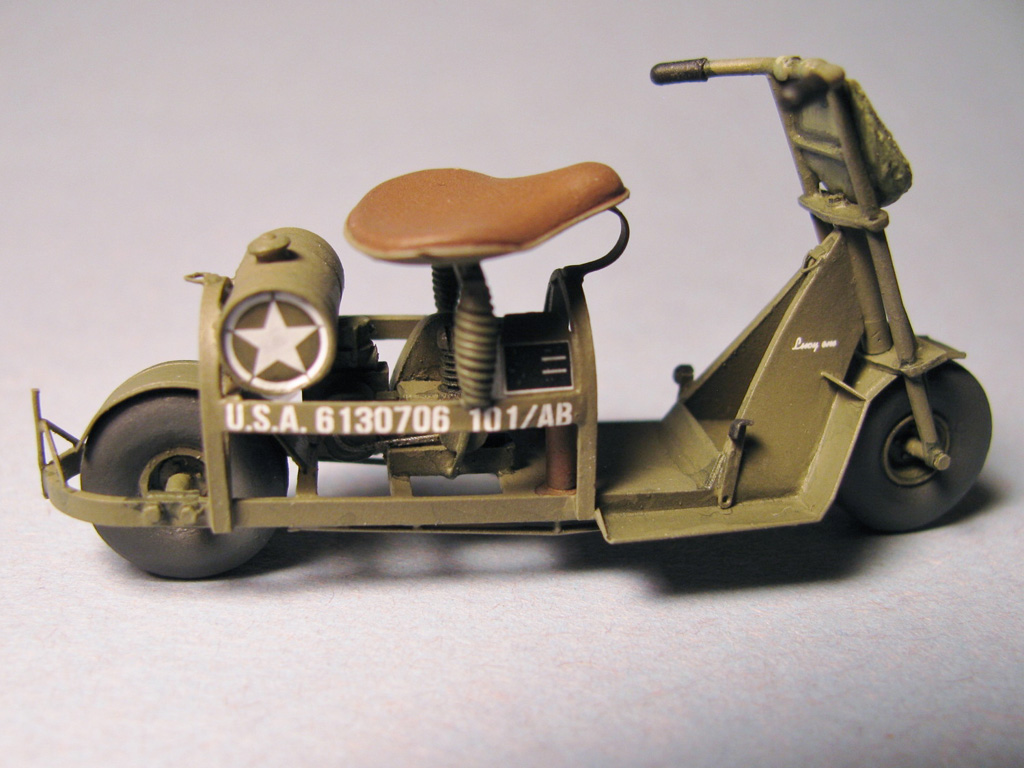
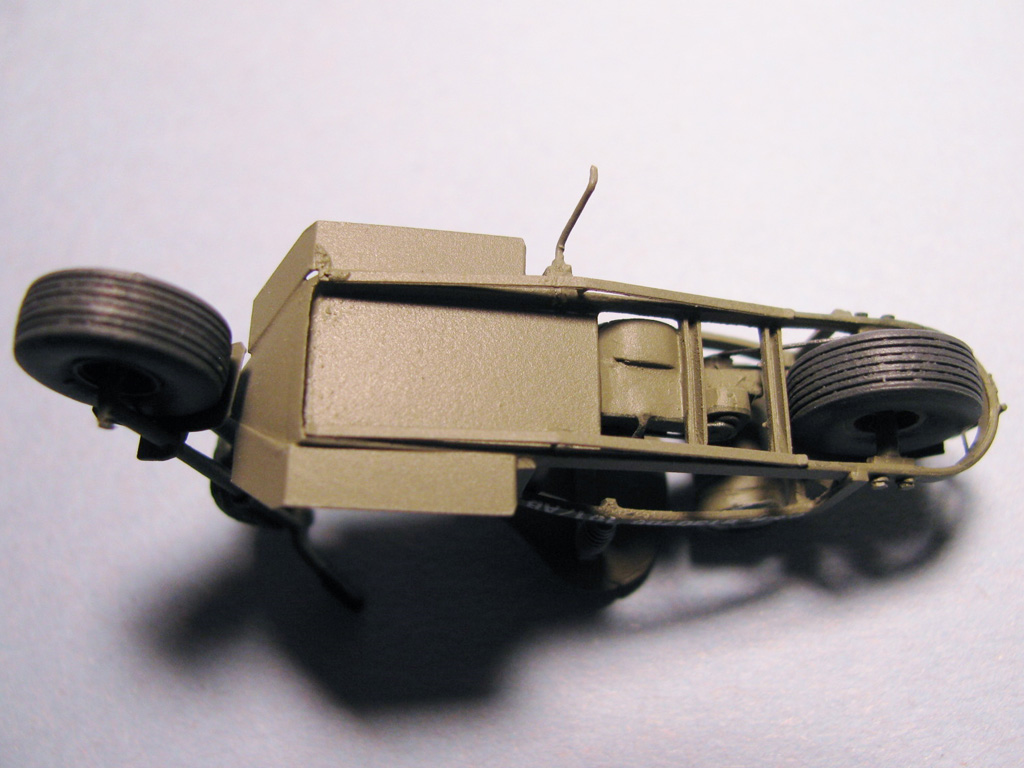
Of the three Plusmodel scooters I have built, this was by far the most challenging to assemble due to the amount of detail for something so small, and figuring out when items had to be assembled to allow for painting. This kit comes with an engine, and with items like a chain and sprocket for the rear wheel, I decided to build up the floor, engine and rear wheel as one assembly prior to painting. I further built up the front fork assembly as well as the seat, fuel tank, and their support “framework” as my other fabrications for ease of painting. With my lessons learned from my first Plusmodel kit, I used Thin CA for joining all of the parts, and had no issues as a result.
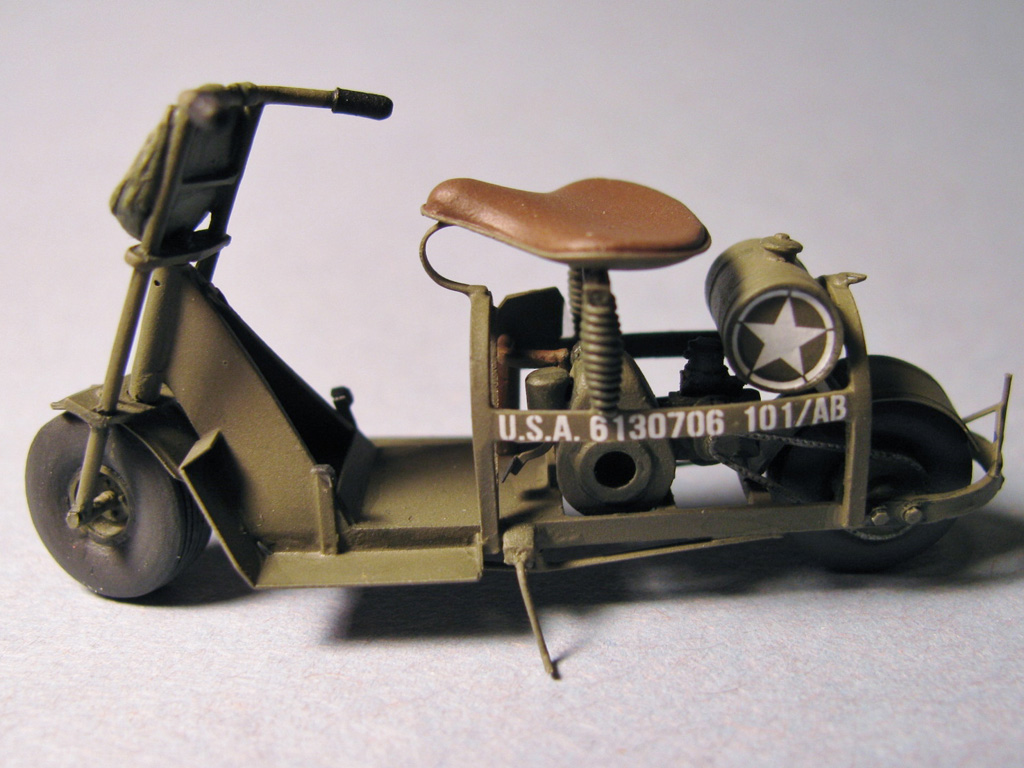
I used Model Master Acryl Olive Drab for the overall color along with Vallejo Dark Rubber (for the tires), Leather (for the seat), and Flat Black (for the handlebars, accelerator and brake pedals). The front pouch was painted with Vallejo US Army Tanker green, which was then lightened and darkened for highlights and shadows. I made use of my Rustall set for the engine exhaust/muffler, which sets just forward and to the right of the engine. I used Micro Gloss prior to installing the decals, which worked fine with Micro Set and Micro Sol, and I used Micro Flat for the final finish.
As far as my hits of this kit are concerned, I really liked the uniqueness of the offering of a scooter, especially in this scale, as it will look nice posed alongside WWII US Army Airborne figures, or with vehicles in this scale. The detail, in my opinion, is very good for this scale, especially showing off the engine that cannot be seen on the other scooters I have built. The scooter looks very convincing once assembled, and is true to the Cushman design.
My only real miss for this kit once again involved the instructions, as they can be a little vague for some items (such as the tow post support, and fit of the wires around the front wheel fender). I would have liked a dimension to cut the wire used for the tow post to, and my rear fender did not reach all the way back to the tow post support. I ended up cutting slots in my front fender to pass the two front wire supports, as they need to pass through holes in the lower support plate of the front fork assembly. I did heat treat the two photoetch parts that are used to simulate the holding straps for the pouch on the front fork as I did not see the rather thick brass rolling easily.
As I started my review, I would highly recommend this kit to any modeler wanting to pose this unique vehicle next to their 1/35 scale figures or vehicles. Anyone having experience with small photo-etch items should have few difficulties in building up this kit.
My thanks to the folks at Plusmodel for producing this unique kit, and for providing it as a review kit to the IPMS/USA Review Corps. I always like to thank Dave Morrissette and the folks who keep the Review Corps running as smoothly as it does, and always important are those who take the time to read my comments.


Reviewer Bio
Scott Hollingshead

Scott retired from the commercial nuclear industry with over thirty years of experience in Maintenance, Engineering, and Training. Prior to that he served on two aircraft carriers during his time in the U.S. Navy. He has been building models for over 50 years with his first kit being purchased with money from his grandparents for his sixth birthday. With a stash that consists of more aircraft than anything else, Scott still enjoys building a little bit of everything (including but not limited to tanks, cars, show cars, military vehicles (aside from tanks), ships, figures, real space, and some science fiction), which keeps his stash growing. Scott and his wife Fern reside in southwest lower Michigan, not far from South Bend, Indiana, and have three adult children and currently three grandchildren as well as a small dog and a large cat.
Comments
Add new comment
This site is protected by reCAPTCHA and the Google Privacy Policy and Terms of Service apply.
Similar Reviews