
U.S. Military Policeman w/Motorcycle
The Kit
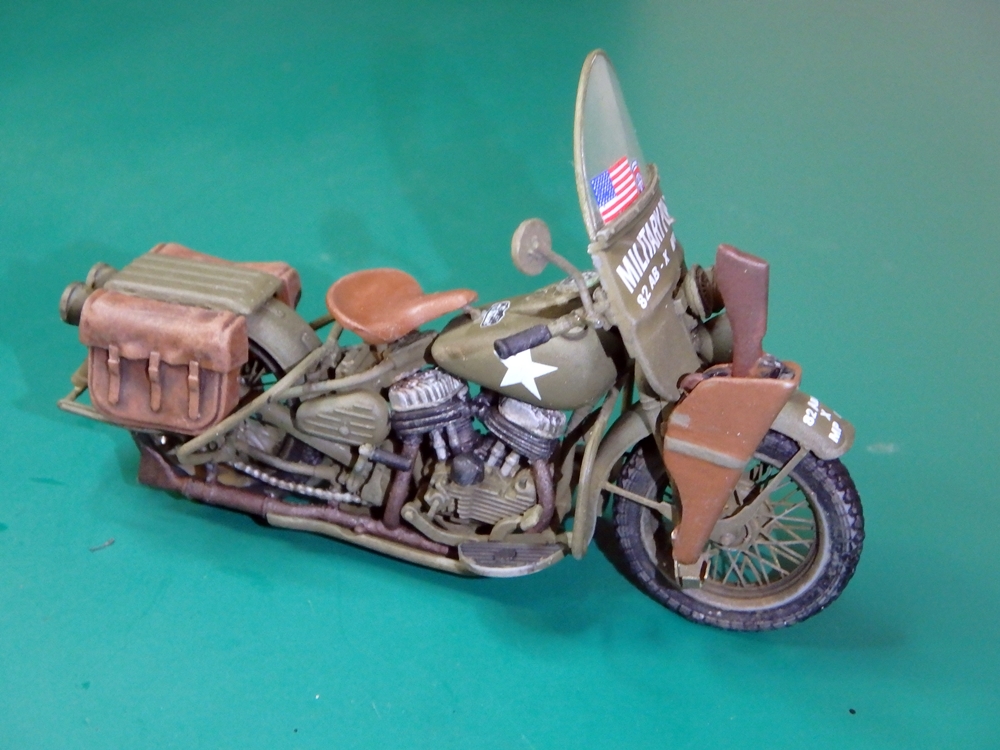
The plastic motorcycle parts are on a single sprue, the figure on a separate sprue, plus a sprue of clear parts, a set of photo etched parts, and a decal sheet with markings for the motorcycle and uniform patches for the figure. The instruction sheet is very nice: Large, clear, and in color.
The parts are all very cleanly molded, no issues with flash, sink holes or ejector pin marks, and the detail is crisp. The kit also includes plastic jigs for bending the photoetched parts.
The Build
Following the instructions, the build begins with bending the photo-etched parts. The spokes for the wheels are no problem, but the fender supports for the front wheel assembly were a bit challenging. In order to get the proper curve where the supports attach to the front fender, I used a small paintbrush handle, pressing into the cutting matt to get the proper curvature. I couldn’t get a sufficiently curved bend using the jig alone.
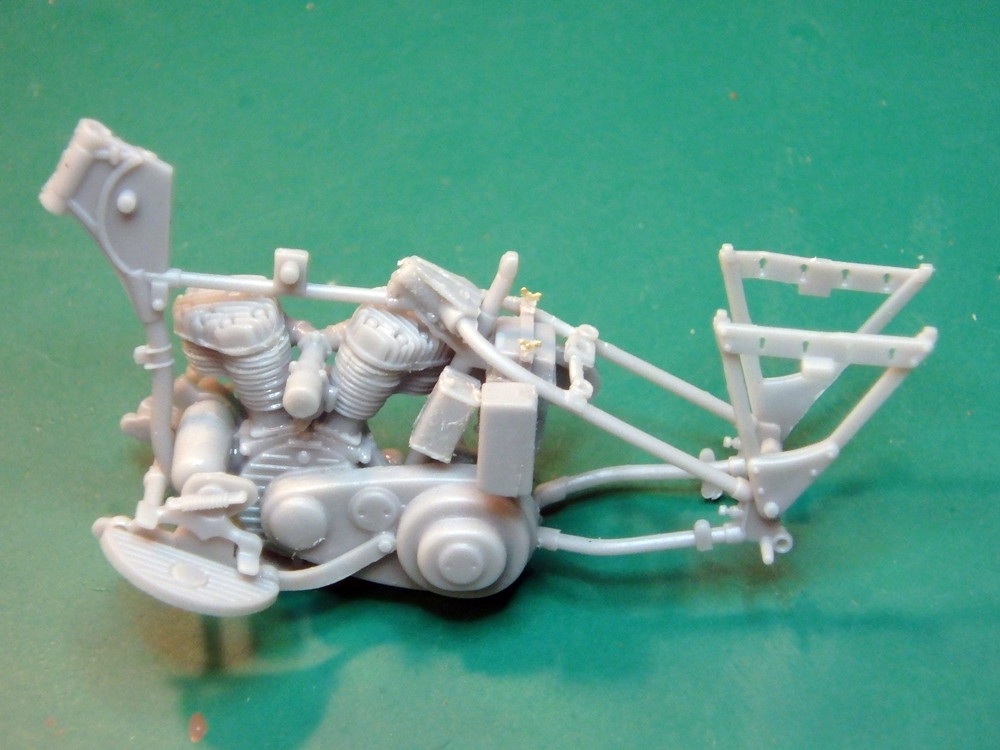
The engine and frame go together smoothly, although some care may be needed to ensure that everything lines up squarely.
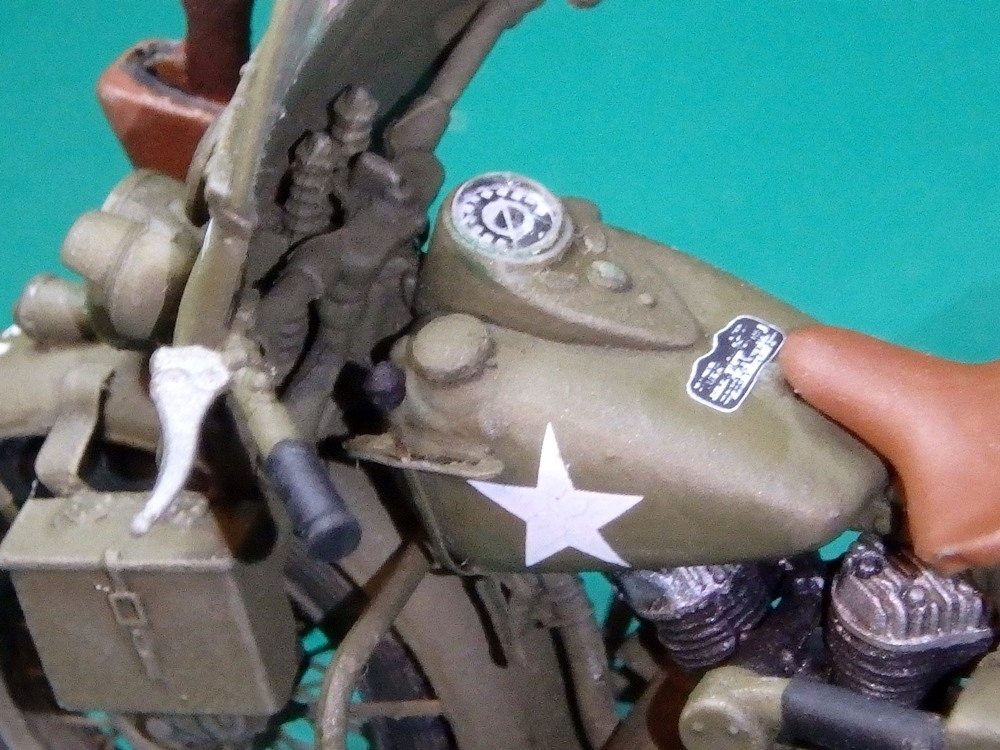
Some of the photoetch parts are extremely small and delicate. There are some rivet heads (I think that’s what they are) along the bottom of the fuel tank, butterfly nuts, and clasps on the air cleaner that are very tiny and require careful handling while bending and/or attaching to the model.
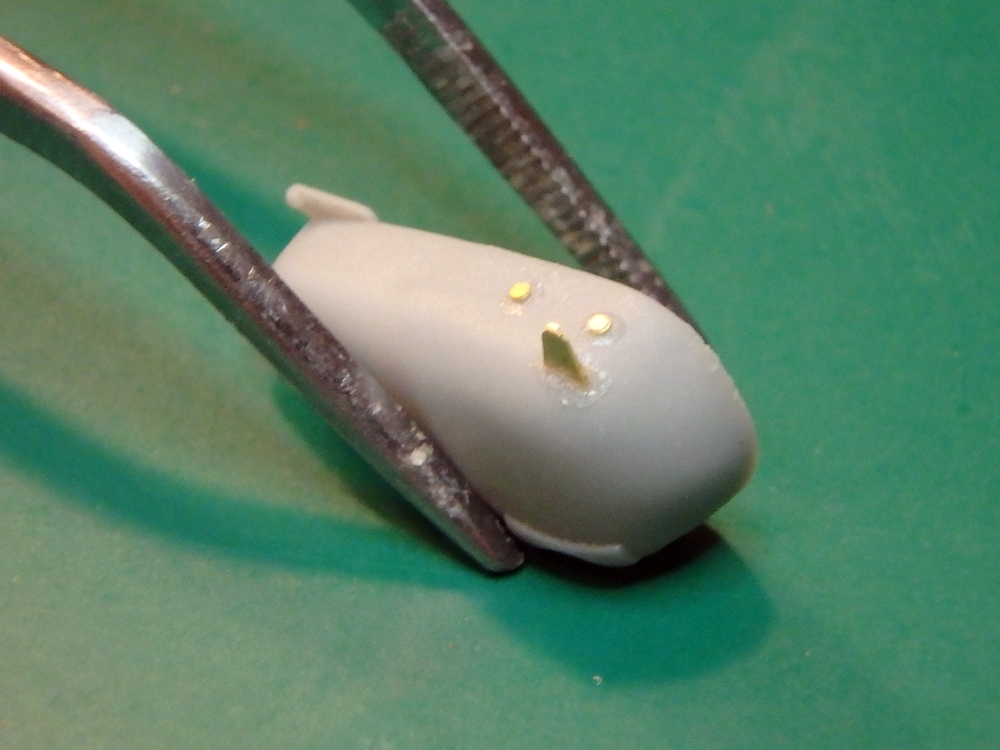
The first real problem I encountered was with the tail lights. The alignment pins on the tail lights were too big to fit in the slots in the PE bracket. I’d suggest filing them narrower before trying to press them into the bracket because the bracket is quite thin and easily bent out of shape (and hard to bend back into shape – you can probably guess how I know this).
There are no marks of any kind on the rear fender to indicate the exact position of the tail light bracket, nor do the instructions give any measurement to help you locate the correct position. I googled pictures of the bike and then made my best guess.
One the most difficult step for me was gluing the gear shift knob onto the photoetched lever. I finally super-glued the knob top down on an old knife blade, carefully filed a small groove for the shifter and then super-glued the end of the PE lever into the groove. I believe the better way to do this would be to glue the PE lever onto the knob before you remove the knob from the sprue, but I didn’t think that far ahead.
I also had a bit of trouble aligning the rear tire. This is dependent upon gluing the wheel hub into the PE wheel spokes without getting it off center or at an angle. I also had some trouble getting the chain and sprocket to fit into the hole in the PE wheel spokes. It appears that the diameter of the hole in the PE spokes is too small for the chain/sprocket part to fit into. This could be due to thickness of paint or something I did, but ultimately I had to file down the diameter of the round bulge on the sprocket that is supposed to fit in the hole in the center of the spokes.
Aside from these concerns, the kit went together quite well. As with any kit with tiny parts, you need to be careful not to drop them in the carpet, and you have to be increasingly careful handling the model as you get further along because of all the delicate parts on it that can be easily broken or dislodged (into the carpet).
The Figure
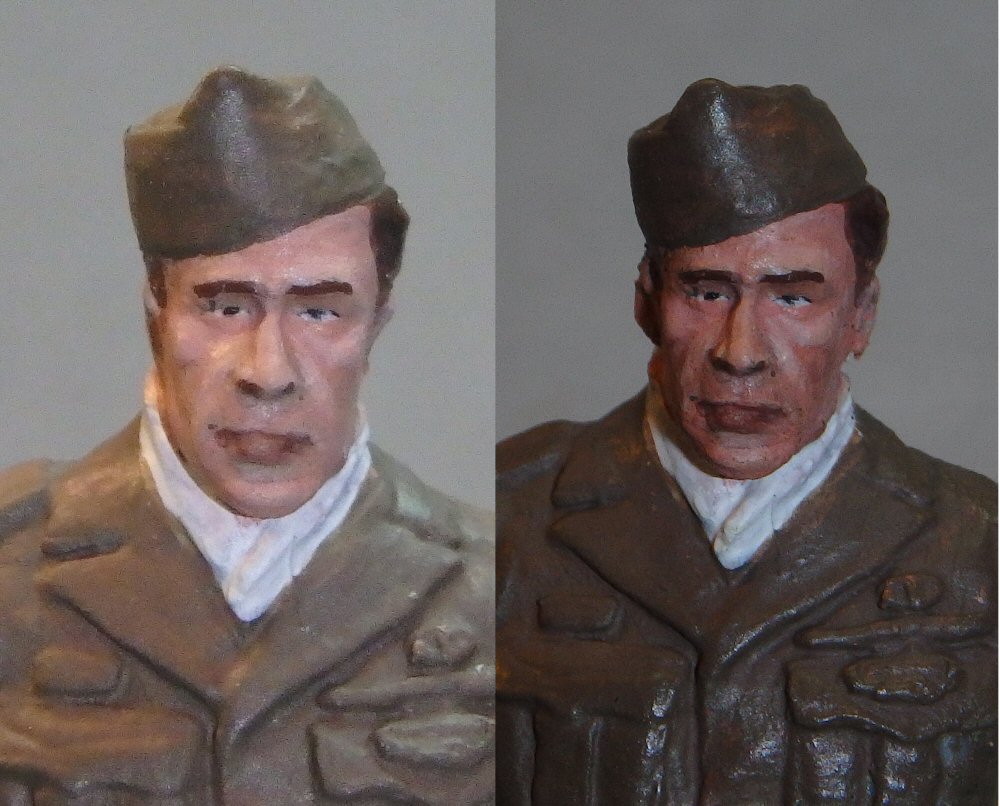
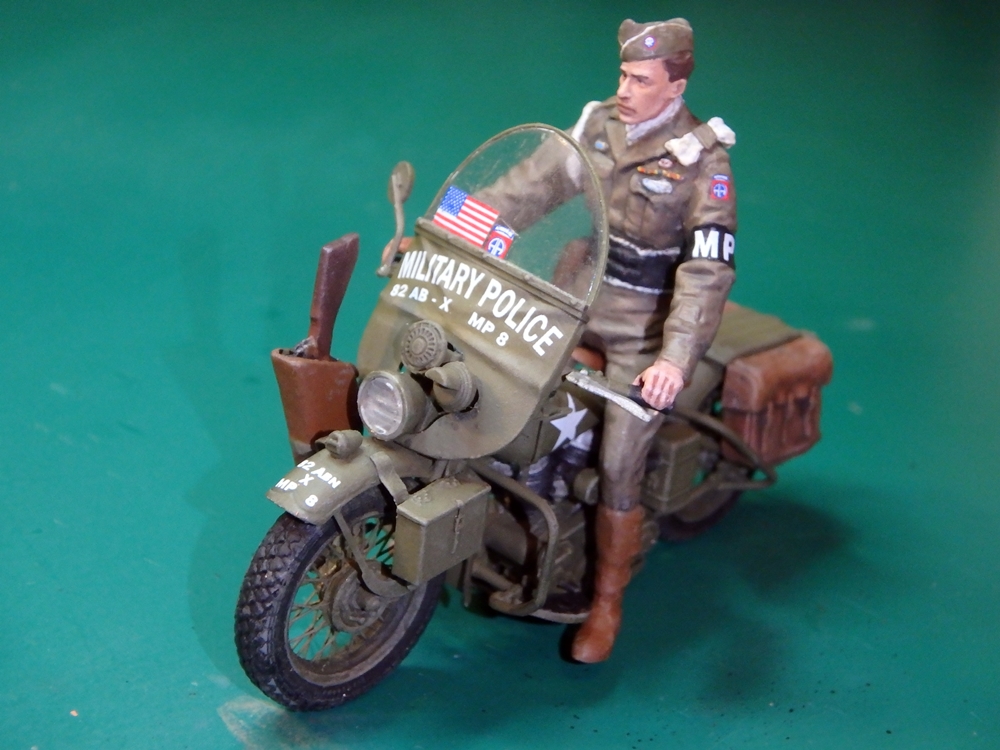
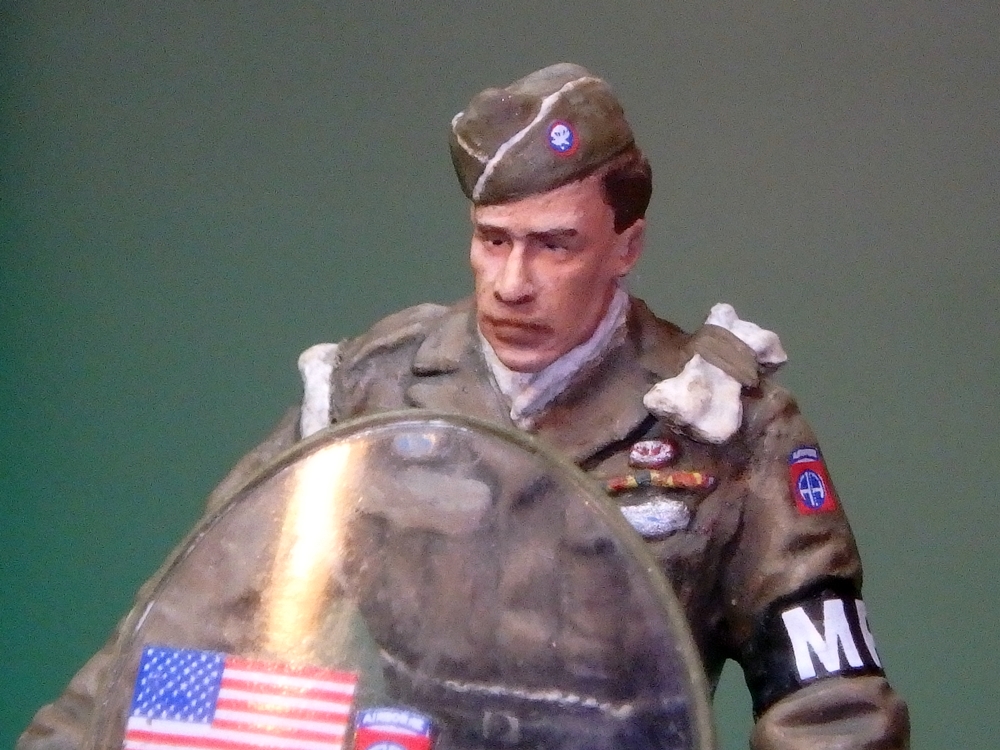
The main issue with the figure is that, when seated on the motorcycle, his feet don’t reach the ground. The figure is nicely molded, except that his ears are almost flush with his head and from the front they can’t be seen. To remedy this, I took an X-Acto knife and carefully cut behind his ears from the back, leaving the front of his ears attached. I then pried them out to a normal position and filled in behind them with gap filling super glue.
The kit includes decals for some of the figure’s patches, but his ribbons, airborne wings, and combat infantry badge have to be hand painted.
As I mentioned above, when finished and placed on the motorcycle his feet don’t reach the ground. In one spot his thighs were too narrow, so I trimmed the inside of his thighs and trimmed his behind where he sits on the seat so that he rides lower. Nevertheless, his feet still didn’t reach the ground, but they’re a little closer. It would have been nice if his feet could either rest on the ground or the motorcycle rather than being awkwardly suspended in the air.
Paint and Decals
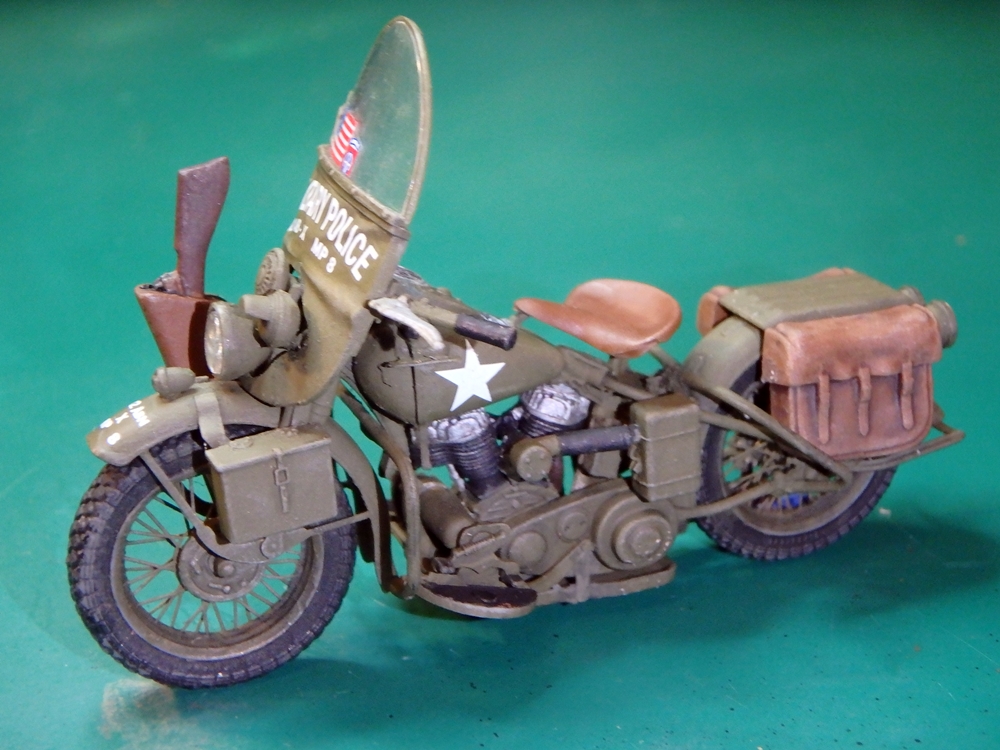
I painted the bike with Model Master enamel flat olive drab. I brush painted all of the engine components and details with Model Master enamels. The figure was done mostly in acrylics, but the final highlights were done with enamel.
It would have been nice if they had provided a mask for painting the thin frame around the windshield, but it’s not too hard to paint without a mask, it just takes a little longer.
The decals are very good, but thin and somewhat delicate, so handle with care when moving from the decal sheet onto the model. I folded the flag decal onto itself and it broke apart. I was able to restore it with some tedious effort.
Conclusion
This is an excellent kit, well designed and with fantastic detail. Those of you with more advanced modeling skills may have no troubles, but it wasn’t the easiest build for me. I am, however, quite happy with the completed model. I love the level of detail and I really like the figure, just wish his feet reached the ground.
Recommended if you’re comfortable with tiny parts not averse to some complex bending of photoetch.


Comments
Add new comment
This site is protected by reCAPTCHA and the Google Privacy Policy and Terms of Service apply.
Similar Reviews