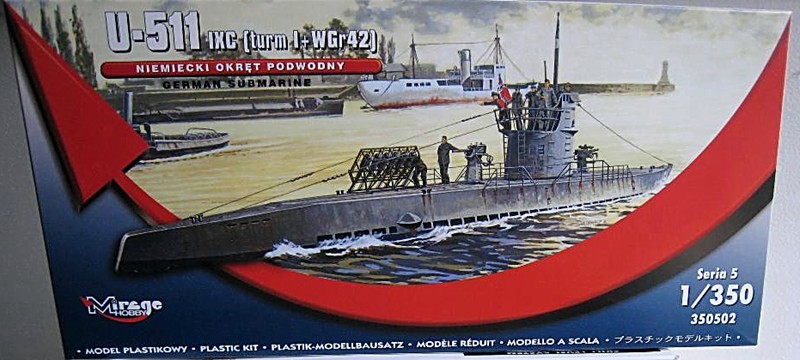
U-511 Type IXC Turm I
After producing several 1/400th U-boats, Mirage is now offering U-boats in the increasingly popular 1/350th scale. The U-511 was a Kriegsmarine long-range IX-C type submarine. The Turm-I variant included trial installation of a six tube Wurfkörper 42 artillery rocket launcher rack and improved 37mm and 20mm anti-aircraft armament. The kit features a 2-piece full hull, detailed exterior surfaces, conning tower with 2 periscopes and wintergarten, 10.5cm deck gun, display base, photo-etch parts (railings for all deck levels, anchor, cable cutter, WGr42 launcher base, ladders, screw blades and nameplate), and decals (U-511 bow placards and ensign). The completed model is approximately 8.6" long.
Having worked most recently with 1/25th scale autos, and 1/72nd and 1/48th scale aircraft, I found the 1/350th scale challenging! Small tweezers and a magnifier are most helpful. First off, the sprues needed to be washed with a plastic toothbrush and dish detergent to remove the mold release agent. Be careful not to damage the fragile small parts. The plastic is soft, and removal of small parts from the sprue trees can be risky. Using a # 11 Exacto knife, I gently ‘sawed’ small pieces from the sprue attachment points, as early attempts to snip off pieces with pliers resulted in damaged parts. The deck has good detail as do most of the small parts. Many of the latter have seams in hard to reach areas that need to be sanded. The hull detail is softer, and easy to sand off.
I reviewed and re-reviewed the 2 page instructions (there is no text) to make sure I was following the correct placement arrows for the small parts. No FS or RLM color numbers are provided, however, these subs were usually painted light gray for upper surfaces and dark gray/black below the water line. The colors were rapidly altered by the ocean waters and dry dock repair, so use your imagination or internet research. I used grimy black for the lower hull and a combination of RLM 02 and 63 for the upper hull, conning tower, and everything else on the deck. A dark gray wash was used for the limber holes and deck.
The deck to hull fit is very good, first though, cut the flash off the inside of the top of the hull halves. I taped the hull halves and deck, and sparingly used thin liquid glue to cement all 3. Next I lightly sanded the keel and hull join seam after using small amounts of putty and Mr. Surfacer. For ease of handling I then glued the completed hull to the base. This protects the lower stern and bow parts from being broken off later. The anchor and dive planes were then glued, along with the deck guns. The dive planes are very fragile; I broke one, and was very cautious with these small parts for the remainder of the build (see 2nd paragraph above). Finally, the photo-etch (“PE”) deck railings and PE rocket launcher base and rocket assembly were added to the deck.
As for the stern, you need to figure out where to start the assembly, as the instructions don’t provide step by step info. I started by gluing the propeller support arms (G7), followed by 2 cut down straight needles for the propeller shafts. Next came the 2 hydroplane/support parts (G6) (both of which I had broken in 2 when removed from the sprues). I needed to file down the supports to properly reach the propeller support arms. I drilled new holes in the hull closer to the keel center to insert each rudder tab (G4), otherwise, the rudder support (G5) would not reach the bottom of both rudders. Finally, the PE screws were added, after gently twisting each blade into shape.
The conning tower halves fit together very well, but the nicely done PE railing for the tower gave me fits trying to glue it to the round base. The PE railing is the only one provided in the kit, and I sure wished that a plastic railing was also available for the inexperienced ship modeler. The instructions don’t show the 2 ladders or life preservers on the conning tower, I glued these PE pieces on both sides as seen on other Type IX U-boats. The periscopes, antiaircraft gun, and DF loop were then glued and the completed sub-assembly was painted light grey, and glued to the deck.
For me this was a fun project that required only several hours. Despite the fragile small parts and my clumsiness with PE, the finished U-511 is an attractive model. The U-boat mavens can accessorize the kit with after-market weapons, weatherize, or build another of the type IX U-boats in a variety of colors and camouflages.
Thanks to IPMS USA, Mirage of Poland, and Dragon Models USA for the review kit.


Comments
Add new comment
This site is protected by reCAPTCHA and the Google Privacy Policy and Terms of Service apply.
Similar Reviews