
Typ 320 (W142) Soft Top, WWII German Staff Car
ICM boasts a rich heritage within the modeling community, establishing itself as a well-established Ukrainian-based plastic modeling company. Expanding its selection of modeling kits, ICM presents its newest release, the 35542 Typ 320 (W142) Soft Top - a WWII German staff car. While this kit is a reissue of the 2016 version, it includes additional new parts.
The following is a brief history of the Typ 320 W142 taken directly from ICM’s website:
The Mercedes-Benz 320, also known as the W142, was developed at the design bureau of Daimler-Benz AG and began production in 1937. It had a six-cylinder engine with a volume of 3.2 liters (3.4 liters in later versions) and 78 horsepower. The model was available with a short (2880 mm) or long (3300 mm) wheelbase and various body styles. The Cabriolet body variant was available in a long wheelbase version. The four-seater version had two doors and four side windows; the roof was soft and could be folded down to protect it from the weather. This vehicle was often seen in the Wehrmacht, with some retaining civilian license plates. It was used as a staff car and was also used to transport senior commanders.
Box and Contents
The kit is packaged in the standard ICM top-loading box with an oversleeve, which has dimensions of 9” (22cm) x 12” (30.5cm) x 1-5/8 (14cm). On the box’s lid, you will find a vibrant depiction of a Typ 320 Soft Top WWII German Staff car, while the sides of the box display supplementary illustrations and include a brief account of the car’s history.
Within the box, you will find a cellophane bag holding three gray sprues, a set of rubber tires, and another package containing clear parts identified as sprue D. Furthermore, there is a compact 4-page pamphlet that details ICM paints, complete with a color chart.
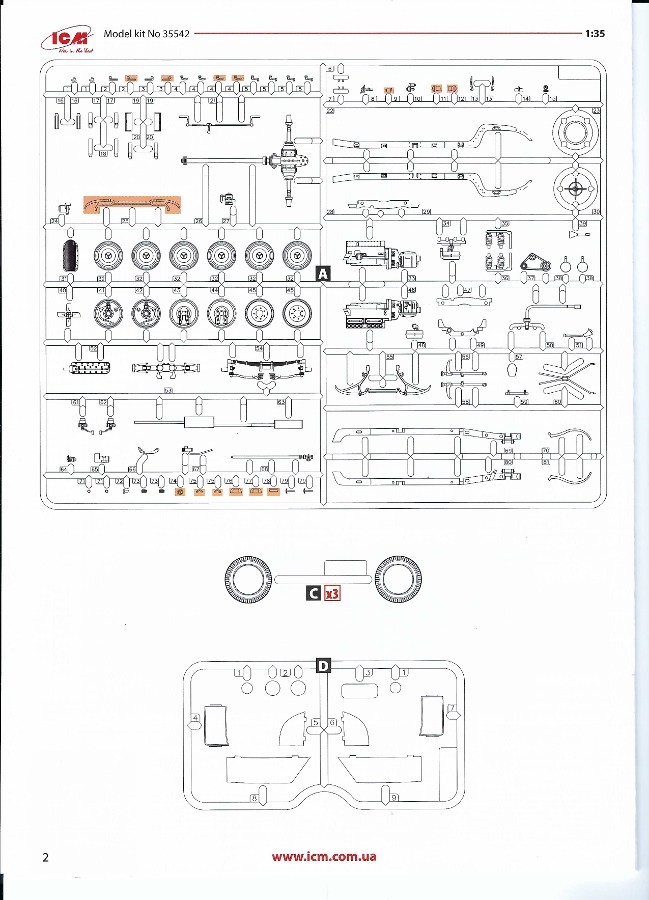
Additionally, there is a 16-page instructional booklet enclosed, featuring a small decal sheet. The instructions, following the typical ICM style, are presented in a portrait format with sixty-one CAD-drawn steps. The initial page provides a concise history of the staff car along with color references using ICM paints. Pages two and three show the parts layout with parts not used in orange. There is no photo etch included in the kit. With a total of 146 parts in the kit, the assembly should be swift and efficient.
The small decal sheet provides markings for four options:
- France 1940
- Unknown Luftwaffe unit, 1940
- Eastern Front, 1943
- Nachtjagdeschwader 1 (NJG 1 - Night fighter wing), 1943
Sprue Breakdown:
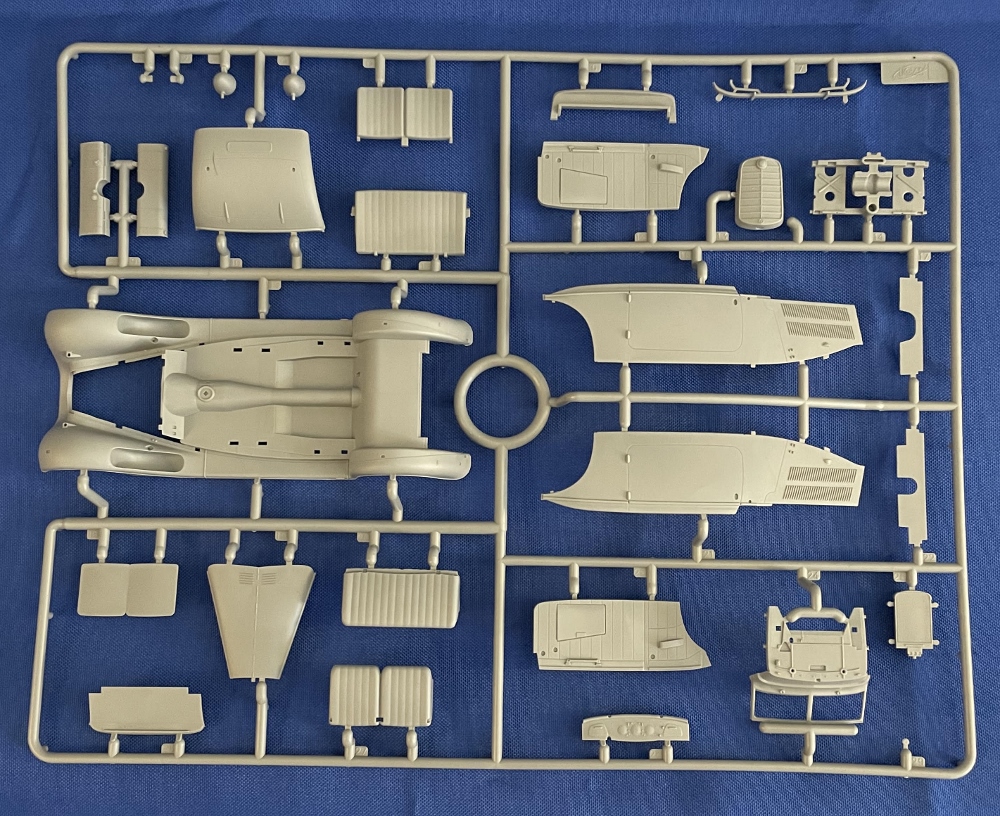
- One sprue (A) from ICM kit # 35537 (2016)
- One sprue (E) from ICM kit # 35540 (2023 Typ 320 Cabriolet
- One sprue (F2) Soft Top from ICM kit # 35542 (New)
- One clear sprue (D) from ICM kit # 35540 (2023 Typ 320 Cabriolet
- Sprue C vinyl tires from ICM kit # 35537 (2016)
The Build
For the construction of this project, I have opted to incorporate version four featuring marking and paint in the NIGI-Night Fighter Wing 1943 scheme, which includes shades of grey-blue, German Grey, and neutral grey colors.
Step 1-7
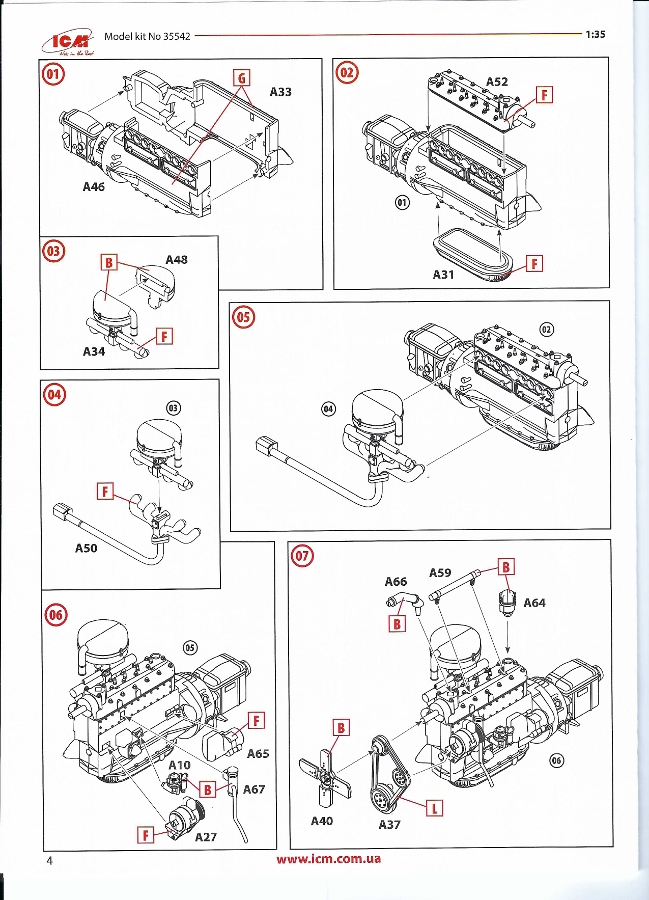
These steps involve assembling the 3.2-liter (195 cu-in) six-cylinder gasoline engine, generating 77 horsepower. The engine, equipped with 12 valves, is outfitted with a Solex 32 JFF 2-barrel carburetor. The construction process commences by connecting the two halves of the engine block, followed by positioning the cylinder head, attaching the manifold and carburetor, and finally installing the pulley and the fan belt. The level of detail in the molding is exceptional. For modelers seeking to emphasize the intricacies of a detailed engine, this serves as a solid foundation.
Steps 8-15
These steps consist of the construction of the chassis and attachment of the front and rear axles. On each side of the chassis frame, there are two-part rails that need to be glued together and subsequently aligned with the cross members. Unfortunately, ICM has designed the front axle and steering in a way that restricts the articulation of the wheels. The chassis design by ICM otherwise facilitates the accurate attainment of alignment. Here again, the level of detail is excellent. This base allows the modeler to install brake lines and other wiring details.
Steps 16-24
These steps consist of assembling the wheels, attaching the rear springs, adding the two-part fuel tank, installing the front bumper, and steering linkage, placement of the engine in its mounts. Additionally, a detailed radiator is installed. Step 24 involves installing the front fender braces. Nevertheless, specific mounting points on the frame are not evident. At this point, the chassis was complete, and it was time for painting before the body was installed. The chassis was primed with A. Mig Grey Primer 2024. After this, an application of Ammo Mig Schwartzgrau 218 Grey was applied. I applied ICM German Grey 1038 to the wheels, diluting the 12ml containers with 5ml of distilled water to attain a final dilution rate of 42%. This quantity filled the container. ICM suggests a dilution rate in the range of 40-60%.
Steps 25-30
In these steps, the instructions call for the installation of the car’s body to the frame. I chose to deviate from the instructions and continue with the construction of the car’s body components before installing them onto the frame. This would not take place until step 61 was complete as I wanted to ensure painting would not be an issue. The exhaust system (part A63) would also be saved until later. I installed the interior foot pedals and shift levers, the dash with instrument decals, and the window glass. I chose to mask off the window glass while it was still on the sprue before fitting it into the windshield frame. The body seamlessly fits onto the frame without any noticeable issues.
Steps 31-39
Component A68 represents the steering shaft with gear, linking to the steering attachment point on the axle. The instructions recommend gluing it in place from the rack through the dash. However, during body construction and painting before attaching to the axle, I opted to cut the rod at the gear and glue it to the dash. This approach allowed me to place it when the assembly was complete. At this point, the seats and door panels were primed and painted with Vallejo Model Color Leather Brown 70.871.
Steps 40—61
The build concludes with the execution of these twenty-two steps involving the addition of the door panels, steering wheel, trunk lid, engine grill and brace, spare wheels, hood closures, headlights, and mirrors, and finally, the installment of the top with landau brackets. Regrettably, ICM does not offer the option of opening the doors or hood. Nevertheless, with some scratch buildings using a jewelry saw and plastic card stock, it is possible to achieve this modification.
Painting
The engine block was painted with A. Mig Gun Metal 045, while other detailed components were painted using ICM Black 1002, and ICM Natural Steel 1025.
The exhaust manifold and tubing were coated with a blend of Vallejo German Black Brown 70.822, Orange Brown 70.981, and Light Rust Wash 505.
The cabriolet top underwent priming using A. Mig Grey Primer then two light coats of Vallejo Model Color Neutral Grey 70.992 were applied. The car’s exterior underwent priming with A. Mig Grey, followed by two coats of ICM 1038 German Grey.
Decals
ICM provides gauge decals which were applied using Micro Set and Micro Sol. There were no observable problems following their application. The only observation I have is that the gauges’ yellow background would have been less noticeable if they had a white background.
Conclusion
Initially, I would like to mention that during the installation of the transparent glass, I encountered several issues, all of which were a result of my actions. I opted for Revell’s Contacta Clear to affix the glass to the frames, but despite my efforts, they did not fit seamlessly into the joints, and excess glue ended up on the glass. In an attempt to address the glue residue, I experimented with an alternative method by using Pledge Floor Finish, but unfortunately, none of my attempts proved successful.
ICM has accomplished a remarkable level of detail resulting in an outstanding representation of a German WWII Staff Car. The kit includes decals for four different markings, The only limitation I find is that ICM does not allow for the opening of the hood and doors. However, for the modelers, this should present no significant challenge. Another drawback is the inconsistent depiction of attachment points in the instructions. However, with adequate references, this should not pose a problem. Despite these observations, the kit remains an excellent choice for modelers ranging from basic to advanced skill levels.
Thanks to ICM and IPMS/USA for allowing me to review this kit.

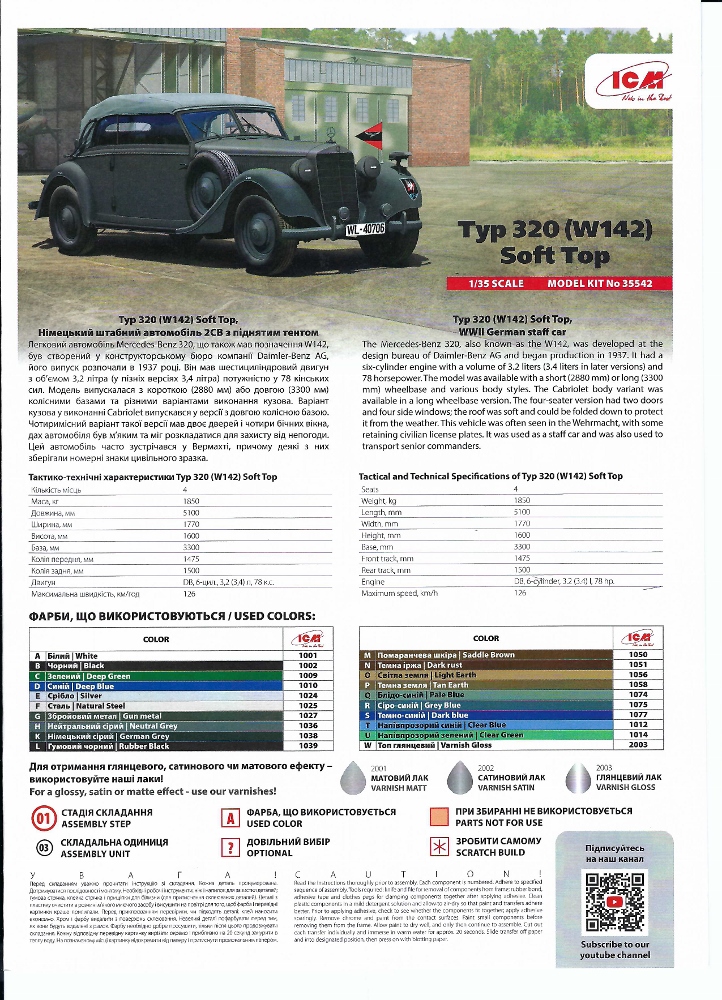
Guide age 1
Guide page 2
Guide page 4
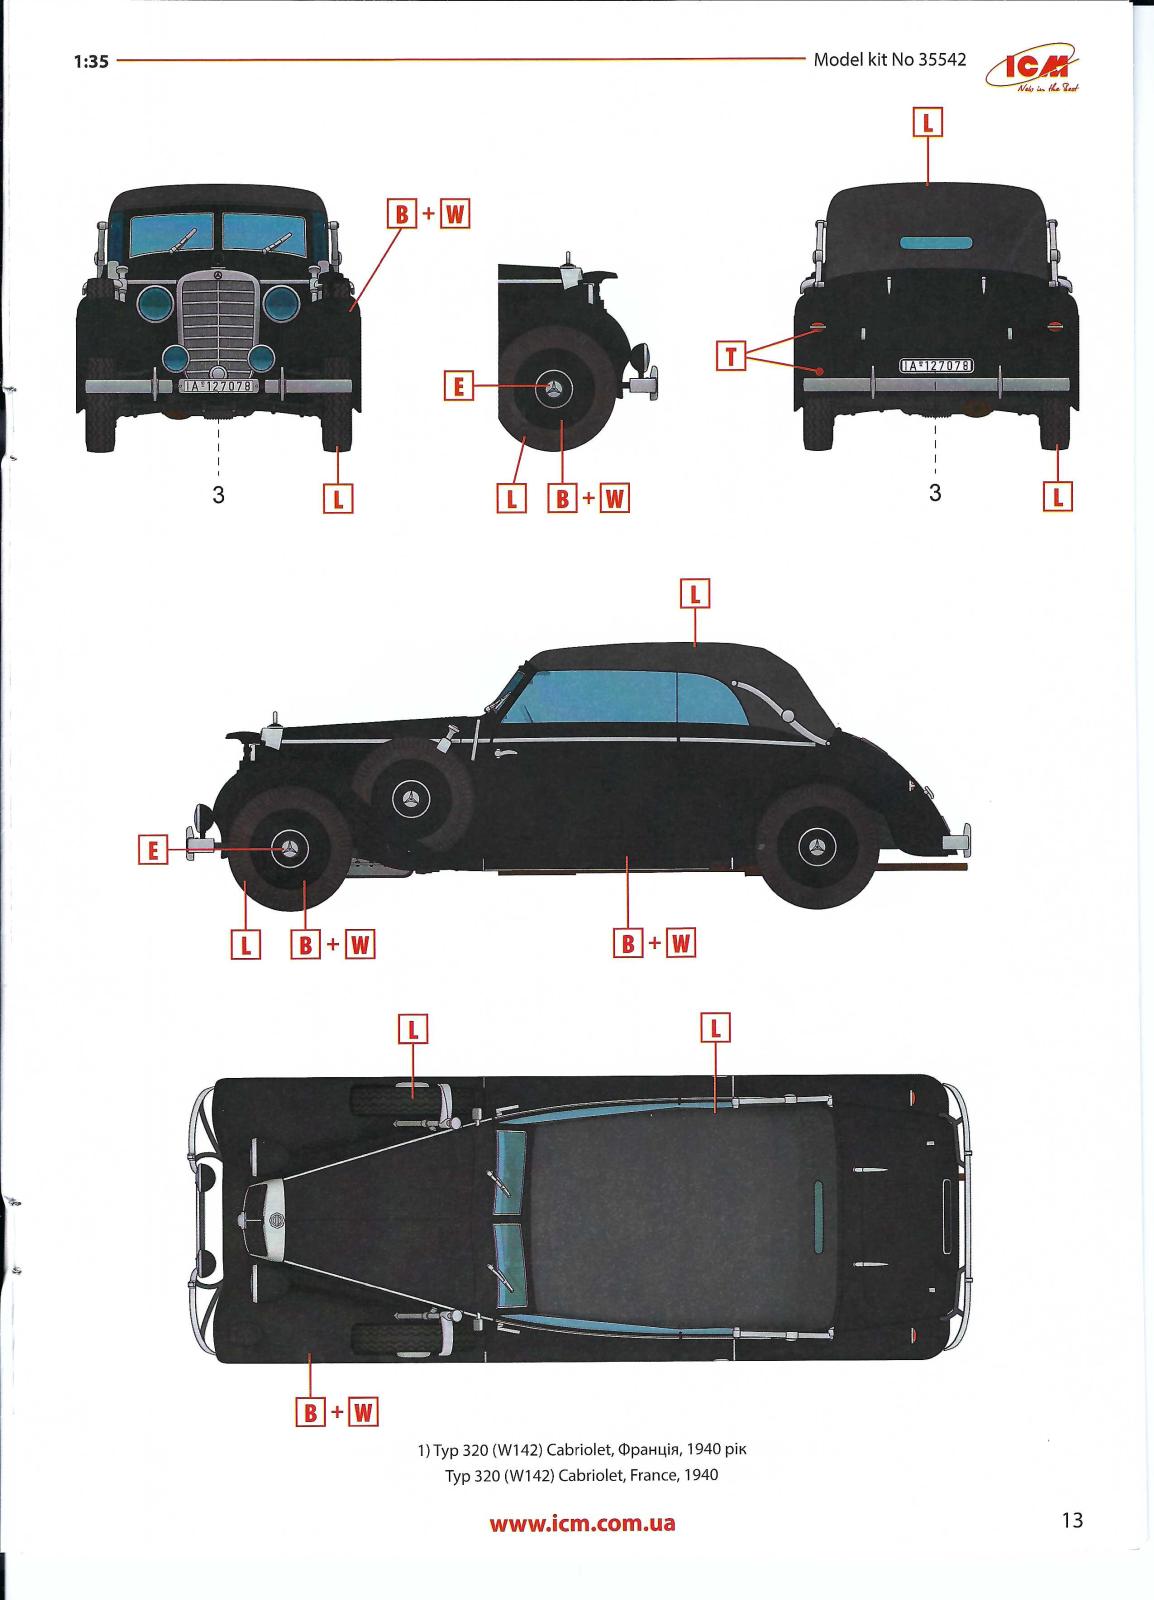
Option 1
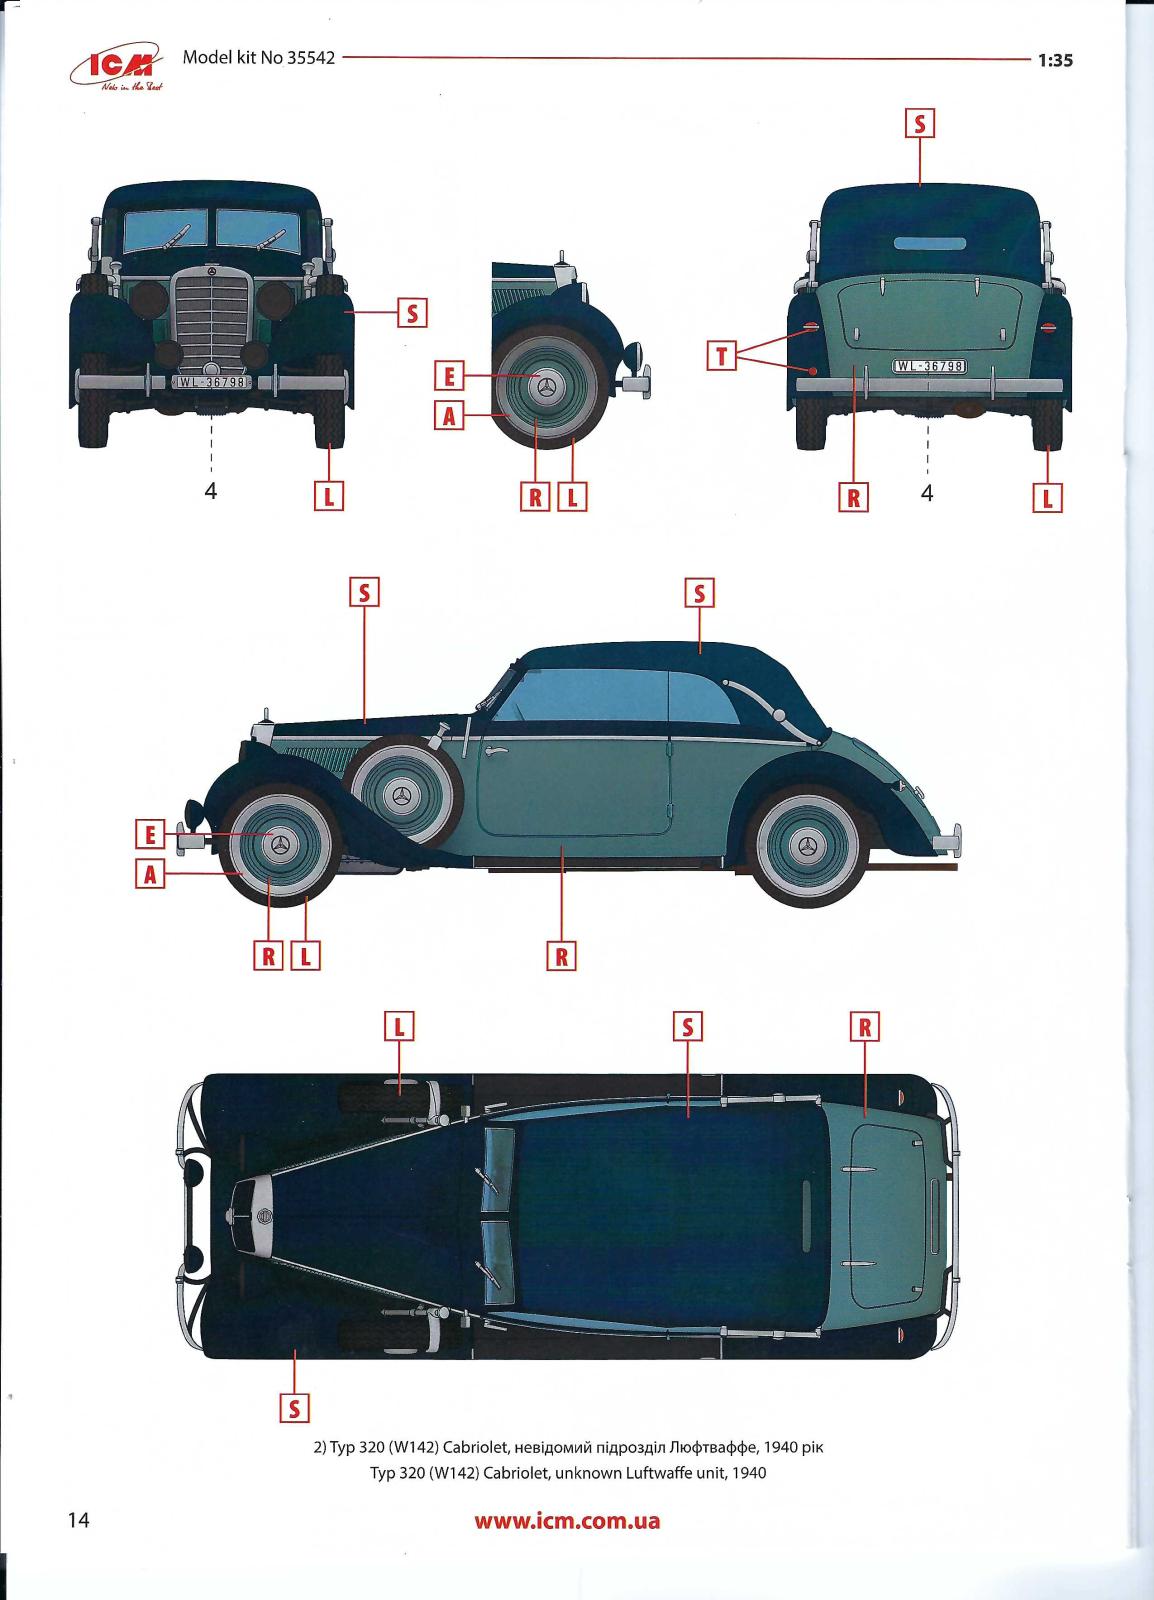
Option 2
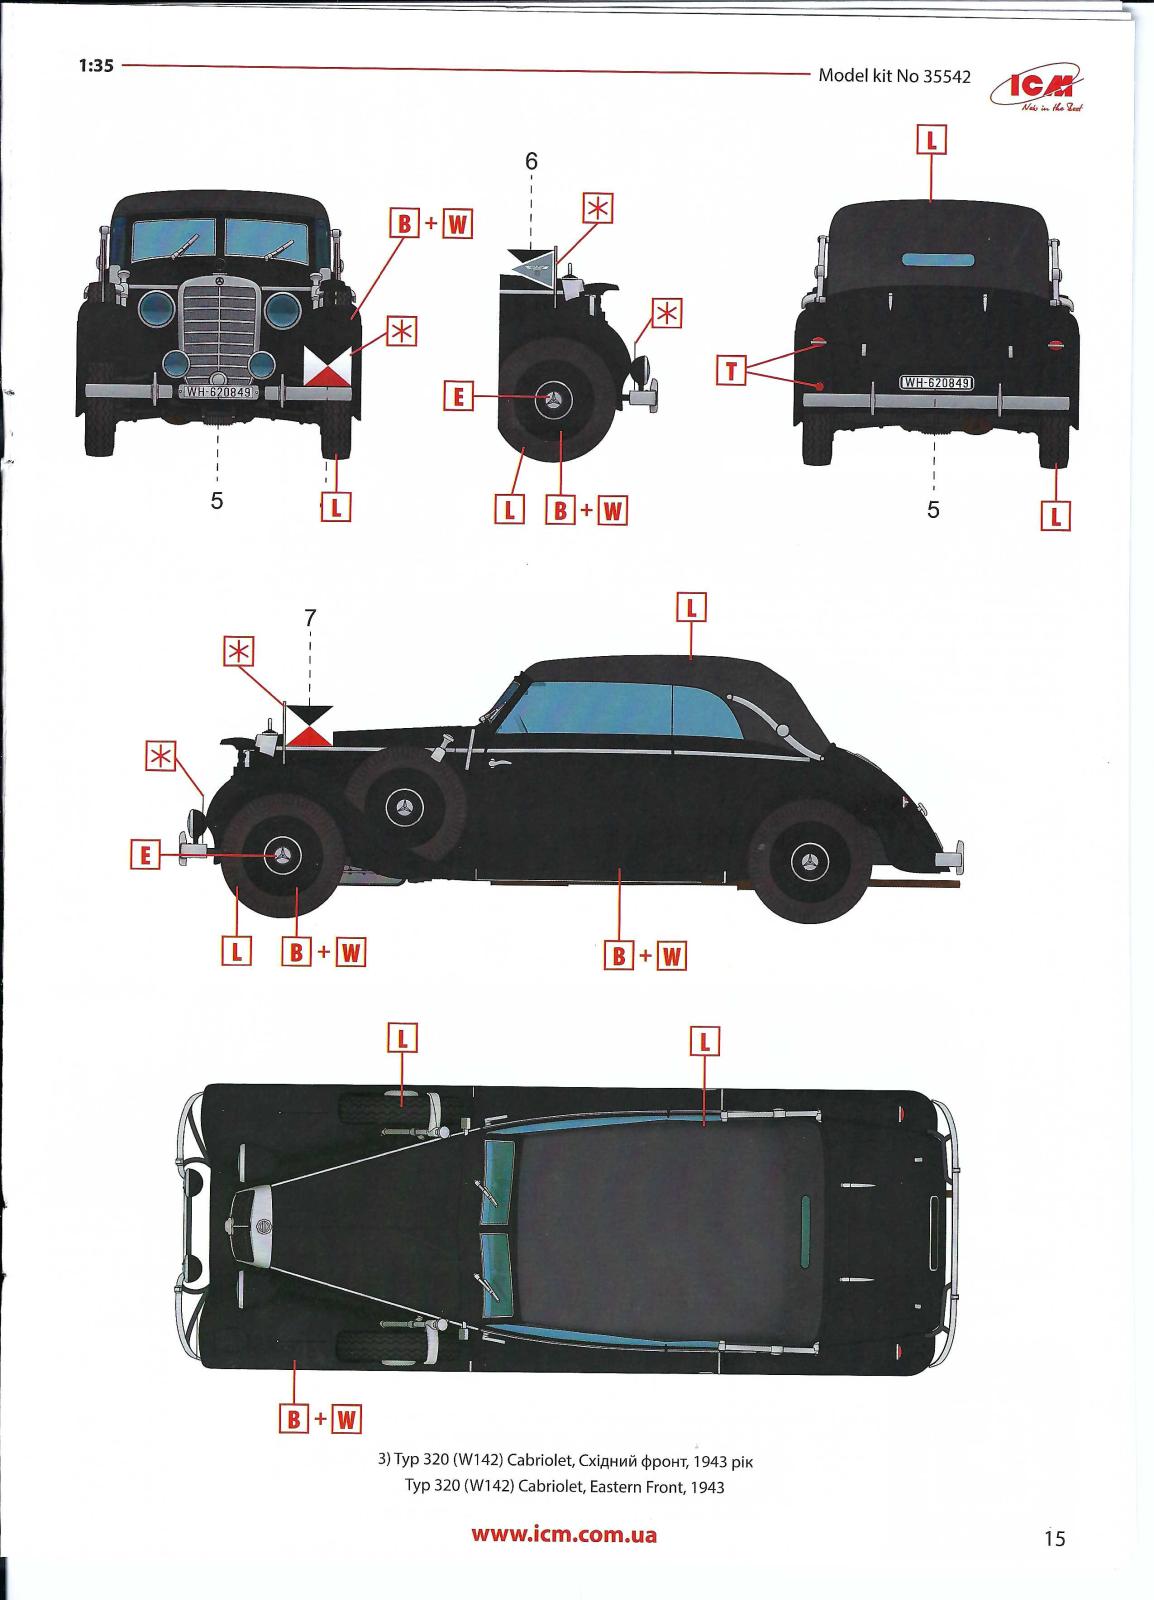
Option 3
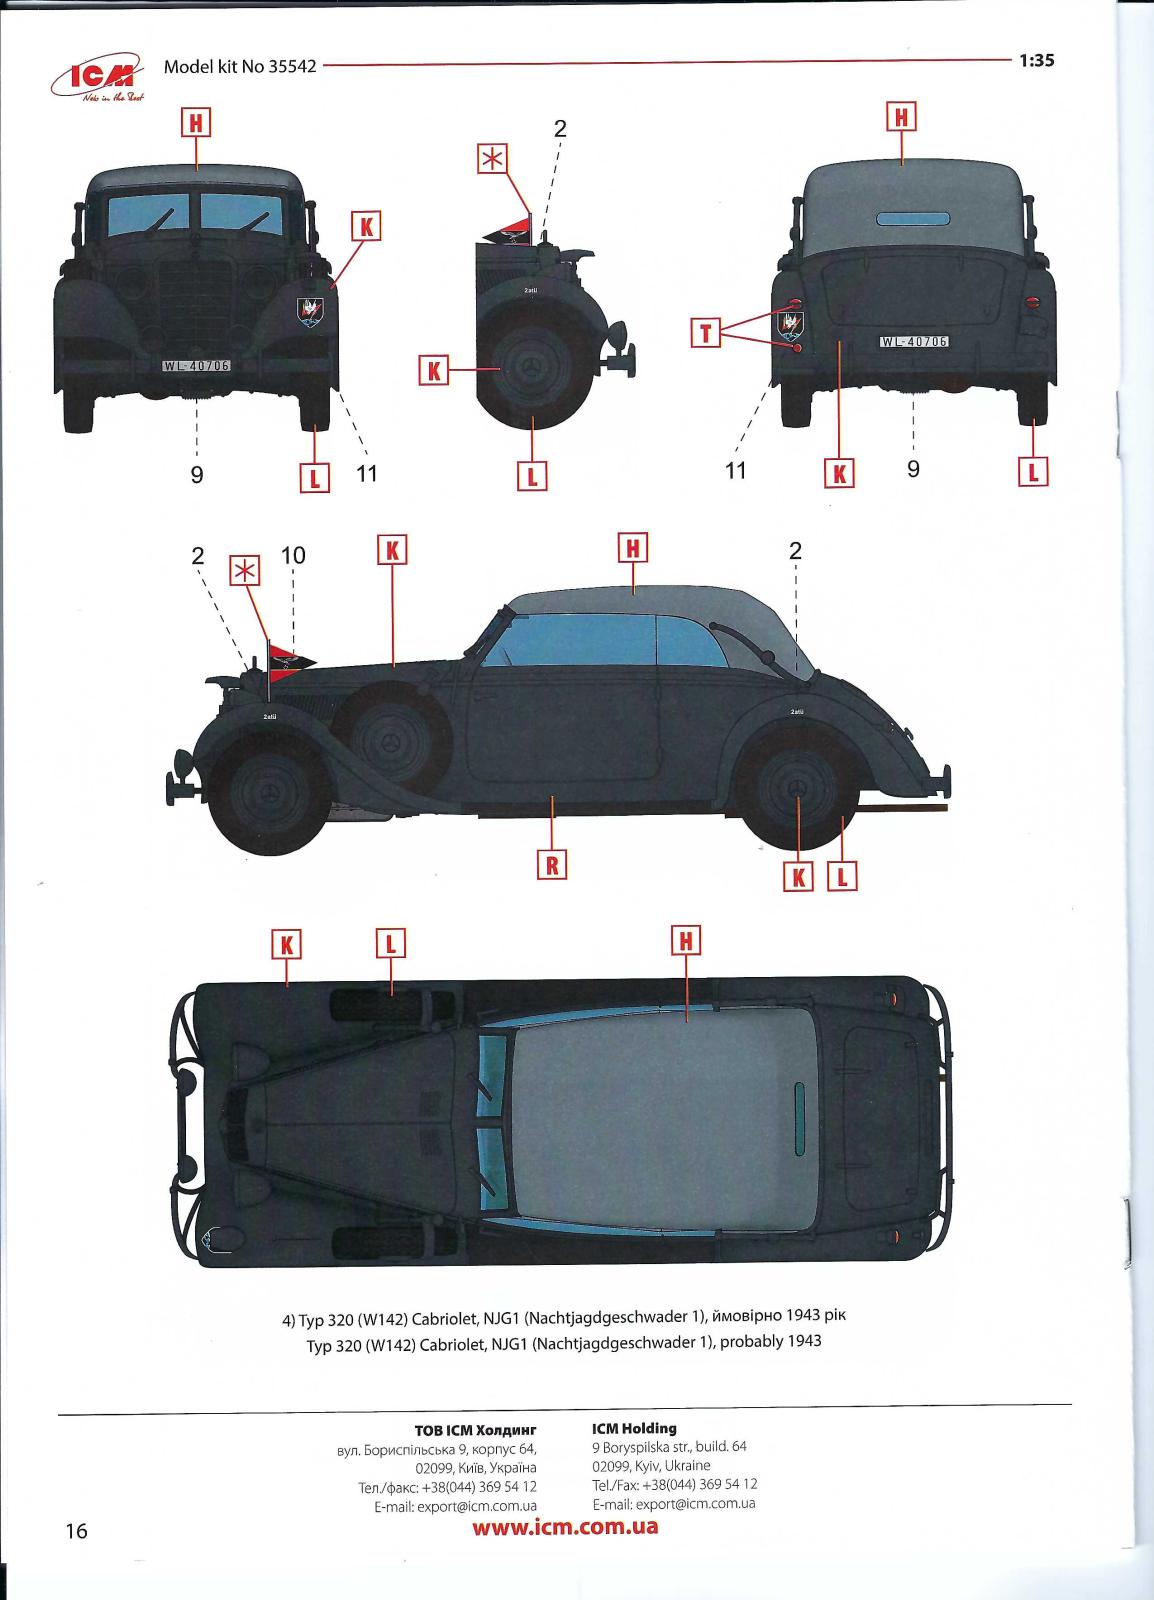
Option 4
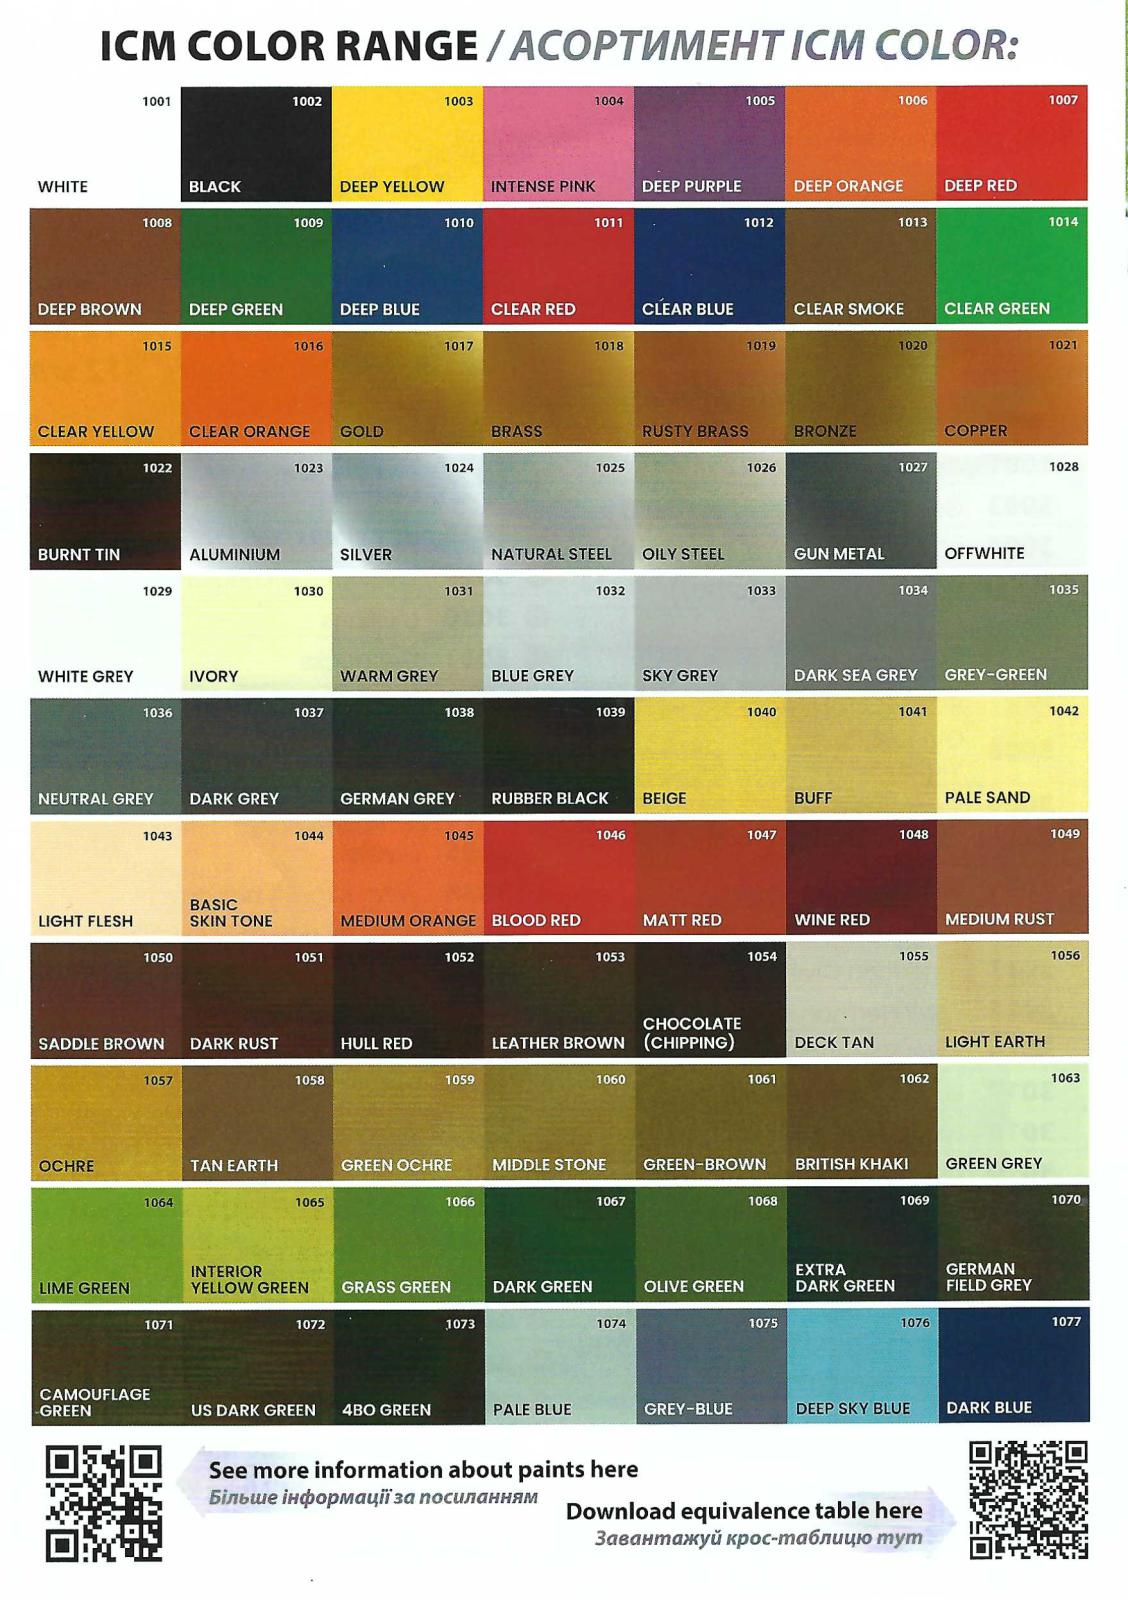
ICM Paint Colors
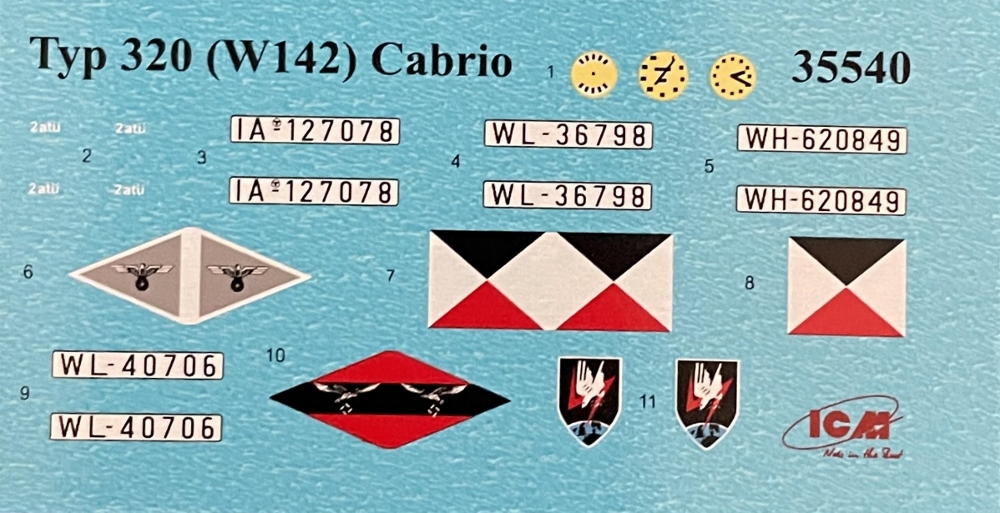
Typ 320 German Staff Car decals
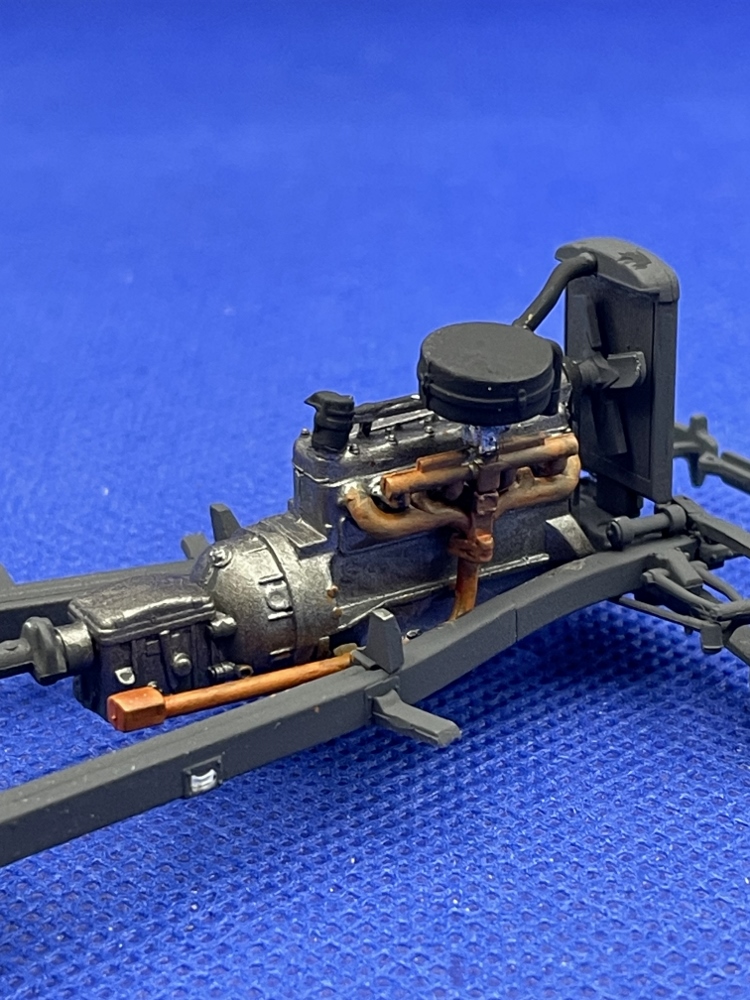
ICM Typ 320 German Staff Car Engine
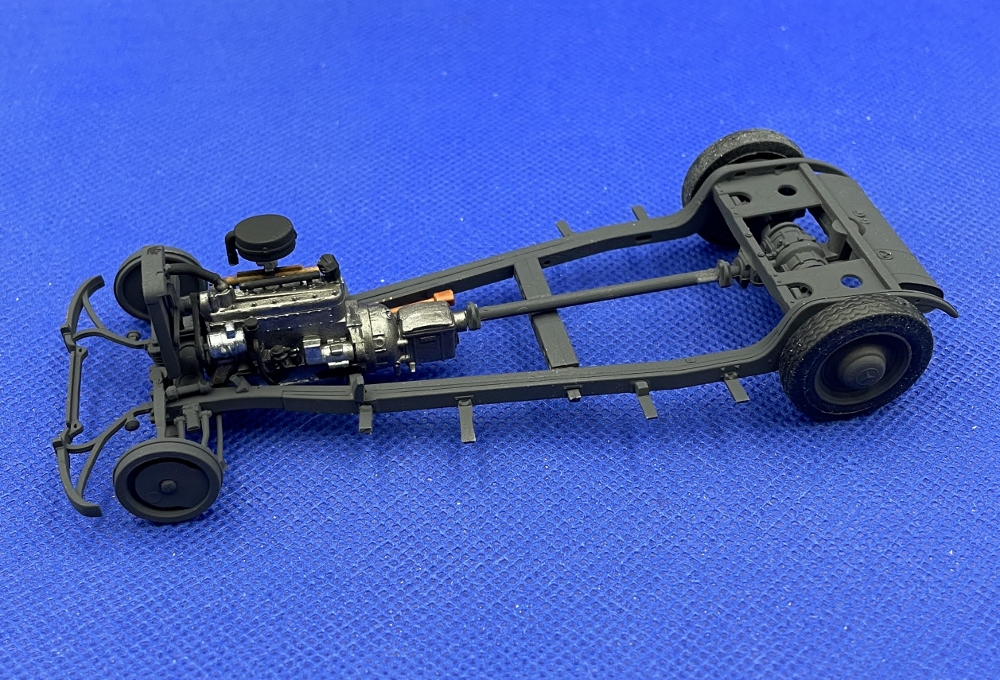
Tpe 320 German Staff Car chasis
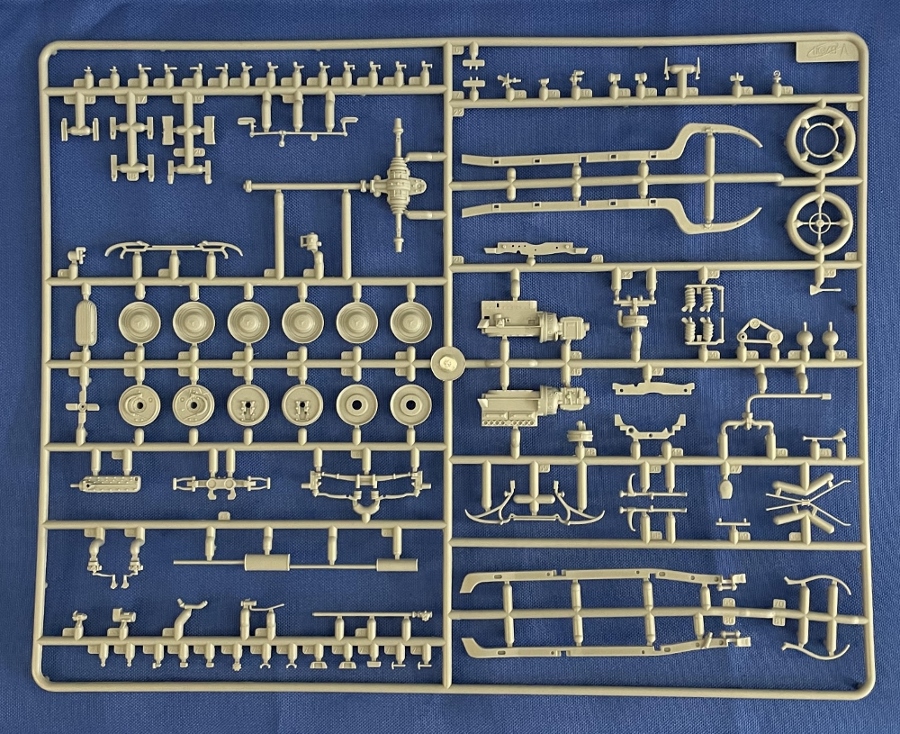
Sprue A
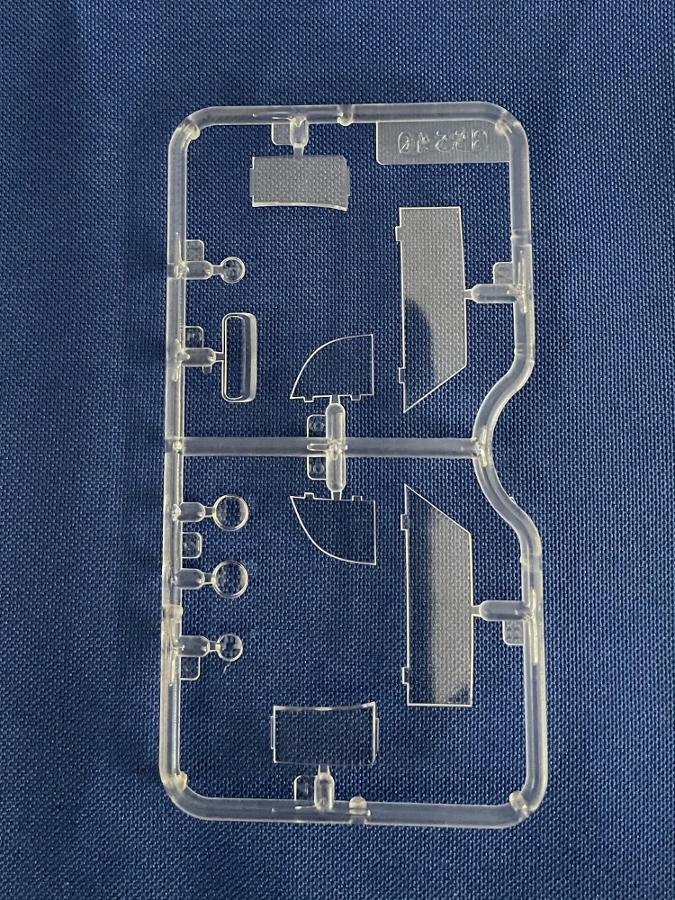
Sprue D
Sprue E

Sprue F
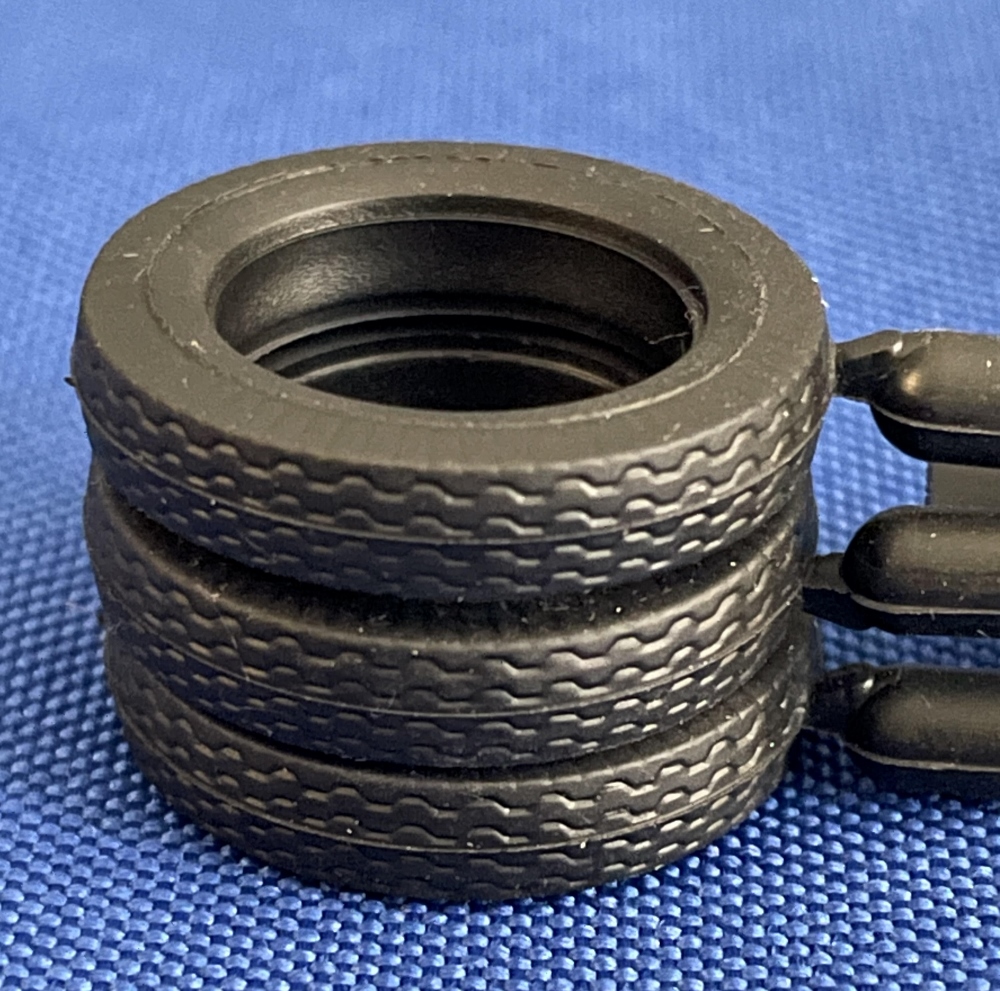
Tires
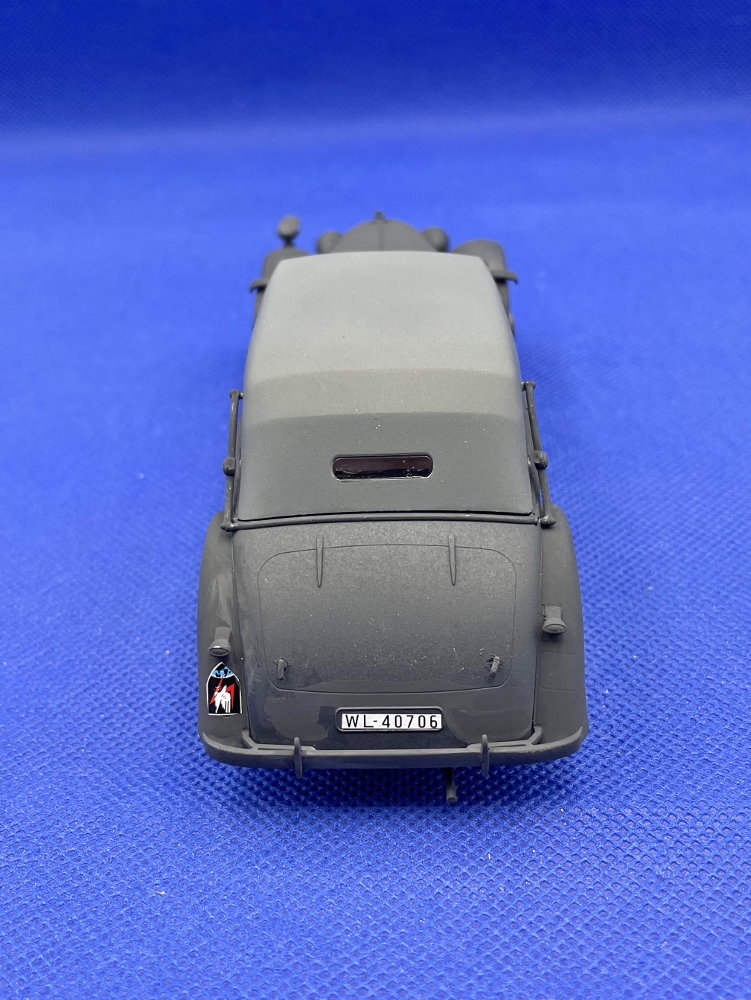
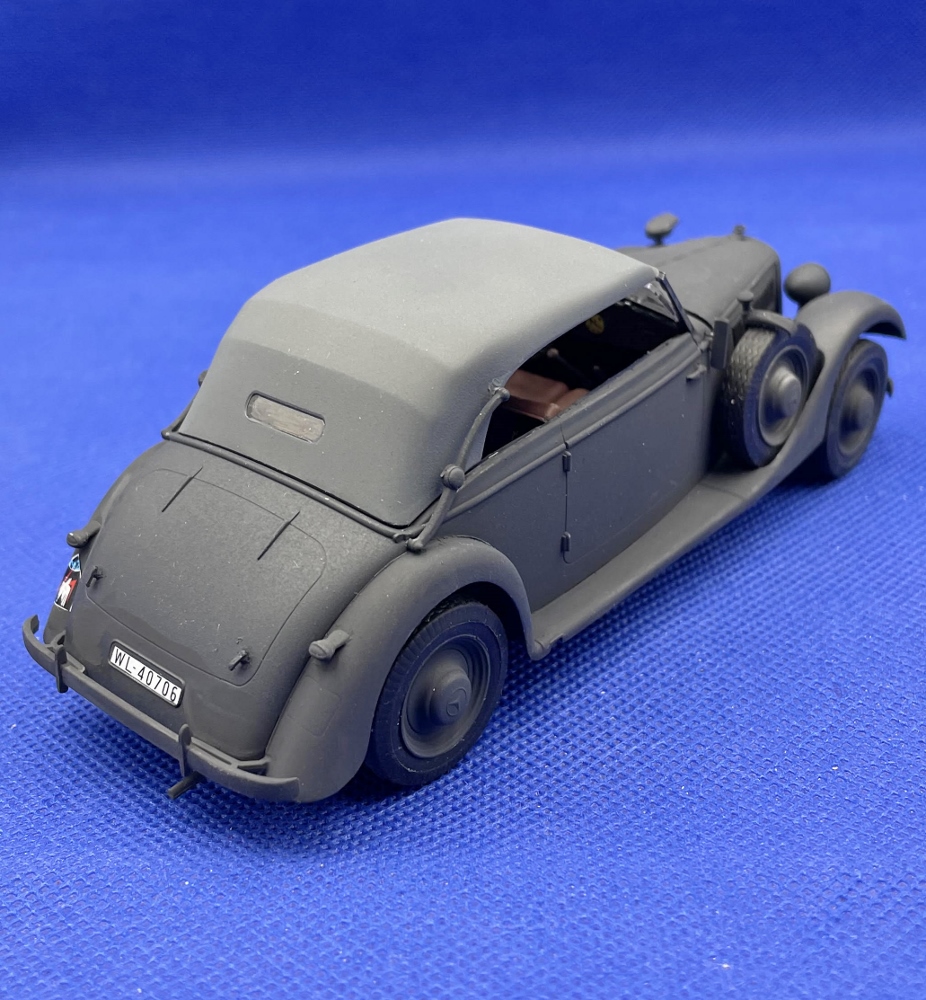
ICM Typ 320 German Staff Car rear view
ICM Typ 320 German Staff Car right side view
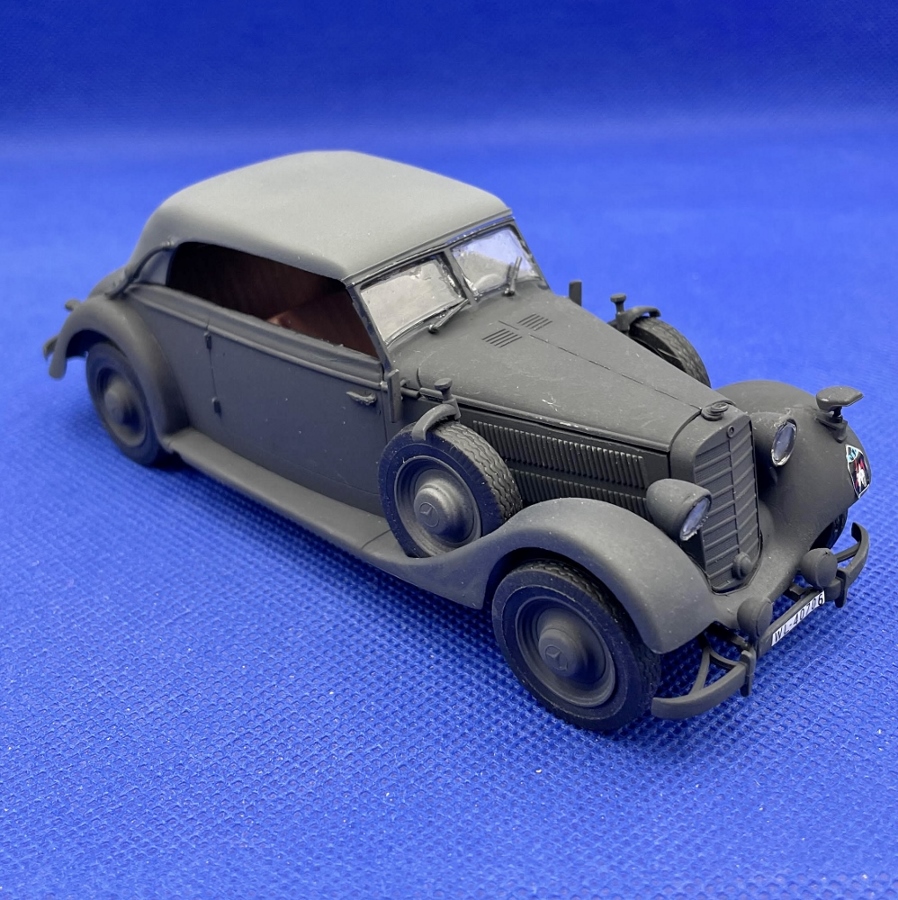
ICM Typ 320 German Staff Car Right Front View

ICM Typ 320 German Staff Car top view
Reviewer Bio
Phillip Cavender

Phil Cavender, IPMS/USA #50085, is a retired pharmacist from the Veterans Administration, having retired in 2011. While he explored model car building as a child, it wasn’t until 2015 that he rediscovered plastic scale modeling. His renewed interest emerged while researching his father’s military history, which led him to a local hobby shop. There, he met a former UK military tanker who reignited his passion for the hobby. After relocating to Myrtle Beach, Phil teamed up with six skilled modelers to co-found the Grand Strand Scale Modelers chapter of IPMS/USA. He now focuses on building armor models in scales from 1/35th to 1/16th.
Comments
Add new comment
This site is protected by reCAPTCHA and the Google Privacy Policy and Terms of Service apply.
Similar Reviews