
Tornado F3 111 Squadron Anniversary Set
This kit provides aircraft and markings for two Tornado F.3s, in markings for 111 Squadron’s 90th anniversary, 1917 – 2007.
The Aircraft
The Tornado F.3 is called the ADV by the other operators of the type: Italy and the Royal Saudi AF. It has 80% parts commonality with the attack/recce versions of the Tornado. For the RAF the mission is long endurance combat air patrol.
111 Squadron has flown Bristol Scouts, F.2Bs, S.E.5s, Nieuport 17s, 23s and 24s, Snipes, Siskins, Bulldogs Gauntlets, Hurricanes, Spitfires 1, 2, 5, and 9, Meteors, Hunters, Lightings, Phantoms, and Tornados. They are scheduled to transition to the Eurofighter Typhoon in 2010.
The Kit
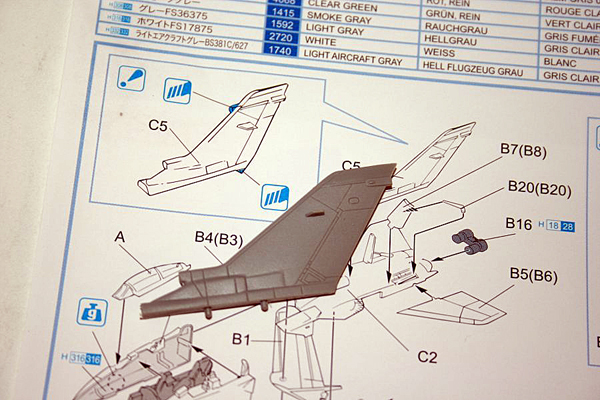
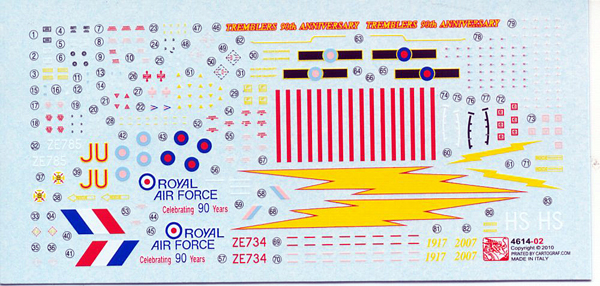
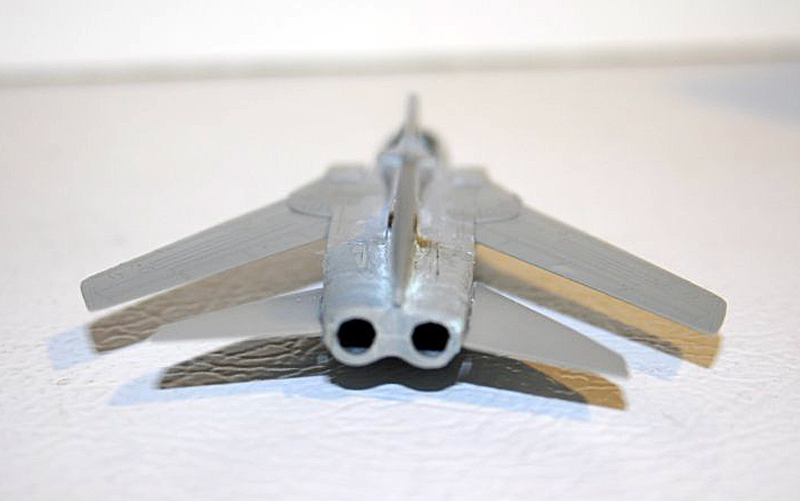
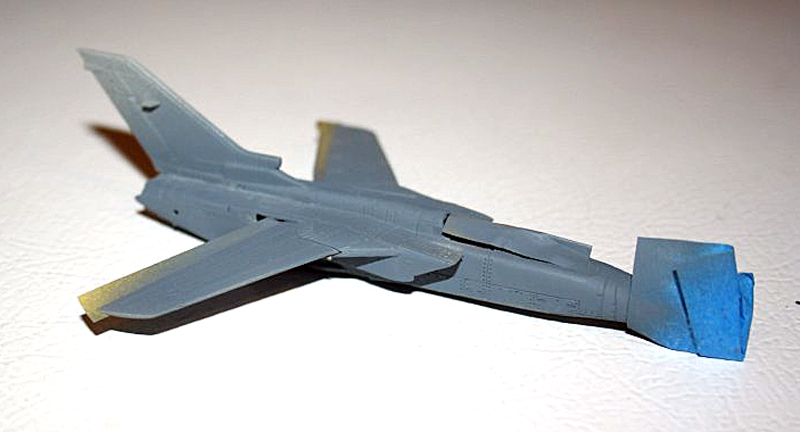
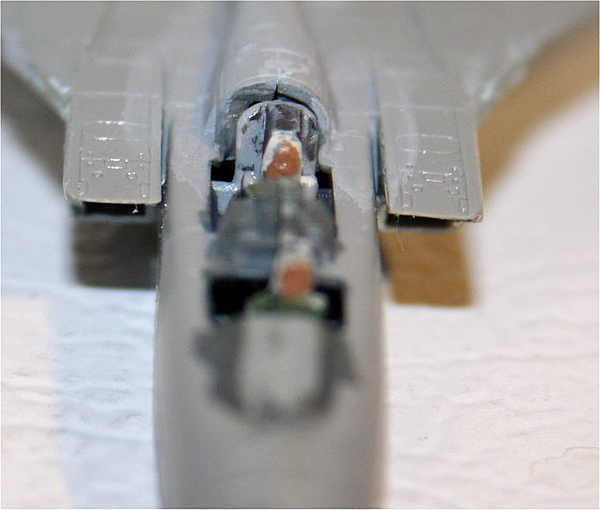
Of course you get two of everything. Actually you get more than two; more on this later. Sprue C has the fuselage assembly and drop tanks, while sprue B has the wings, landing gear and pylons. The E’s (there are 2 different E sprues) have weapons, and A is the canopy. You need 2 Sidewinders and 2 Sparrows for these tornadoes, and the sprues provide 8 Sidewinders, 6 Sparrows, 6 LGB's and a pair of what appear to be Harpoon missiles. These weapons are little gems, and my spares box is SO grateful. The decal sheet is from Cartograf, and is quite colorful. It’s also quite small, being only about 3 inches (7.5cm) by 1.5 inches (3.8cm).
Construction
I was pleased with the engineering of this kit. One of my criteria is that I want the place where the part connects to the sprue to be as small and well hidden as possible. Dragon does very well with this, and this makes building the kit far easier, as I didn’t have to spend a lot of time and effort cleaning up these connections.
I did have a problem with the instructions on step 1. It shows that you should remove the scoop on the leading edge of Part 5. There is no scoop there. Later I discovered a second vertical stabilizer, Part 41, which has the scoop. I’m still a little mystified about why they showed removing a scoop from the part which doesn’t have it. And if that’s the worst thing that happens with the instructions (which it is), I’m not unhappy.
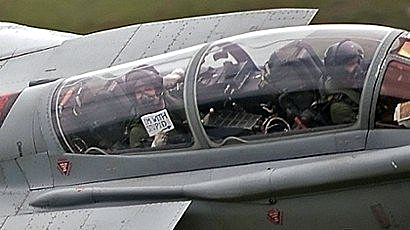
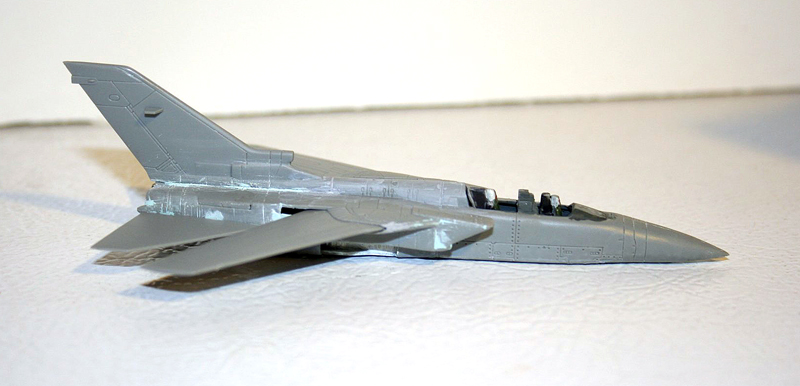
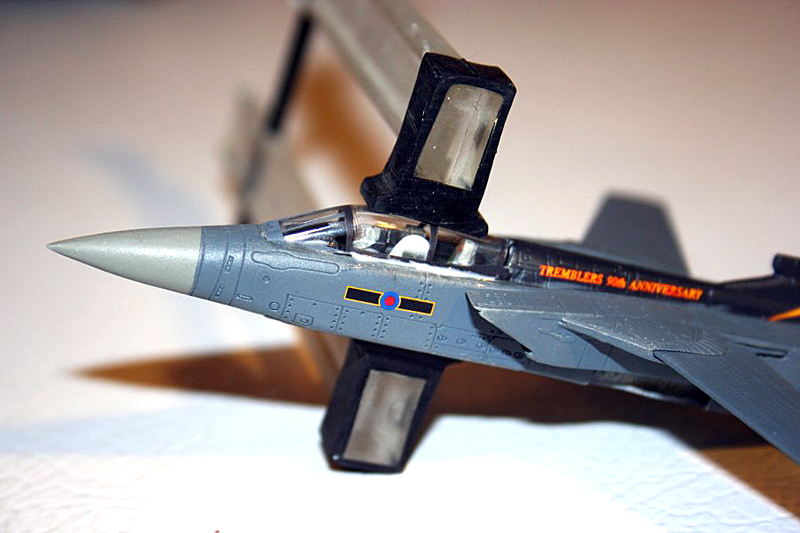
There is an interior, with 2 crew figures. They’re not up to Dragon’s standard, but this is not their first Tornado, and it’s a legacy part. On the other hand, having any sort of interior in a 1/144 aircraft is still a step up. I originally hoped to do the famous “I’m with Stupid”, but that’s a GR4 Tornado.
Assembly of the main components was easy, and everything fit pretty well. I’m not sure why, but nobody gets a good clean fit on the rear fuselage between the wing and horizontal stabilizer when they split the fuselage horizontally. F/A-18s always require lots of putty there. This kit was better than average, only requiring a small bit of filler and some light scraping. I also used filler on the vertical stabilizer, as getting the part to fit just by sanding and cutting just didn’t work for me.
Paint
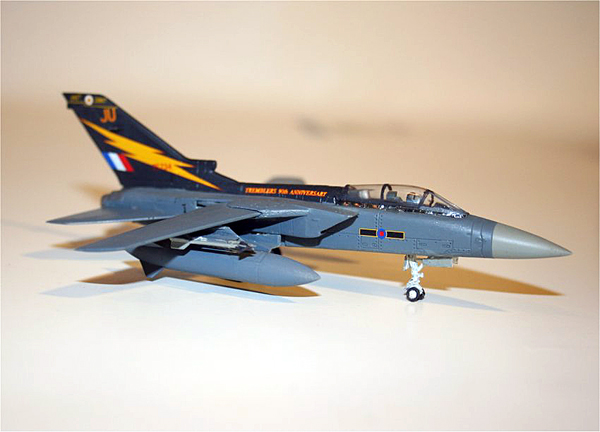
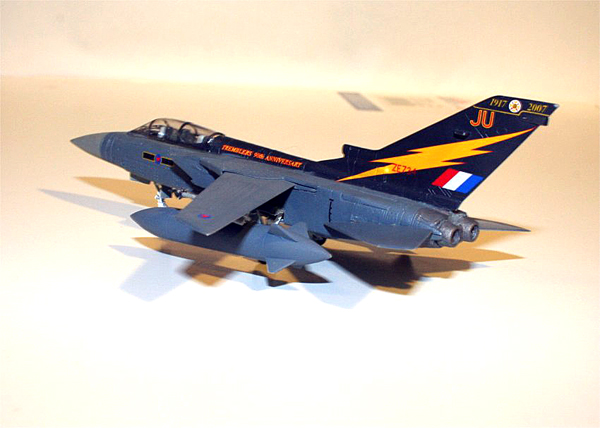
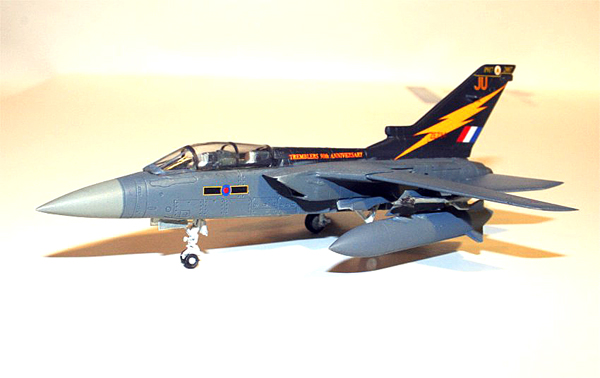
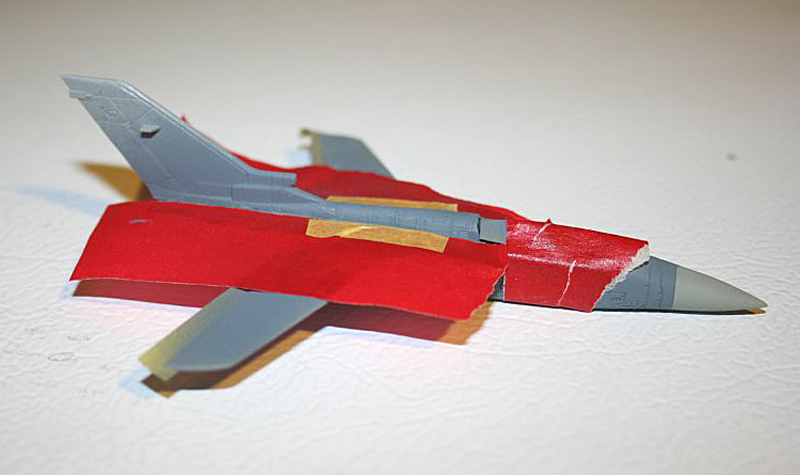
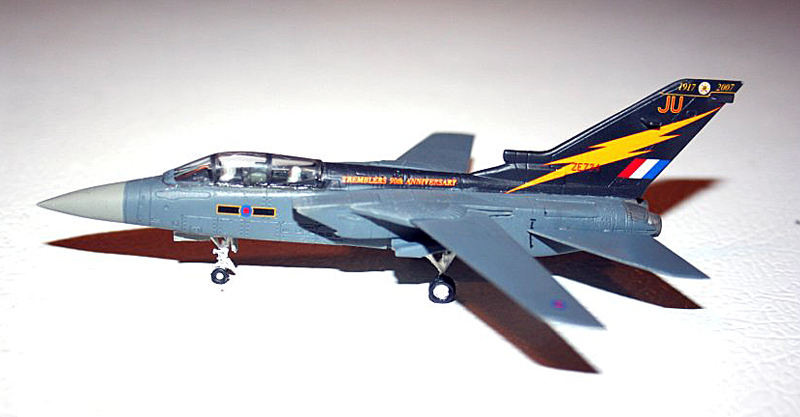
I chose the more colorful of the two aircraft for my subject because I’m getting a whole shelf full of gray airplanes. I painted the lighter gray on the underside of the fuselage, wings, nose cone and horizontal stabs, then masked and painted the darker gray. Another mask and the black spine and tail were completed. Then I went back and fixed the black overspray on the wings where I failed to make the mask large enough. After painting, I put on the Future and then applied decals before doing the final assembly.
Decals
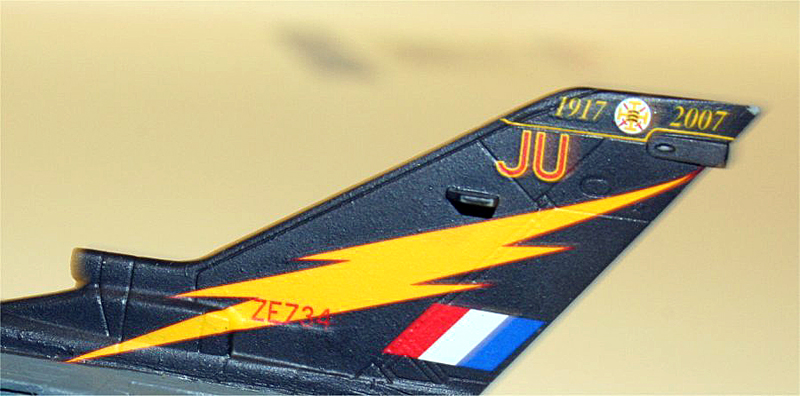
The decals are really good quality, printed by Cartograf of Italy. They are very nicely printed, in register, the colors are right on, and they come off the backing paper cleanly. I didn’t have any major problems with the decals, but this particular aircraft is really complex. There are 8 separate decals on one side of the vertical stabilizer. The two dates, the shield, the line below the dates, the lightning, the JU, the fin flash and the aircraft serial. Then you get to go over and do the other side.
You need a really good set of decal scissors, as there’s a lot of stuff packed onto that small decal sheet, and it’s hard not to cut into the next decal over while removing a marking from the sheet.
Finishing
And the “fiddly bits”. I always leave off anything which is breakable until after decals, as I have to really concentrate to get them in place and fairly straight, and I usually break something. Note that I didn’t put the horizontal stabilizers on until after decals.
I had to do a little extra on the canopy. It’s super thin, and I’ve had no problem with other Dragon 1/144 canopies, but this one just didn’t want to sit down on top of the fuselage. Some Micro Krystal Kleer© and a clamp was all that was needed to convince it to remain in place.
I had glued the wheels on the main gear legs before assembling them to the aircraft. This was a mistake. Those wheels don’t line up like I thought they should, and I had to remove them and re-glue them to get correct alignment. Otherwise, the final assembly was easy.
A word on those Sidewinders: they are the most petite and nicely molded missiles I have ever seen on a Braille-scale aircraft.
Overall Evaluation
Recommended! If you’re going to do jets in 1/144 scale, this is a great addition. The fit is good, the decals are wonderful, if somewhat complex, and there’s only that one problem in the instructions.
Thanks to Dragon USA for an excellent model of an interesting aircraft. And thanks to IPMS/USA for allowing me to build it.

Comments
Add new comment
This site is protected by reCAPTCHA and the Google Privacy Policy and Terms of Service apply.
Similar Reviews