
Tamiya F-14A (Late Model)
Tamiya’s Description
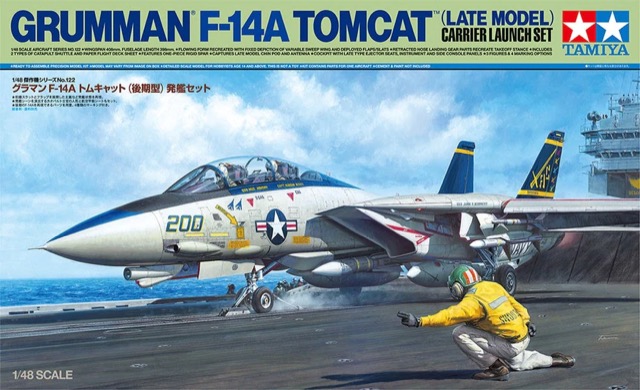
This model kit recreates the Grumman F-14A Tomcat. The F-14A Tomcat U.S. Navy Fighter is famous for being the first mass-production and the most-produced model among the F-14 series. This kit realistically depicts the F-14A Tomcat (Late Model) - in service from the late 1980s to the early 2000s- with wings featuring separate flaps and slats. The kit includes one crew figure and paper flight deck sheet for use on a super realistic diorama set.
- 1/48 scale plastic model assembly kit of the Grumman F-14A Tomcat (Late model). Fuselage length: 398mm, Wingspan: 408mm.
- Features fixed depiction of variable sweep wing supported by a single-piece part.
- The kit depicts wings with deployed flaps and slats which can be attached to wing by support parts (NOTE: This model CANNOT depict wing at neutral position).
- The catapult shuttle and one-piece holdback bar with its nose landing gear realistically depict the F-14A taking off from the carrier deck.
- New nose landing gear part with retracted "kneeling'' shock absorber recreates the F-14A's takeoff stance.
- Features detailed sections such as telephoto camera pod, AAX-1 TCS, ALR-45 radar warning antenna under wing, and four Mk. 82 low-drag general-purpose bombs (LDGP, 500 pound) for realistic look.
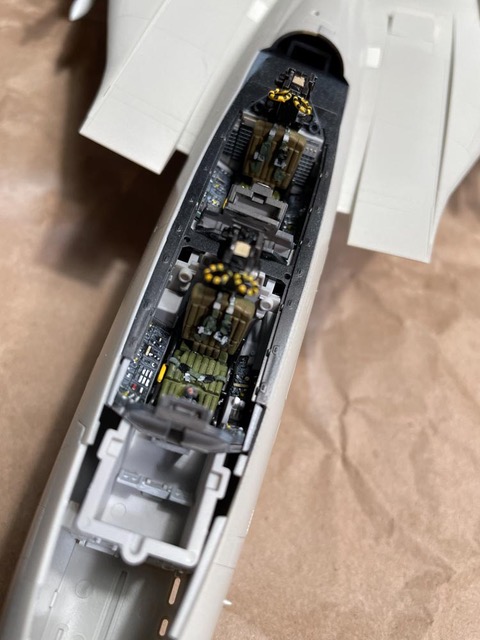
- A realistically recreated cockpit depicts late model ejector seat cushions, instrument panel and side console panels.
- Includes the catapult officer (called “Shooter” who gives the OK for the operator to release the shuttle) figure and paper flight deck sheet.
- Comes with four marking options: two for F-14As from the VF-32 “Swordsmen” and one VF-211 “Fighting Checkmates”, plus one VF-154 “Black Knights”.”
The Build
I found most of this kit to be quite different from the Tamiya F-14D which I previously built. There are several key differences, including the basic wing structure and positioning of the wings, which must be in the outward, straight wing configuration. As usual, it comes in a large, heavy box with several optional parts, mostly due to the various weapons and underwing stores available for the F-14A. You will also notice that the original 2016 copyright date is shown on the lower fuselage half. While you might initially think ‘what could there be different’ in only five years, it soon becomes evident that is largely a different F-14. What could be different one might ask?
This is one seriously impressive kit! I am very impressed with most of the surface detail, including the raised details, rivets, etc. The overall attention to detail and fitting is outstanding. The instructions are also clearly printed in color to further delineate the assembly steps, parts, and their relationship to one another and have been clearly updated for this ‘late model’. Another plus with this kit (as in any of the more recent Tamiya kits) is the thoughtful design process which allows for the numerous attachment points to consistently remain ‘behind’ where the sprue tree attachment points are. What I am trying to say is that Tamiya has placed the vast majority the attachment points where they are not visible when the model is completed.
The importance of carefully following the actual kit instructions cannot be overstated. I have noticed in several reviews where the reviewer failed to follow the step outlined by Tamiya and then they had to ‘make things’ work, sometimes with not so pleasing results. Tamiya is not new to the instruction process—pay heed. I also fell prey to several ‘obvious short cuts’ and soon regretted those missteps.
You should also note that this kit provides multiple options in both the markings as well as the parts necessary to build the four aircraft. These decisions should best be made at the earliest point as one begins the assembly of the kit.
Talk about multiple parts! There are numerous aspects where you need to pay special attention to kit instructions—these include the large number of weapon options, underwing stores, LANTIRN targeting and TARPS pods, ‘dumb’ and smart LGBs, several kinds of missiles, different wheels and varied pylons.
For example, when fitting the two-part nose gear doors together, the drawings are accurate and yet I had mistakenly placed the four pieces together incorrectly and found the parts mismatched. Hence the importance of dry fitting these parts, prior to gluing and carefully watching the instruction detailed drawings. I found in every instance, there were drawing details illustrating the correct positioning for a part.
On the top surface, I found the mating of the two fuselage parts, in step #14 was uneven any way I tried to place them together. I solved this dilemma cutting one of the small tabs off, allowing me to use some of the Tamiya ‘quick setting’ ‘extra thin’ liquid cement (lime colored lid top, #87182) to ‘tack weld’ the joint in several places. This ultra-fast setting of the parts worked and finally the seams look like the prototype a/c top.
Construction required only a minimal amount of sanding and clean-up. I found one very small amount of flash which a small sanding stick easily removed.
I also spent some time trying to visualize the leading and trailing edge slats and flaps. Each wing requires a delicate amount of glue and careful attention to its painting. I found that I had to initially paint the exterior gull grey, then paint the red for the interior areas followed by some more grey to ensure that the colors fully covered each flap and slat as illustrated on the instruction steps.
Another note about the importance of dry fitting on the Tamiya kit. Most of the parts have only one correct way to install them. If you find that the fit doesn’t quite look or fit in the way the instruction sheet shows—it’s probably not correctly mated to the other part(s). As an example: the main gear wheels have a disjointed fit if installed on the incorrect side and you’ll quickly see the error in the application. Overall, when dry fitting, if it doesn’t look quite right, you’re probably not putting the parts correctly.
Painting
I chose to use the AK Real Colors acrylic lacquer paints and briefly experimented while using Vallejo surface primer on the base and then with the Real Color acrylic lacquer (which is a new reasonably new product for me, and I am rapidly become a fan of). The result of my highly unscientific experiment impressed me and leading me to believe these acrylic lacquer paints do not need to be primed first (saving an entire preliminary step required with the acrylic paints) and mark I eyeballs indicates the colors are very accurate.
The overall aircraft is painted in Light Gull Grey, FS 16440 AK Real Color #RC220. The wheel wells were painted in Insignia White, FS 17875, AK Real Color #RC223. The gear doors were edged in acrylic Model Master Red #MMP-003.
I did use some very small brush touch ups with Mission Models acrylic paint (primarily around the cockpit area) and Vallejo Metal colors—both of which spray and lay down in my experience beautifully. Another Mission paint I always use is their Worn Black Grey Tires/Camo (#MMP-105) which when hand-brushed provides a tire-like look when painting my tires.
I used Tamiya’s Mark Fit (#87135) and my ‘go to’ elixir Walthers Solvaset (#904-470) for all decal setting required. My final finishing consists of Alclad Aqua Gloss Clear (ALC 600), followed by decals, and finally another covering coat of Testor’s Dullcoat (#1160). A side note about the Alclad Aqua Coat: more than one modeler has said they didn’t use it because it looks ‘cloudy’ in the bottle. Trust me dries very quickly and clear as a bell.
I use another favorite Vallejo Acrylic Metal Color to pick out the metallic colors around the exhaust pieces and the oleo places on the main and nose gear areas (Aluminum #’s 77.701 and Jet Exhaust 77.713).
What little wash applied was done using highly thinned Winsor & Newton Burnt Sienna (#074) or 502 Abteilung Basic Earth (#Ab093).
Metal Photo-etched
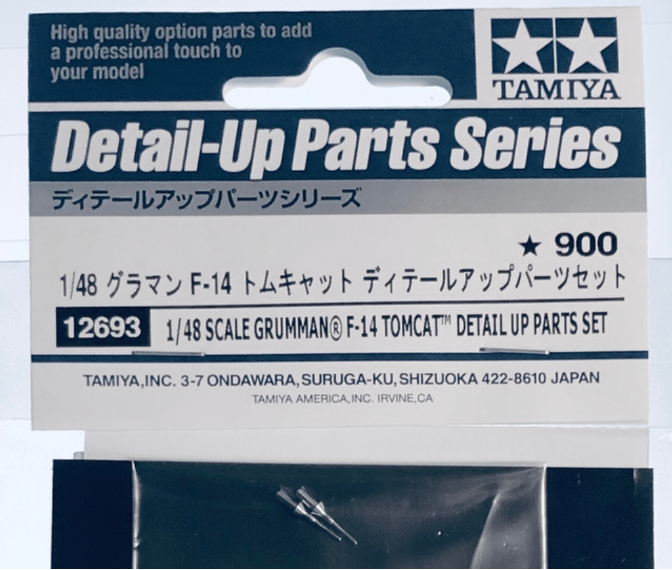
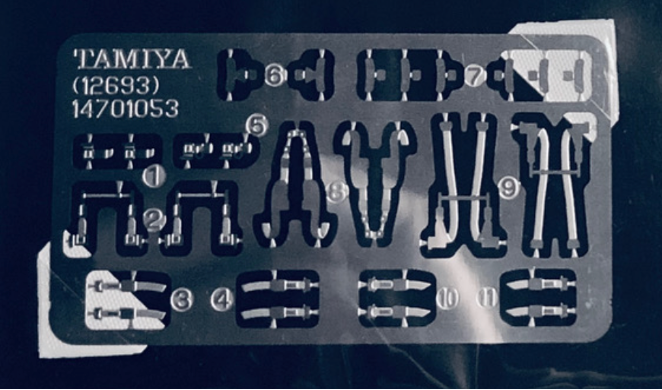
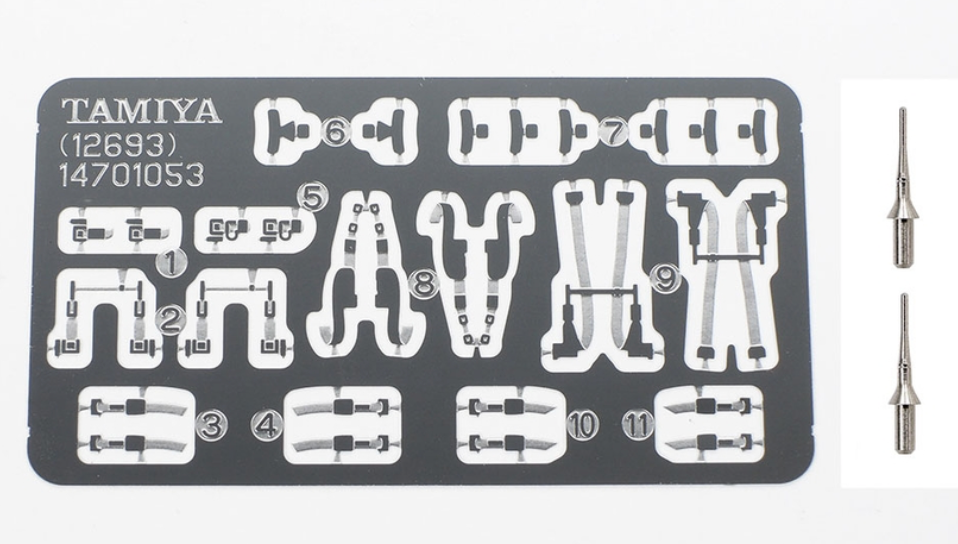
As an extra, added aspect, I was able to add “1/48 Scale Grumman F-14 Tomcat Detail Up Parts Set”, Item 12693.
This photo etch set contains the added photoetched parts to compliment and complete the F-14A, F-14B and F-14D. There three major components to this set (a) the rear-view mirrors for the canopy (for two aircraft), (b) the alpha nose probe (again for two aircraft) and (c) the seatbelts for each of the major Tomcat versions (the seat harnesses are different in each of these variants). A previous version of this small set was issued in 2017 as # MA-48014.
I primed these parts on both sides, covering the mirror surfaces with a bit of masking tape to provide for a shiny mirror-like appearance. I allowed a day to pass and then over painted the seat belt surfaces to approximate the colors called out on the painting guide.
Another interesting note: when accessing the web site for this set, it contains a note stating: ‘This product is not currently available for purchase’. Even more to the point this identical note is found when one attempts to order the underlying F-14A kit. You are to consult “your local Hobby Store or Request Availability Notification” where one hopes to learn where you might find this aftermarket set or the base kit itself.
Decals
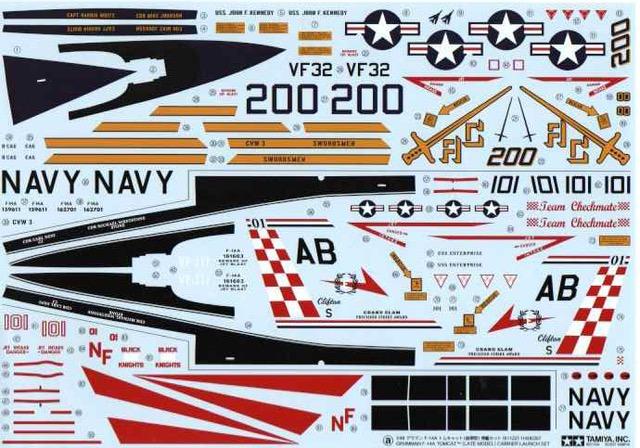
There are a wide variety of decals to complete whichever paint scheme you choose, including the four squadrons mentioned from the Tamiya sheets. The colors on these Tamiya decals are all accurate to my eyes, with no registration overlaps or errors. I have included scans of these sheets to better illustrate the squadron markings and ordinance markings. I used several of these decals in this build and found they went down easily and dried with almost no evidence of clear film around the edges. The missile decals which I used will try your patience—they are numerous, small and require quite a lot of time. Frankly they just about drove me over the edge!
One of the several decals from the Tamiya sheets were the upper and lower wing striations. These are the visible marks left from the wing’s retraction into the high-speed maneuvers. These decals are a great addition to the upper and lower wing root surfaces.
While not really a decal, Tamiya has long utilized a thin plastic mask which has you trim to the desired shape and press into place. These masks aren’t laser cut although they require only several minutes to cut around the outline shape and then to press into the desired location. While more labor intensive and somewhat frustrating, I find this masking process easy to follow and straight forward in their application.
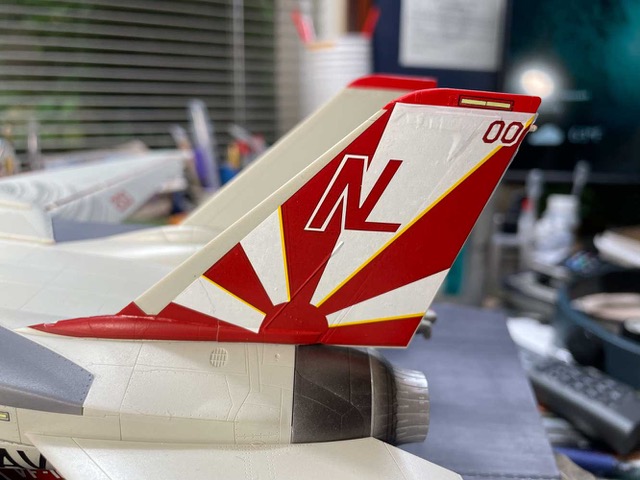
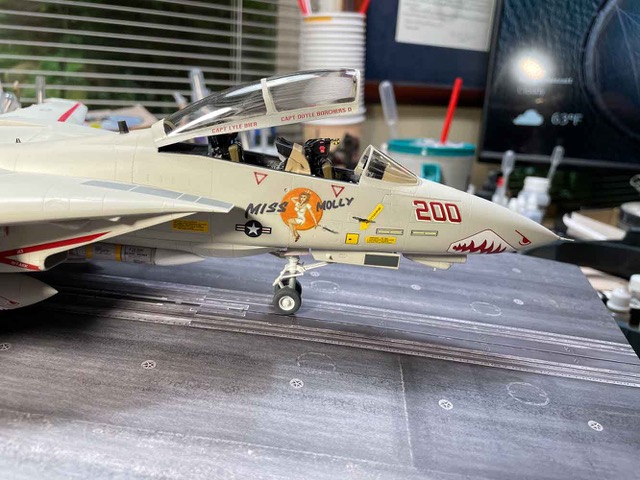
While I looked over the field of available decals, my final choice was to go with the Zotz F-14A decals for the VF-111 Sundowners (#48024). While this sheet is no longer in production (and sometimes found on eBay, there are several other manufacturers’ depicting these similar markings. I have also included scans from these four sheets as well. The one drawback is the fit to the kit. This decal sheet is not perfect, as the Tamiya kit’s physical dimensions (most notably the rudder surfaces) is ever so slightly different requiring some trimming modification to the Zotz decals. I also notices the lettering for ‘Miss Molly’ is black and I found several reference photos leading me to question if it shouldn’t be a dark navy blue?
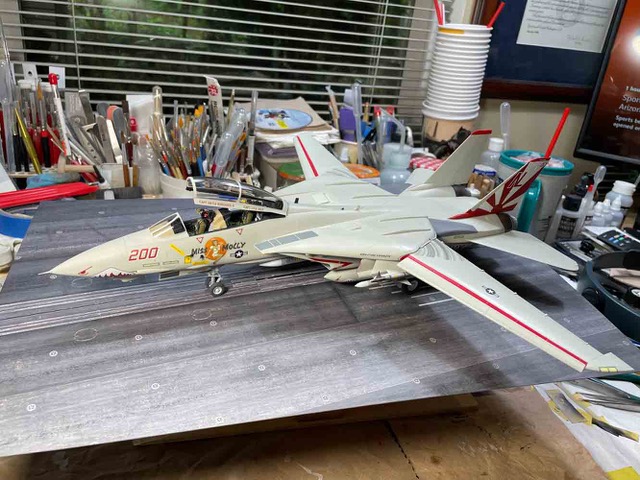
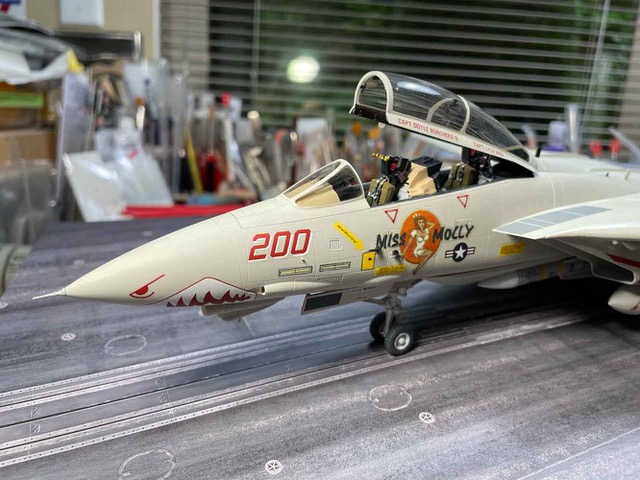
Images
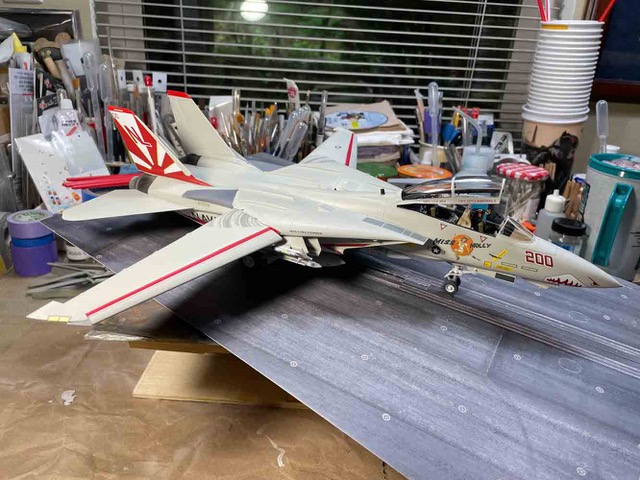
I may have gone overboard in the number of images accompanying this review for which I apologize. I’ve included several to illustrate early assembly steps and the final completed model.
In addition to the 23-page instruction booklet, Tamiya has included short synopsis outlining the history of F-14 Tomcat a full color set of large drawings to illustrate each of the four marking sets included in the kit.
Overall Evaluation
This kit has been a pleasure to build, with the very high degree of detail, exceptional attention to engineering and fit of the parts themselves. As you build this F-14 kit, you must ask the question, why another Tomcat, which has now been built in at least four or five different scales, many different markings, and multiple versions? As you complete the kit the answer is staring you in face.
With its exceptional planning and engineering, this Tamiya product has been as well planned and clearly set a high bar for their hallmark perfection. The assembly fits in every dimension and you ask why haven’t the other manufacturers built to the same quality level? With the numerous kits on the market today, one wonders.
It has truly been a pleasure to build and complete. It is well engineered, the instructions thoughtfully laid-out and should not prove a difficult build for a wide range of modelers, from the beginners to the more experienced. Once again, I applaud the Tamiya company for this kit and their efforts on our behalf.
I am most appreciative for the opportunity to build this kit and want to thank Tamiya America and IPMS/USA for the opportunity to build this kit.


Comments
Add new comment
This site is protected by reCAPTCHA and the Google Privacy Policy and Terms of Service apply.
Similar Reviews