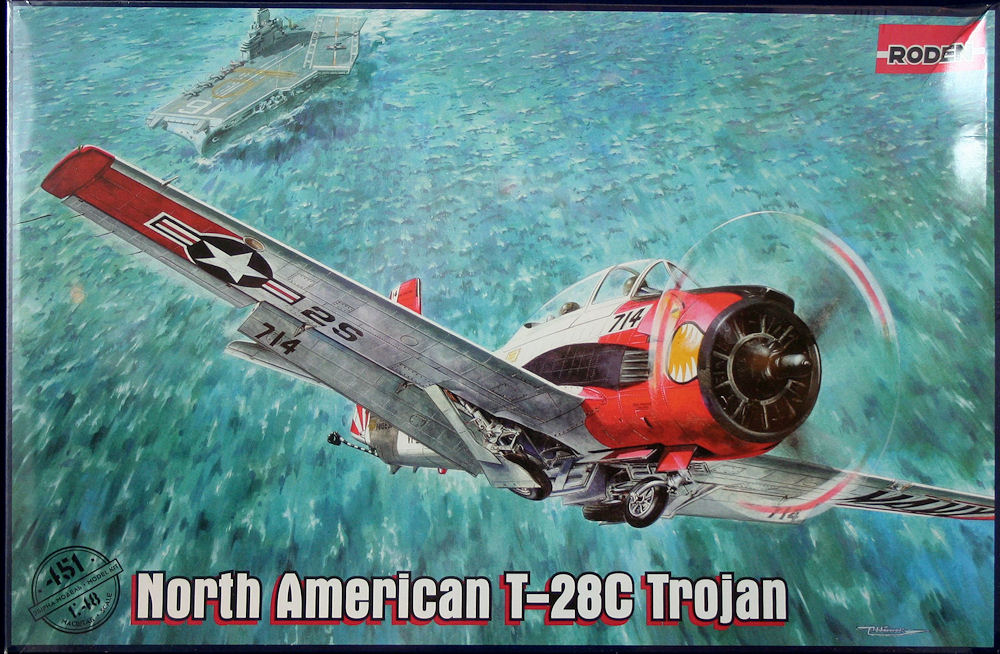
T-28C Trojan
The Aircraft
The T-28 Trojan was built by North American Aviation as a training replacement for the venerable and very dated T-6 Texan. The Navy wanted a tandem, tricycled training aircraft to train recruits to the new aircraft entering service. The contract was signed for VSN2S in 1946. The Army, also wanting to replace their T-6’s, contracted for their version of the VSN2S, the T-28 Trojan. In 1949, the newly formed United States Air Force and the Navy took delivery of the first T-28 Trainers.
The Model
There are 8 pages of well printed and defined instructions. All of the paint color callouts are in Vallejo numbers only. If you do not use Vallejo paints, a conversion chart may be necessary. There are three plastic bags in the box, one with the soft grey plastic parts trees, a second holding the instructions and decals, and a third for the clear parts. The molding is crisp and clean with minimal flash and reasonable sprue attachment points. The recessed panel lines seem heavy for the scale but are great for using washes. The parts are well detailed with a number of extras, including two propellers, and leave lots of room for detailing. Of the 146 parts, 14 are not used in the C-version build. Be sure to wash the parts well before beginning. I washed as usual in warm water and detergent, and there were still times when I had difficulty getting the Vallejo paints to stick due to the mold parting compound. I decided to prime all the plastic parts with Alclad Gray Primer to help with adhesion.
Construction
The engine is nicely cast and well detailed but had some very nasty sink holes on the valve covers that will have to be filled if the engine is to be exposed. The air distribution tubes on the back of the engine did not fit well, so I snipped off the alignment pins. In retrospect, I should have drilled the holes to allow the pins to fit.
The cockpit consists of 17 parts, is reasonably detailed, and, with some work, could be made into a very nice front office. Because there is so much clear canopy, I chose to replace it with a resin cockpit from Aires. Due to the added weight of the resin cockpit, I reduced the recommended nose weight from 28 to 14 grams. While the completed model does sit on its gear, a few more grams would be helpful. The resin made me concerned for the kit’s excellent scale landing gear being able to support the added weight, so I replaced the struts with metal gear. The Aires tub required a good deal of plastic to be removed from the inside of the fuselage sidewalls. I must have gotten too aggressive because I had a gap between the canopy rails and the fuselage that needed filling.
The clear plastic canopy is thin clear and well cast. Clear plastic is characteristically brittle and care should be taken removing from the sprue. I used by favorite sprue cutter and chipped some of the clear plastic. I recommend a fine saw and a very sharp blade instead.
General Construction
The engineering on the wings is nothing short of superb. The way the air dams are molded in and the fit of the ailerons and flaps is just spectacular. Even if you wanted to build the kit with the flaps up, the temptation to leave them down is almost irresistible. That being said, there are some minor problem areas. I had to remove a fair amount of plastic from the top of the wheel wells to get the wing halves to fit together correctly. The upper and lower wing halves are not exactly the same length, so to retain the correct dihedral, a gap remains on the top wing root that will need shimming. The surgery did not affect the excellent detail of the main wheel wells. While we are on the wheel wells, the main gear and speed brake wells are detailed but the nose gear well is conspicuously absent of any. The lower air scoop on the cowling had a sink mark and fit problem that needed a little filing and filling to match up correctly.
Paint & Decals
There is no labeling for the manufacturer, so Roden is apparently making their own decals. Markings are provided for Training Squadron 5 aboard the USS Lexington around 1971, and a gray and white painted version for Attack Squadron 122 at NAS Lemoore, California, circa 1977.
The decals are well saturated and mostly in register. The red on the stars and bars is slightly out of place. The decal carrier plastic is thin, which makes for a flat-lying application. However, a flood of water will be needed to move them after placing. This may have been caused by the high humidity when I was building, causing a long cure time for the acrylic paint. They responded well to Microset and Microsol solutions. The only exception was the painted mouth on the compound cowling curves. I ended using Solvaset, a very aggressive setting solution, and still could not get them to conform.
Overall Evaluation
In my opinion, the real stars in this kit are the engine and, especially, the wings. I have never seen a kit with this degree of detail on the ailerons, flaps, and associated wing air dams. With the level of detail in the molding, it is easy to become focused on the components as separate kits. I thoroughly enjoyed this project and I am looking forward to another Roden build.
My thanks to Squadron for the review kit and IPMS/USA for the opportunity to work with this well detailed Roden offering.


Comments
Add new comment
This site is protected by reCAPTCHA and the Google Privacy Policy and Terms of Service apply.
Similar Reviews