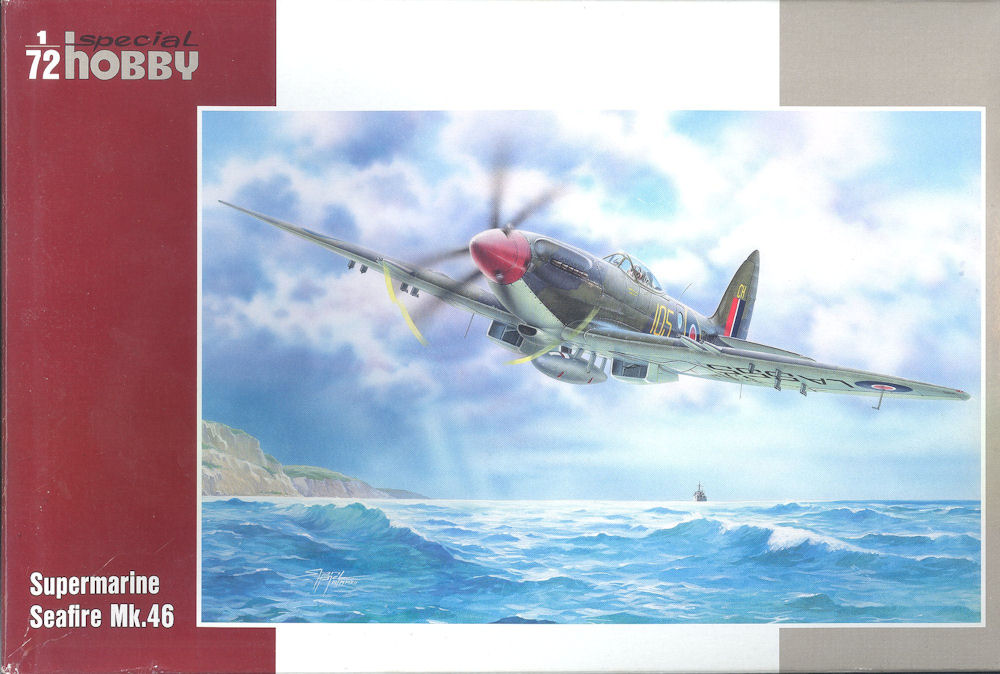
Supermarine Seafire FR.46
I have always been very interested in the odd subject, the one-offs, the participants in some historically significant or merely strange event, and the Seafire FR 46 fits in there somewhere. The Seafire 46 was a modification of the Spitfire F 22, with the bubble canopy and contra-rotating props. Combined with the larger vertical stabilizer of the Seafang, the Mk 46 fixed the problem of the sudden swing to starboard when power was added, as on takeoff.
There was an order placed for 200 FR 46s, but only 24 were built. It wasn’t a very good carrier aircraft as there was no provision for folding the wing. The follow-on Seafire 47 had a folding wing, and the 46 was relegated to shore-based training units.
Yep, I was destined to build this kit.
Special Hobby has sort of overachieved with this kit. It contains all the parts you need to build the Seafire FR 46, but there’s also an extra fuselage, prop, horizontal stabilizers, cannons, wheels and canopy in case you suddenly decide to build the Seafire 45.
The kit has the look of a limited run model, but the molding is pretty clean and crisp, with no flash.
Assembly
I pretty much followed the instructions, and assembled the cockpit interior, did some detail painting on the instrument panel and the seat, then assembled the fuselage. There is a fit issue with the cockpit inside the fuselage, and I had to do some cutting and filing before the fuselage halves met well for a decent fit. I also discovered that the plastic doesn’t play well with Tamiya Extra Thin cement. I used Testors liquid, Tenax, and gel-type CA, and they all worked fine.
When I started the wing assembly, I discovered that there were a couple of “bumps” on the top of the radiators and gear interiors which had to be removed before the wing fit. The good news is that these are easily removed with a sanding stick, and they don’t show after the wing is assembled. As you can see from the photo, I put the right wing on first, using the cannon ports as alignment guides.
Before I put the left wing on, I glued the fuselage on next to the right wing. When I test fit the left wing, the cannon ports didn’t line up. I had to remove about ½ mm from the fuselage and wing mating surfaces to get these to align. This meant I had to use putty on the left wing root, as it’s difficult to get the edges to line up when you’re using a sanding stick.
On this kit, it’s necessary to drill the camera port on the bottom of the fuselage. The instructions call for a 4mm hole. The guys at True Value Hardware didn’t have any metric drills, and couldn’t do the conversion. OK, I finally figured it out. I got out my drill set and found one that fit the hole in the side of the fuselage. Sometimes we just make a problem far too cosmic when there’s a simpler solution.
OK, time to paint. Well, time to figure out what paints to use. Sky for the underside was really easy, but Dark Slate Grey and Extra Dark Sea Grey were a little more troublesome. Fortunately I have the IPMS Color Cross Reference Guide by David Klaus. With some persistence and a little luck, I found that Extra Dark Sea Grey is very close to FS 36118. And I found that Dark Slate Grey is FS 34096. After some more sleuthing, I discovered that 34096 is also RLM 83. I had both in the paint stash. I used a scan of the instruction sheet, blown up and set on a light table to make a custom mask.
Once I had the paint on, I put on Future and applied the decals. The decals are in register, the colors appear to be correct, and they went on the aircraft with almost no problem. After everything dried, I put on another coat of Future, as this aircraft had a gloss finish.
I then put the propeller(s) together. You get 2 parts to the spinner, so you can vary the position of the front and rear sets. I have to give high marks to whoever designed this assembly. The prop blades are individual parts, and there are different blades for the front and rear halves of the spinner. The blades have square pegs, and the spinners have square holes. This makes it very easy to get the blade angle correct and uniform for both sets of props.
I did have a problem with the main gear wheels. The instructions offer wheel hubs with either 3 or 4 spokes on the wheels. And they include both types. And don’t tell you which is right. I found a photo of a FR 46 in a book on Griffon engine Spitfires, and the 4-spoke wheel was the one. And then they gratified me by making the gear leg and socket keyed so that it’s easy to get the correct angles on both gear legs with almost no effort.
The canopy and windscreen have excellent fit, and there are two tiny wingtip lights, one red and one green. I owe Tamiya one for coming out with clear red and clear green paint.
And it was done.
Overall Evaluation
Recommended. This is a good kit of an aircraft no one else will ever make a kit of. There are some things which require a little extra work and some research, but if they were all box-shaker kits, where would the challenge be? I like the way this model came out, and I’m happy with it.
Thanks to MPM/Special Hobby for the review kit, and to IPMS/USA and Steve Collins for the chance to build it.


Comments
Add new comment
This site is protected by reCAPTCHA and the Google Privacy Policy and Terms of Service apply.
Similar Reviews