
Su-22m4 Fitter
Aftermarket products used:
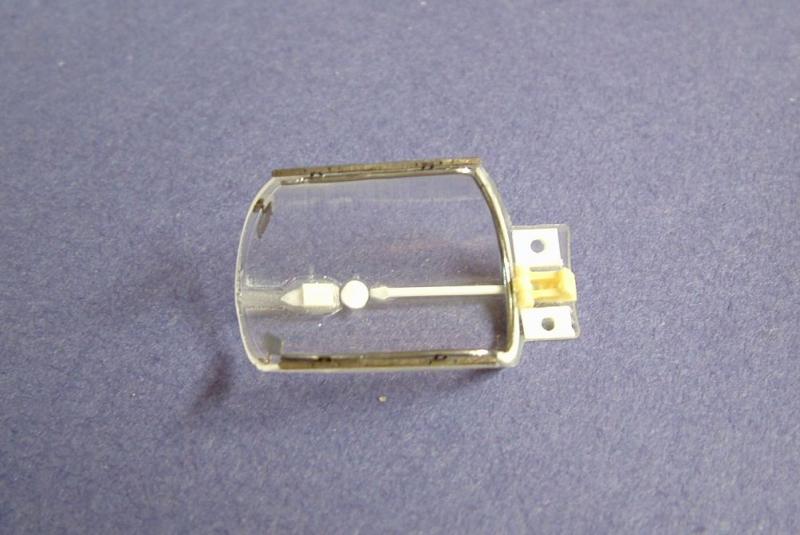
- Quick Boost QB 48-322 Su-22 Fitter Correct Landing reflector
- Quick Boost QB 48-326 Exhaust and Intake Covers
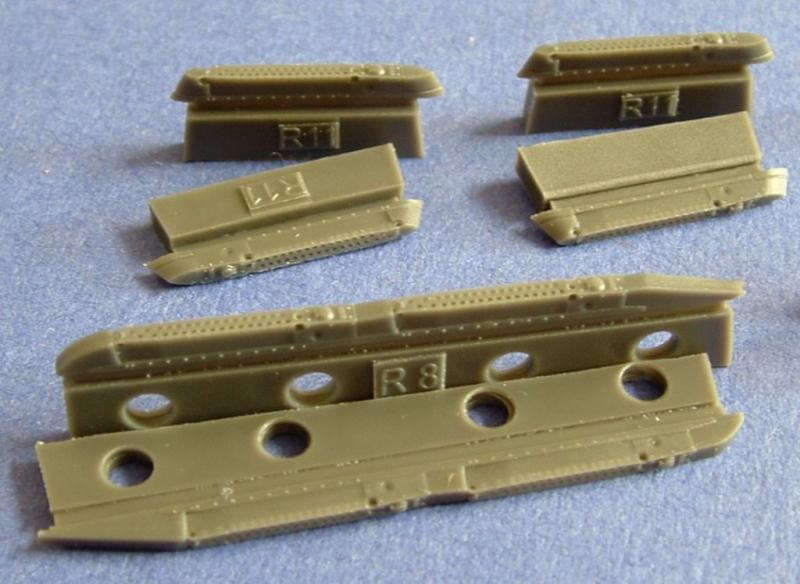
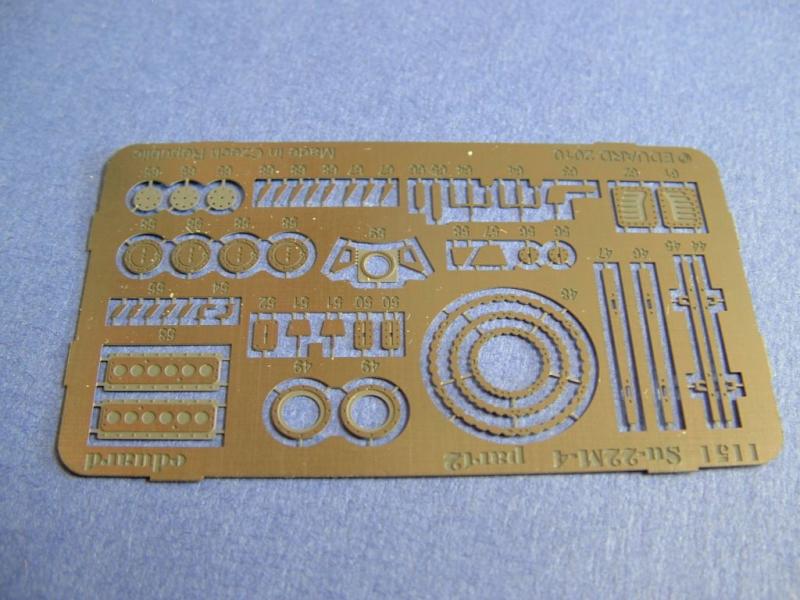
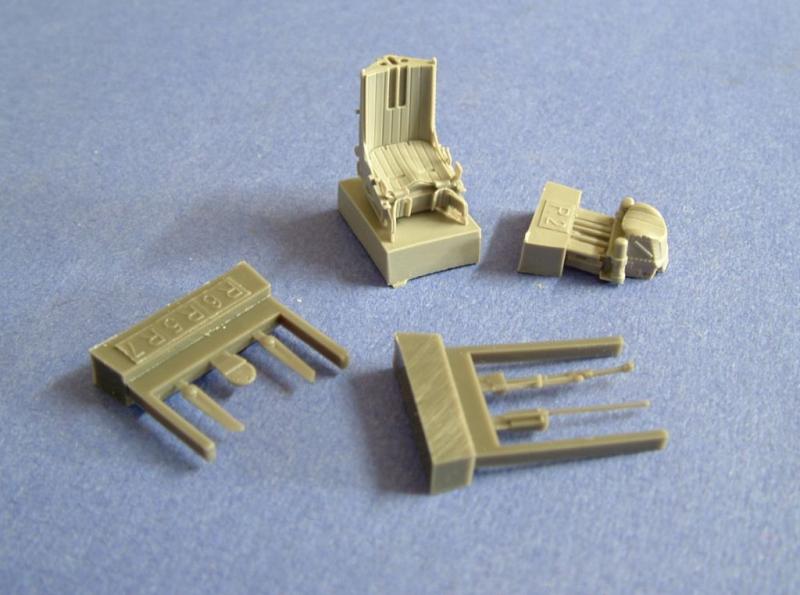
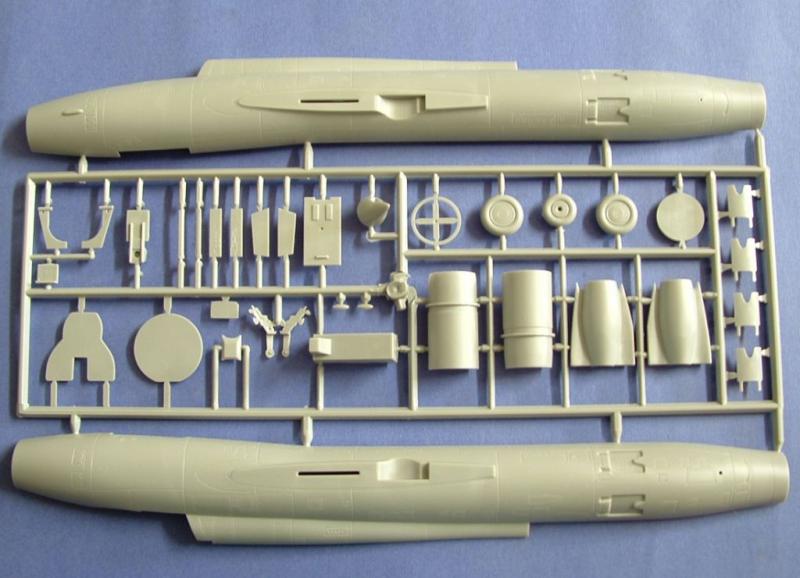
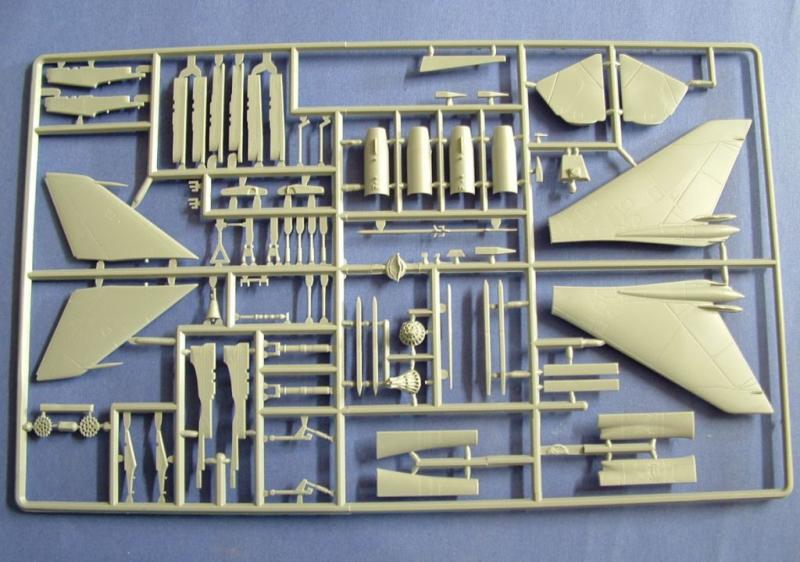
I have to once again applaud Eduard for re-releasing essentially sound kits and providing the details and decals to greatly improve the plastic straight out of the box. This is the second boxing by Eduard of the Su-22, the first being the Su-22M3 (no air scoop at the base of the tail). The base kit is the Kopro (formerly OEZ) kit of the Su-22. It was and is the only game in town for the Su-22 in this scale. The base kit has some weak areas (engine, cockpit, lack of flare packs, and aligned nose well opening), but it is essentially a pretty accurate airframe. OEZ/Kopro uses the same fuselage for both aircraft – it is right for the Su-22M4 but not the Su-22M3 due to the engine type and fuselage width. Unlike older OEZ kits of the Su-7 and Su-25 the recessed detail is crisp and uniformly deep. Like previous Eduard releases, they provide the details necessary to make a much more accurate model including: interior and exterior PE, resin sidewalls and rear wall for the cockpit, a resin K-36 seat, resin flare packs, masks and a large Cartograf printed decal sheet.
In addition to the review kit, I received two Quickboost detail sets for review:
- Quick Boost QB 48-322 Su-22 Fitter Correct Landing reflector – Molded in clear resin these components give a more realistic bump out. They are a one for one replacement and fit over the engraved detail. Mine were pretty clearly molded and fit as advertised. I painted the inside of the “lens” silver before attaching them to fuselage with CA.
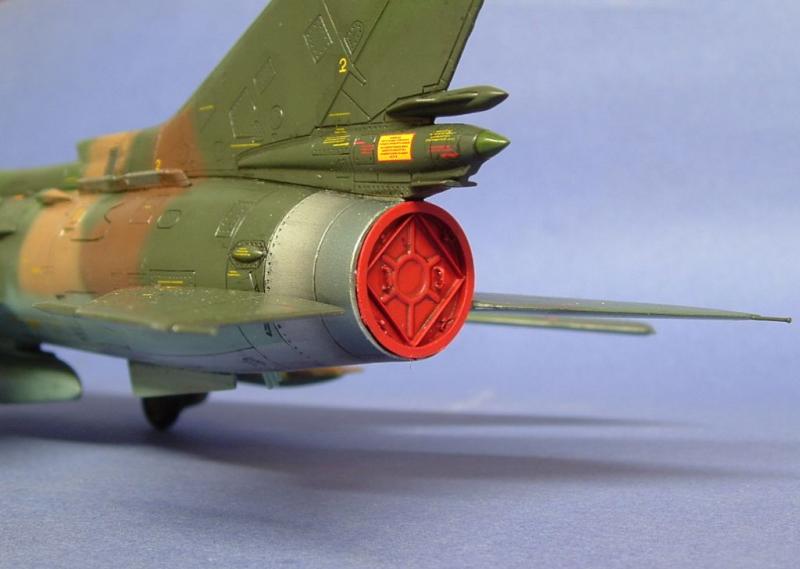
- Quick Boost QB 48-326 Exhaust and Intake Covers – Molded in gray resin these are multipart components that are designed to fit into the nose intake and exhaust opening. They come with resin handles molded with the pour block and simply are trimmed off and glued the cover. My sample arrived damaged, with part of the intake cover bent. Also the resin was really thin. I was able to salvage the nose cover by dipping the resin into hot water, letting it soften and then bending it back to shape. I then reinforced the resin with CA. I installed the resin handles, but first enlarged the mounting holes. Once assembled, I painted them Insignia Red, gloss coated them, added a wash and then sprayed with Dullcoat.
Construction
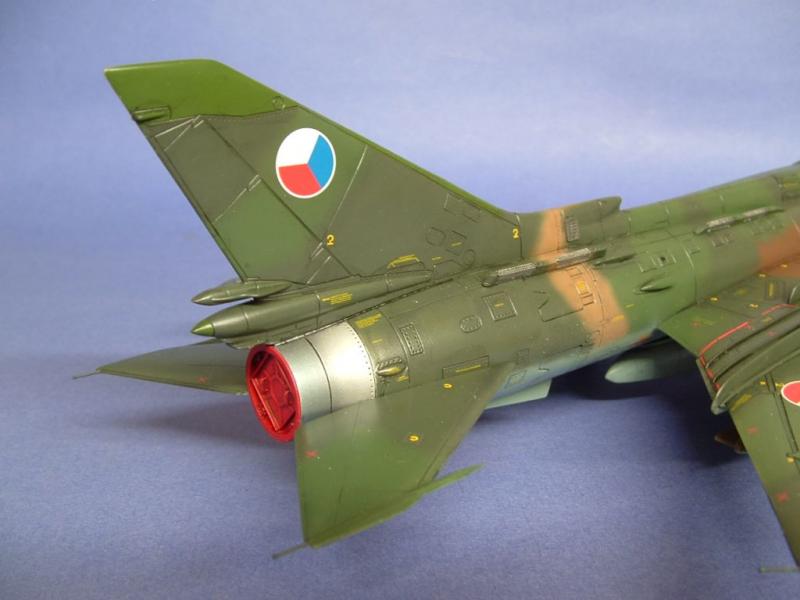
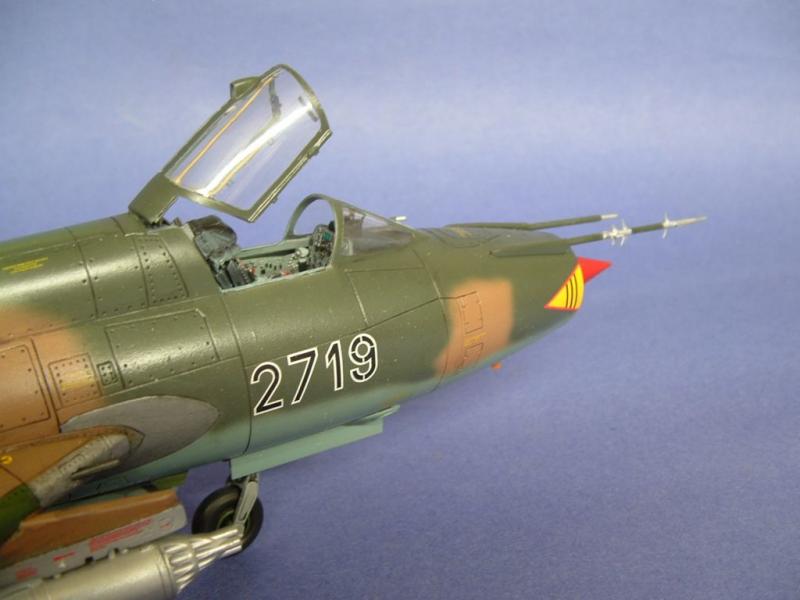
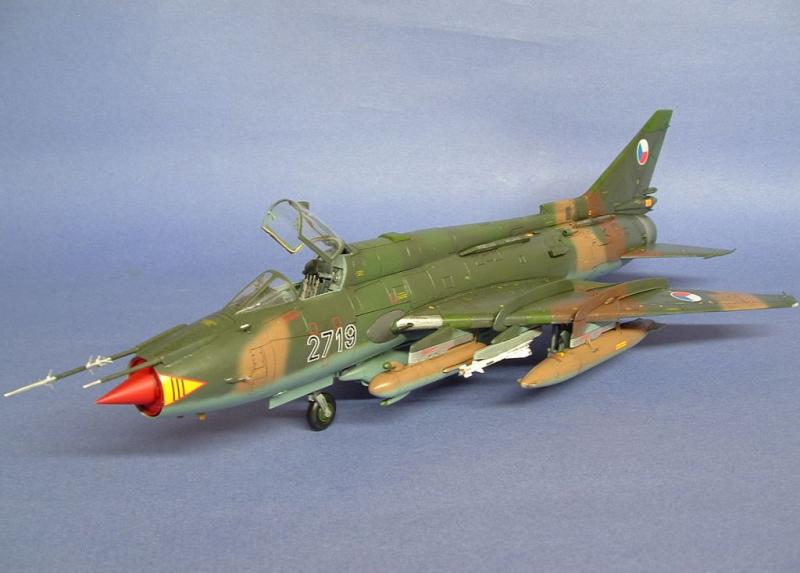
Before starting, I had to decide which option to build. I settled on the Czechoslovak Peoples Army, 47th Pzip Pardubice Air Base circa mid-1980s right after the type was introduced in that country. I opted to build the aircraft with the reconnaissance package.
Having built the Su-25K release, this was a more straight forward and pleasant build. I started construction with the fuselage, but before doing so I mapped out the options I wanted to pursue with the kit. One of the items I received for review was the Quickboost set which provides a resin nosecone cover and engine cover. More about these details later, but because I had the rear cover and the fact that the burner can, even with the PE detail provided by Eduard, was still going to be a poor representation I decided at this point to leave out the burner can and blank the rear fuselage. I also opted to close the speed brakes since the detail is poor. Unfortunately the brakes were designed to be assembled opened and the initial fitting is poor. To achieve a better fit, I cut off the hinge arms and sanded the inside of the brake to a thinner profile. This achieved a much better fit. I replaced the hinge arms with .01 x .06 strip cut to a length of 5/32.
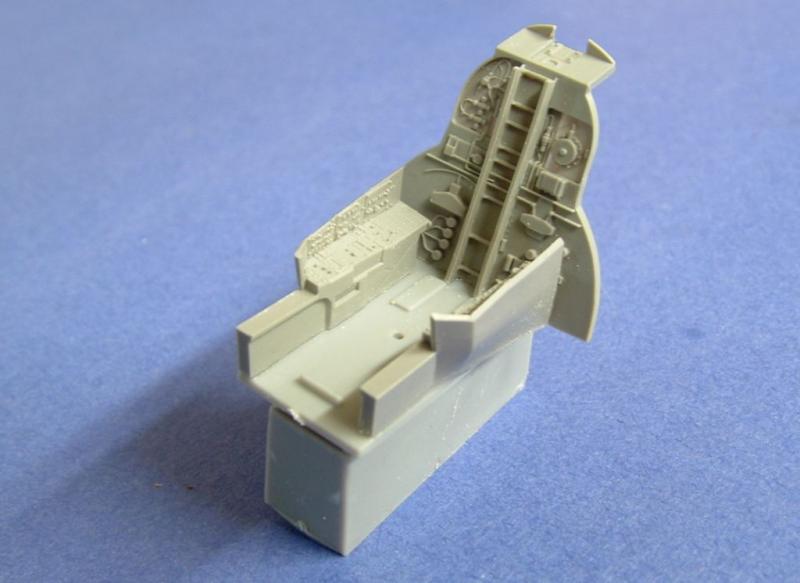
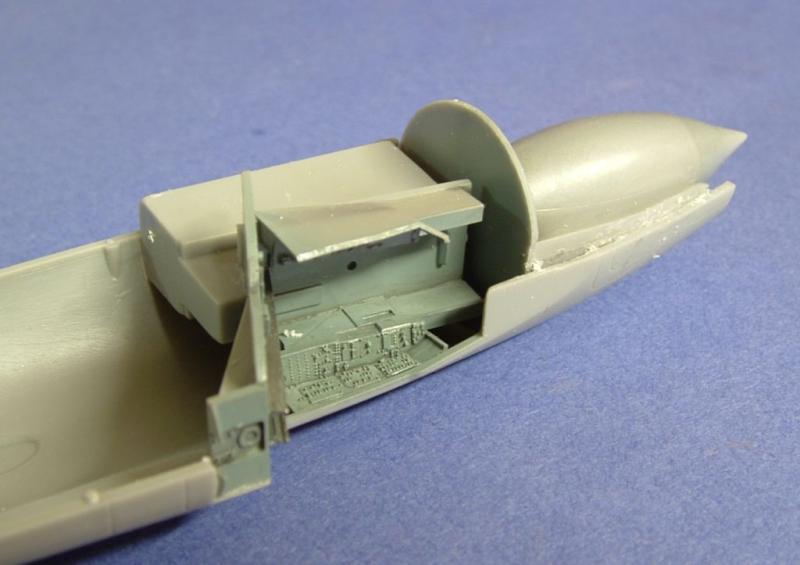
I began with the fuselage sub-assemblies. I moved onto the cockpit. The assembly of the cockpit was straight forward. I added the sidewalls floor and rear bulkhead. I then glued this assembly to the nose wheel well. The detail is superb and the fit good. I painted the cockpit with a base coat of MM Medium Gray. I then sealed the paint with a coat of future and applied a wash of MM enamel Euro One Gray. I inserted the resin fuselage piece at the front of the nose well opening and removed 3.5mm, per the instructions, from the rear. The measurement was spot on. I then assemble the two rear halves of the shock cone and when dried pressed lead fishing weights into the cavity. I then added the nosecone and blanking plate. I painted the nosecone and the inside of the fuselage halves Floquil Old Silver and then painted the blanking plate dark gray and black to simulate depth.
In assembling the fuselage halves. First I inserted the cockpit tub and nose well assembly with only slight gapping of the nose well. I then added the shock cone which was a bit confusing, lacking definitive attachment points to lock it in place. I worked carefully to get it correctly aligned. Once that was done I assembled the fuselage halves. I trusted the kit alignment pins and worked slowly to ensure proper alignment along the fuselage length. After my bad experience with the Su-25, I was a bit leery. But the fit was perfect and the fuselage aligned properly. Almost all of the panel lines aligned as they should. When done, I found that the left fuselage was a little long at the back end. This I sanded to match the right side with little effort.
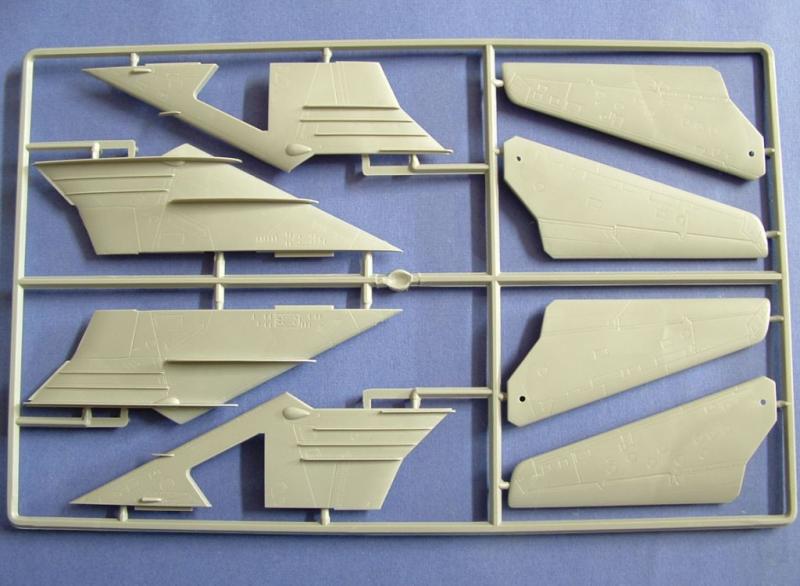
With the fuselage together I worked on the tail and wings. First I assembled the tail: part 44B to 43 and 45B to 42. When dried, I fitted this assembly to the fuselage. There is no locating table or other way to ensure alignment. I worked slowly, filing the underside of the tail to better match the curve of the fuselage. I was able to get a good fit with only a small step where it meets the spine molded to the fuselage; I also had small gap on the starboard side. Next, I fitted the nose ring to the intake. It took some sanding to get a smooth joint. I had read that the outer wings of the kit were too thick, especially if you want the wings swept back. A quick dry fit revealed this to be true. Since I wanted the high speed look of swept wings, I opted to thin the outer wing halves by treating them like vacuum formed pieces. I sand slowly on sandpaper taped to the workbench, carefully dry-fitting as I went to ensure I did not remove too much plastic. Once I was satisfied I glued the halves together and then glued them inside the inner wing halves at maximum sweep. I then attached the wing assemblies to the fuselage. The fit was pretty good, but it is a butt joint and again Tenax was a big help.
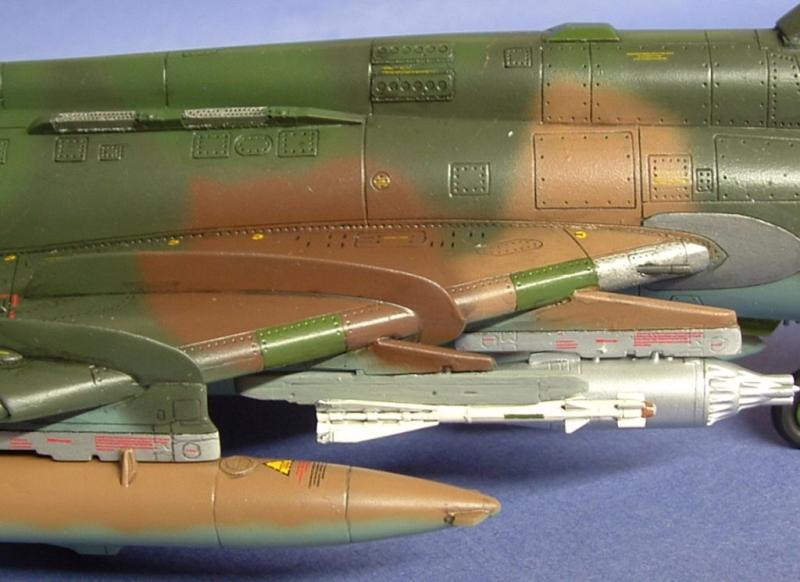
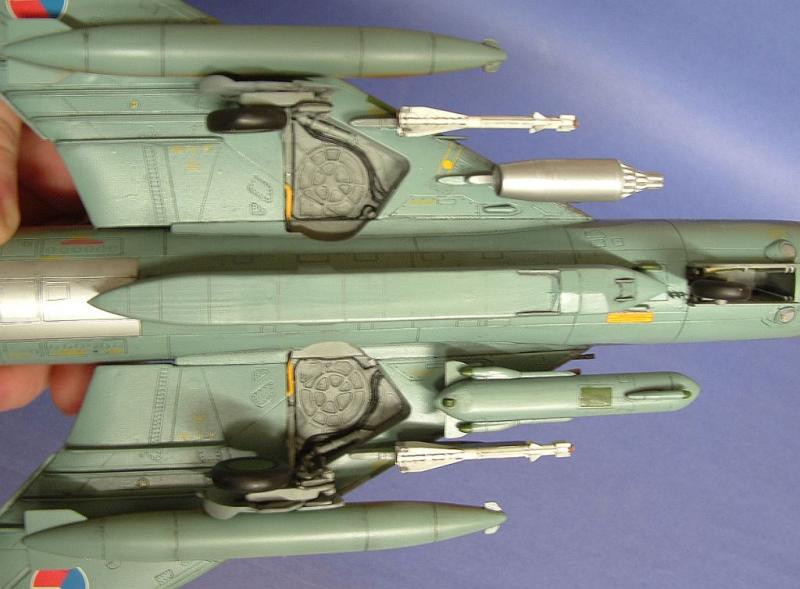
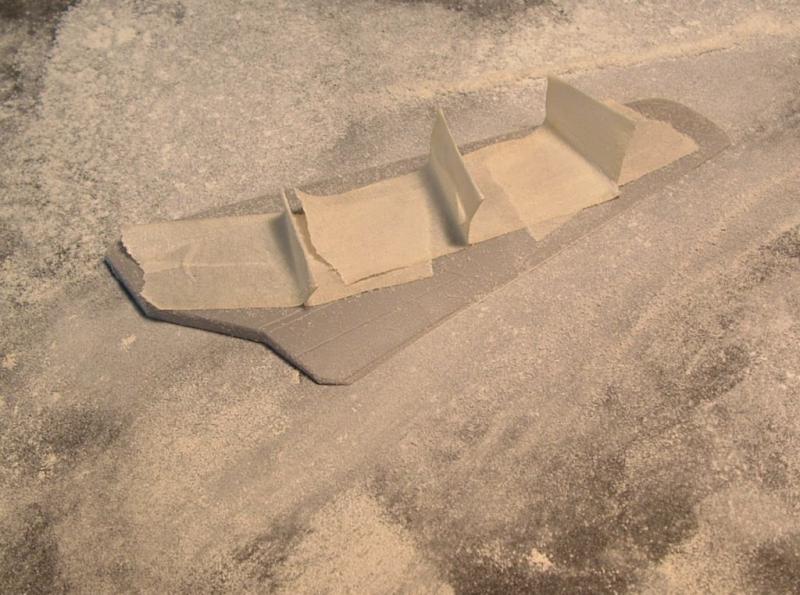
I next turned to the other fuselage details. The dorsal antenna (part 48) location in the instructions is too far back based on the pics I had. The rear edge of the antenna, and not the front edge, should be at the panel line indicated. It fit the fuselage curve perfectly. I added the Quickboost corrected landing reflectors (QB 48 322) to the underside, painting the inside of the lens silver, before gluing. The intakes on the fuselage, used to cool the engine, were molded solid with no opening. Since it is hard to drill a square hole, I opted to cut off the front of each intake and box them in with strip styrene cut and sanded for a smooth exterior. The result is far more realistic in appearance. I then added the other small intakes (with the openings drilled) before fitting the resin flare packs. These are beautiful components, but the locating information in the instructions is unclear. I studied photos for their placement.
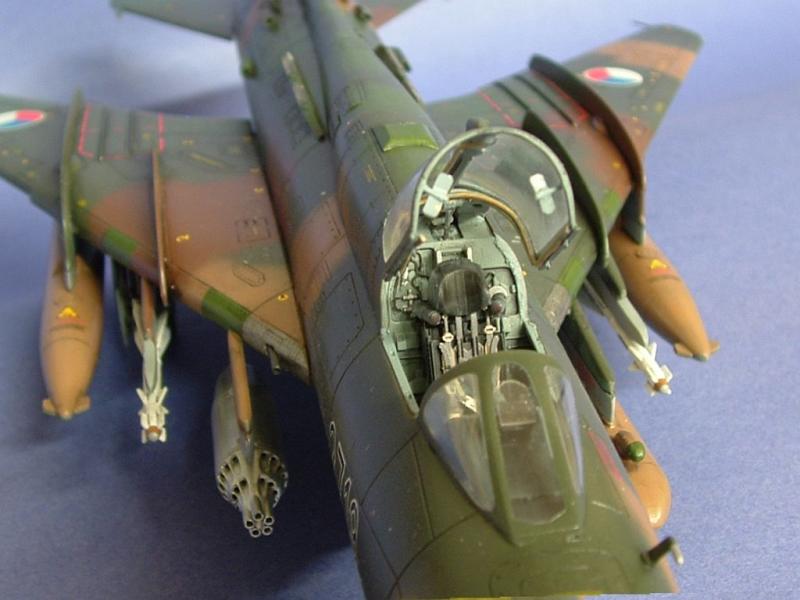
I went back to the cockpit and finished the details. I painted the knobs and switches to match color photos using a toothpick to lightly apply the paint. I assembled the instrument panel per Eduard instruction except that the video display provided by Eduard did not protrude out as much as I saw in my references; so I attached some styrene scrap to the back. I then attached the instrument panel to the coaming. The fit of the coaming was good, but the fit of the IP to the side walls was tricky. I built up and painted the resin ejection seat and added the set of harnesses that matched my pics – two sets are provided. The ejection seat was a mini-project just like the in the Su-25 kit. Also, like the Su-25 build, the Kopro control column has too much rubber boot at the base and is missing the upper part of the column. I cut off half of the base and added a modified F/A-18 stick to get the proper height. I added the HUD and painted and weathered the coaming. I then installed the stick and seat and dull coated the interior before finishing with the HUD glass. The kit provided wind screen is a little too wide. So I glued the right side in place and when dry applied a little pressure for the left side and then glued it in place with Tenax carefully applied; tape help it in place until dry.
With that done I move to the wheel wells, which have some nice detail but need a lot more. Before starting I studied the complex landing gear mechanism and the plumbing/wiring in the well. I started by assembling the landing gear and by removing the mounting keys at the top of the strut. I fabricated a new diagonal pivot assembly which is how the gear folds inward. I then removed the locating key from the landing gear using a sharp chisel. I glued the landing gear in place and then added additional actuators from spare landing gear parts to replicate all of the hydraulic assemblies of this complex gear. I used .02 lead wire and diodes for the hydraulic lines and wires. The resulting gear ended up being quite stable.
I detailed the nose gear well and gear with similar detail, but left of the nose strut, using a piece of plastic tubing a temporary support.
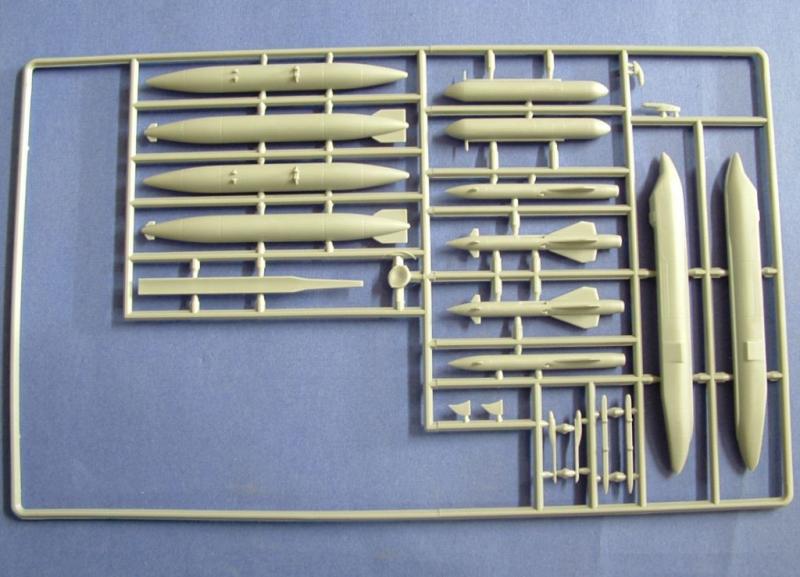
Next, I worked on the pylons and stores.
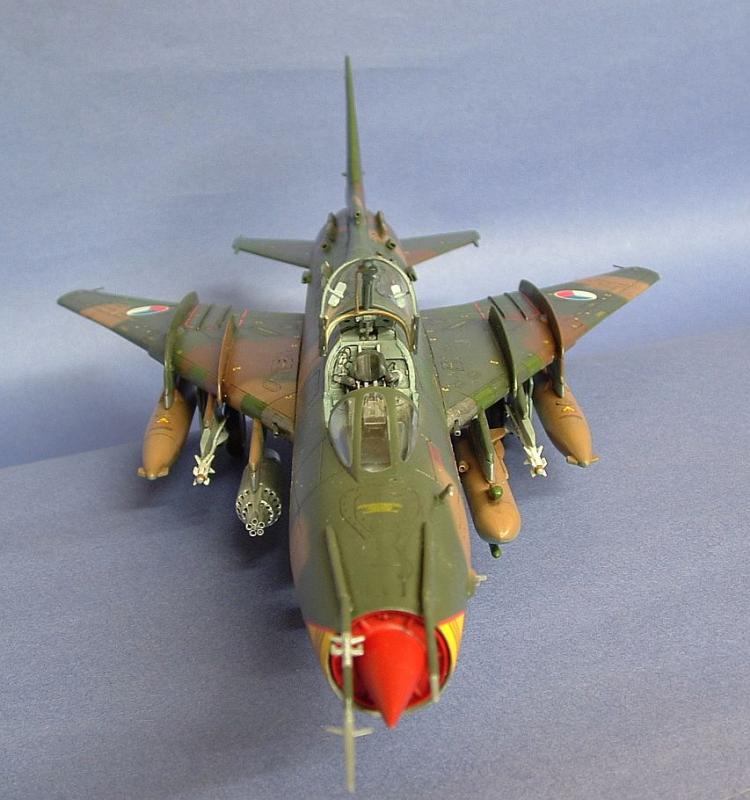
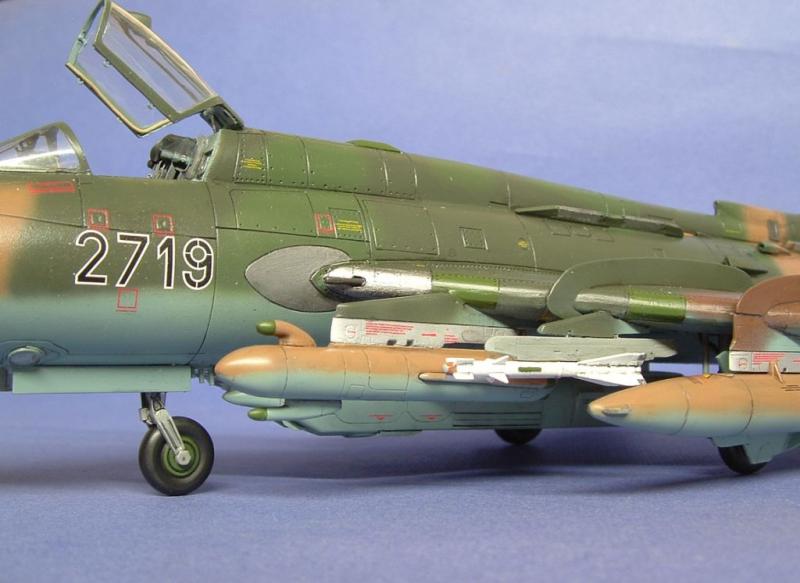
- Since I was building a reconnaissance plane, I left off the ventral pylons and instead assembled the reconnaissance pod. It has an adapted which fits it to the fuselage. This assembly fit well, but again the instructions were vague as to location and I had to use my references (drawings and pics). I added additional detail to the recon pod to simulate the sliding camera doors up front and underneath.
- I also detailed the jamming pod provided in the kit by adding a missing cooling intake on its starboard side. I also added a small antenna at the back end of the pod’s underside.
- I followed the very helpful Eduard instructions in order to modify the wing pylons. The modification help the pylon fit the angle of the wing.
- I assembled the drop tanks and added the PE fuel caps. One modification is required for the tanks to fit the pylon correctly. The aft away bracket needs to be much taller than the front one. I shaved off the old bracket and made a new one from styrene strip.
- To balance the jamming pod, it was common practice to hang an empty rocket pod on the opposite station. I used provided in the kit and drilled out the front end of the tubes before assembling the pod.
- I robbed two R-60 missile rails from the Kopro Su-25 and mounted them on the middle pylons. I used R-60s from the Eduard Mig-21MF.
The last bit of assembly included all of the fuselage antennas and the nose probes. Since this was a Warsaw Pact Sukhoi, I used the Odd Rods IFF antennas. Since the PE ones looked flat, I used the plastic antennas. I was not ready to attach the nose probes at this point since I was afraid of knocking off the detail. Plus the way they mount is incorrect. So I cut the probes off the fuselage fairings and glued them into a more prototypical configuration. I then rebuilt the starboard probe with the PE details. The port probe I by extending it to its proper length and shape with a pitot tube from my spares box. I painted both probes and set them aside for final assembly.
The Paint Shop
Prior to painting I masked using the Eduard masks – they worked great. I then masked everything else and pre-shaded the panel lines flat black. I freehanded the camouflage using a double action clone airbrush from Harbor Freight – a nice tool for $15 on sale. Using the instruction book as a guide, I started by spraying the aluminum underside panel with Alclad Aluminum. Once dry, I masked the area -and sprayed the underside color. I then sprayed the topside colors one by one and then re-sprayed colors as necessary to clean up the demarcations. Table 1 has the colors used.
|
Component |
Color |
Ref. Number |
|
Underside |
Russian Underside Blue |
MM 2123 |
|
Upper camouflage |
Dark Tan FS 30219 |
MM 1742 |
|
Upper camouflage |
Italian Dark Brown |
MM 2111 |
|
Upper camouflage |
Field Green FS 34097 |
MM |
|
Upper camouflage |
Dark Green FS 34079 |
MM 1718 |
|
Dielectric panels / wheel hubs |
Medium Green FS 34102 |
MM 1713 |
|
Landing gear / wheel wells |
Flint Gray FS 36314 |
MM |
|
Cockpit |
Medium Gray FS 35237 |
MM 1721 |
|
Flare launchers, leading edge metal |
Non-Buffing Steel Metalizer |
MM 1420 |
In preparation for decaling, I applied Model Master Metalizer Sealer as a gloss coat. The Cartograf printed decals went down without trouble using MICROSOL. I started with the roundels and aircraft specific markings, before adding the stenciling. As would be expected the stenciling was very time consuming and because many are so small, Eduard provides extras. I then sealed the model with Metalizer Sealer before applying washes.
Since I chose to model soon after delivery in the mid-1980s, so I kept weathering to a minimum. I did apply a wash to all of the panel lines, using Warpigs excelling gray wash. The contrast was sufficient for both the underside and topside. I let it dry and then used a Q-tip dipped in water to remove any access. I reapplied as necessary to achieve an even consistency. I then sealed the wash with Model Master Semi-gloss lacquer toned down with some drops of Dull Coat. It gave the aircraft a uniform sheen without being high gloss.
Final Assembly
I decided to give the horizontal stabilators more strength than that provided by the molded on mounting pins. So I cut them off and used heavy brass rod cut to a length wider than the fuselage. I drilled holes in each stabilizer to achieve a tight fit. I then glued the rod to one stabilator, pushed the rod through the fuselage openings and then press fit the other stabilator with some glue applied. Friction and not glue holds the stabilators at the required droop angle.
I detailed both the nose gear doors and main gear doors since they lacked any detail. The main gear doors are very complex and have a complicated pattern of reinforcements. I fabricated these from .04 sheet styrene cut to match drawings I have and enlarged to scale. Once glued in place they had to be sanded to replicate the portion that covers the wheel. I painted these Flint Gray and applied a wash.
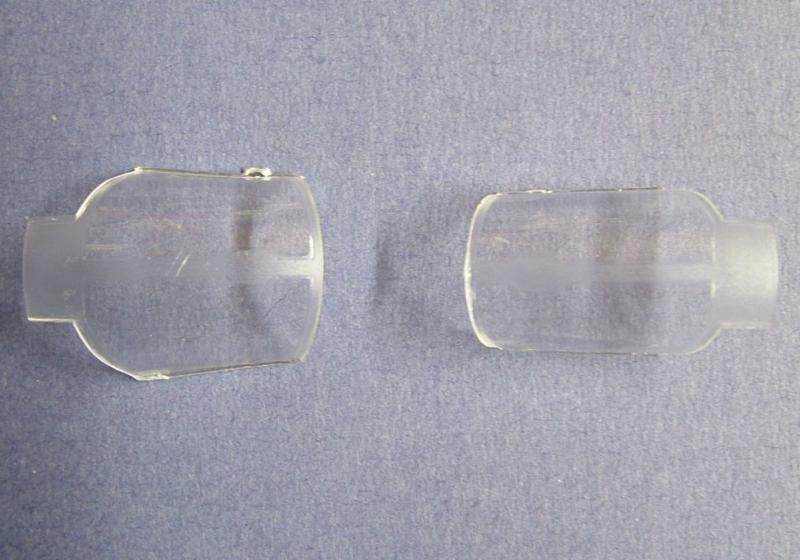
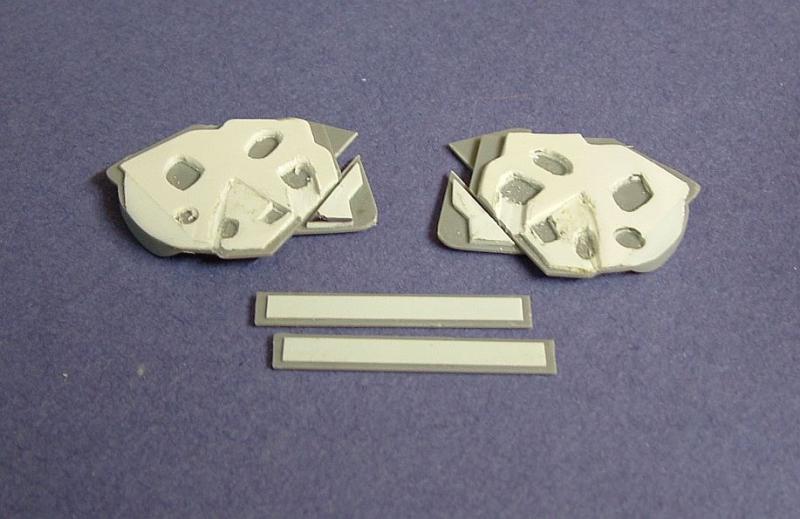
If you want to pose the canopy open, there are multiple issues to deal with. First provided in the kit are two sets of canopies, one molded in a single piece (for a closed canopy) and one molded in two pieces (for posing open). The problem with the separately molded canopy is that it came out of the mold misshapen and too wide. Correcting it with heat would likely result in further distortion and stress marks. Instead, I took the single molded windscreen and canopy and cut them apart. You can see the difference in the accompanying photo. The other issue is that the inside of the canopy is devoid of detail and Eduard only provides some simple PE. So I added the required detail using lead wire and scrap styrene. I scratch built the actuating-mechanism by using a resin mechanism from an F/A-18 detail set (Black Box) and by adding styrene for the surrounding structure. I then added detail around the periscope and replicated the air piping (to keep the canopy clear) from .02 lead wire. The Su-22 had a flash curtain that the pilot would pull forward during nuclear weapons delivery. I replicated the rods with brass wire. I finished by adding the mirrors. I hand-painted the interior color to avoid complicated and potentially damaging masking.
After installing the canopy, the nose pitots and the under wing stores, I installed the Quickboost nose and exhaust covers. I finished by making static discharge whips for the wing tips and stabilator tips. I made them from .01 rod, heated to flare the tips. They were painted and applied with CA.
Conclusion
A much easier kit to build than the Su-25. The base kit is has better fit, alignment and consistent engraving than the Frogfoot. Eduard’s details really improved the realism of the kit, especially in the cockpit. The Su-22 is an impressive jet both in design and size and is still in use with many countries. This Eduard release is a mush have if you like this jet.
My thanks to Eduard for providing this review kit.


Su-22 by Eduard

Su-22 by Eduard

Su-22 by Eduard
Su-22 by Eduard
Su-22 by Eduard
Su-22 by Eduard
Su-22 by Eduard

Su-22 by Eduard
Su-22 by Eduard

Su-22 by Eduard
Su-22 by Eduard
Su-22 by Eduard
Su-22 by Eduard
Su-22 by Eduard
Su-22 by Eduard
Su-22 by Eduard

Su-22 by Eduard
Su-22 by Eduard
Su-22 by Eduard
Su-22 by Eduard
Su-22 by Eduard

Su-22 by Eduard
Su-22 by Eduard

Su-22 by Eduard

Su-22 by Eduard
Su-22 by Eduard

Su-22 by Eduard

Su-22 by Eduard

Su-22 by Eduard
Su-22 by Eduard
Su-22 by Eduard
Su-22 by Eduard
Su-22 by Eduard
Comments
Add new comment
This site is protected by reCAPTCHA and the Google Privacy Policy and Terms of Service apply.
Similar Reviews