
Strumpanzer Ausf.l Als Befehlspanzer with Zimmerit
The Strumpanzer Ausf.L als Befehlspanzer was a command and control infantry support motorized gun based off the Panzer IV chassis. It was used at the Battles of Kursk, Anzio, Normandy, and was deployed in the Warsaw Uprising. It was known by the nickname Brummbär by allied intelligence but a name which was not used by the Germans. Just over 300 vehicles were built and they were assigned to four independent battalions. Dragon has released a model of this tank in 1/35th scale with its new Zimmerit molds, DS Tracks and PE side skirts. I had not built a tank in many years and when I saw this new kit come up for review I thought it would be a nice way to renter the world of armor modeling. Dragon gives you 20 sprues of grey plastic with certain parts having the Zimmerit molded in, 2 clear sprues, 3 sheets of photo etch parts and two vinyl single piece “DS” tank tracks.
Construction
After doing some research on building armor I sat down to begin the build of the Sturmpanzer. The first step was to see what parts I actually needed for this build. Since the actual tank is based off the Panzer IV, Dragon gives you most of the parts for that tank as well as specific parts for the Strumpanzer. I took each sprue and using the guide that Dragon gives you, marked all the parts that are not being used for this tank. I highly recommend you doing this as it will help you in the search for parts during the construction process.
The first step is to build the road wheels, idlers, and track motor wheels along with the lower chassis. I built the wheels first and then set them aside for painting later. There is a subassembly marked E which I also built but after going through the entire build and even having other people look at the directions it never says where the “E” parts go. This would become a running theme throughout the build. Step 2 is to build the front armor plate for the tank. This is straight forward if you have marked the parts ahead of time. As there are multiple versions of the same part. Step 3 continues the lower chassis build and has you add the parts that hold the road wheels, idlers, and drivers in place. Step 4 has you adding parts to the rear of the tank such as the exhaust, fuel filler neck, hooks, and other various accessories. I kept the exhaust off as well to paint it separately later. Step 6 has you adding a hitch handle and some photo etch accessories. Step 6 has you adding the upper front plating to the chassis and the wheels. I recommend leaving the wheels off and skipping that part of step 6 until after painting has been completed. All these steps went fairly quickly with no real issues in building. With that the lower chassis is complete.
Step 7 has you begin work on the upper portion of the tank. The first parts are the track fenders and this is where things started to get confusing. In step 7 they have you add the front track cover and in the rear photo etch hatch covers. If you look at step 7 it looks like the photo etch goes on the outer portion of the fenders. In step 8 the diagram has them on the inner portion. They seem to line up better on the inner edge so that’s where I put them. The last part of step 7 is to trim certain portions of the inner parts of the fenders so they fit properly. They are not hard to trim but take care you don’t take too much off the edges. Next in the step is adding headlights and other accessories to the fenders. They headlights are 3 pieces each and the generator looking item is 7. They look great but are very small so a magnifier is worth using on this kit. Step 9 has you adding grab handles and other items to the undersides of the turret hatches. If you are going to have the turret closed up you could skip most of that step, though part c8 should still be glued in as it covers a hole in the hatch. Step 10 has you building the exhaust area and engine covers. This is also where I found what may be another error. According to the direction diagrams the left side of the engine cover has an accessory box and on the right side what looks like a large wrench. It seems though that the attachment holes for each part are reversed and they should go on opposite sides as to what the directions show. In fact if you put the box on the engine cover according to the directions it will cause the engine cover to not fit correctly as it hits a part on the fender! The easiest fix is to fill the holes on both sides of the engine cover, cut the locating tabs off the accessory parts and just glue them on the opposite sides or keep them off completely. Either way will work.
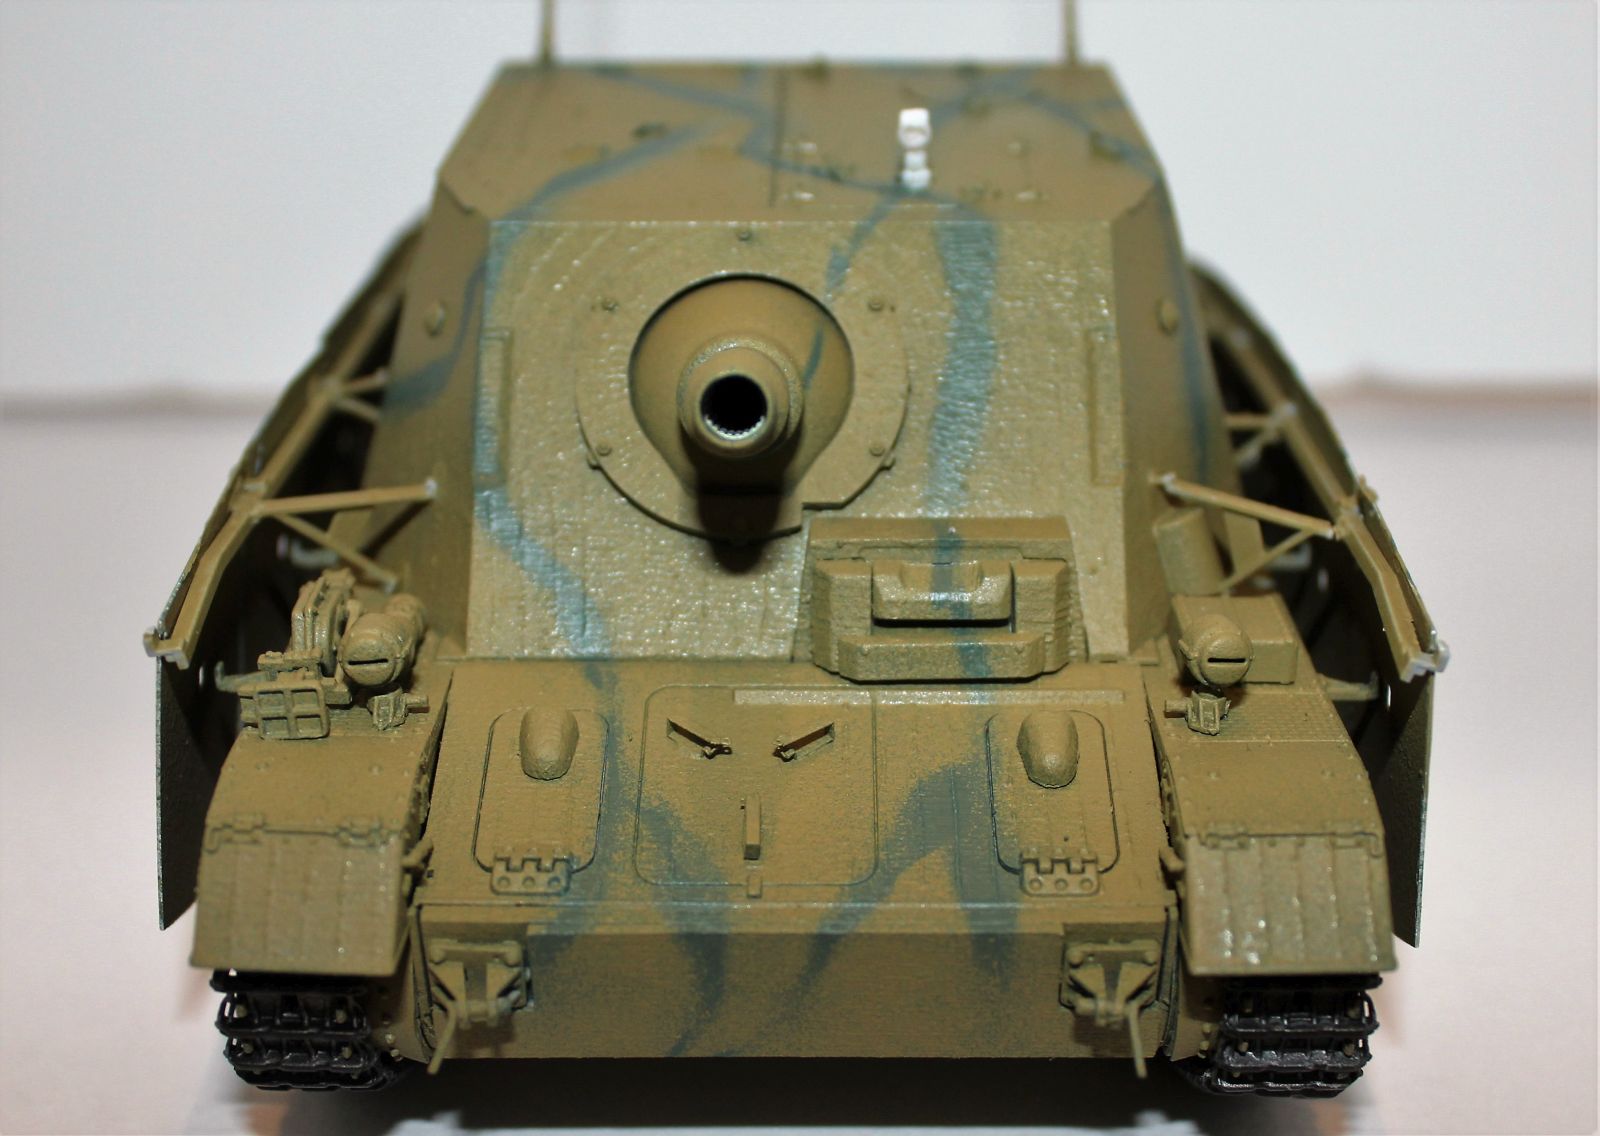
Steps 11-14 have you working on the turret. Step 11 has you choosing if you want the hatches open or closed. I chose closed. Internally the only parts are the gun. The rest of the interior is open as Dragon does not give you a driver’s compartment, engine and transmission, etc. Closing the hatches while hiding the gun, makes it seem more complete. Step 12 has you finishing the engine cover and this is where I found the error mentioned previously about the wrench and box. It also seemed like step 12 should have happened before working on the turret if you progressed logically. Step 13 has you working on the turret assembly, it’s mostly the back of the turret but you do add a backing plate for where the gun exits the turret in front. This step has you add air vents and ammo loading doors which can be positioned open or closed you also add hinges to the doors and photo etch on the parts holding the command and control antennas. Dragon would have you add the antennas at this point but I left them off until the end as I knew I would break them if I didn’t. Step 14 has you adding the gun ring to the front of the turret, along with the armored driver’s viewport. Finally they have you add escape chains to the inside of the turret but since I closed the hatches I only added the portion of the escape chains that are on the exterior of the turret.
Steps 15-17 are the main point of this tank. The Gun. Dragon really shines here with a highly detailed weapon that can even elevate. The gun is made up of 37 parts and 3 major sub-assemblies, the gun itself, the elevation system and the gun mount. When it is complete it is very detailed and is a shame that it is hidden if you close the hatches. For the amount of detail on the gun it’s almost worth keeping one hatch open so that people can see at least a little bit of it. It is straight forward to put together and they do offer two different types of periscope for the gun aimer but they don’t tell you which one for which version and honestly since only the top sticks out of the hatches I’m not sure if anyone other than the most knowledgeable about Brummbär’s would know one from the other. I went with the part labeled S2. Also make sure that in step 17 when you attach the gun to the gun mount you make sure the attachment points are solid before moving on. If you close the hatches there is no way to get to the gun inside the tank and it could ruin the entire build if the gun falls off.
Step 18 has you attaching the top hatch sub assembly from step 11 to its position on the top of the turret. It also has you adding some armor to the bottom of the driver’s window.
Final Assembly
Steps 19-22 are the final assembly for this Brummbär. These steps should be followed for the most part exactly as Dragon has them. Step 19 has you attaching the turret to the fenders. This is straight forward and they went together easily. I do recommend making sure they stay level though as the inside edges have nothing to attach to and could bend upward. They also have you make the “spare wheels” for the tank that will attach to the back of the engine compartment.
Step 20 is where a big problem can happen if you don’t follow the step exactly from bottom to the forward part of the tank to the back. I went from the bottom of the tank to the back of the tank forward and it was the worst thing I could have done. Dragon has you attaching the tank treads first in step 20, this is the only part of the step you can skip as I feel it makes final painting easier. Then they have you attaching the gun and gun mount assembly to the floor of the tank. Attach this and let dry. Then attach parts D6 and D11, it’s a subfloor the attaches to the gun mount and an engine compartment wall. Once these are dry then take the subassembly from step 19 slide it over the gun and glue to the chassis. This will leave just the engine compartment cover from steps 10 and 12 left to attach. If all went well this will be no issue and it will slide on easily attaching to the fenders and part D11. My problem was I did the engine cover first and it made it so I couldn’t slide the fenders underneath! I nearly had to break the engine cover off to fix the issue. Thankfully it all turned out ok in the end. Now it was on to paint before final assembly.
Painting
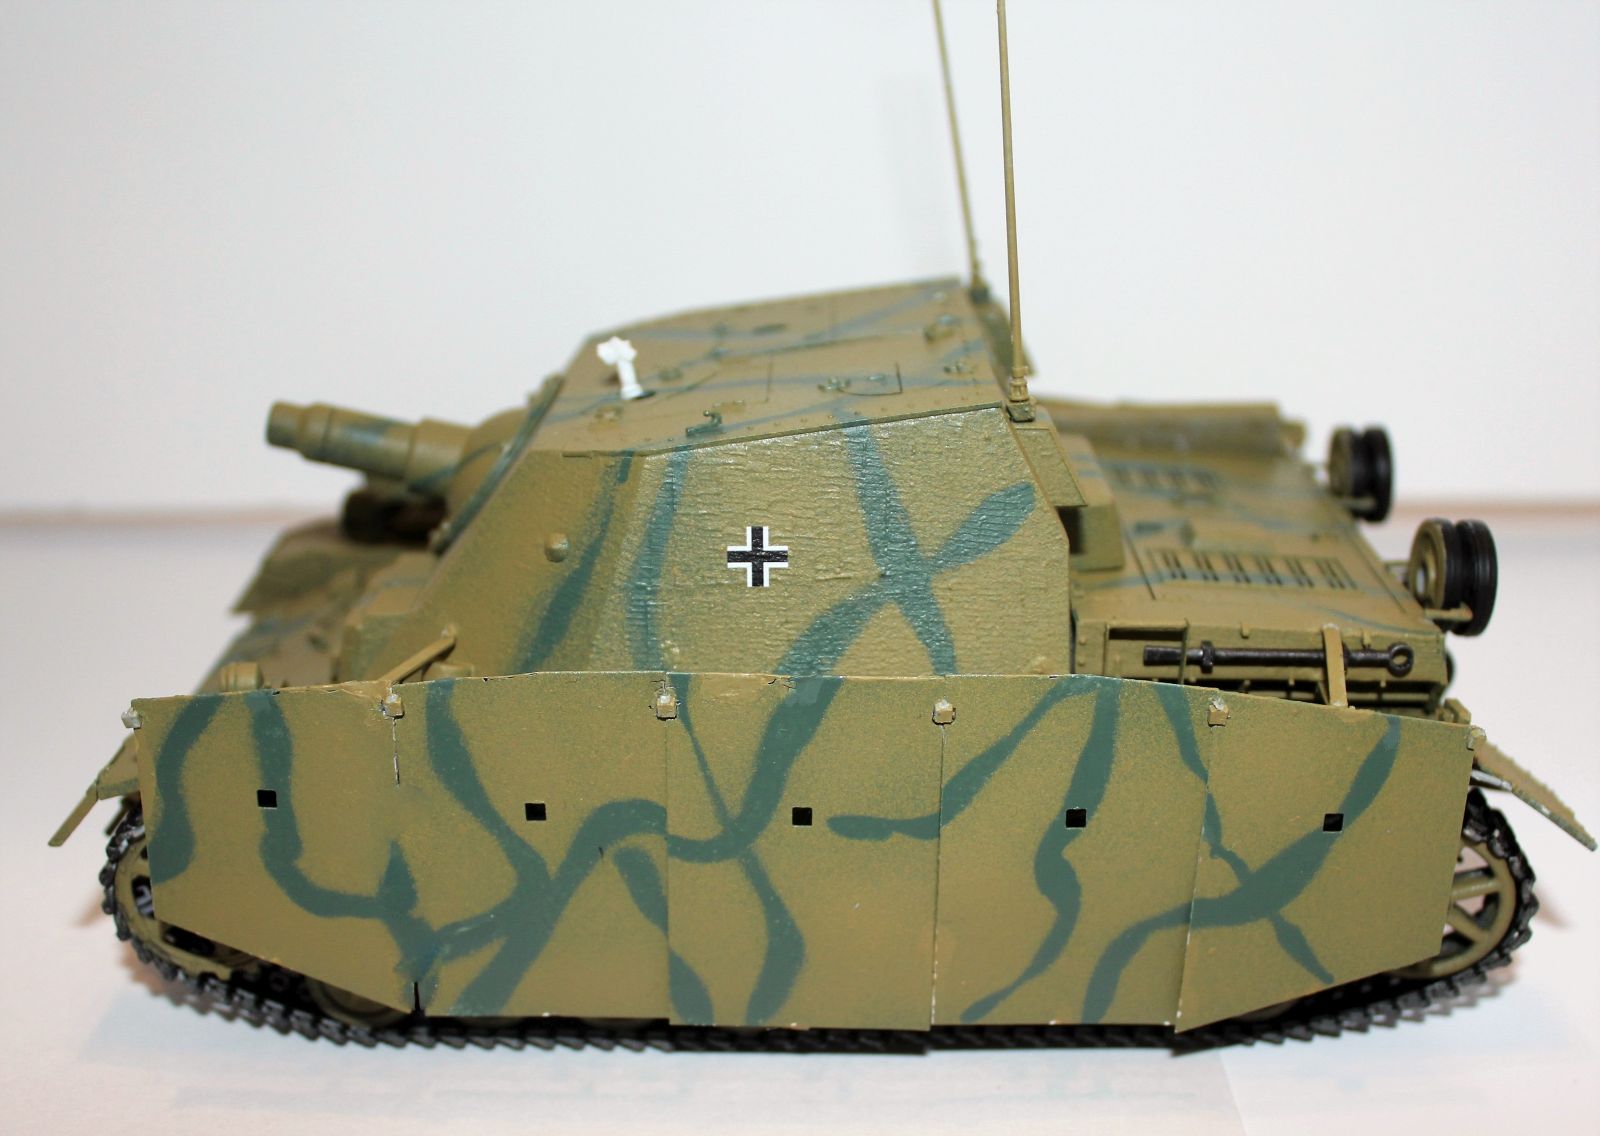
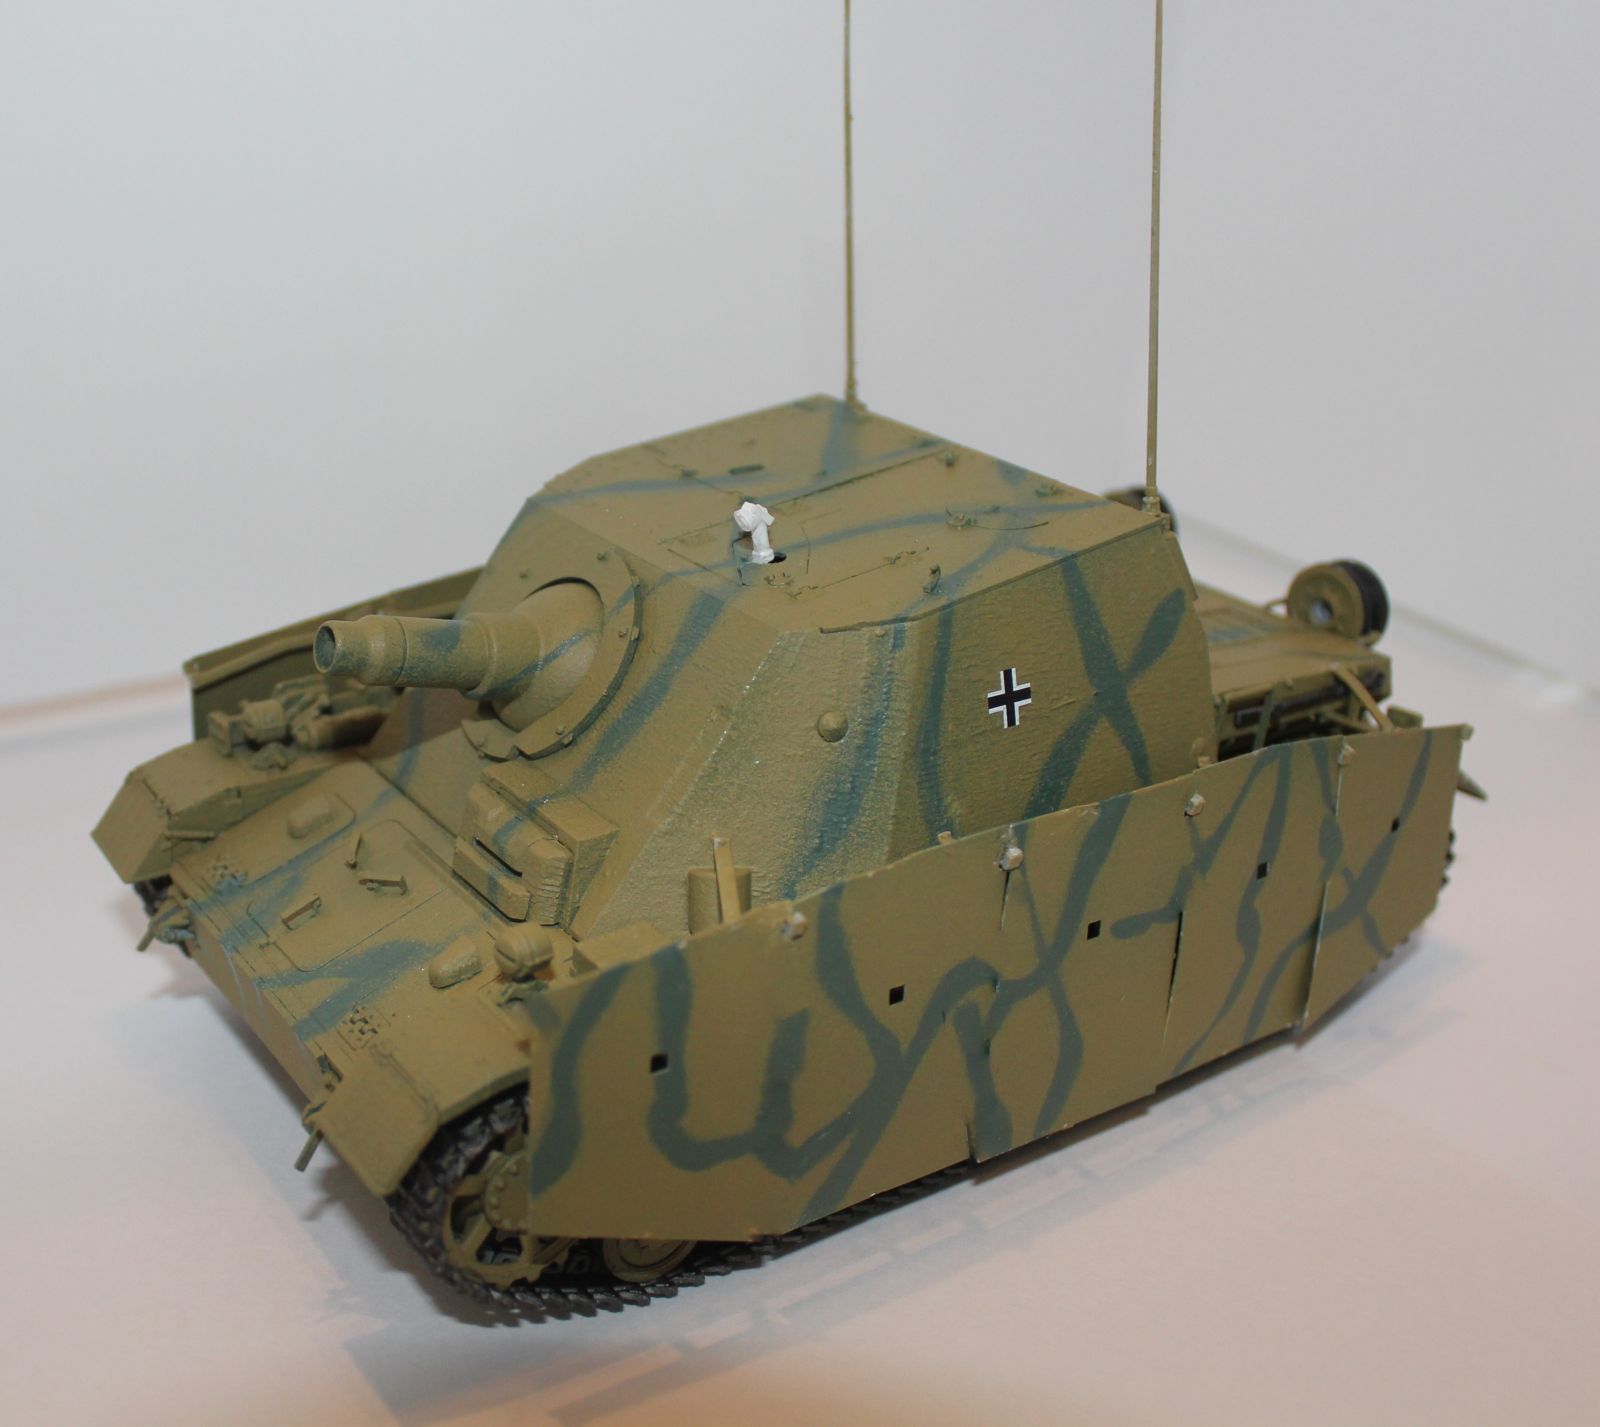
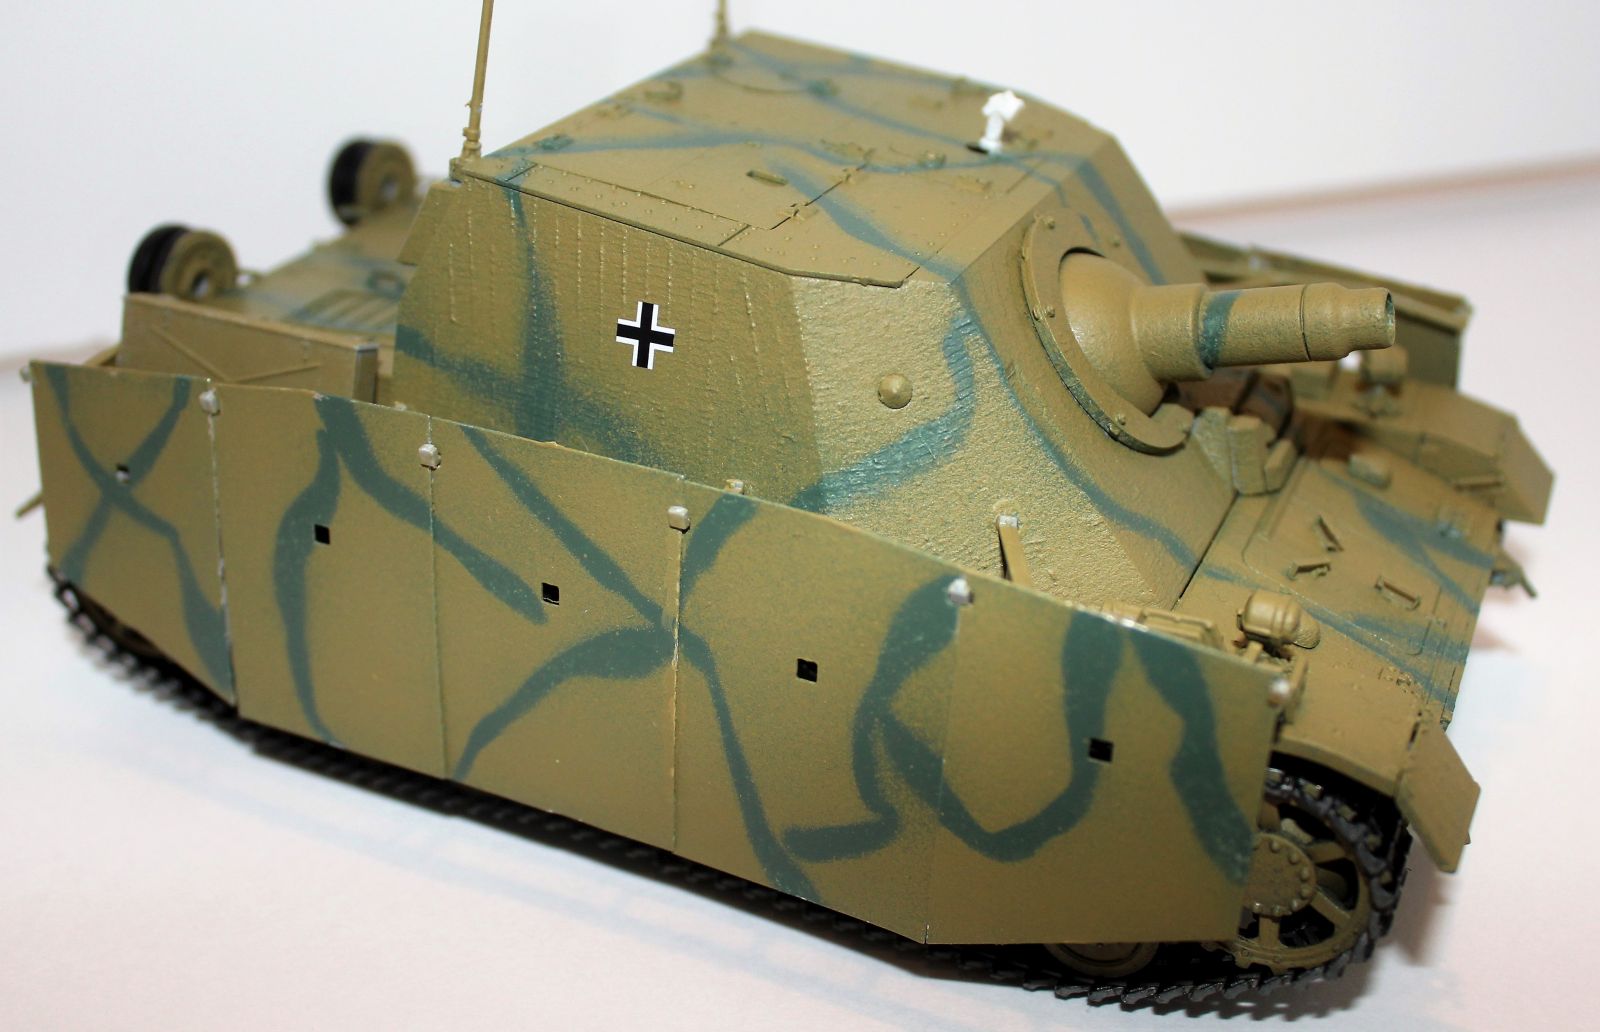
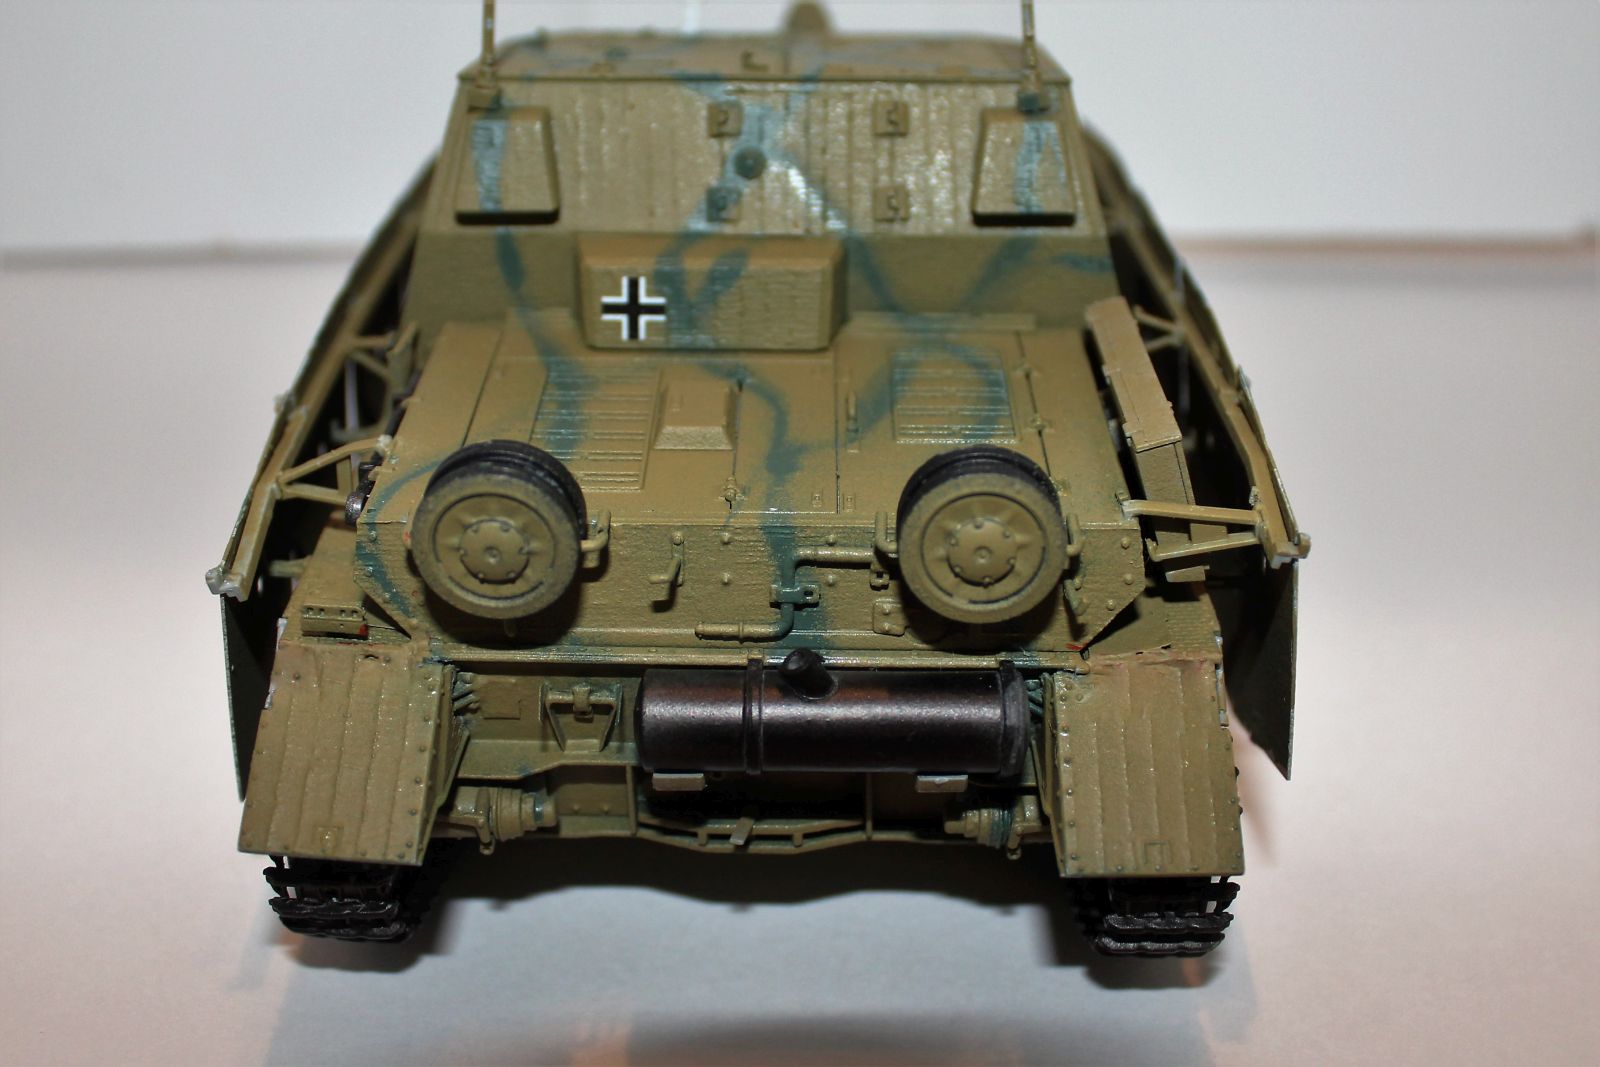
Painting the tank was pretty straightforward. The color callouts are in Mr. Color but they give you the FS number so I was able to get them in Testors ModelMaster enamels. Overall the tank is in dunkelgelb or dark yellow with Khaki green and red brown camouflage. Dragon gives you two different paint schemes one with green and red soft stripe camo and one with just the green stripes. I chose the latter as it was just a bit simpler. Both will look good though with this tank. I painted everything green first, then using the “bluetac” method covered the areas I wanted with bluetac I then gave the tank its overall dark yellow color. Since this tank has the “zimmerit” coating make sure you rotate and check every angle to make sure the paint is covering everything. I had to go back and repaint a couple areas due to this. Next up was all the road wheels, drivers, and idlers that had been built in step one. The road wheels were first painted black overall as the directions called for black rims. Then once dry all were given a coat of dunkelgelb front and back and the idlers and drivers got that overall. Now it was time to decide if you want to use the Photoetch sideskirts. I did and painted those according to the cammo pattern given by Dragon. These I primed first to give the paint something to attach to before doing the same bluetac method. Finally it was the “metal parts” aka the treads and the fuel tank turn in the paint booth. I used Alclad metals on the treads starting with primer, then steel, then used burnt iron and exhaust manifold to give the treads some definition and variation, The fuel tank was then hit with steel and a light shading of exhaust manifold. All of this was set aside to dry before final assembly
Final Assembly
Once the paint was dry it was now time for final assembly. First I added the wheels and treads to the tank. The one piece treads do go on fairly easily and as long as you do it in stages it won’t be much of an issue to get the treads to meet up. I ended up having the attachment be on the bottom. I used CA glue for this as I wasn’t sure how the vinyl would react to regular model glue. Then I attached the “fiddly bits” hooks, antennae, spare wheels, and fuel tank. I went back through each step looking for items I might have missed or deliberately left off such as the antennas and fuel tank. Then it was onto the last two steps in the build. Step 21 is if you choose not to use the side skirts and step 22 is if you do. Step 21 has you adding the rear fenders. Due to my previous problem with the fenders and the engine cover my fenders were a bit too short! Nothing a little putty and paint couldn’t fix but still yet another reason to double and triple check everything before you glue it down. Dragon also has you filling in the holes for the side skirts if you chose not to use them. They have you attaching small covers to the ports for them. Here is another small issue though. There are no holes in the turret! The directions show where they should be but the plastic parts show no divots or holes. As I was going to use the side skirts I wasn’t sure what to do until I realized that one part actually does have an alignment hole. Part c5 is added to the tank turret and has the holes for the first bracket of the side skirt. I was able to cut the pins off the back of the brackets and using the one hole in part c5 was able to get the whole assembly aligned. As for the other side of the tank that side skirt was aligned by using my eye, CA glue and a lot of hope. After letting all this dry I went back and touched up some areas where the paint had flaked off the side skirts and then added the three decals for this tank. There are no numbers or identifiers but there are three crosses that need to go onto the Brummbär. One on each side of the turret and one on the back of the tank. These went on very easily and settled onto the Zimmerit with no issue. I was finally able to sit back and call this build complete.
Final Thoughts
Dragon has another interesting and unique Tank kit on their hands. It may not have been the best one for my first foray in to armor as there are some advanced techniques that you need to use but for anyone who has built a Dragon armor kit in the past this one should be no surprise to you. I would recommend it if you are into armor, or unique tanks.
My sincere thanks to Dragon the kit and to IPMS for allowing me to review this interesting and unique kit!

Comments
Add new comment
This site is protected by reCAPTCHA and the Google Privacy Policy and Terms of Service apply.
Similar Reviews