
Stearman PT-17
Revell surprised model builders earlier this year by announcing they would be releasing a new Stearman PT-17 in 1:48 scale. It didn’t take long for some of those on the Internet who delight in predicting things to rumor that Revell was just going to rebox the long-standing Lindberg kit. Well, the predictions were wrong. Revell has presented us with a very nice…let’s say, state-of-the-art kit that is definitely a new tooling and offers a very nice alternative to the Lindberg kit at a very reasonable retail price.
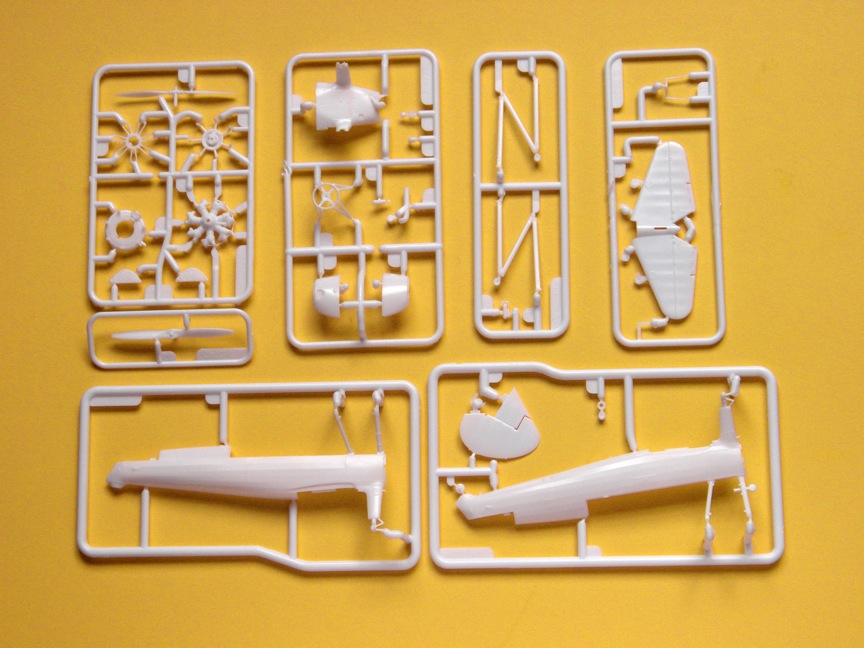
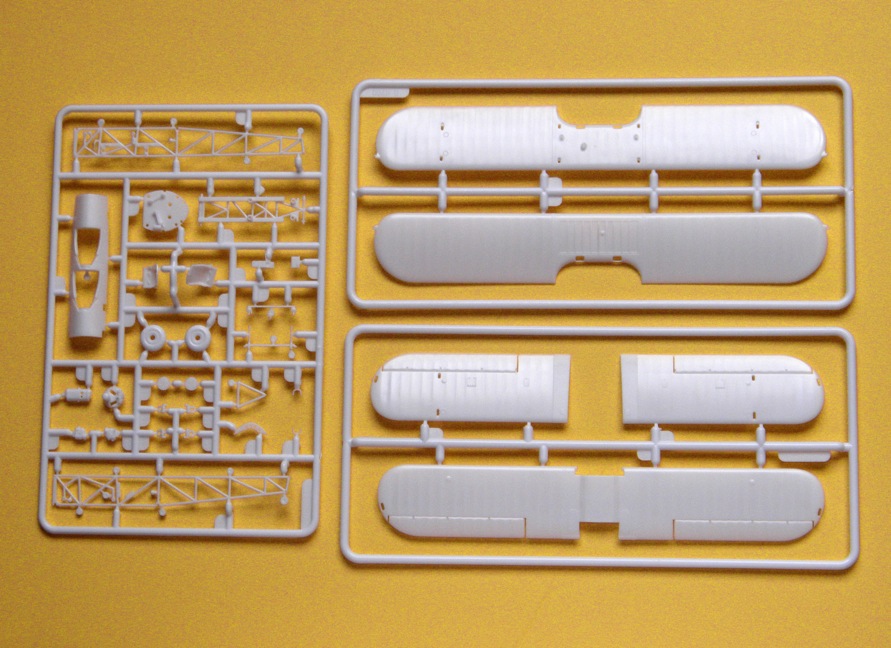
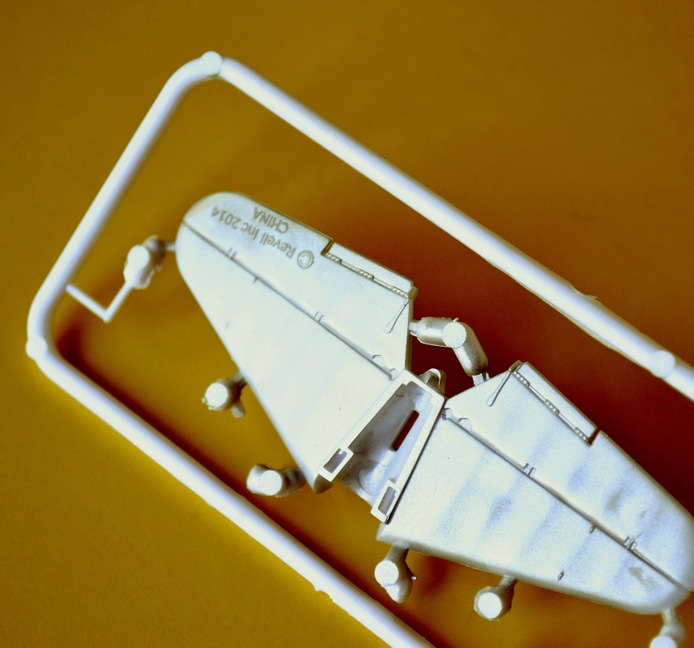
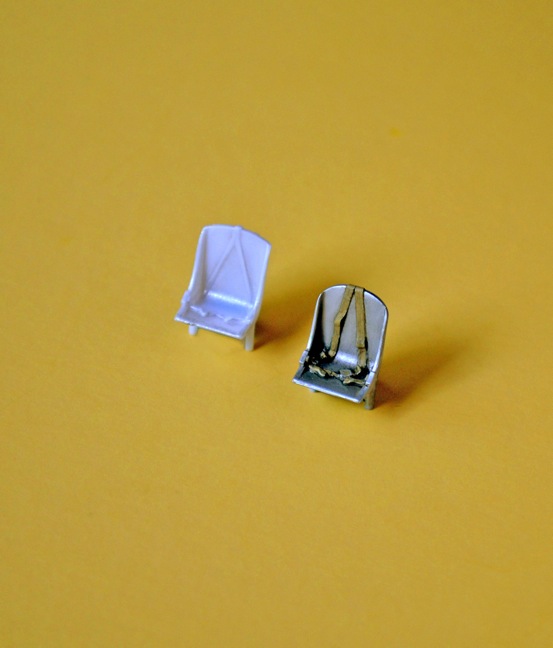
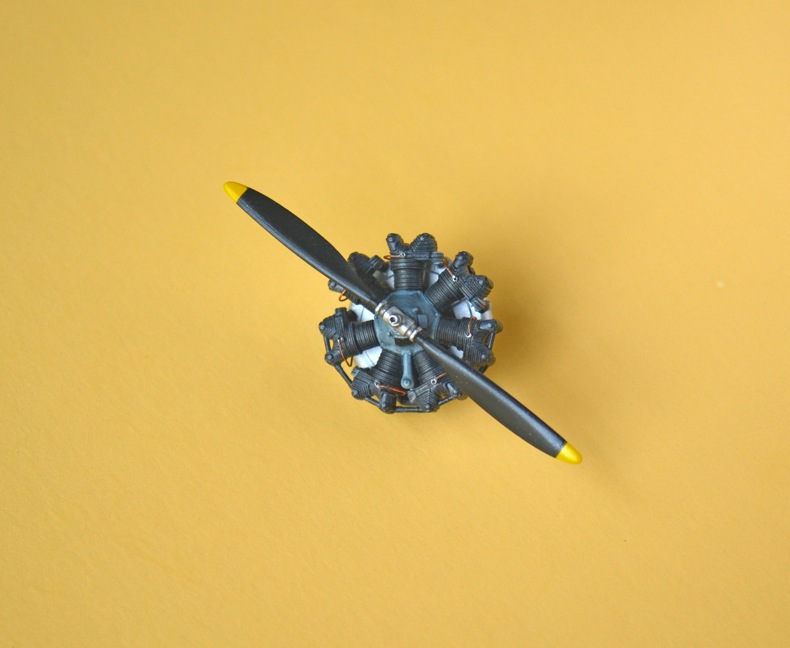
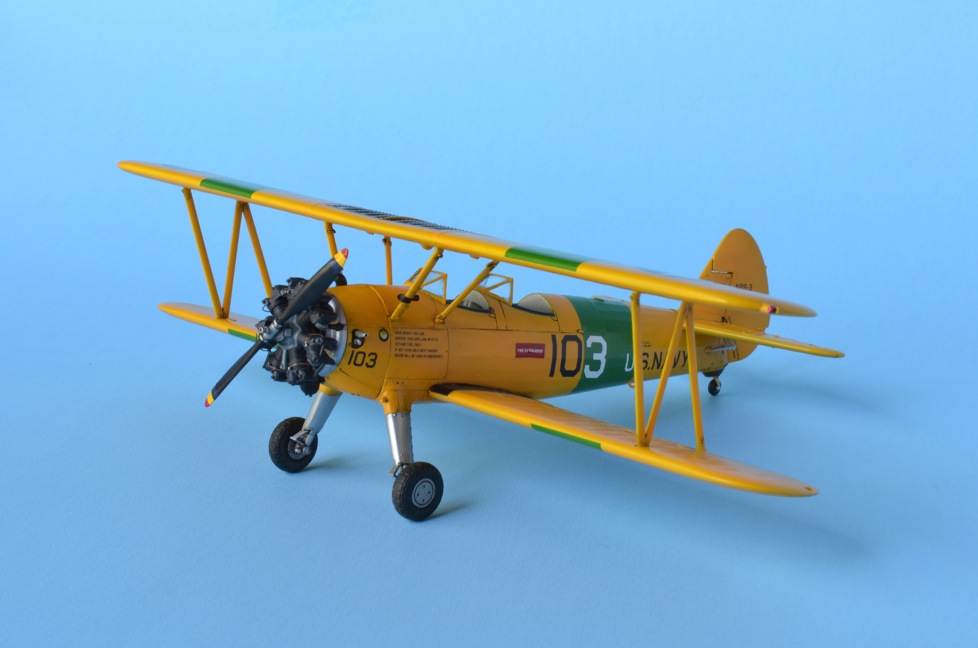
Originally known as the Model 75, the twin-seat Stearman biplane (also known as the “Kaydet”) became the primary trainer for most US military pilots during WWII. Thousands were built in Wichita KS beginning in the mid-1930s and continuing through the war years. After doing its intended job very well, following the war many surplus aircraft emerged in a variety of jobs that included civilian training, crop dusting, barn-storming and sport. The wealth of existing ‘warbird’ examples permitted Revell to measure and study the real thing, match shapes and reproduce details accurately. As a result, overall detail in this kit is excellent, but it also reflects the kind of contemporary modifications that are to be found on today’s warbirds. Exterior features, panel lines, fasteners, rivets, etc. are refined and well molded. Internal details include all framework and sidewall stringers, instrument panel, dual controls, rudder pedals and seats. With the exception of the seats, everything inside appears accurate. Unfortunately, the shape of the seat back doesn’t match photos of original equipment and the stiff looking molded-in shoulder harness looks like they were posed unrealistically. On the other hand, the engine is a very nice representation of the PT-17’s air-cooled Continental R-670 engine and both styles of propellers (wood and metal blades) are provided. Photos below of the sprues show the parts breakdown.
There are 60 parts. Three are molded in clear plastic and all of the others are molded in white plastic. White? Yes, Revell may have chosen to mold parts in white because many are to be painted yellow and white works well for that…but white plastic means model builders will be faced with a few challenges when removing parts from sprue points, trying to clean up seams and preventing delicate details like raised rivets from accidentally disappearing during sanding. And…the plastic is soft enough that details can be lost quickly if care is not exercised.
For reasons only Revell can explain, they have chosen to place their copyright declaration on the exterior of the stabilizer in raised lettering that will distract from the finished model (see the photos). Fortunately they placed it on the underside, but most modelers will want to sand it off. That bit of prep work should be done carefully to avoid loosing the rib detail.
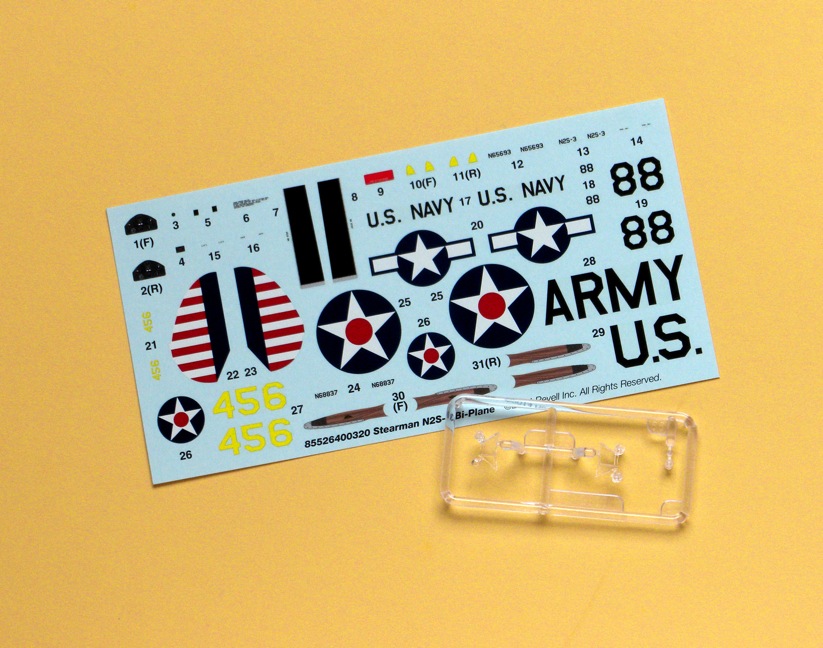
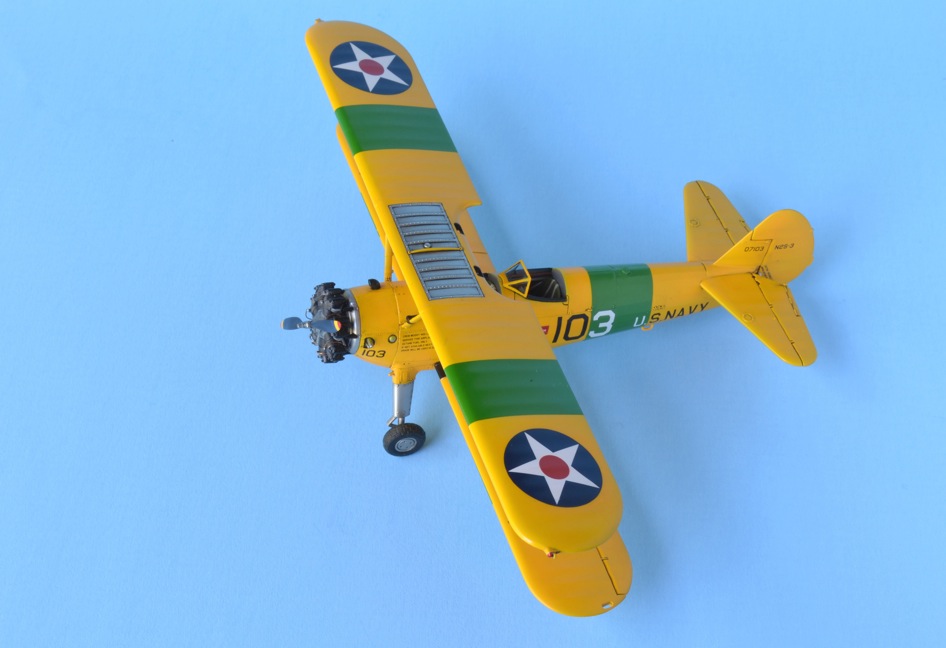
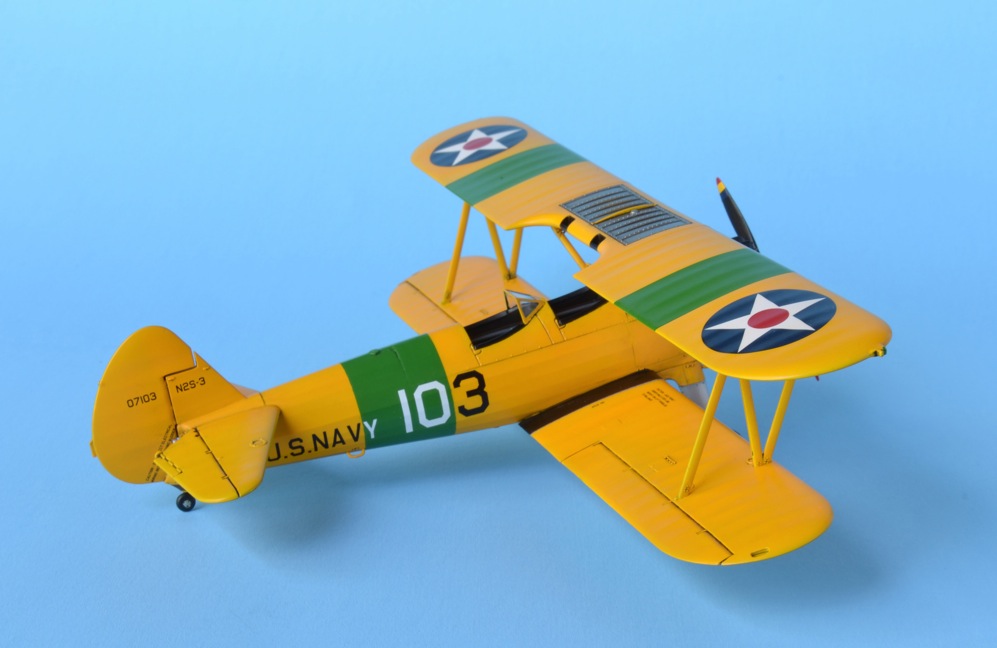
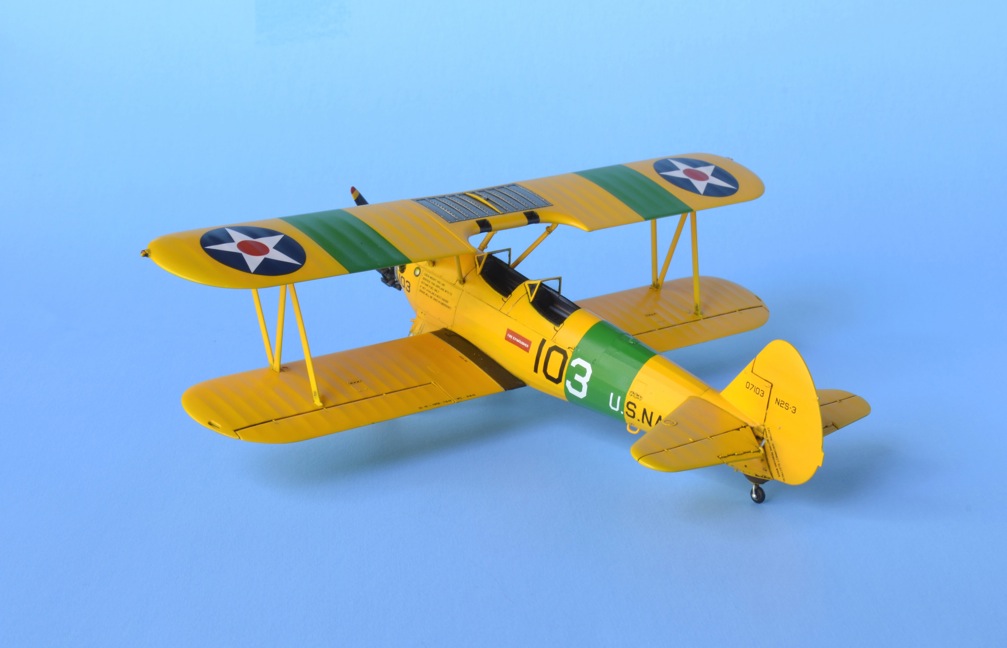
Decals are included for an Army Air Corps PT-17 and an USN N2S “Yellow Peril”. Good choices, but the kit decals are based on those painted on current warbirds and do not accurately match original military markings…the early war national insignia for the top wing is oversize, the one for the underside of the bottom wing is undersize and the registration numbers are for privately owned civilian aircraft. Instrument panel decals are included as well as a decal for the wood propeller that replicates the wood grain and metal edges very nicely. The instrument panel decals are marginal, but Revell deserves a gold star for including the very nice decal for the wooden propeller. To be fair, if a modeler is not concerned about the kit decals depicting a contemporary warbird, the kit decals will make for a very colorful model.
Fortunately, as I began working on the review build, Yellow Wings Decals released their first set designed for this kit that provides markings for two WWII era N2S-3s giving me an alternative to using the kit decals…an alternative I decided to choose (Note: A review of the Yellow Wings set is posted elsewhere in the reviewer’s corps site).
Because of the white plastic, I decided to first spray a light overall coat of color on everything to help me distinguish what needed to be cleaned up and what needed to be left alone. Gray would have worked well but I chose aluminum to highlight small details and clearly separate them from hard to see seam lines that needed to be smoothed over.
The kit’s 12-page instruction booklet specifies interior green for many internal details. That may be accurate for restored warbirds and aircraft built after 1942, but aviation historian Dana Bell confirms that painting specs for PT-17 and N2S trainers built before that time called for a top coat of aluminized lacquer for framework and other internal metal components. Seats, however, were contractor built and finished in something similar to Bronze Green. From 1943 on, after aluminum was deemed a strategic material in limited supply, the specification for a topcoat of aluminized lacquer was dropped leaving one of the tinted-zinc chromate greens (interior green) primer applied under it as the default topcoat. So, any aircraft sporting a national insignia with a red dot centered in a white star probably had internal framework with an aluminized lacquer finish. Since the Yellow Wings Decals’ set I decided to use provides markings for early war USN N2S-3s (displaying white stars with red dot centers), interior metal details would have been treated to a coat of Alclad II Duraluminum.
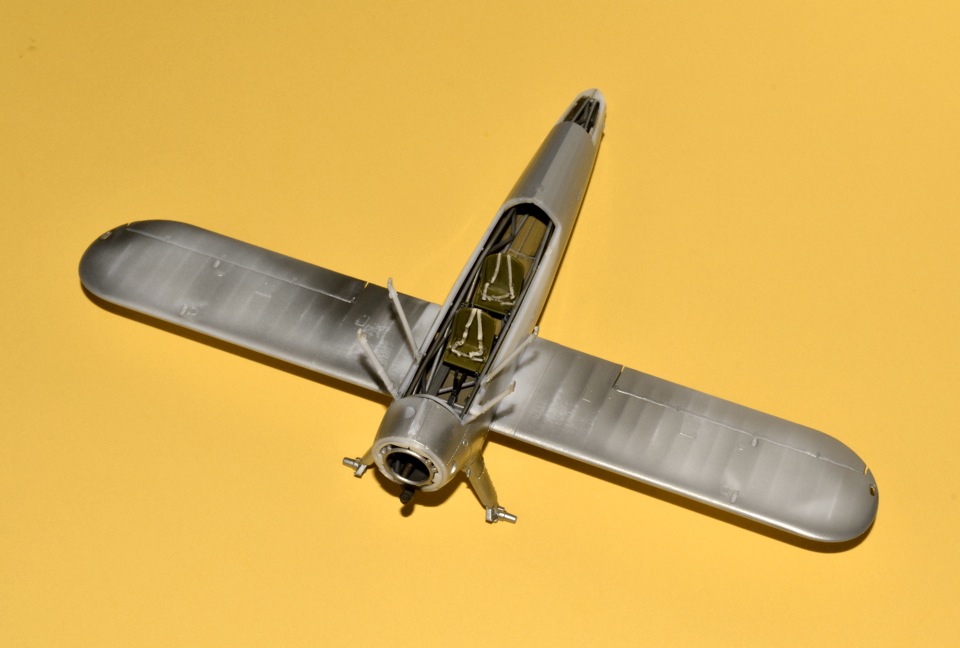
The interior cockpit parts and sidewalls were the first order of business so I scrapped off the mold seam lines along the fuselage frame members, dry fitted and then painted them. I reshaped the contour of the seat backs with a sanding stick, scraped off the unrealistic shoulder harnesses, replaced them with strips of wrinkled tape, painted the seats a color approximating Bronze Green and the belts in a color simulating weathered webbing. I’ve included a photo showing the original kit seat and the modified version after painting it. Little else needed alteration although I believe the right side consol in the rear cockpit may be a detail found on warbirds rather than wartime aircraft. I painted the sidewalls to represent stringers finished in aluminized lacquer and fabric in a primed linen color…painting the aluminum first, masking the stringers and then airbrushing the fabric color. Interior parts fitted well and went together easily. The fuselage sides were closed up and seams smoothed out with no drama.
The ignition wiring was added to the engine, then painted the engine to match photos found on the Internet...using engine gray for the crankcase, black for the cylinders, white for the sparkplugs and a bronze tone for the wires. All that was needed after that to bring everything to life was dry brushing the raised details and applying an oil wash (as the photo below shows). I set the engine aside as it would not be installed until later in the build.
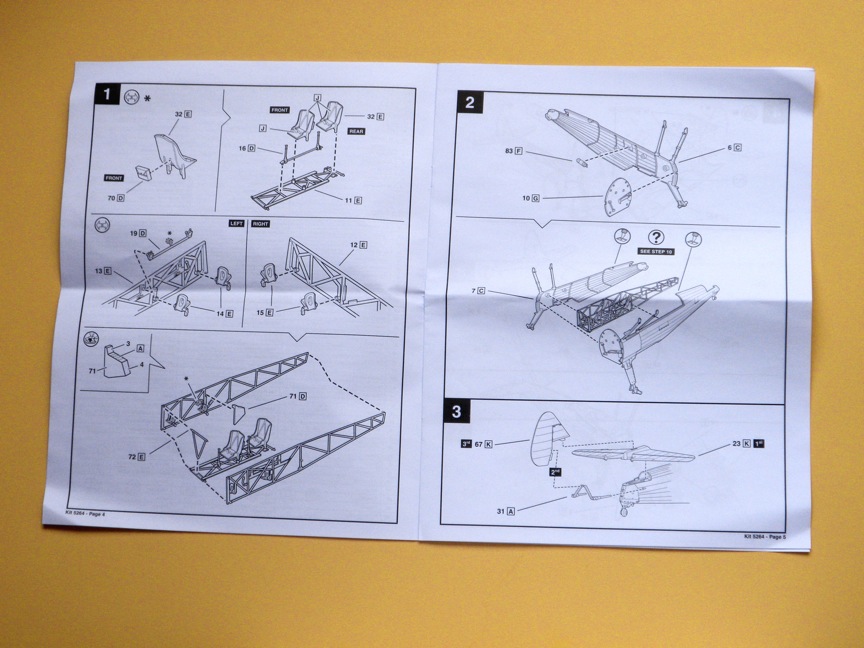
The recommended assembly sequence was altered a bit so some parts could be prepainted and fitted because of personal preference but the steps in the instruction sheet are well sequenced and should help guide less experienced builders. Dry fitting indicated a few parts would benefit from a swipe with a sanding stick. After that, in general everything fit well and assembly rolled along smoothly.
A very nice feature of this kit is that Revell has molded the cabane struts with the fuselage sides (something that harkens back to Monogram’s mid-1960s 1/72 scale F4B4, P-6E and Goshawk kits and Accurate Miniatures’ 1/48 scale F3F kits. With the cabane struts firmly pre-aligned in this fashion, top wing alignment is assured.
Wing halves went together nicely. Everything lined up well but I felt the gaps separating the ailerons on the lower wings looked a bit generous. I added shims of .050’’ styrene along one side of the gap to reduce it to something that seemed more realistic to me. At this point I also predrilled holes for the rigging.
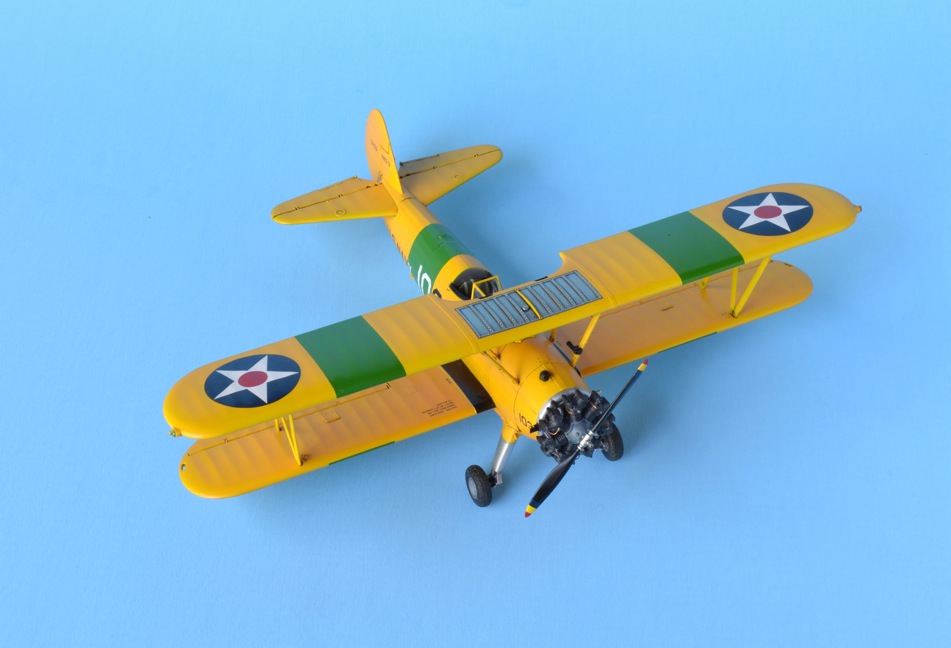
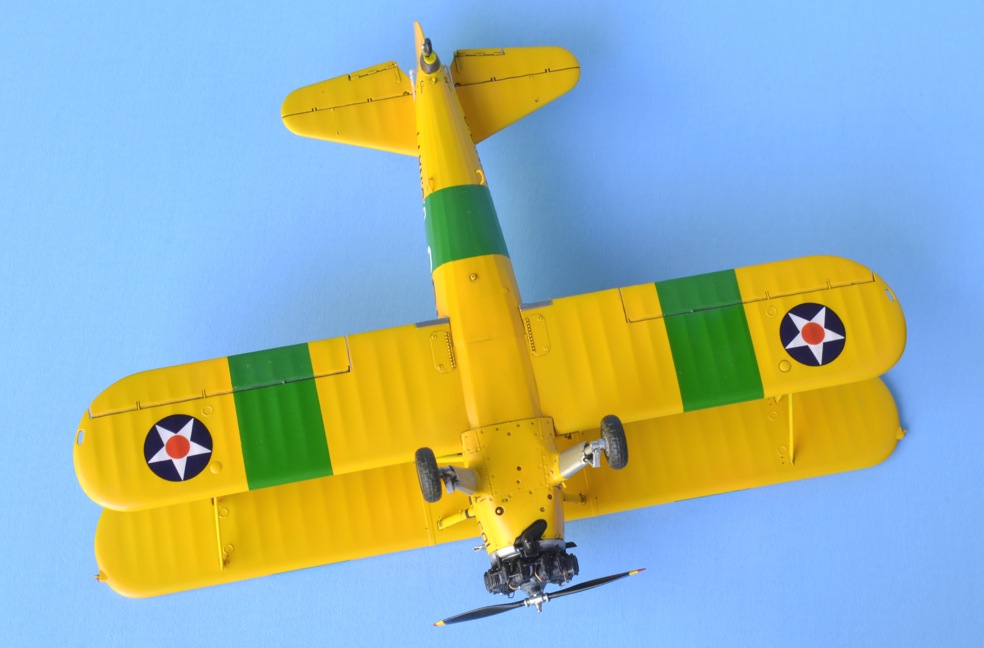
Dry fitting showed that attaching the top wing would be easy and everything would align properly, so after smoothing the leading and trailing edges, I proceeded with priming and painting the wing. The kit instructions call for FS 23655 Yellow, but the color specification for USN trainers called for FS33538 Orange-Yellow. I decided to match that by adding a few drops Gunze Mr. Color Yellow #4 to #58 Orange Yellow until it matched a FS 38018 color chip in the fan deck. After painting the wing, I added the National Insignia decals and color bands and set the finished subassembly aside until later.
The remainder of the assembly went as expected…easily and enjoyably. After the lower wing and tail planes were attached, I masked off the aluminum landing gear legs and cockpit openings, primed everything else (with a thin coat of white), painted the rest of the subassembly with the same Orange-Yellow color I had mixed for the top wing, painted the details with the appropriate colors and continued applying the decal. All was proceeding with little drama until I realized the Yellow Wings’ national insignia decals for the underside of the lower wing were actually oversize. Progress slowed until I found the correct size insignia (30” dia.) on an old Scale Master sheet, allowing me to finish the model in something more closely matching the actual USN scheme.
Adding the top wing was a snap and at this point in the build it would then be time to deal with one of the most dreaded tasks for model builders…rigging a biplane. Rigging is not mandatory but Revell has made the job much less daunting by providing full-size sizing templates in the instruction booklet for cutting the rigging wires. Including these templates is a very nice touch for rookies and experienced model builders alike. They make cutting thin wire to exact lengths a simple process…and also help modelers who prefer to rig with stretched sprue or monofilament. In spite of the fact that I had predrilled the holes for the rigging, I decided not to rig the review model in the interest of time. Since it would be easy to add the rigging later, however…I may just do that.
When adding the nicely detailed windscreens, I found the clear plastic parts to be thin and a bit fragile. So, I recommend modelers exercise extra care when removing them from the sprue to avoid fracturing them and handle the parts without stressing them. I masked and painted the frames before attaching the windscreens, then added the prepainted engine and the wheels. After that there wasn’t much more to do than photograph the vividly painted model for the review.
Although the box top says the skill level is 3, this kit is recommended to builders at all levels. If not rushed, it is a very pleasant biplane build without the anticipated concerns about wing alignment and rigging. Revell has done a great job with this kit. In spite of the white plastic and the decal issue, it is a well-engineered kit that can reward a modeler with a nicely detailed and colorful 1:48 scale replica of a PT-17 (or N2S-3).
My thanks to Revell for providing the review sample and IPMS/USA for the opportunity to build and review this kit.


Comments
Add new comment
This site is protected by reCAPTCHA and the Google Privacy Policy and Terms of Service apply.
Similar Reviews