
SSN-585 "Skipjack" Submarine
History
The Skipjack was a class of United States Navy nuclear submarines. This class was named after its lead ship, the USS Skipjack. The Skipjack’s design was based on the USS Albacore design. This new design was maximized for underwater speed by shaping the hull like a blimp. The bow panes were moved to the massive sail to cut down on the flow-induced noise near the bow sonar array.
The Kit
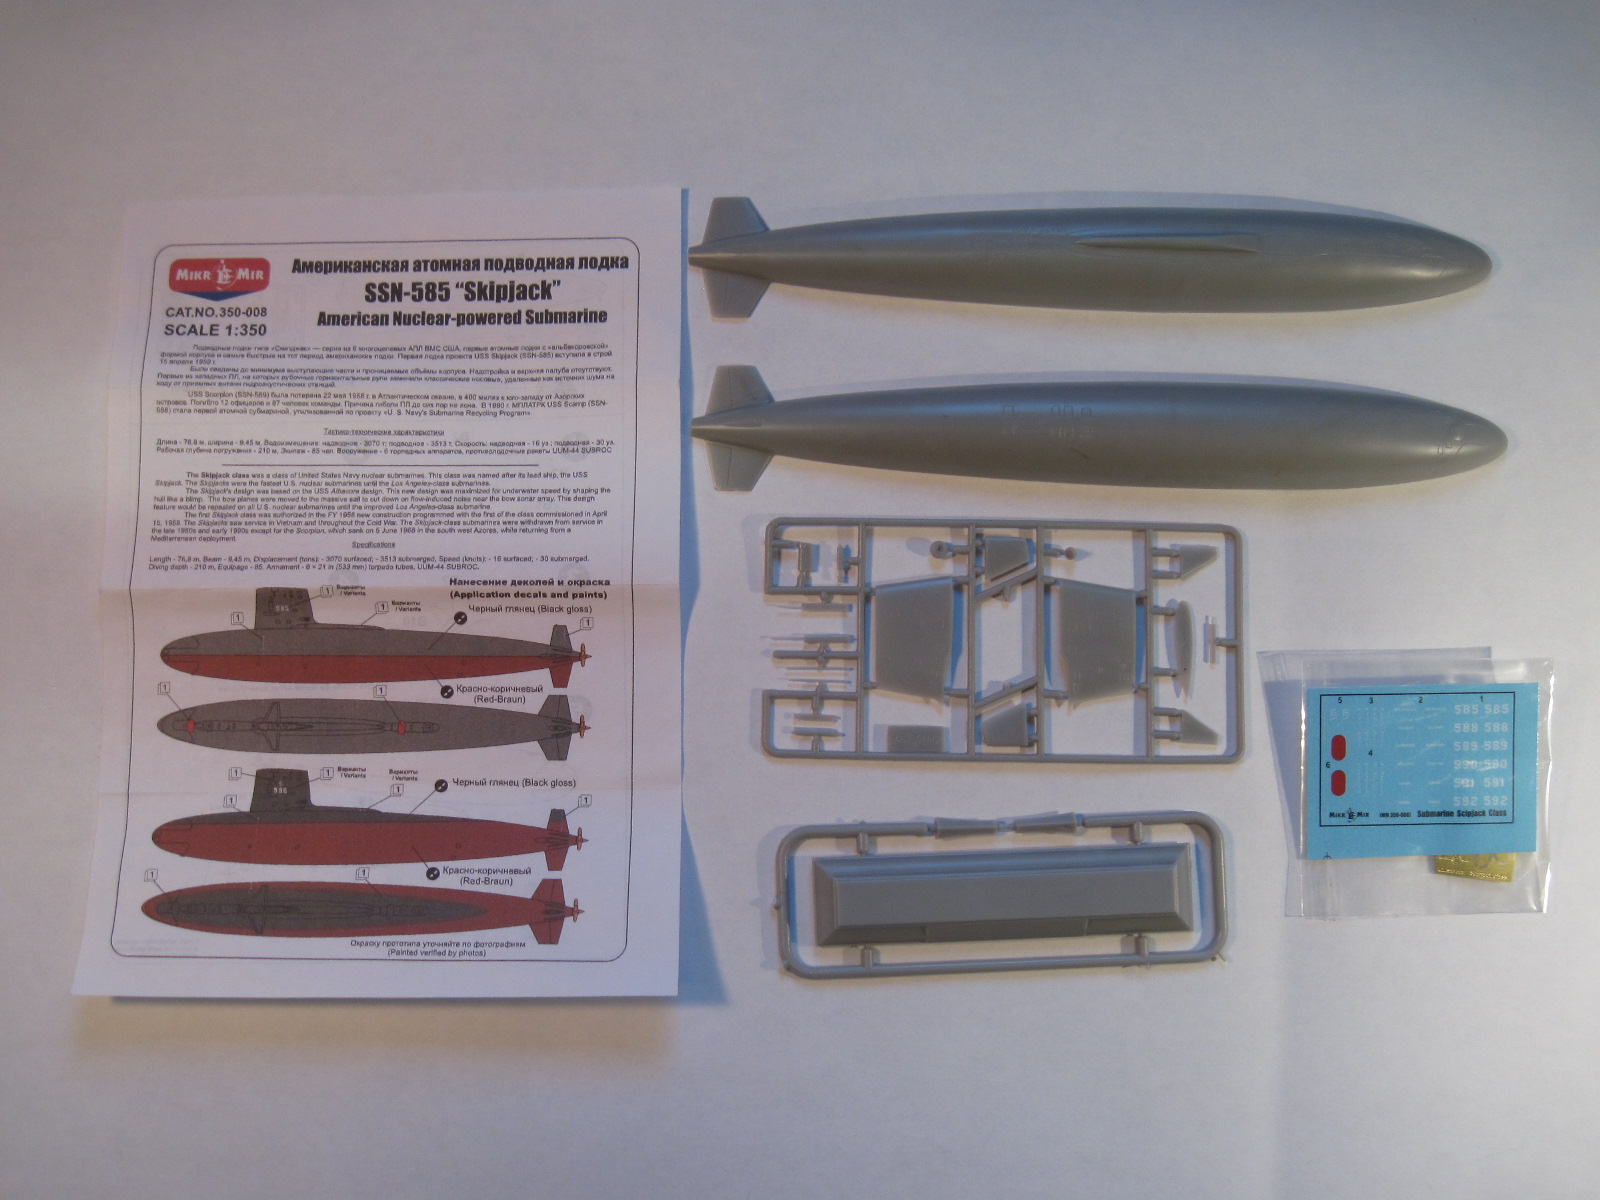
Opening the box: When I opened the box, the model was packaged with three sprues one for the hull halves, one for the parts to go on the model and a sprue containing the stand the model will be displayed on. Also included was a clear plastic envelope containing the photo etch propeller and the decal sheet.
Instructions: The instructions are on a one-piece two-sided paper. There are two hull painting variants pictured on one side of the paper and a 5-step construction guide on the other. Also pictured on the instruction sheet is a layout of the sprue’s with parts attached and photo-etch parts.
Sprues: The parts attached to the sprue are colored grey and there are two per kit.
Photo Etch parts: included in the kit is a photo etch of the propeller. Once mounted on the submarine the propeller blades are bent to the proper pitch. When bending the propeller, care must be taken to not detach the blades from the propeller hub.
Panel lines: The hull and sail have engraved panel lines depicting various hatches, doors and missile tubes. The best way to view them will be to add an oil pin wash to them in the final steps of the build.
Decal Sheet: The decal sheet is printed by Mikro-Mir and has hull numbers to identify 6 different submarines. Be aware these decals a very fragile.
The Build
The first thing I decided to do to start the build was to drill the holes on the display base to attach the model supports, and also to give the model some weight I added some weight to the underside of the stand. Once those holes were drilled I then drilled corresponding holes in the bottom of the hull. The hull halves were divided into a top and bottom piece, so once the mounting holes were in place I dry fitted the bottom half of the hull onto the display base and checked for alignment.
The next part of the build was to attach the top and bottom halves of the hull. Initially, I had to straighten a slight vertical warp of the hull halves, the gap at the bow of the hull was approximately 3/8 inch with the aft end clamped. To get the seam for the hull halves together, I glued the aft end of the hull and slowly worked my way to the bow by gluing and then pinching the hull together and at the same time clamping, taping and using a hair dryer to help get the hull pieces to align and come together. There were no alignment pins on the hull pieces so I had to take care to make sure the seam would line up with the hull halves top to bottom and side to side.
Once the hull pieces were glued together the next item to attend to were three depressions in the plastic along the hull seam line. I chose to mix up a batch of talcum powder and CA to mix into a putty type of material and filled the depressions. Once the putty mixture was in place I dabbed it with some CA fixer. Before the putty mixture set up hard, I took a #11 Exacto blade and carved the excess putty mixture from the application point. There is a point up to a few minutes after the fixer is applied that the putty mixture can be carved like hard cheese reducing the amount of material that will need to be sanded off.
The last part of the hull work was to sand the seam line and remove any gluing imperfections. I started sanding with 600 grit then 1000 and the final polish of the seam area with 3000 grit.
Completing the "Sail" or conning tower consists of a left and right part with a top pieces. The top of the sail had indentations for the placement of the periscopes and different antenna, I chose as a variant in the instructions to leave them off as if the sub were traveling on the surface. The dive planes were attached and the sail was completely ready to attach to the hull. Molded panel lines, and doors were all pre-engraved on the sides of the sail with the finest of lines and care had to be taken to not get glue on them while mounting the diving planes.
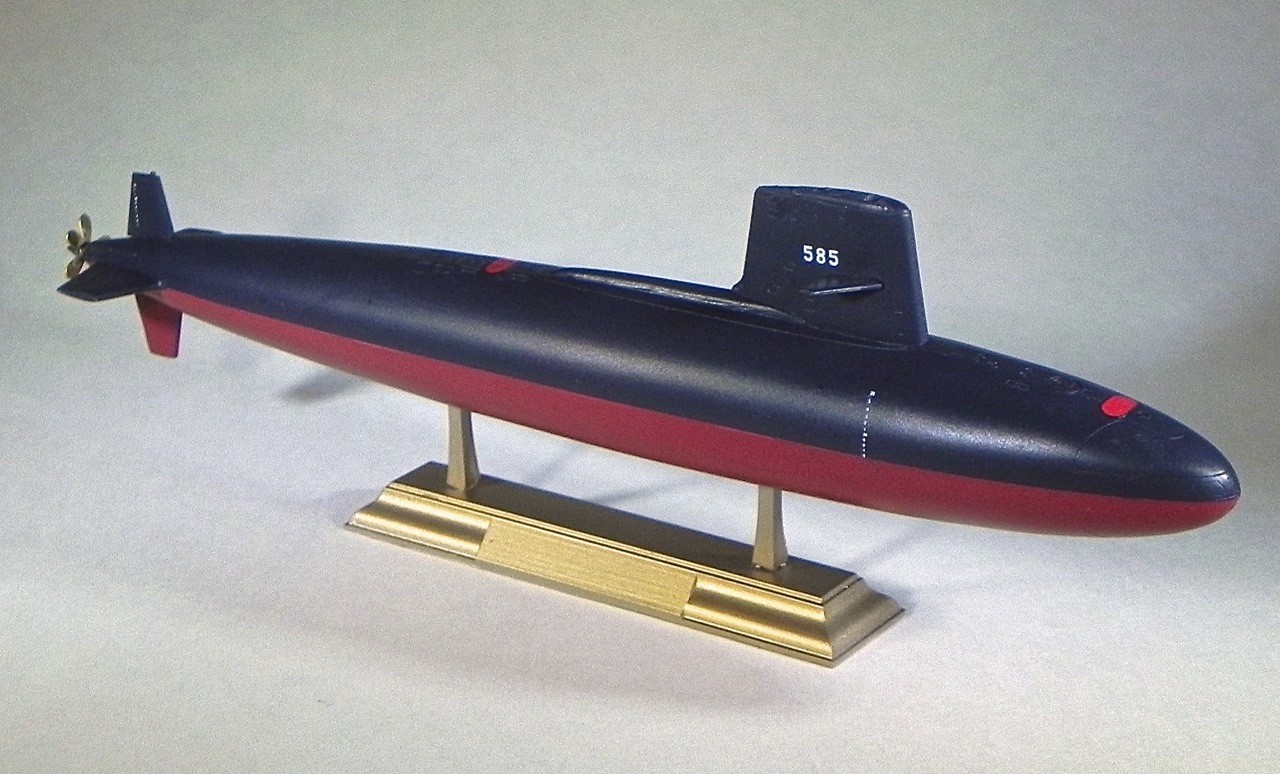
The hull was finished by adding the rudders top and bottom along with the photo etch propeller.
The propeller was attached to the hull and then the blades of the propeller were bent to the right pitch. I glued the propeller using CA glue.
Completed Model Dimensions
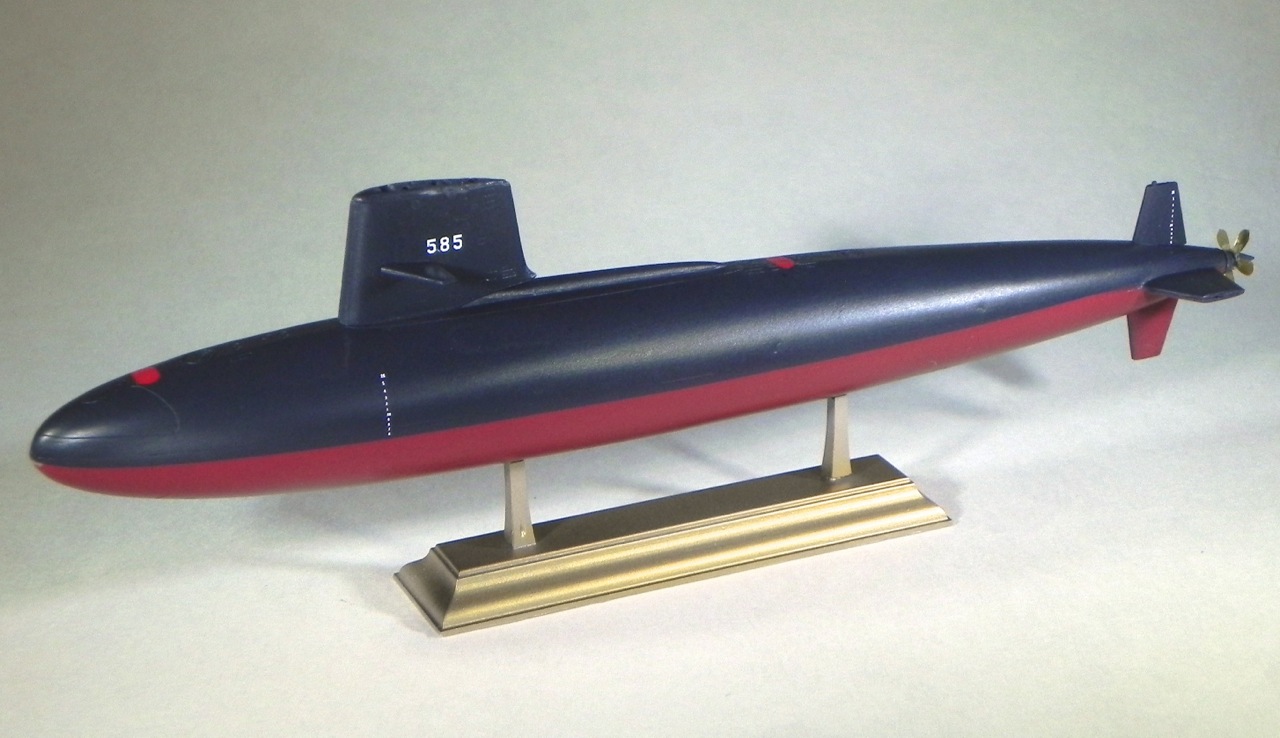
The overall completed length of the submarine is 8.5 inches long and 2 inches tall.
Painting
After wiping the model display stand down with denatured alcohol (Crown “Cleans Glass” not the Fuel) I mixed up a batch of Mr Hobby 1500 gray primer and thinned it with Mr Hobby Leveling Thinner 50/50 to give the base coat a good surface to stick to.
The display stand was then sprayed with AK Interactive Pale Brass paint. I was impressed by the brass paint at how well it laid down on the stand and ended up with a smooth surface.
Next was the submarine, I wiped it down also with Crown denatured alcohol to make sure it was clean and there were no areas that the primer would not stick.
Again, I sprayed Mr. Hobby 1500 gray primer on the sub first in light dry coats and then covered with two wet coats. When the primer dried it was a very smooth and uniform coating allowing all the engraved panels, hatches and vents to be easily seen.
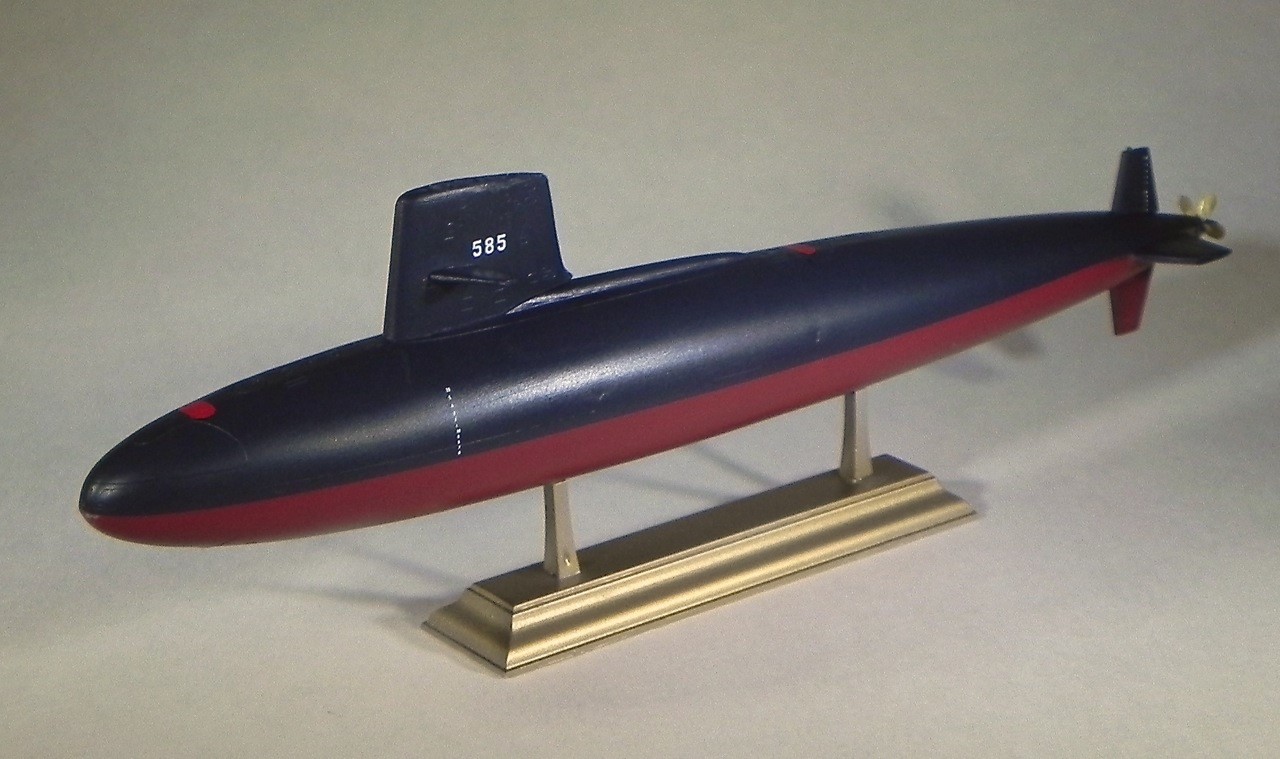
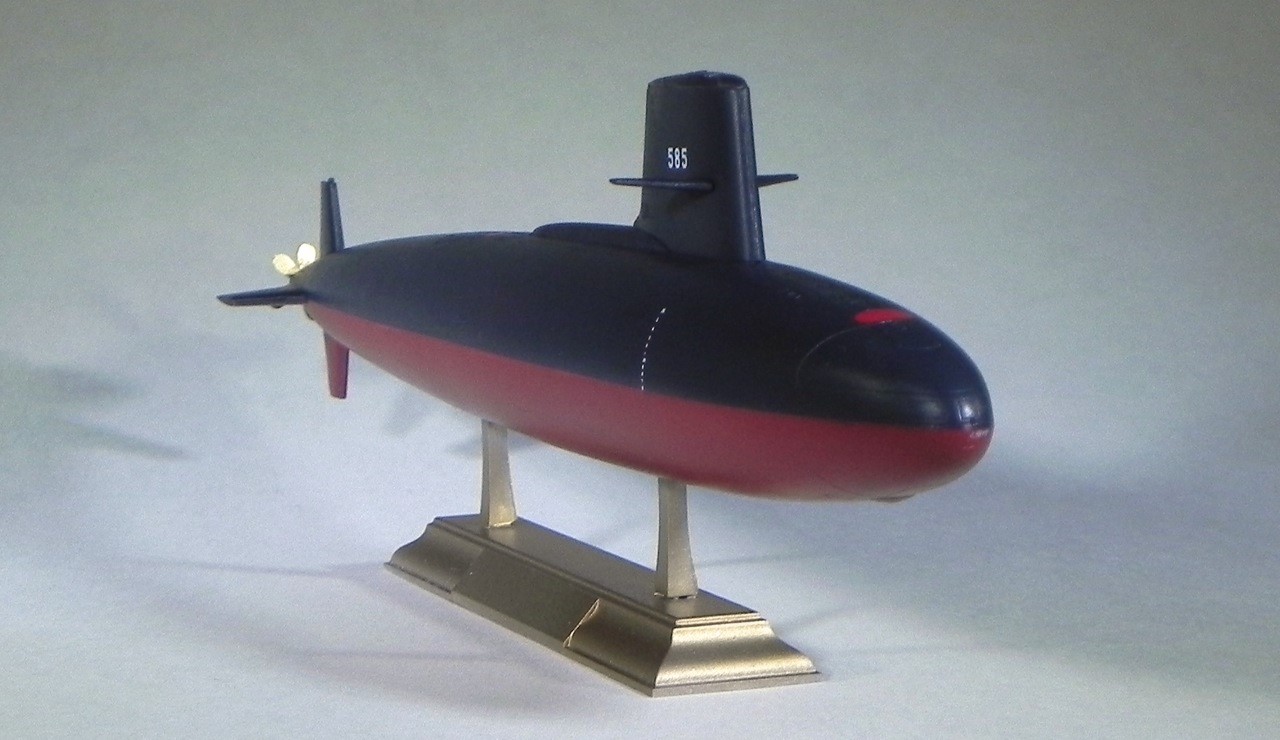
According to the instructions two different paint schemes could be applied to the Submarine. I chose to divide the hull in half top and bottom with a black over dark red scheme with the diving line between the colors extending the whole length of the model.
I have been working with Mission Model Acrylic paints on other models so I decided to use those paints on this submarine. The mix I use is 60% paint and 40% thinner poly mix with 10% of the poly mix Mission Models polyurethane.
Red for the lower hull was a mix of Red, Yellow, White and Black to come up with a “dark hull red”. I sprayed four dry coats on the lower hull and to build up the color. I let the paint dry overnight in preparation for masking and application of black paint on the rest of the submarine.
The black paint was made by mixing black with red, yellow and white paint. I went a little heavy with the red paint and blended in the yellow and lightened with the white. The paint was applied to the upper hull and sail after the red was masked. I used the same mix of thinners and poly mix as I did with the red paint. Once again, I made four dry coat passes to build up the paint color.
After the application of the black, all of the inscribed panel lines of the surface of the submarine were visible so I had not applied too much paint.
After the black dried overnight, I applied two coats of Alclad Aqua Gloss to provide a paint sealer and a base to apply the decals.
Decal Application
The application of the decals was straightforward. As I said earlier there were decals (hull numbers) to label six different submarines.
I applied Micro Set and Sol over all of the decals getting them to lay down on the model. The decals were of a delicate nature and took special care to apply. They came off the sheet easily and were very thin.
Once the decals were in place and dried, I applied another coat of Alclad Aqua Gloss to seal them.
Finishing
The final portion of the submarine project was to add some oil pin washes. I used a blend of white and black artist oils to produce the wash. I highlighted various hatches and vent screens to allow them to stand out from the black and red colors of the hull.
I added my own decal on the display stand nameplate area. I am thinking that the name for the submarine could have been added to the decal sheet for the final finishing touch.
Summary
The submarine went together with very little effort, the only assembly issue was the hull completion and that was accomplished easily by gluing the hull starting from the stern and working toward the bow in sections.
At the beginning of this build, I had no submarines in my model collection, however after completing the model I started to think that the 1/350 scale submarines by Mikro-Mir would be fun to have. I am currently looking into adding more of these models.
Thank you to Mikro-Mir and IPMS/USA for the opportunity to review this model.


Comments
Add new comment
This site is protected by reCAPTCHA and the Google Privacy Policy and Terms of Service apply.
Similar Reviews