
Spitfire Mk.IXc Early Version
Eduard has re-released its fantastic Spitfire Mk.IXc early version in the Profipack version. When I say fantastic I really mean it. You get 6 sprues (one clear), a set of masks for the clear parts, a fret of prepainted photoetch and decals to finish your airplane with 6 different options (2 in North Africa colors, 4 in European colors) and a small decal sheet with stencils.
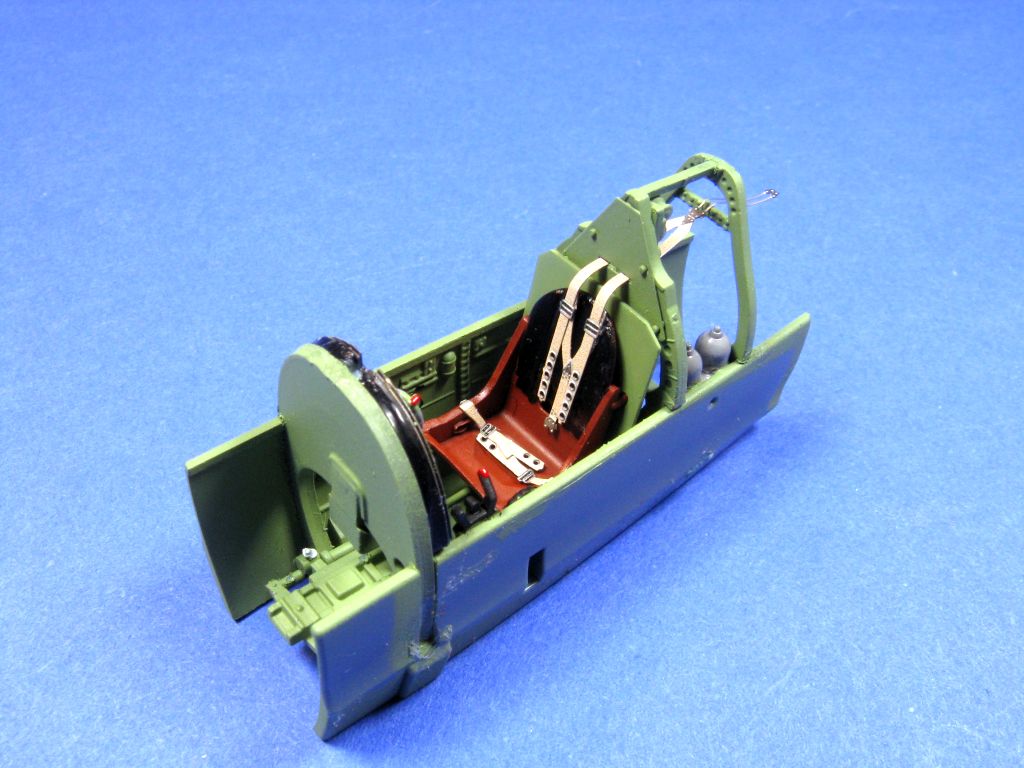
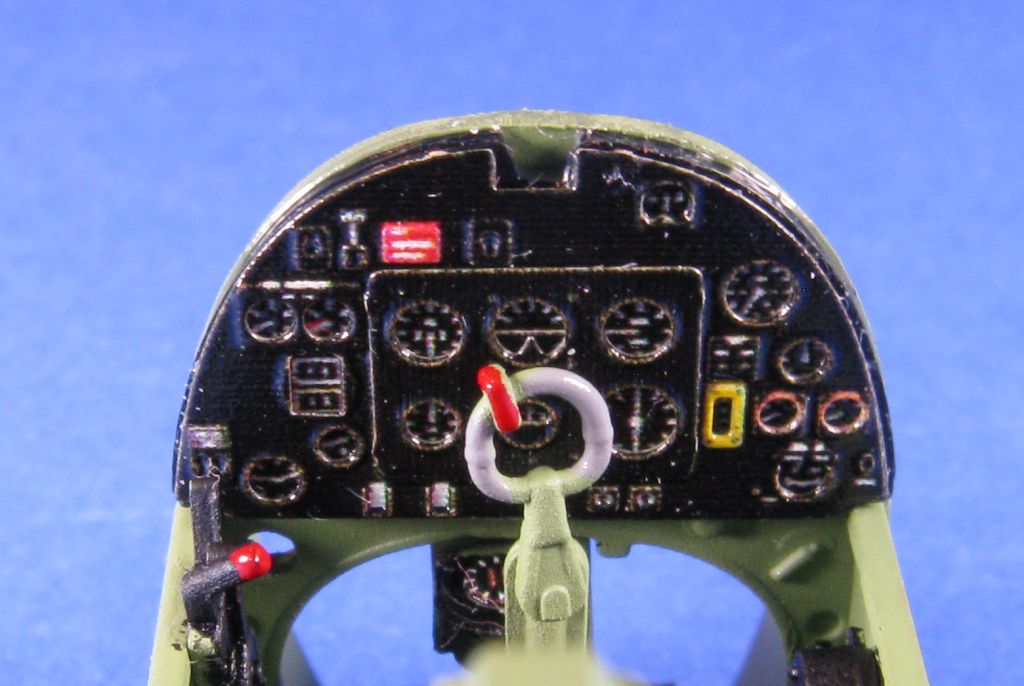
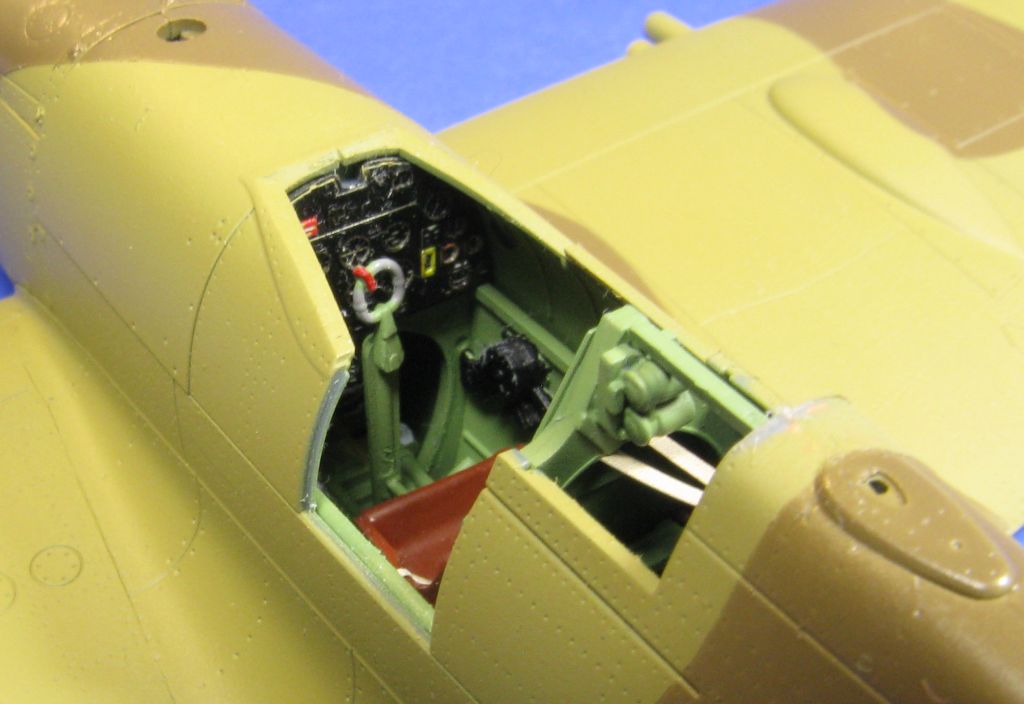
Like most airplane models, construction starts with the cockpit. Please note that I used the included Eduard photoetch fret to enhance the cockpit looks. The original cockpit is nicely detailed, with a combination of raised and recessed details, plus decals for the instrument panel, if you choose to go that route. Note: there are no decal seatbelts in this boxing. Actually the in-box decals for the IP –and the IP itself- look so good that I am sure I will use them to improve others kits I have in my stash.
The cockpit assembly -with or without the PE- is straightforward and comprehensive. There are probably 20 to 25 parts going into this cockpit. While the number might sound a bit intimidating, the overall fit is exceptional. You get a multipart cockpit floor, stick, rudder pedals, instrument panel (I used the Photo-etch one which is made of “layers”, so no folding of any part), multipart seat, and console side detail.
Before closing the fuselage make sure you sandwich the tail wheel holder and add the front-fuselage bulk-head. It is there to provide a sound and square foundation to the fuselage nose.
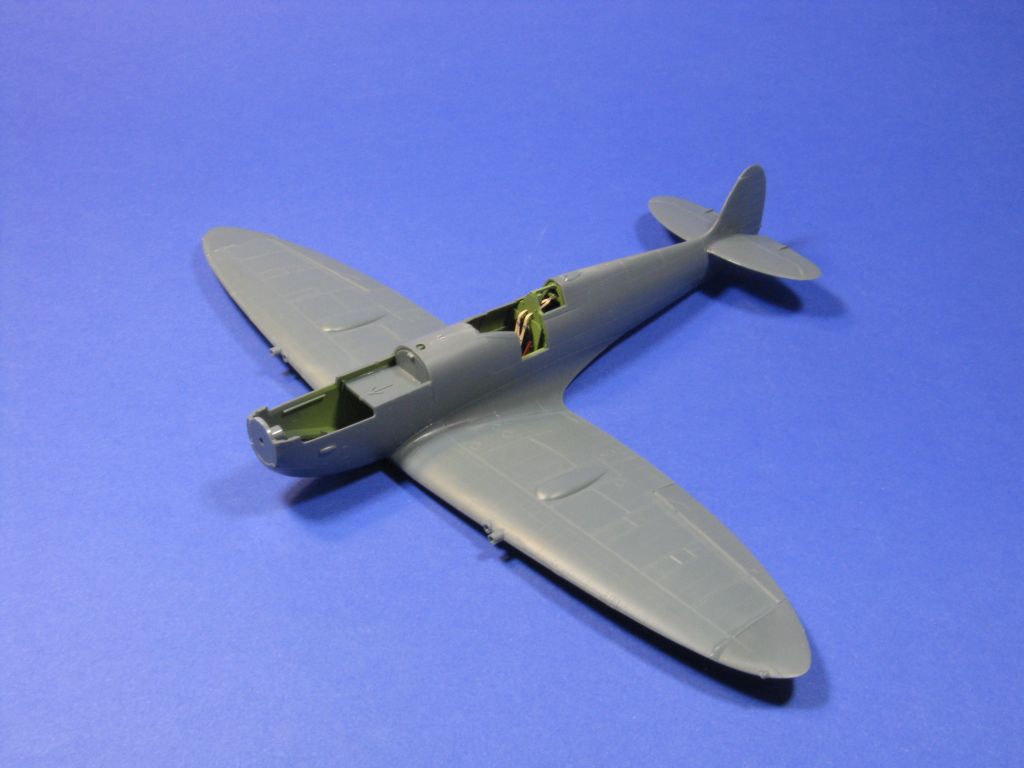
Closing the fuselage presented no issues whatsoever as the fit is as close as perfect as you can find it. I only needed a light pass with the sanding stick in a few spots to get rid of seams. No filler was needed anywhere
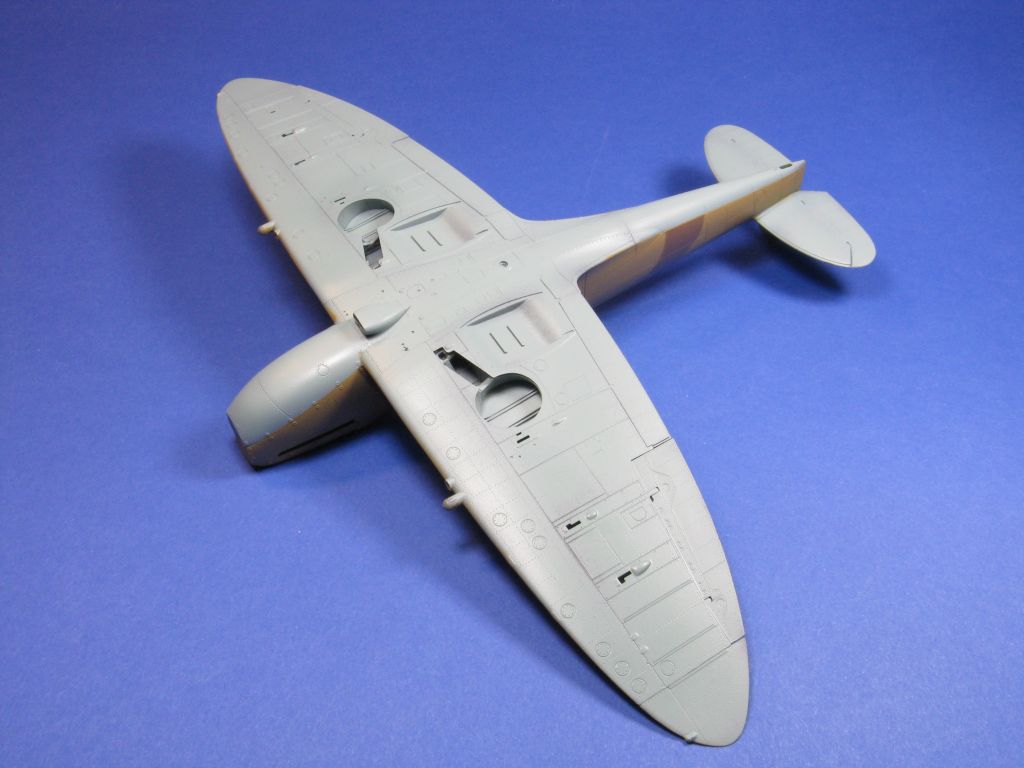
Construction then moves to the wings and the multipart wing wheel. Make sure you take your time and align the parts G47 and G46 really well as they are the receptacles to the landing gear struts. If you don’t align them right, then your Spitfire won’t sit right. Luckily the engineering of the parts make this job very easy, providing a solid foundation for the landing gear.
Adding the tail surfaces at this time is a good idea and they don’t present any issue either. The engineering of the tail surfaces is admirable. You assemble the horizontal tail surfaces as left/right parts and then you add the movable part of them as a single piece ensuring perfect alignment and squaring them with the rudder.
At that point I moved construction towards the nose and cowling. I want to mention that here I had the chance to include a Brassin cowling top and I modified the nose so I could add the engine exhausts after painting. In parallel I started work on a few small subassemblies like the underwing oil coolers and the landing gear, while I was preparing for painting of the model.
I masked the canopy using the provided pre-cut masks which made painting of the clear parts a breeze.
Main painting of the model was accomplished with Model Master Enamels and masking tape. After giving the paint job a full 24 hours of curing time a coat of Future was then applied in preparation for decals.
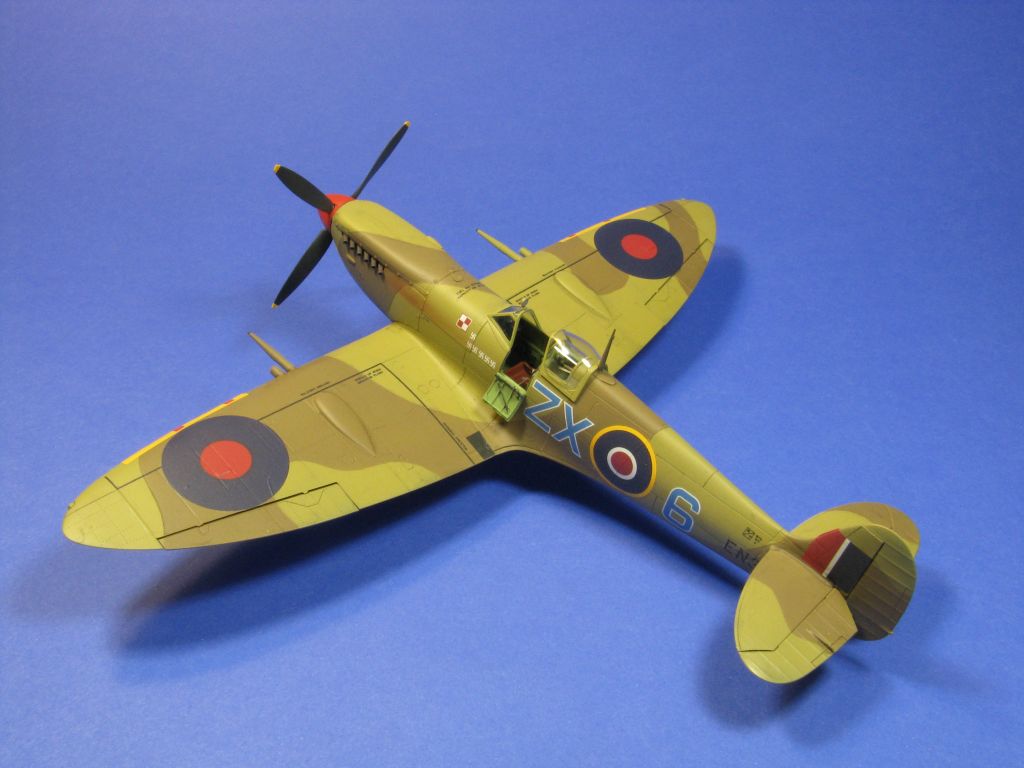
You are provided with national markings, squadron markings, and a full set of stencils, but not wing leading edge recognition markings. For most decals, the clear backing ends with the printed ink region, minimizing the risk of silvering. The decals have good color density, meaning you can place them on top of areas with varying camouflage colors and the underlying colors won’t be ‘see-through’. These decals (printed by Eduard) are very thin and they conform well to the panel lines. Make sure you have plenty of water underneath the decal for placement.
The only decal I had trouble with was the national marking that is applied on the lower part of the wings, as they go over some large bulges and I made the mistake of using Solvaset on them. Don’t do that, because they did not react well to it. I raided spare lower wing roundels from another model (the extra decals are printed by Eduard as well) and this time I choose to do several applications of MicroSol/Set and everything worked fine.
I applied another coat of Future and after it cured I applied an acrylic-based wash to all the panel lines to highlight the surface detail.
At this point I mounted the engine exhausts, antennas, guns, cockpit door and landing gear. Based on my limited research on Spitfire Mk. IX there were no aerials on these airplanes, just the mast behind the cockpit (aerials are appropriated for Mk I and Mk II Spitfires). You might want to do your own research on that topic.
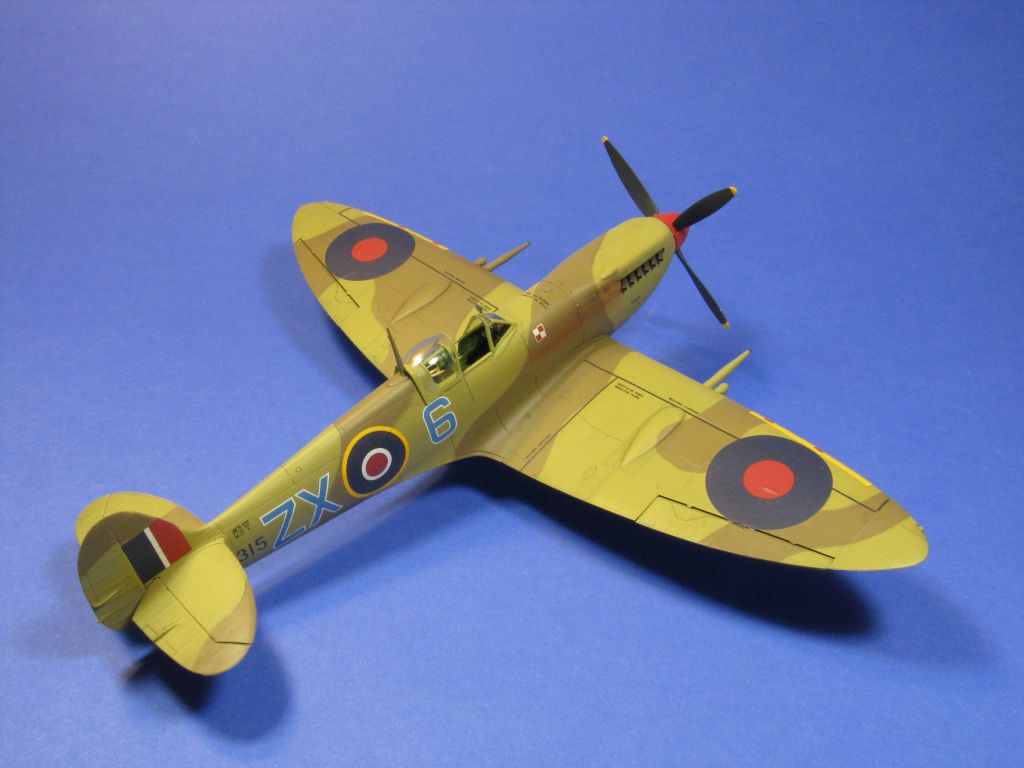
With all the final parts in place I gave the model a flat coat; I added the canopy and finished the weathering with a pastel chalk, giving the Spitfire those exhaust marks often seen along the fuselage sides.
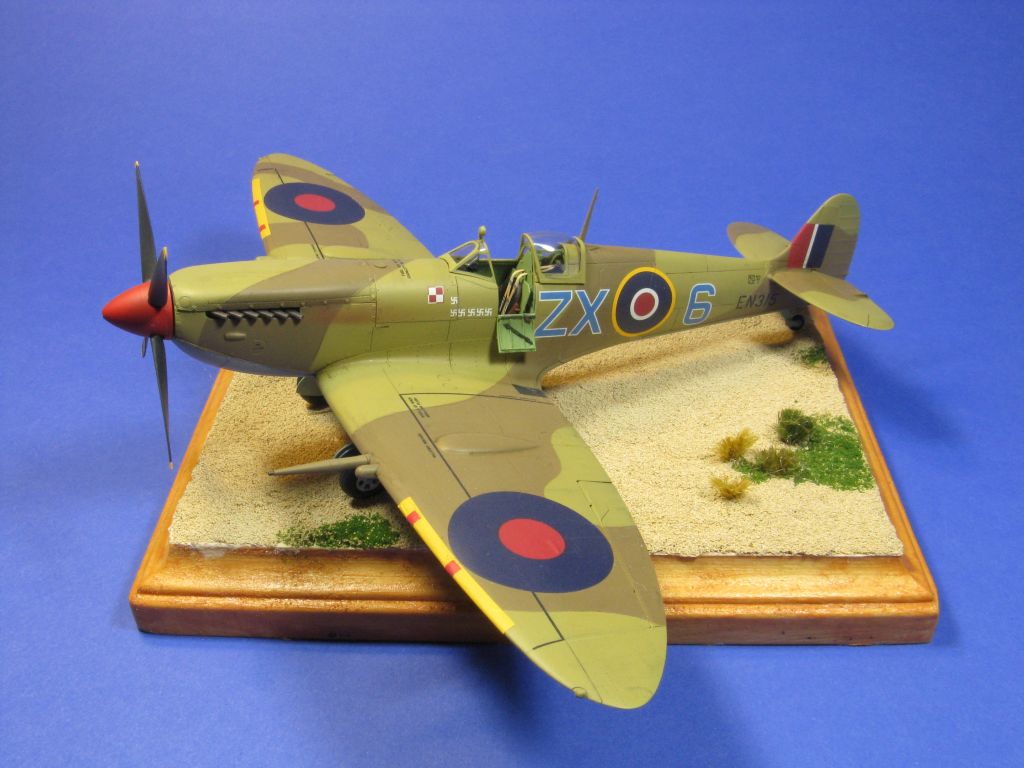
I kept the weathering to a minimum as the Spitfire Mk.IXc from the Polish Fighting Team were brand new at time of delivery.
As a summary: this model is a delight to work with. Everything fits well and the part count is relatively low, making it being a stress-free model to put together. The markings are attractive and varied. The decals are thin, have good color density and behave well to setting solutions –just avoid Solvaset
I highly recommend this kit to modelers of all experience levels, except the most novice due to the need to work with some photoetch.
I would like to thank Eduard Models and IPMS/USA for the review sample.


Comments
Add new comment
This site is protected by reCAPTCHA and the Google Privacy Policy and Terms of Service apply.
Similar Reviews